Monthly Archives

January 2012

Cloverleaf Connectors: My new favorite thing!

January 27, 2012

I am always looking for ways to incorporate messages or cute little phrases into my jewelry. I think a word or phrase can change the whole meaning of a piece of jewelry. By adding words, you can add emotion to your designs. So when we added new stamp-able Cloverleaf Connectors to our inventory, I just couldn’t resist making a pair of earrings to show off their stampability!

All six platings and all three sizes with the circle side showing.

All six platings and three sizes with the diamond side showing.

The connectors come in three sizes and six platings. The sizes are 9mm, 12mm and 16mm and the platings are raw brass, antique brass plated, antique silver plated, antique copper plated, gunmetal, and silver plated. They are also two sided and you can even stamp both sides! So let me show you how I created these and hopefully you will be inspired to create a pair of your own.

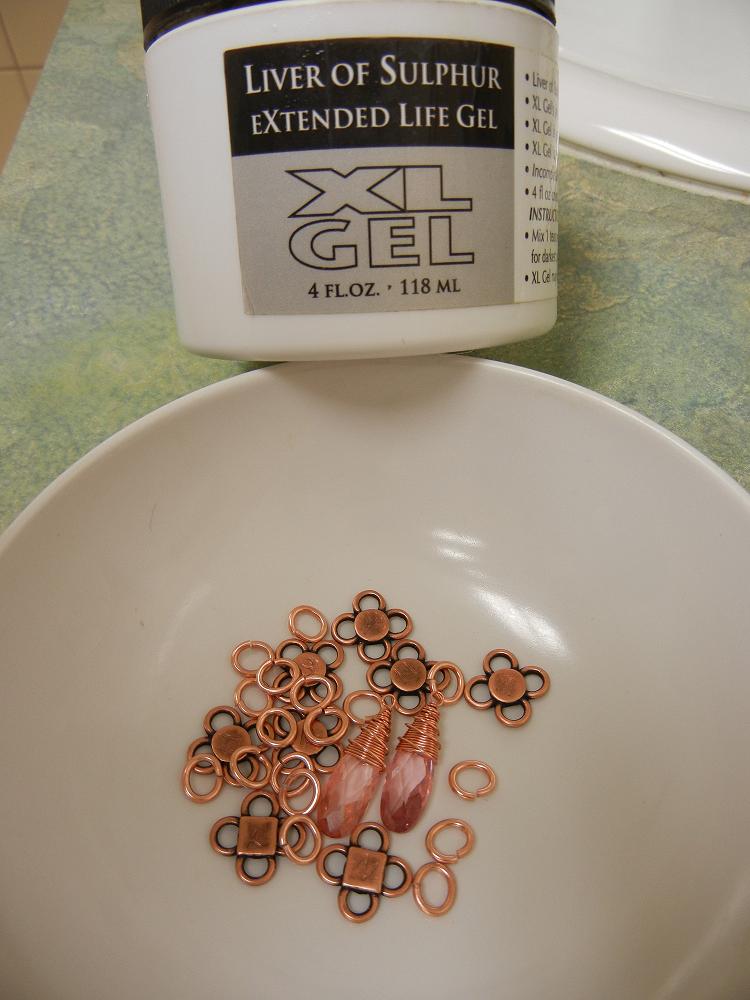
Everything needed to make these cute earrings. See the list below for links to the supplies.

I am an antique copper kinda girl myself so that is what I chose to use for this design. I wanted to make a somewhat whimsical pair of earrings, so I stamped WISH and WANT into the earrings, but you could choose any 4-letter word… naughty or nice 😉 … to convey your message. Here are the supplies needed to make these earrings:

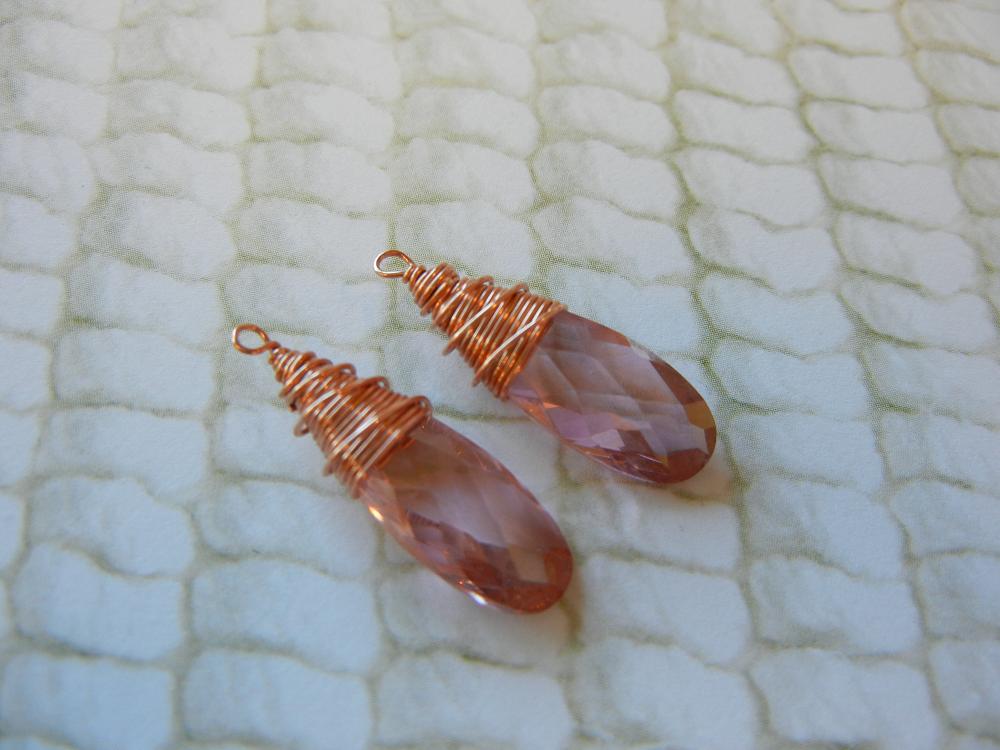
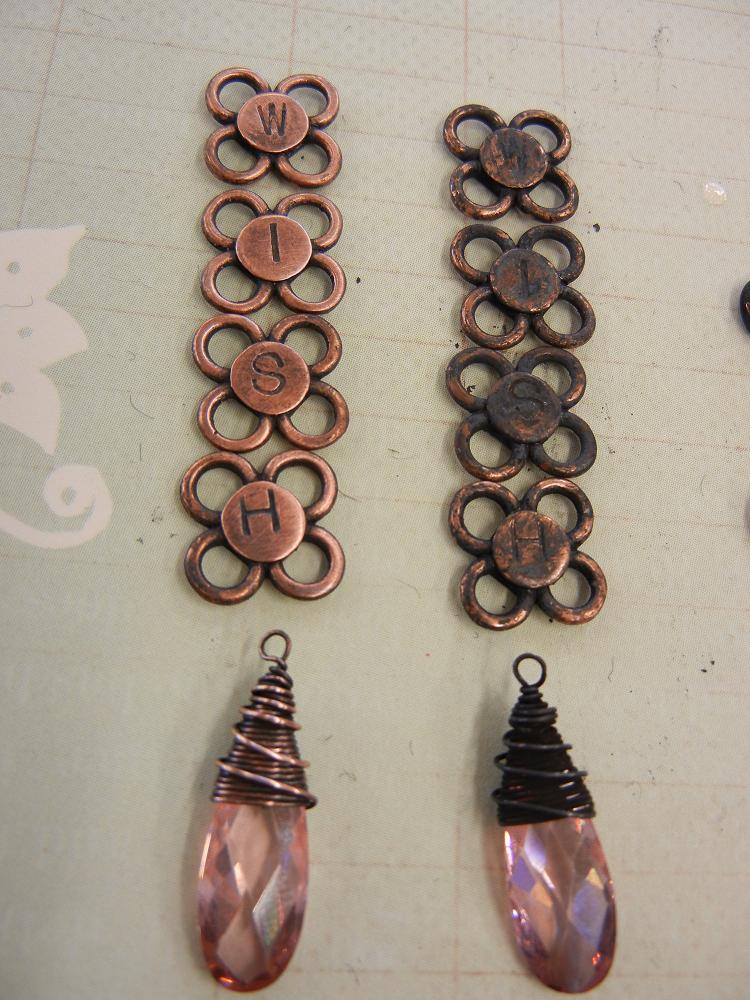
Wire wrap the cubic zirconia briolettes. See the link at the bottom of the page to learn how to wire wrap a briolette.

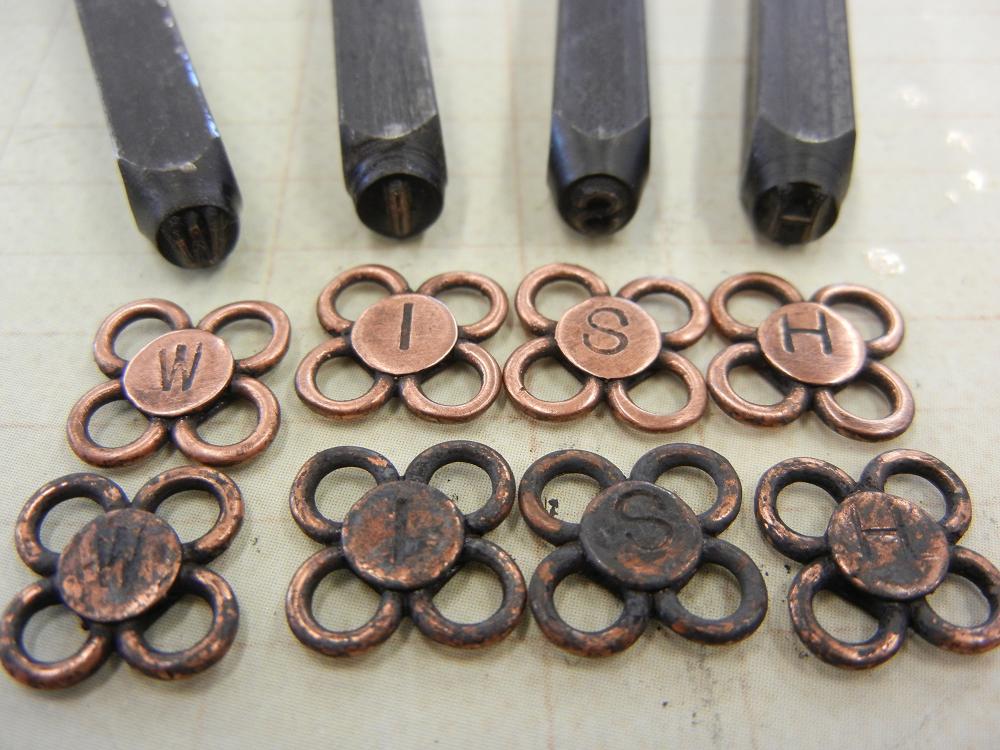
Stamp your desired words onto the connectors. They are two-sided, so you can choose two different words to stamp.

Use an antiquing solution to darken the jewelry components. *note: plated findings are not intended to be antiqued. The patina will most likely not be consistent, but the intention is only to darken the lettering. *

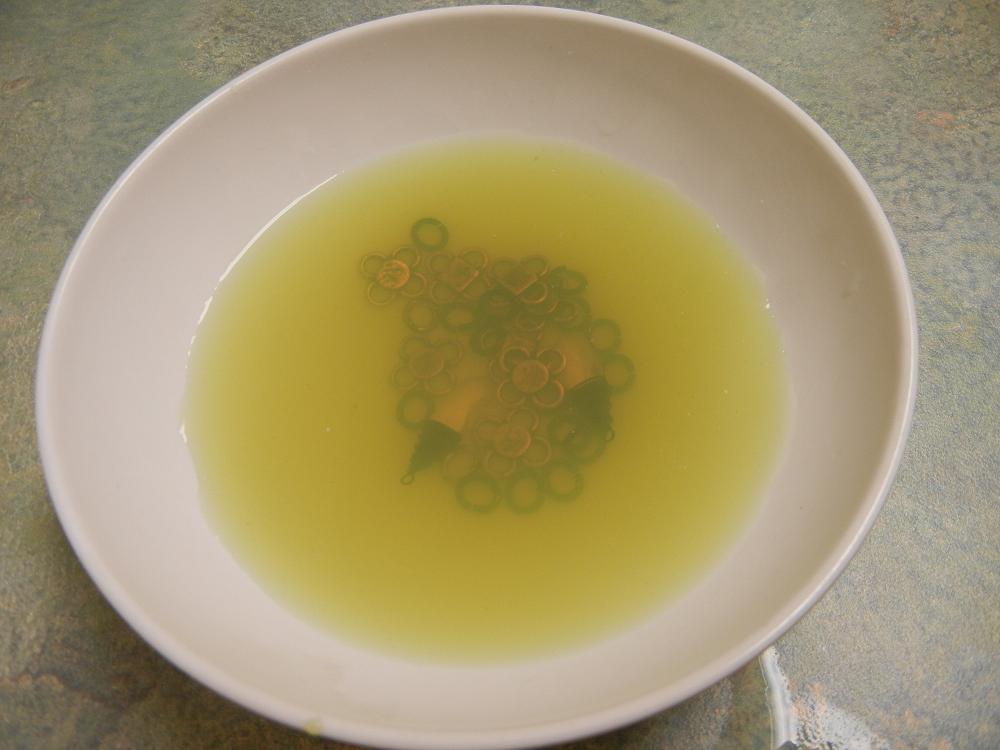
I used Liver of Sulfur. When you mix the gel with warm water, it will make a yellow (saffron colored) solution.

After being antiqued, the copper components will turn black.

Use a little steel wool to buff away the patina, this will make the letters really “pop”.

See what a difference a little buffing can make!

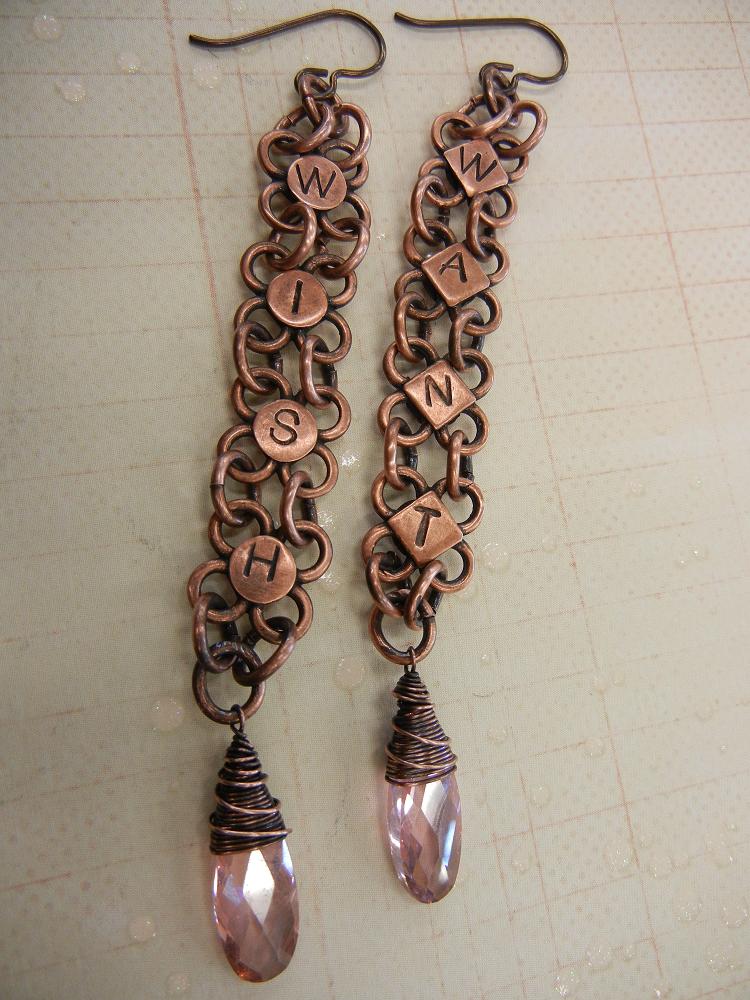
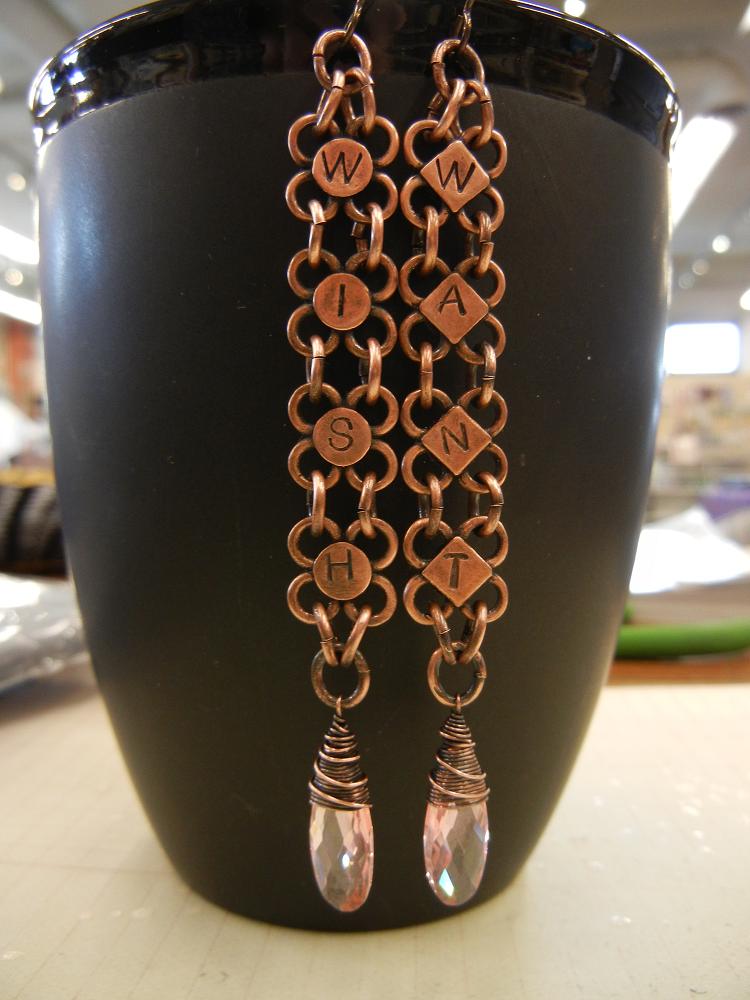
Assemble the earrings, making sure all your letters are in the right order. They are stamped on both sides, so they are reversible.

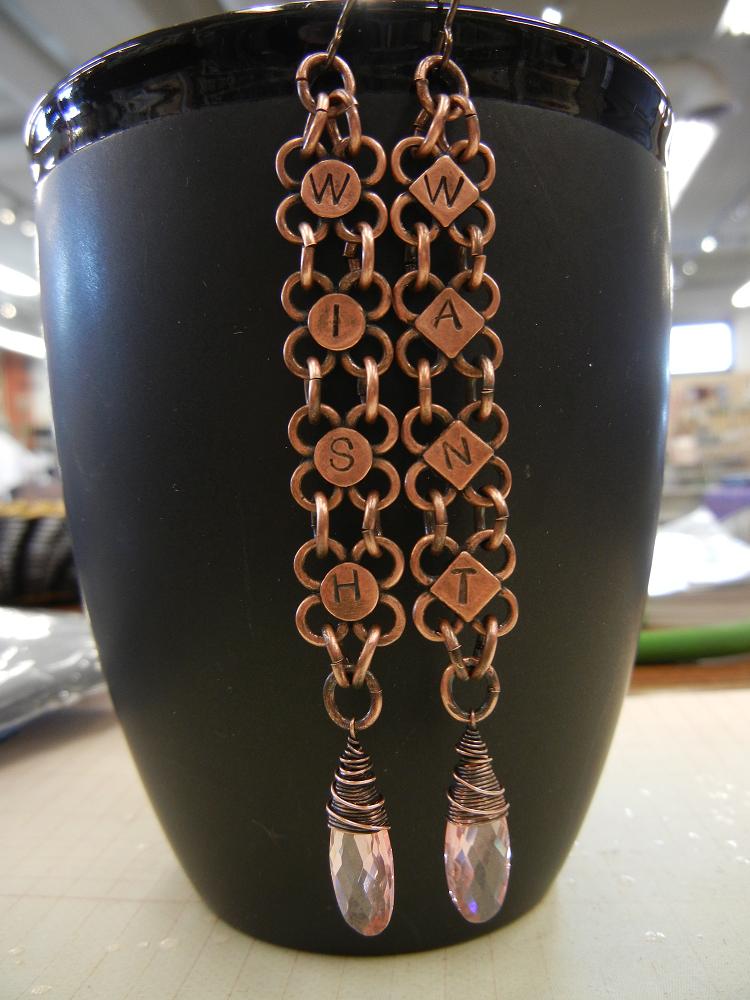
Completed Wish & Want Earrings

Well I hope I have inspired you to add a little wording to your designs! The possibilities are truly endless! Worded bracelets, necklaces and earrings galore! If you need to learn how to wire wrap a briolette, go to our blog “How to Wire Wrap a Briolette” and if you have any questions, feel free to ask me! ~~Tiffany

Sweet heart jewelry designs – for Valentine's Day and more!

January 19, 2012

Valentine’s Day is just a few weeks away. How did that happen?!? But there is still plenty of time to make your own jewelry to wear, to gift, even to sell (how many men wait until the day before to purchase gifts, hmm?).

brass-heart-vintaj-earrings

Brass heart cutouts textured with the new Vintaj BIGkick machine.

Mollie made the above earrings with our brass fairy doors and the Vintaj BIGkick (tutorial coming soon!). Hearts are popular year round. Especially SWAROVSKI crystal hearts – they are so sparkly!

blue-valentine

Mollie’s “Blue Valentine” necklace is a classic.

zombie-love-valentine-cindy

My zombie bracelet is not!

I used ITS (image transfer solution) to copy the zombies to the copper disks, and alcohol inks to colorize the stamped tags.

But hearts are just the beginning. Since Valentine’s Day is all about love, I think jewelry that features items you or the intended wearer love is totally appropriate. How about sweets for your sweet?

sweet-treats-bracelet

Toni’s sugar rush of a bracelet.

Tiny ceramic cupcake beads create an adorable confection. And don’t forget about toys. Who doesn’t love to play?

barrel-o-monkeys-necklace

Mollie’s monkey is barrels of fun!

Jump rings and chain can turn most anything into a necklace! Does anyone else think the monkey bears a striking resemblance to Dr. Quinn’s (Jane Seymour’s) open hearts? Maybe if you flip it sideways and upside down?

Whatever your style, have fun with your Valentine’s creations! ~ Cindy

DIY Shamballa style macrame bracelet tutorial

January 8, 2012

Square knot macrame bracelets have been given new life due to the influence of high end designers. I’ve got the “Circle of Life” from The Lion King playing in my head as I write this. How else to explain how a simple macrame bracelet design, which has spent years as a summer camp staple and a tourist shop standard, has been reborn as the chic “Shamballa” brand must-have look?

I think it is a great example of how basic techniques can be adapted to suit nearly any style or budget. Have hemp cord and plastic pony beads? You can make this bracelet. Have premium knotting cord and diamond-studded platinum beads? You too can make this bracelet! The trickiest part is making the sliding clasp, but like any type of magic, once you know the trick, it is no problem.

Rings & Things actually made a square knot (aka half knot) macrame bracelet instruction sheet years ago (updated macrame bracelet instructions here). The sliding clasp instructions were also published as part of our “Meteor” macrame bracelet, which has a totally different look. It is past time to update the tutorial with some photographs!

Supplies needed for square-knot macrame bracelet with sliding clasp:

Cord – hemp, Chinese knotting cord, linen, cotton – whatever you like. You’ll need about 12 feet total.

Beads – again, whatever you like – but the holes must be large enough for two strands of your selected cord to fit through. Depending on your knot to bead ratio, you might need one bead or 20.

Scissors, needle, a clipboard (or a work surface and a binder clip), and flat or chain-nose pliers.

Cut two 2′ pieces of cord and one about 6′ long. Leaving approx. 8″ tails, clip the two anchor cords to your work surface. Center the long cord under the two anchors. (For the sake of photos only, the anchors are blue and the knotting cord is black.) You can start with either side, but I start from the right:

2-right-loop

3-left-through-loop

Pull to tighten the cords, and you’ve completed 1/2 of a square knot. The second 1/2 is the same, just from the left:

4-left loop

5-right-through-left

Pull tight and you have a complete square knot.
Tip: If you want your knots to spiral, then skip this “second side” step… just repeat the first half of the knot, always starting from the same side of the knot.

6-keep-knotting

It is totally up to you how many knots to tie between beads, but odd numbers (1, 3, 5, etc.) look best. Tie a few knots, slide a bead onto the anchor cords, tie a few more knots…it is really quite fun! Continue until you have the length you want. Keep in mind that the clasp will add about 1/2″ to the overall length.

Since you started knotting with a single long piece of cord, the starting end is “finished” while the tail end has….tails. To remedy this, sew the tails (one by one) up through the last section of knots. I needed to use pliers to pull the needle through.

7-sewing-up-end

Snip off the ends and it is like they were never there!

8-magic-clean

Now that you know how to make square knots and finish the ends, let’s make the “magic” part – the sliding clasp. Make your bracelet into a circle and overlap the anchor cords. Use bits of cord to bundle them together for the moment.

9-ready-to-tie-clasp

Now clip the top to your work surface. Cut a 12″ piece of cord and center it under your four anchor cords. Start tying square knots, just like you did for the bracelet itself. Continue for about 1/2″, then sew the ends back in. This section of knots should be able to slide back and forth on the anchor cords. Now, for the tails: they serve an important purpose. Make slip knots an inch or two away from the clasp on each pair of anchor ends. Tie beads on too if you like. These knots/beads act as stoppers, ensuring the ends don’t slide out of the clasp. Make sure you leave enough length to make the bracelet big enough to get over your hand. And ta-da! Adjustable bracelet bliss.

10-sliding-clasp

***

FREE Rings & Things Design Gallery Projects

Rainbow Bead Macrame Bracelet Tutorial” created by Rings & Things designer Michelle Horning.

Remember to Breathe Bracelet Tutorial” created by Rings & Things designer Michelle Horning.

Bee Moody Bracelet Tutorial” created by Rings & Things designer Michelle Horning.

***

Happy knotting! Please let me know if you have questions, and have fun making your own bracelets! ~ Cindy

www.rings-things.com

Torch fired enamel jewelry ideas

January 4, 2012

[editor’s note: links updated March 2018]

Torch fired enameled metal is really (really!) quite beautiful! You can create your own on copper (or a few other metals) using Thompson vitreous enamels, or purchase artisan copper components from C-Koop Beads. C-Koop components’ colors are deep and lustrous due to the layers of glass fused to the surface of the metal, and since they are handmade, each one is slightly different. Here are a few of the mixed-media jewelry pieces our designers have recently created with enameled copper:

enameled-leaves-handpainted-wood

Nory painted wood pendants and beads with a rose motif, and had Tiffany construct his design using silk ribbon and brightly dyed wood beads. The enameled copper leaves, rings, bead caps and toggle clasp are all by C-Koop.

cindy-morris-gogoshebogo-design

I used copper clay powder to create the bird pendant, which coordinated well with C-Koop enameled pink rings and Swarovski antique pink crystals. I love how you can see bits of copper underneath the enamel.

bottle-cap-necklace-enameled-heart

The elongated heart shape is practically Sondra’s signature, so of course it was the finishing touch on her bottle cap necklace.

enameled-etched-copper-bracelet

Rita etched a copper washer to create the center link on this bracelet, and used a clasp and beads from C-Koop to add more color.

~Cindy