Did you know that all of Rings & Things’ hat pins meet the guidelines set forth by the Arkansas hat-pin ruling of 1909? Curious? You can read about the history of hat pins on the American Hatpin Society’s website: http://www.americanhatpinsociety.com/tour/history.html. (And yes, there is an American Hatpin Society!)
While the history of hat pins at Rings & Things isn’t as colorful, we have offered the necessary findings for years, and they are still popular. You too can make hat pins (whether for personal adornment, weaponry, or both). Just follow the step-by-step instructions in this free Rings & Things jewelry-making tutorial.

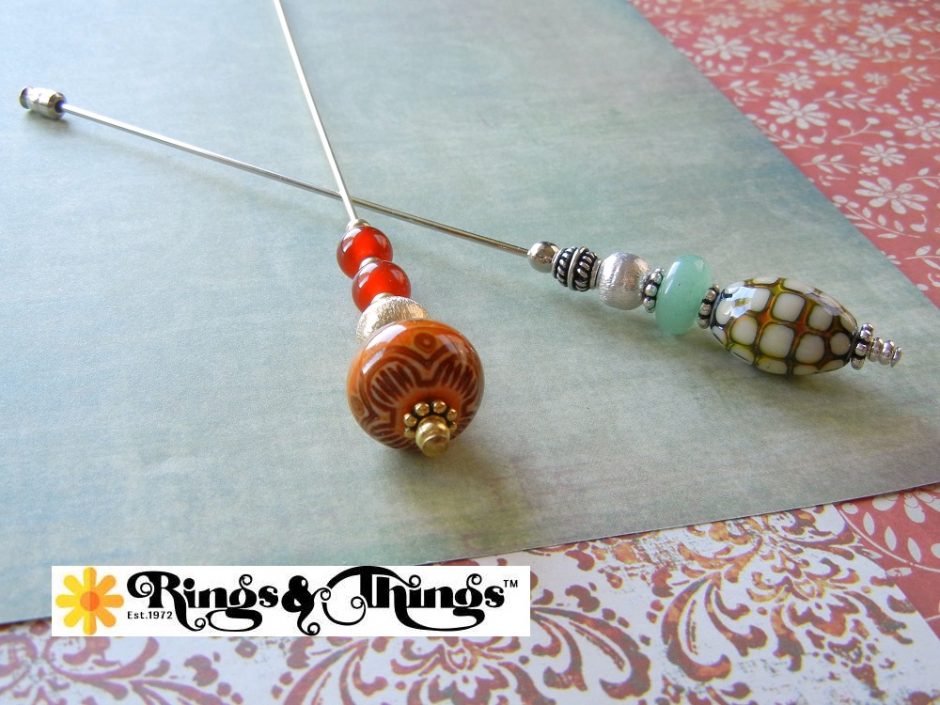
Purchasing beads by the strand is a great value. They aren’t just for stringing necklaces; I used the large-hole beads pictured here to create hat pins. And the leftover beads will be an inspiration for future projects. Can you have too many beads? I don’t think so.

You will need these supplies:
- 1 each hat pin with head (I used item #38-030-1)
- 1 each stick pin clutch (I used item #38-850-1)
- 2 each 3.4x1mm metal heishi-style beads (I used item #26-233-1)
- 3 each 6x2mm spacer bead (I used item #49-954-06-AS)
- 1 each color-changing Mirage bead (I used item #27-398-01)
- 1 each large-hole rondelle gemstone bead (I used item #21-001-011-03)
- 1 each fancy-metal bead (I used item #26-815-108)
- 1 each brushed-finish metal bead (I used item #26-815-209)
- 3 each earring backs (I used item #33-960)
- 1 each crimp cover (I used item #48-285-48-1)
***

Large-Hole Base-Metal Beads
Hat-pin findings are made of hardened 16-gauge wire, which requires beads with 1.3mm holes. Rings & Things lists the bead-hole size on each item listing’s detail page
Large-hole base-metal beads are organized by hole size on the Rings & Things’ website. Now you can find the perfect bead with ease for your jewelry-making project.
***

You will need these tools:
- #65-012 EURO TOOL Jewelry Pliers, Mighty Crimper, 5″
- #65-370 Fiskars Precision Tip Scissors for Beading Cord

Plan the design and lay out the beads in your desired pattern.

The “Ocean Pearl” color-changing Mirage bead has a 3 – 4mm hole-a little too large to sit evenly on the 16-gauge hat-pin wire. But no worries, you can use white-rubber earring keepers to keep it firmly balanced on the wire.

String the first three beads on to the hat pin finding: 3.4mm heishi-style metal bead, 3.4mm heishi-style metal bead, and 6mm beaded spacer bead. String on 2 wire keepers and space them to match the length of the Mirage bead. These will serve as “bead adjusters”.

String the Mirage bead on so both wire keepers tuck inside the bead. No wobbly bead now.

String on the remaining beads: 6mm beaded spacer bead, 12mm Aventurine Rondelle, 6mm beaded spacer bead, 8mm round brushed-finish bead, and fancy metal barrel bead.
Jewelry-Making Hack
Follow these steps to make a base-metal “smart bead”:

Use sharp scissors to cut a white-rubber wire keeper in half.

You will now have two half-sized wire keepers. You will only need one for this project.

String the half-sized wire keeper onto the already beaded hat pin (positioned a few inches from the sharp end is fine).

Insert the half-sized wire keeper into a base-metal crimp cover.

Use the large, rounded part of the “Mighty Crimper” pliers’ jaw to close the crimp cover over the half-sized wire keeper. Pivot the crimp cover in the jaw and squeeze from a few positions until it is fully closed and rounded.

Slide the homemade smart bead up the hat pin until it positions firmly against the decorative beads, thus holding everything in place.

Finish the beaded hat pin by adding a stick-pin clutch. The clutch comes lined with a rubber insert that protects the sharp end of the hat pin (and you)!

“Ocean Pearl” Hat Pin by Rings & Things designer Mollie Valente.

“Chinese Lantern” Hat Pin was created by Rings & Things designer Mollie Valente. The supply list and instructions for this project are coming soon to the Rings & Things Free Jewelry Projects!
Make Things!
Mollie
www.rings-things.com

No Comments