Browsing Category

New products

How to make chain maille (from a kit)

May 14, 2014

Rings & Things has added a whole new line of enameled copper jump rings and clasps from Weave Got Maille, and a handful of Byzantine kits and box chain kits to go with them.

Weave got Maille Bracelet Kits and Jump Rings

Weave got Maille Bracelet Kits and Jump Rings

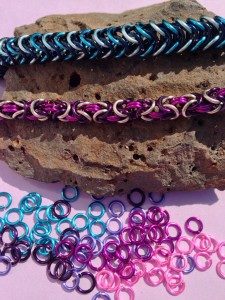
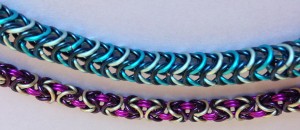
Melissa and I tested the kits, to produce some quick example pieces for our website, and I have to say, I think the kits are a great way to go for anyone who is new to chain maille, or to a specific weave of maille.

Weave Got Maille kit Chain Maille Bracelets

Weave Got Maille kit Chain Maille Bracelets

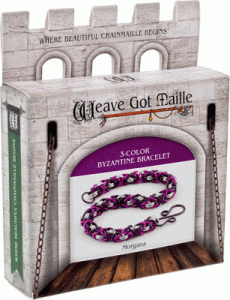
I chose to use the Morgana kit, which produces a 3-color byzantine chain maille bracelet. There are enough rings in the kit to make a bracelet up to 8 1/2″ long, but the final length can be shortened easily by stopping at the end of any completed unit.

Morgana Bracelet Kit

Morgana Bracelet Kit

The instructions are the property of the kit maker, so I won’t be listing the step by step instructions here, but the step-by-step sheet included has great close-up pictures and is easy to follow (and once you have made up the kit project, you have the instructions to make as many more as you like, by just purchasing additional jump rings and clasps).
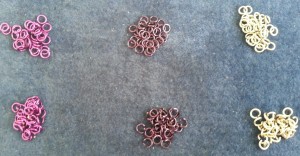
Jump rings from Weave Got Maille kit

Jump rings from Weave Got Maille kit

Here are my thought and hints for weaving chain maille painlessly.

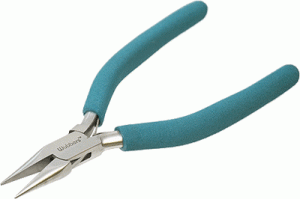
  • Yes, you do need two pair of chain nose pliers. Do not try using a pair of flat nose or a pair of round nose as a substitute. They can both be regular, or bent, or a combination of styles, but you want smooth pliers, because serrated nose pliers will mar the finish on the rings. The smaller the rings that you are using, the more important it is to have pliers with a narrow tip, and ones that are comfortable to hold. My personal choice for comfort and pricing are the full size wubbers pliers. The longer cushioned handle helps prevent hand fatigue and the tips are reasonably narrow. For extremely narrow tips, lindstrom pliers can’t be beat, but they are a definite investment.
Wubbers Chain Nose Pliers

Wubbers Chain Nose Pliers

  • To weave the maille quickly, you will need to pre-open some rings, and pre-close others. Only open the rings as wide as you need to slip them over the appropriate quantity of other rings. If you open the rings too wide, it is harder to close them neatly and tightly. For the pre-closed rings, make the closure as seamless as possible. It is much easier to close the rings neatly at this stage than it is when weaving. An illustration of the correct way to open and close rings is included in the instructions.
Opened and Closed rings from Weave Got Maille Kit

Opened and Closed rings from Weave Got Maille Kit

  • Use a soft surface to work on. The bead mats are ideal, since they allow you to “scoop” up the closed rings without catching on the material, and the rings that you drop (and you will) don’t go very far.
  • When weaving, rest your hands on the surface, or as close as you can comfortably be to the surface. The extra support will help prevent the project from slipping and rings from escaping.

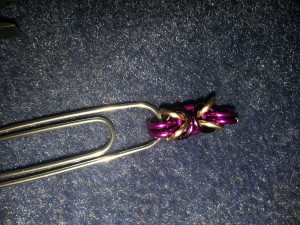
One of the tools in the kit is a large paperclip. Attaching this to the beginning of the project accomplishes two things, it gives you a “handle” to work on the chain while it is short, and it reminds you which end you are working on.

Byzantine Chain first unit

Byzantine Chain first unit

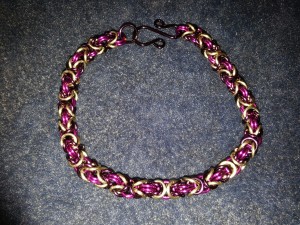
Here is my finished project. You may notice that the design doesn’t quite match the design on the box. This is because I made a mistake on the second unit of the chain, by reversing my “b” and “c” colors. Rather than take it apart and re-do the section, I chose to work with this as a new pattern, and alternated each correct unit with an incorrect one. I kind of like the variation in the design. Sometimes errors allow for new ideas.

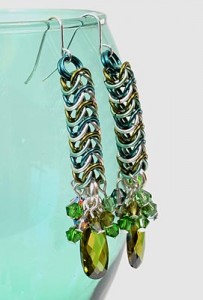
Melissa made a box chain bracelet, and then, having learned the pattern, designed this pair of Night in Emerald City box chain earrings.

Night in Emerald City earrings

Night in Emerald City earrings

Are you a chain maille maker? Reply below if you have any great hints to share.

~ Rita ~

Embellish Jewelry Blanks with Crystal Chatons

November 11, 2013

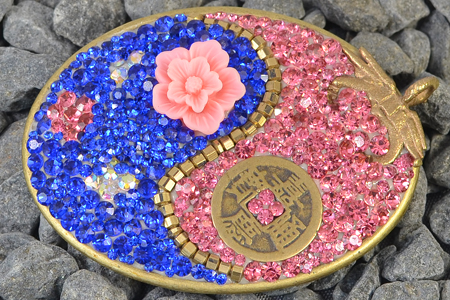
It doesn’t matter if you’re a rhinestone cowgirl or an urban fashionista – dressing up belt buckles and other jewelry blanks with sparkling crystal chatons is just plain fun!

Use the steps below to either recreate the Zen Yin belt buckle by Jan or to embed you own designs in a wide range of jewelry components including bezel cups, buckle blanks, cuff links, and more.

supplies

1. Gather your supplies.

Supplies:

To make the exact belt buckle pictured in this blog, see the “Zen Yin” belt buckle full parts list in our Design Gallery.

tools

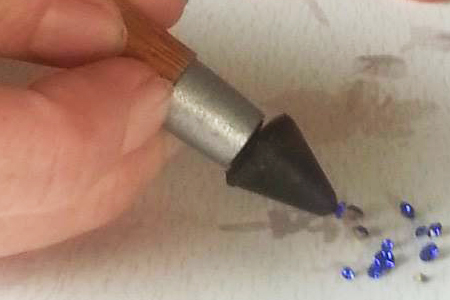
jewel setting tool makes it easy to set chatons in your jewelry clay.

Tip: A jewel setter makes it much easier to set small objects into the clay! While bare fingers can hinder your field of vision and upset other elements of the design, jewel setters provide a wax tip to lightly pick up and place small objects in just the right spot.

plan

2. Plan your layout.

Plan your layout before you unwrap the clay. This allows you to tinker with design options without the clay drying prematurely. This is especially important on large objects like a belt buckle.

Form two equal balls

3. Measure equal amounts of clay.

Wear thin gloves to protect your hands. Measure equal amounts of “A” and “B” types of clay, and form each material into a separate ball. If the clay sticks, apply a thin coat of vegetable oil.

Mix the clay

4. Combine.

Combine the two balls together until they are well blended and uniform in color.

Adding clay to your blank.

5. Press clay into jewelry blank.

Press the clay into your jewelry blank. You can smooth it out by adding a little vegetable oil on top. If it gets too sticky, dust it lightly with baby powder.

Embellishing jewelry clay

6. Place large objects & focals first.

Place larger objects and focal points into your clay first. Tip: To save time, you can leave strung beads on the string, rather than placing them individually in the clay. Trim excess string once the beads are in place.

crystal katana

7. Fill in remaining clay with crystal chatons.

Next, fill in the remaining exposed clay with sparkling crystal chatons. As mentioned above, a jewel setter can make this task quicker and easier. When you are placing your chatons into the clay, be sure not to press or tap them in to deeply. The clay will rise up a little bit around them particularly when it is very wet.

finished_belt_buckle

8. Allow clay to dry and you’re done!

Set aside your design in a safe spot and allow the clay to thoroughly dry, based on the manufacturer’s instructions. EnviroTex Jewelry Clay fully cures in 24 hours to a hard, durable, and shock resistant substance with a smooth, porcelain like surface. It does not shrink as it cures!

Below, check out more fun designs Jan made with EnviroTex Clay and crystal chatons.

donuts

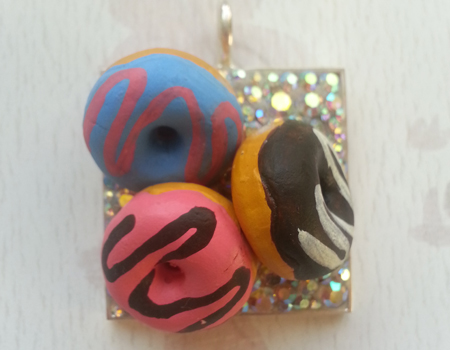
These chunky donut beads are held fast in the crystal clay,
demonstrating how strong EnviroTex clay is!

Homer Simpson wouldn’t be able to resist this whimsical bit of bling! It’s made with donut beads, aurora borealis crystals, and a square bezel-cup pendant blank.

heart key chain

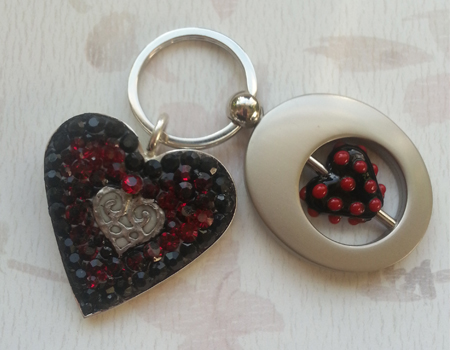
EnviroTex Jewelry Clay is durable enough for heavily-used objects
like key rings. Add heart to designs with heart bezel cups.

Heart-shaped bezel cups add an extra bit of love to jewelry designs.

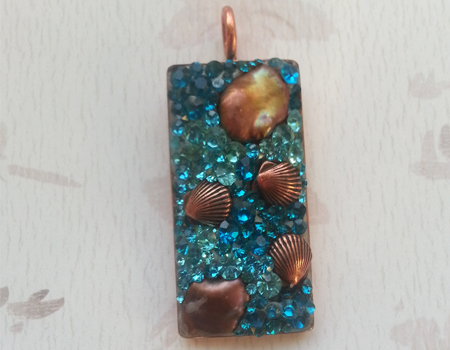
seashore

Go nautical with embedded scallop shell beads and freshwater pearls.

Rectangle bezel-cups provide a great shape for custom pendants with a touch of bling. The design pictured above is adorned with shell beads and freshwater pearls surrounded by blue zircon and aquamarine crystal chatons.

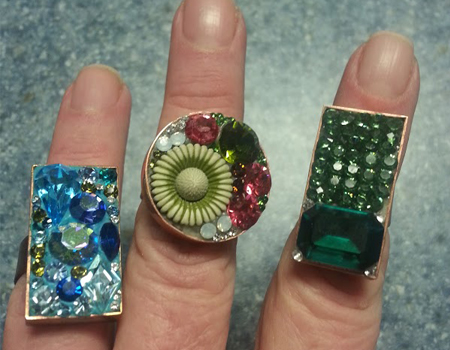
three-rings

Adorn your hands with bezel cup ring blanks!

Bezel cup ring blanks come in several colors and shapes. Some styles are exclusive to Rings & Things, and all styles are adjustable to fit any ring size. They’re perfect for making blingy costume jewelry.

bear

You don’t have to use crystals.
This polar bear ring has seed beads embedded in the jewelry clay.

Embed seed beads and other objects in the crystal clay to see what other effects you can achieve! This winter-themed ring has a polar bear bead and a “Snow Ball” seed bead mix embedded in the clay. Let your imagination be your guide as you have fun making mosaic jewelry and a whole lot more! 🙂

How to Make Leather Bracelets – Two Finishing Methods

August 12, 2013

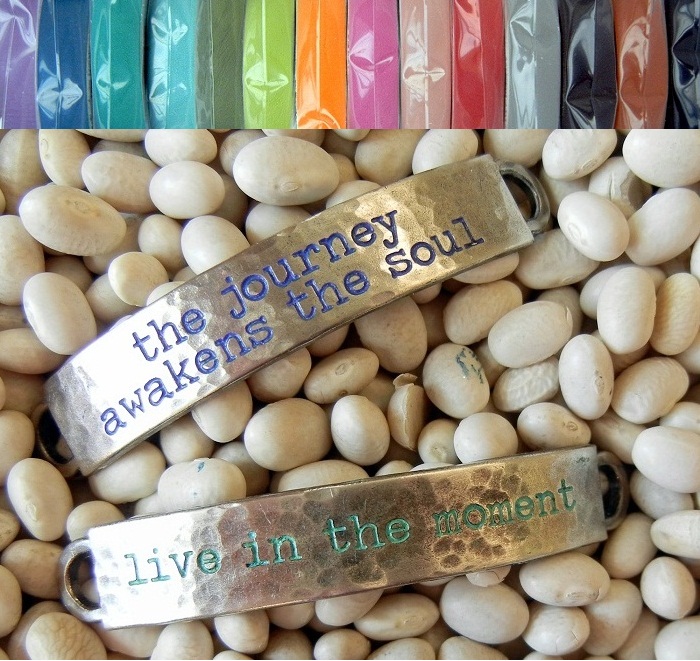
In this do-it-yourself jewelry-making tutorial, the bracelet blanks from last week’s blog post, “Customizing Tim Holtz idea-ology® Word Bands for a Handmade Look”, combine with Rings & Things’ new leather strips to make two styles of leather cuffs.


How to make a leather bracelet with metal stamped word band blanks.

Combine a customized bracelet blank with one of the many colors of Rings & Things’ leather strips to create a handmade leather bracelet.


Leather Bracelet Style One – A Single-Wrap Bracelet with Drawstring Clasp:

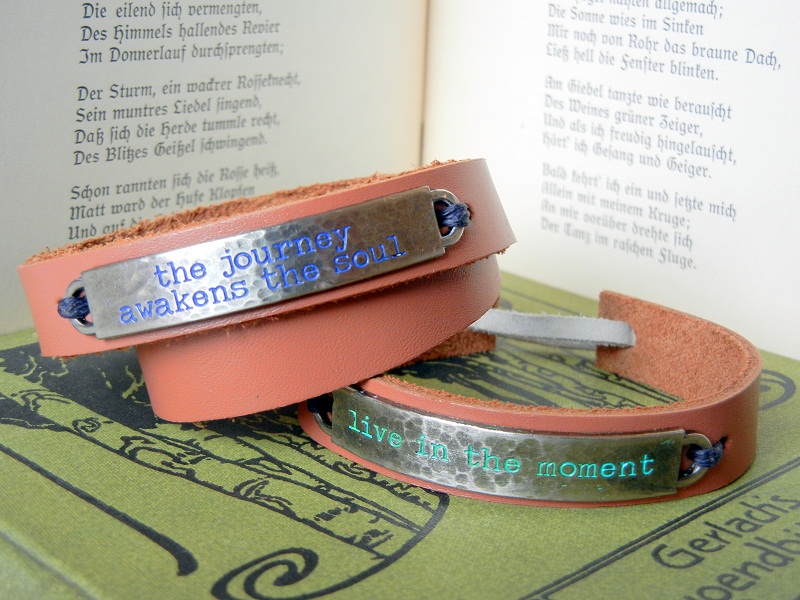
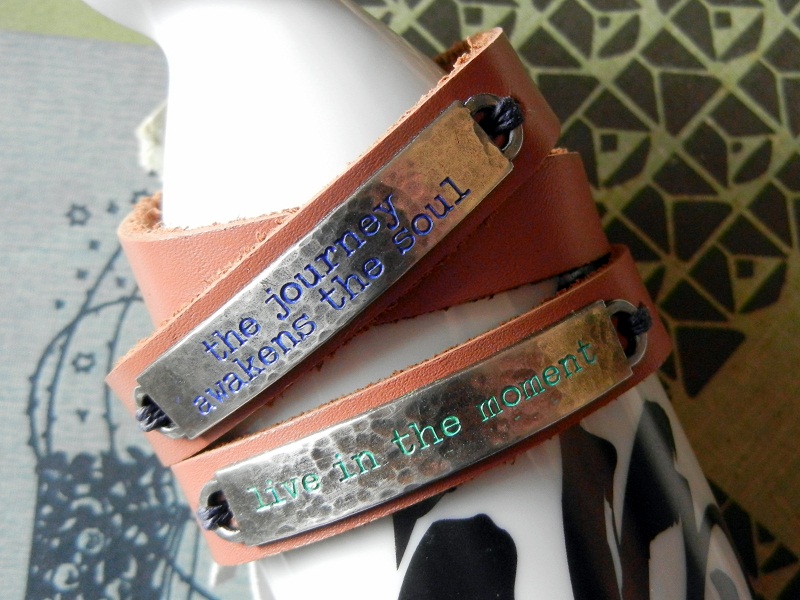
“In the Moment Leather Cuff Bracelet”

Tutorial: how to make a leather bracelet with drawstring clasp; a step-by-step DIY jewelry project.

Step 1: Gather together the supplies you will need to make a drawstring clasp leather bracelet.

You will need the following tools and supplies:

ruler

cutting mat

hobby knife

rotary leather hole punch

1/2″ wide leather strip

3mm suede lace

5-ply waxed linen cord

large-hole bead (hole size 4mm)

customized Tim Holtz idea-ology® word bands

Sharpie®, Extra Fine Point


Make a DIY leather bracelet: Cut the leather strip with a hobby knife.

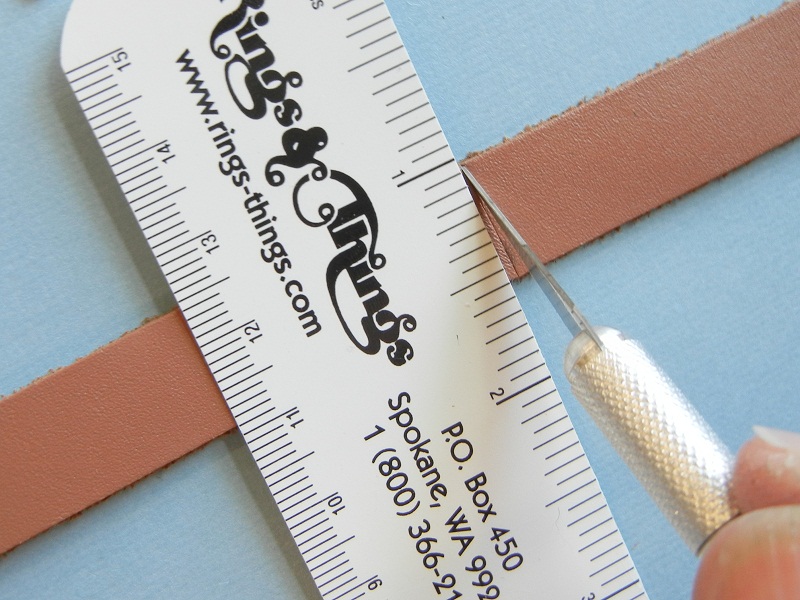
Step 2: Cut the leather strip to length. Size the leather so it fits comfortably on the wrist, ends butted together; mark the leather at the cut length. Use a ruler and hobby knife to make a straight cut at the mark.


Tutorial Leather Strip Bracelet D

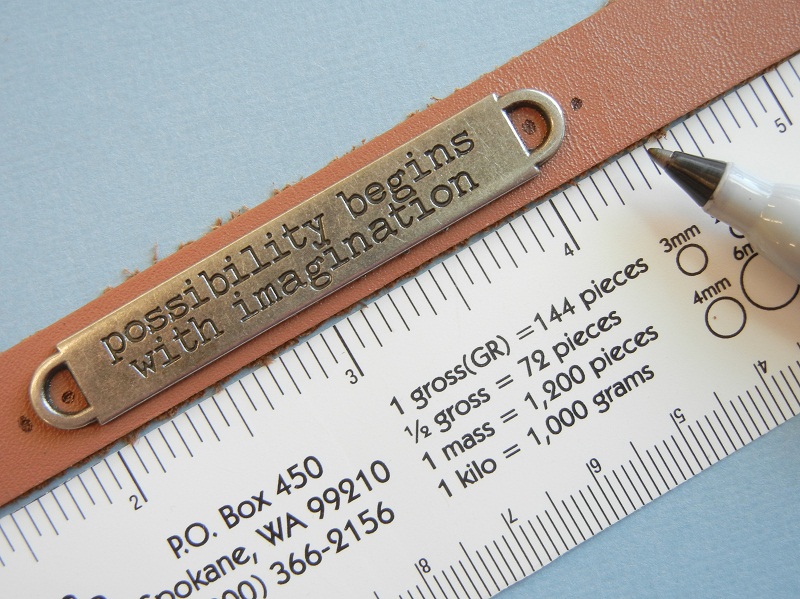
Step 3: Measure and mark the position of the holes to be punched (it is easiest to do this before you curve the word band). Mark two “stitching” holes on either side of the two word-band loops. Also mark a “lacing” hole set 1/4th inch from each leather end.


How to make holes in leather with a rotary leather hole punch.

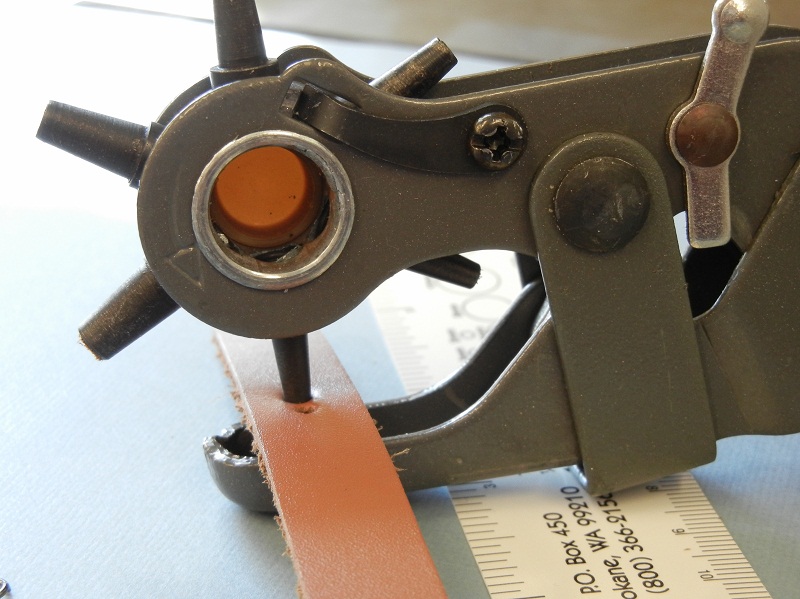
Step 4: Use a rotary leather hole punch to cut holes in the leather strip at the marked positions. Use the smallest punch (2mm) to punch the stitching holes for the bracelet blank; use the largest punch (4.5mm) to punch the lacing holes for the drawstring closure.


How to attach a metal-stamped bracelet blank to a leather cuff using waxed linen cord.

Step 5: Align the bracelet blank with the punched stitching holes and stitch each side in place. The waxed linen cording is stiff enough to go through the 2mm holes without a needle. After making two or three stitches, pull the cord tight and secure with a knot on the backside of the bracelet.


How to make an adjustable drawstring closure for a leather cuff bracelet.

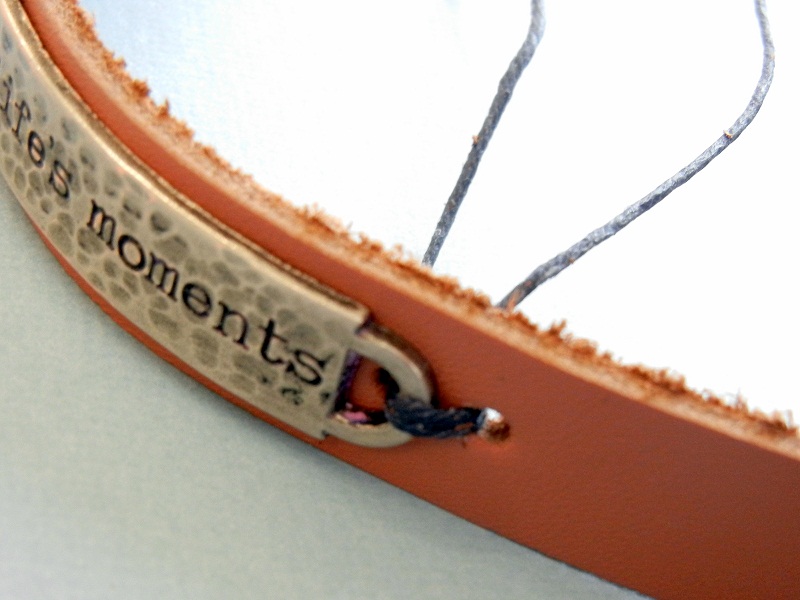
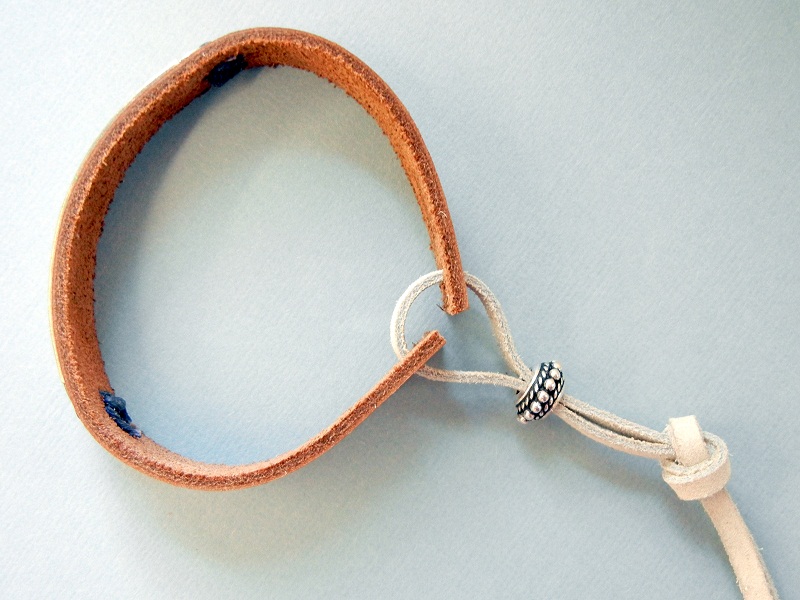
Step 6: To create the drawstring closure, lace the suede cord through one hole and then back out, so the cord tails are on the outside of the cuff. String both cord ends through the large hole bead. Combine both cord ends and make an overhand knot approximately 2″ from the cuff. Slide the bead to tighten or loosen the cuff.


How to use a drawstring closure on a handmade leather cuff.

“Live in the Moment” leather-cuff bracelet with drawstring clasp is ready to wear.


Leather Bracelet Style Two – A Double-Wrap Bracelet with Hitch Clasp:

“The Journey Leather Wrap Bracelet”


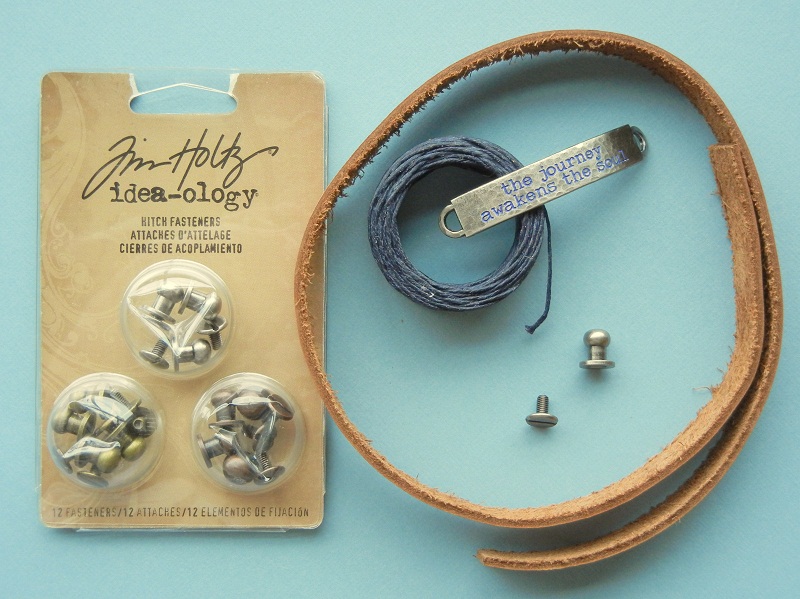
How to make a double-wrap leather cuff bracelet--you will need these supplies.

Step 1: Gather together the supplies you will need to make a double-wrap leather cuff bracelet with hitch fastener.

You will need the following tools and supplies:

ruler

Sharpie®, Extra Fine Point

cutting mat

hobby knife

rotary leather hole punch

screwdriver

1/2″ wide leather strip

idea-ology®, Hitch Fasteners

5-ply waxed linen cord

customized Tim Holtz idea-ology® word bands


How to make a double-wrap bracelet cuff--size and cut the leather strip.

Step 2: Cut the leather strip to length. Size the leather so it fits comfortably wrapped twice around the wrist; add one inch for the closure overlap. Mark the leather at the cut length. Use a ruler and hobby knife to make a straight cut at the mark.


How to make a leather cuff bracelet--measuring and marking for hole punching.

Step 3: Measure and mark the position of the holes to be punched (it is easiest to do this before you curve the word band). Place the leather on your wrist and determine approximate placement for the metal blank. Mark two “stitching” holes on either side of the two word-band loops. Also mark a “hitch” hole set 1/4th inch from the first leather end and 1/2 inch from the second end.


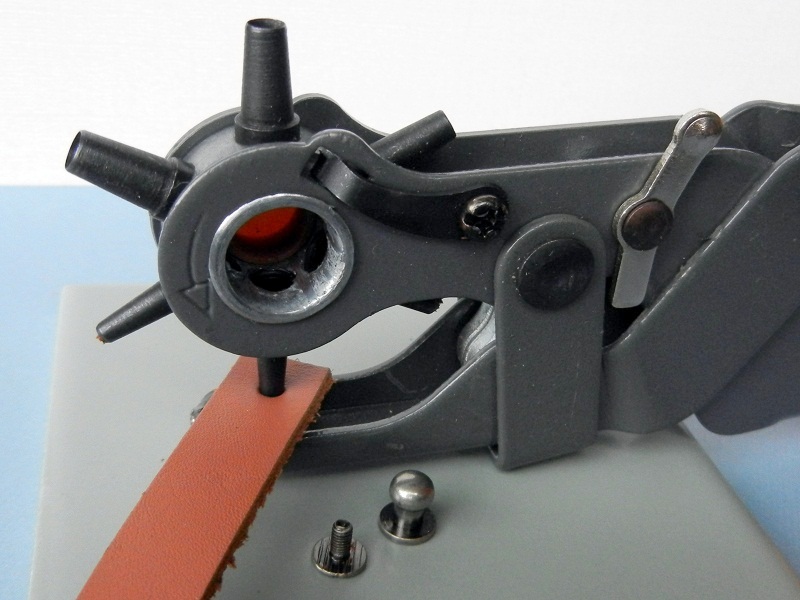
How to make a leather cuff bracelet--punching holes for a hitch fastener closure.

Step 4: Use a rotary leather hole punch to create holes in the leather strip at the marked positions. Use the smallest punch (2mm) to punch the stitching holes for the bracelet blank; use the largest punch (4.5mm) to punch the fastener holes for the hitch closure.


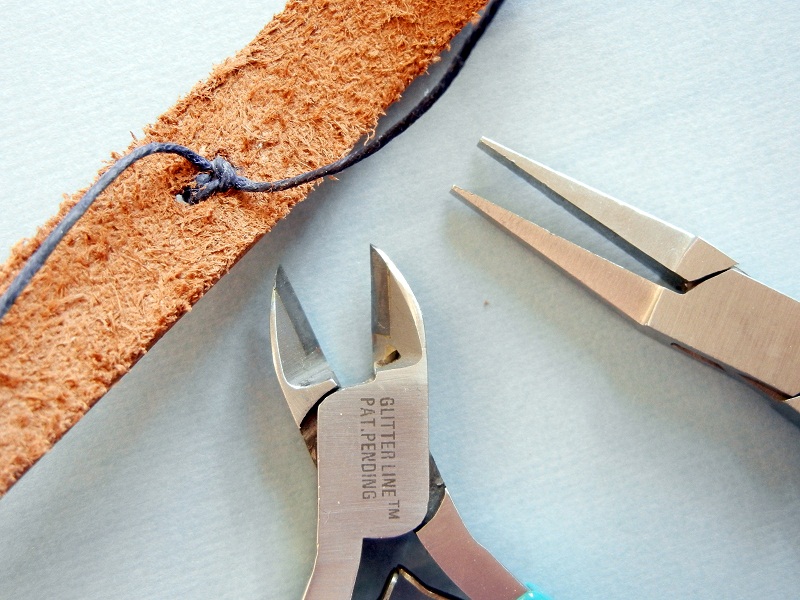
How to attach a metal-stamped bracelet blank to a leather cuff using waxed linen cord.

Step 5: Align the bracelet blank with the punched stitching holes and use waxed linen cord to attach the word band blank to the bracelet. Stitch the blank in place and knot the cord on the back side. For ease, a large sewing needle can be used.


How to make a hitch style clasp for a DIY leather cuff bracelet.

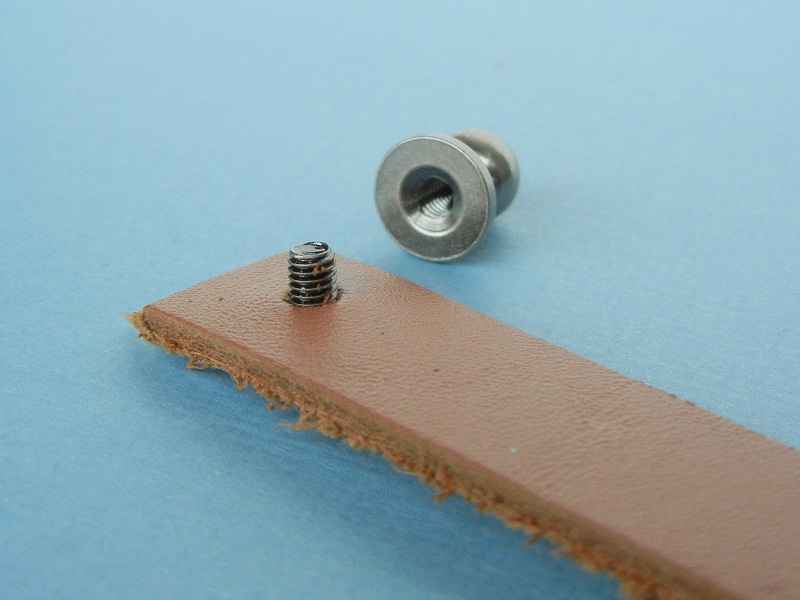
Step 6 a: On one end hole insert the screw side of the hitch fastener.


How to make a hitch style clasp for a DIY leather cuff bracelet.

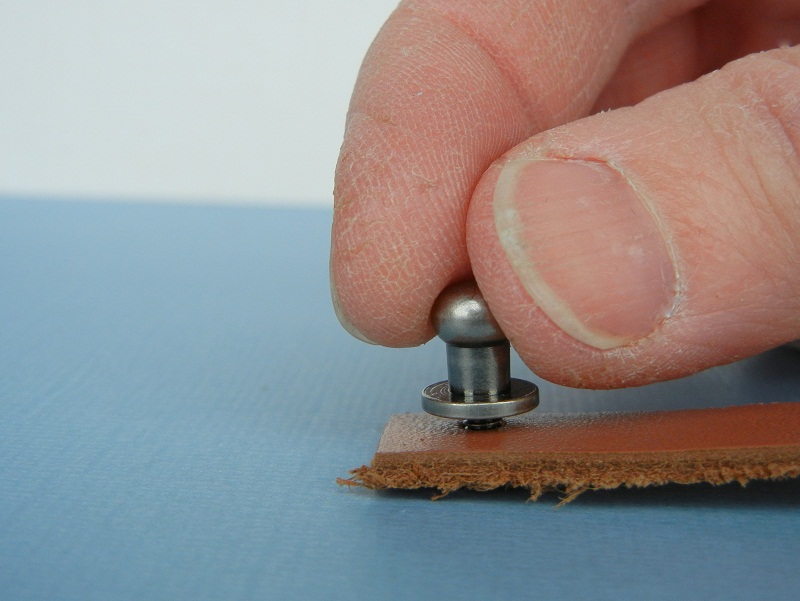
Step 6 b: Attach and screw the hitch in place. From the backside, use a flat-head screw driver to tighten the hitch.


How to make a hitch style clasp for a DIY leather cuff bracelet.

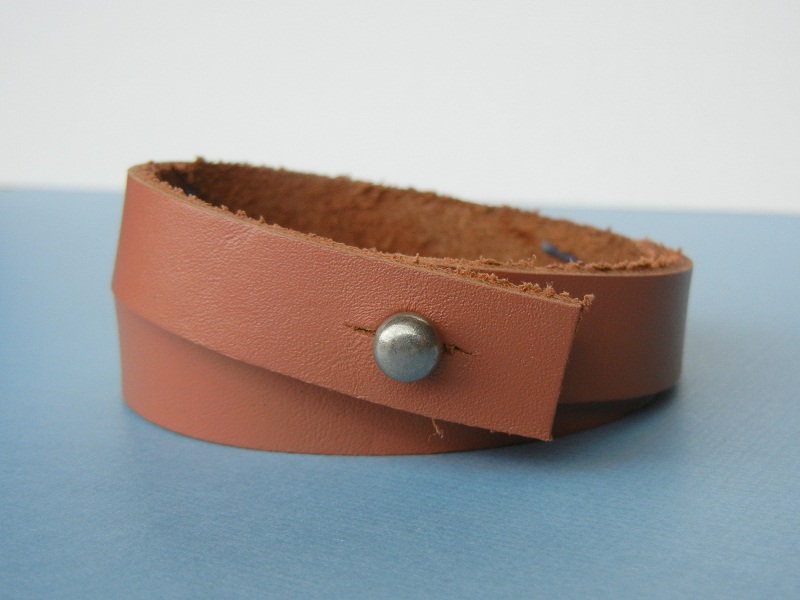
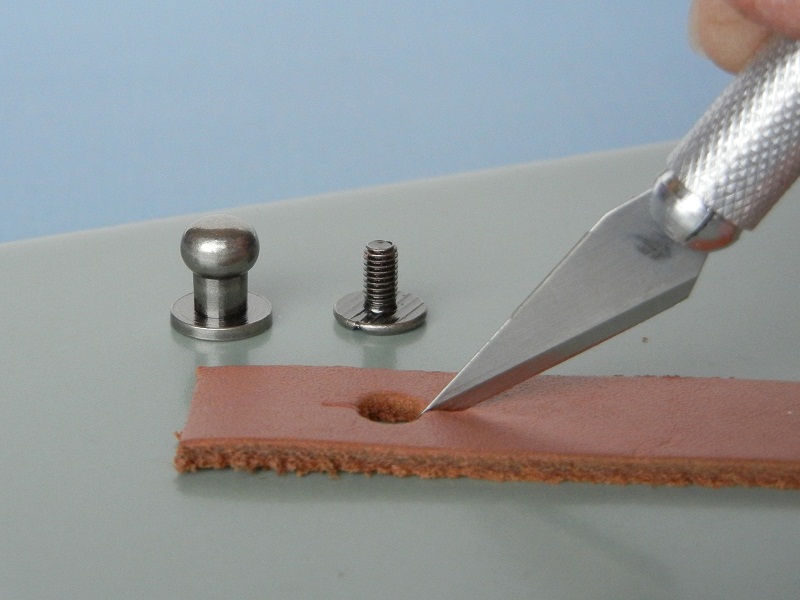
Step 7 a: On the other end hole, use the hobby knife to cut 1/8″ slits on opposite sides of the hole, running parallel to the strip length. This will allow the hitch to slip into the hole, but stay securely in place.


How to make a hitch style clasp for a DIY leather cuff bracelet.

Step 7 b: Insert the hitch through the hole to close the fastener.


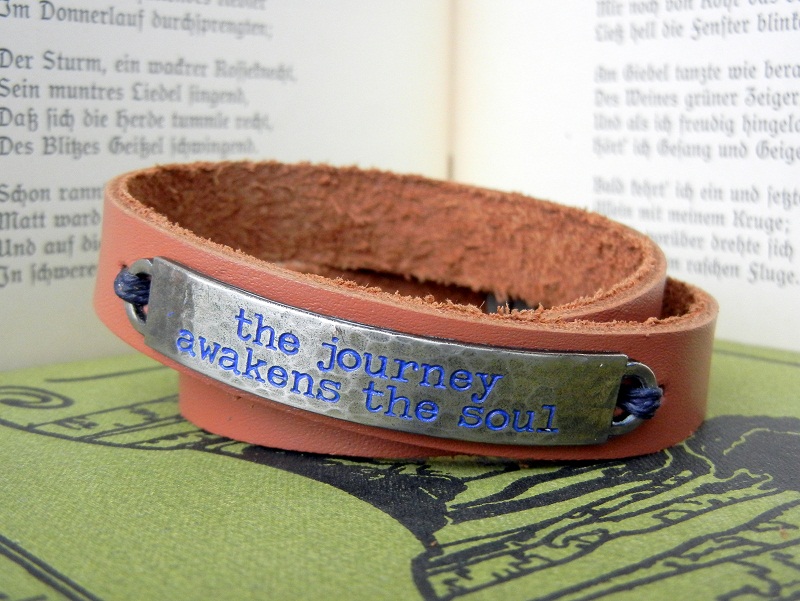
How to make a leather wrap bracelet with metal stamped blank --ready to wear.

“The Journey Leather Wrap Bracelet” is ready to wear!


Layer bracelets for a trendy look.

Bracelets can be worn together for a layered look.


Make things,

Mollie


Concrete in Jewelry

July 29, 2013

Free tips for using Artisan Encapture Concrete and other jewelry grade concretes for mini mosaics, art concrete projects, concrete jewelry and more by Sondra Barrington of Rings & Things.

An industrial material such as concrete seems unlikely for jewelry, but it works very well! It is relatively lightweight, and very durable. It is great for personalized adornment, because you can embed virtually any charm, bead or found object you want.

Visit our design gallery for free jewelry projects and check our Mosaic Jewelry Board on Pinterest for concrete jewelry inspirations.

Difference Between Cement and Concrete

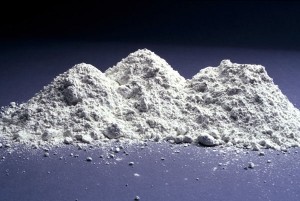
Cement is a powdered ingredient (mostly calcium silicates) used in concrete. It is strong, but brittle and susceptible to scratching. When mixed with water, it undergoes a series of chemical reactions and slowly crystallizes into a strong, interlocking form. Concrete is a mixture of cement, an aggregate (sand or gravel) and water.

Free tips for using Artisan Encapture Concrete and other jewelry grade concretes for mini mosaics, art concrete projects, concrete jewelry and more by Rings & Things.

cement powder

Jewelry Grade Concrete

EuroTool created EnCapture Artisan Concrete specifically for jewelry artists. This new kit makes it easy for designers to create small mosaics and concrete jewelry. For information on making your own concrete, visit Ganoksin.

Creating with Artisan Concrete

Tips on Using EnCapture Artisan Concrete

Storage of the product is critical. Extreme temperatures may affect the mixture or compound, and can jeopardize the integrity of the activator liquid. For best results store in a dry, cool location and don’t freeze. Keeping the compound dry is essential; once moisture is introduced the chemical reaction starts. Store products in closed containers. The shelf life, when stored properly, is one year (if not longer).

Coloring Concrete

Prismacolor colored pencils can be used to color the surface of concrete! To prepare the surface, wet-sand it using fine-grit, wet/dry sandpaper and let dry for 24 hours. To seal the color, spray with several light coats of Krylon UV sealant.

Free tips for using Artisan Encapture Concrete and other jewelry grade concretes for mini mosaics, art concrete projects, concrete jewelry and more Rings & Things.

Prismacolor Pencils

Safety When Using Concrete in Jewelry

Always use disposable cups and utensils. Throw away unused concrete; do not wash it down the drain (it will clog pipes). Wear a respirator, safety glasses and gloves.

Have Fun & Happy Creating!

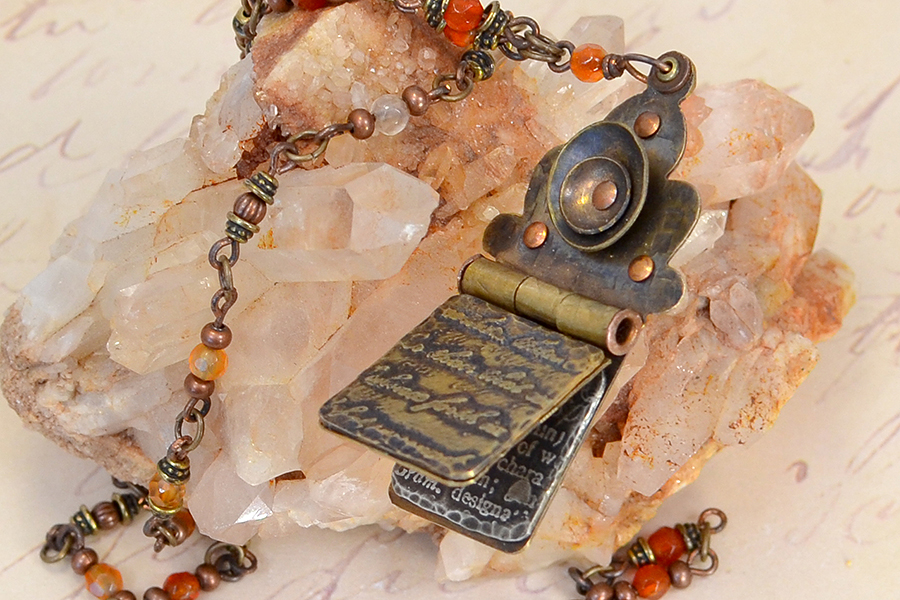
Create a Hinged Metal Memory Journal

July 18, 2013

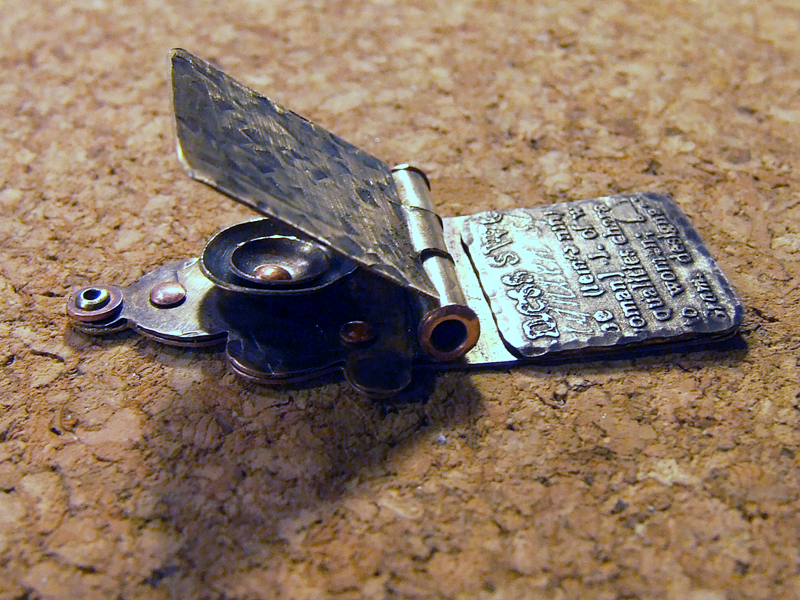
Use a hinge to turn shrine-shaped metal blanks into a journal!

Decide on the layout, location of the hinge and other decorative elements. Using a checkered hammer, apply texture to the top and bottom panels of the journal. Patina, file rough edges and clean.
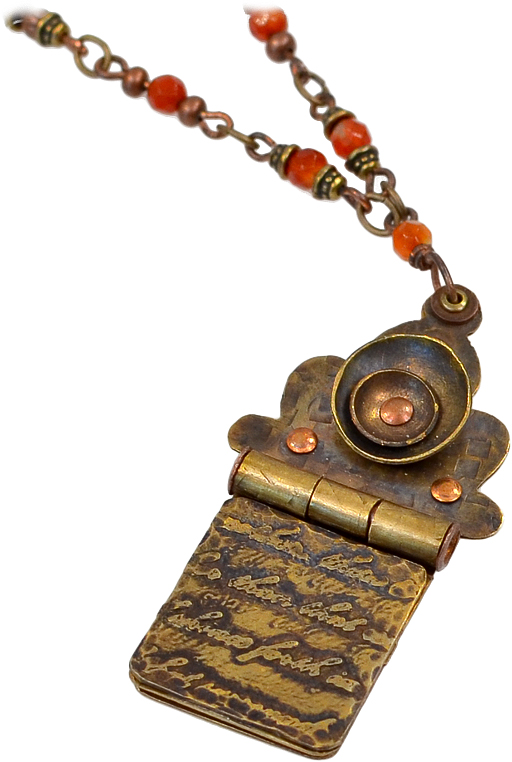
Hinged Pendant Memory Journal Rings & Things. This free DIY jewelry project features metal etching, metal stamping, dapping and riveting. Antique brass, nickel silver, copper and natural agate were used in creating this design. The one-step looping plier was used for the handmade chain.

Layout

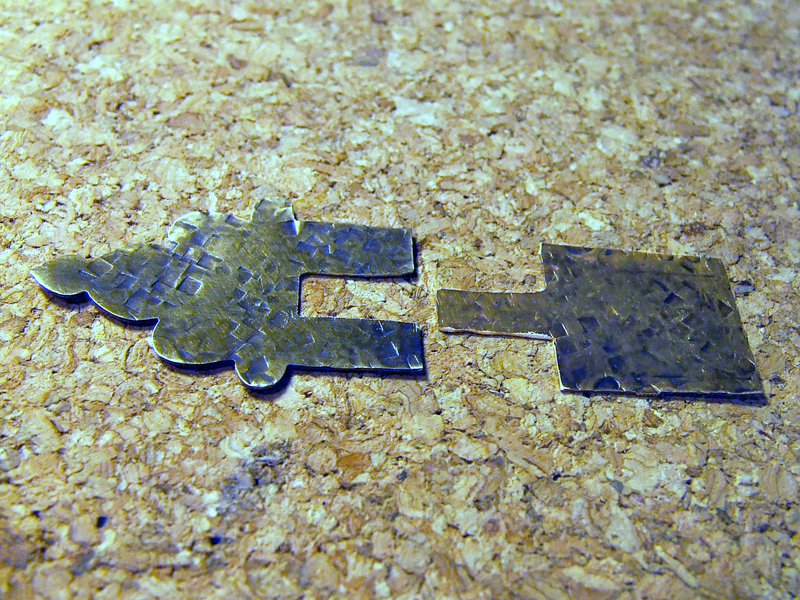
Cut the hinges, which can be as wide or as narrow as you choose. For 3/32 tubing, make hinges that are one-half inch deep. You need an odd number of hinge tabs. Measure, mark and saw tabs into the top panel. Use plenty of cut lube to prevent the saw blade from sticking when cornering.
Hinged Pendant Memory Journal Rings & Things. This free DIY jewelry project features metal etching, metal stamping, dapping and riveting. Antique brass, nickel silver, copper and natural agate were used in creating this design. The one-step looping plier was used for the handmade chain.

Create Hinge Tabs

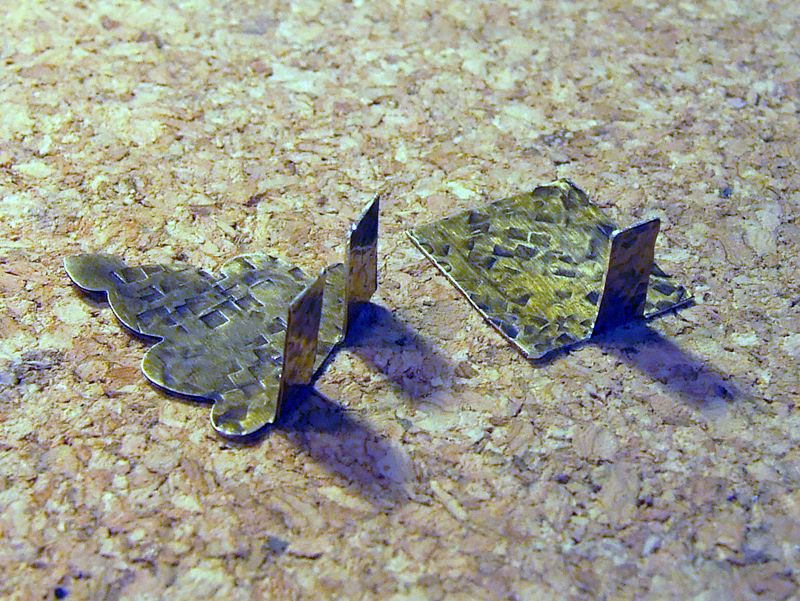
Using wide, flat nose pliers, crease and fold each tabs up to a 90 degree angle. The position of the fold determines whether the hinge will be visible from the front of the pendant, or only from the back side. Keep the textured sides face up, so the design is consistent.
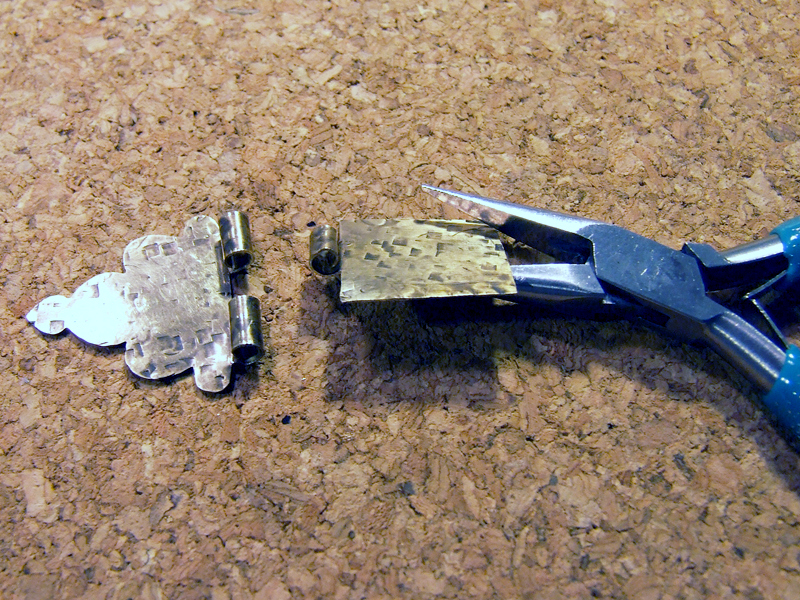
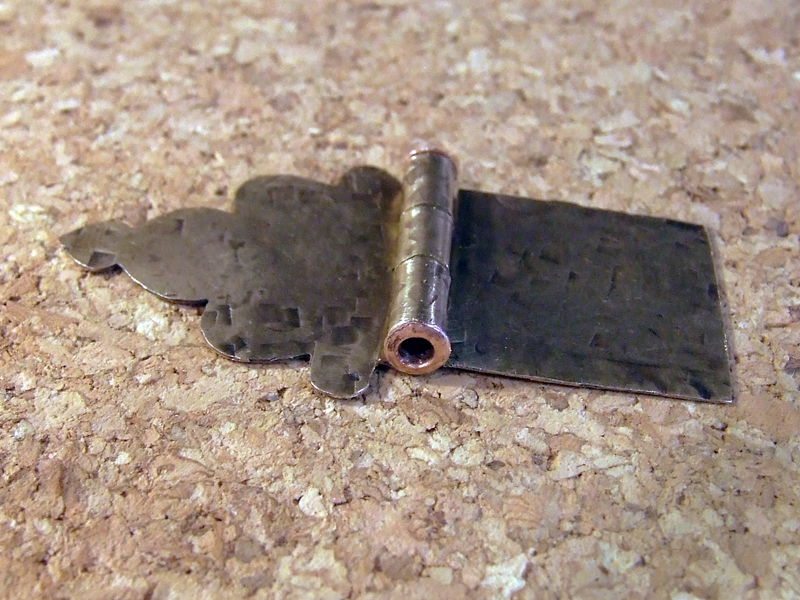
Carefully roll tabs into cylinders using chain nose pliers or medium bail making pliers. Leave hinges a bit loose until after you have inserted the tubing, then you can tighten for best fit.
Hinged Pendant Memory Journal created by Sondra Barrington of Rings & Things. This free DIY jewelry project features metal etching, metal stamping, dapping and riveting. Antique brass, nickel silver, copper and natural agate were used in creating this design. The one-step looping plier was used for the handmade chain.

Roll Into Cylinders

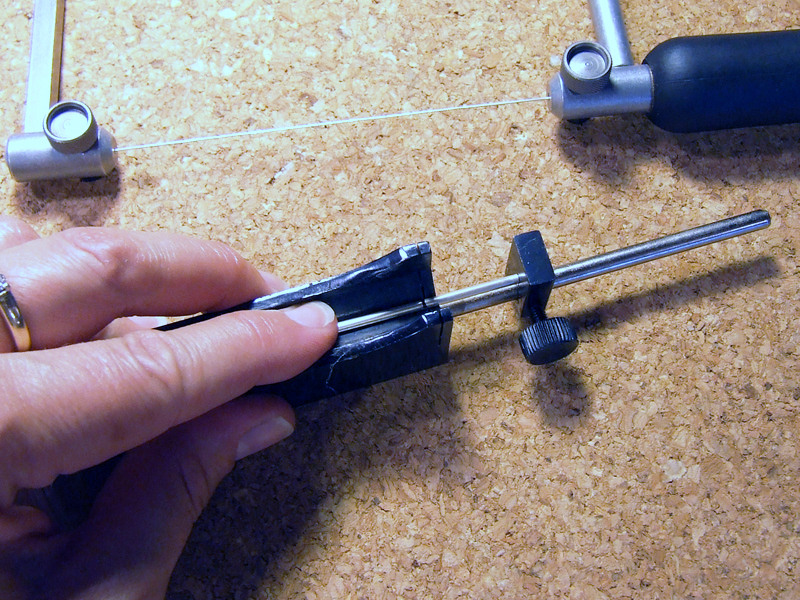
Use a tube cutting jig to cut a length of tube 1mm longer than the width of your piece (for 1/2mm on each side).
Hinged Pendant Memory Journal created  Rings & Things. This free DIY jewelry project features metal etching, metal stamping, dapping and riveting. Antique brass, nickel silver, copper and natural agate were used in creating this design. The one-step looping plier was used for the handmade chain.

Cut Tubing

Slide tubing down the channel and finesse hinges as needed. Rivet tubing into place to finish the hinge. Open and close hinge to ensure a proper fit.

This free DIY jewelry design by Sondra Barrington features antique brass, nickel silver, metal etching, dapping and creating hinges.

Assemble Hinge and Insert Tubing

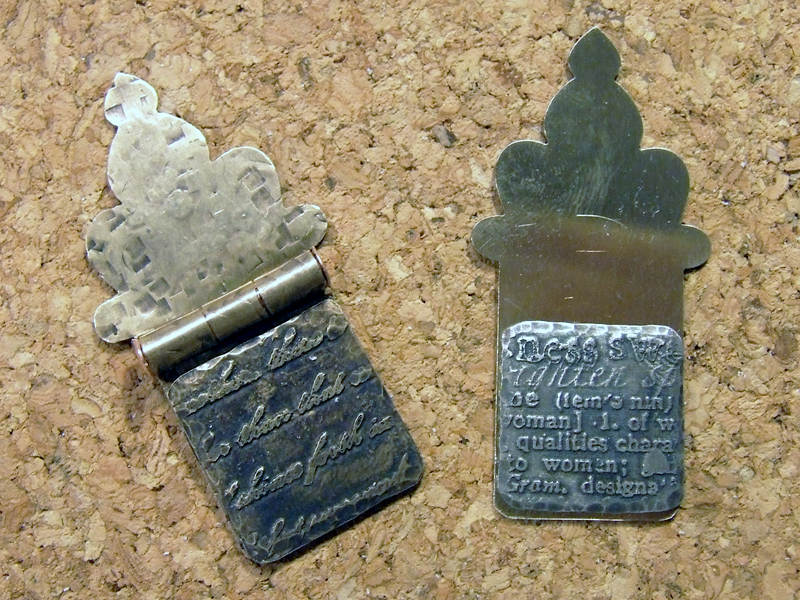
Working with the bottom panel, lay out etched metal pieces for the cover and inside page. Cut, file and patina as necessary. Leave sufficient room for the hinge to lay flat against the bottom panel.
Hinged Pendant Memory Journal created by Sondra Barrington of Rings & Things. This free DIY jewelry project features metal etching, metal stamping, dapping and riveting. Antique brass, nickel silver, copper and natural agate were used in creating this design. The one-step looping plier was used for the handmade chain.

Lay out Etched Metal Page

Measure, mark and punch holes for decorative rivets, accents and center piece (using the small side of the hole punch).
Hinged Pendant Memory Journal created by Sondra Barrington of Rings & Things. This free DIY jewelry project features metal etching, metal stamping, dapping and riveting. Antique brass, nickel silver, copper and natural agate were used in creating this design. The one-step looping plier was used for the handmade chain.

Prepare Embellishments

Using two-part epoxy, carefully glue the etched metal panels into place.
Hinged Pendant Memory Journal created Rings & Things. This free DIY jewelry project features metal etching, metal stamping, dapping and riveting. Antique brass, nickel silver, copper and natural agate were used in creating this design. The one-step looping plier was used for the handmade chain.

Lay out Etched Metal Page

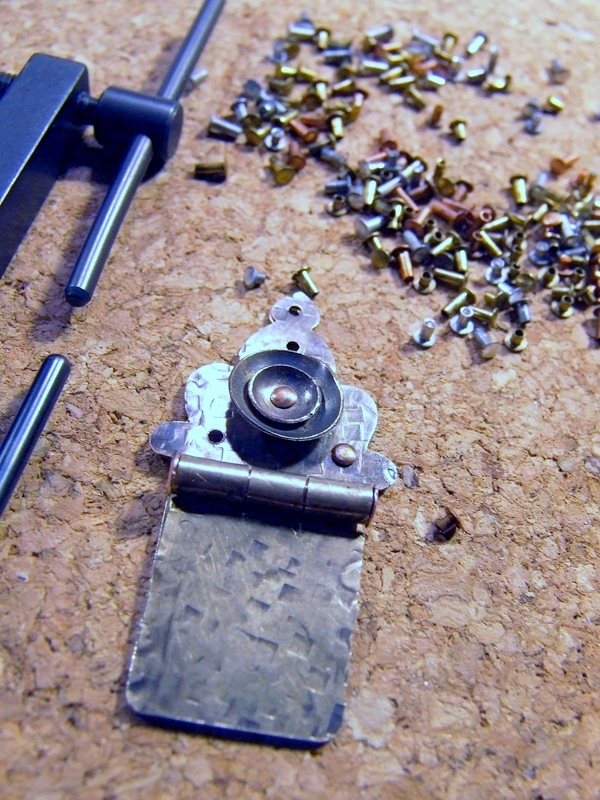
Using a dapping set, dome two small round shapes that can nest one inside the other. Patina, file away any rough edges and clean the domed metal. Layer, and rivet domed metal nests onto the top panel. Connect top and bottom panel with rivets. Use a tube rivet at the top so that you can thread a jump ring through it (if you choose).
Hinged Pendant Memory Journal created by Sondra Barrington of Rings & Things. This free DIY jewelry project features metal etching, metal stamping, dapping and riveting. Antique brass, nickel silver, copper and natural agate were used in creating this design. The one-step looping plier was used for the handmade chain.

Rivet Domes Into Place

Carefully clean and polish the pendant before attaching the necklace chain.

Hinged Pendant Memory Journal created by Sondra Barrington of Rings & Things. This free DIY jewelry project features metal etching, metal stamping, dapping and riveting. Antique brass, nickel silver, copper and natural agate were used in creating this design. The one-step looping plier was used for the handmade chain.

Clean Finished Pendant

Handmade jewelry looks great on a custom beaded necklace, on leather cording, silk ribbon or chain. I created a necklace by making individual links using the one-step looping plier, eye pins, metal beads and natural agates. The links were connected using jump rings.

Hinged Pendant Memory Journal created by Sondra Barrington of Rings & Things. This free DIY jewelry project features metal etching, metal stamping, dapping and riveting. Antique brass, nickel silver, copper and natural agate were used in creating this design. The one-step looping plier was used for the handmade chain.

Memory Journal Necklace

This free DIY Memory Journal pendant was created by designer Sondra Barrington of Rings & Things. This necklace features riveting, metal etching, antique brass shrine stamping blanks, dapping, and metal stamping. The chain was created in an ombre pattern using natural agate gemstone beads, TierraCast antique brass bead caps, metal heishi trade beads and the one-step looping plier with antique copper head pins.

Button, Button, What to do with buttons?

June 18, 2013

I love a good button. I think most bead hoarders have a button tin somewhere as well. The materials used for buttons range from the simple and inexpensive to exotic and pricey. Obviously buttons have a practical use in sewing and clothing design, but they can be great additions to DIY jewelry as well.


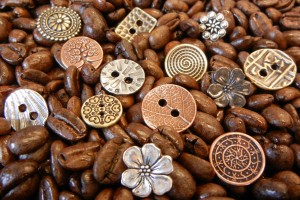
button box spill

button box spill

Buttons as beads:

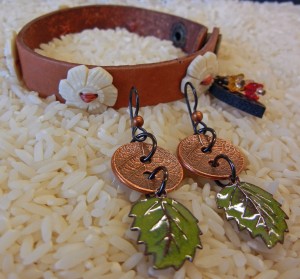
Boston Bracelet and New Leaf Earrings

Boston Bracelet and New Leaf Earrings

By their nature, buttons tend to have either a shank, with an opening for thread, or 2-4 holes for sewing. These holes and openings mean your buttons can substitute for beads and work as connectors in jewelry design. See round TierraCast buttons with a leaf pattern in New Leaf Earrings and bone buttons sewn on the Boston Bracelet.

Buttons as clasps:

Dark and Dangerous Bracelet

Dark and Dangerous Bracelet

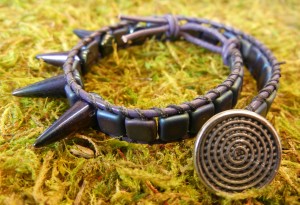
Whether for popular wrapped lashed leather bracelets, or for necklace designs, adding a button to one end of your design and creating a simple loop or series of loops at the other end will complete your creation. The Dark and Dangerous Bracelet uses a cast pewter Spiral Button for the closure.

Buttons as Cabochons or Cameos:

Cute as a Button Bracelet

Cute as a Button Bracelet

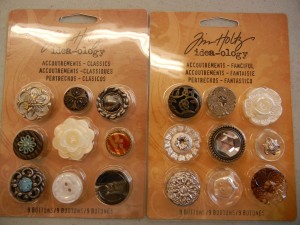
Disk & Loop Bracelets make up into quick finished jewelry by gluing buttons to the disks. If the button has a shank, you may need to trim it and file the surface, then add your favorite adhesive, and you have quickly created a new accessory. Cute as a Button Bracelet uses an assortment of plastic “accoutrements” by Tim Holtz for decoration.

Copies of Buttons:

Buttons, Molds, and Cast Reproductions

Buttons, Molds, and Cast Reproductions

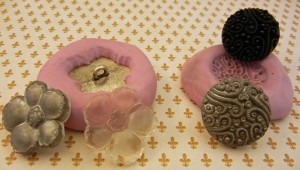
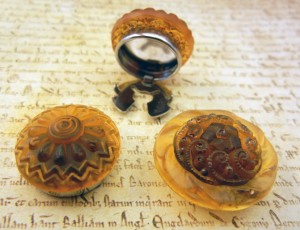
Have a one-of-a-kind or vintage button that you love, but don’t want to part with? 2-part silicone molding material works great to make a mold of your treasure that you can re-create in polymer or resin and use time after time. Silicone molds were quickly made of the buttons in this picture. Reproductions of the buttons (without the pesky shanks) were easily made with Amazing Resin and SuperClear Resin. For more information on making molds, see our previous blog: Making Your Own Molds is a Hoot.

Buttons you can buy from Rings & Things:

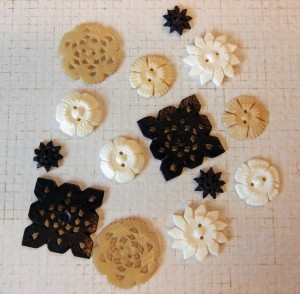
Rings & Things carries buttons in materials such as bone,

Assortment of Bone Buttons in various colors.

Assortment of Bone Buttons in various colors.

plastic,

Plastic Button Assortments

Plastic Button Assortments

cast pewter

A sampling of pewter buttons.

A sampling of pewter buttons.

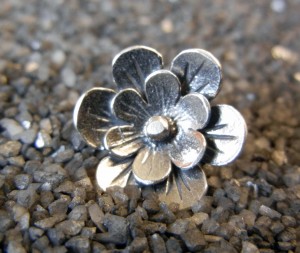
one lone sterling offering

Sterling Flower Button

Sterling Flower Button

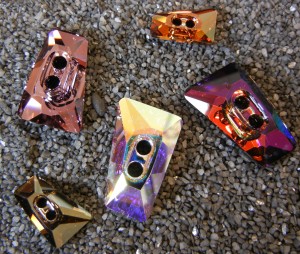
and SWAROVSKI ELEMENTS crystal

Crystal Buttons

Crystal Buttons


Making a Button:

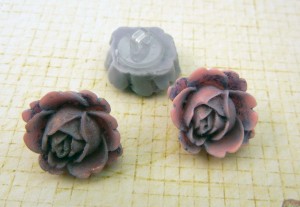
Resin Flower Buttons

Resin Flower Buttons

Do you have an item without holes that you want to use as a button? Easily glue a plastic button shank to your piece to create a button. These work great for turning resin, polymer clay, hand-made glass, and ceramics into useable buttons. Since these shanks are plastic, they don’t have the sharp edges that you sometimes find on metal shank findings. The set shown above are made from resin flowers, colorized with gilders paste, and attached with E-6000.

Changeable buttons:

Cast Resin Button Covers

Cast Resin Button Covers

With a button cover and some glue, you can create a decorative cover that can be transferred from garment to garment, covering the plain or boring buttons used in manufacturing. This set is made with super clear resin, colored with dye and glitter, and attached with E-6000.

Our pinterest board “Buttons” has further inspirations for using buttons and great handmade buttons.


~ Rita
Quick and Easy 1-Step Looper Tutorial

May 10, 2013

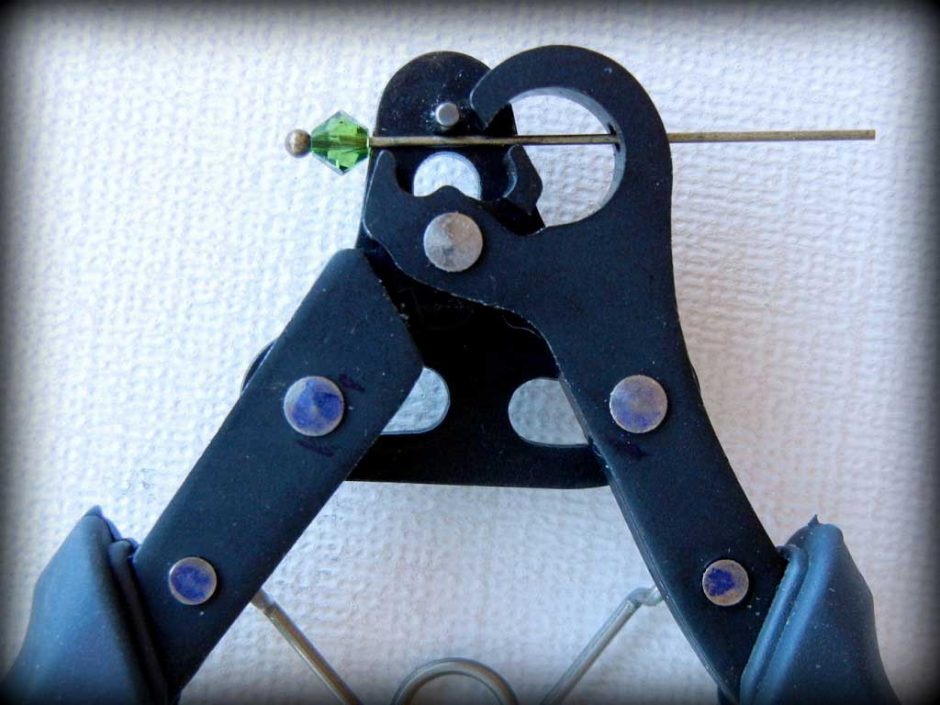
I love jewelry with lots of sparkly adornment, but making simple jewelry loops can be tricky. Creating matching loops with the perfect shape requires skill and time. It’s little wonder the “1-Step Looper” is so popular — this magical tool makes consistent loops in one quick and easy step. In fact, the process is so quick, you might miss it if you blink. Continue Reading…

Add color and shine with Gilders Paste

February 4, 2013

Gilders Paste, trying various methods and materials, and deciding I like it! 86-381-gilderspaste2 Rings & Things has added an assortment of colors. Each tin is 1.5 oz of wax-based medium, and is enough to cover 30 square feet of metal, wood, resin, et cetera. You can apply Gilders Paste with a cloth, cotton swab, or fingertip. Thin with paint thinner, turpenoid (but not turpenoid natural) or mineral spirits to transform the highly concentrated Gilders Paste for brushing, sponging, staining, washing or spray painting. I suggest having the following tools handy when you plan to colorize with Gilders Paste:

  • Soft Rag (an old cotton t-shirt worked well)
  • Baby Wipes
  • Small Mixing cup
  • Disposable (cheap) small paint brushes
  • Palette
  • Stir Sticks
  • Mineral Spirits – from the hardware or craft store.
  • Non Stick Craft Sheet
  • Apron

I don’t really mind getting my hands dirty. I didn’t have the foresight to use a craft sheet, so the table was gilded along with the objects. After I was done, the plastic table cleaned up good as new with some mineral spirits, and my hands cleaned up fine with soap and water. If you are more particular (and don’t want any gilding of your fingernails), you may want to wear latex or nitrile gloves. Drying time varies depending on substrate and surface preparation, approximately 60 minutes to the touch on dry debris-free surfaces and 12 hours for complete cure time. If polishing or burnishing is required, allow 12 hours drying time. Rubbing the base coat immediately after application with a dry cloth or slightly wet with thinner will remove Gilders Paste from the relief detail and highlight depressed details. Lightly brushing Gilders Paste over the top will highlight the relief details. This is patina color on a reproduction Ching dynasty coin. I scraped a little paste out of the tin, and then wet the paint brush with mineral spirits and mixed it together on the palette until I had a paintable consistency. mineral spirits I put on a fairly thick coat. 44-062 with patinaAfter an hour or so, I buffed off the excess paste, and this was the result (with a un-gilded example for contrast). 44-062 patina buffedThis is a nice use of the Gilders Paste for faux aging. The color was a bit paler than I hoped for so I mixed some African bronze paste into my patina color. patina and african bronzeI painted a new layer of paste onto the opposite side of the coin, and the new color was more to my liking. 44-062 dark patinaThis is a filigree cross in antiqued copper plating, which I colored with verdigris Gilders Paste. For this color, I still mixed in the mineral spirits, but I applied the color with a stir stick. verdigris cross After drying and buffing, the verdigris color is subtle, but it counters the reddishness of the copper metal. verdigris cross compare This color was nice, but I wanted a bit more shine, so I layered german silver Gilders Paste over the verdigris. german silver filigree crossHere is the filigree with the metallic layer lightly buffed off, and the original plating for contrast. german silver filigree cross buffedToo much of the verdigris was covered now, so I went back in for a 3rd layer, verdigris paste on top of the previous two applications. After some more drying and buffing time, this was my final result: filigree cross final My next experiment involved resin flowers. I was curious about the results on a highly dimensional, non-metallic item. I thinned out violet Gilders Paste, and applied it to 3 colors of resin flower with a paintbrush. violet paste on resin flowersAfter drying, this was too tricky to just buff with a cloth, so I touched up the high points with my cloth, and then used a dry brush to remove excess paste from the crevices. The two lower flowers are un-colored. The flowers with the paste have an almost velvety look to them. colored resin flowers This is another antiqued copper plated filigree. The piece on the right has iris blue Gilders Paste applied directly with a cloth. The piece on the left has been layered. White Gilders Paste on the filigree makes the iris blue top layer more visible. Both of these are dried and buffed. blue iris filigreeNext I tried colorizing some silver plated wavy disk beads. I thinned out the iris blue and damson pastes, and applied them to the beads with a brush. This is after buffing, with a shiny bead in the center for contrast. The lighter the metal color is to start with, the greater contrast the paste seems to make. wavy disksI tried out the rusty red pinotage color Gilders Paste on both silver plated flower charms and antique brass filigree. This was my chance to paint the flowers red. For these items, I added a bit of mineral spirits to my brush, and conditioned some of the paste directly in the tin. pinotageLastly, I wanted to mix colors, as opposed to layering them. I mixed the pinotage with the German silver Gilders Paste in the palette. Both of these colors happened to be creamier than some others, so I didn’t need to thin them down. I applied this mixture by brush to a raw brass filigree and got a lovely metallic pink finish. metallic pink The manufacturer says Gilders Paste will be permanent in 24 hours. It will accept an over coat such as clear lacquer, varnish, urethane, or powder coating to achieve a uniform appearance where the paste was not used, or to provide further durability to areas where repeated handling is required, such as a door knob. Due to the anticipated increased wear for jewelry, I tested 4 different products for sealing Gilders Paste.

The first 3 sealers all worked great. The spray sealer was the easiest to use, but the fumes from it can be quite obnoxious. spray sealed filigree I sealed one of the filigree crosses with the glaze, and the other with glossy accents. To me they look identical. sealed crossesThe renaissance wax, however, provided unanticipated results. Due to the cleaning components of this product, it stripped most of the color from the item I applied it to. The disk on the left was the original gilded iris blue wavy disk. The disk on the right has had renaissance wax applied, which lightened the color. It is good to know that this may work to lighten a color without fully removing it if that is ever your desired effect. waxed disk Be aware that the consistency of this product will vary from color to color and from tin to tin. If you have a tin with creamy consistency, enjoy it. If the product is crumbly, (whether it came that way, or you left the lid open) don’t ever consider it “bad”. You can re-constitute the paste with mineral spirits, a few drops at a time. So, having tried Gilders Paste, I’m hooked. Now I need to figure out what colors to buy to start my collection. ~ Rita