Browsing Category

Reviews

Micro butane torches for jewelry

February 27, 2012

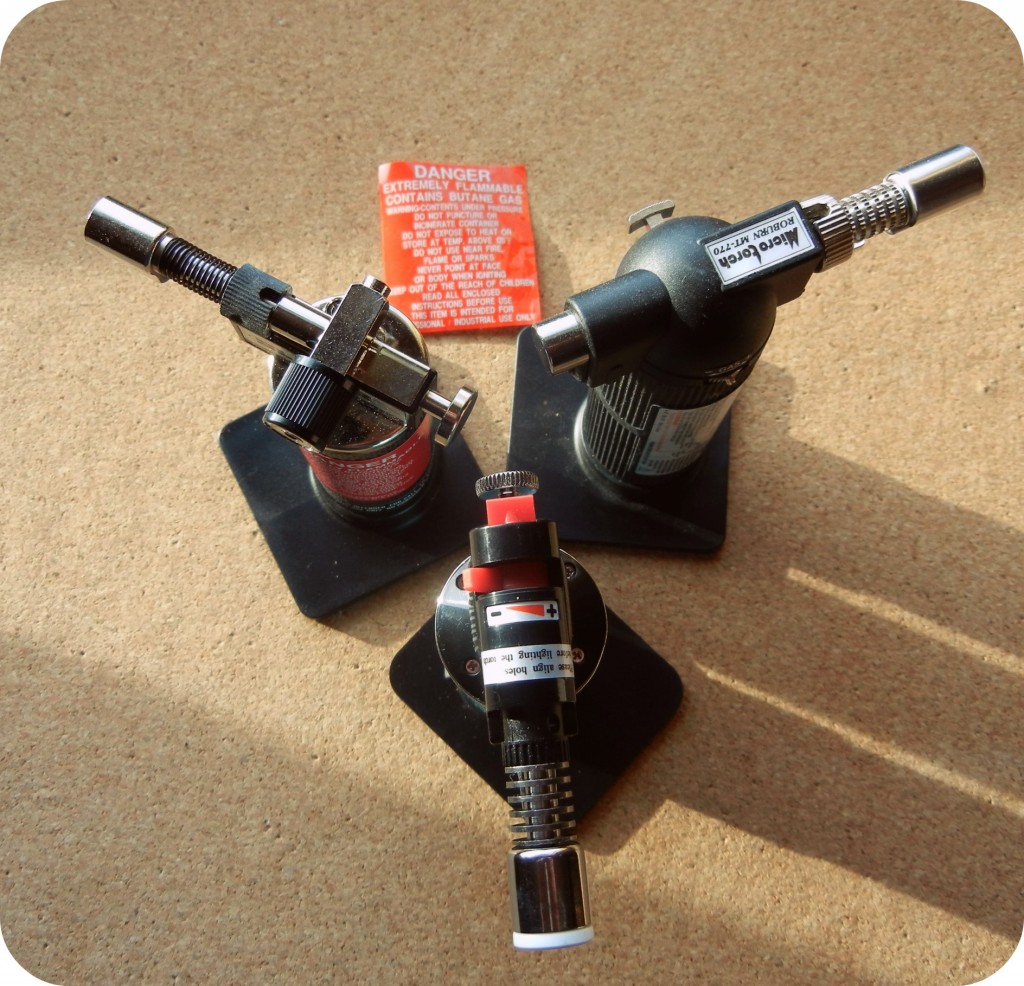
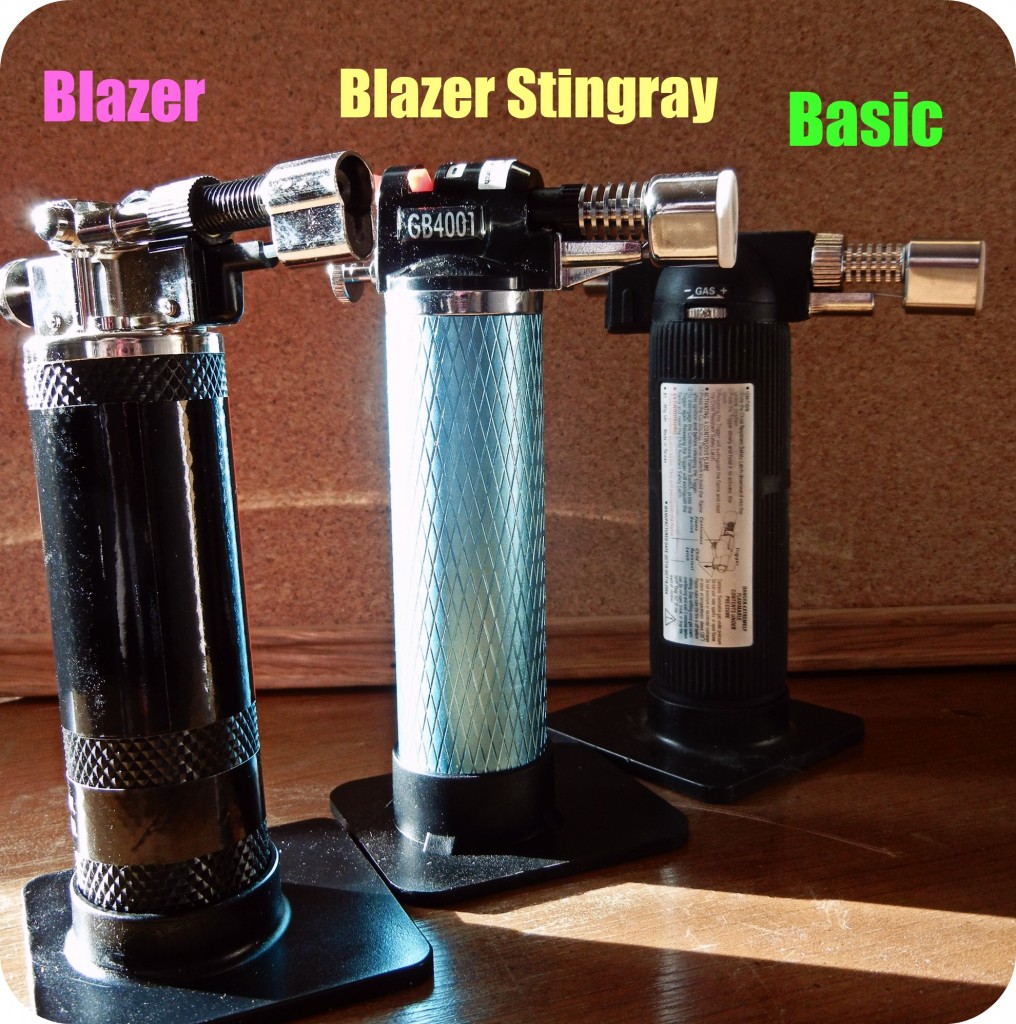
It is great to have choices – but sometimes comparison shopping is such a chore! We recently added two new Blazer brand micro-torches. While our selection of three butane torches isn’t exactly overwhelming, it still raises questions. Why choose one over the other two? They all look about the same … and in many ways, they are the same:

  • No appreciable differences in height, width or diameter.
  • All three use triple refined butane (buy it locally due to shipping restrictions).
  • All three include a plastic stand for hands-free operation.
  • All three have flame adjustment options.
three-micro-torches-rings-things
Micro butane torches are only about 6″ tall but easily reach flame temps of 2400 F. All three of these torches can handle small soldering, fusing and enameling jobs.

However, in several important ways, these three little torches do differ. The most obvious way is in price: the Blazer costs over twice as much as our original little torch. In fact, you can buy an entire mini torch kit, which includes a torch, soldering blocks, a tripod with mesh, tweezers and soldering pick, for less than the Blazer torch. Yet …

three-torches-top
Micro torches are easy and safe to use – just use common sense. Never point the flame at yourself and keep combustibles out of the way. The heat is very concentrated and easy to control.

The Blazer is by far the easiest micro torch to use! It is a professional model torch, not designed for home use. It doesn’t have a child safety lock, so if you have any concerns about unauthorized use of your tools, this might not be the best choice (I hope it goes without saying you should keep any torch out of the reach of children). However, if you hate fumbling around with levers and buttons, then you will *love* the black Blazer torch. It has a really high quality ignition system. I won’t go into boring details on that. Just know that, while trying to do a fair comparison of the three torch options, I kept instinctively reaching for the Blazer because it was just more fun to use. Good design works! Plus, its burn time is about double that of the entry-level micro torch. Refilling butane is the least fun part of using a micro torch, so that detail counts for a lot in my opinion!

I really wanted to like the Stingray model the best – it is my favorite color after all! – but the safety lock and flame control just weren’t my favorite. So if budget is the biggest factor, the our original micro torch is still a great deal. It gets the job done. But if you can afford to splurge a bit, the Blazer torch is a tool worth owning. And if you truly want middle of the road performance and price – with the prettiest color! – then the Stingray fits the bill.

Here’s the stats in handy bullet form, with torches listed from Highest/Greatest to Lowest in each category:

  • Burn time: Blazer, Stingray, Basic
  • Price: Blazer, Stingray, Basic
  • Ease of use: Blazer, Stingray, Basic
  • Safety lock: Basic, Stingray, Blazer

Whether you want to fire small Art Clay silver pieces, torch enamel, solder metals or fuse fine silver, a micro torch is a great introduction to using heat! Here’s a little tutorial on making ball-end head pins to get you started. ~ Cindy

How to choose a Knew Concepts saw for jewelry making

February 5, 2012

Hi bloglandia! Do your jewelry projects ever seem to stack up, one on top of another? Mine do. Maybe you are able to focus entirely on each project, finish and clean up before moving on to the next, but it seems I always have 10 different things going at once. Right now I’ve got a bunch of metal shapes to saw out and then solder together. The next few blog posts are going to use a few of these projects to highlight different tools and techniques, starting with the Knew Concepts saw frames and ending with Blazer micro torches.

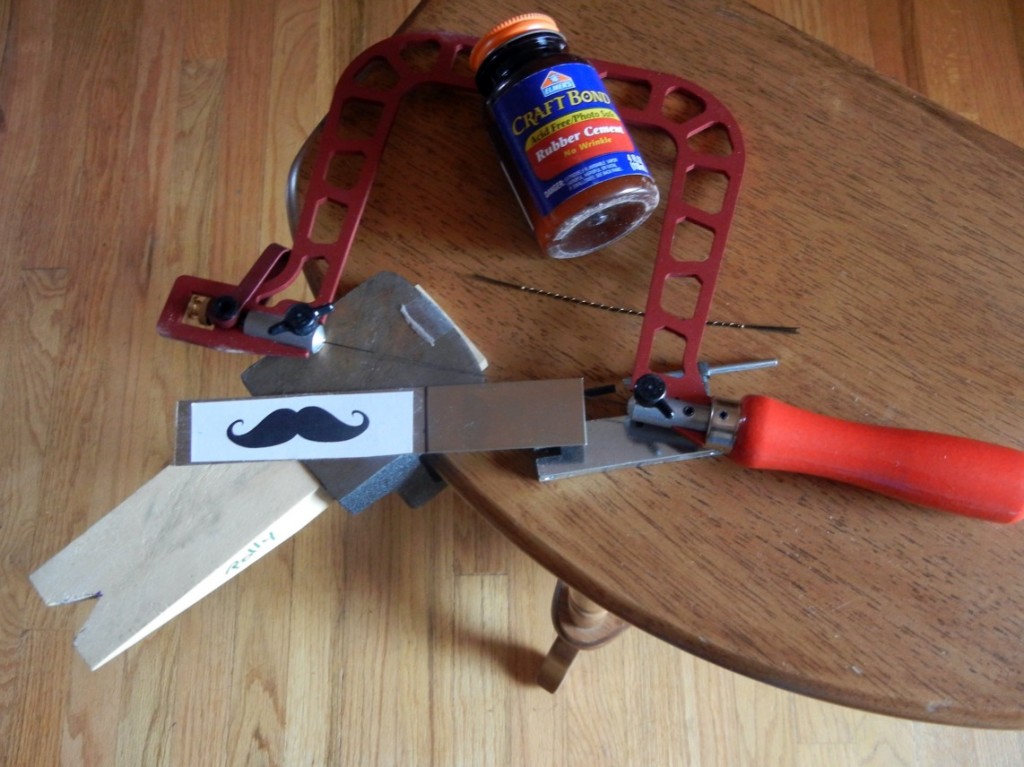
sawing-tools
Saw frame, saw blades, bench pin, rubber cement, sheet metal and a design! Ready to saw!

So, what is new about Knew saw frames, other than their distinctive shape and bright red color? Well, most of us learned to saw with standard adjustable saw frames. In order to get the right tension on your blade with these frames, you press the frame between your body and a table or other sturdy object. By inserting the blade while the frame is bowed, the blade gets pulled tight into place when you release that bow. But – ow! That action bruised my breastbone. And when you break saw blades as often as I did starting out, it becomes a real chore.

Knew Concepts saw frames are different in a number of ways. Obviously, they are bright fire engine red. They are extremely lightweight, which makes them more comfortable to hold. And they are available in a whole lotta different models! How to pick?

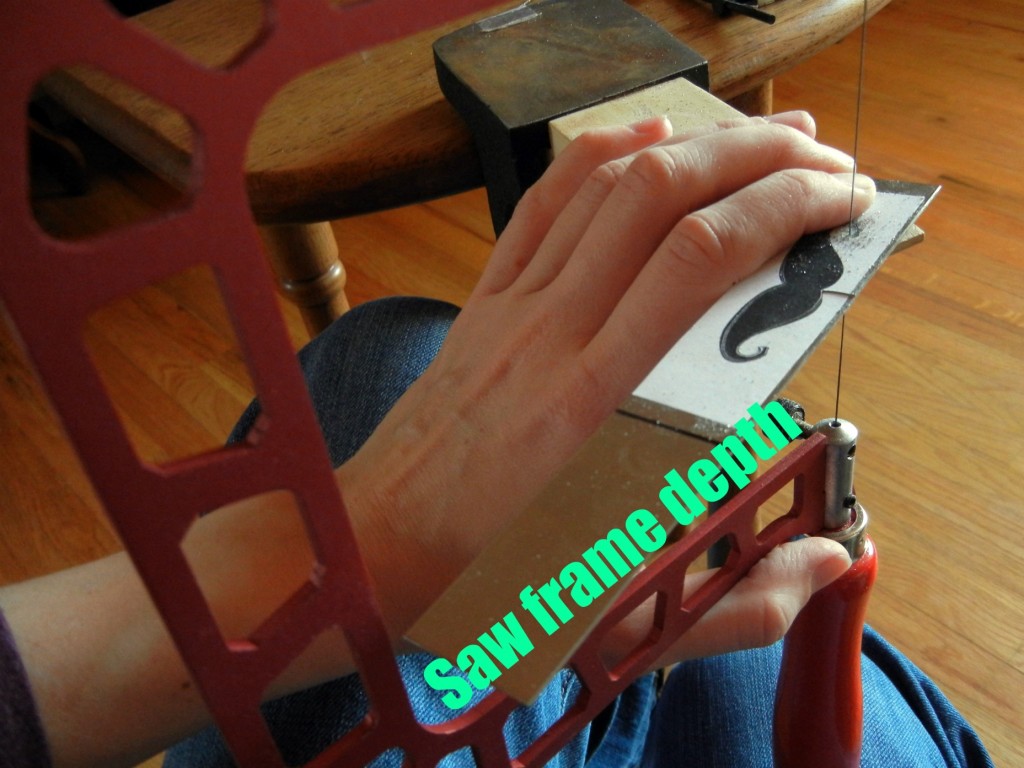
1. Size. 3″, 5″ or 8″? My vote is for 5″, unless you plan to work with very large or very long pieces of metal, in which case the 8″ frame makes sense. If your hands tire easily and you only work with small pieces, than the 3″ frame might meet your needs. I’m a middle of the road kind of girl! Note that the size refers to the depth of the frame. The height for all Knew frames is fixed. This means you won’t be able to re-use broken blades by shortening your frame. (But wouldn’t you rather not break the blade to begin with? Knew frames help with that!)

saw-frame-depth
If you want to pierce the very end of a long strip of metal, you need either a large frame or the swivel model.

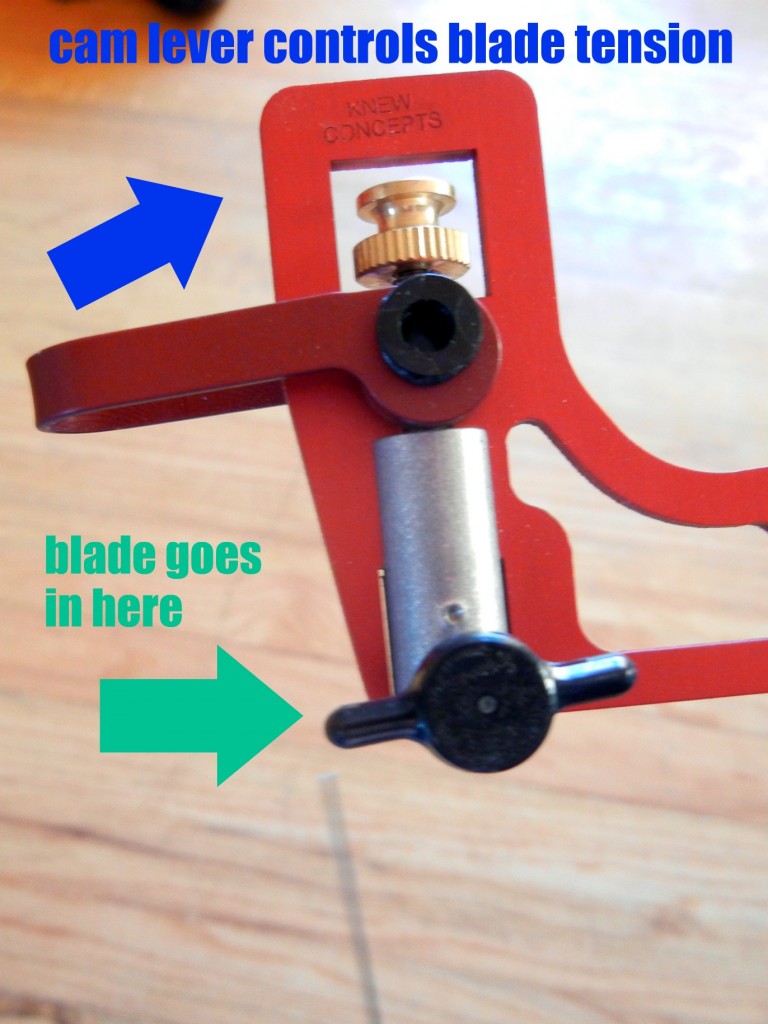
2. Blade tension options. Screw tension or cam-lever tension? I 100% endorse the cam-lever tension because the tension does not change when you switch blades. Instead of sandwiching the frame between your chest and the table every time you break a blade or move to a different area of a pierced design, you simply flip the cam-lever switch! What a relief!

cam-lever-tension
The cam-lever option is totally worth a few extra bucks.

3. To swivel – or not to swivel? That is the final question. Personally, I found the swivel to be an extra complication that I didn’t really want to mess with. However, if having a really lightweight saw that can still get into tight corners is important, buying the small 3″ saw frame with the cam-lever and swivel would accomplish that goal.

After testing the different options, I decided the 5″ Cam-Lever Tension model was my favorite (69-169-52 – it is the one with the staff choice icon in our online store). It is comfortable to hold and large enough to handle pretty much any jewelry project I would undertake.

Of course, the first question should have been: do I really need a Knew Concepts saw frame when I can buy a standard jeweler’s saw for less money? The answer depends on how you define need! If budget is the #1 concern, then maybe the answer is no. An adjustable saw frame has been the industry standard for years. However, if you want to invest in a tool that will serve you well for years, and which will make the – let’s face it – somewhat tedious job of sawing more enjoyable, then yes, you kneed a Knew frame! ~ Cindy

Edited January 2022 to update links.

Wubbers Wire-Looping Pliers – and more

June 17, 2011

Hello bloglandia! There was a “hit” product at last week’s Bead & Button show in Milwaukee: the new wire-looping pliers from Wubbers. Our booth sold out – then our website sold out! Wow. It was “wub – twue wub.” We just got more in stock, but they could be gone soon!

Continue Reading…

Luster Gel – a new way to color silver!

May 10, 2011

Create a full rainbow of colored patinas on silver with new Luster Gel.

Iridescent Luster Gel for Silver is a brand-new product that makes it easy to change the color of silver jewelry. Unlike patina solutions that mostly* darken or oxidize the metal, Luster Gel creates a whole rainbow of different colors. The best part is, the colors appear in a reliable order! (*I say mostly because it is possible to get cool rainbows when using liver of sulfur… however, the process is less predictable and may require additional chemicals or heat.)

** 2020 Update: We loved Luster Gel at first, but the last couple years our customers had a lot of problems with it. It seems much less stable now, and at least half the people who used it in 2018 through early 2020, reported that it didn’t work at all and/or was discolored or dry when they received it. The others who gave us feedback said they had to use heat to get it to work, and they can achieve a similar effect with other forms of sulfur. So we no longer carry this product. **

Two options instead of Luster Gel are:

  • Search ganoksin or other jeweler’s forums, or take a class, or read a classic silversmithing book, to learn how to use traditional liver of sulfur (not the gel form) plus heat to produce rainbow effects similar to the photos in this blog.
  • Search the internet (especially youtube) for information on anodizing silver with sodium hydroxide (lye) and sulfur. This gives stunning colors, but it is definitely more hazardous than traditional liver of sulfur.

buddha beads

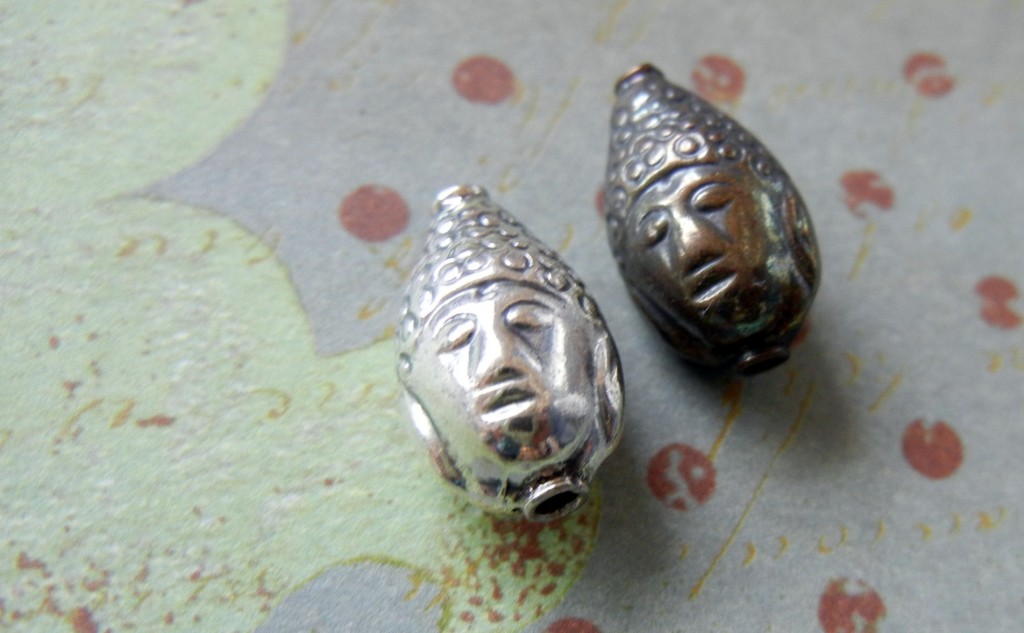
Sterling silver Buddha / bodhisattva beads before and after being treated with Luster Gel. The blue color takes 20-30 minutes to achieve.

Sterling silver, fine silver and silver-plated jewelry pieces can all be colorized with Luster Gel. Since patinas are created via chemical reactions, anti-tarnish treatments and coatings could interfere with the gel’s performance. Also, follow the basic chemical safety rules when working with this product: avoid skin contact, wear eye protection and work in a well-ventilated area. Don’t eat it either!

luster gel for silver

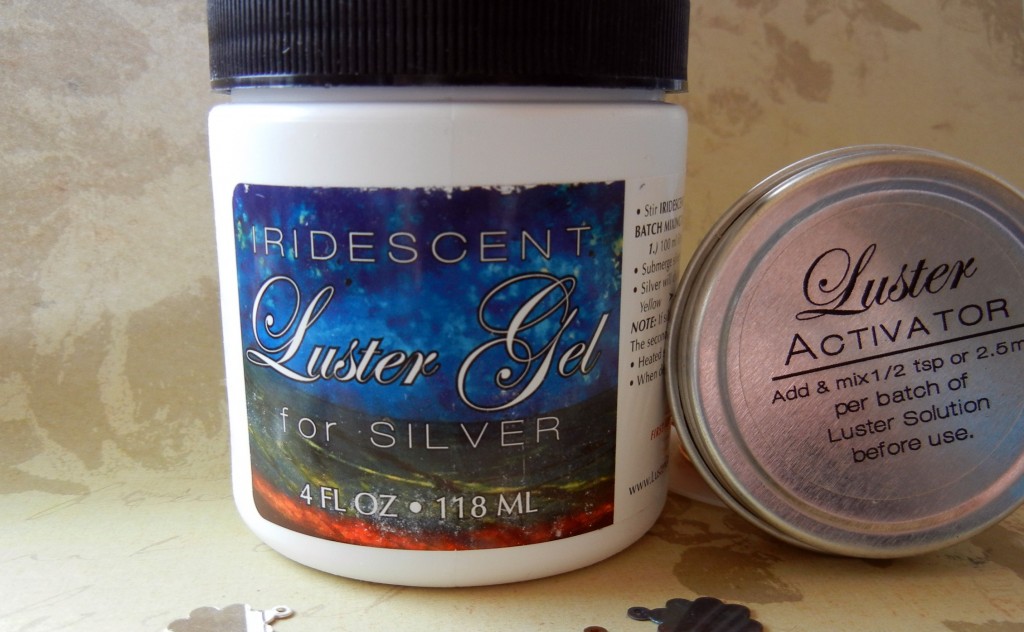
Iridescent Luster Gel for Silver

Luster Gel is sold in a 4 oz. jar and needs to be mixed with water and the included activator powder prior to use.

luster gel

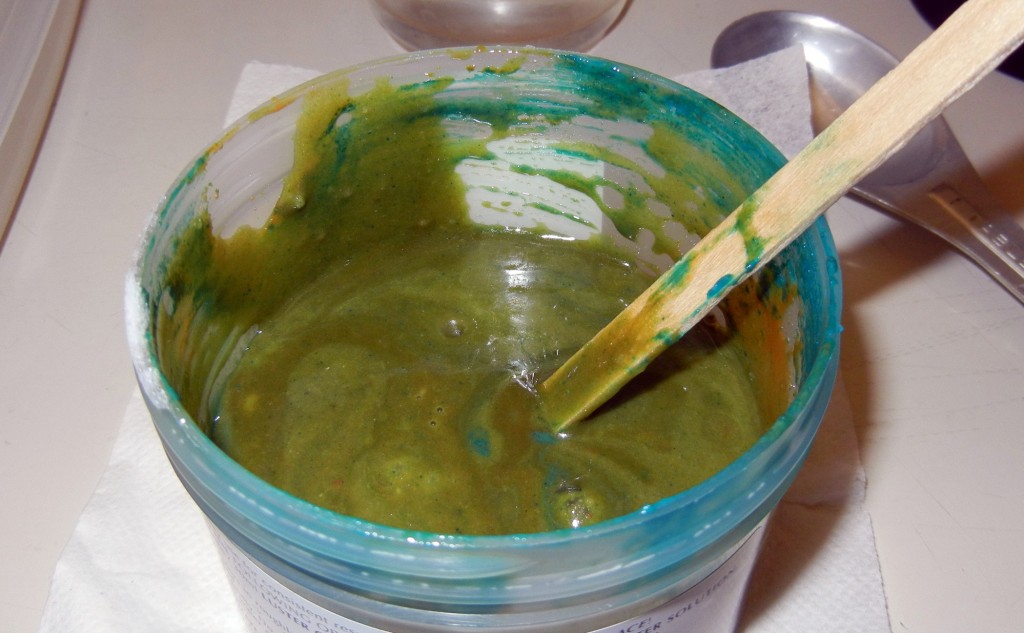
Luster Gel gets its green color from cupric (copper) acetate.

For each batch of Luster Solution, mix, in order:

  1. 100 ml (about 3.5 oz.) filtered water (use warm – not hot – water for a more rapid color change)
  2. 30 ml (1 oz. / 2 tablespoons) Luster Gel (stir before use)
  3. 1/2 teaspoon Luster Activator (powder)

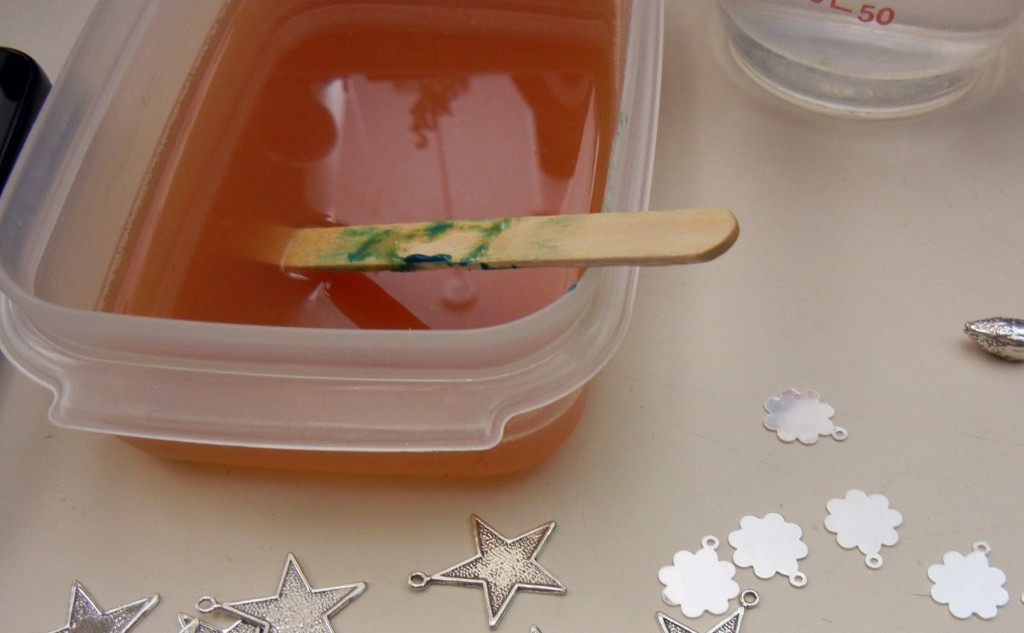
luster gel solution

Once mixed with the activator, the Luster Solution turns dark orange.

Dip your piece into the solution (use a string or a plastic hook, or wear gloves, to avoid touching the solution). Over the next 30 minutes, the silver will change from yellow to gold, then orange – red – brown – purple – and finally blue. If you leave it in longer, it will go through the same color-change process again, only this time the colors will be deeper and more iridescent.

luster gel silver rainbow

All of the colors pictured here occur within 30 minutes, starting with gold (top left) after about 5 minutes in the solution and ending with deep blue after a full 30 minutes. On the far right are plain sterling pieces to show the transformation.

Once you are happy with the color, pull your piece out of the solution, rinse with clean water and allow it to air dry. Once it is completely dry, seal it with Renaissance Wax or a clear spray sealer to protect the finish. That’s it. Super easy!

When you are done, mix baking soda into the Luster Solution to neutralize it. At that point you may safely dispose of it by washing it down the drain. Happy rainbows to you! ~ Cindy

Reviewed: Crunchy Granola Charm e-book

March 11, 2010

Here’s a readily available e-book that’s well worth the $5.95 to download it!

Crunchy_Granola_Charm

For some peaceful, easy beading…

If hippie chic is your bag, get into “Crunchy Granola Charm: Easy 60s-Inspired Jewelry to Make on Your Way to the Revolution“. Yvette Doss‘s e-book lays seven approachable projects on you, with mellow pointers on how to put it all together.

Attractive photos from various angles open your mind to the true nature of each design. In a great touch, Yvette also provides a soundtrack by suggesting some “Music to Bead By”.

She also keeps things nice and grounded throughout, listing a few possible places to buy the parts for each project. Ribbon, natural materials like wood beads, and organic forms all contribute to a consistent and fun style in Yvette’s jewelry pieces.

For a source of inspirations, or as a gift for that earth-muffin friend or relative who’s interested in beginning to make her own jewelry, “Crunchy Granola Charm” is a good place to turn!

Read any good jewelry e-books lately? Let us know in a comment!