Continue Reading…
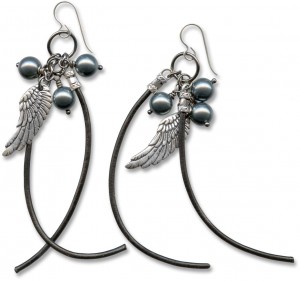
Cluster Shades of the Sea Mermaid Bracelet
January 13, 2015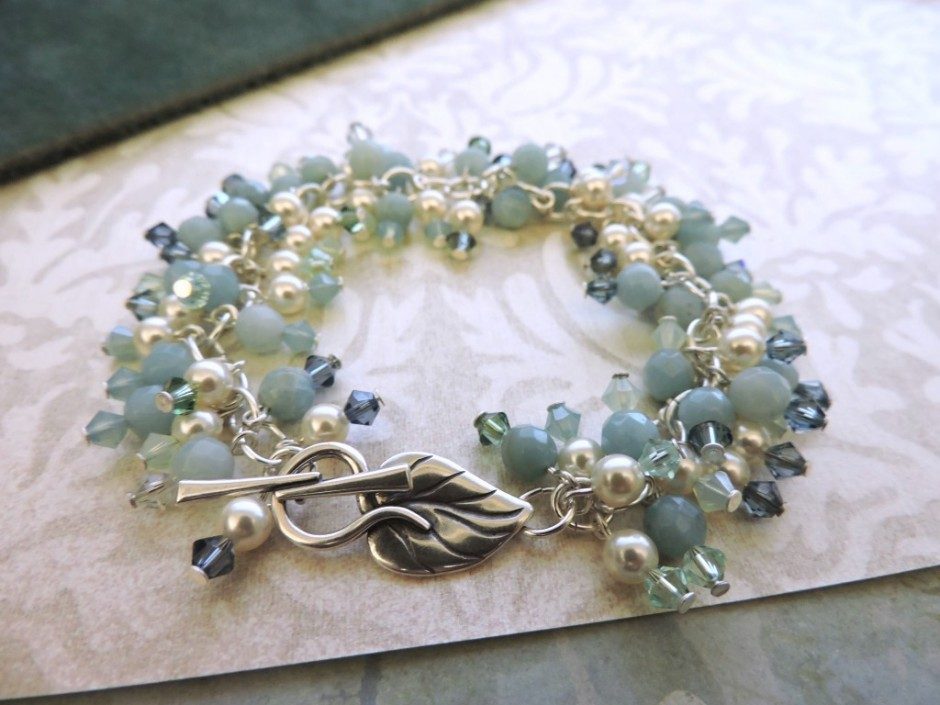
Continue Reading…
When you’re making jewelry, center crimp cord ends are an easy way to cleanly finish the ends of a wide variety of jewelry cord including but not limited to leather, silk ribbon, and chain.
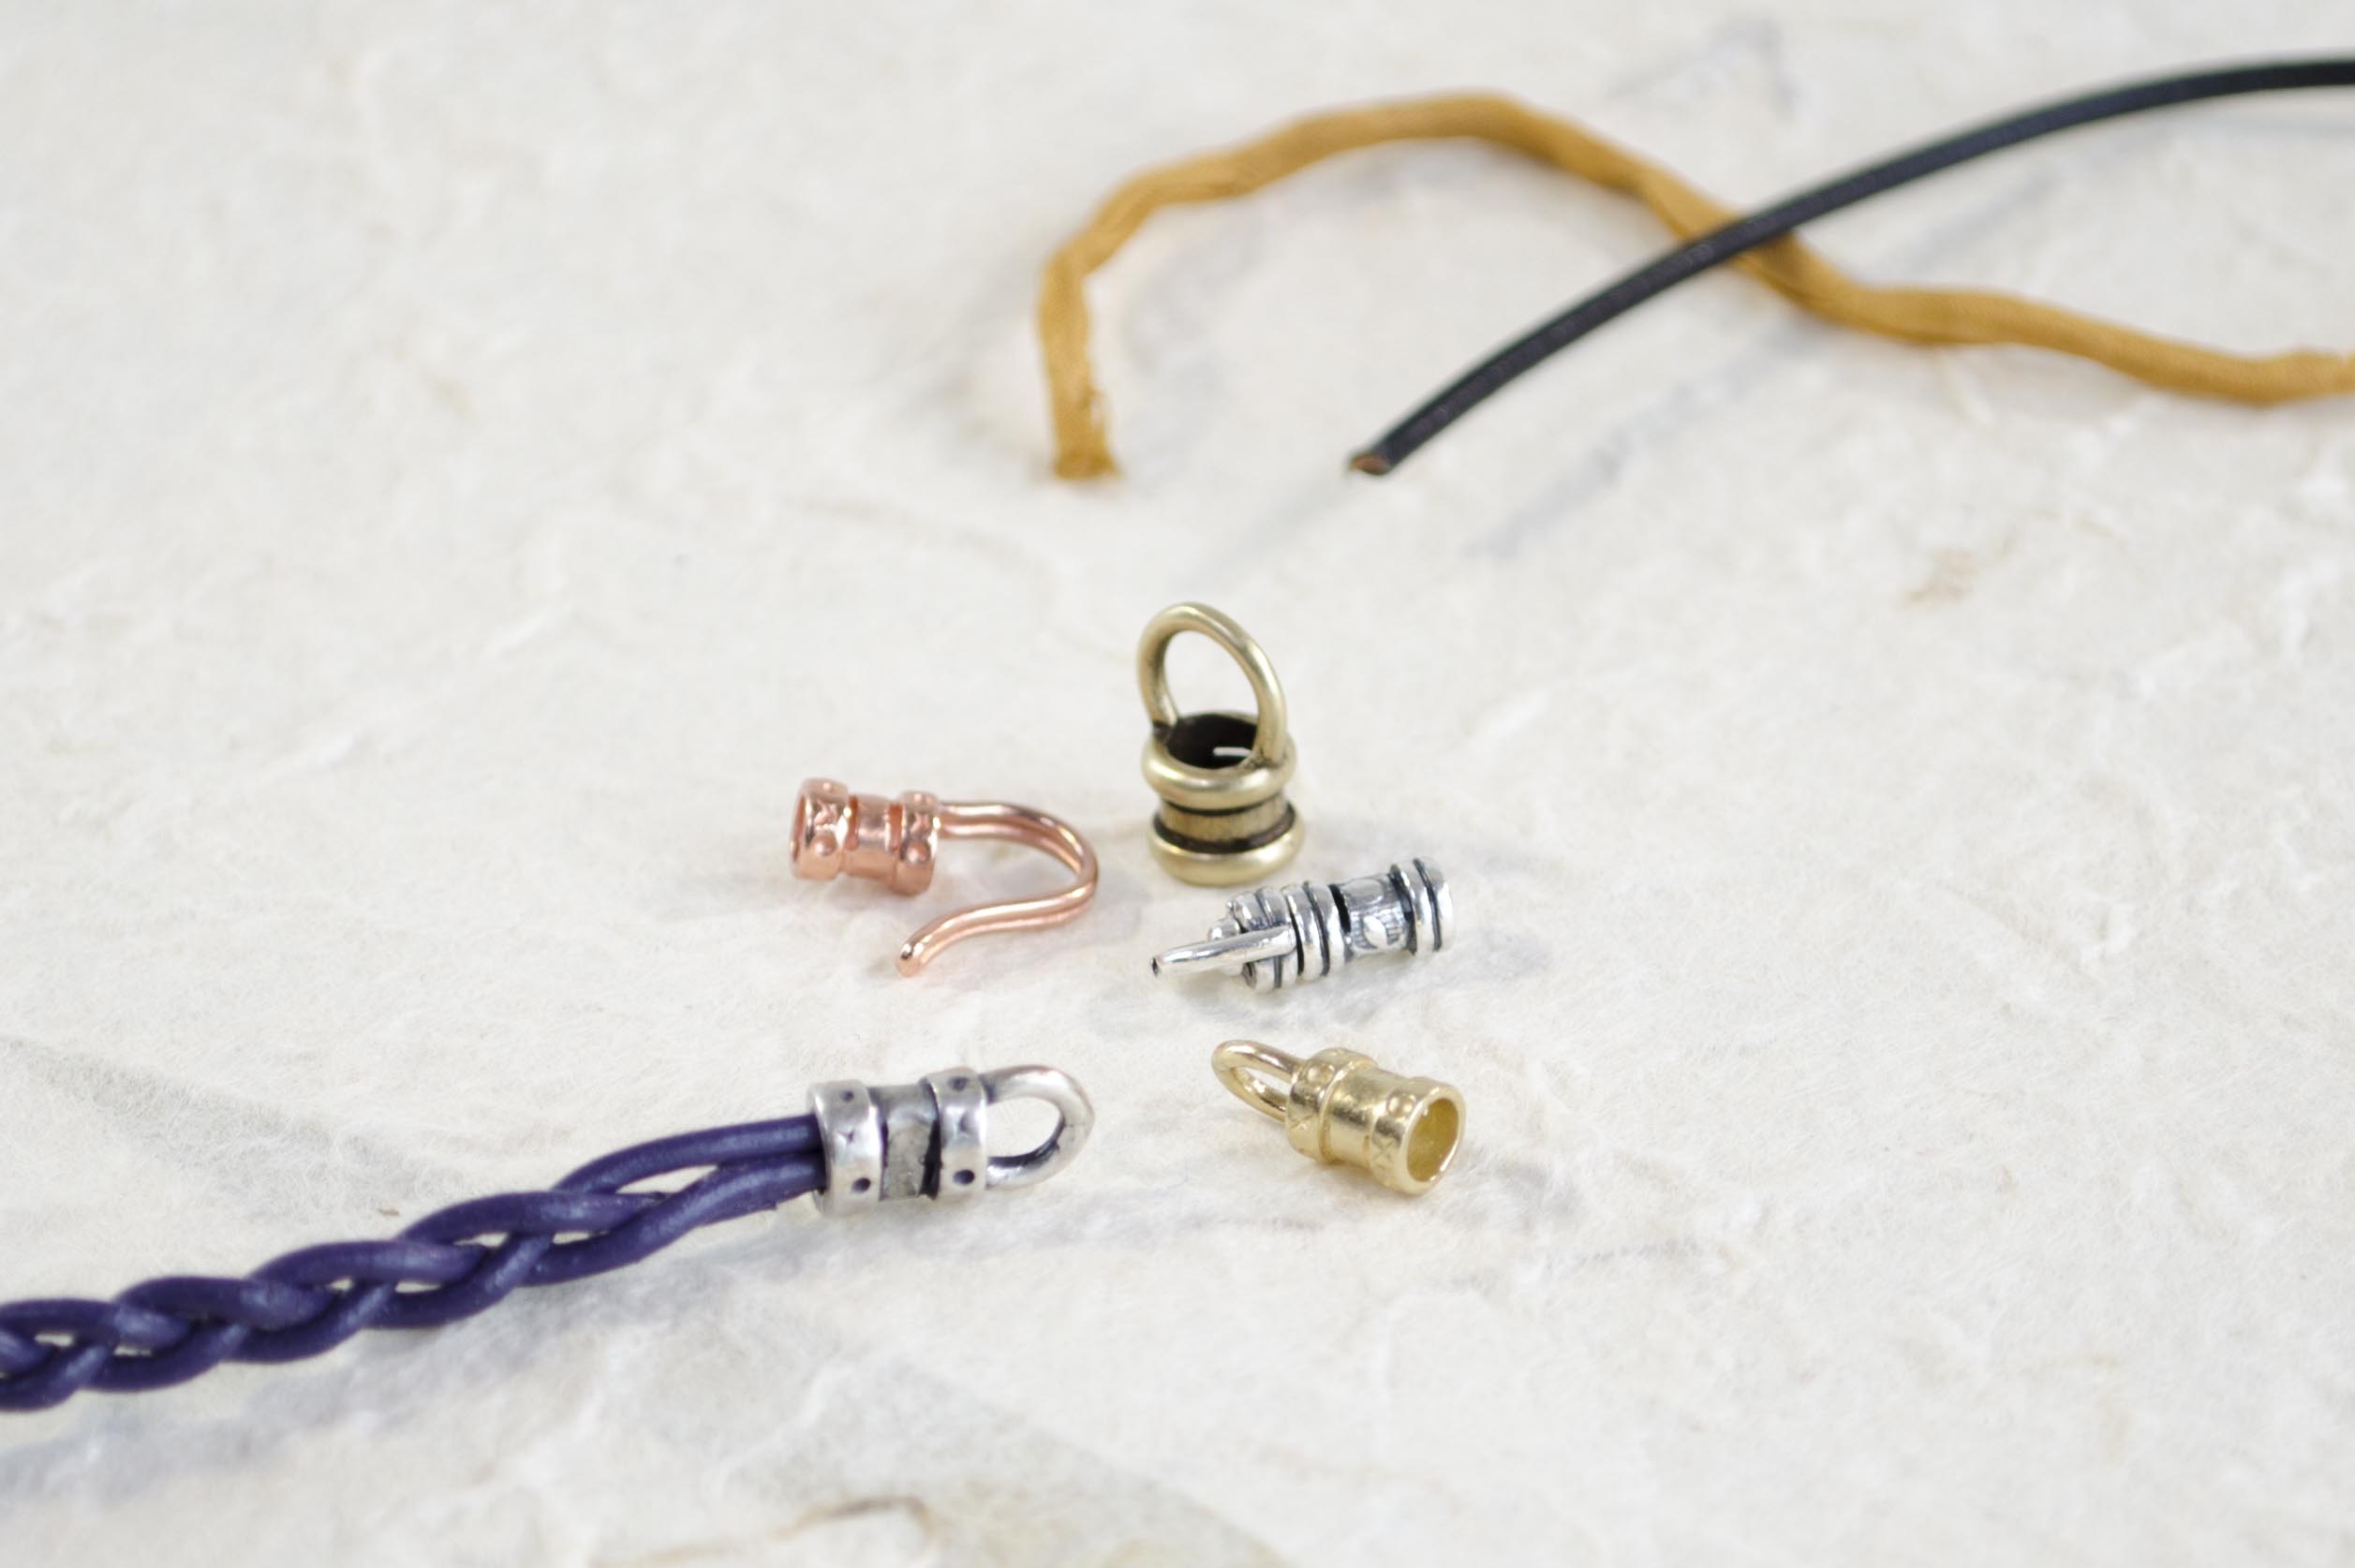
Center crimp cord ends are an easy way to cleanly finish the ends of a wide variety of jewelry cord.
You can finish your necklace or bracelet with a loop and a hook:
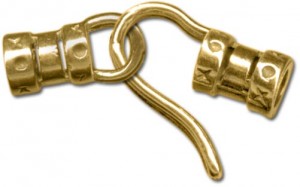
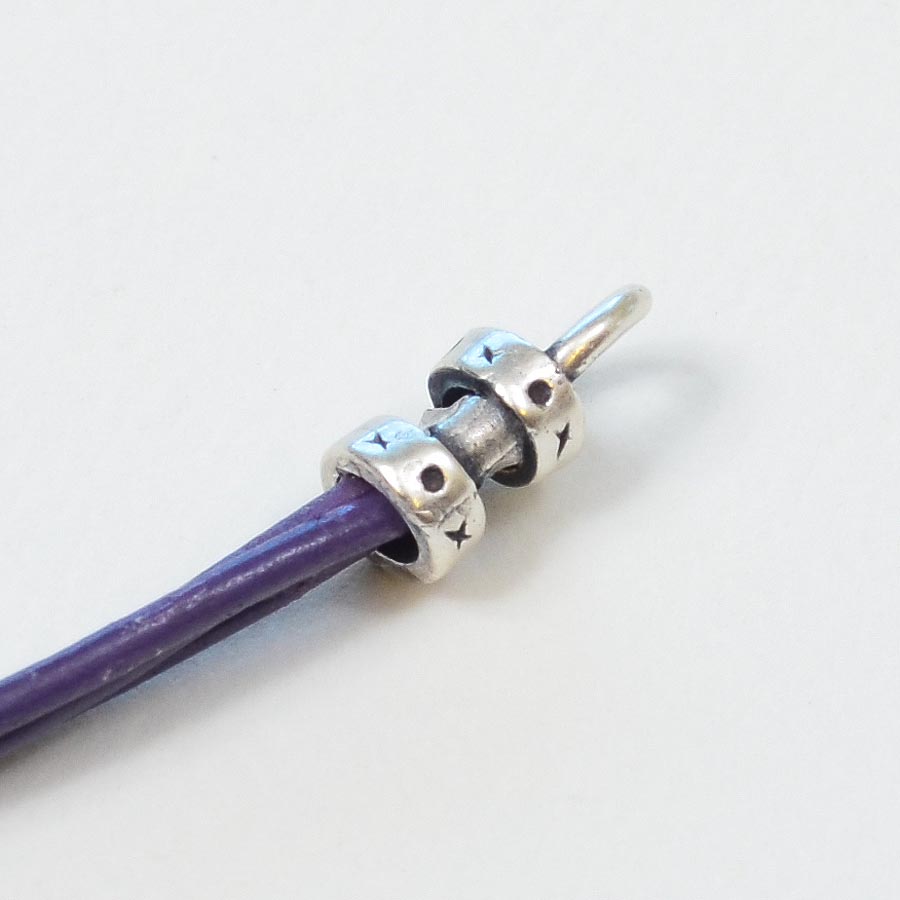
Use loop and hook center crimps together.
Or, use two loops and the clasp of your choice (shown here is an “S” hook clasp):
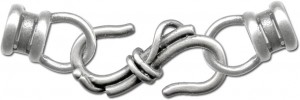
Using two loop crimp ends and a clasp.
Here is how to apply the crimp ends:
1. Gather your supplies. All you really need are the crimp ends, some round nose pliers (or non serrated chain nose pliers) and of course your cording material. Super glue is optional, but adds extra security.

Supplies for applying center crimp ends: Crimp ends, pliers, cording & Glue.
2. For added security, put a dab of super glue inside the crimp end. Slide the cording end(s) into the crimp end. Do this quickly before that dab of glue dries.

Insert the cording into the center crimp end. A dab of glue will offer added security to your clasp.
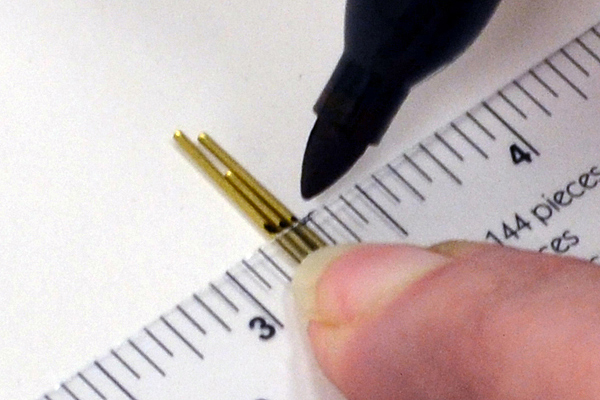
3. Holding the crimp in place over the cording, use your pliers to firmly squeeze the center portion of the crimp and clamp it down on the cording.

Firmly squeeze the center of the crimp end.
4. Once crimped, the center of the end piece will be flattened down on the cording. Crimping the metal on top of the glue will ensure a secure connection for jewelry designs.
A crimped end piece.
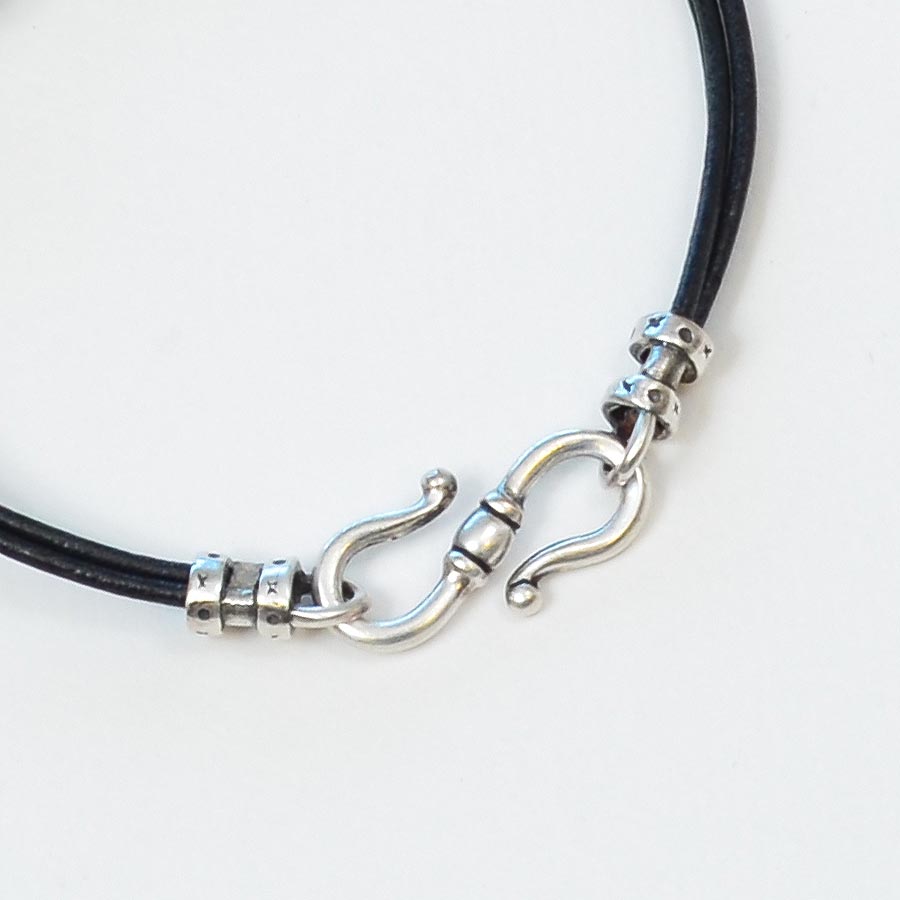
Center crimp ends with loops combined with an “S” clasp and leather cording make a simple yet stylish bracelet.

Crimp ends shown using a variety of cording and clasp options.
Here are some jewelry inpirations that incorporate the use of center crimp ends. These designs and more can be found in our Jewelry Design Gallery where you will find the complete supplies list as well as tips from the designer. Click on the images to take you there.
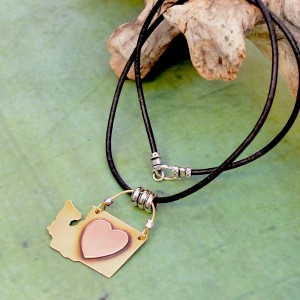
Go West Necklace Tutorial by Mollie Valente
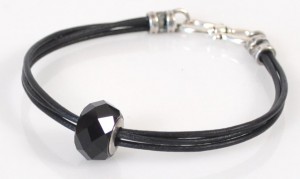
Basic Black Bracelet Tutorial by Rita Hutchinson
Bastian’s Earrings Tutorial by Lindsey Green
New Connection Necklace Tutorial by Karin Davis
Now that you know what to do with center crimp cord ends, don’t be shy! Use them to make bracelets, necklaces, earrings and more.
Did you know? You can Shop for center crimp cord ends here.
Happy creating! ~ Val
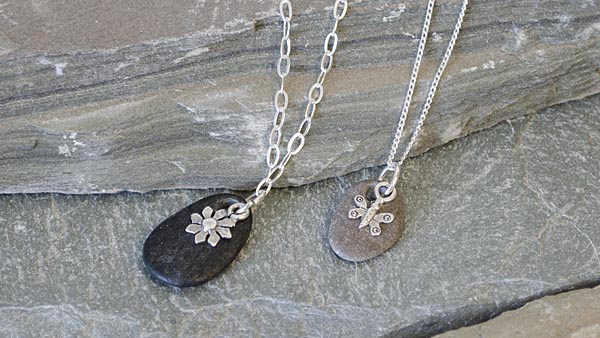
Sometimes when it comes to jewelry, less is more. That’s the case when it comes to these adorable river rock and sterling silver charm necklaces designed by Rings & Things’ Amy Mickelson. This project is easy, yet really pretty! Plus there are a ton of different sterling silver charms to pick from!
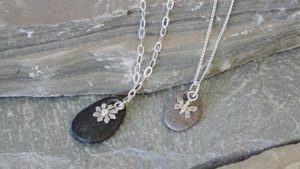
These necklaces only require one tool and a few simple components to make! The sterling silver chain necklaces are already finished with a clasp, making them a breeze to use. Plus, I just adore the contrast between the natural river rock and the dainty sterling silver charms.
Supplies and Tools Needed:
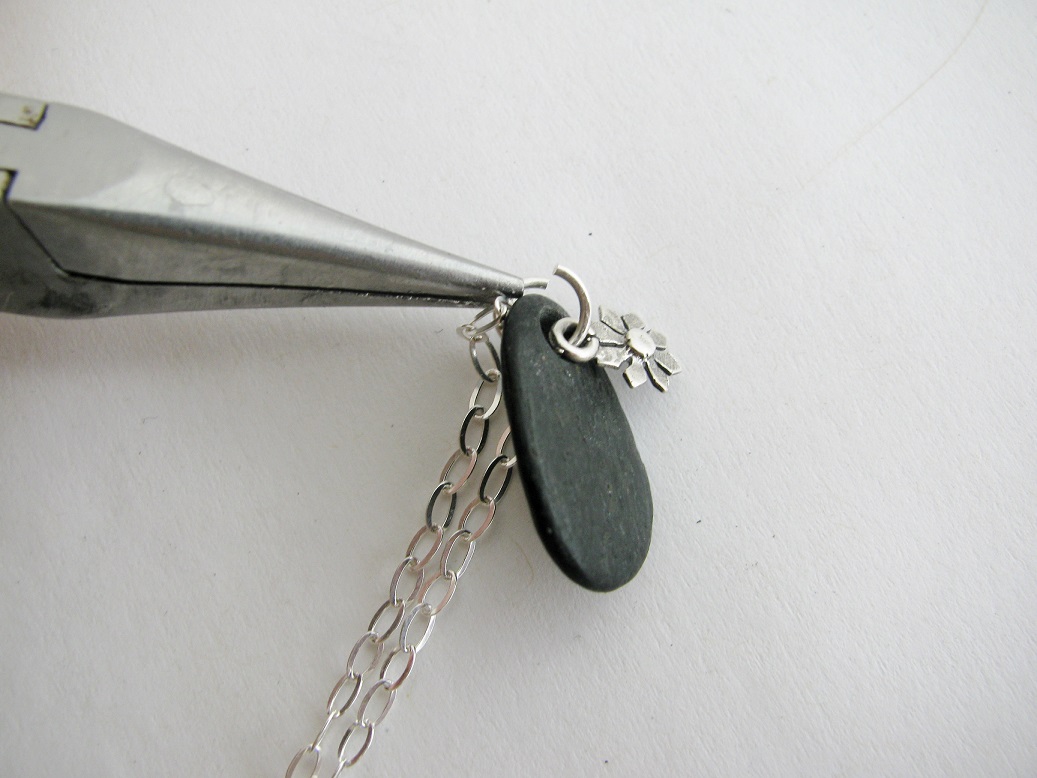
Simply layer the items on the sterling silver jump ring. Chain first, then river rock pendant, then sterling charm.
Creating this necklace couldn’t be easier! Using your chain-nose pliers, pry open the jump ring a little. You only need to open it enough so that you can layer the three elements together. When opening jump rings, remember to always twist the ends in opposite directions to separate them. Do not “oval” the ring by pulling the ends apart.
Place the chain first, then the rock pendant, then your sterling silver charm onto the jump ring. Close the jump ring carefully, so that the ends line up flush.
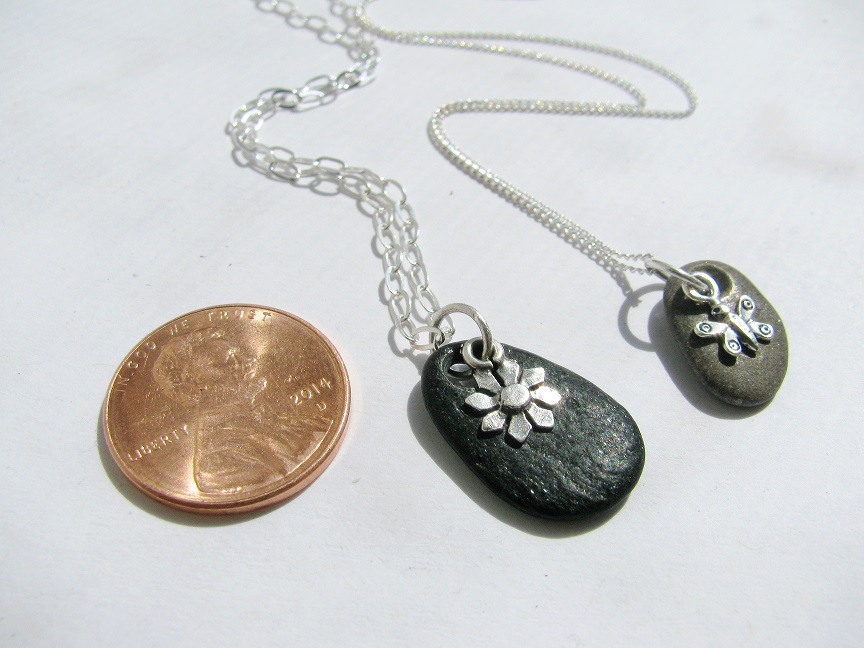
These dainty pendants are so cute! And smaller than a penny!
Each finished dangle is smaller than a penny!
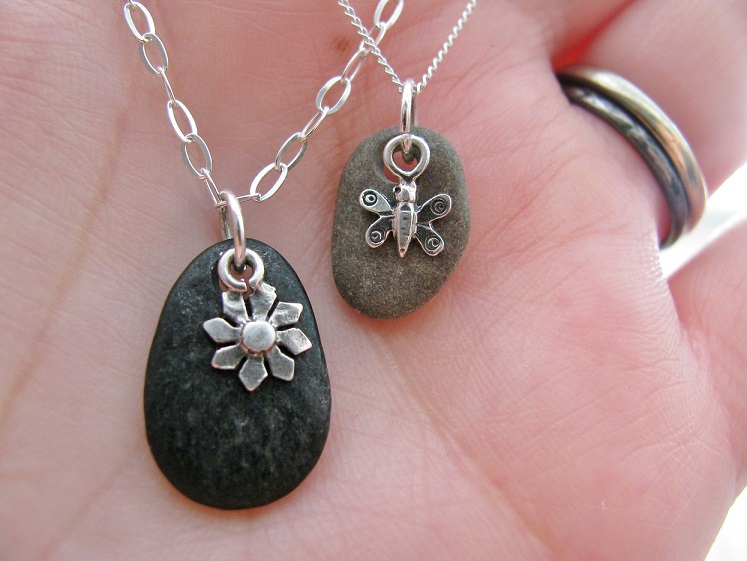
So cute in the palm of my hand!
If you like this look, buy the parts to make these necklaces now!
All the parts are ready to buy in our Gallery – just click this image to go there.
You can check out additional possibilities by browsing our huge selection of sterling silver charms and sterling silver chain necklaces! My personal favorite chain is the sterling faceted ball chain, because it sparkles!
~ Tiffany
Rings & Things has added a whole new line of enameled copper jump rings and clasps from Weave Got Maille, and a handful of Byzantine kits and box chain kits to go with them.
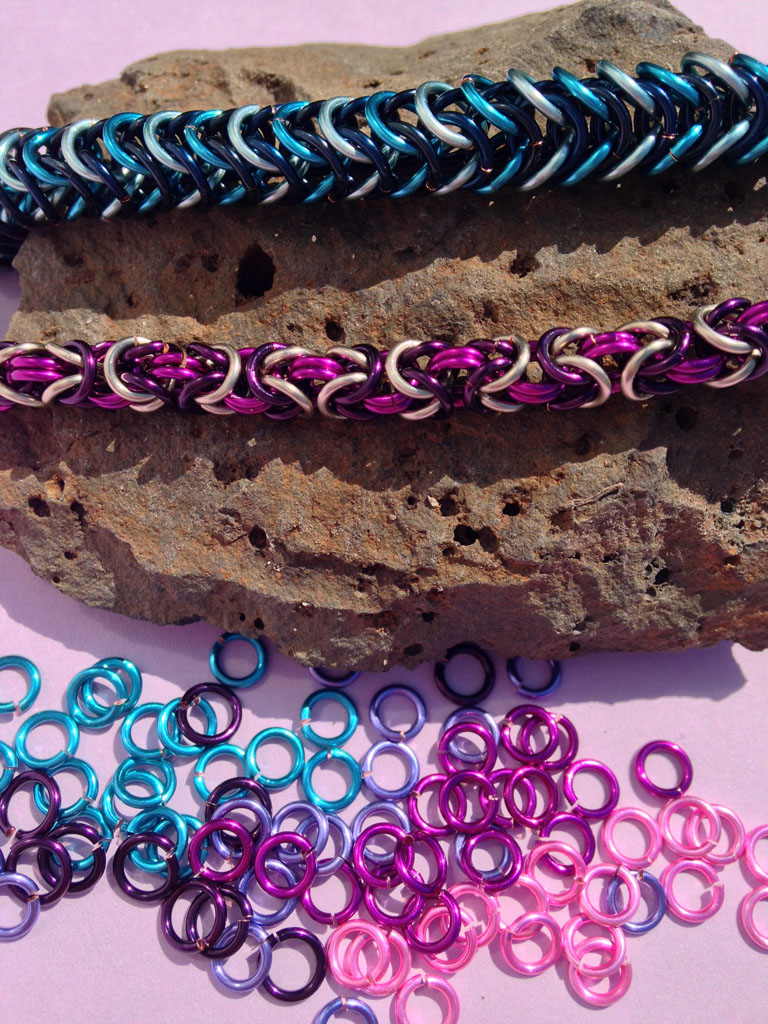
Weave got Maille Bracelet Kits and Jump Rings
Melissa and I tested the kits, to produce some quick example pieces for our website, and I have to say, I think the kits are a great way to go for anyone who is new to chain maille, or to a specific weave of maille.
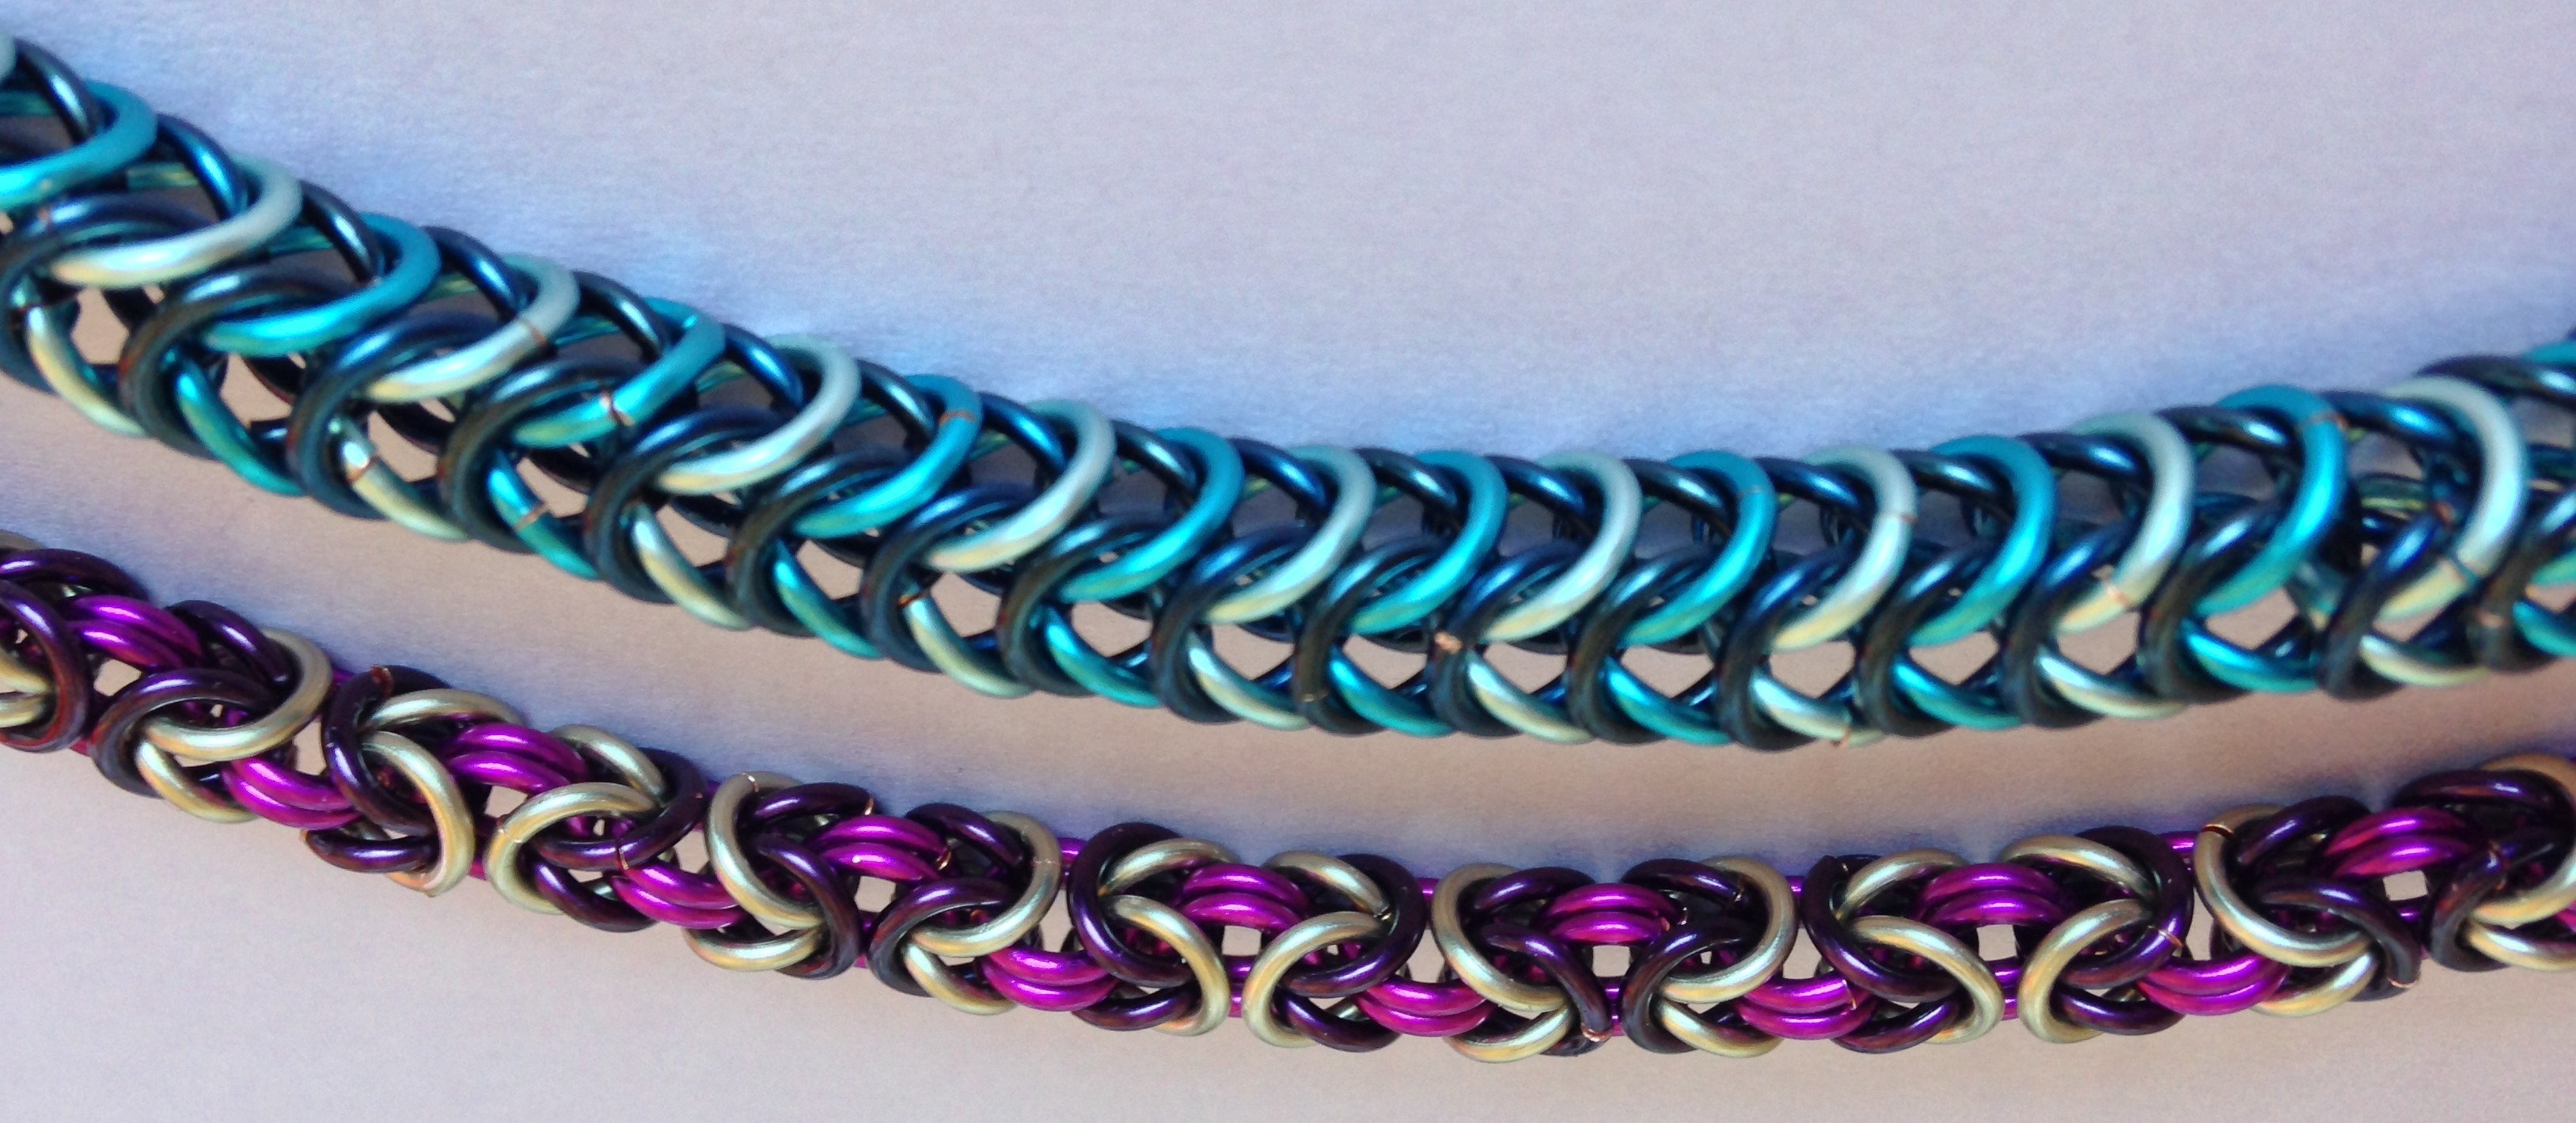
Weave Got Maille kit Chain Maille Bracelets
I chose to use the Morgana kit, which produces a 3-color byzantine chain maille bracelet. There are enough rings in the kit to make a bracelet up to 8 1/2″ long, but the final length can be shortened easily by stopping at the end of any completed unit.
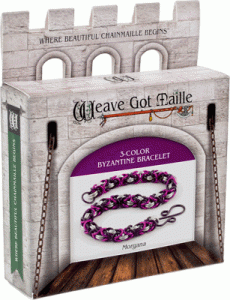
Morgana Bracelet Kit
The instructions are the property of the kit maker, so I won’t be listing the step by step instructions here, but the step-by-step sheet included has great close-up pictures and is easy to follow (and once you have made up the kit project, you have the instructions to make as many more as you like, by just purchasing additional jump rings and clasps).

Jump rings from Weave Got Maille kit
Here are my thought and hints for weaving chain maille painlessly.
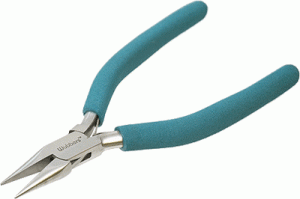
Wubbers Chain Nose Pliers
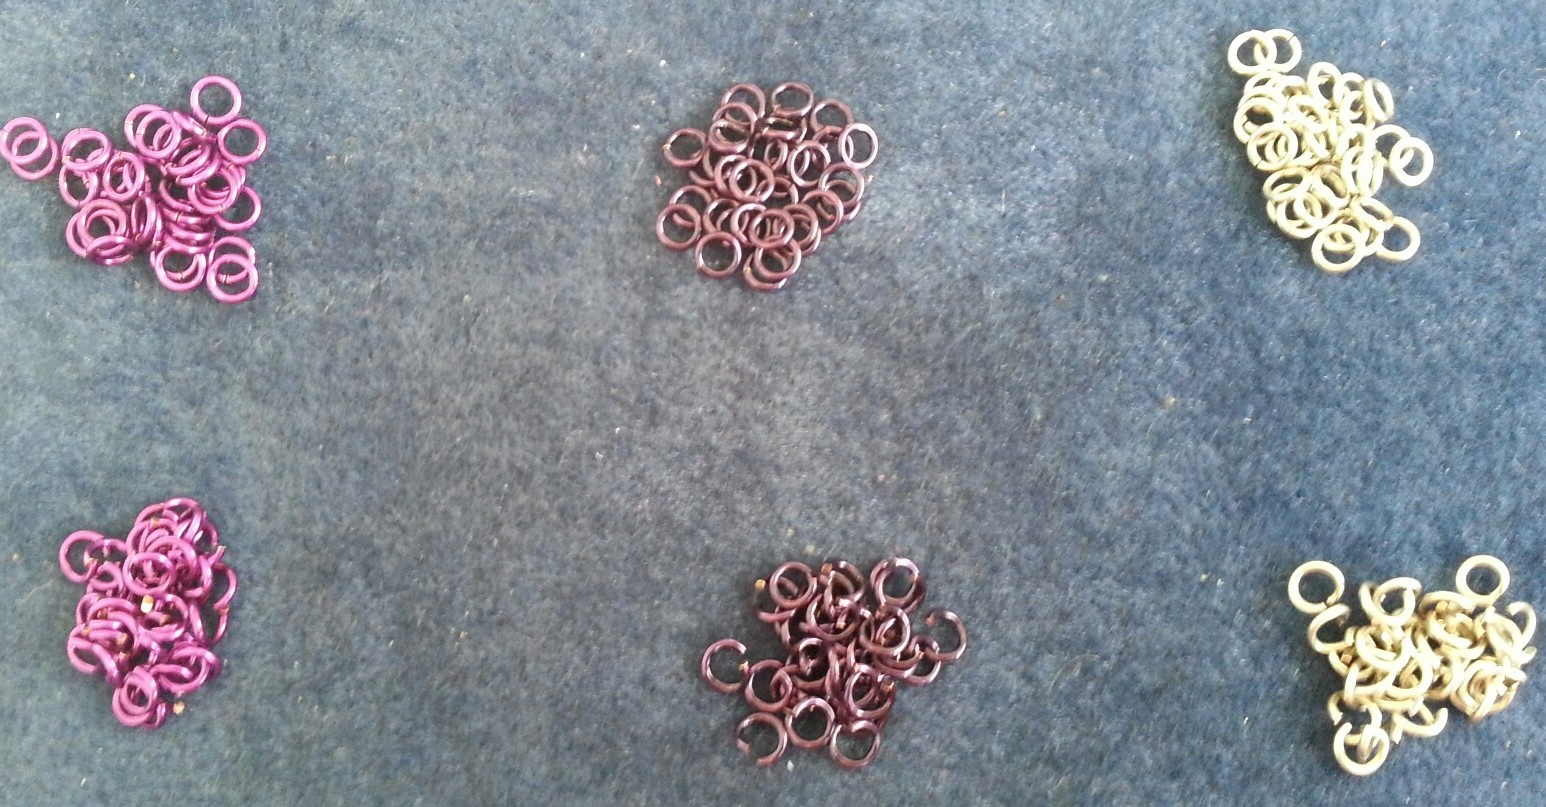
Opened and Closed rings from Weave Got Maille Kit
One of the tools in the kit is a large paperclip. Attaching this to the beginning of the project accomplishes two things, it gives you a “handle” to work on the chain while it is short, and it reminds you which end you are working on.
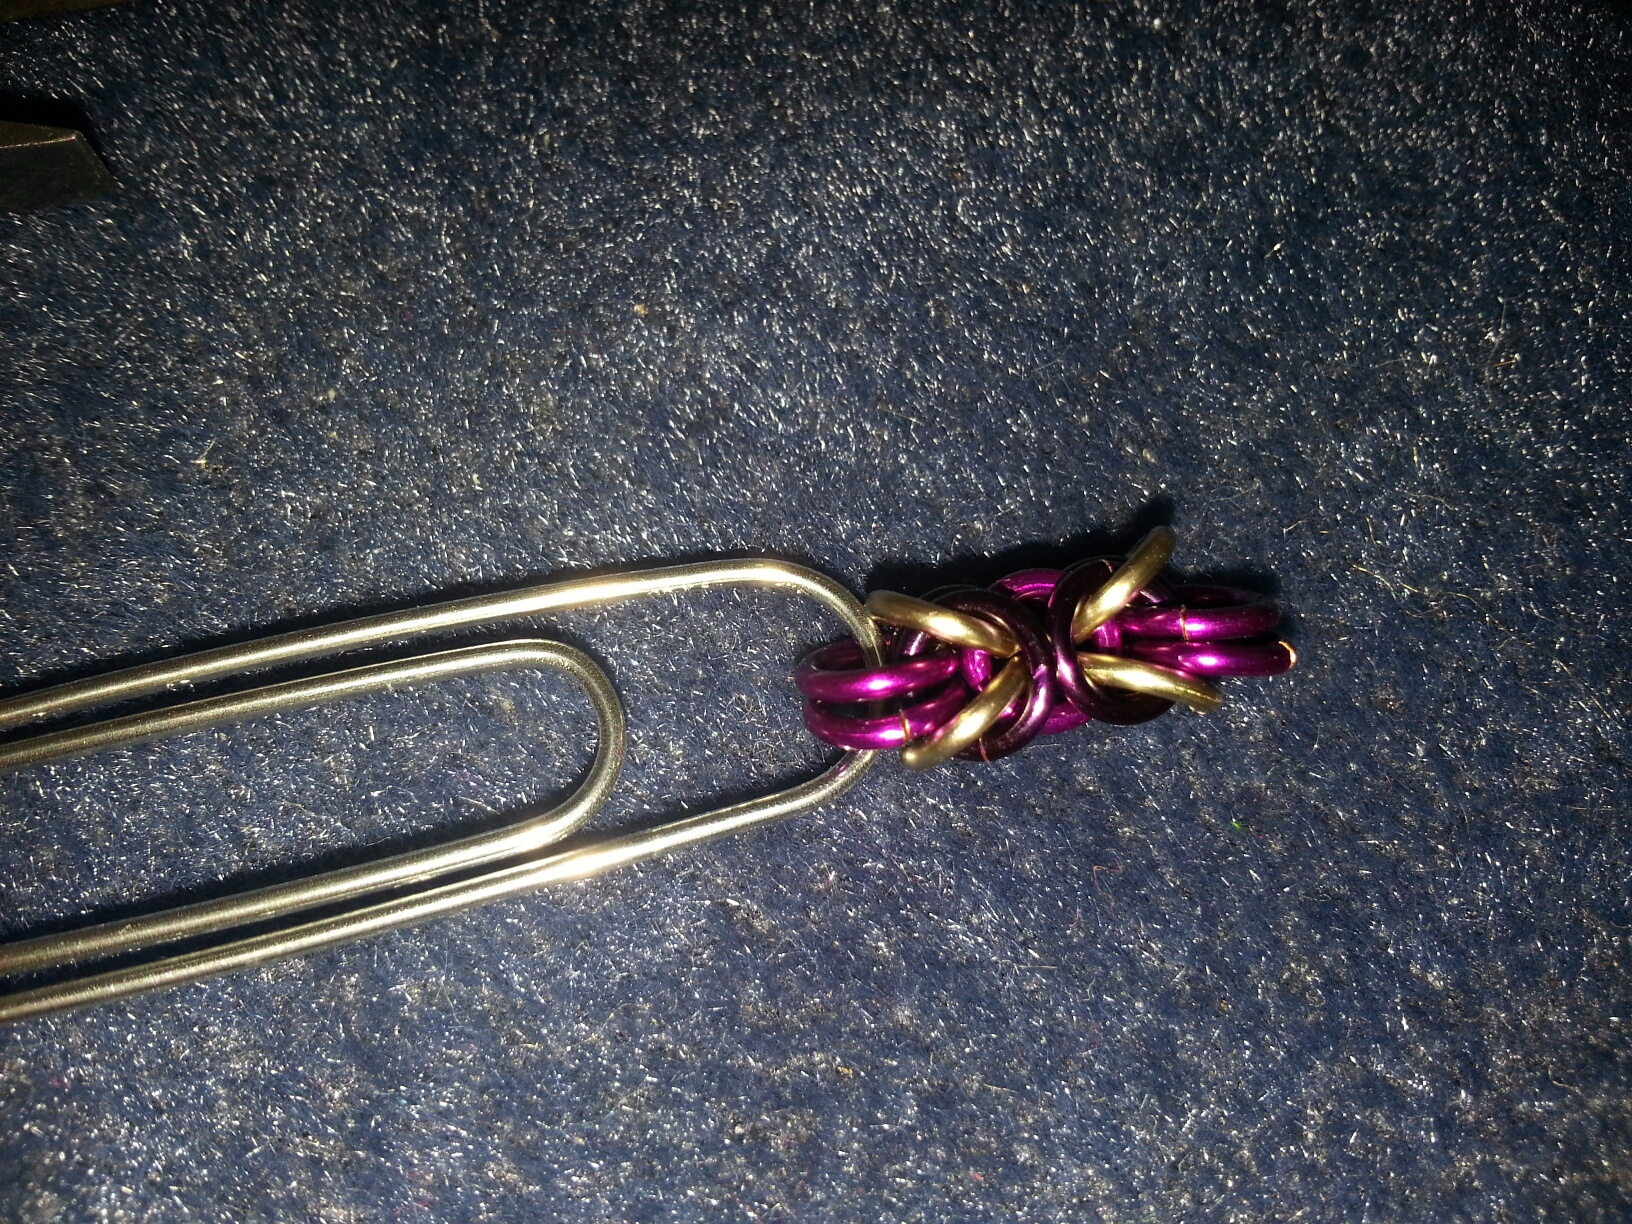
Byzantine Chain first unit
Here is my finished project. You may notice that the design doesn’t quite match the design on the box. This is because I made a mistake on the second unit of the chain, by reversing my “b” and “c” colors. Rather than take it apart and re-do the section, I chose to work with this as a new pattern, and alternated each correct unit with an incorrect one. I kind of like the variation in the design. Sometimes errors allow for new ideas.
Melissa made a box chain bracelet, and then, having learned the pattern, designed this pair of Night in Emerald City box chain earrings.
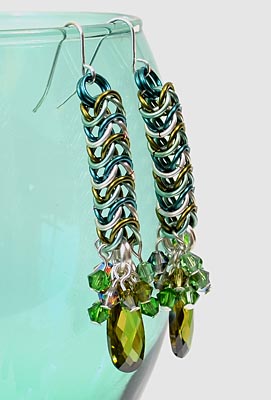
Night in Emerald City earrings
Are you a chain maille maker? Reply below if you have any great hints to share.
~ Rita ~

Make A Metal Box
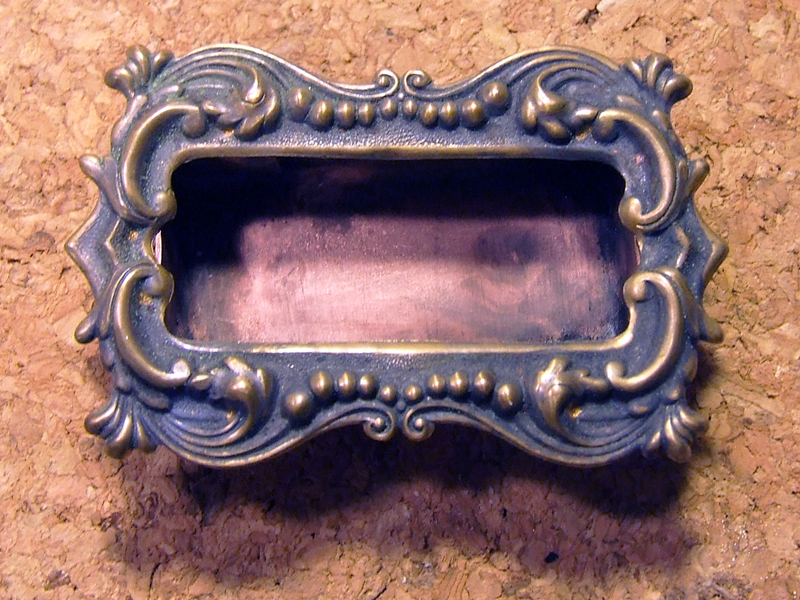
A small metal box was turned into a framed reliquary, containing an antiqued frozen Charlotte doll. Create your own metal box that can be transformed into memory jewelry, a tiny shrine or used for some other whimsical (or practical) purpose.

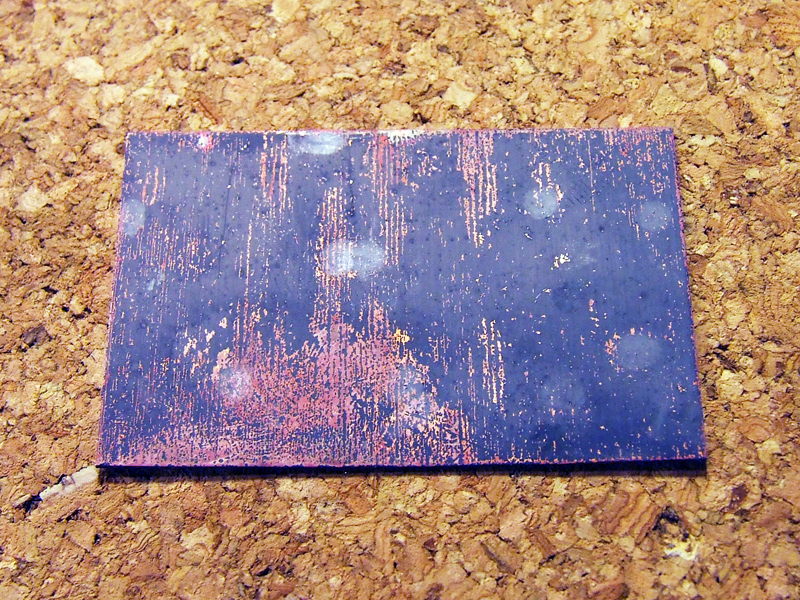
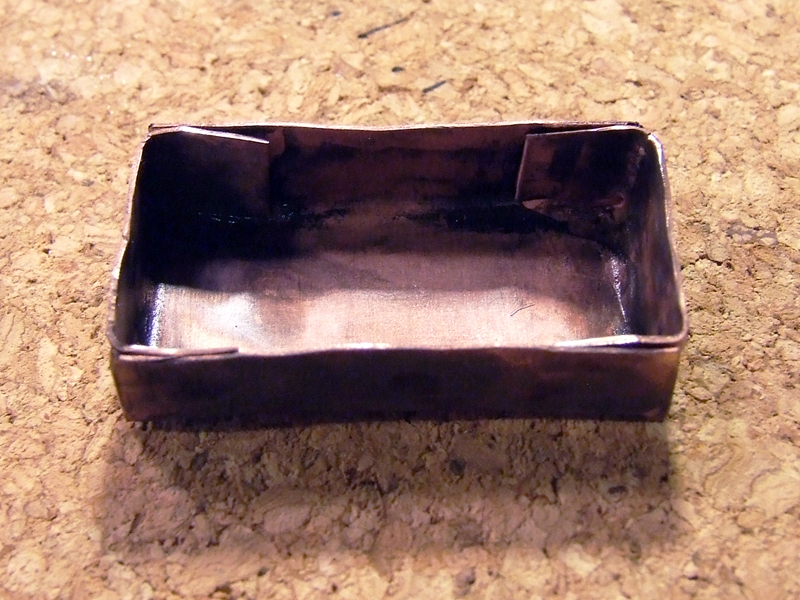
To make a metal box, first decide on the type of metal, and the size of the box you want to create. I recommend using 20 gauge sheet metal for strength and durability. Copper or brass sheet metal are nice choices as they are inexpensive and they antique nicely.
Anneal the metal before cutting so that it can be manipulated more easily. Heat it with a torch until it is glowing red, let it cool naturally and clean thoroughly.
Cut the metal to size. This box was 1-1/2″ long and 3/4″ wide. It is 3/8″ deep. Draw lines of box using a Sharpie pen.
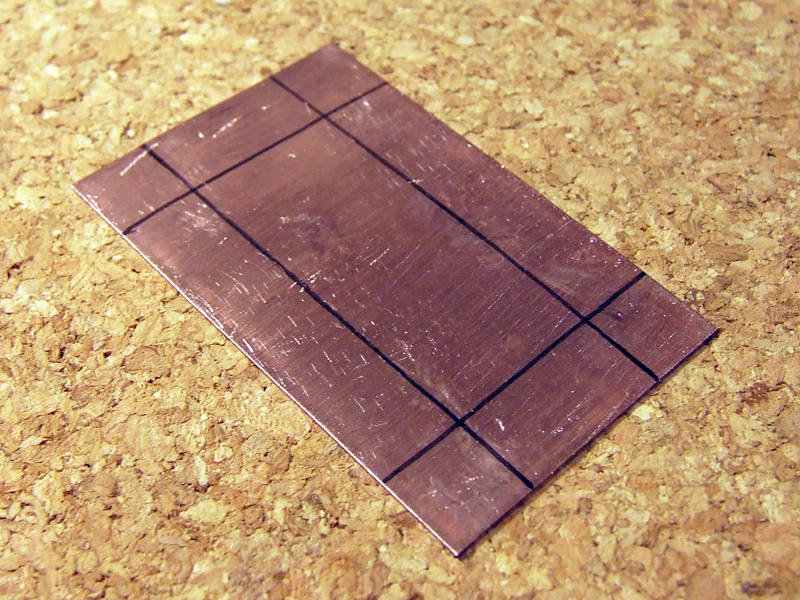
Cut one line of each corner to the point where it intersects with another line. Using wide flat nose pliers, bend the ends in, and the sides up, to create the box shape. Carefully fold each end of the box into place, making the corners square and secure. File if needed to remove any uneven edges.
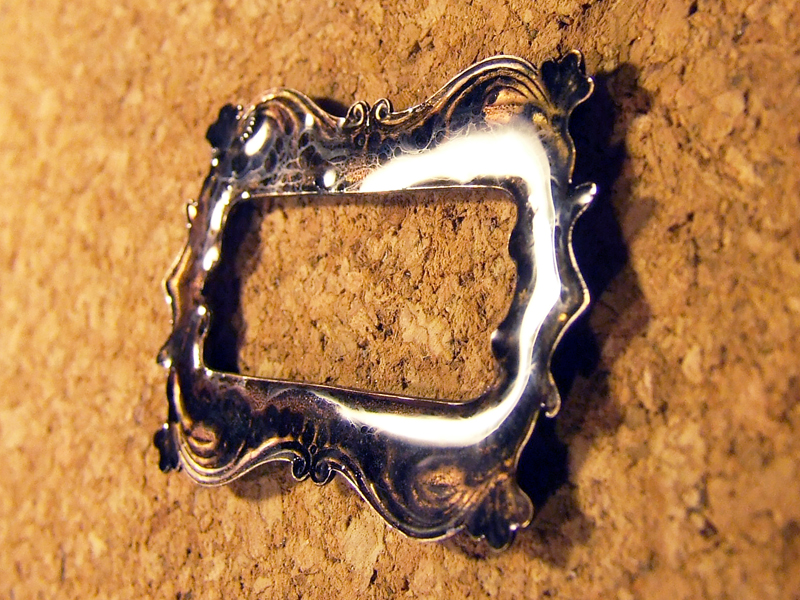
Antique and colorize all parts you intend to assemble.
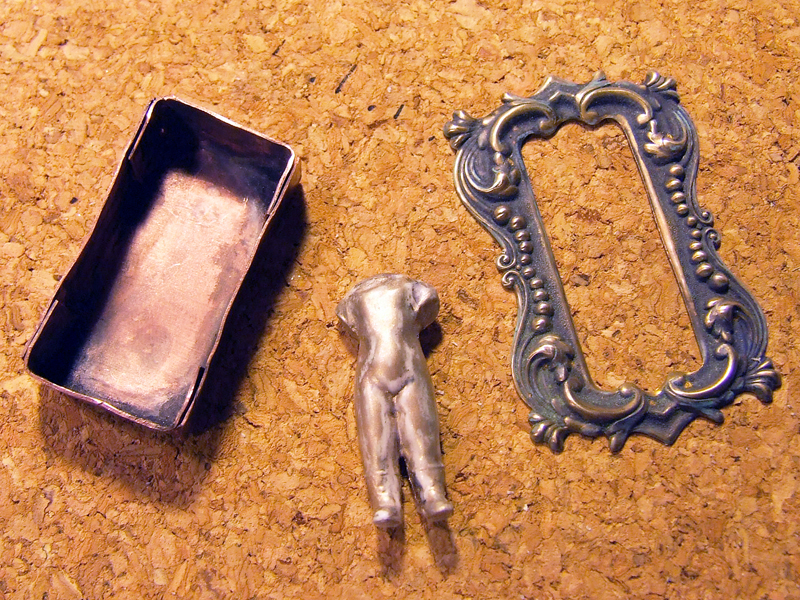
Fill back of frame with two-part epoxy. Center box over ornate brass frame and press into epoxy to place.
Using a two-part epoxy, UV resin, jeweler’s grade resin or other strong, clear glue, embed your treasures into your framed metal reliquary. Small toys, souvenirs, images layered in resin and tiny mementos are all used in creating custom memory jewelry.
Use epoxy to attach a magnet, let it cure and you are done! (Note: You could also attach a pin back or changeable bail in the same manner for a DIY jewelry brooch or pendant).

Questions? Please post them below!
Using one-step looping pliers and a few supplies, you can have a set of fantastic earrings in under 30 minutes!

Gather supplies

Lay out pattern and mark paddles
Loop paddle-end head pins


Adjust and tighten loops

Assemble


Repeat for other earring & enjoy!

For more information, scroll down to see the video tutorial and review tips on this one-step looping pliers page.
Well, hello there, bloglandia. Do you ever feel like most jewelry findings are designed to look feminine? Even if they aren’t frilly or covered with hearts and flowers, there is often something innately delicate about most DIY jewelry findings. When you want to make beaded men’s jewelry, it can be a problem. Crimp beads and bullion just don’t look that tough! Luckily, jewelry designer Jeff Fulkerson invented a solution: the Bead Bandit.

Pendant frames for all styles and tastes.
Hi bloglandia! Today’s design question: What memories or images do you have that are worth framing?
I just stumbled across this photo of some little house hinged pendants our design team made awhile back. It always amazes me how you can give people, in this case 9, the same jewelry component and end up with such completely different results! Our hinged glass frame pendants are reversible, so you can have two images inside if you’d like! (Also check out the memory boxes, which aren’t two sided but are deep enough to hold all sorts of treasures.)
From the bottom right going clockwise, you see the following jewelry designs:
Selina made the Dia de los Muertos paper collage, another jewelry designer used fabric and a peace sign, Mollie has a spritely fairy with star charms, Lindsey made a ginormous, interactive wooden pendant, Amy captured summer childhood memories, Sondra soldered up some enlightenment, I used one of my favorite vacation photos, a bulldog earned a crown and wings, and Rita created a wee house inside her frame. Hopefully one or more of these designs will inspire you to frame some mementos of your own! ~ Cindy

Making beaded snowflakes is a fun project for anyone old enough to not put beads in their mouth!
Day 4 is an ultra-simple, instant gratification project: beaded snowflakes. Simply take a wire snowflake form and add beads. This is an ideal project for using up leftover beads, especially sparkly glass beads!
 There are several options for keeping the beads in place:
 Or – the easiest and best in my opinion – use a French wire keeper. French wire keepers are little rubber stoppers that keep earrings in place – or beads on snowflake forms. French wire keepers also make great pin backs, or clutches/nuts for post earrings. A very versatile little jewelry finding indeed!
Dress up the view with sparkly snowflakes!
Winter – and the cold & flu season – is upon us. I didn’t post day 4 of the 12 Days of Christmas jewelry designs yesterday because I never made it out of bed. Silly head cold. So let that be a lesson to you all – it is never to early to start your holiday projects because you never know what interruptions you might face!

“Spring” assortment of Hemptique cord with Maori-style fishhook pendant.
Hello, bloglandia! As promised, here are the instructions for finishing a multiple-strand piece of jewelry (like the braided hemp necklace I made with the Kumihimo disk last week) using glue-on bullet ends.

Cord End Caps are much less bulky than knots on multistrand designs.
A bullet end is a jewelry finding that hides cord ends and makes a clean transition to a clasp. Bullet ends are also called end caps, barrel caps, and a variety of other creative names. Just make sure the caps you are using have loops on the ends and that they are wide enough to accommodate your cording. (I used these.)
 Take a piece of thread and wrap it tightly around the end several times (this is also called “whipping”). Tie a double knot to secure, and trim the thread ends.
 Cut the braid between the thread and the knotted end.
Make sure to let the glue cure fully before wearing. (For E-6000, this means 24 hours. ) The glue will be dry long before then, but to be safe, let it cure all the way.
E-6000 is one of my favorite glues because it holds up nearly as well as a 2-part epoxy, but you don’t have to measure and mix. Whatever glue you use, just make sure that is is compatible with both metal and fibers. Although instant gratification is tempting, super glue (cyanoacrylate glue) is a bad choice for this project because it can’t fill the gaps between the cord and the metal very well.
That is all there is to it! This technique works equally well with leather, ribbon, rattail and other types of cord. ~ Cindy
