Browsing Category

New products

EnCapture Artisan Concrete

February 4, 2013

We tested the new EnCapture Artisan Concrete Kit!

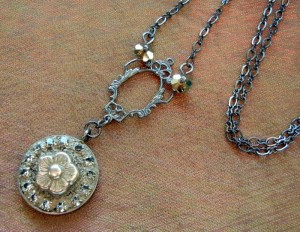
This free jewelry project by Rings & Things uses bezel cups, jewelry grade concrete (EnCapture Artisan Concrete), Gilders Paste, rhinestone chain, vintage inspired filigree, black gunmetal chain and has a delicate flower bead as the center of the mini mosaic.

Flor Sepultiado Mosaic Necklace

This “unique texture-rich medium for jewelry making is designed for embedding treasures such as glass, gemstones, metal, buttons, wire and beads to create visual interest and contrast.  Here are some tips for using it!

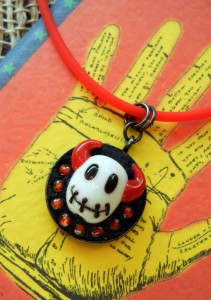
This free jewelry project by Rings & Things features a stitched devil head lampwork bead as the centerpiece of a mini mosaic. Small beads surround the black white and red focal, which is set into Encapture Artisan Concrete (jewelry grade concrete). The small mosaic is held inside an inexpensive 1" round bezel cup.

Stitched Devil Mosaic Necklace

Mixing: We found the easiest way to mix the concrete was making a slurry (or thin paste) by putting a small amount of the base material in the mixing cup and adding the activator. To the slurry, mix in the base material and pigment incrementally until you have achieved the desired color and consistency.

Application:  You can extend the life of your concrete while you are working by covering the mixing cup with a damp paper towel. We recommend you remove excess concrete from your embedded treasures as you work using a damp paper towel, cotton swab or toothpick. It is easier to remove when it is moist than after it starts to dry.

Initial cleaning of the mini mosaic involves wiping away the excess jewelry grade concrete (Encapture Artisan Concrete) from the silver flower and rhinestone chain. Remove any excess concrete from the back of the gunmetal bezel cup. All parts available at rings-things.com

Work Time:  As the concrete starts setting within 5 minutes, you must work quickly!  Pre-arranging your design is very helpful.  We found it easiest to trace the bezel, and to mock-up the arrangement on paper.  This allows you to quickly and precisely place each item when it is time.   
Encapture Artisan Concrete (jewelry grade concrete) sets quickly. The lampwork cat head bead and smaller gemstone round beads were positioned into place before the concrete was placed, making it easier to create a small mosaic. All parts available at www.rings-things.com
Green Cat Mosaic Necklace
Design:  Including small beads in your design is easiest if you string them first (this way they can’t roll and move as easily). For a more elaborate or mosaic-style design, setting your treasures with a dab of two-part epoxy glue is recommended. Glue your items in place and allow the glue to fully dry before applying concrete.  
Trade beads, a Tierra Cast hamsa hand, an Amate primitive heart or art heart (arte heart) silver bezel were carefully glued into place for this small mosaic. The designer bezel will be filled with jewelry grade concrete (EnCapture Artisan Concrete) once the glue has dried. Free DIY jewelry project by designer Sondra Barrington of www.rings-things.com.

Hamsa Hand in Heart Mosaic Necklace – Tutorial

Finishing Touches:  If you do not like large grains of sand from the concrete being visible in your design, you may be able to bury them by gently poking them down into the wet concrete with a toothpick.

Once the product has cured, for a beautiful golden sheen, the brass brush works wonders!  If you do not want to alter the color of your finished piece, gently clean around embedded treasures with the straight carver.

Using a toothpick to place jewelry grade concrete (Encapture Artisan Concrete) into the small mosaic, around the silver flower and rhinestone chain. Carefully place the concrete to avoid getting it on the gunmetal bezel cup. All parts available at rings-things.com

In addition to the tools and supplies provided in the kit, we found the following tools and supplies very helpful:
* Damp paper towels/moist towelettes
* Extra wood mixing sticks
* Cotton swabs
* Tablet & pencil
* Extra disposable plastic mixing cups
* Extra dust masks
* Extra disposable gloves
This free jewelry project by Sondra Barrington of www.rings-things.com features a silver Amate primitive heart bezel. This deep dish art heart bezel has been filled with jewelry grade concrete (Encapture Artisan Concrete) and an assortment of trade beads, small silver beads and a Tierra Cast hamsa hand charm. The mini mosiac is hung from an inexpensive choker.
Links:

The Bead Bandit: make masculine beaded men's jewelry!

July 18, 2012

Well, hello there, bloglandia. Do you ever feel like most jewelry findings are designed to look feminine? Even if they aren’t frilly or covered with hearts and flowers, there is often something innately delicate about most DIY jewelry findings. When you want to make beaded men’s jewelry, it can be a problem. Crimp beads and bullion just don’t look that tough! Luckily, jewelry designer Jeff Fulkerson invented a solution: the Bead Bandit.

Continue Reading…

New Beads on the Block – Gemcolor Crystal Pearls!

May 13, 2012

Hi bloglandia! Take a look around and what do you see, fashion wise? That’s right: color. Big bold blocks of vivid color.

swarovski-gemcolor-pearls

These beads absolutely pop with gemstone colors.

Incorporate this season’s love for pure color into your jewelry designs with Swarovski “gemcolor” crystal pearls.

gemtone-bead-bar-necklace

An easy to make bead bar necklace with red coral, pink coral, lapis, jade and turquoise crystal pearls.

I really love gemstones natural variations in color. However, even I am a fan of these not-so-natural crystal pearls. They are just plain fun, perfect for summer or anytime really. The color palette is really versatile, too. The gem colors make many great combinations. Here are a couple of my favorites:

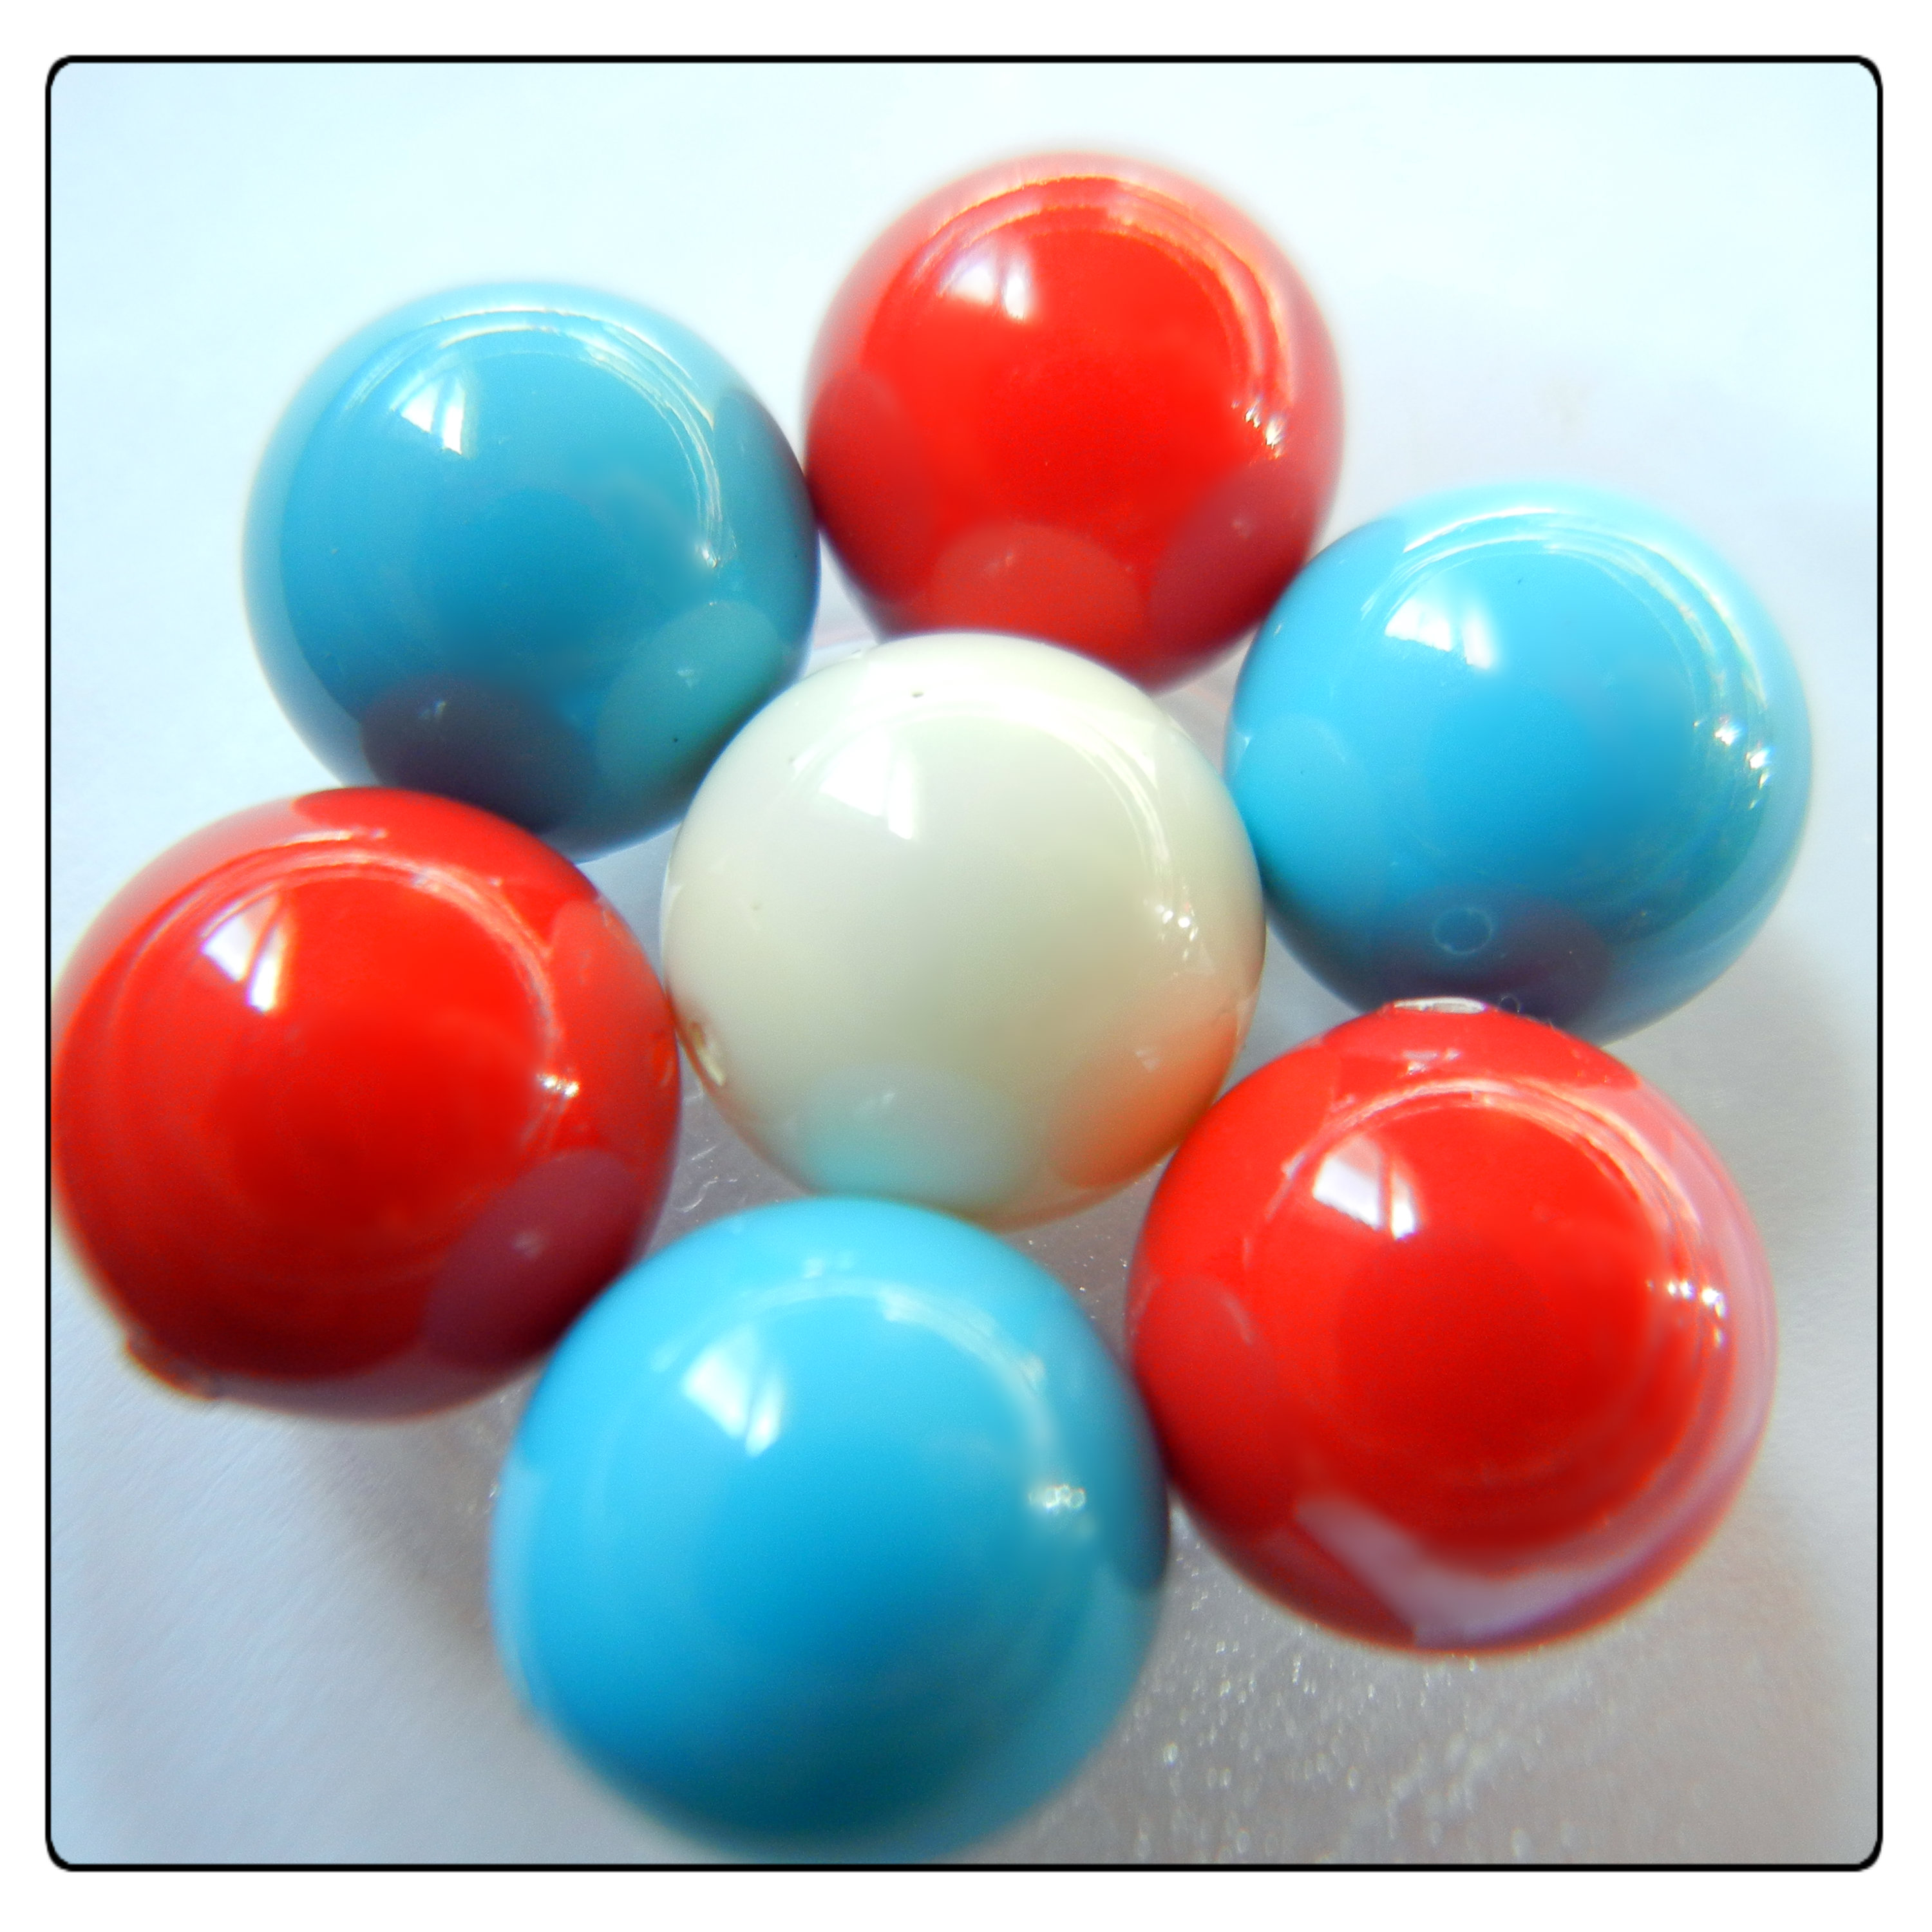
redcoral-turquoise-crystal-pearls

Red coral and turquoise is a classic gemstone combination. The pearl in the middle is ivory color.

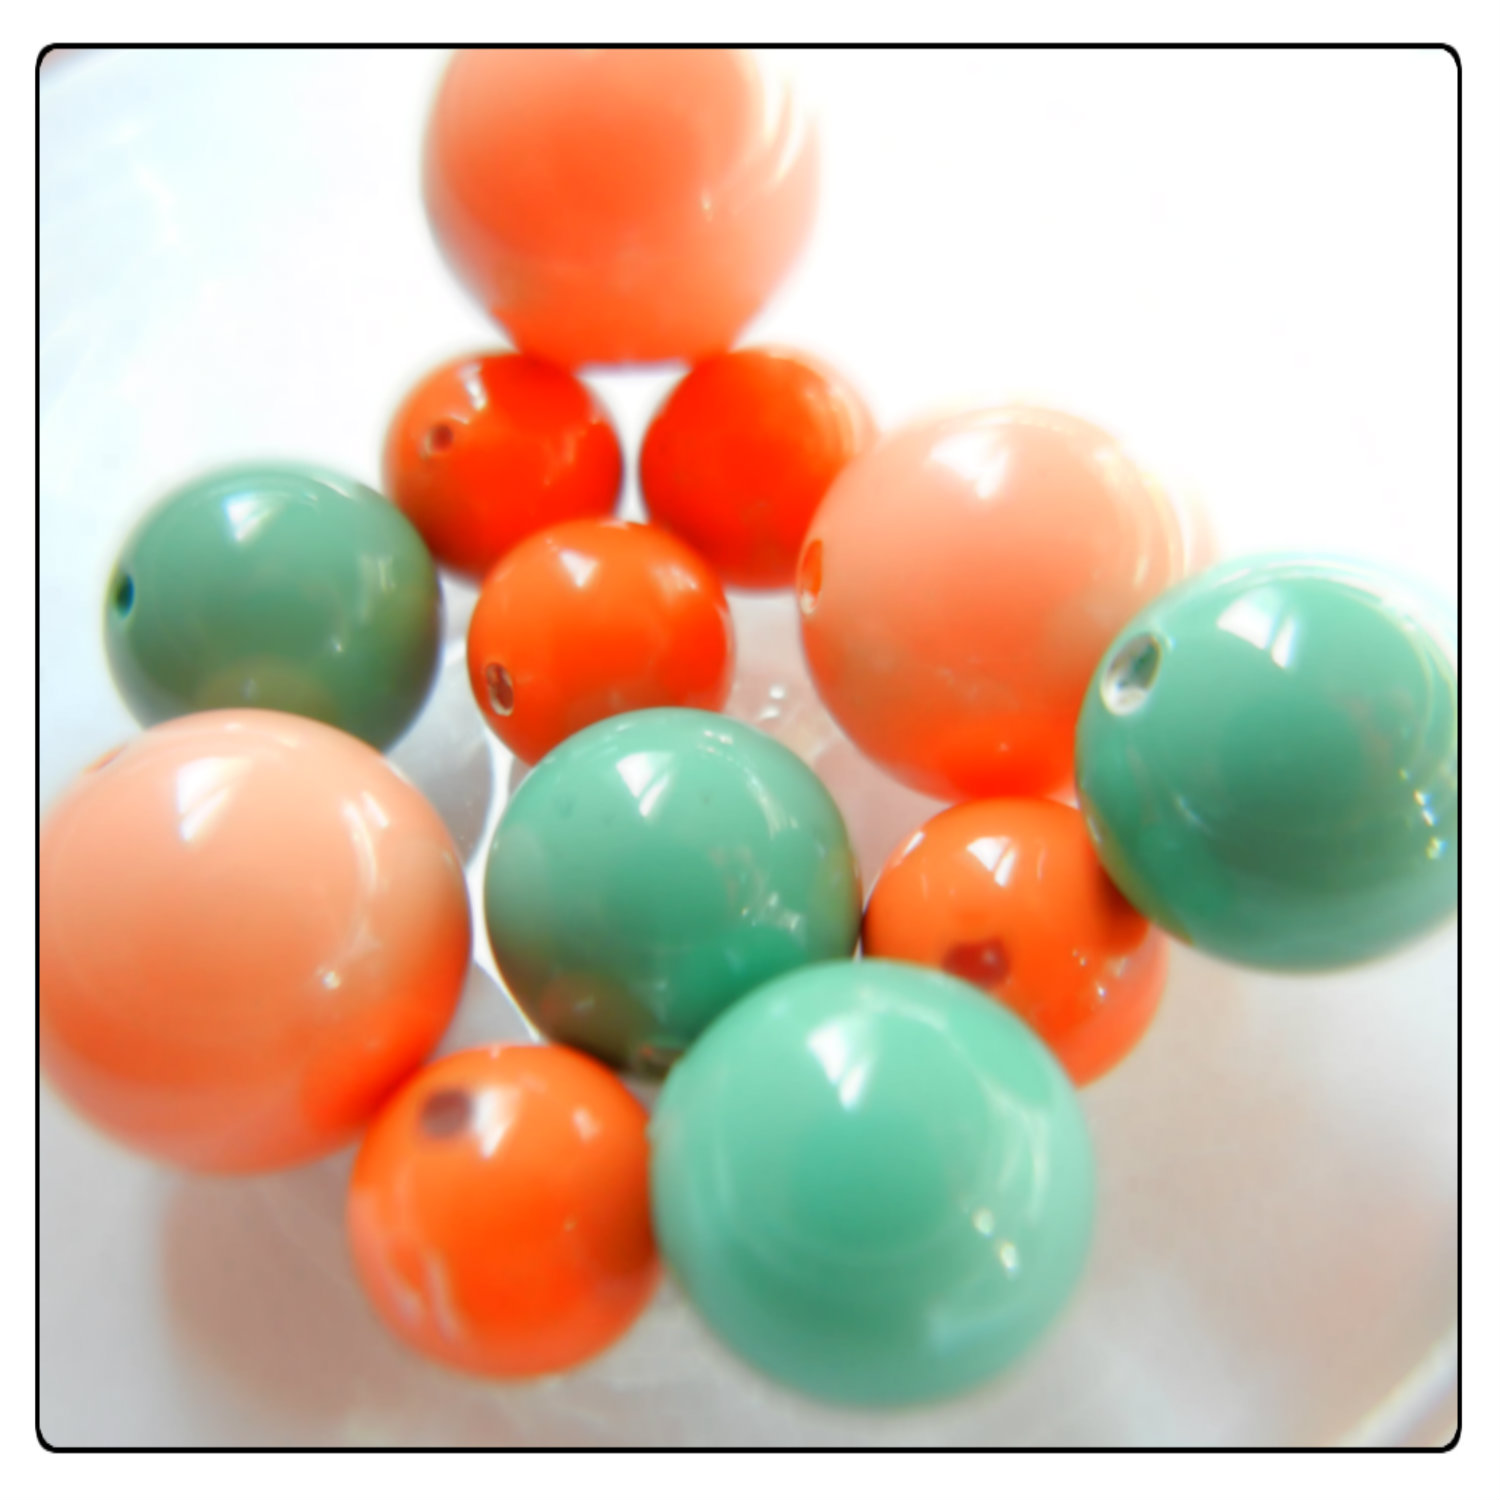
coral-jade-crystal-pearls

Coral, pink coral and jade crystal pearls.

lapis-turq-onyx-crystal-pearls

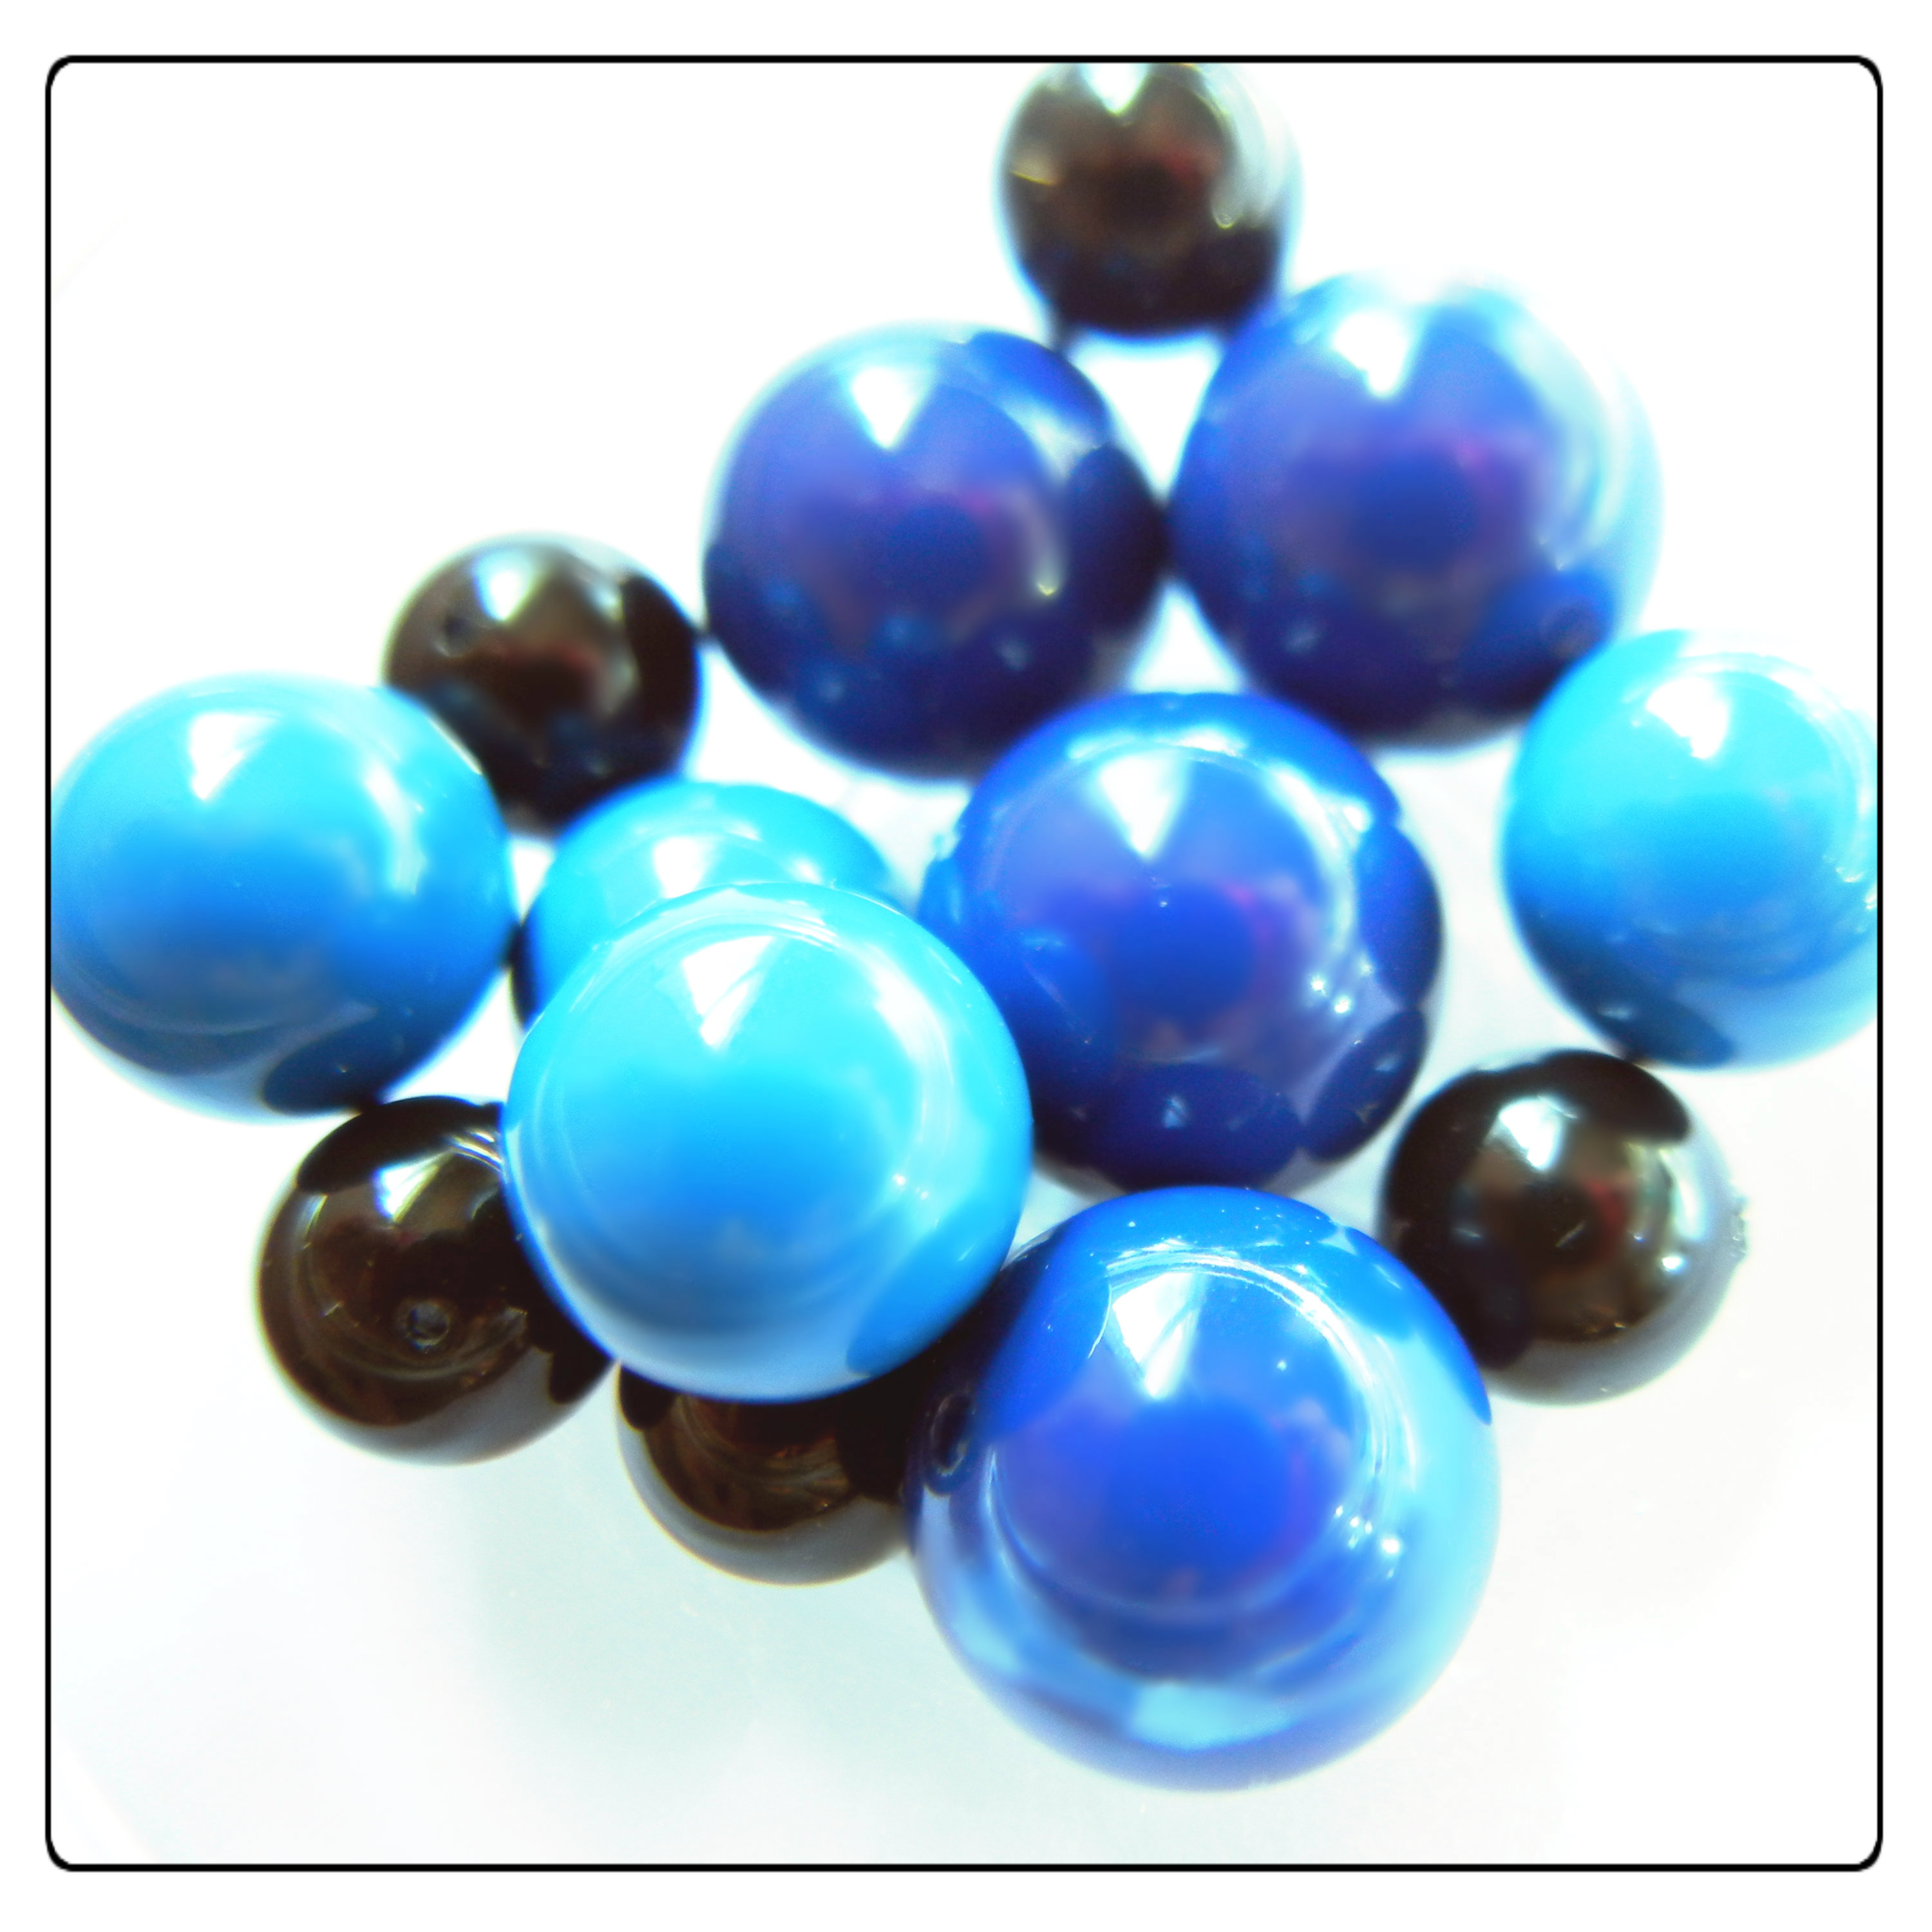
Dark lapis, turquoise and mystic black crystal pearls make a cool blue mix.

Notice how shiny the little buggers are too – I couldn’t avoid getting reflections in my snapshots, especially that last one (the rings are light bouncing off the clear bowl the pearls were in.) That is one of the perks of crystal pearls – unlike natural pearls, which will get destroyed by common things like perfume & hairspray – crystal pearls are very durable. The shiny, uniform coating is meant for fun in the sun. So go get some – of both! ~ Cindy

Leather strap wrap bracelets in bright new colors!

March 6, 2012

Spring is (almost!!) here, and what better way to celebrate the return of short sleeves than a wrist full of bracelets? With this in mind, we chose a fun new palette of leather strap bracelets based on the Pantone Color Chart. These triple-wrap bracelets are 1/2″ wide and feature three snaps for an adjustable fit. The gorgeous colors are created with lead-free vegetable dyes. Vegetable dyes are color fast, but you should avoid getting your leather bracelets soaking wet, as it could damage the leather.

Leather bracelets are easy to customize and fun to wear. Here are some of the ways our design team dressed them up:

orange-teal-purple-pink-gray-leather

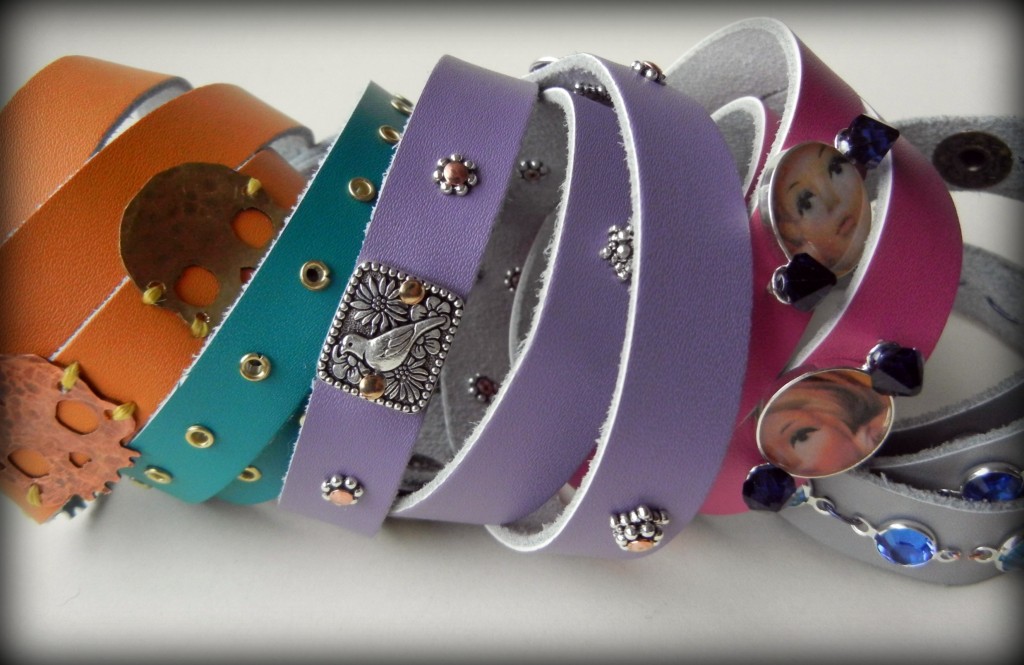
Some of the brighter and bolder Pantone-inspired color choices – Solar Power, Lagoon, Bellflower and Pink Punch! The concrete gray makes a great neutral base for many colors, including sapphire crystals.

Most of our designers chose to sew their beads, charms, crystals and other decorations in place. Pretty much any stringing material can work, depending on the situation. We used Nymo, Superlon, embroidery floss, hemp cord and even wire.
sewn-adornments-leather-rings-things

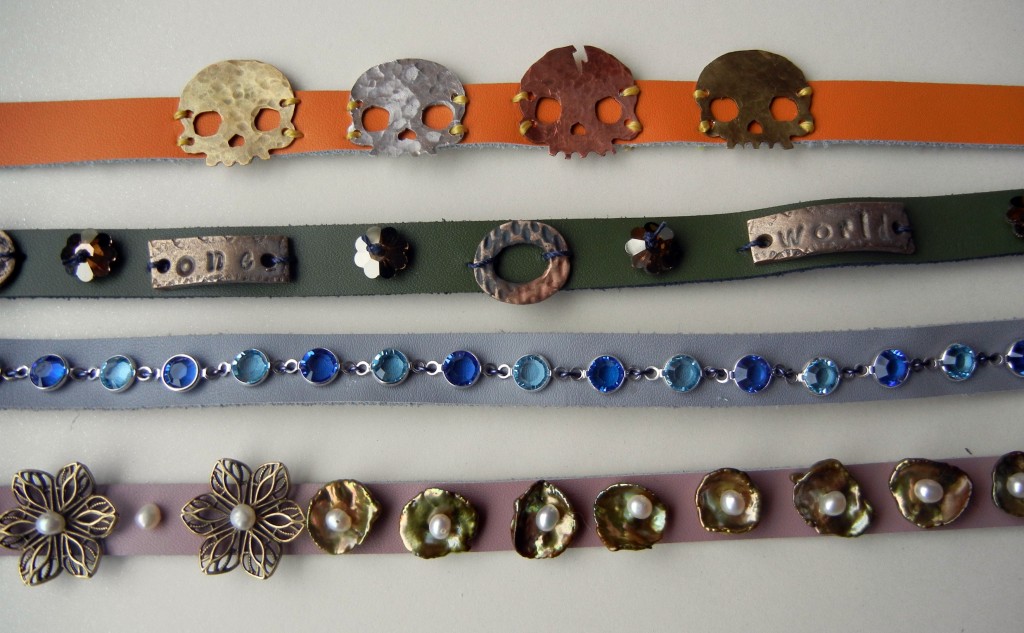
From the top: Jaci used a jeweler’s saw to cut skulls out of sheet metal. I attached bronze clay charms and bronze shade crystal margaritas. Laurae stitched crystal channels on with wire. Toni used freshwater pearls and antiqued brass filigree.
Use a rotary hole punch tool or an awl to make holes where needed, and stitch away! Just be sure to choose a thread thickness that feels durable enough for the weight of the items you are attaching.

stitches-reverse-rings-things

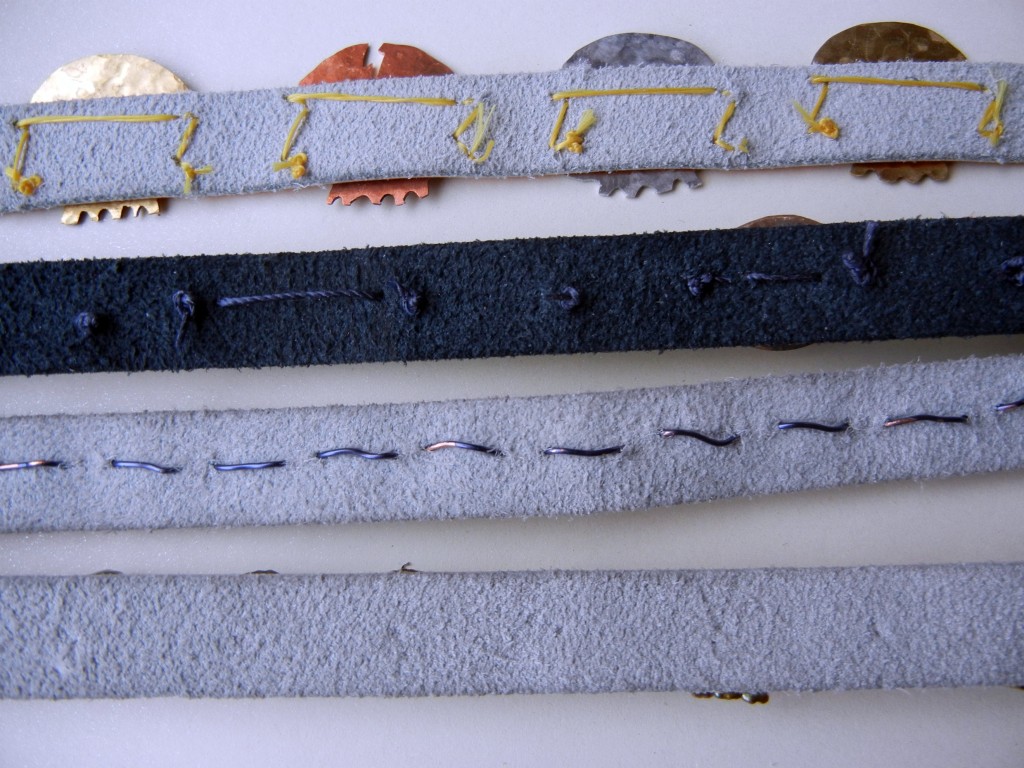
As you can see, our stitch methods varied a lot. Mine are quite clumsy while Toni’s are practically invisible – but they all worked! Laurae’s wire was the most problematic to sew with, but it does add a nice heft to the bracelet.

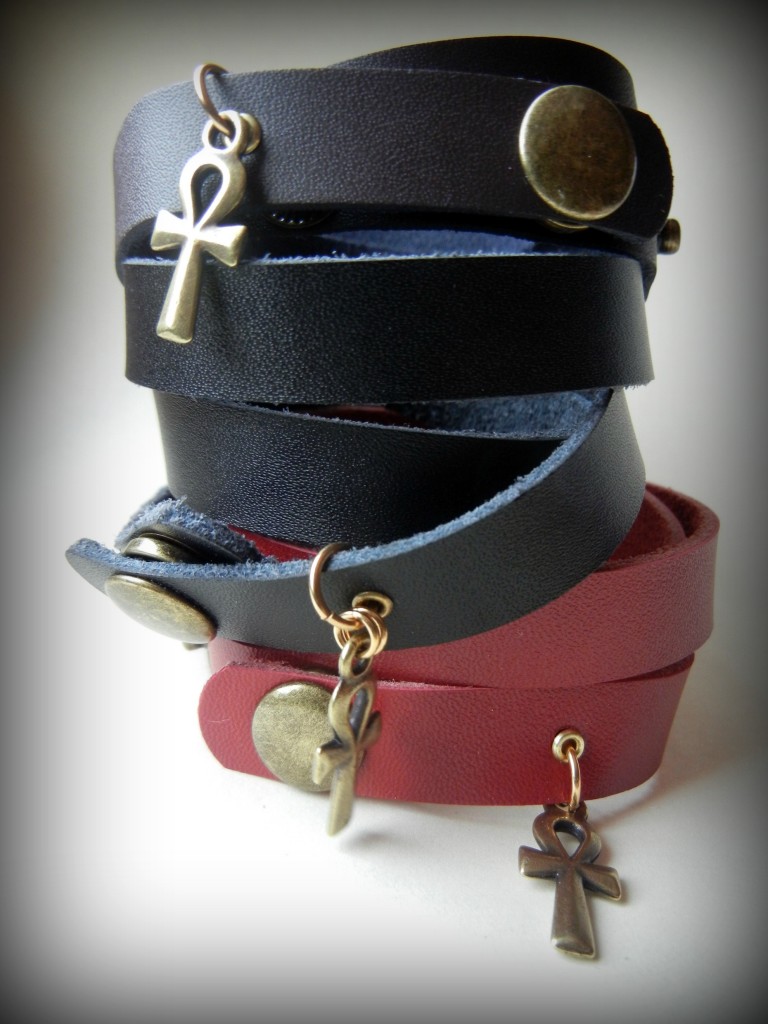
Another leather embellishing option is to use rivets and/or eyelets. Eyelets line holes nicely for durability, which allows you to hang charms from them, like on Sondra’s stack of ankh bracelets:

wrapped-in-ankhs-rings-things sondra barrington leather ankh bracelets

Simple and stylish wrapped leather bracelets in black, dark brown and scarlet leather. I wanted to name that color of red “lipstick red” but was out-voted on the grounds that not all lipstick is red! Scarlet won because it is a pretty true red without orange or brown tones.

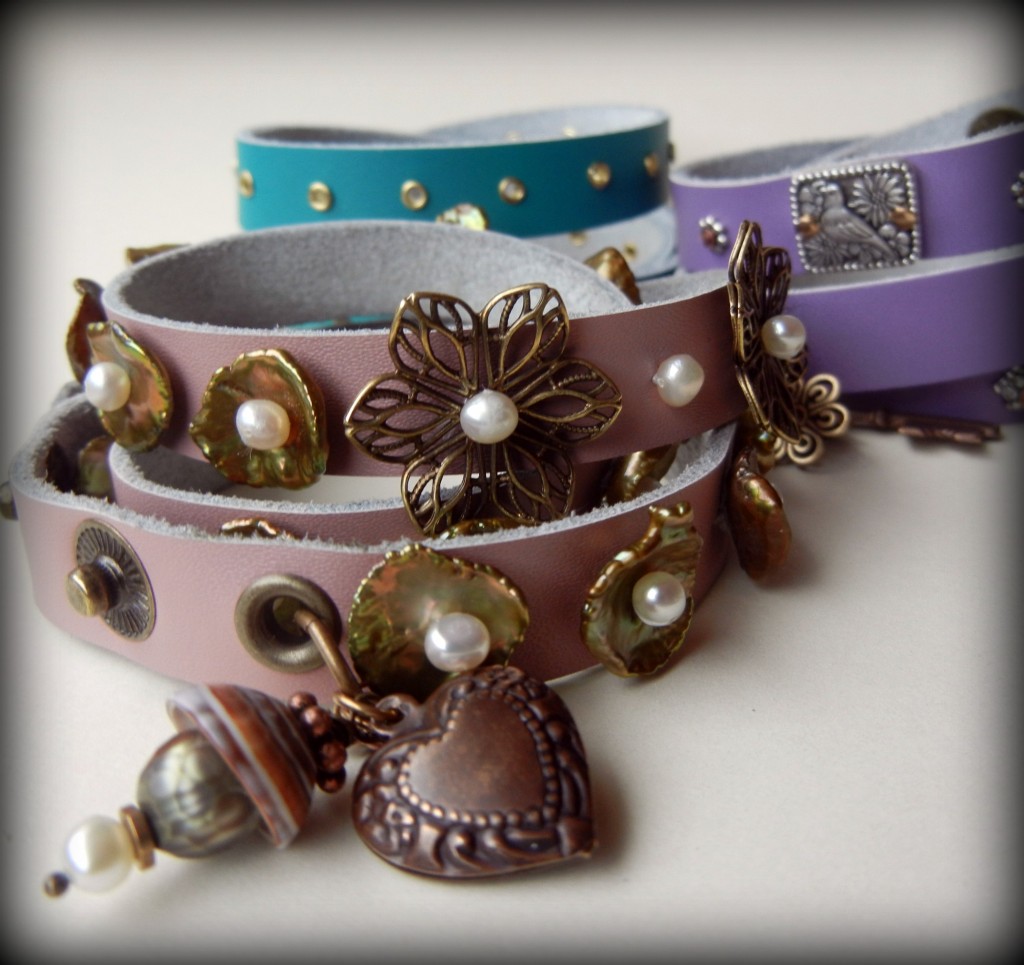
Polly used the Crafted Findings riveting system to attach TierraCast charms and spacer beads to her purple leather bracelet. The teal blue bracelet uses evenly spaced eyelets to create an industrial style, while Toni used a couple of large leather eyelets to create attachment points for pretty charms and beads.

romantic-wrap-bracelet

The front pearl bracelet is on “Silly Putty” colored leather. The pinkish yet neutral color is hard to describe, but somehow we all agreed silly putty summed it up!

pink-leather-resin-bracelet

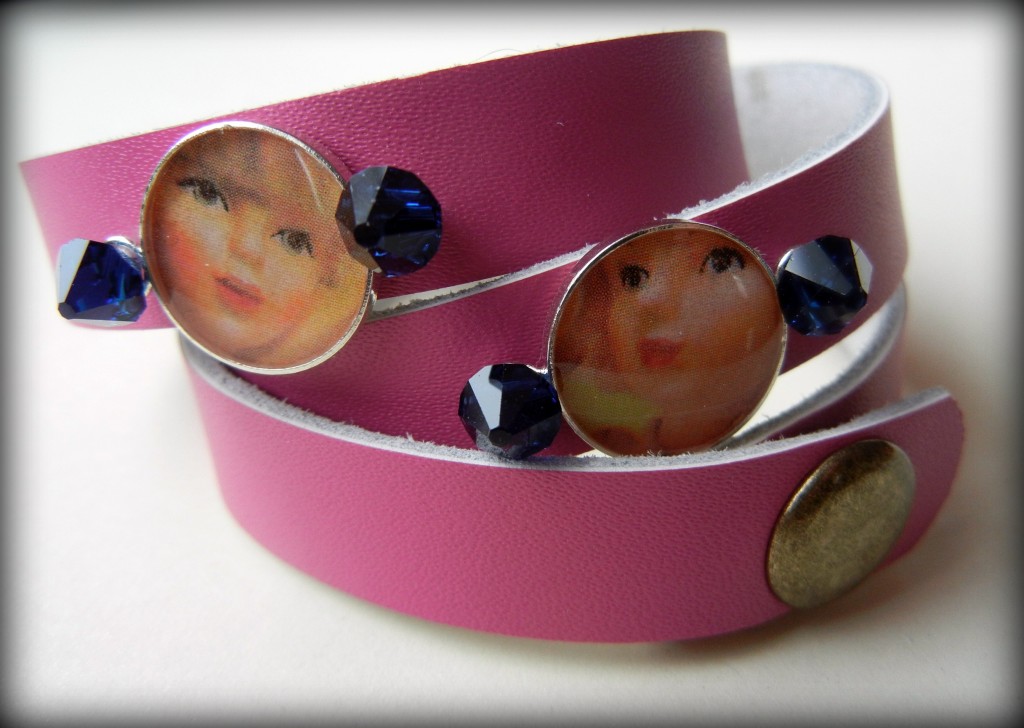
I stitched Dark Indigo bicone drops in place over the bezel loops on my “Clueless” bracelet to make spikes.

I had a hard time rounding up all these bracelets … I didn’t quite have to pry them off people’s wrists, but almost. They’ve been getting a lot of wear – and a lot of compliments! We hope you have just as much fun creating your own jewelry with them! ~ Cindy

Micro butane torches for jewelry

February 27, 2012

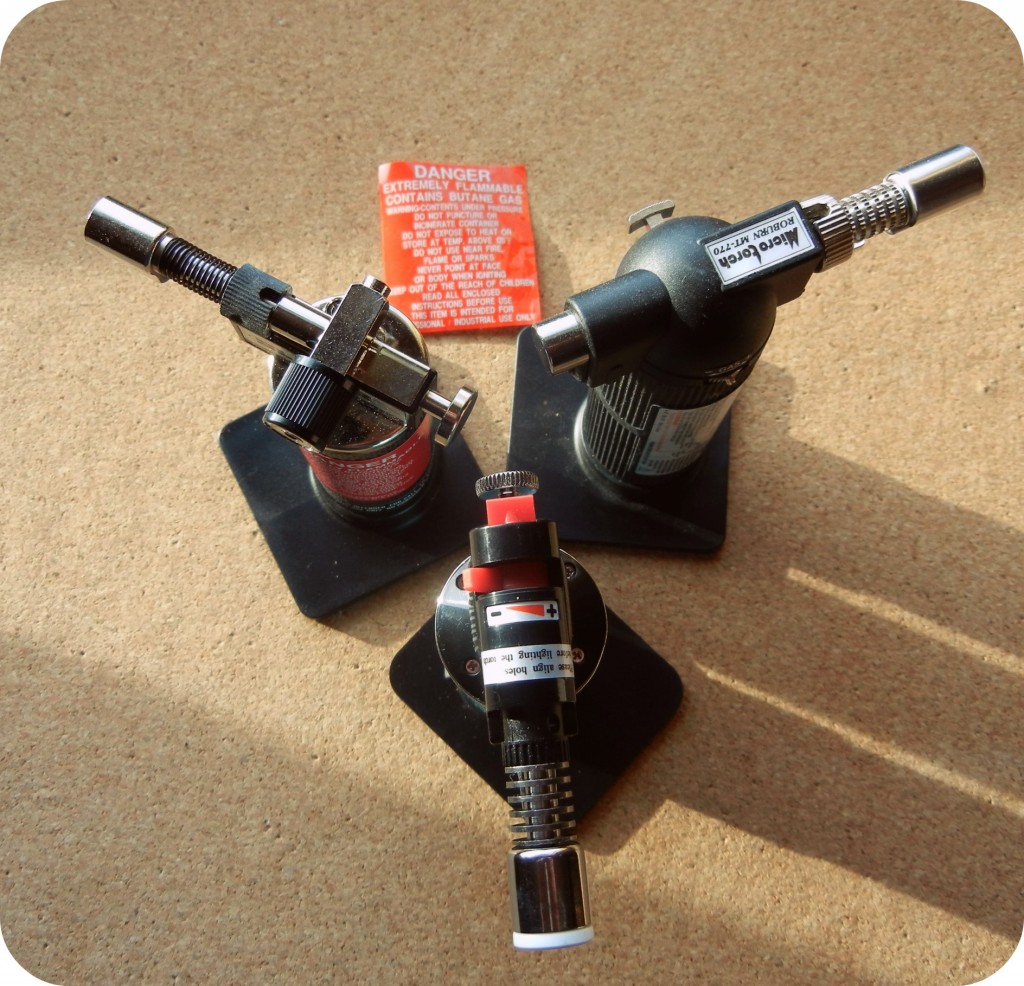
It is great to have choices – but sometimes comparison shopping is such a chore! We recently added two new Blazer brand micro-torches. While our selection of three butane torches isn’t exactly overwhelming, it still raises questions. Why choose one over the other two? They all look about the same … and in many ways, they are the same:

  • No appreciable differences in height, width or diameter.
  • All three use triple refined butane (buy it locally due to shipping restrictions).
  • All three include a plastic stand for hands-free operation.
  • All three have flame adjustment options.
three-micro-torches-rings-things
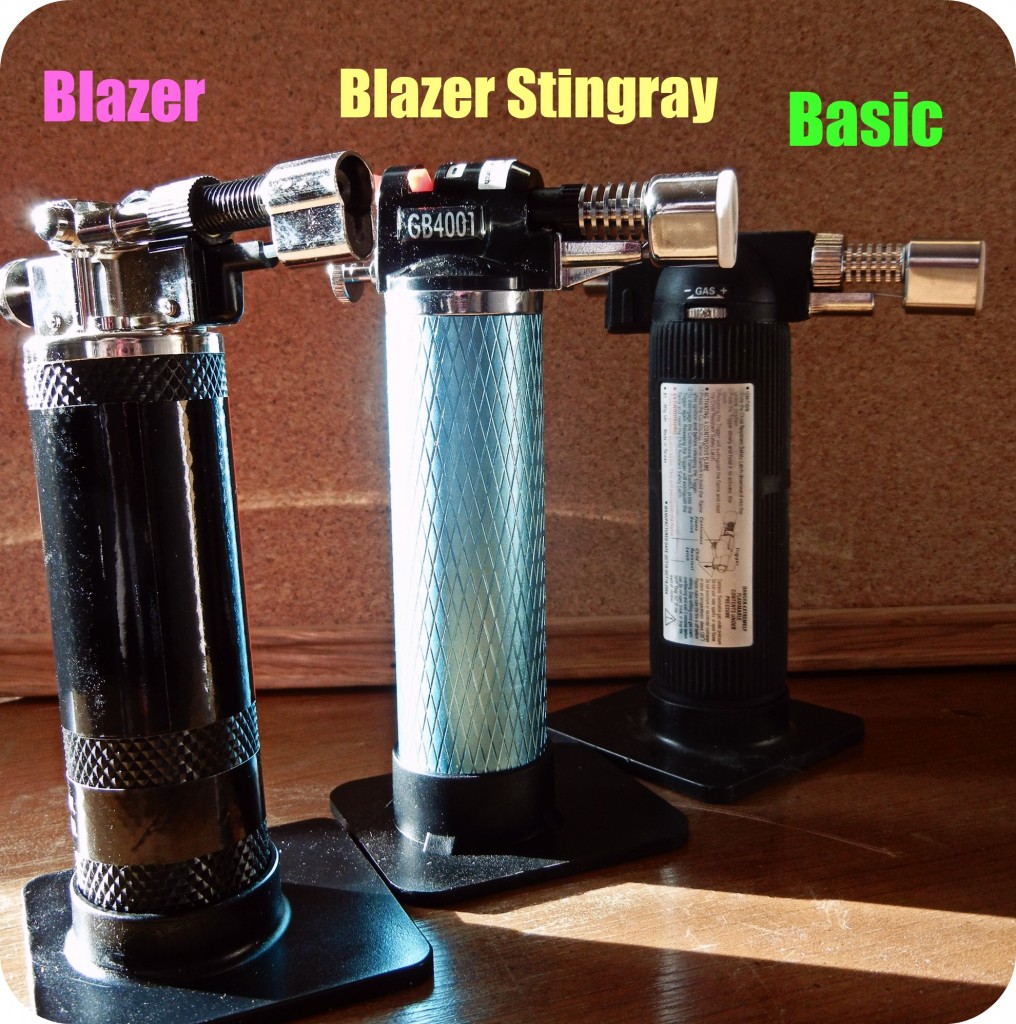
Micro butane torches are only about 6″ tall but easily reach flame temps of 2400 F. All three of these torches can handle small soldering, fusing and enameling jobs.

However, in several important ways, these three little torches do differ. The most obvious way is in price: the Blazer costs over twice as much as our original little torch. In fact, you can buy an entire mini torch kit, which includes a torch, soldering blocks, a tripod with mesh, tweezers and soldering pick, for less than the Blazer torch. Yet …

three-torches-top
Micro torches are easy and safe to use – just use common sense. Never point the flame at yourself and keep combustibles out of the way. The heat is very concentrated and easy to control.

The Blazer is by far the easiest micro torch to use! It is a professional model torch, not designed for home use. It doesn’t have a child safety lock, so if you have any concerns about unauthorized use of your tools, this might not be the best choice (I hope it goes without saying you should keep any torch out of the reach of children). However, if you hate fumbling around with levers and buttons, then you will *love* the black Blazer torch. It has a really high quality ignition system. I won’t go into boring details on that. Just know that, while trying to do a fair comparison of the three torch options, I kept instinctively reaching for the Blazer because it was just more fun to use. Good design works! Plus, its burn time is about double that of the entry-level micro torch. Refilling butane is the least fun part of using a micro torch, so that detail counts for a lot in my opinion!

I really wanted to like the Stingray model the best – it is my favorite color after all! – but the safety lock and flame control just weren’t my favorite. So if budget is the biggest factor, the our original micro torch is still a great deal. It gets the job done. But if you can afford to splurge a bit, the Blazer torch is a tool worth owning. And if you truly want middle of the road performance and price – with the prettiest color! – then the Stingray fits the bill.

Here’s the stats in handy bullet form, with torches listed from Highest/Greatest to Lowest in each category:

  • Burn time: Blazer, Stingray, Basic
  • Price: Blazer, Stingray, Basic
  • Ease of use: Blazer, Stingray, Basic
  • Safety lock: Basic, Stingray, Blazer

Whether you want to fire small Art Clay silver pieces, torch enamel, solder metals or fuse fine silver, a micro torch is a great introduction to using heat! Here’s a little tutorial on making ball-end head pins to get you started. ~ Cindy

How to use charm bracelets to make necklaces!

February 20, 2012

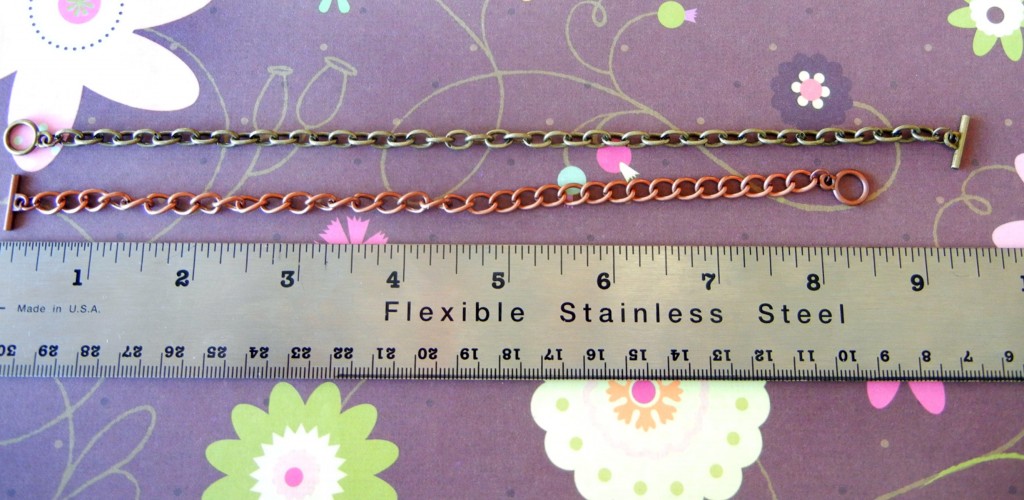
Hola, bloglandia! Today I wanted to share a quick and easy way to make necklaces using charm bracelets. Rings & Things has a great selection of ready-made chain bracelets with toggle clasps. The typical use is to leave the bracelet in one piece and add charms with jump rings for a charm bracelet. However, these bracelets are a bit longer than advertised.

long-long-bracelets

With clasps, the 7.5

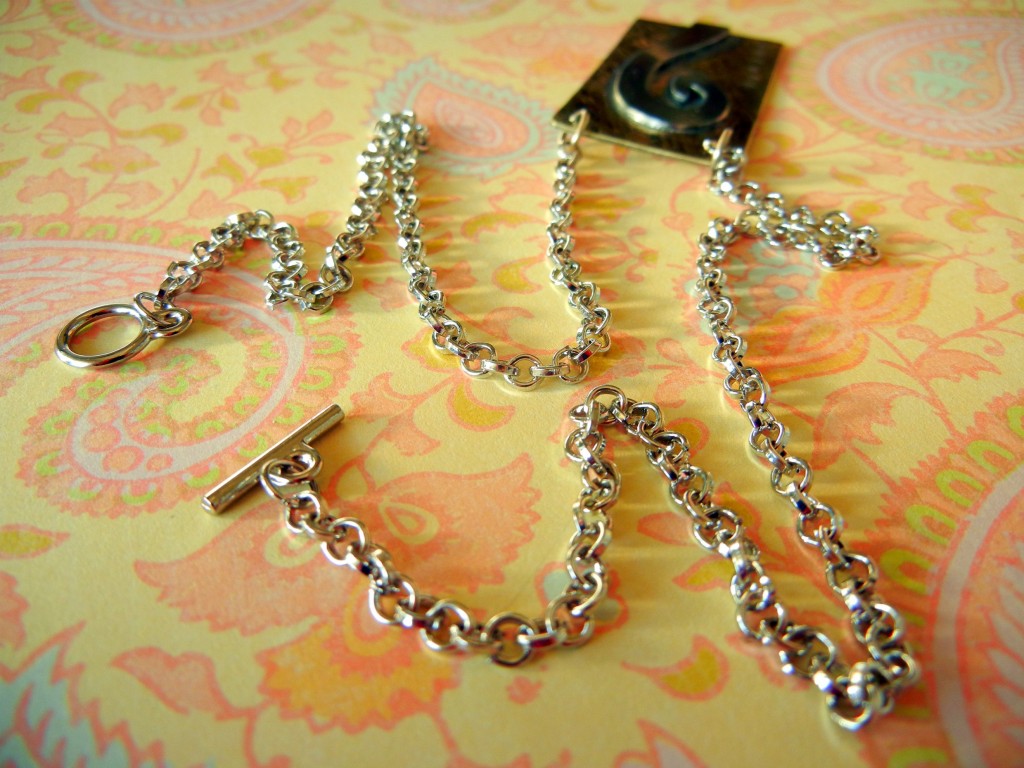
It is always better to have too much chain vs. not enough, so think of those extra links as a bonus you can use to make coordinating earrings. Or, do as I did and use two bracelets to make a necklace! Instead of removing extra links, you can also take advantage of the longer length by removing the bar from one and the loop from another to create a necklace!

convert-bracelets-into-necklace

My pendant had two holes, so I just attached on bracelet to each hole and viola! A 19

Here’s another example:

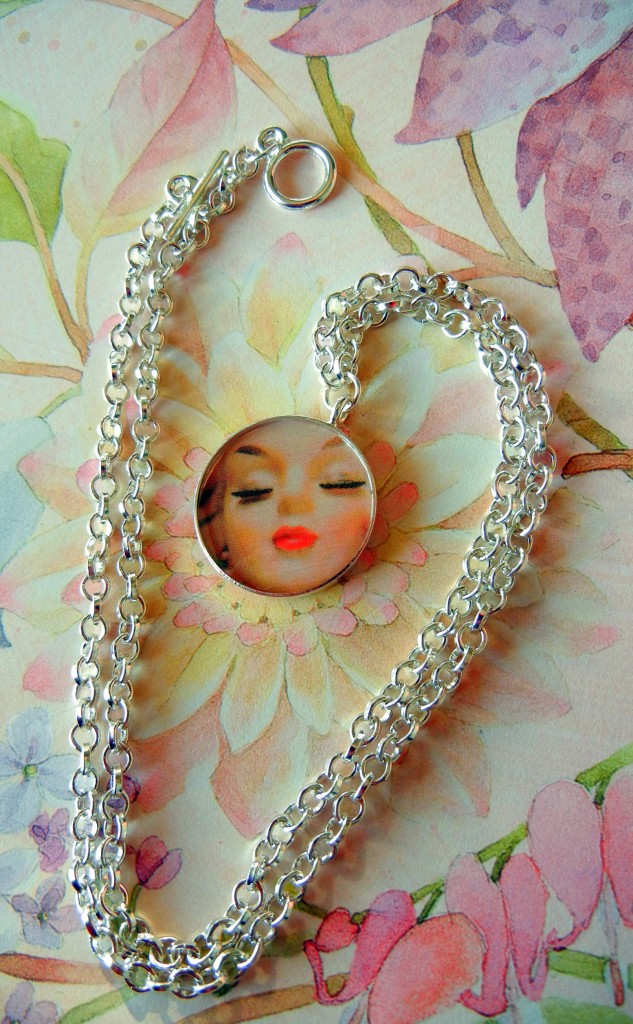
resin-necklace-pretty-lady

For this one, I attached the two bracelets with a single jump ring to my resin pendant.

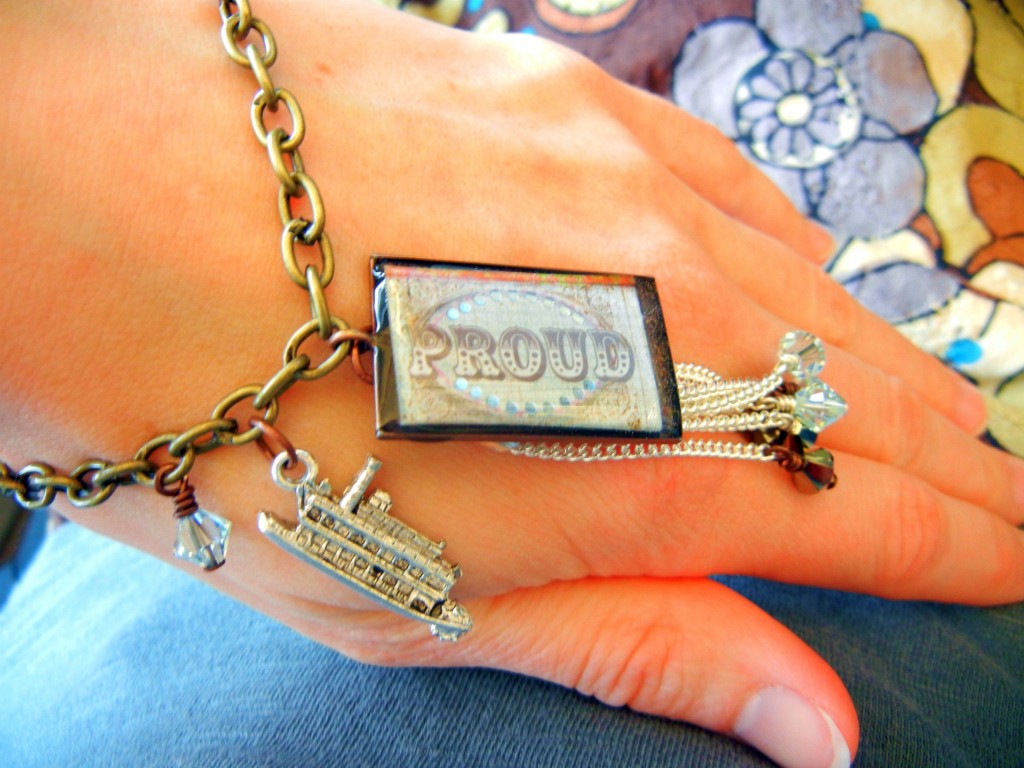
These extra long bracelets also make great anklets. And yes, they still make great bracelets! Here are two examples:

proud-mary-bracelet
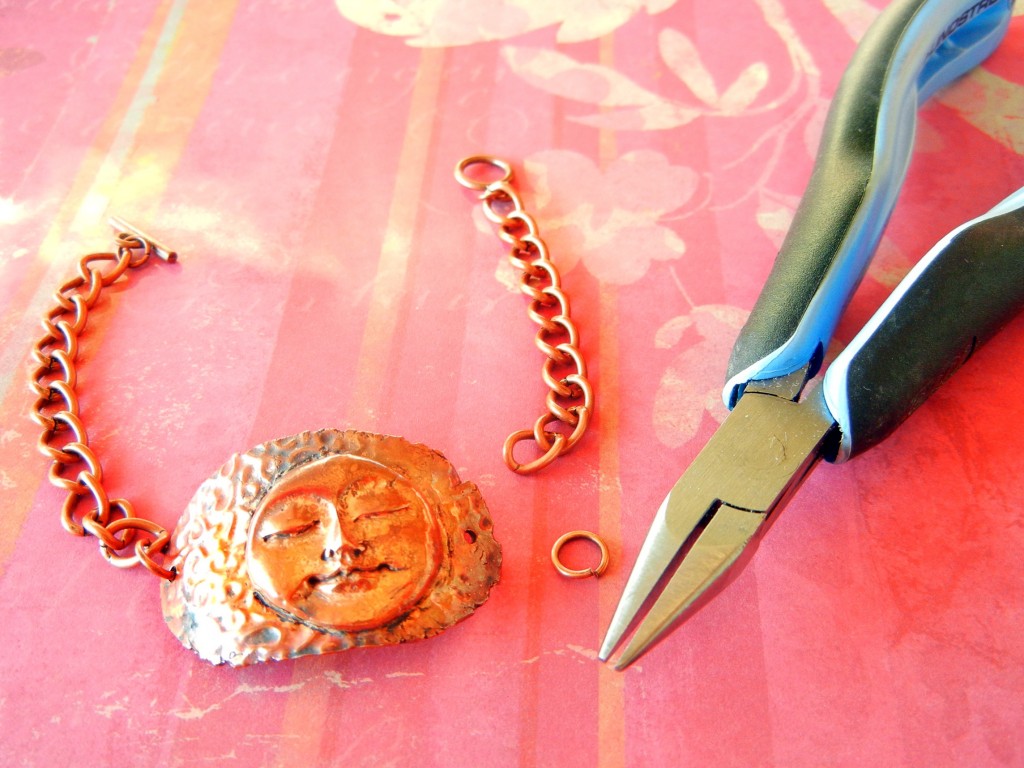
altered-chain-bracelet

I simply removed a section of chain and replaced it with my handmade copper clay connector.

You might have noticed that all the focals for these pieces are handmade. Browse our resin and bezels, metal-working tools and metal clay selection to get busy making your own!

Tips for sawing sheet metal with a jeweler's saw

February 15, 2012

Hi bloglandia! Today’s blog is about how to use a jeweler’s saw. Why? Because if you want to cut clean shapes out of metal without bending the metal, you need a saw. All metal shears, even the really nice ones, bend the metal, at least a bit. It is just the nature of the beast. Also, unless you have the hand strength of ~ I don’t even know who! ~ you probably need a saw to cut metal thicker than 24 gauge.

A saw also allows you to cut very intricate designs. Pierced is the term for designs that are cut from within the metal, as opposed to coming in from the edge. However, “pierced jewelry” brings up a whole different category of jewelry when you search online!

sawing-tools-rings-things
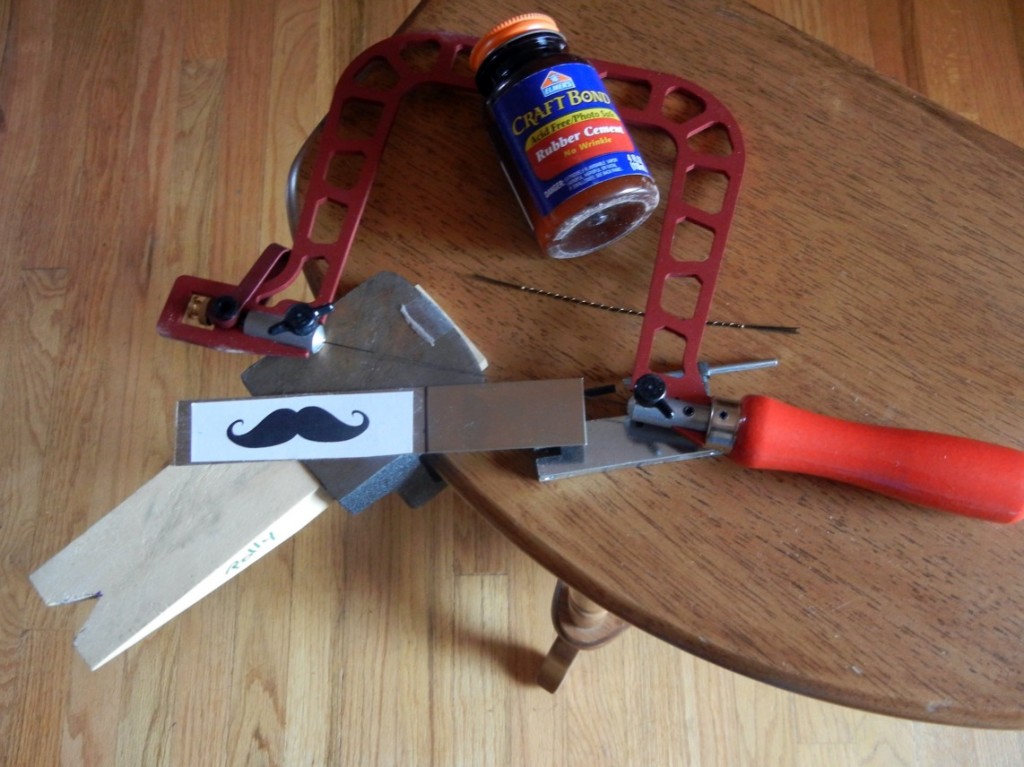
The basic tools needed for sawing metal.

Supplies needed for sawing your own metal shapes:

  • Jeweler’s saw frame – I’m using a pretty lux Knew Concepts frame, but the technique is the same no matter which saw frame you use.
  • Saw blades – Rings & Things offers both Form d’Arte (entry level) and Antilope (higher quality) saw blades. I think the higher quality is worth the price for less breakage, but it is up to you. Make sure to use the right size for the gauge of metal you are cutting.
  • Sheet metal – I like working with 20 gauge, but you might choose thinner metal if you’re planning to layer the pieces, or if you are working with pricey sterling silver.
  • Bench pin/ – I’m using a bench pin that’s been modified for sawing. Our bench block already has a V cutout. You’ll see why this V is necessary shortly.
  • Paper design – the more ornate the shape, the more you will challenge your skills!
  • Rubber cement – for adhering your design to the metal. Don’t think that you can draw your design onto the metal with a marker – it will smudge and blur and be impossible to follow. “Permanent” is a relative term!
  • Hole punch – optional – to pierce metal, you need to drill or punch a hole to insert the saw blade into. If you are sawing in from the edge of the metal, you don’t need a hole.
  • Cut Lube or beeswax – optional or not, depending on who you ask. Many people swear by it, but I typically prefer to saw without it. The lubricant is meant to keep the blade moving easily across the metal, but sometimes it gunks up the shavings and clogs the blade, so use it sparingly at first.

How to saw metal:

Adhere your design to sheet metal with rubber cement and let dry.

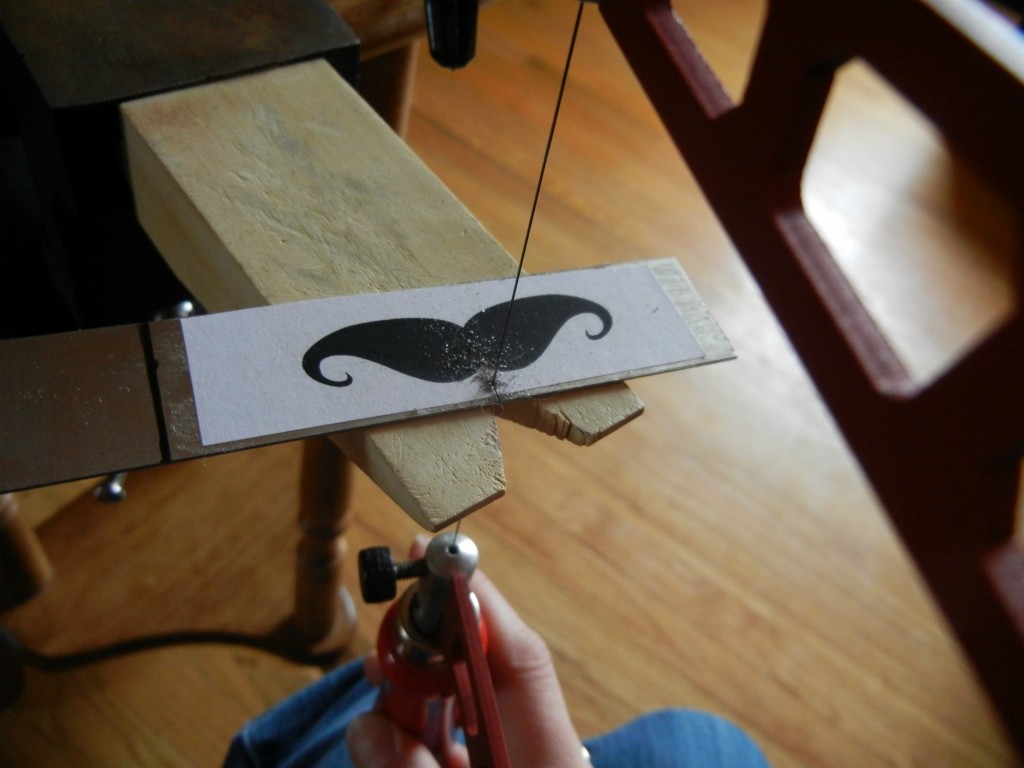
Insert saw blade into saw frame with the teeth pointing out (away from frame) and down (towards floor). Make sure you have the blade in there good and tight – a loose blade very quickly becomes a broken blade! Tension is key. (If you haven’t used a jeweler’s saw before, see post about Knew Concepts frames and tensioning.)

sawing-metal-rings-things
My left hand is holding the camera is this shot, but really it needs to be holding the metal down on both sides of the blade while I’m sawing.

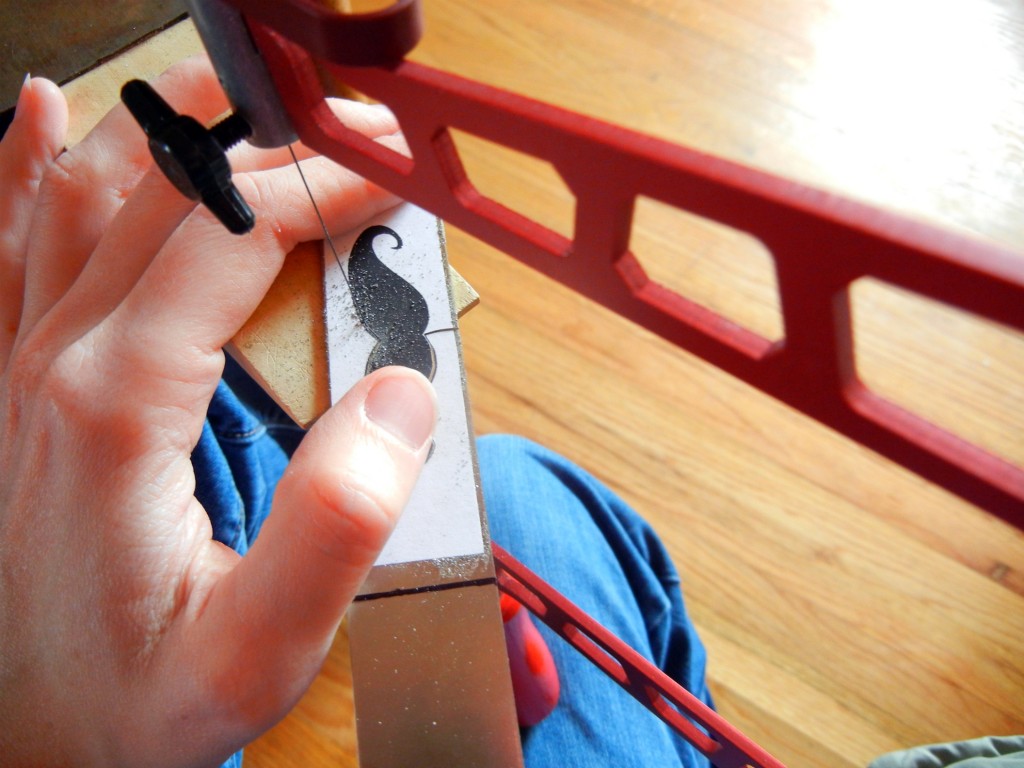
Hold your metal in place on the bench pin with your non-dominant hand.

sawing metal rings and things tutorial
Supporting the metal on both sides of the blade keeps it from wobbling. Less wobbling = easier sawing.

Hold the saw frame between 90 and 45 degrees to your metal and start sawing. You are only sawing (removing metal) on the down stroke, but try to keep the sawing motion smooth and even on both the upstroke and down stroke.

sawing-nickel-silver-rings-things
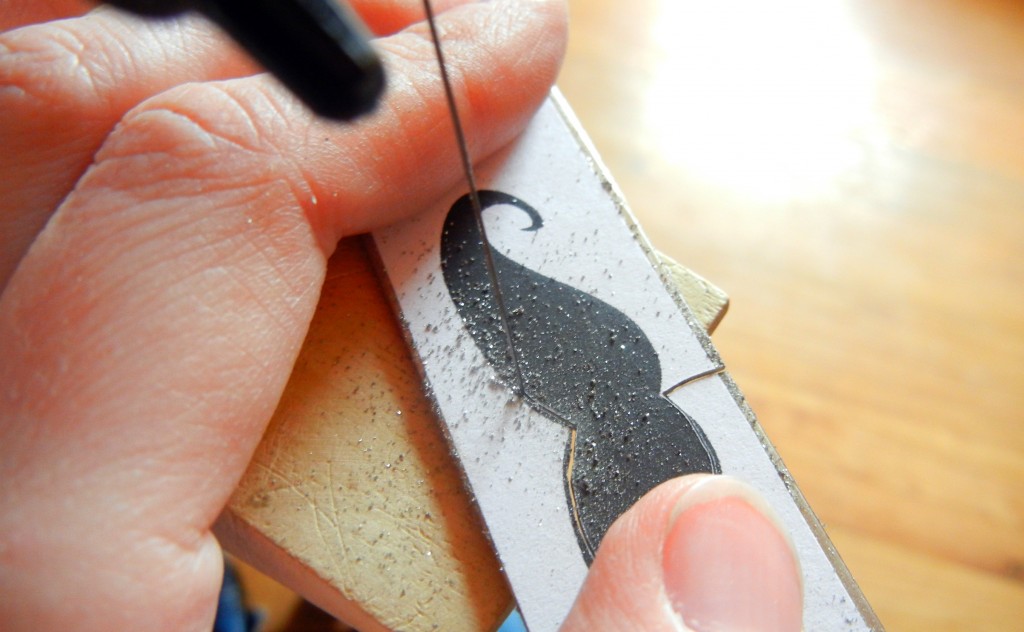
I try to keep the saw fairly stationary and rotate the metal to follow my pattern.

Follow your design! It takes practice, but you’ll pretty quickly learn how to maneuver your metal and/or saw to follow curves. Blow away the shavings every so often so you can stay true to your pattern. If the blade seems to be catching or it feels jerky, check your tension and/or apply a little lubricant to the blade.

Moving too quickly, especially when changing direction, is an easy way to break your blade. Smooth and steady wins the race. One of the most difficult things at first is not pressing too hard with the hand that’s holding the metal down. Hand cramps hurt, so take frequent breaks and be conscious of what you’re doing. It doesn’t take much pressure to keep your metal in place. It does, however, take that V-cut bench pin. You will (er, I did) break lots of blades and have tons of problems if you try to hang your metal off the edge of a table rather than supporting it on both sides of that V.

It is always a good idea to wear safety glasses while you are sawing. Everyone – yes EVERYONE – breaks blades, and you’ll notice yourself getting your face closer and closer to your project. So again, take frequent breaks and also be sure to set up your sawing station at a height that is comfortable for you.

Happy sawing!

Edited January 2022 to update links.

How to choose a Knew Concepts saw for jewelry making

February 5, 2012

Hi bloglandia! Do your jewelry projects ever seem to stack up, one on top of another? Mine do. Maybe you are able to focus entirely on each project, finish and clean up before moving on to the next, but it seems I always have 10 different things going at once. Right now I’ve got a bunch of metal shapes to saw out and then solder together. The next few blog posts are going to use a few of these projects to highlight different tools and techniques, starting with the Knew Concepts saw frames and ending with Blazer micro torches.

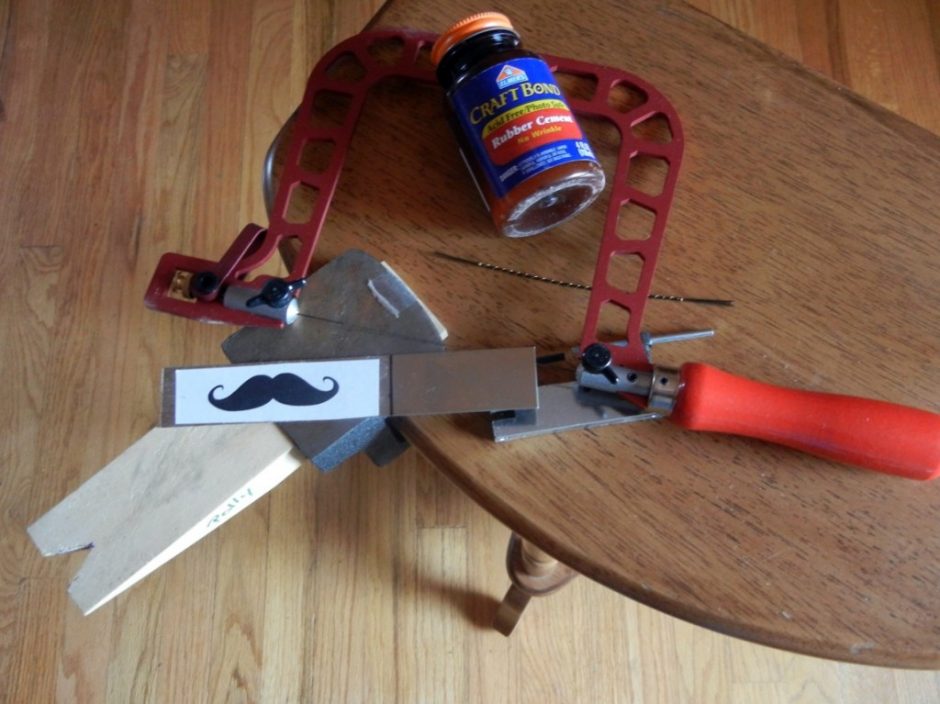
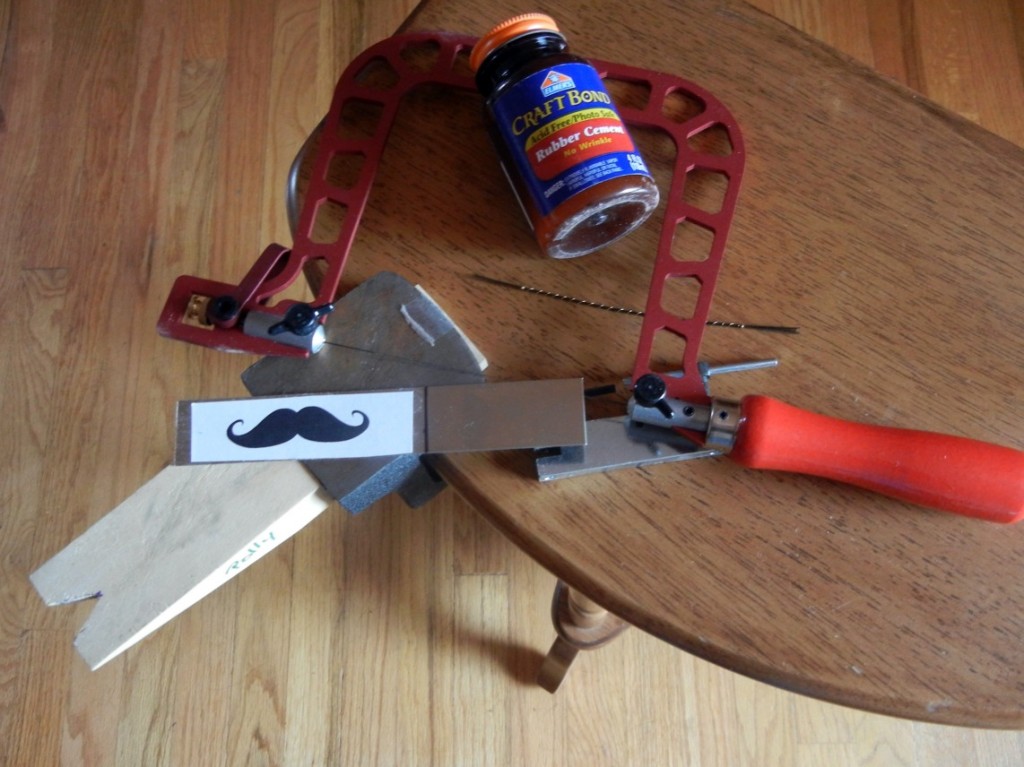
sawing-tools
Saw frame, saw blades, bench pin, rubber cement, sheet metal and a design! Ready to saw!

So, what is new about Knew saw frames, other than their distinctive shape and bright red color? Well, most of us learned to saw with standard adjustable saw frames. In order to get the right tension on your blade with these frames, you press the frame between your body and a table or other sturdy object. By inserting the blade while the frame is bowed, the blade gets pulled tight into place when you release that bow. But – ow! That action bruised my breastbone. And when you break saw blades as often as I did starting out, it becomes a real chore.

Knew Concepts saw frames are different in a number of ways. Obviously, they are bright fire engine red. They are extremely lightweight, which makes them more comfortable to hold. And they are available in a whole lotta different models! How to pick?

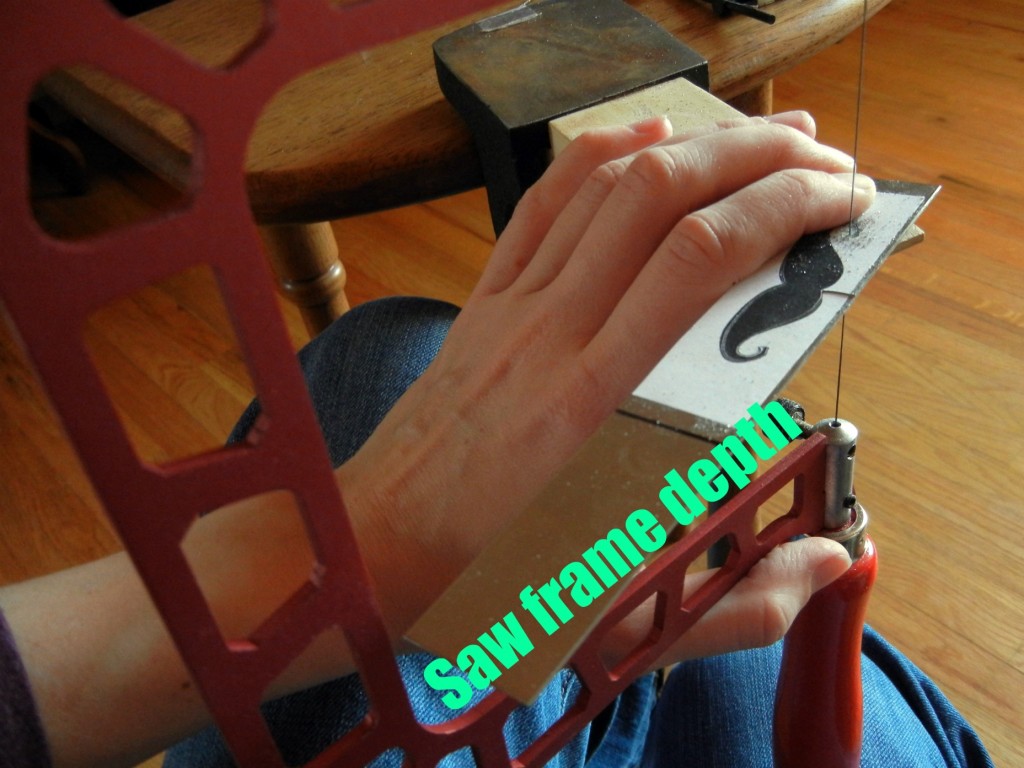
1. Size. 3″, 5″ or 8″? My vote is for 5″, unless you plan to work with very large or very long pieces of metal, in which case the 8″ frame makes sense. If your hands tire easily and you only work with small pieces, than the 3″ frame might meet your needs. I’m a middle of the road kind of girl! Note that the size refers to the depth of the frame. The height for all Knew frames is fixed. This means you won’t be able to re-use broken blades by shortening your frame. (But wouldn’t you rather not break the blade to begin with? Knew frames help with that!)

saw-frame-depth
If you want to pierce the very end of a long strip of metal, you need either a large frame or the swivel model.

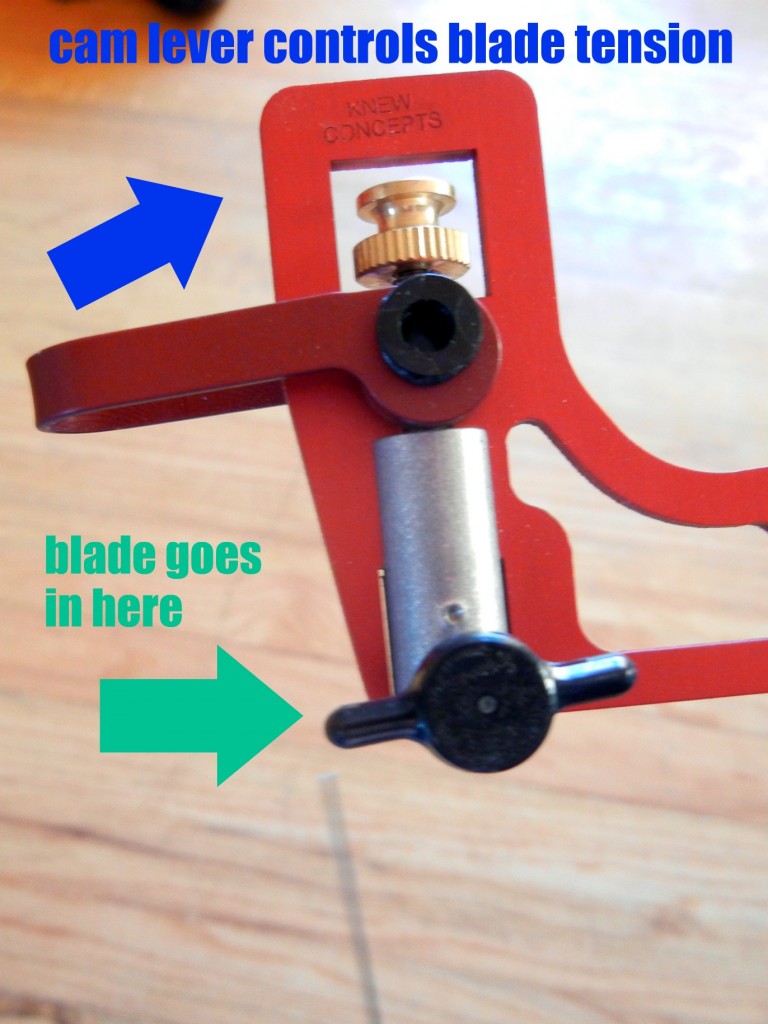
2. Blade tension options. Screw tension or cam-lever tension? I 100% endorse the cam-lever tension because the tension does not change when you switch blades. Instead of sandwiching the frame between your chest and the table every time you break a blade or move to a different area of a pierced design, you simply flip the cam-lever switch! What a relief!

cam-lever-tension
The cam-lever option is totally worth a few extra bucks.

3. To swivel – or not to swivel? That is the final question. Personally, I found the swivel to be an extra complication that I didn’t really want to mess with. However, if having a really lightweight saw that can still get into tight corners is important, buying the small 3″ saw frame with the cam-lever and swivel would accomplish that goal.

After testing the different options, I decided the 5″ Cam-Lever Tension model was my favorite (69-169-52 – it is the one with the staff choice icon in our online store). It is comfortable to hold and large enough to handle pretty much any jewelry project I would undertake.

Of course, the first question should have been: do I really need a Knew Concepts saw frame when I can buy a standard jeweler’s saw for less money? The answer depends on how you define need! If budget is the #1 concern, then maybe the answer is no. An adjustable saw frame has been the industry standard for years. However, if you want to invest in a tool that will serve you well for years, and which will make the – let’s face it – somewhat tedious job of sawing more enjoyable, then yes, you kneed a Knew frame! ~ Cindy

Edited January 2022 to update links.

DIY copper etching tutorial

December 28, 2011

It is easy to etch your own designs into metal for jewelry. This tutorial will teach you how! (Check out our etching kit too!)

etched-stamped-metal
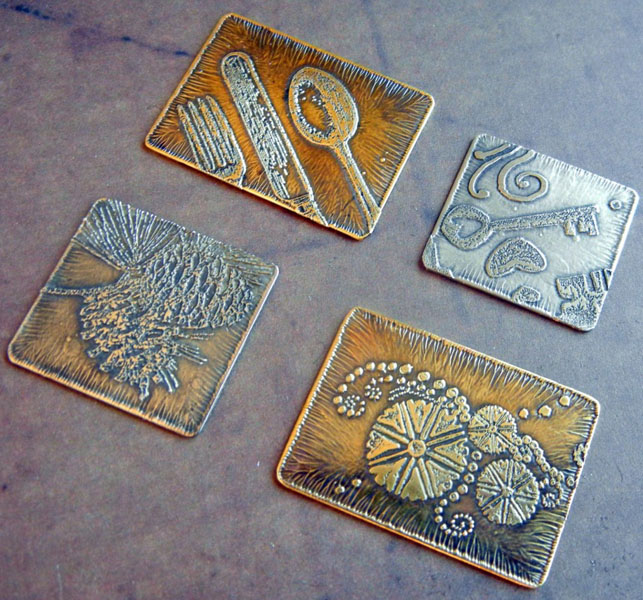
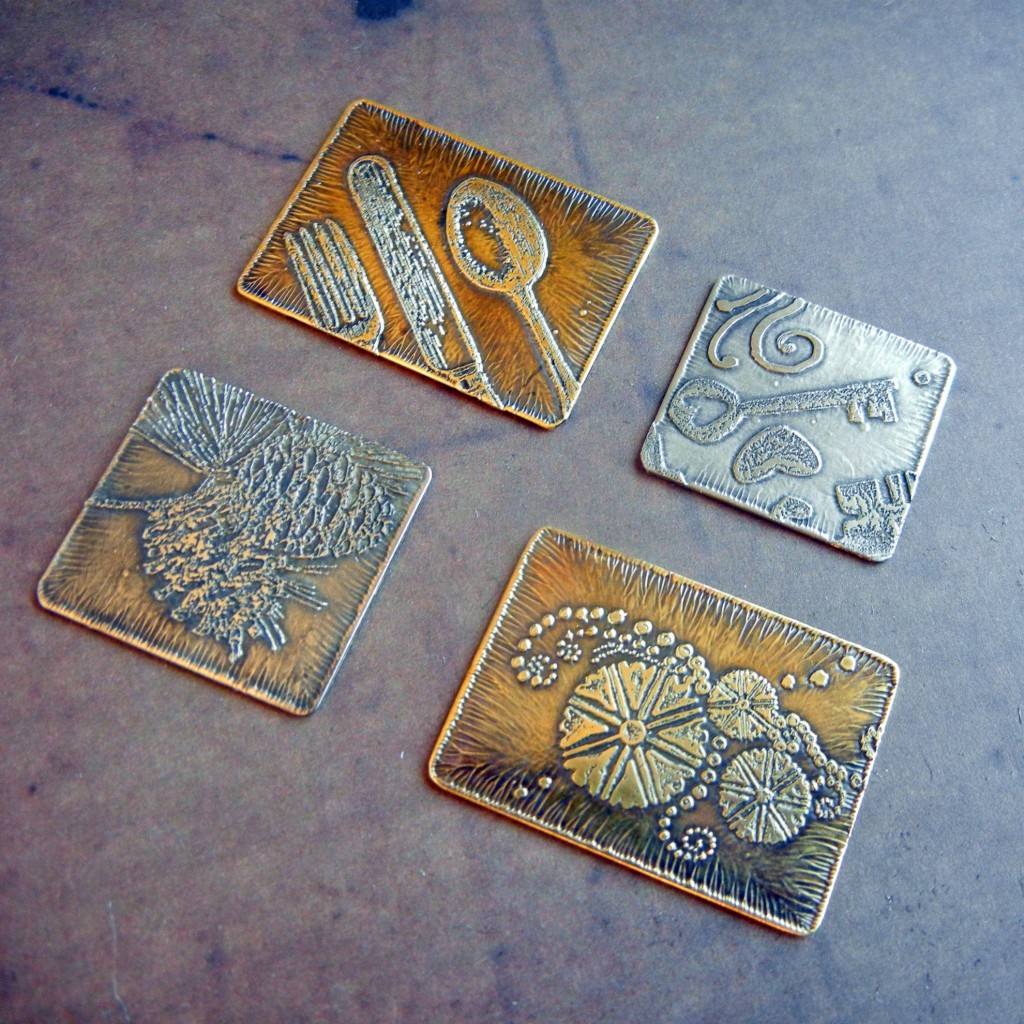
Rubber stamp designs etched into brass sheet metal.

Before you begin, please read the safety considerations for etching metal with chemicals blog post.

You’ll also probably want to read the design considerations for etching metal blog post too!

Now, here are the steps for etching metal with ferric chloride:

1. Choose your metal(s). Ferric chloride works on copper, brass and nickel silver. It will not work on actual silver (fine or sterling). Do NOT use ferric chloride on aluminum. Metal as thin as 24-gauge can be etched – just leave it in for less time than you would for thicker metal. If you want to etch both sides or etch really deeply, use at least 20-gauge metal.

2. Clean metal with Penny Brite (our favorite) or an abrasive cleaner and scrubbie. The metal must be very clean. Water will sheet off (not bead up) on the surface when it is truly clean.

3. Apply resist. Stazon ink, Sharpies, toner transfers – there are many options! (Read the design considerations.)

Continue Reading…

Copper Washers: A beautiful addition to your Jewelry Designs

October 31, 2011

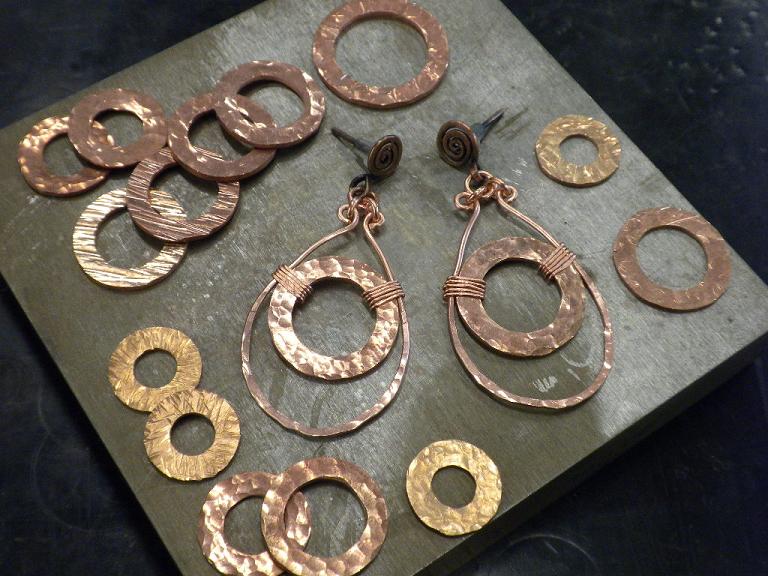
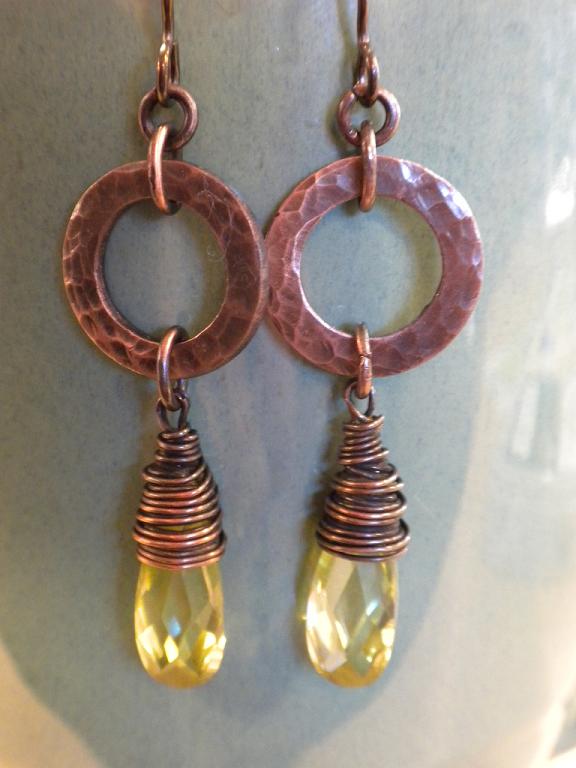
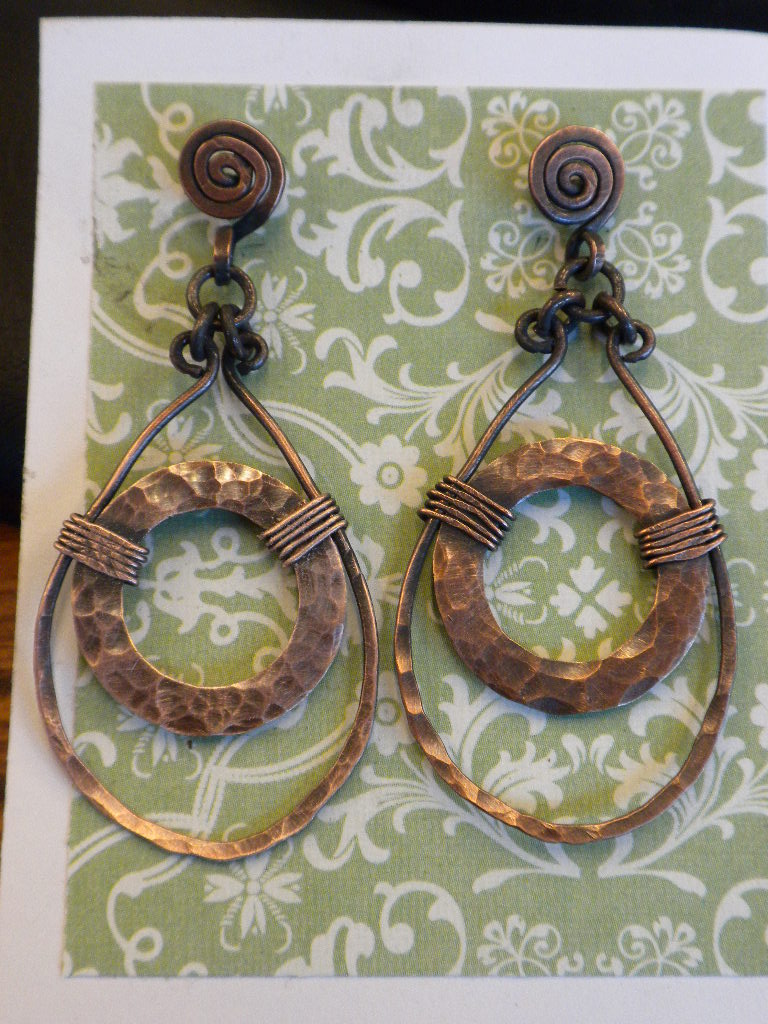
Earrings made with copper washers and copper wire

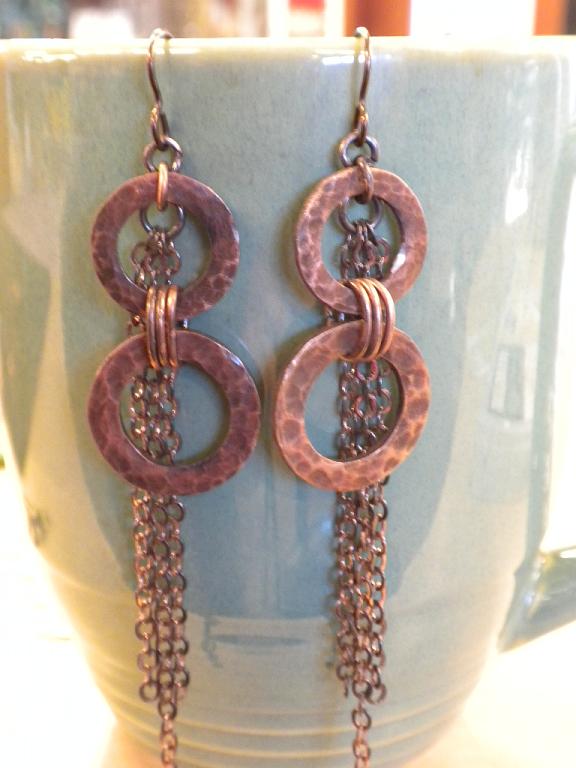
Copper washers may seem overly industrial for jewelry, but with a little manipulation, they work great. Ever since we started carrying them a couple of weeks ago, I have been experimenting and the results have been fabulous! And I have only scratched the surfaced. These washers would be great linked as bracelets, soldered together for fabulous bib necklaces or dapped into pretty dome shapes!

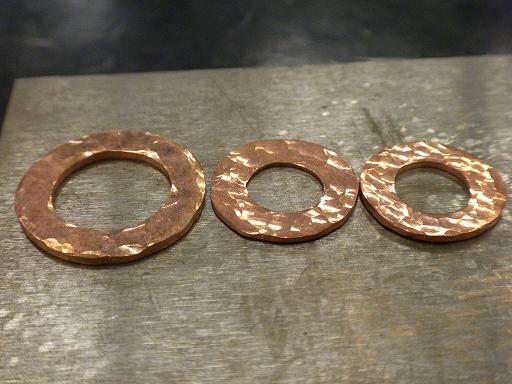
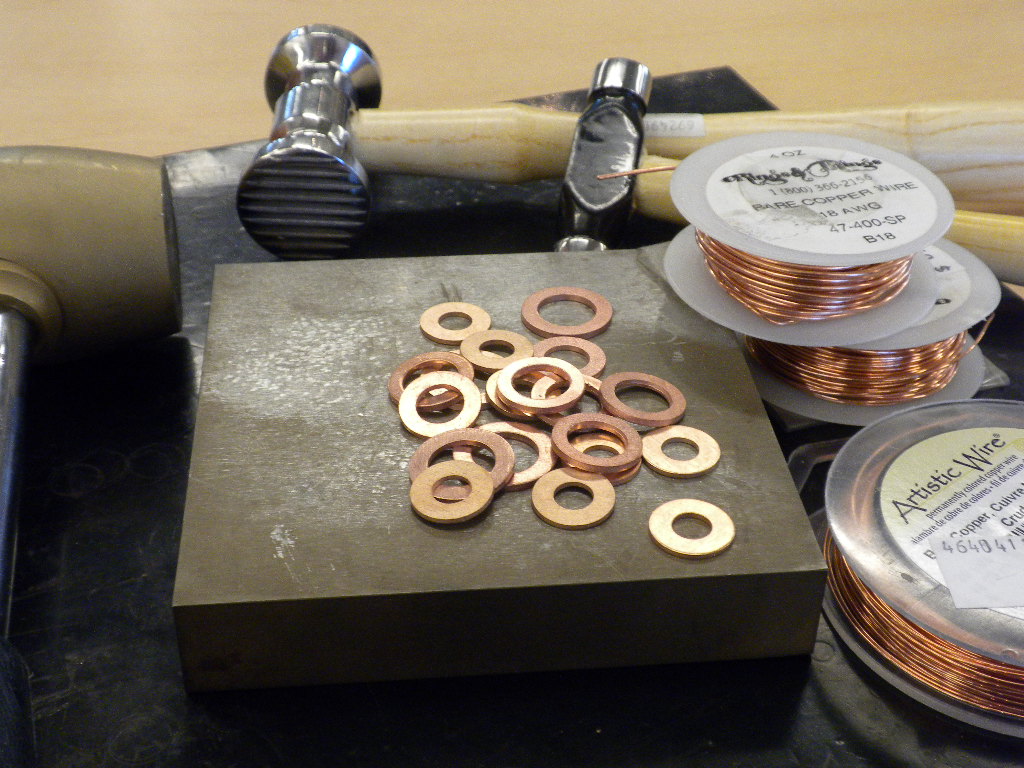
Everything you need to create hammered copper links: Washers, steel block, and hammers. Oh and some copper wire can add a nice touch!

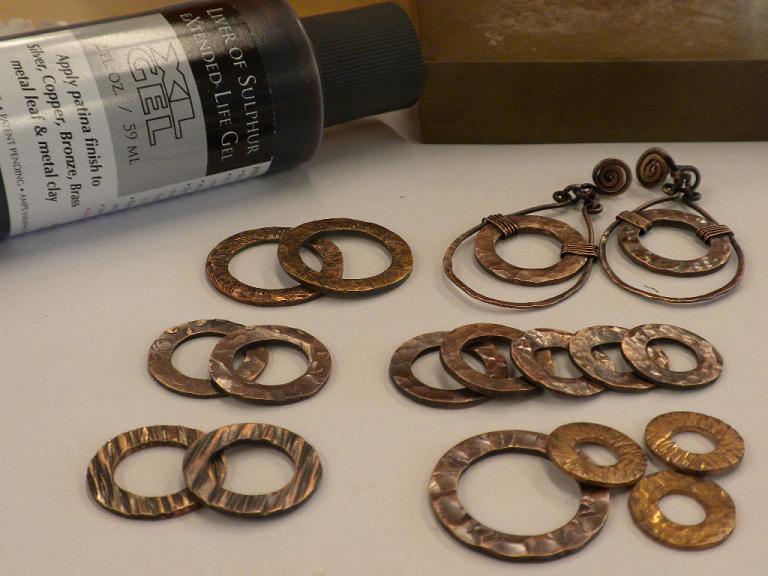
I chose to distress the washers using a steel block and multiple hammers. Then I used a little liver of sulfur to blacken the washers and some steel wool to buff them up. The result is the antiqued hammered links that can be used anywhere you would use any other link.

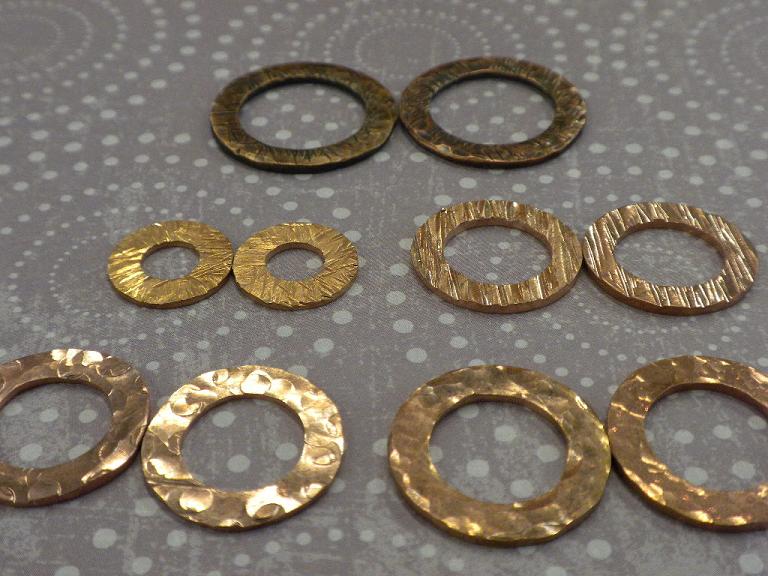
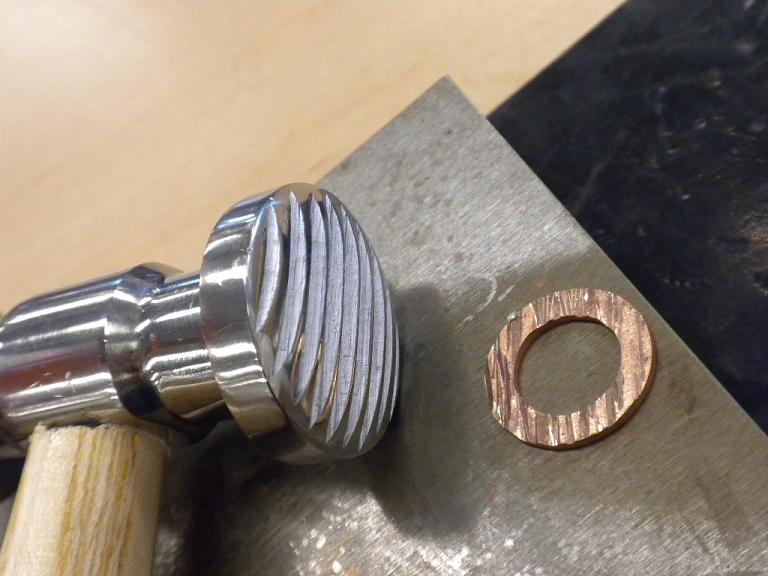
Cool lines created by a texturizing hammer!

Hammered look created using a ball pein or chasing hammer

Look at all the pretty washers! The assortment pack is great because there are several sizes.

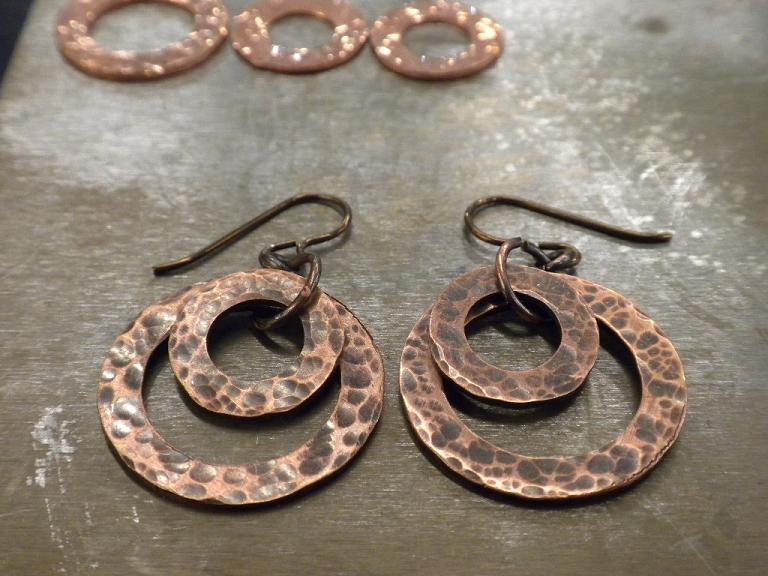
In the center are the earrings seen above before being antiqued!

A little liver of sulfur will easily blacken your washers since they are solid copper. These are all the same washers as above!

Earrings made with copper washers and cubic zirconia briolettes! I love the new cubic zirconia briolettes that we are carrying!

Hammered copper washers with a little chain 🙂

Two sizes of hammered washers, slightly sanded to show off the deep hammering

Well I hope you have enjoyed my washer blog! Please feel free to ask me any questions about the washers, tools or beads that I used. :0

~~Tiffany

Suggested supplies for the designs in this blog:

Solid copper jump rings are nice, because it’s great to say that nothing in your design is plated. But they are only available in a few sizes, so I love to have the assorted copper jump ring mix on hand too, because then I always have the right size.