Browsing Tag

saw frames

springing forward!

March 30, 2012

Blink and you miss it – March is already behind us! Here in Spokane we were teased with one gorgeous sunny day last weekend…following by a week of pouring rain. The Bead Show crew has found pockets of nice weather here and there, but spring is a most changeable season.

unfurl-metal-necklace-cindy
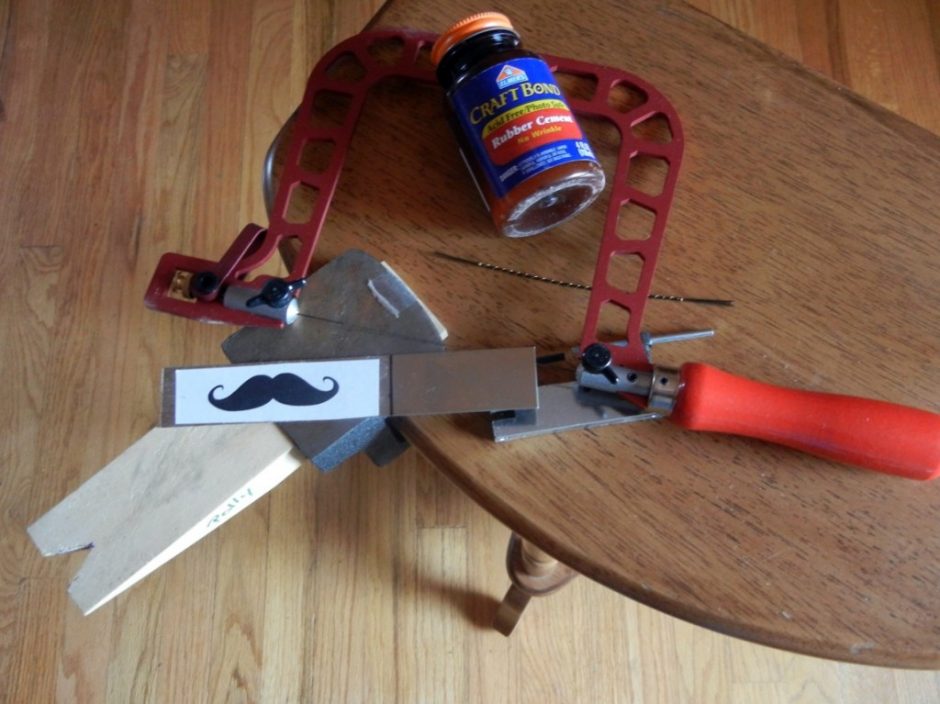
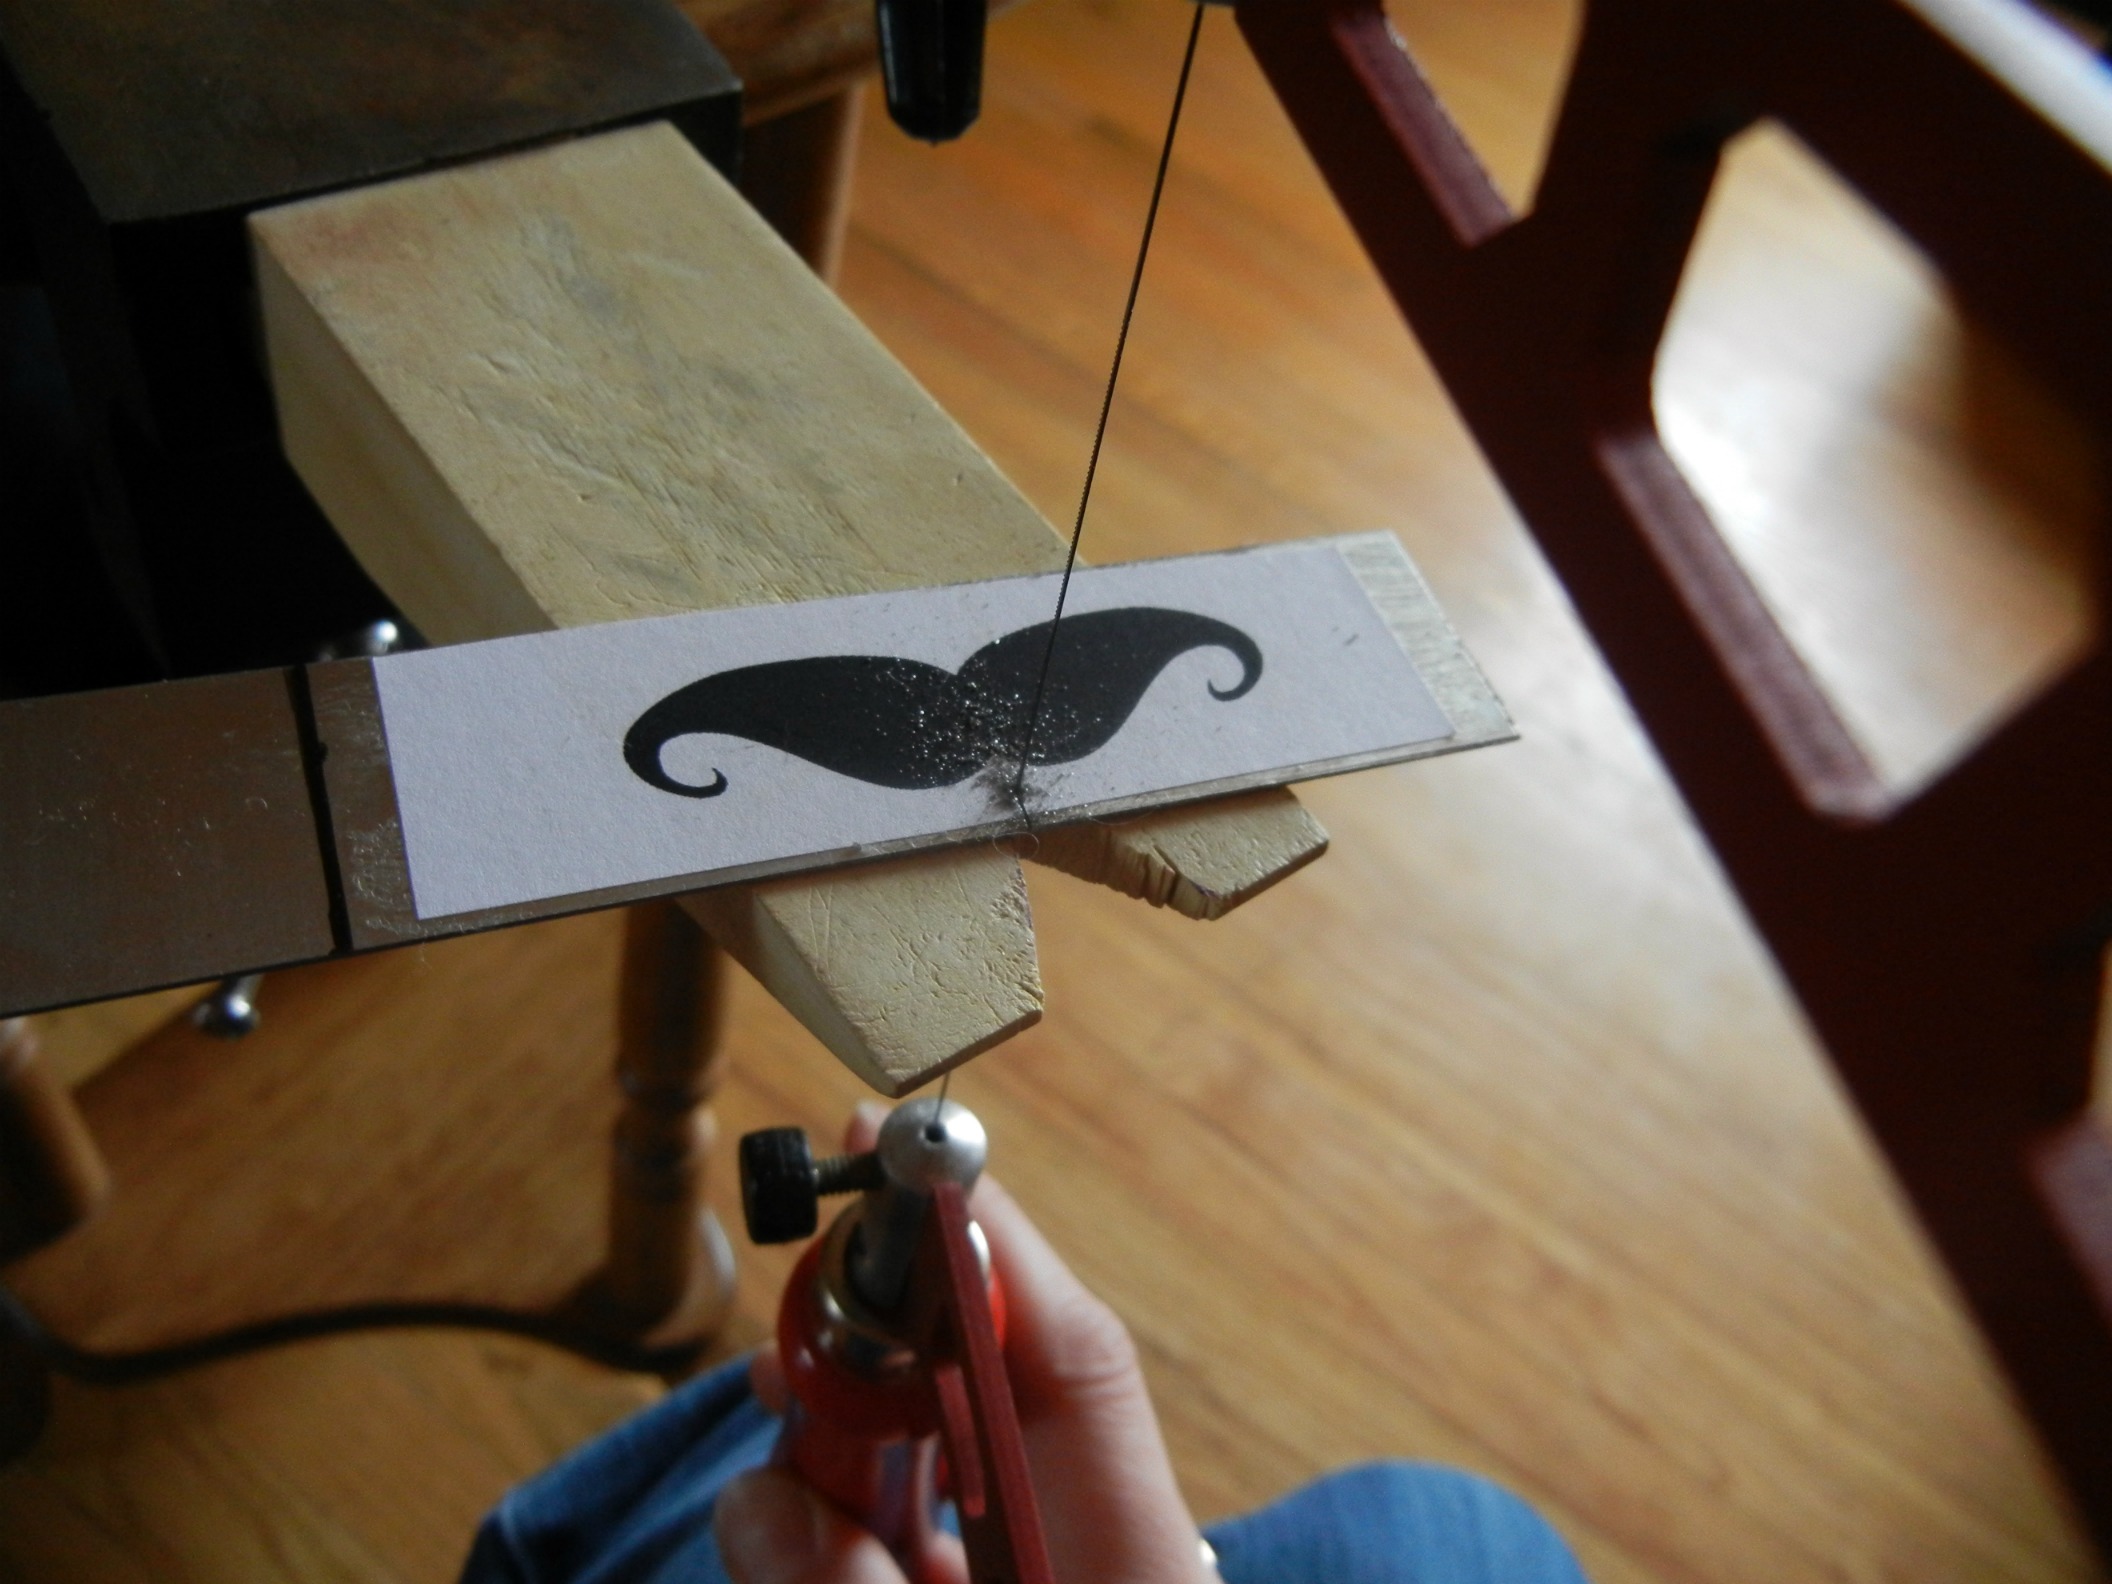
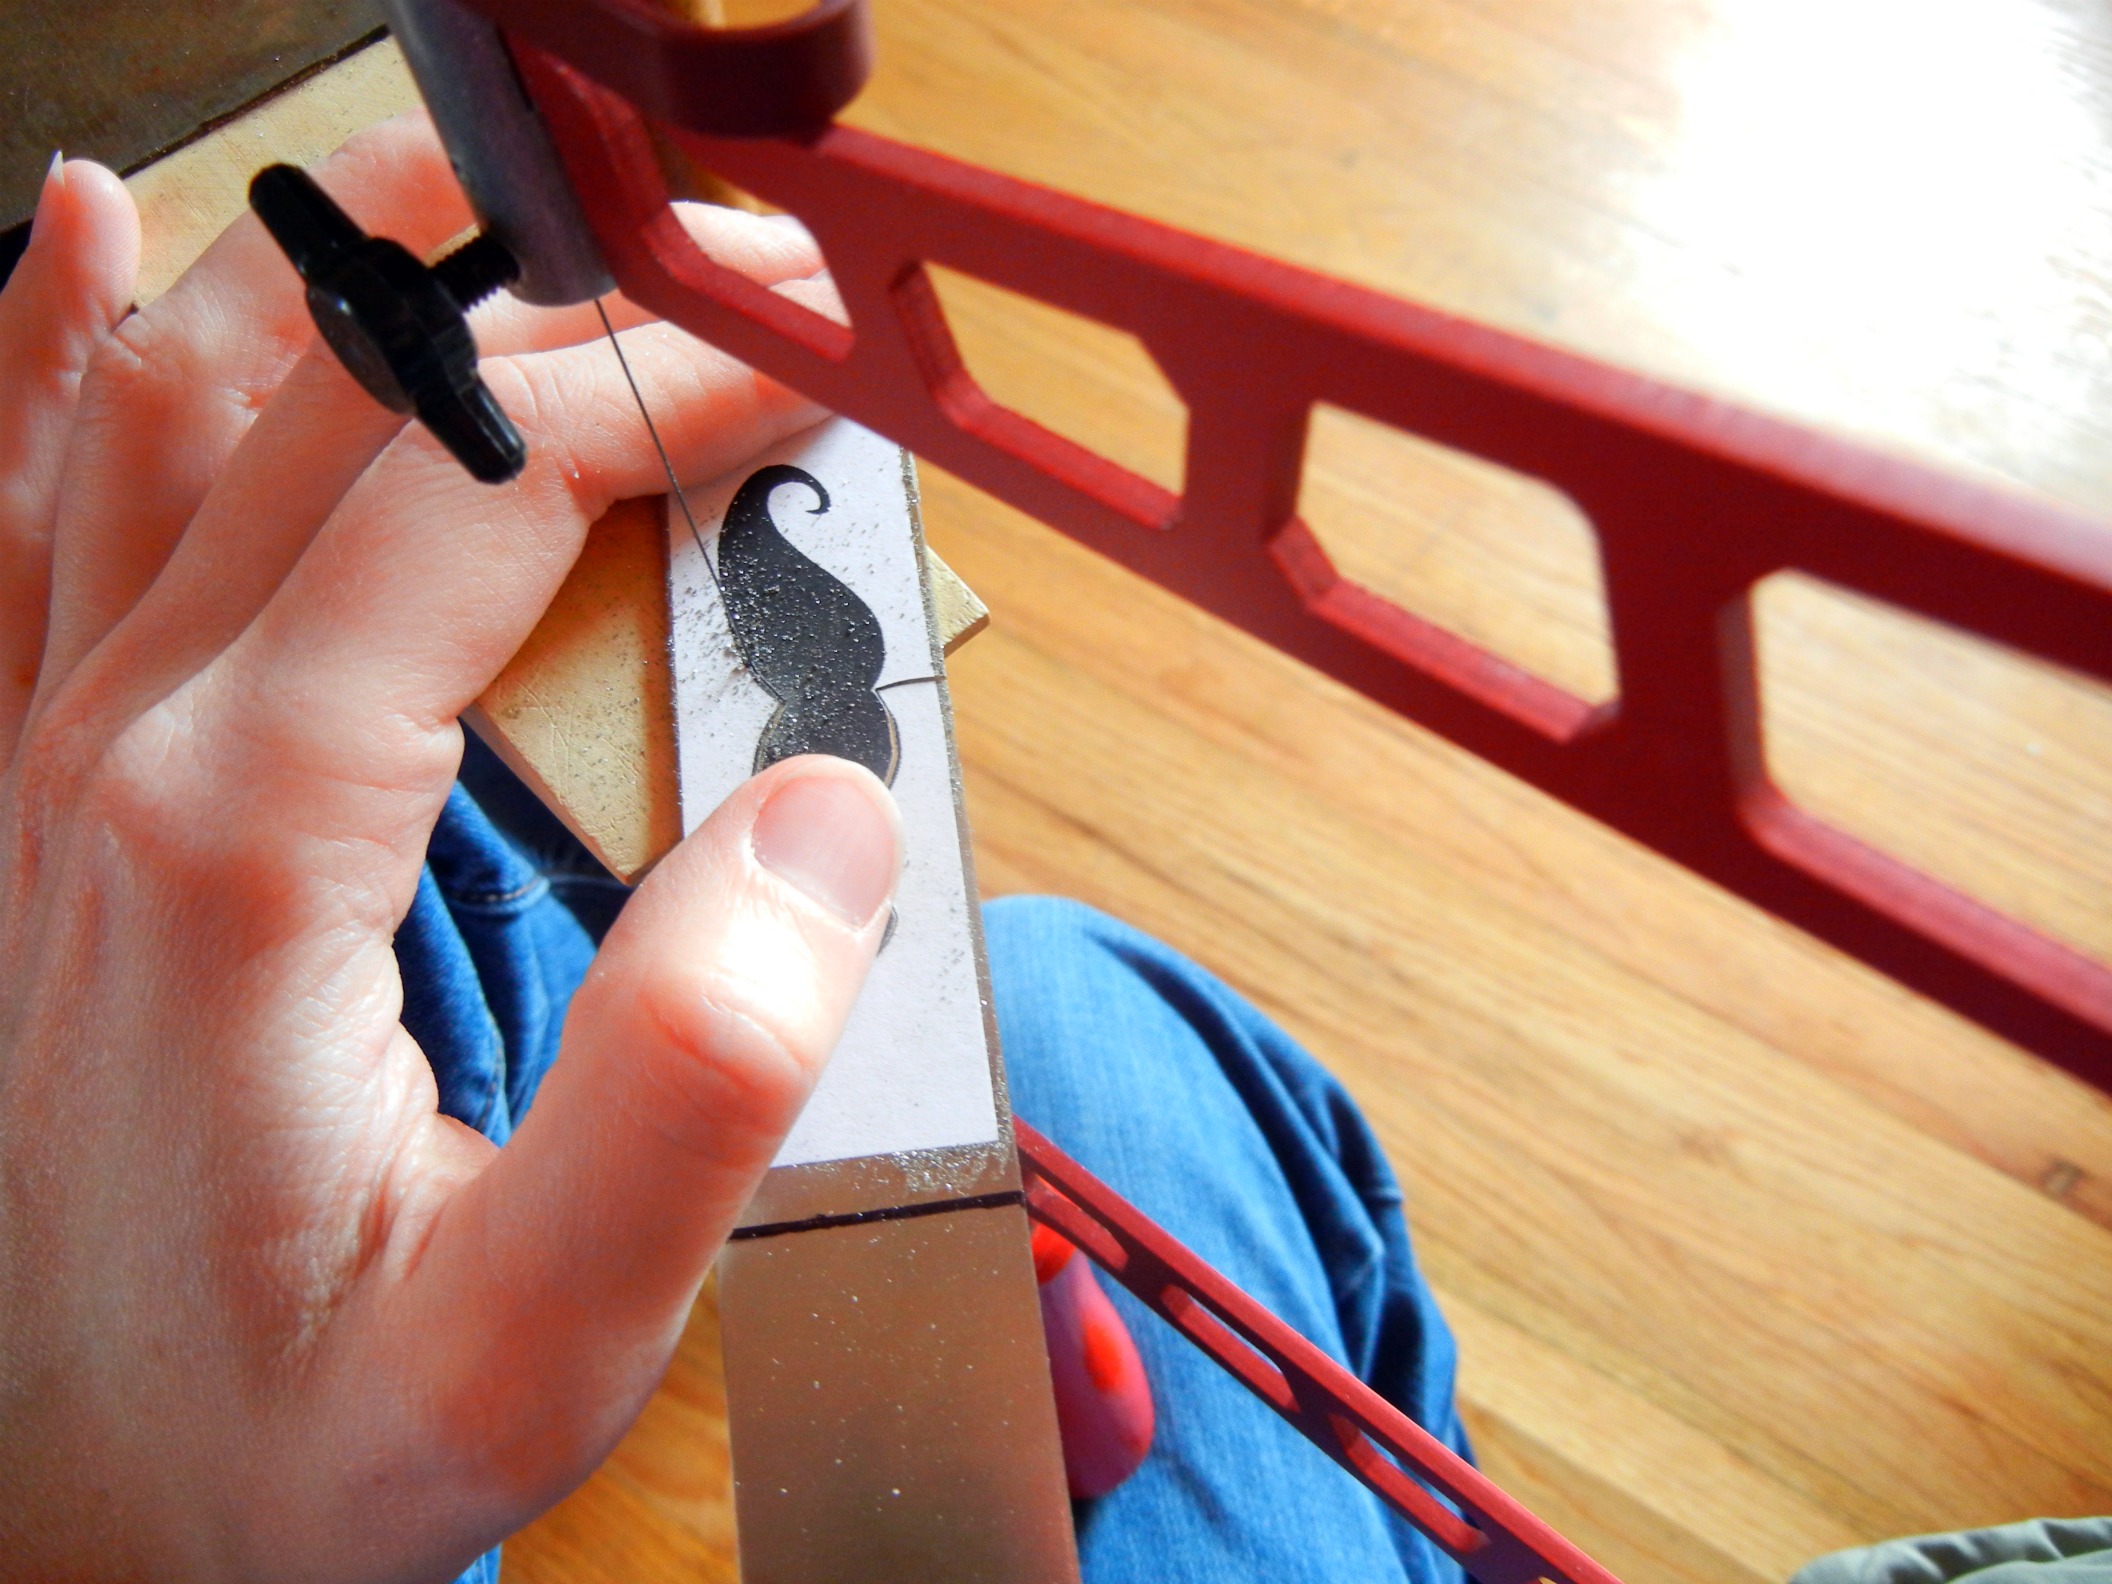
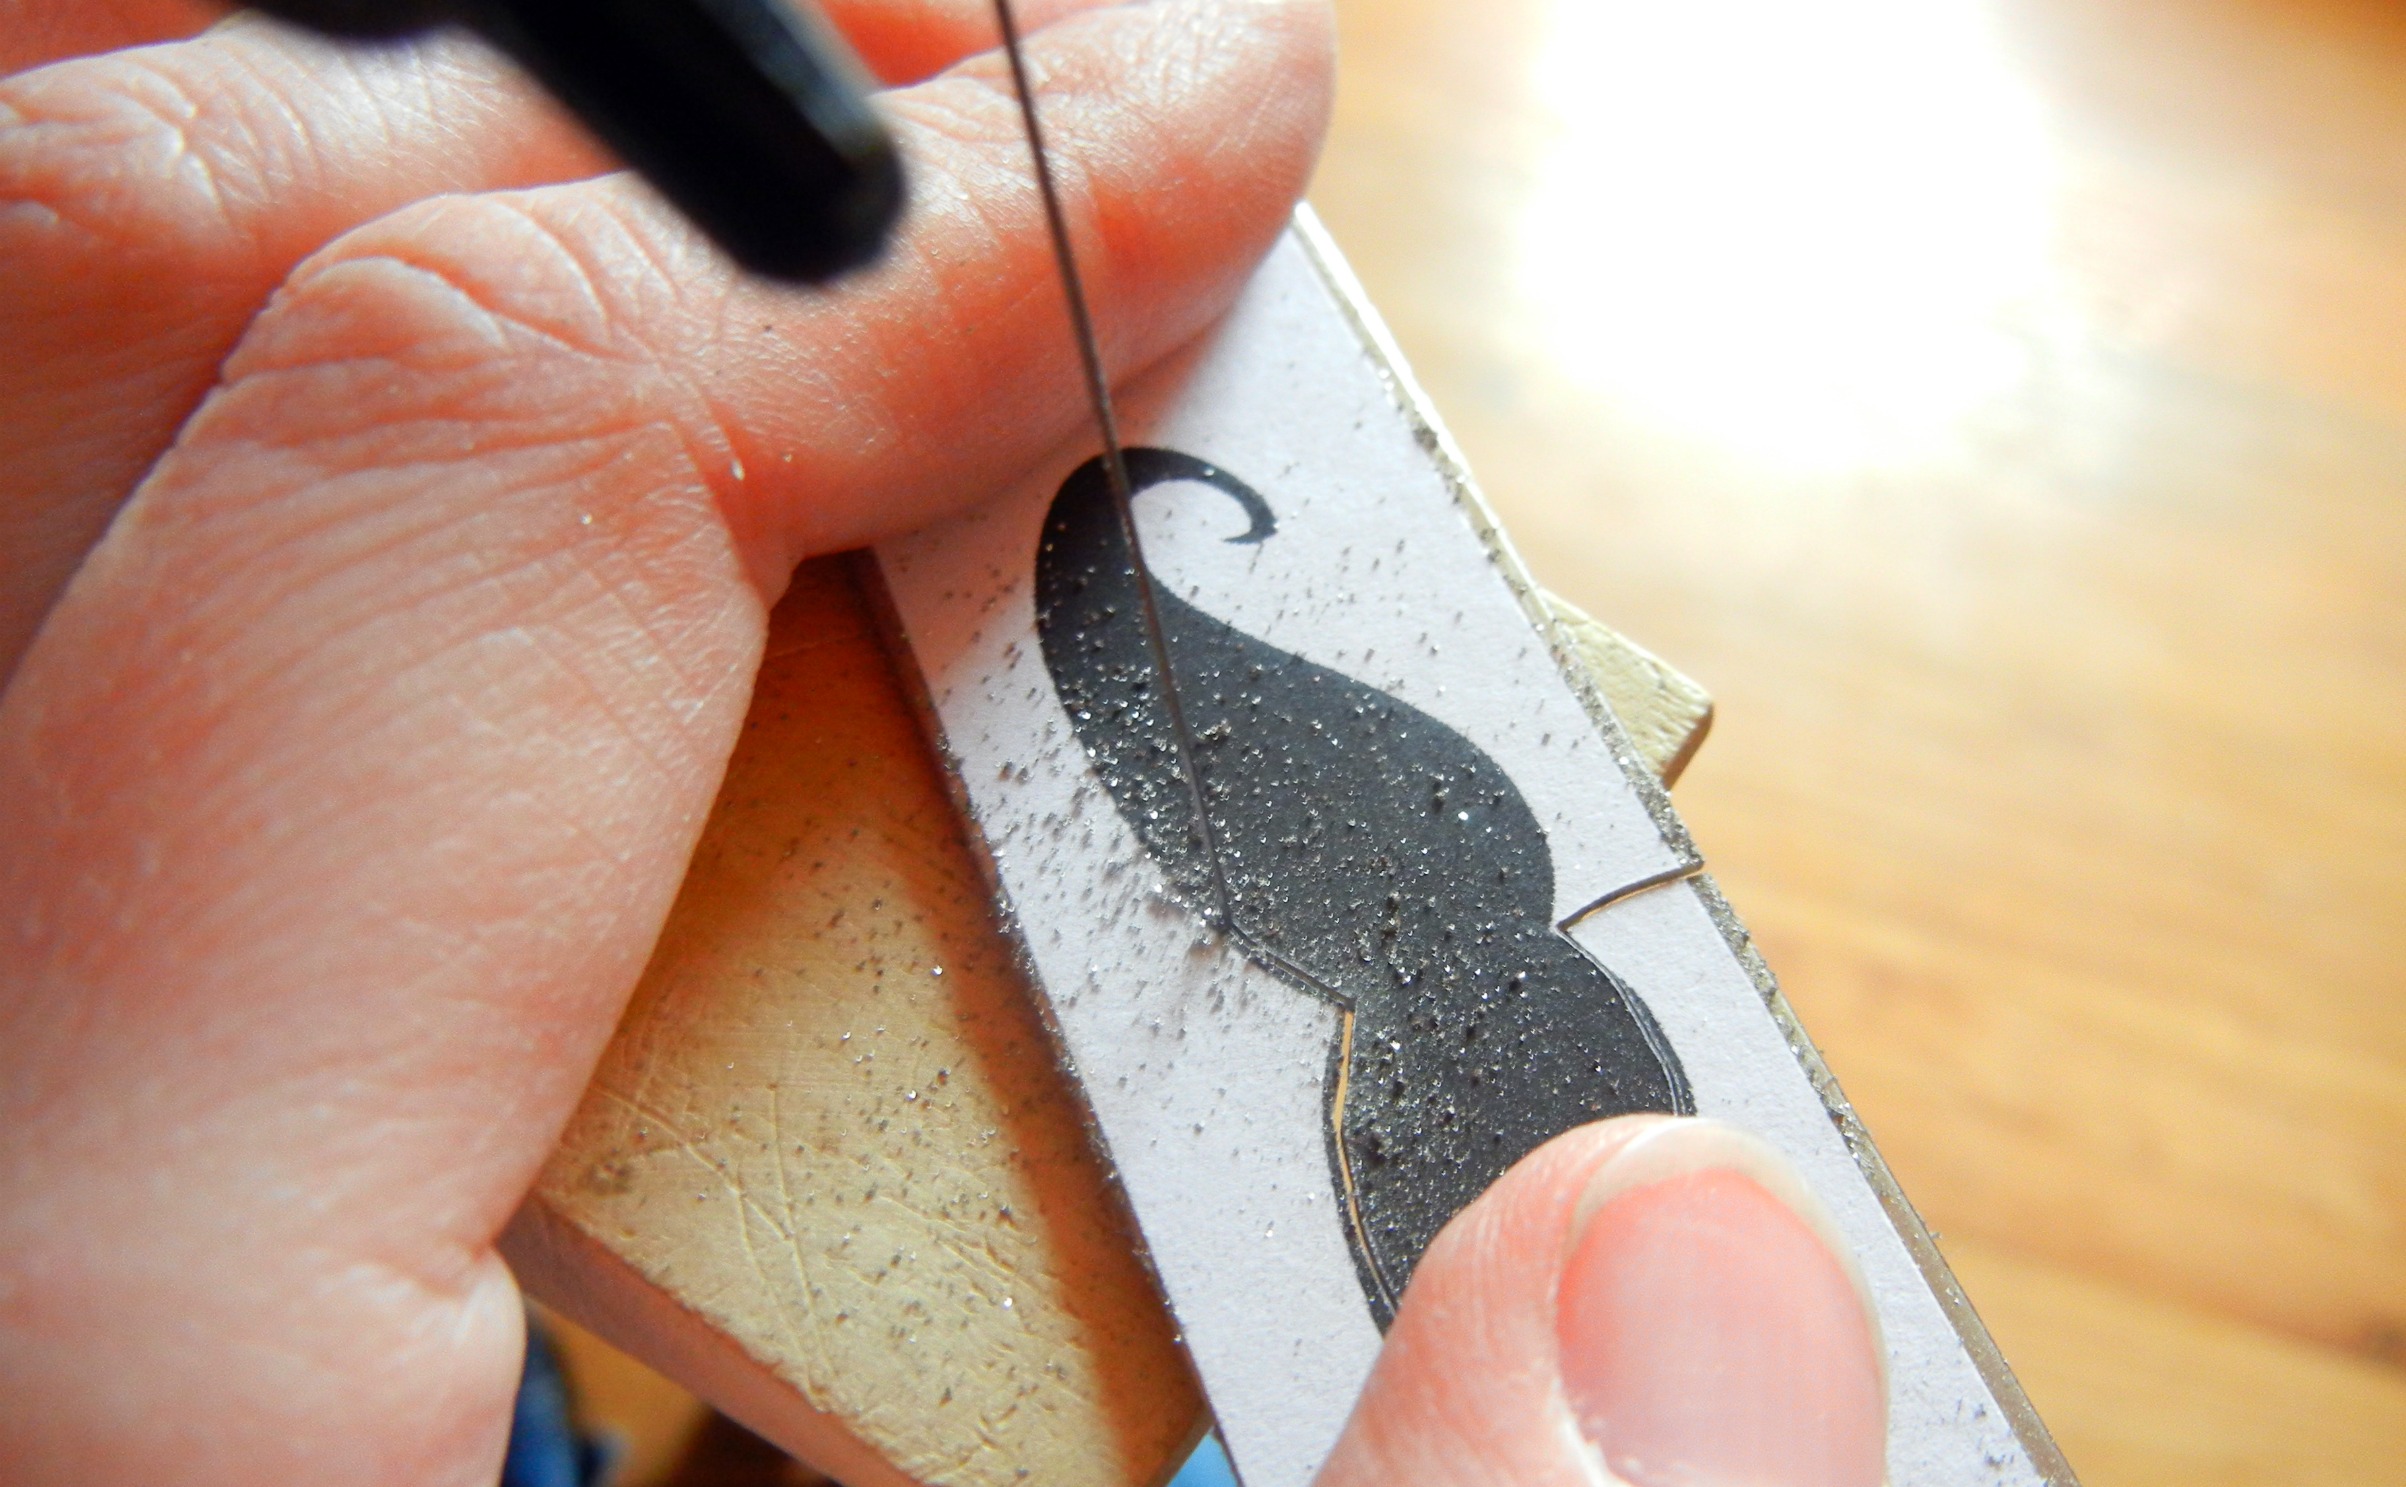
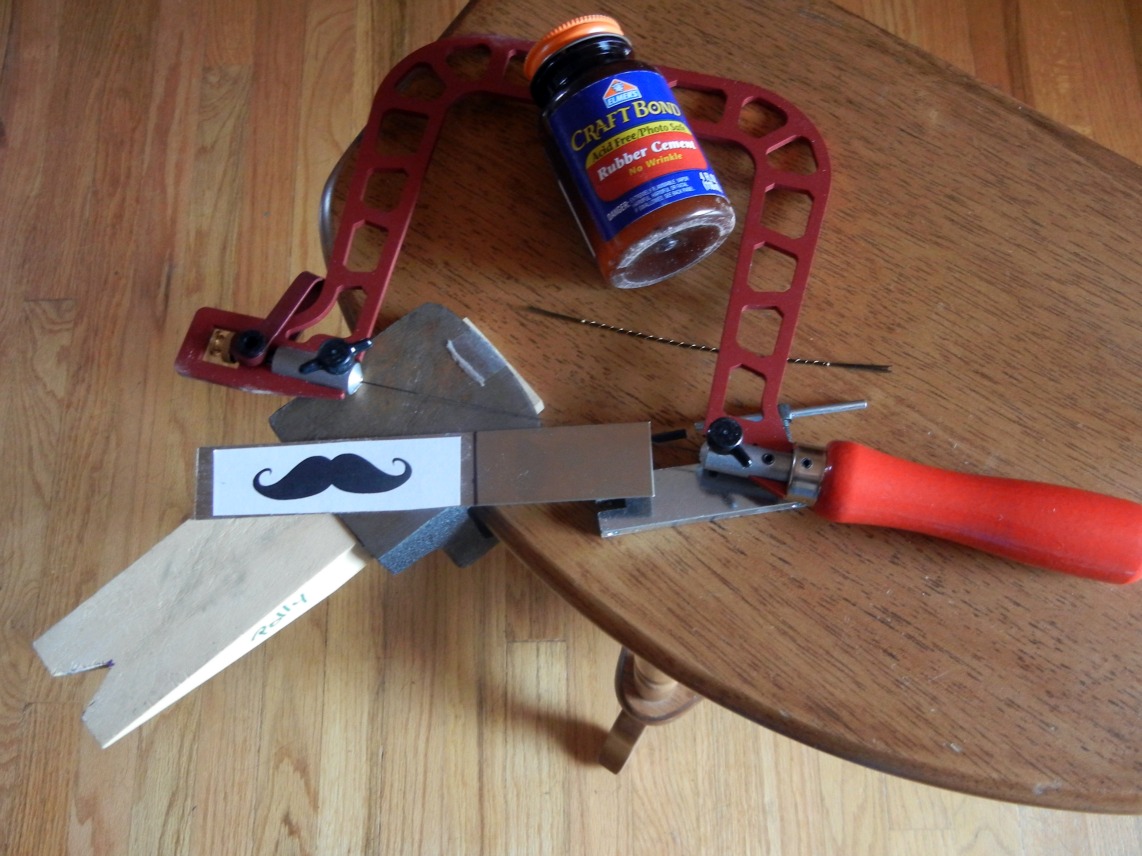
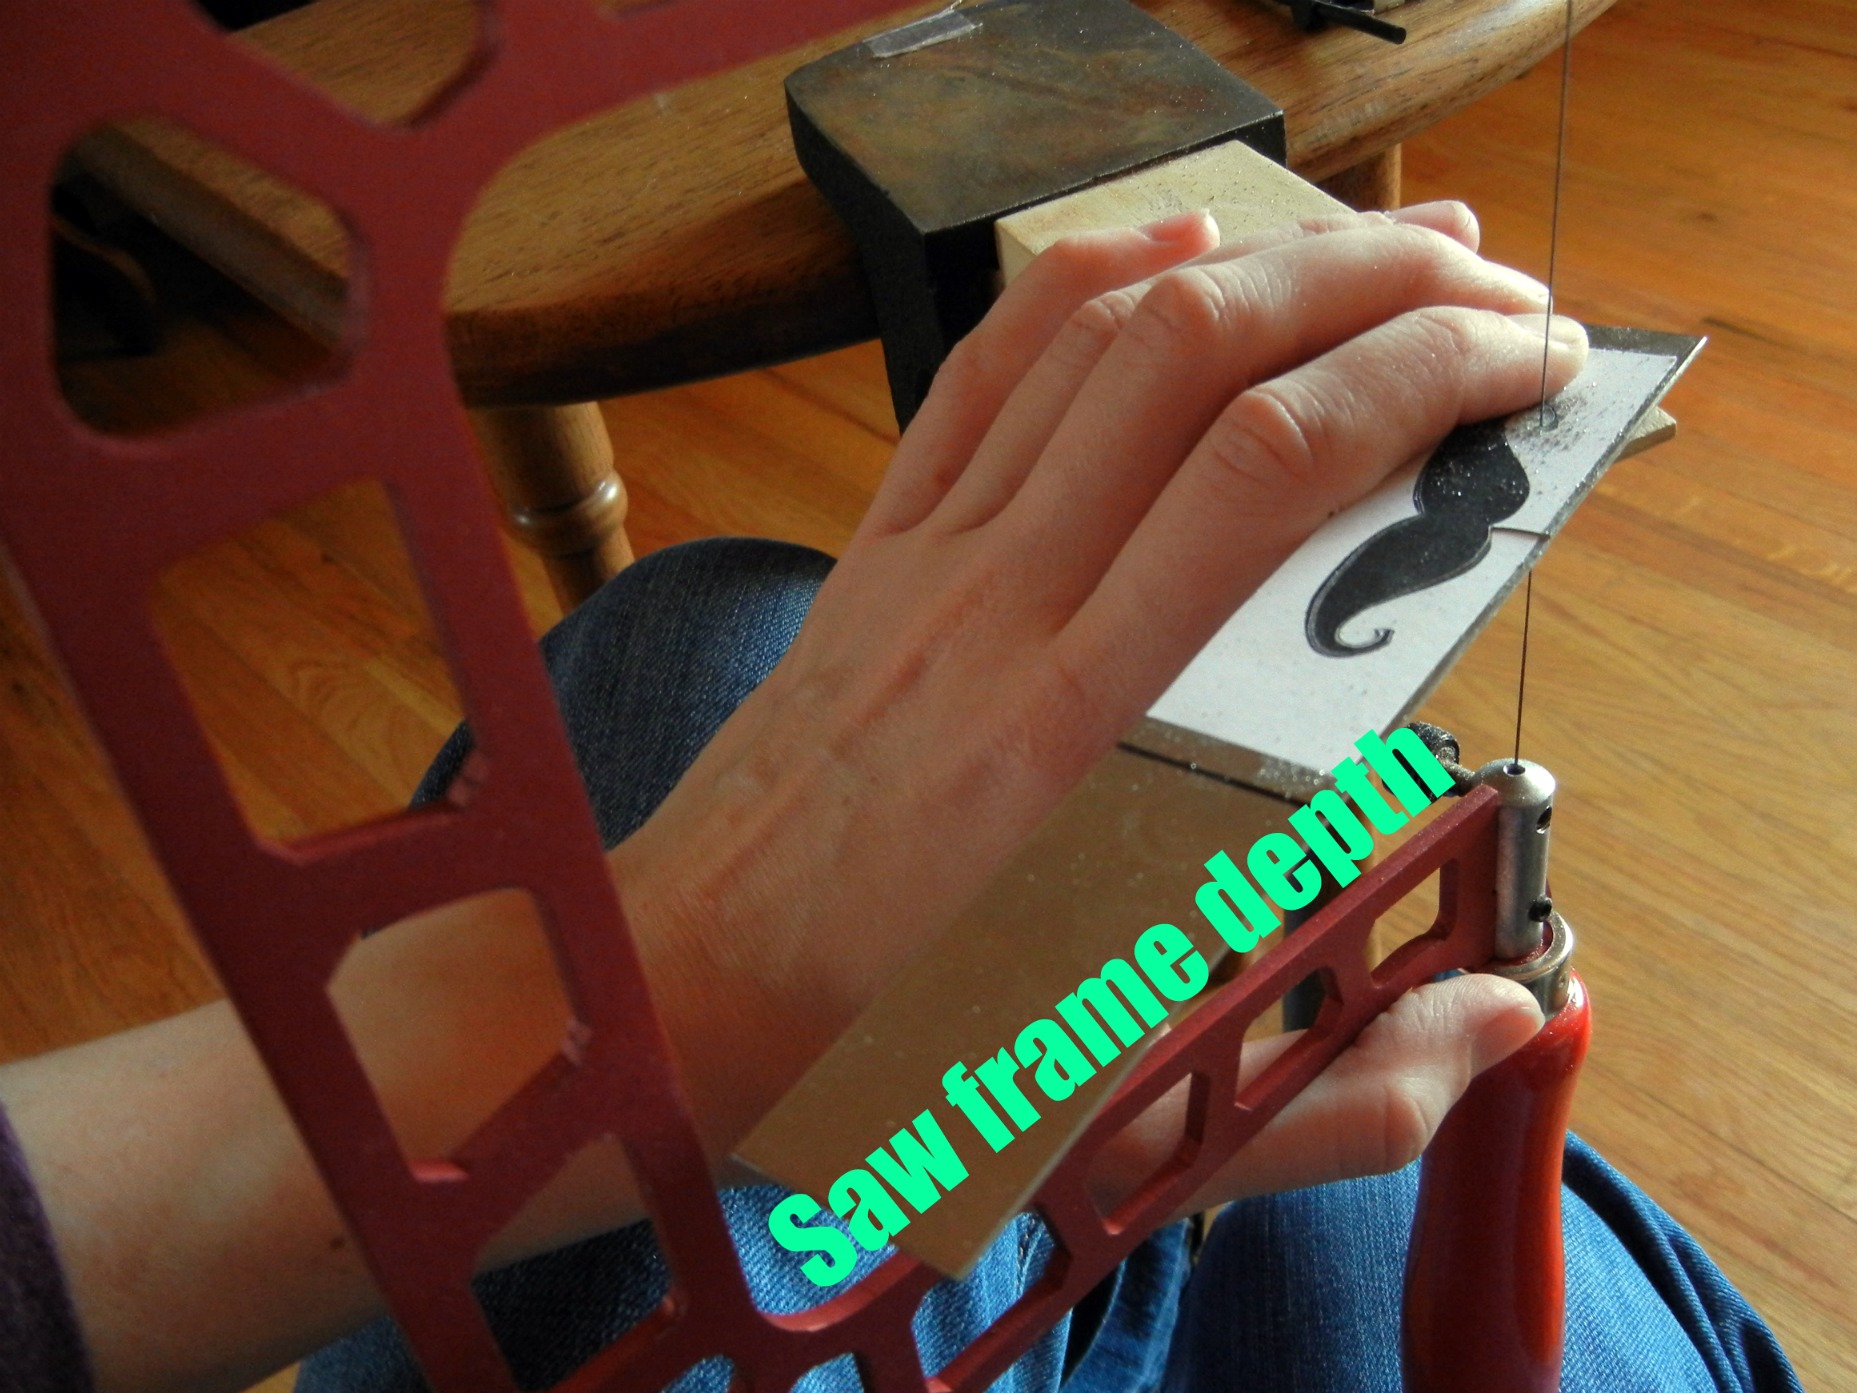
I had a lot of big plans for what I wanted to accomplish this week, but they’ve gotten derailed by the need to do some basic computer housekeeping. I’m not going to admit to how many pictures I have saved on my hard drive – I mean on the network. Yes, I always make sure all my files are backed up on the network drives! That’s right techs, no worries here! But um, yeah, it is always a good idea to purge old files periodically. So that’s what I’m doing and I just happened to find this picture of a necklace I made in February and neglected to post. I used the new Knew Concepts saw frame to cut a fiddle-head fern shape from nickel silver and soldered it to brass sheet metal with a Blazer micro torch.

The message “unfurl” seems especially appropriate today – what looked like dead branches just a week ago are now alive with new growth. Spring has sprung! Hope your creativity is unfurling as well ~ Cindy

Tips for sawing sheet metal with a jeweler's saw

February 15, 2012

Hi bloglandia! Today’s blog is about how to use a jeweler’s saw. Why? Because if you want to cut clean shapes out of metal without bending the metal, you need a saw. All metal shears, even the really nice ones, bend the metal, at least a bit. It is just the nature of the beast. Also, unless you have the hand strength of ~ I don’t even know who! ~ you probably need a saw to cut metal thicker than 24 gauge.

A saw also allows you to cut very intricate designs. Pierced is the term for designs that are cut from within the metal, as opposed to coming in from the edge. However, “pierced jewelry” brings up a whole different category of jewelry when you search online!

sawing-tools-rings-things
The basic tools needed for sawing metal.

Supplies needed for sawing your own metal shapes:

  • Jeweler’s saw frame – I’m using a pretty lux Knew Concepts frame, but the technique is the same no matter which saw frame you use.
  • Saw blades – Rings & Things offers both Form d’Arte (entry level) and Antilope (higher quality) saw blades. I think the higher quality is worth the price for less breakage, but it is up to you. Make sure to use the right size for the gauge of metal you are cutting.
  • Sheet metal – I like working with 20 gauge, but you might choose thinner metal if you’re planning to layer the pieces, or if you are working with pricey sterling silver.
  • Bench pin/ – I’m using a bench pin that’s been modified for sawing. Our bench block already has a V cutout. You’ll see why this V is necessary shortly.
  • Paper design – the more ornate the shape, the more you will challenge your skills!
  • Rubber cement – for adhering your design to the metal. Don’t think that you can draw your design onto the metal with a marker – it will smudge and blur and be impossible to follow. “Permanent” is a relative term!
  • Hole punch – optional – to pierce metal, you need to drill or punch a hole to insert the saw blade into. If you are sawing in from the edge of the metal, you don’t need a hole.
  • Cut Lube or beeswax – optional or not, depending on who you ask. Many people swear by it, but I typically prefer to saw without it. The lubricant is meant to keep the blade moving easily across the metal, but sometimes it gunks up the shavings and clogs the blade, so use it sparingly at first.

How to saw metal:

Adhere your design to sheet metal with rubber cement and let dry.

Insert saw blade into saw frame with the teeth pointing out (away from frame) and down (towards floor). Make sure you have the blade in there good and tight – a loose blade very quickly becomes a broken blade! Tension is key. (If you haven’t used a jeweler’s saw before, see post about Knew Concepts frames and tensioning.)

sawing-metal-rings-things
My left hand is holding the camera is this shot, but really it needs to be holding the metal down on both sides of the blade while I’m sawing.

Hold your metal in place on the bench pin with your non-dominant hand.

sawing metal rings and things tutorial
Supporting the metal on both sides of the blade keeps it from wobbling. Less wobbling = easier sawing.

Hold the saw frame between 90 and 45 degrees to your metal and start sawing. You are only sawing (removing metal) on the down stroke, but try to keep the sawing motion smooth and even on both the upstroke and down stroke.

sawing-nickel-silver-rings-things
I try to keep the saw fairly stationary and rotate the metal to follow my pattern.

Follow your design! It takes practice, but you’ll pretty quickly learn how to maneuver your metal and/or saw to follow curves. Blow away the shavings every so often so you can stay true to your pattern. If the blade seems to be catching or it feels jerky, check your tension and/or apply a little lubricant to the blade.

Moving too quickly, especially when changing direction, is an easy way to break your blade. Smooth and steady wins the race. One of the most difficult things at first is not pressing too hard with the hand that’s holding the metal down. Hand cramps hurt, so take frequent breaks and be conscious of what you’re doing. It doesn’t take much pressure to keep your metal in place. It does, however, take that V-cut bench pin. You will (er, I did) break lots of blades and have tons of problems if you try to hang your metal off the edge of a table rather than supporting it on both sides of that V.

It is always a good idea to wear safety glasses while you are sawing. Everyone – yes EVERYONE – breaks blades, and you’ll notice yourself getting your face closer and closer to your project. So again, take frequent breaks and also be sure to set up your sawing station at a height that is comfortable for you.

Happy sawing!

Edited January 2022 to update links.

How to choose a Knew Concepts saw for jewelry making

February 5, 2012

Hi bloglandia! Do your jewelry projects ever seem to stack up, one on top of another? Mine do. Maybe you are able to focus entirely on each project, finish and clean up before moving on to the next, but it seems I always have 10 different things going at once. Right now I’ve got a bunch of metal shapes to saw out and then solder together. The next few blog posts are going to use a few of these projects to highlight different tools and techniques, starting with the Knew Concepts saw frames and ending with Blazer micro torches.

sawing-tools
Saw frame, saw blades, bench pin, rubber cement, sheet metal and a design! Ready to saw!

So, what is new about Knew saw frames, other than their distinctive shape and bright red color? Well, most of us learned to saw with standard adjustable saw frames. In order to get the right tension on your blade with these frames, you press the frame between your body and a table or other sturdy object. By inserting the blade while the frame is bowed, the blade gets pulled tight into place when you release that bow. But – ow! That action bruised my breastbone. And when you break saw blades as often as I did starting out, it becomes a real chore.

Knew Concepts saw frames are different in a number of ways. Obviously, they are bright fire engine red. They are extremely lightweight, which makes them more comfortable to hold. And they are available in a whole lotta different models! How to pick?

1. Size. 3″, 5″ or 8″? My vote is for 5″, unless you plan to work with very large or very long pieces of metal, in which case the 8″ frame makes sense. If your hands tire easily and you only work with small pieces, than the 3″ frame might meet your needs. I’m a middle of the road kind of girl! Note that the size refers to the depth of the frame. The height for all Knew frames is fixed. This means you won’t be able to re-use broken blades by shortening your frame. (But wouldn’t you rather not break the blade to begin with? Knew frames help with that!)

saw-frame-depth
If you want to pierce the very end of a long strip of metal, you need either a large frame or the swivel model.

2. Blade tension options. Screw tension or cam-lever tension? I 100% endorse the cam-lever tension because the tension does not change when you switch blades. Instead of sandwiching the frame between your chest and the table every time you break a blade or move to a different area of a pierced design, you simply flip the cam-lever switch! What a relief!

cam-lever-tension
The cam-lever option is totally worth a few extra bucks.

3. To swivel – or not to swivel? That is the final question. Personally, I found the swivel to be an extra complication that I didn’t really want to mess with. However, if having a really lightweight saw that can still get into tight corners is important, buying the small 3″ saw frame with the cam-lever and swivel would accomplish that goal.

After testing the different options, I decided the 5″ Cam-Lever Tension model was my favorite (69-169-52 – it is the one with the staff choice icon in our online store). It is comfortable to hold and large enough to handle pretty much any jewelry project I would undertake.

Of course, the first question should have been: do I really need a Knew Concepts saw frame when I can buy a standard jeweler’s saw for less money? The answer depends on how you define need! If budget is the #1 concern, then maybe the answer is no. An adjustable saw frame has been the industry standard for years. However, if you want to invest in a tool that will serve you well for years, and which will make the – let’s face it – somewhat tedious job of sawing more enjoyable, then yes, you kneed a Knew frame! ~ Cindy

Edited January 2022 to update links.