Browsing Category

Grow your business

Create a Custom Personalized Necklace

December 6, 2013

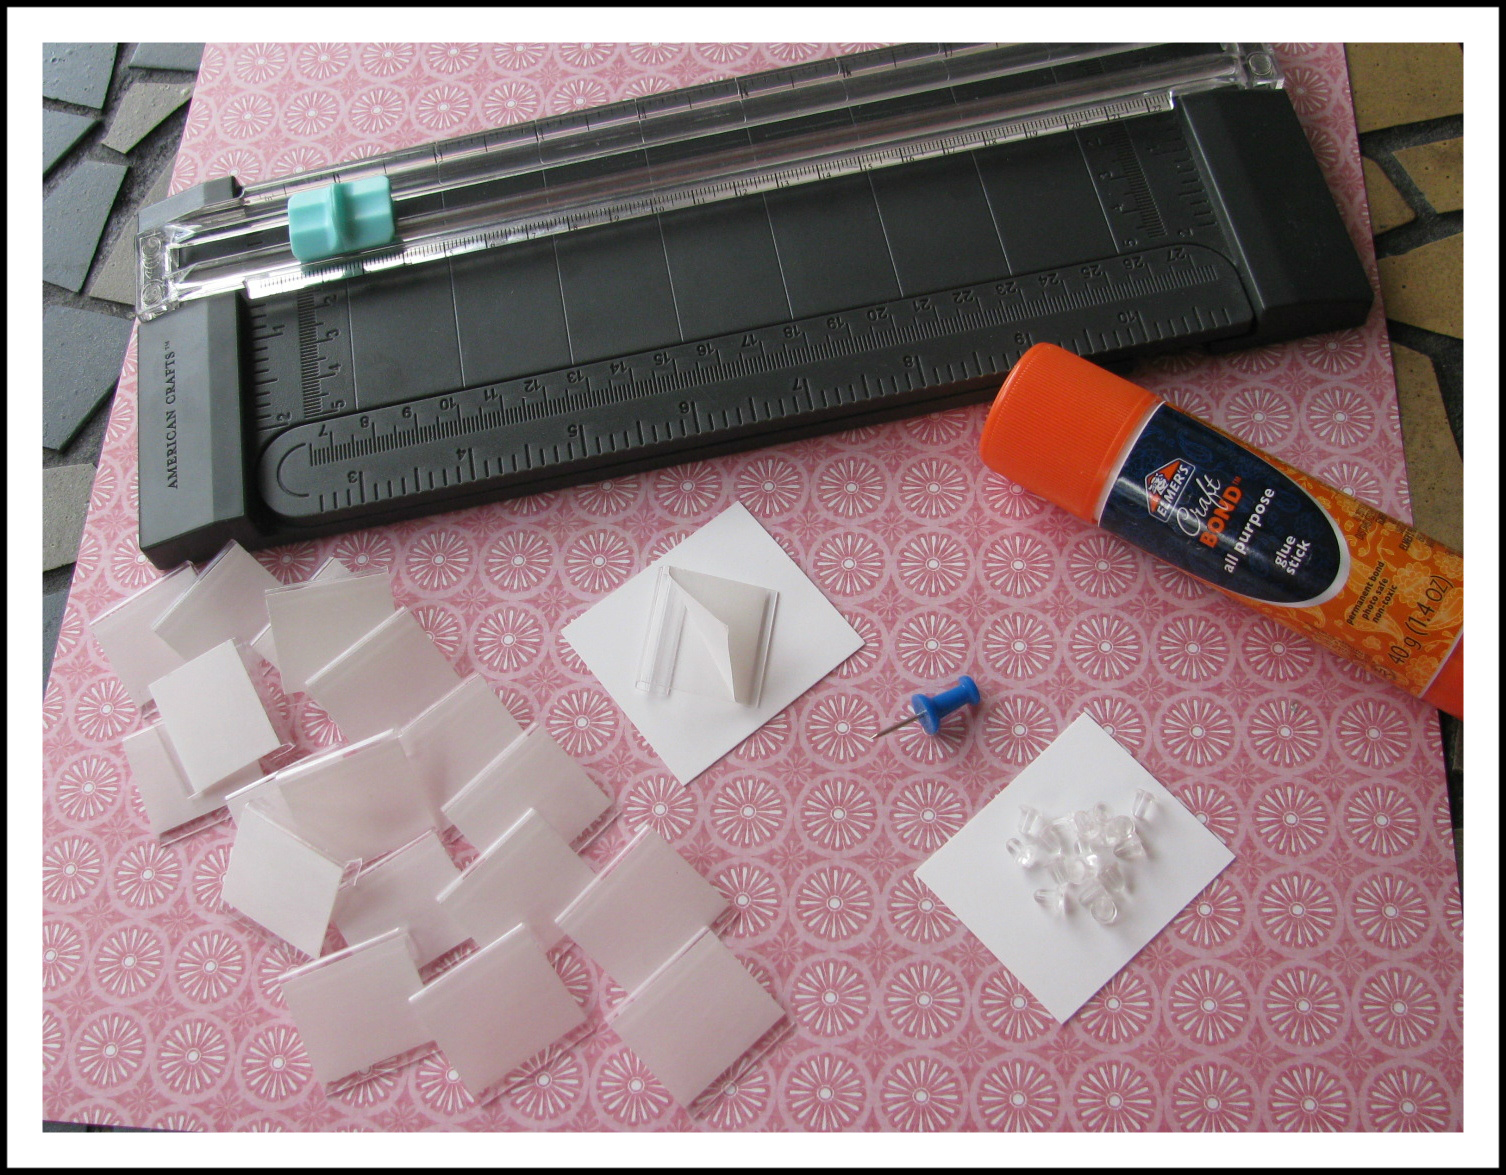
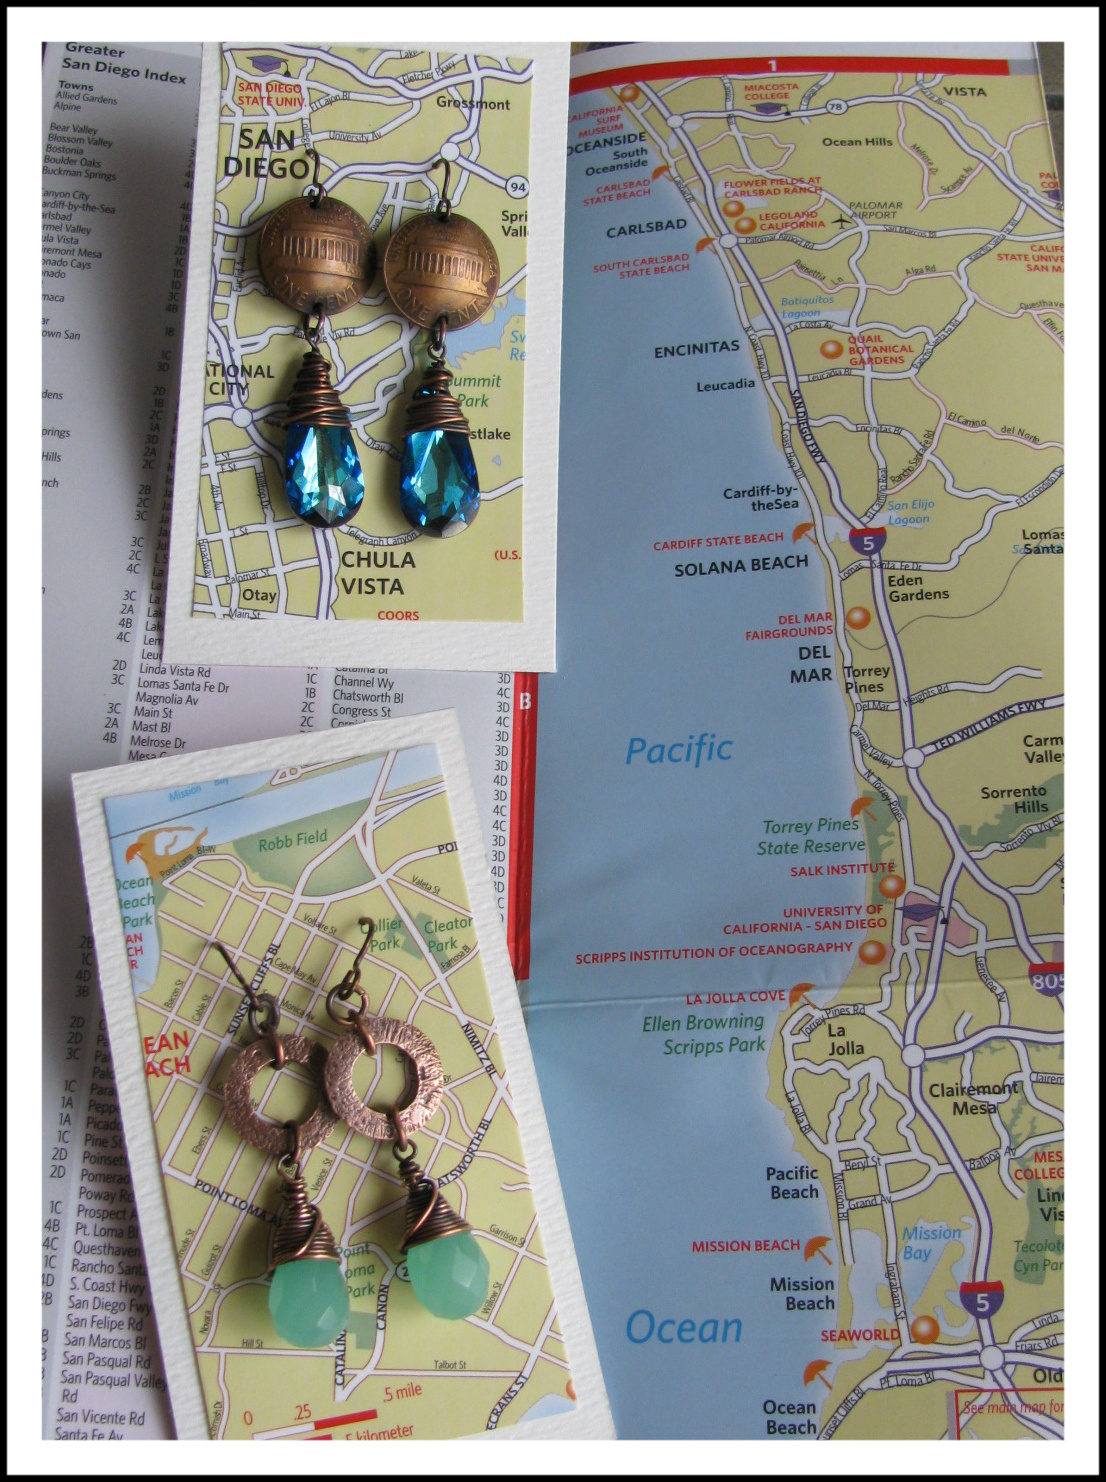
Personalized jewelry is very popular, and quite simple to create! A four-piece jewelry making tool set and basic assembly techniques are all you need to create custom necklaces.

Earth Mother, a custom mother's necklace includes birthstone charms, a butterfly charm and three flowers on a silver charm.  This free DIY custom memory necklace project by Sondra Barrington of www.rings-things.com features sterling silver, swarovski crystal, gemstones and personalized charms.This free DIY custom memory necklace project by Sondra Barrington of www.rings-things.com features sterling silver, swarovski crystal, gemstones and personalized charms.

(Click for larger image)

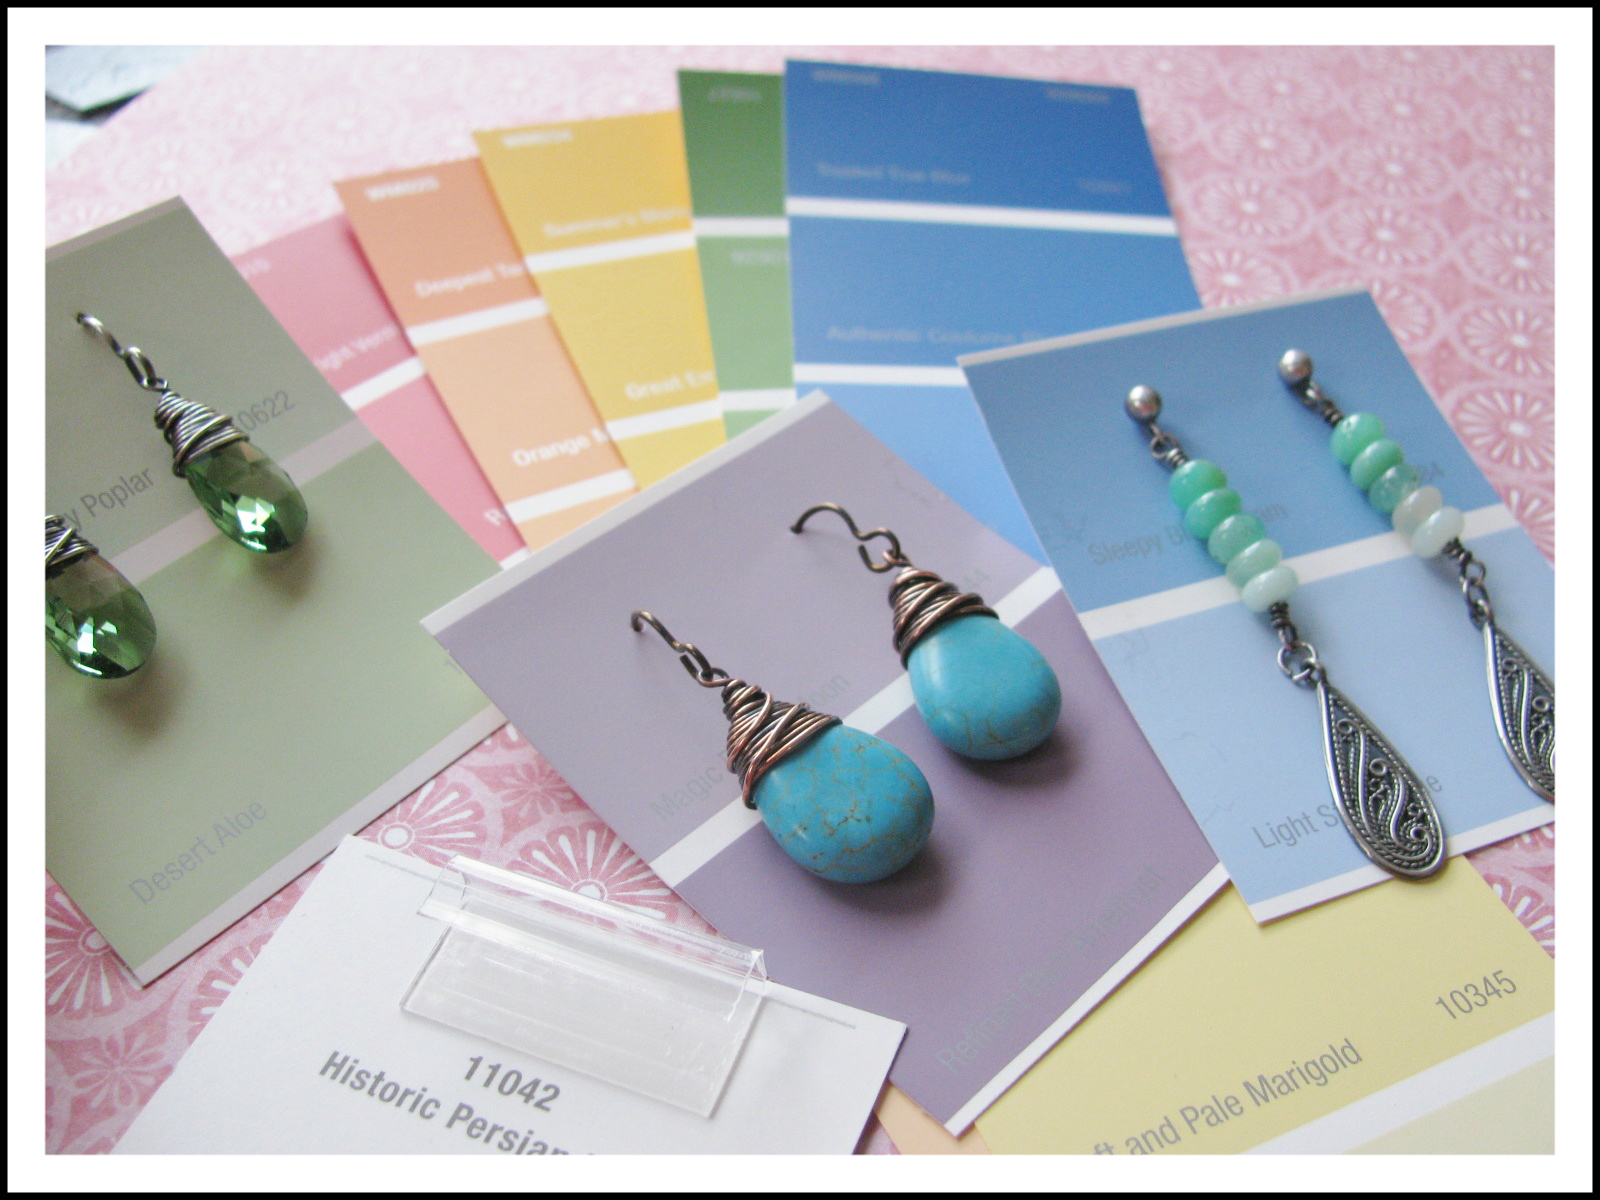
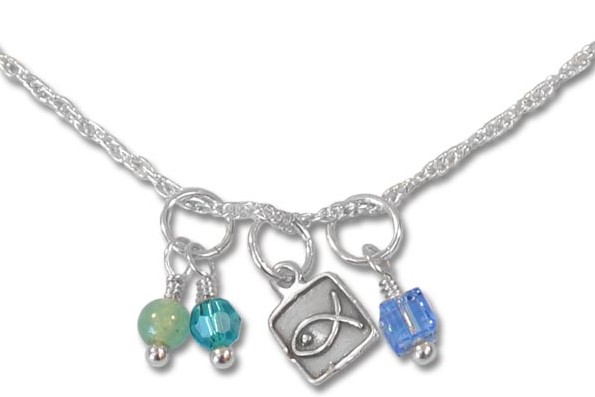
It is easy to personalize jewelry using birthstone-color gemstones and Swarovski crystal, along with a sterling silver charm or two. Rings & Things sells a huge selection of lightweight budget-friendly sterling charms and necklace chains.

Add-a-dangle using faceted, round, cube and other shaped gemstones!  This free DIY custom memory necklace project by Sondra Barrington of www.rings-things.com features sterling silver, swarovski crystal, gemstones and personalized charms.

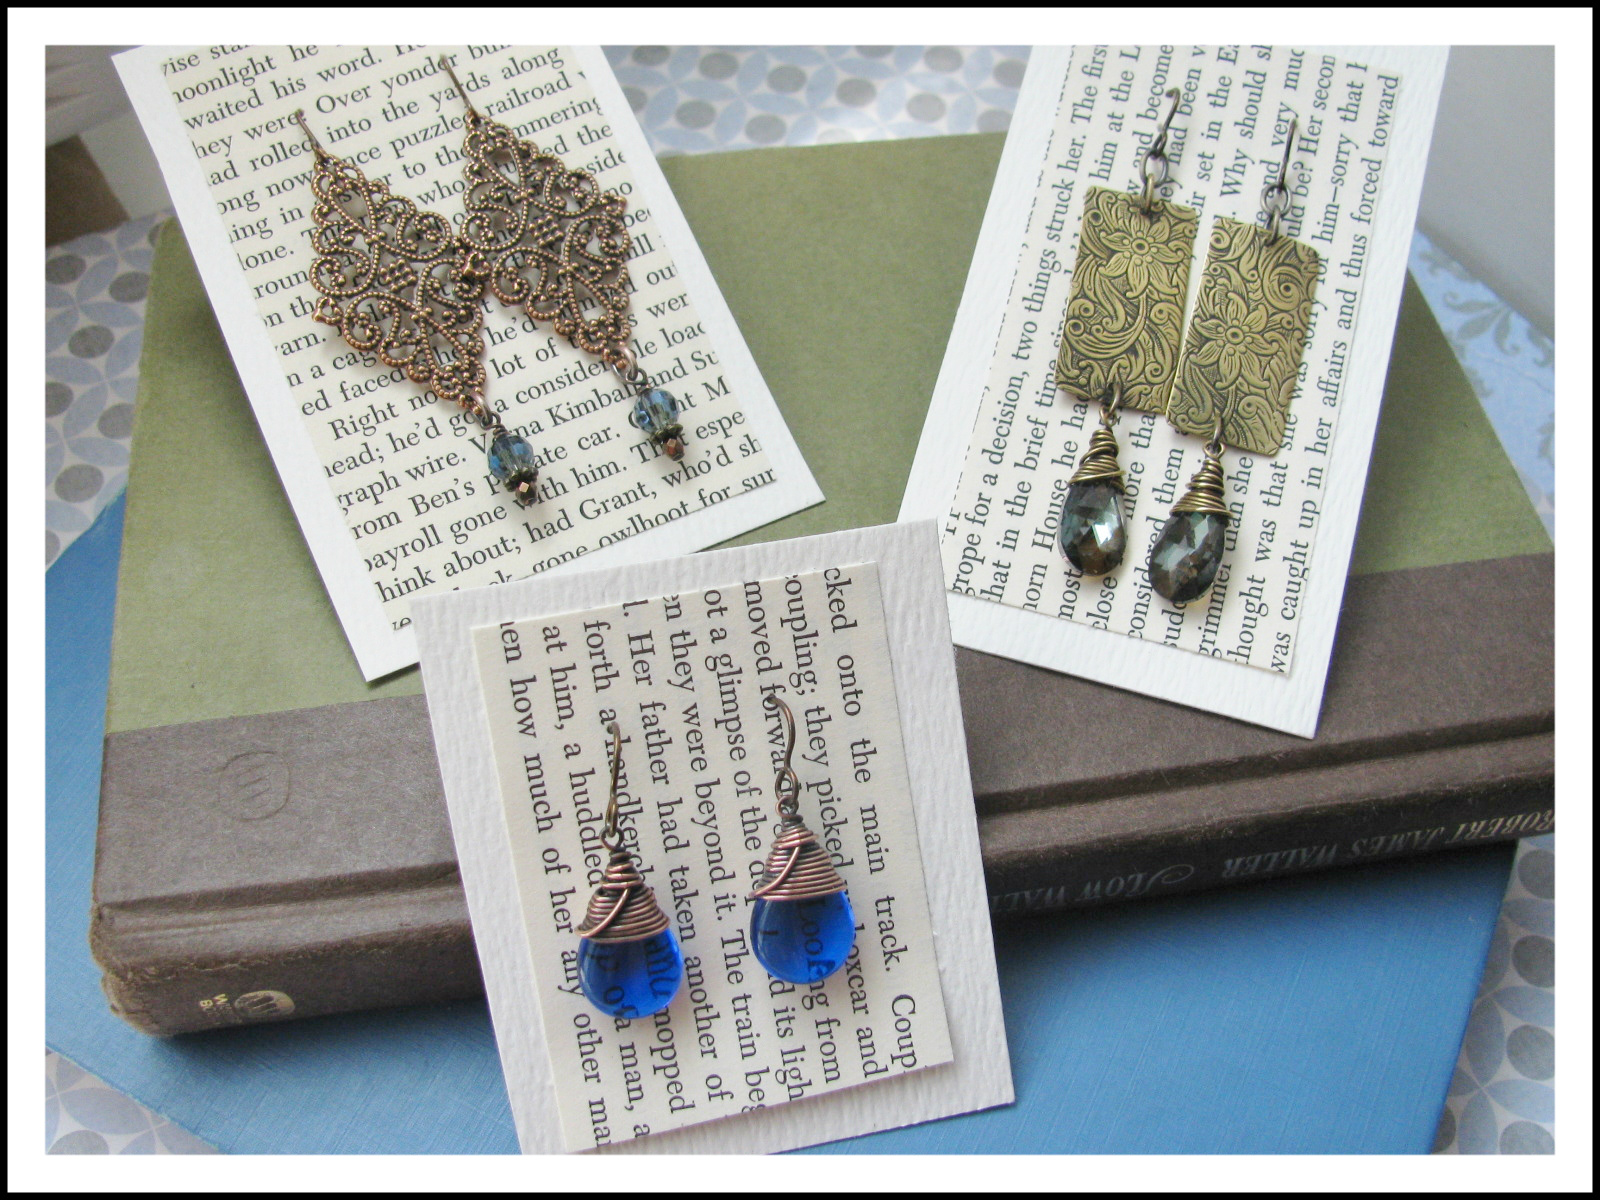
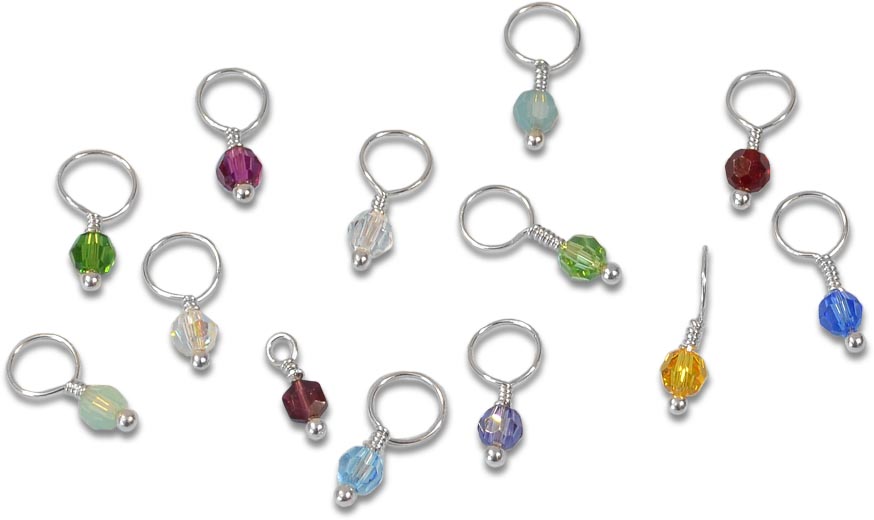
Chains are easily adorned with add-a-dangle, or add-a-gemstone charms. To create these assorted dangles, you just need a selection of small beads from your stash and some sterling ball-end head pins.

Blessed Mother Necklace features gemstone beads and a cube bead as the birthstone charms and a sterling silver fish faith charm. This free DIY custom memory necklace project by Sondra Barrington of www.rings-things.com features sterling silver, swarovski crystal, gemstones and personalized charms.

(Click for larger image)

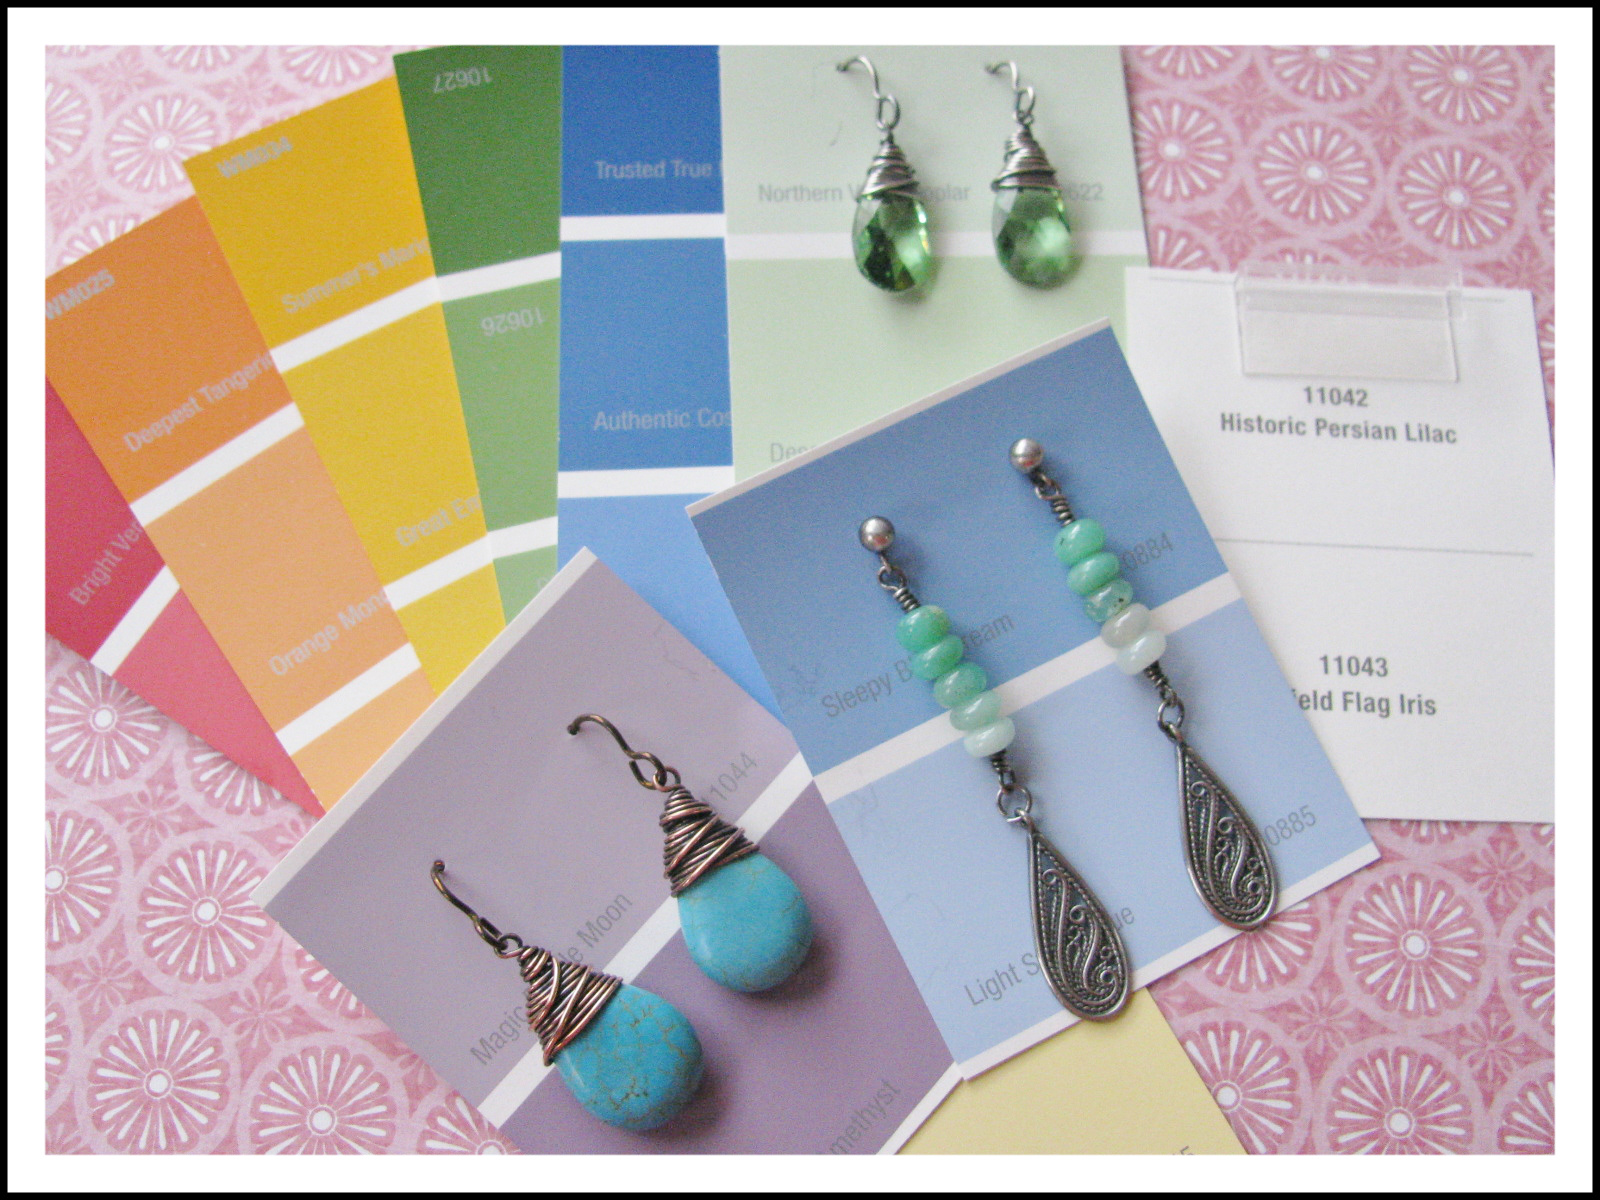
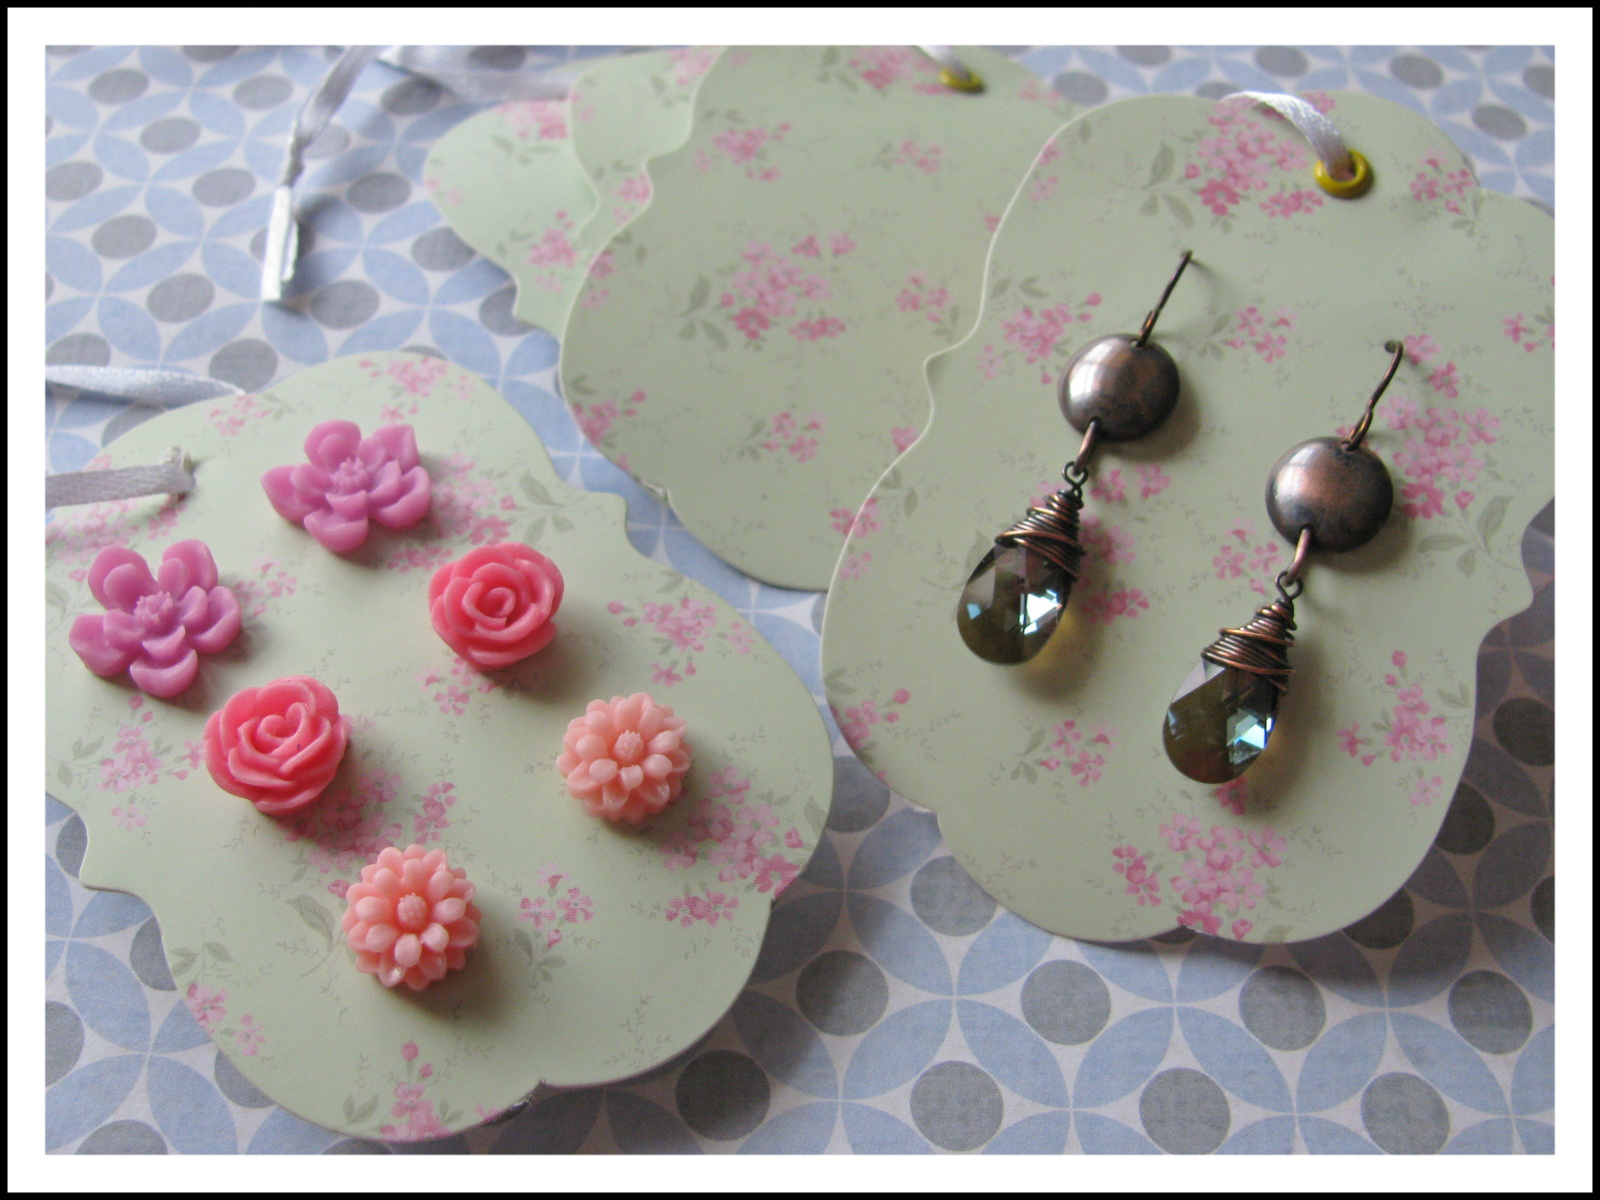
These colorful dangles allow you to add several birthstones to a custom piece, or accessorize it according the whimsy of the wearer. A mixture of natural stones, freshwater pearls and Swarovski crystals is very popular. Making oversized loops on the dangles makes it easy to slide them onto nearly any chain without adding a jump ring.

Add-a-dangle birthstone charms of Swarovski round crystals! This free DIY custom memory necklace project by Sondra Barrington of www.rings-things.com features sterling silver, swarovski crystal, gemstones and personalized charms.

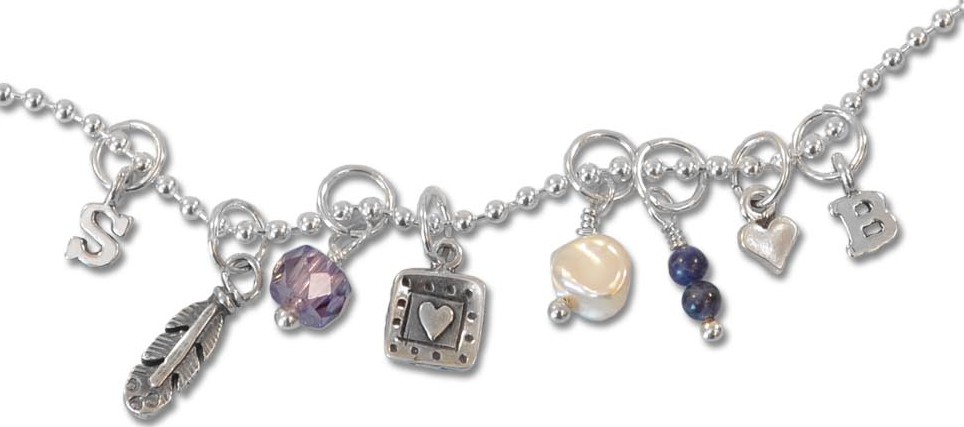
If you sell custom necklaces, consider displaying the basics in a fun display (along with a few completed samples):

  • A tray of sterling silver charms
  • An assortment of pre-made add-a-gemstone dangles
  • A variety of pre-made add-a-birthstone crystal dangles
  • A few styles of sterling silver necklace chains.
This necklace, Adorable Auntie, includes charms representing each niece and nephew! This free DIY custom memory necklace project by Sondra Barrington of www.rings-things.com features sterling silver, swarovski crystal, gemstones and personalized charms.

(Click for larger image)

This jewelry also makes great gifts and mementos for friends, family and other loved ones. Have fun making these darling necklaces!

DIY Earring Cards that won't break the bank!

July 20, 2012

Whether you make jewelry as a hobby, to sell at craft fairs or to just give as gifts to friends and family, presentation is always an issue. You wouldn’t hang up a beautiful print on the wall without a proper frame. Well, the same goes with your jewelry. It is after all wearable artwork that you have created, and it should be presented in a pretty way! I decided to try and find some DIY earring card ideas that are cute, quick and inexpensive. That way you can spend more time making the jewelry, and less time (and money) worrying about how to display it.

For this project, there are are few basic supplies needed to get started. A paper cutter makes this process much easier and faster. You can find small affordable ones at any craft store. Also, a glue stick is great for layering paper, to make thicker cards. I just use a pushpin to make my holes on the cards, though craft stores will sometimes have paper punches available specifically for creating earring cards. I have tried them, but I still prefer my pushpin. The last two items I recommend are nylon or rubber earring stoppers, to keep your earrings on the cards, and adhesive clip cards, so you can hang the earrings on display racks. The rest of the items I used I found for less than $3 at my local mega store.

Basic supplies needed. Paper cutter, glue stick, pushpin, adhesive clip cards, and nylon earring backs

Close up of the earring clip cards. Sometimes,you may need to trim the bottom. This can be done easily: just trim them with scissors.

Close up of the nylon earring backs. There are a few different styles of these available, but I like the bell shape best.

NEW ~*~ NEW ~*~ NEW ~*~ NEW ~*~ NEW 

Since publishing this post in 2012, Rings & Things has introduces new earring-hole-punch tools.  Appropriately named, both punches make the hole-punching task “easy”!

Easy Earring Card Leverback Punch

Easy Earring Card Double Post Punch

~*~*~*~*~*~*~*~

Okay, so now that the basics are covered, time to have fun! Check out all the affordable ideas I came up with below!

Playing Cards

52 cards for a few bucks! And they come in so many different designs!

The classic poker card transformed! Simply adhere the clips to the back so they can hang!

I particularly like these Japanese themed playing cards paired with the Buddha Heads Earrings!

Greeting Cards

All of these cards came from packages of six or more and were less than $3. A paper cutter can transform them into functioning earring cards in no time!

Use your glue stick to glue a second neutral piece of paper to the back, creating a border. The floral card was perfect for resin flower studs and I just love how the zebra print looks with the neon pink chalcedony!

Paint Chip Samples

These offer great pops of color! Coordinate your earrings to have matching colored cards!

Total cost for paint chips, Free! At least for now, though I am sure due to Pinterest, they are disappearing more quickly from the shelves, so don’t be surprised if they start charging for them soon!

Gift Bag Tags

I found a 6-pack of these blank floral gift bag tags for $1! Check the dollar bins at your store, you never know what you might find!

Book pages

Love this look! Cut the pages vertical or horizontal and use the glue stick to adhere them to thick white construction or scrap book paper. Great for vintage looking earrings!

Maps

Buy inexpensive road maps, adhere to thick white scrapbook paper. I love this one, because you can pick out your favorite cities or coordinate your jewelry with the maps. Pair beachy earrings with maps of Hawaii of Celtic Earrings with maps of Ireland!

Well I hope I have inspired everyone to make some pretty earring cards! Please feel free to ask me any questions and add any ideas that you have for creating funky earring cards! Look forward to more blog post to help you with displaying and packaging your jewelry!

~~Tiffany

Cheapskate booth ideas

November 19, 2010

Ever do craft / trade shows? Wendy Rosen is going to save you some money. And hassle!

Cheapskate Booth Ideas

Cheapskate booth ideas from Wendy Rosen: music stands

Music stands!

Cheapskate-booth-ideas-Wendy-Rosen-dioder-lights

Under-shelf lights!

Cheapskate-booth-ideas-Wendy-Rosen-JoAnns-cutting-table

Cutting table from JoAnn Fabrics!

See 20 Cheapskate Booth Ideas (and more) at Wendy’s Facebook page! ….Please note that if you become Wendy’s “FB friend”, you’ll receive more booth ideas, plus tips about wholesaling to shops and galleries!

PS: for extra ideas, check out Tradeshow Stuff and The Buyers Market!

New free technique sheets!

April 28, 2010

Technique sheets: learn all the hottest jewelry craft tips. They’re now right in our online store!

Print them right out there, as high-quality PDFs — Or, click to add any technique sheet to your order for free.

Basic technique sheets now offered include these fun fliers:

ITS Image Transfer Solution technique sheetITS™ Image Transfer Solution

Gluing to metal, a technique sheet for jewelry makersGluing to metal

Metal stamping

Epoxy resin

Stamping on resin

And that’s just a sampling. Check ’em all out! Grow your business with a new skill or two.

Let us know if you have a request for guidance in the form of other technique sheets…

Giveaway! What's your best crafts tip?

February 17, 2010

While R&T’s online store is down for a bit, getting upgraded today, I’m making us useful…Let’s have a giveaway!

Thanks to Making Jewellery magazine out of the UK, for sending me a beautiful promo copy of their new March 2010 issue. Inside the plastic wrap it includes an 86-piece jewelry kit. All of this can be yours in today’s drawing. Just Tweet/FB/comment below with your favorite crafts tip!

You could win this magazine!

Here are the entries, live-blogged (need I point out, you should follow these Tweeters & Facebookers):

  • idolyzer my tip – don’t let the cats near your beading…. seriously 😉
  • swimmer_chick Use empty medicine bottles for bead storage- easy to label and see what’s inside!
  • Clayshion tip: when smoothing out polymer clay, dip your finger in water and rub your finger lightly over the project. Takes out prints.
  • Elaine Carroll Embree To finish a stretchy bracelet, I use a grill lighter to heat up my flat-nosed pliers and press firmly on the knot. This makes the knot much more stable.
  • Julia Grosz For my fellow math dyslexics: use a popsicle stick to mark the length of wire needed for a link or piece to keep them all uniform. For those without a jump ring mandrel, coat your round nose pliers in R&T’s Tool Magic and use different color sharpies to mark where to bend for consistently-sized loops.
  • MABJewelry tip: Beaders, plastic bowl lids make great little bead trays. Just fold to repour beads back into bags or tubes.
  • Priscilla Hennen well I don’t know if this is the BEST tip, but it’s one i’ve used recently. 🙂 when making polymer clay bangles, a soda can is the perfect size/shape for curing them on!
  • all_about_savin Type up directions and place in a 3 ring binder with finished pictures. Separate by occasion. Easy reference tool.
  • silentgoddess -When needing a tight soldering joint, I use the edge of my bench block to file stock even & straight. Perfect fit each time.
  • makeupkat1959 I use a thread spool holder hung on the wall to sort my bead strands
  • Katherine Gibson James I love using scraps from other projects-scrapbook paper especially. you can make wall art, lamp shades, wrapping paper, cute covers for book ect..
  • jessicaleap if out of storage containers for beads, you can use a devilled egg dish to hold beads 🙂
  • lanieekat I save old 35mm film canisters for storage of all things small and crafty. They are perfect 4 beads
  • justicejewelry Candy boxes, like whitmans, & valentines hearts, ones with plastic inserts for individual cholates, are great 4 sorting beads!
  • Deb Gilchrist The plastic, resealable baby food containers are the perfect size for organizing smaller beads and findings – see-through and stackable.
  • HerArtSheLoves I use clay softer and gloves, then I feel like I’m in of those of CSI type shows.
  • Karen Potter Naylor One of my favorite tips for organizing bead projects…I scoured thrift stores and bought all of the MINI muffin pans I could find. They were about $.25 ea and I spray painted them white, let them dry and then I use them for projects with lots of parts & possibilities: clasps, head pins, cute wire, beads, charms, jump rings etc. and even better, they stack on top of each other! When i am ready for a particular project I just get the pan and a beading mat and I am ready to go….Another design tip: I also look at wallpaper patterns, paint chips with fun finishes to inspire me. I get a lot of ideas from looking at furniture decorating and fashion magazines… I cut the pics out when I can, put them into a document protector inside a notebook and when I am lacking a creative idea, I just pull those things out and look at them… Not to copy but to get the creative neurons firing again by looking at things I love.
  • MelanDesigns Always carry a digital camera and small sketch notebook! When something inspires you take notes, sketch it or snap a picture!
  • Miz Fit Leather – leather is the greatest asset to any jewelry makers inventory. It is the universal element, creating great jewelry for males and females. You can make fun bulky designs by braiding it, or use it to display a simple pendant. Why limit your customer base to just female customers, open up your designs to anyone!
  • murphygracehome I put a white cloth on the table while beading.Not only does it make the beads that I drop easier to find, they don’t roll!
  • Alison Nappi My secret to making the perfectly shaped earwire is a pen! 1. Cut the wire to length (I use about 2″ of wire) 2. Debur one end and make a loop at the other 3. Slide the looped end under the pen cap (make sure the loop doesn’t lay flat against the pen. It should lay perpendicular to the pen) 4. Hold the “tail” of the pen cap and bend the wire around the pen. 5. Bend the deburred end of the earwire slightly 6. Make any ajustments (if needed) and vuala! the perfectly shaped earwire!
  • glitz_glitter Baking soda is perfect for polishing your oxidized silver. It is easy to clean up, and leaves the silver with a lovely sheen
  • Janeen Sorensen I hope this will count, but my tip is that I utilize my local library! I check out books on techniques that are new to me, and use them for inspiration and to expand my design capabilities. It’s a free way to challenge yourself to be a better and more wide-ranged designer.
  • leahmichon I use argentium silver and fuse it instead of soldering – this way, no harmful chemicals from flux or pickle.
  • Nesrin Akdemir If you’re working on a project(s) that needs multiple pieces of chain that all have to be the same length. I’ve found for me the fastest way to do it is to measure and cut 1 piece of chain, string it onto a long headpin. Then string one end of your spool of chain onto the same headpin, hold the headpin up and measure and cut it the second piece using the first one as your guid, and repeat as many times as you need. I hope that made sense. It saves me a lot of time.
  • yay4renee tip: don’t be afraid to think outside the box and explore different possibilities.
  • Latisha Leppert I hope this counts as a tip…it is more in dealing with the creative process…When trying to create something unique- pick a 1 or 2 items to begin with then build on those things. When you try to look at a lot of different items (paper, beads, yarn, fabric-whatever your craft is) you can become overwhelmed by things and it gives you what I call craft block. If you simplify it down then you can get your creative juices going and not be overwhelmed with all the possibilities.
  • Mortira Craft Tip: Plastic snack cups from kids’ lunches are perfect for holding beads, glitter, buttons, or just about any small bits
  • Lynn OBrien If you are like me and do a lot of different crafts, I organize my tools by using clear locking lid mini boxes. I can label them for easy finding, as well as see through them to see what I have. I store all my mini-totes on shelves so that I can have easy access to them.
  • BeadGoesOn We tumble our Thai silver with Dawn (blue) dish soap & water. Does the best job for us! Loose beads only!
  • Emily Hale mine is to look at the trends, what are people wearing now, and what will people be wearing 6 months from now? maybe not so much a tip? but it helps me focus on what i plan on designing…
  • whimsybeading Turn left over strung beads/crystals into knitting stitch markers using tigertail wire, 1 crimp bead and a touch of glue.
  • Maureen Connolly my jewelry making has veered into the more ‘metal-than-bead’ genre – mainly copper – so my tip is to use (pre-1984) pennies in place of copper discs. I always have a bowl of them in some sand on top of my woodstove so when I need one, it’s warm to start with so it flattens easier and more uniformly.
  • PepperPaige I use a hardware organizer with clear drawers to organize my beads. Tons of little drawers that are perfect for all supplies.
  • genedotts When storing your finished pieces of sliver jewelry. Put a peice of Chaulk in some Cheese Cloth and keep it stored with it.

See the comments below for more tips, and our winner!

Get your jewelry seen

January 24, 2010

…Join a collective!

RiverSpeak, an arts collective

Like RiverSpeak here in Spokane, WA.

Keep in mind the possibilities that open up to you when you join forces with other artists — not just jewelers!

That’s the quick tip for today 🙂

Craft business tip — BYO booth power

December 8, 2009

I found a powerful idea at Rena Klingenberg’s Jewelry Display Ideas blog: Ever had a booth that was too far from electricity when you exhibited at craft fairs? Bring your own power, for lights & credit-card processing!

How to BYO? Virginia Vivier’s article there has two great suggestions, with solid details given:

Portable battery

Portable battery

  • Battery power
  1. Rechargeable 12-volt battery setup — powers the whole booth!
  2. Laptop credit-card processing — use freely downloaded software
  3. Cellphone credit-card processing — get a wireless merchant account

Flexible solar clip light

Flexible solar clip light

  • Solar power
  1. Rechargeable clip lights — LED technology makes these efficient and long-lasting
  2. Solar cellphone charger — self-explanatory

Images here are from Vivier’s excellent article!

How to market your crafts book

October 13, 2009

No general guidance here — just a tip of the hat to someone for a great idea she had!

We received a package of really attractive bookmarks from our blog partner Lisa Crone:

We loved these cute bookmarks :)

We loved these cute bookmarks 🙂

She combines stylish design, plus her ongoing theme (at least for me, “A Bead A Day” is suggested by the single bead here), plus a quick plug for her upcoming book, “A Bead in Time”.

Lisa made this promo short, sweet enough to make people want to keep it around, useful, and unique. I’d call this example a great craft business tip!

Start conversations…about your craft jewelry

August 13, 2009

From a thread of conversation over at Twitter. Thanks, tweeter friends!

Craft business tip (1): Always carry your business cards with you.

Craft business tip (2): Wear your craft jewelry wherever you go.

Craft business tip (1+2=3): Wear your jewelry and hand out your business cards. It’s amazing how many people have told me about someone approaching them asking “Where did you get that great jewelry? Oh my gosh, you made it??” The next step from there is obvious: snag a new customer.

Craft business tip (3+1=4): Make a t-shirt that artfully invites, “Ask me about my jewelry!” How about a button too?

Ask me about my etsy store

Ask me about my etsy store!

It works.

Share a story about “conversation starters” that led to sales–leave a comment!

Craft business tip: win a contest

May 21, 2009

Sometimes the craft business tips I share come from a lot of people’s hard work & experience…

Today I want to talk about the few, the proud, the lucky winners. And what winning can do for your business.

It's not a gift certificate, but you can cash in on it! (Image from Zoya Gutina's blog)

Earlier today I noticed someone’s item on Etsy that was already familiar to me.* Know why? Because it had been one of the really great, and memorable, winners in a Rings & Things design contest. It’s been awarded other prizes too, so we’re talking about a proven, multiple winner. I knew all that already.

The remarkable thing to me today, though, was the price on this item. I’ll just estimate that it’s now going for five times what it would otherwise sell for. As a jewelry artisan, you know that your creations are legitimately worth money. Entering them into competitions and being independently judged as high-quality jewelry backs up that claim.

I’m very proud of the jewelry artist whose winning creation I’m talking about. Assuming you’re going to sell that superb jewelry item that you made, it’s wise to set its price to reflect your reputation. Good move!

We all know you can’t sell every one of your items at a high price. But it says a lot about your status as a serious jewelry artisan, if you have some “high-end” items.

Think about what designs you can come up with, create, and enter into design contests. Besides the prizes available in these contests, and the sheer glory of winning, you may find yourself recouping your investment of materials and labor many times over.

And that can grow your business!

* I’ve kept the artist’s name and the title of the piece anonymous. They’re tangential to my point!

Have your sales benefited after you’ve won a design contest? Share your story in a comment!

May giveaway:
* You enter by leaving comments this month
* At the end of May, 2 winners will receive coveted Rings & Things goodie packs!
*
So read the blog regularly, to enter a lot & to see if you won!