
Hello bloglandia! Tiffany here. I just recently returned from a fabulous week on the Oregon Coast with my family. While there, I succumbed to one of those touristy penny smashing machines. For some silly reason, I can never resist those machines! Perhaps they remind me of being a kid again and smashing pennies on the railroad tracks. Well anyway, upon my arrival home, I found myself with a pocketful of pennies stamped with fish and boat images. I was about to throw them into one of my many junk drawers to be lost forever when I had an epiphany! I thought to myself, aren’t you a jewelry maker? and couldn’t you possibly make something wearable with these souvenir pennies? Well, since the answer to both of these questions was yes, the Souvenir Penny Bracelet was born!
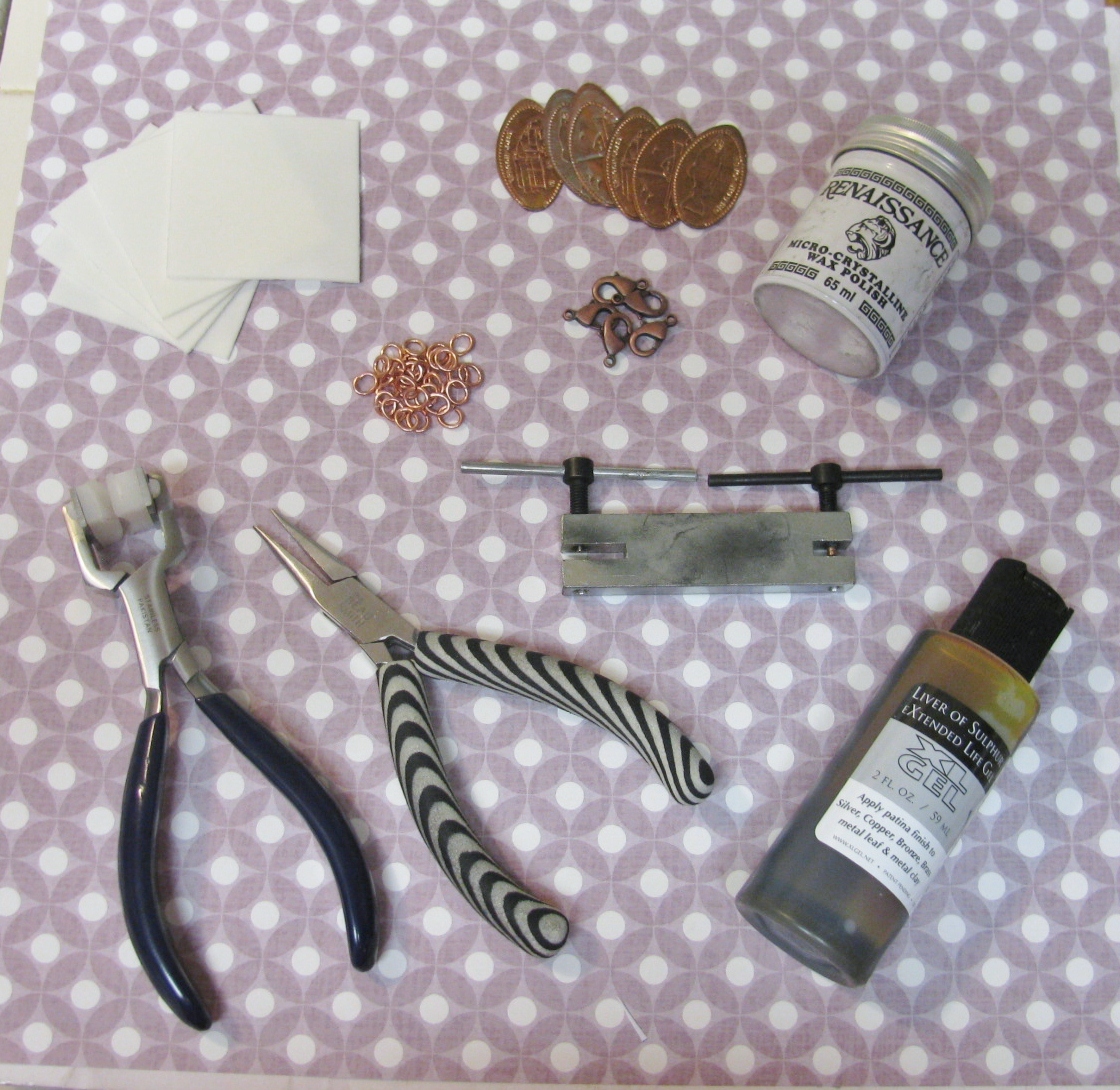
Everything needed to make the Souvenir Penny Bracelet. Look below for close-ups of all these items.
This bracelet is really easy to make. To get started you need the following items:
- five smashed souvenir pennies
- a lobster claw clasp, in either antique copper, copper plated or solid copper
- oval copper jump rings
- a metal hole punch
- liver of sulfur
- polishing pads
- Fine grit (“0000”) steel wool, available at any hardware store
- bracelet shaping pliers
- Renaissance wax
- Chain nose pliers
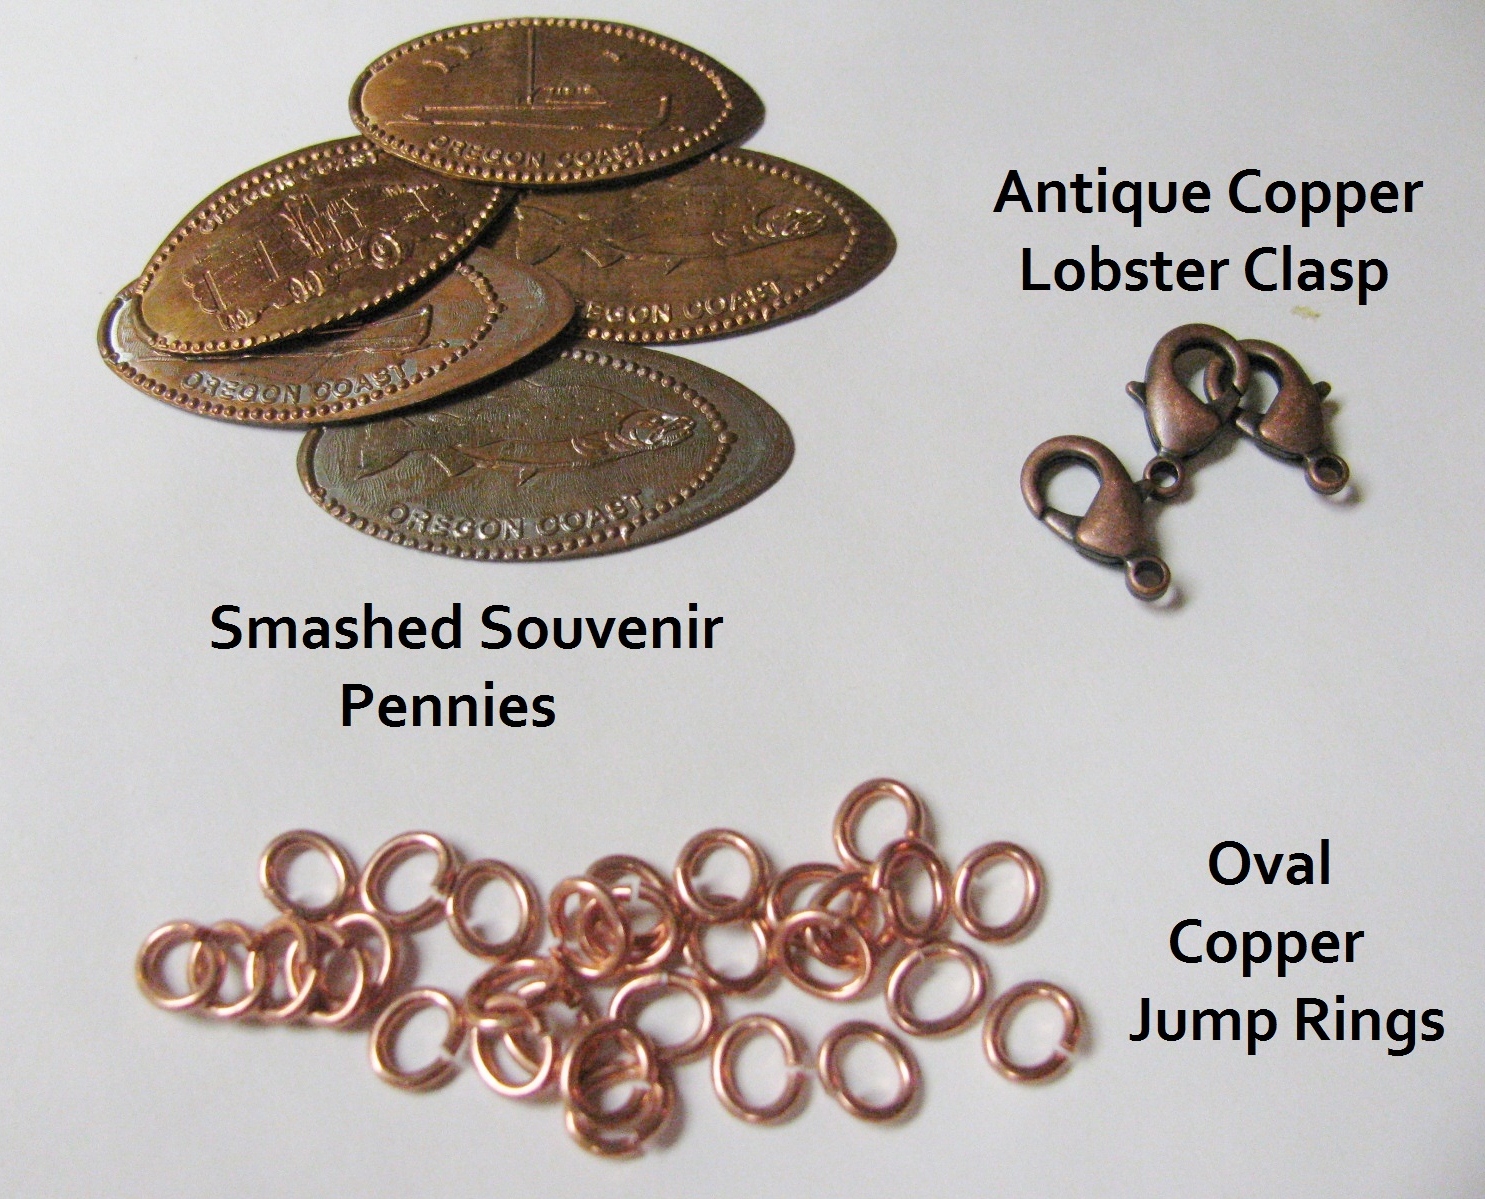
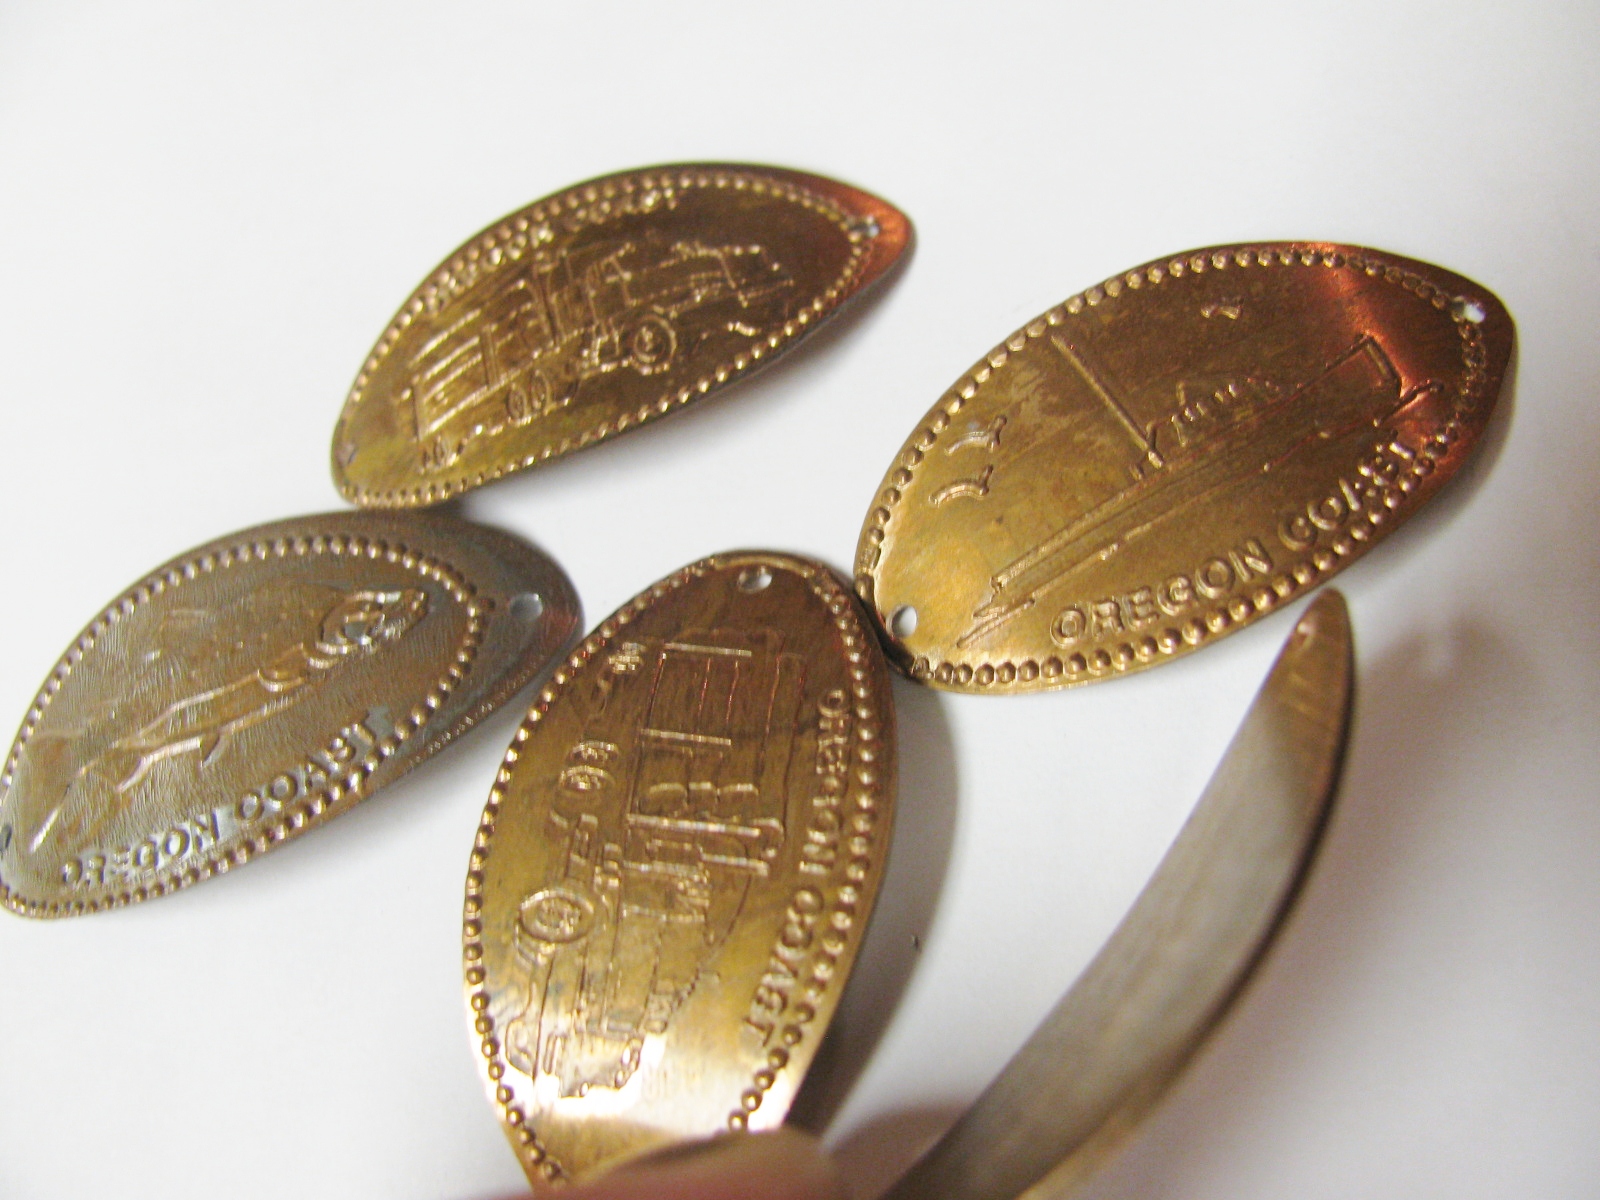
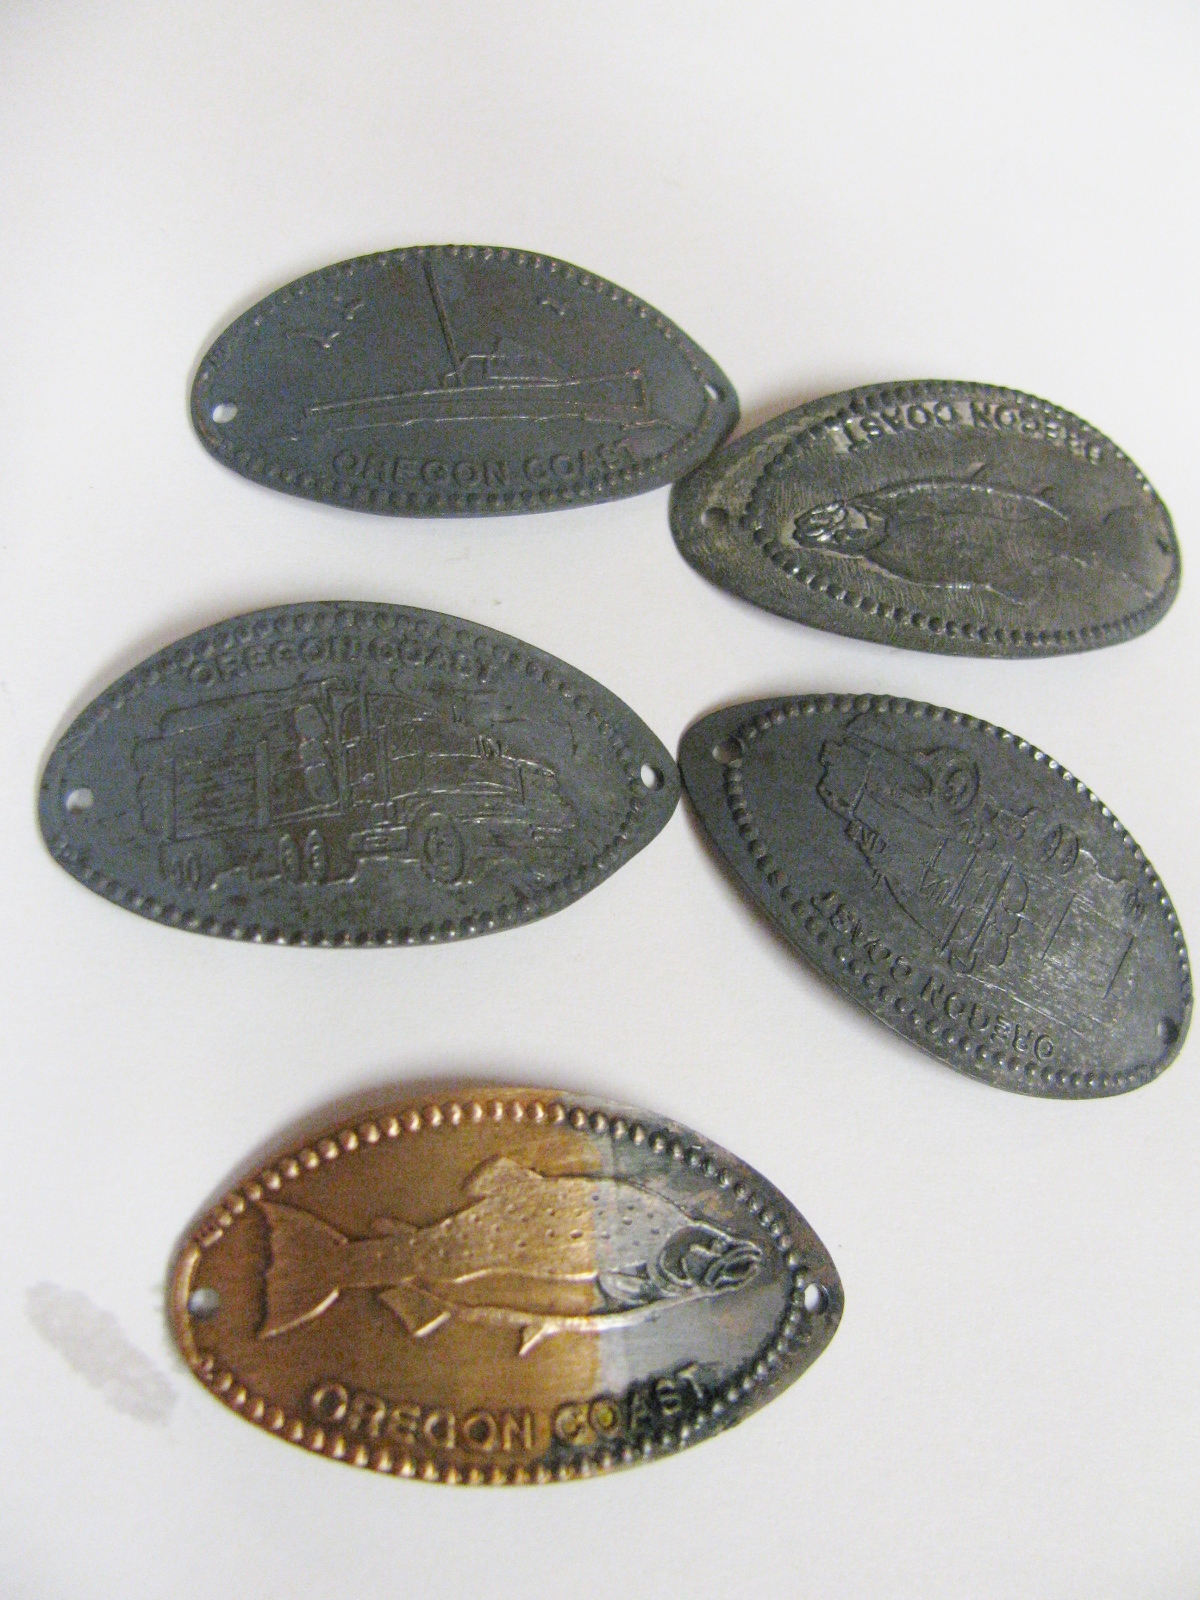
Smashed pennies, copper oval jump rings, and antique copper lobster clasp. When smashing the pennies, try to pick pennies that are older than 1981, because they are solid copper. The solid copper will take to the patina better.
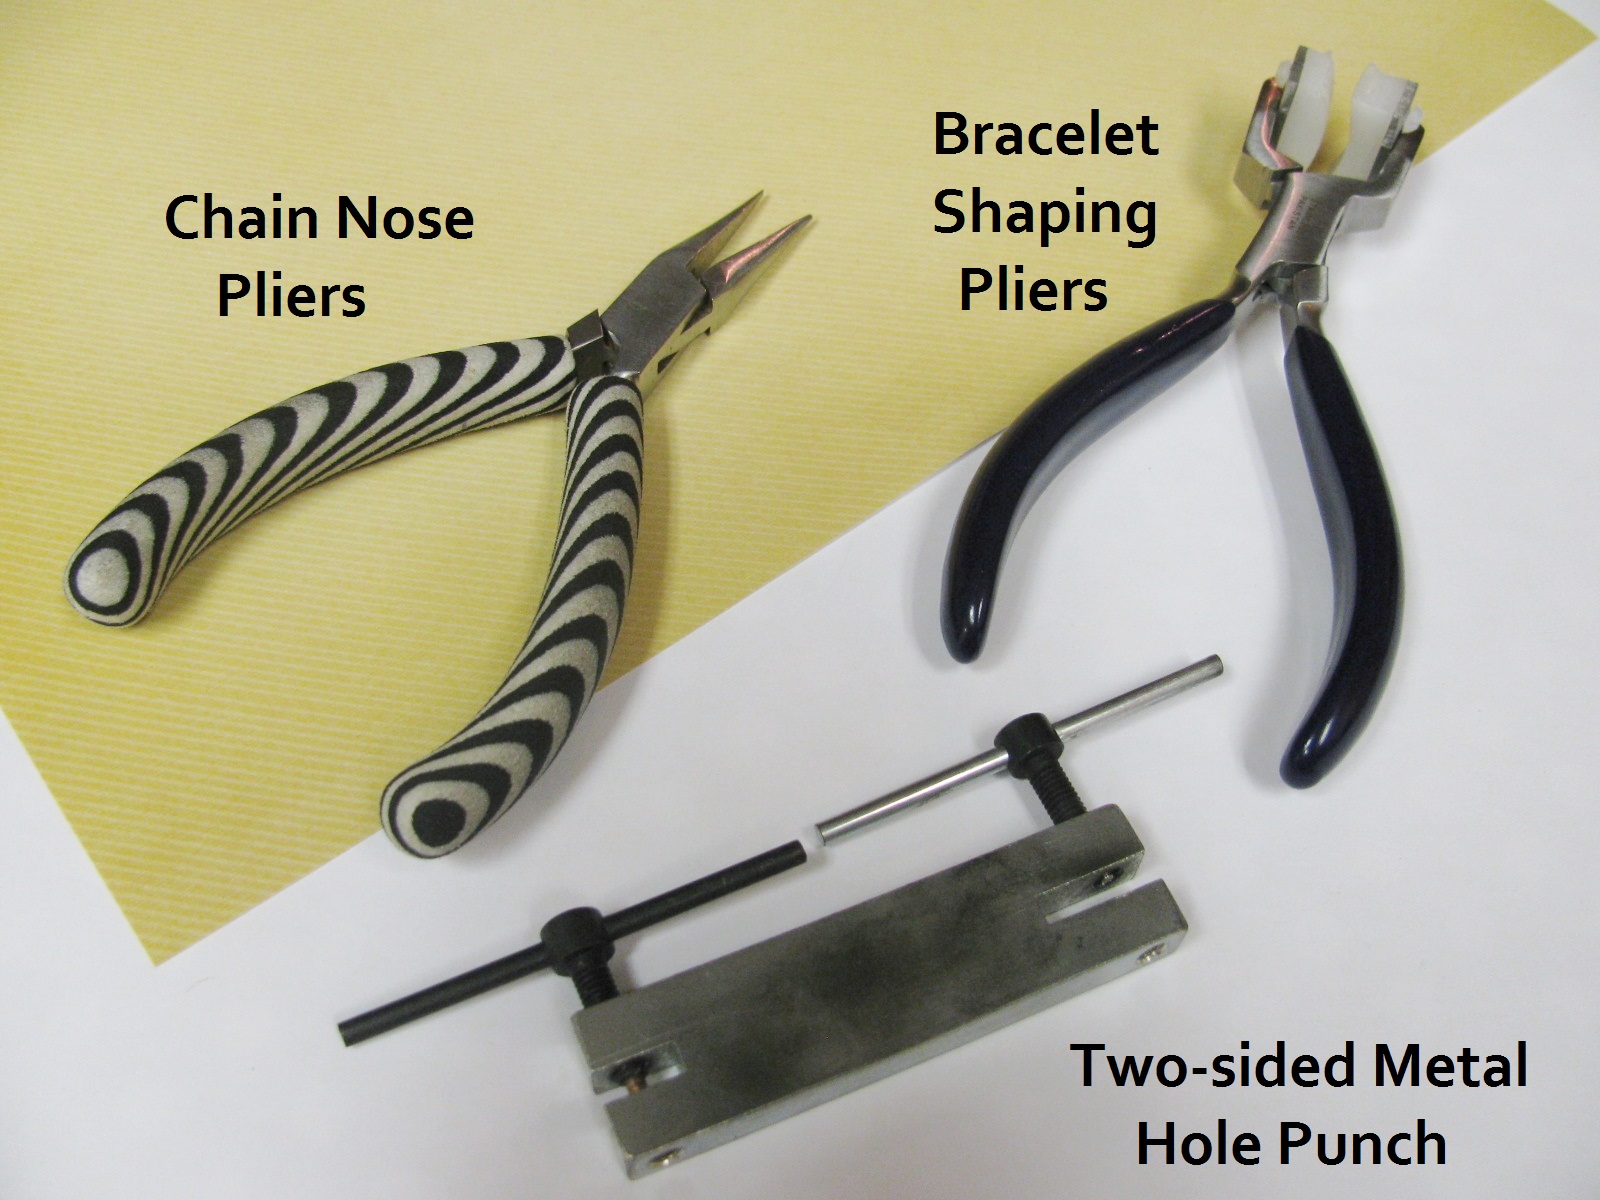
Tools for making the bracelets. Chain nose pliers, bracelet shaping pliers, two-hole metal punch. The bracelet shaping pliers are optional, but they really create a great shape.

Renaissance Wax for sealing the copper. Polishing pads for buffing away patina. Liver of Sulfur for blackening the copper.
Now that you have all the tools and supplies, there are a few easy steps to follow.
1. Punch holes in the pennies.
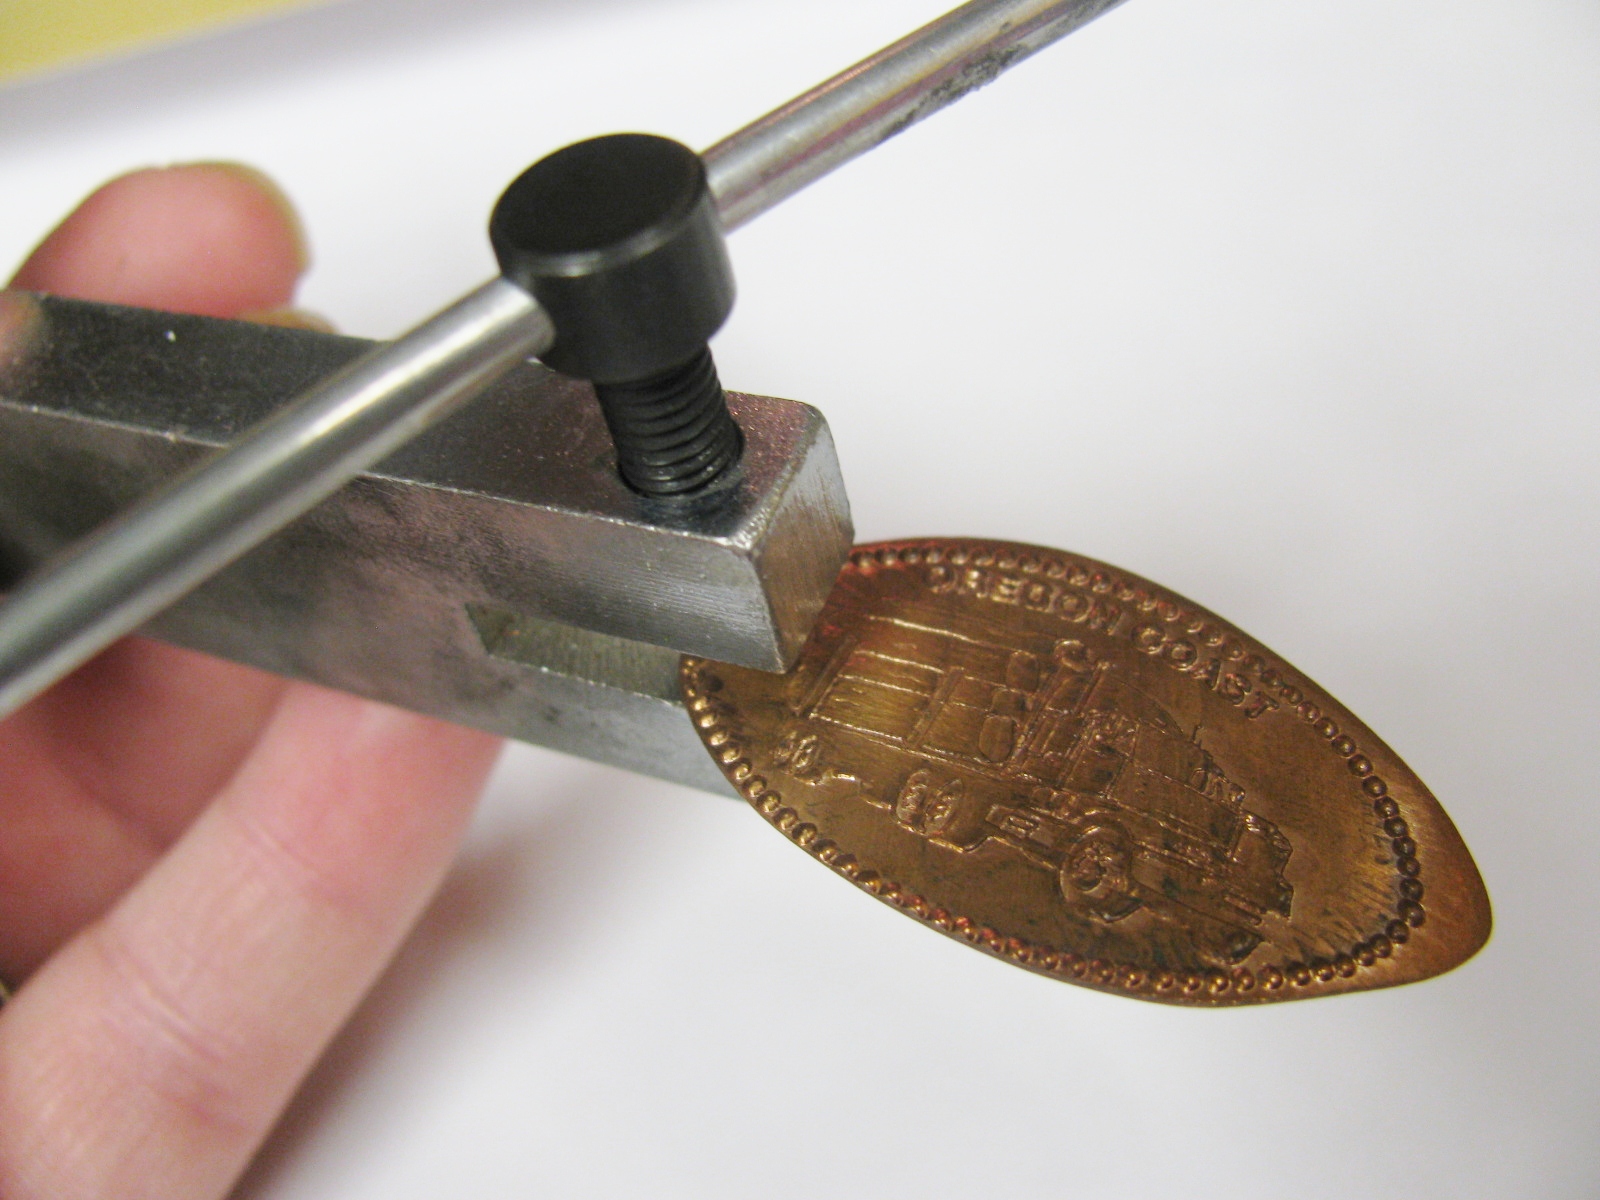
Just twist the handle on the top of the punch to make the holes. There are two sizes, I prefer the smaller size.
2. Use the bracelet shaping pliers to bend the pennies into a curved shaped. This will help the pennies shape to your wrist better and give the bracelet a polished, professional look.
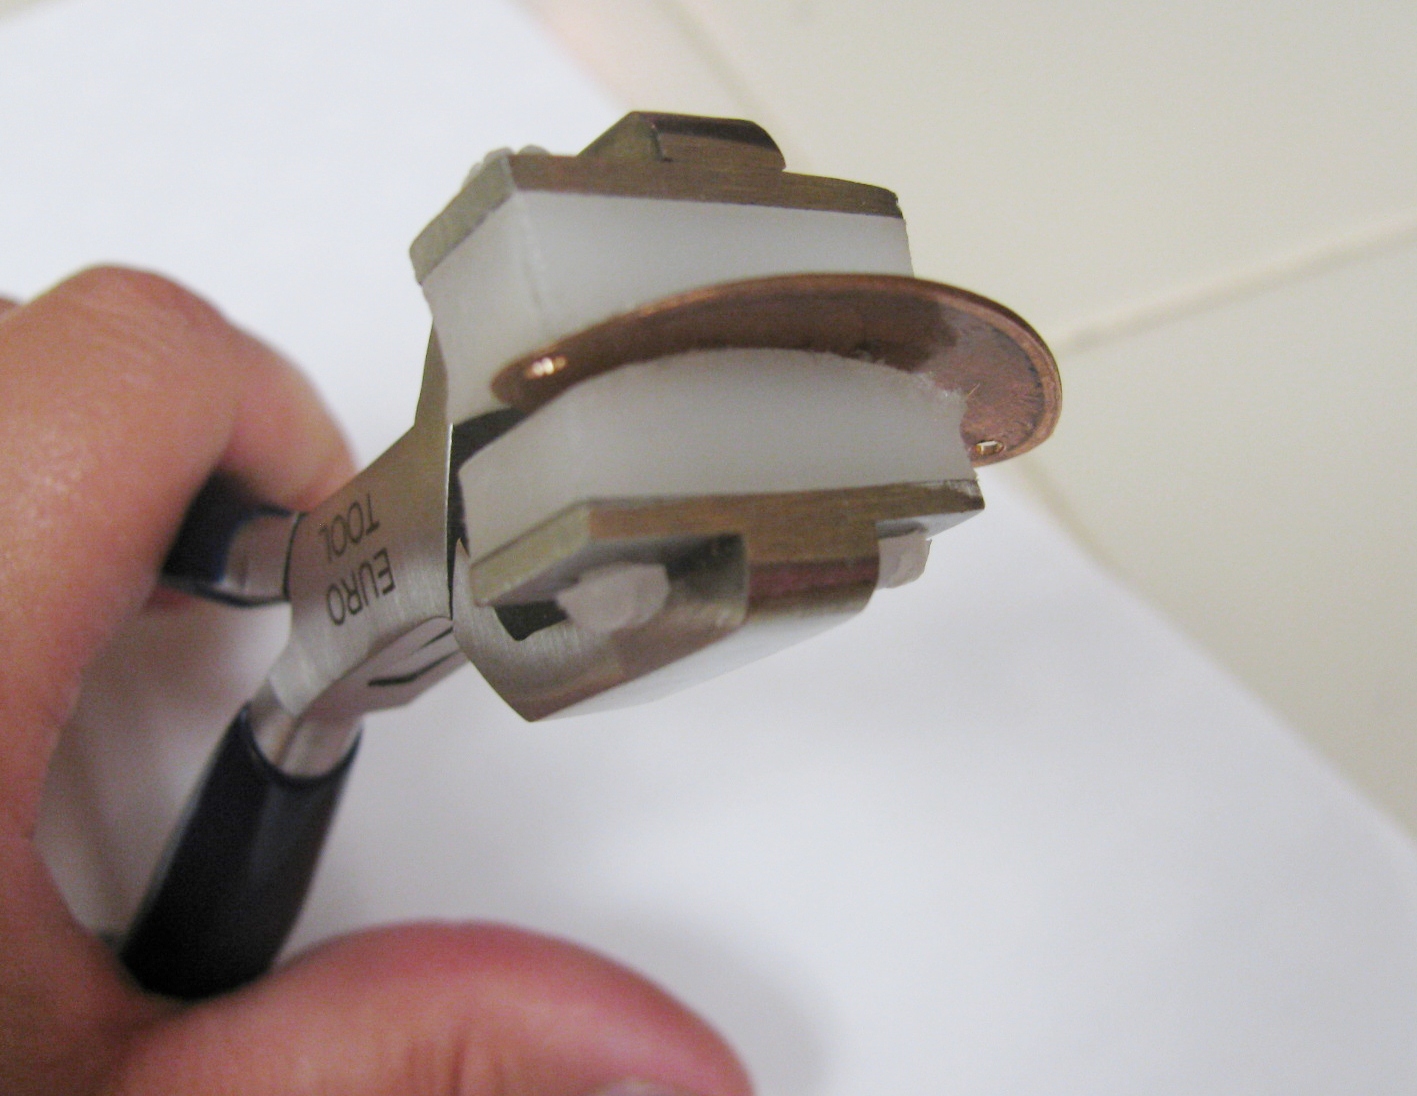
Simply place the pennies in the pliers and they will do the work for you! Sorry mine are kind of worn looking, I use them a lot!
Use the pliers to bend all the pennies. This will help them to lay better on your wrist!
3. Antique the pennies and jump rings. I like to use liver of sulfur, though there are several antiquing solutions that will work on copper.
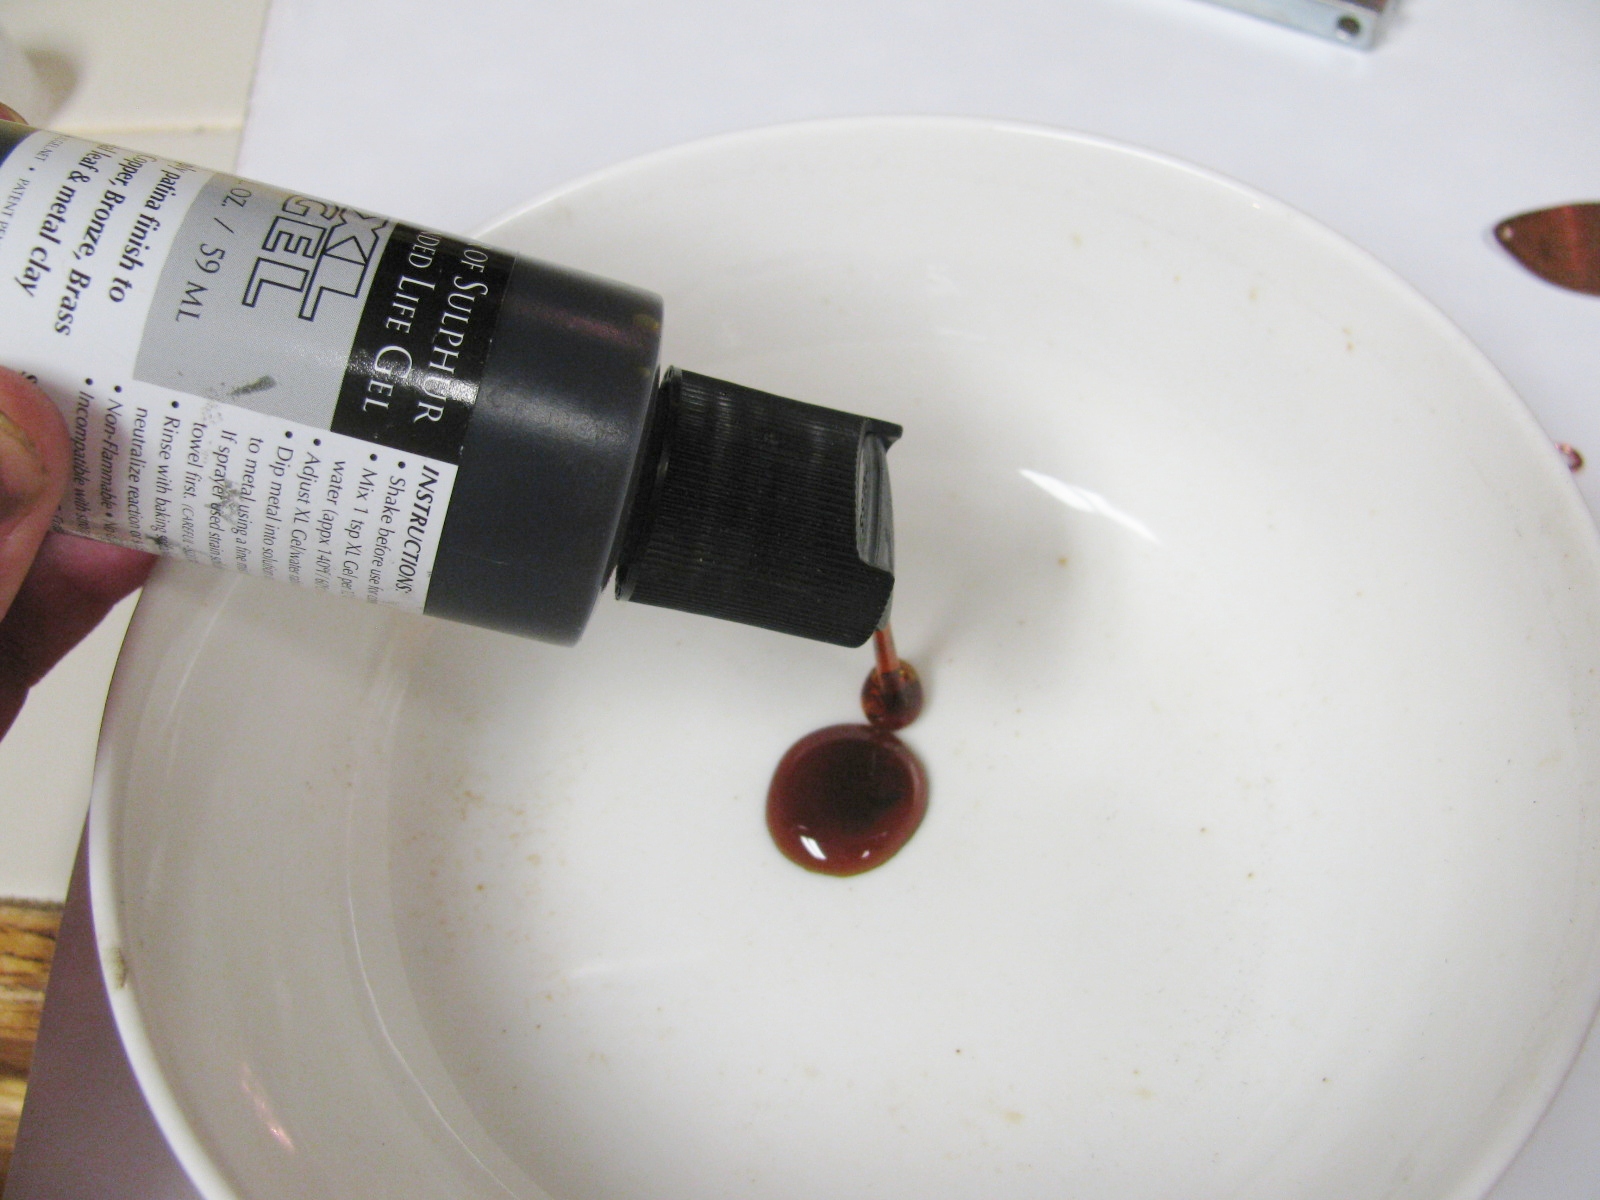
Squeeze a small amount of Liver or Sulfur gel into a small container. I use a small glass bowl as my designated antiquing container.
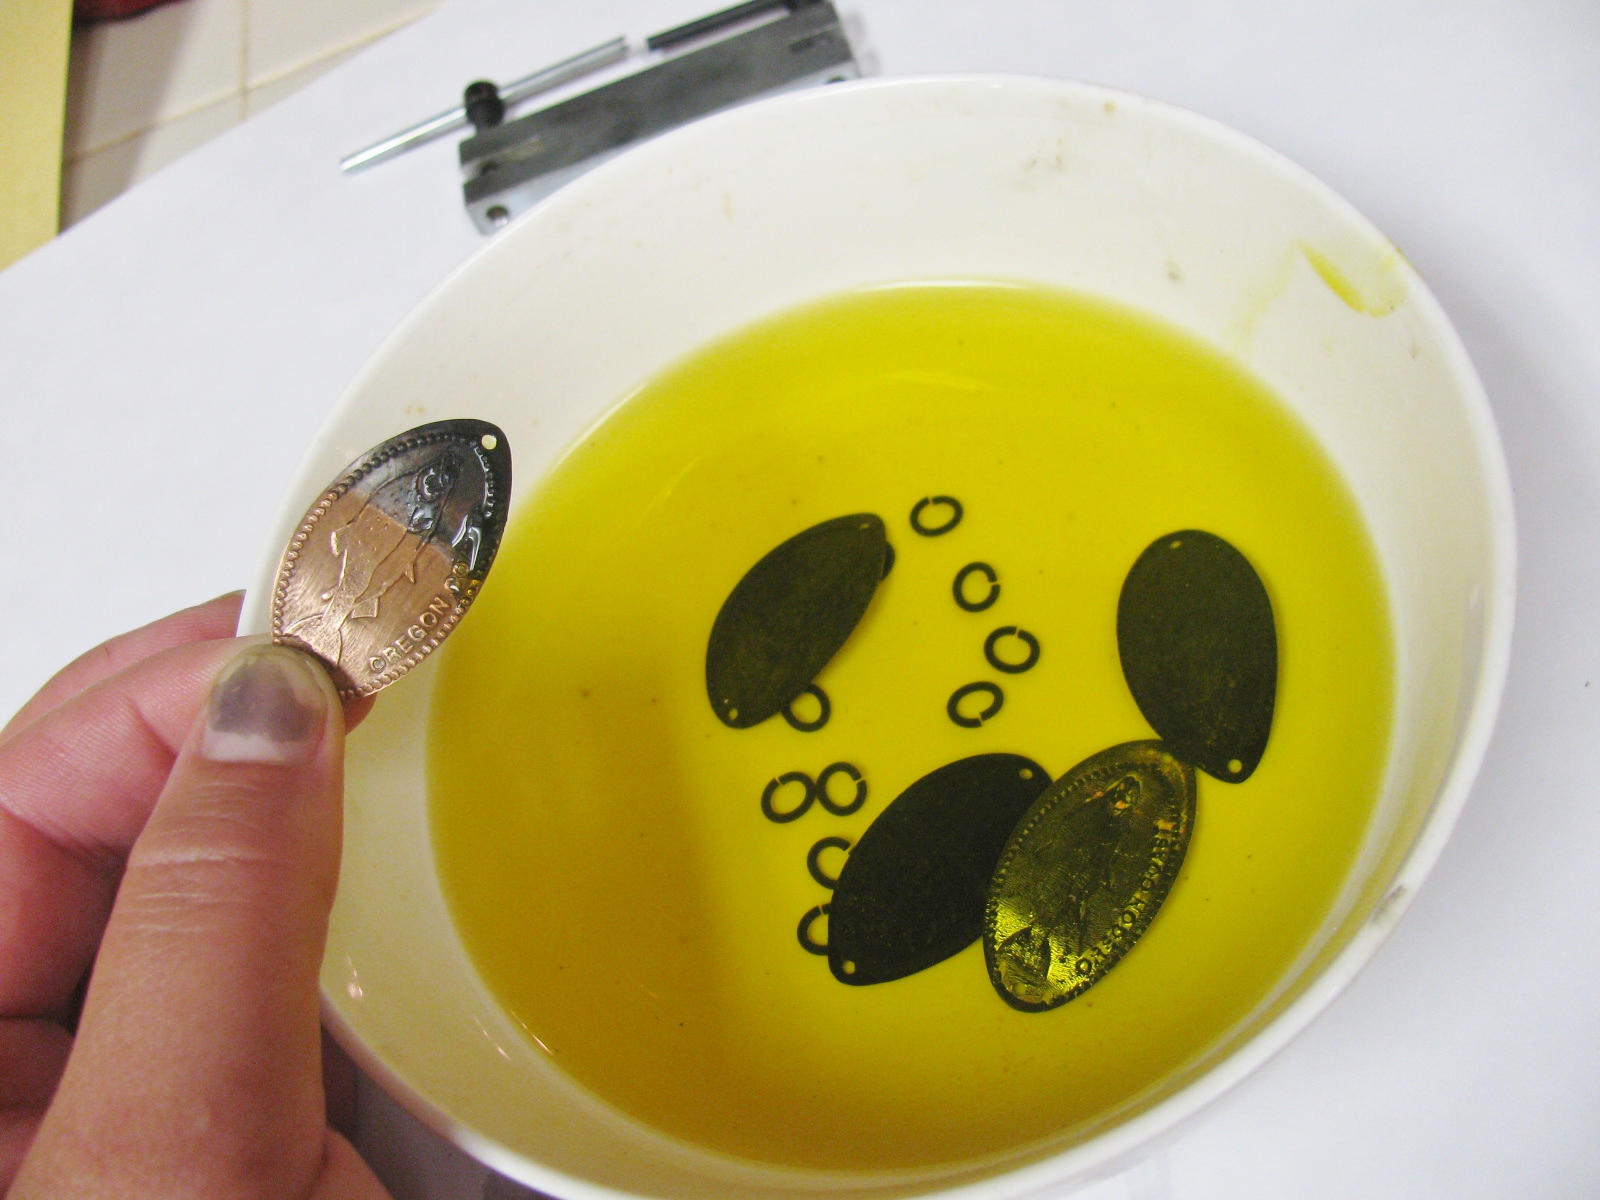
Add warm water to the liver of sulfur gel and stir the mixture. It will stink like rotten eggs. Place your smashed pennies and copper jump rings in the solution. You may need to clean the surface of the pennies and jump rings with some fine grit steel wool. This will take off any oils, dirt, or coatings that will keep the patina from penetrating the copper.
After a little bath in the liver of sulfur, the pennies will turn black. You can see on the last penny, the difference a patina makes.
4. Buff and polish the pennies.

Use the steel wool first to remove the majority of the patina. Then use the polishing pads to make the copper shiny. The patina helps to make the images and lettering really stand out.
5. Seal the pennies with the Renaissance wax.
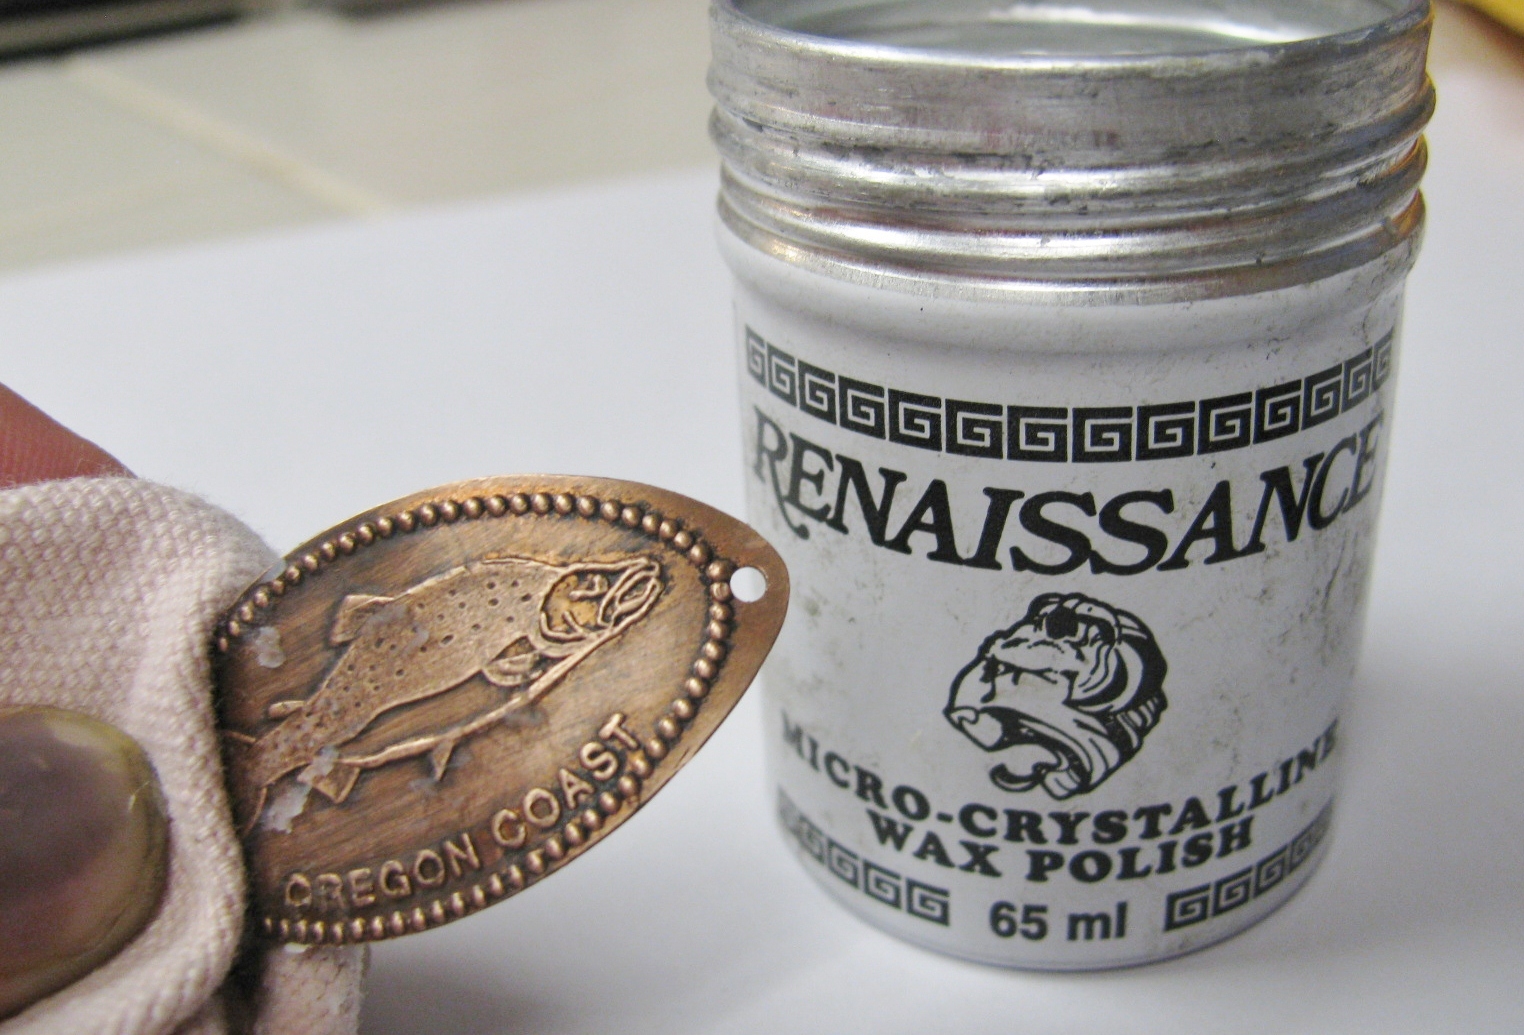
Rub a layer of wax on with either a paper towel or soft cloth. This will seal the patina, prevent further tarnishing and protect your skin from any possible reaction with the copper.
6. Assemble the bracelet.
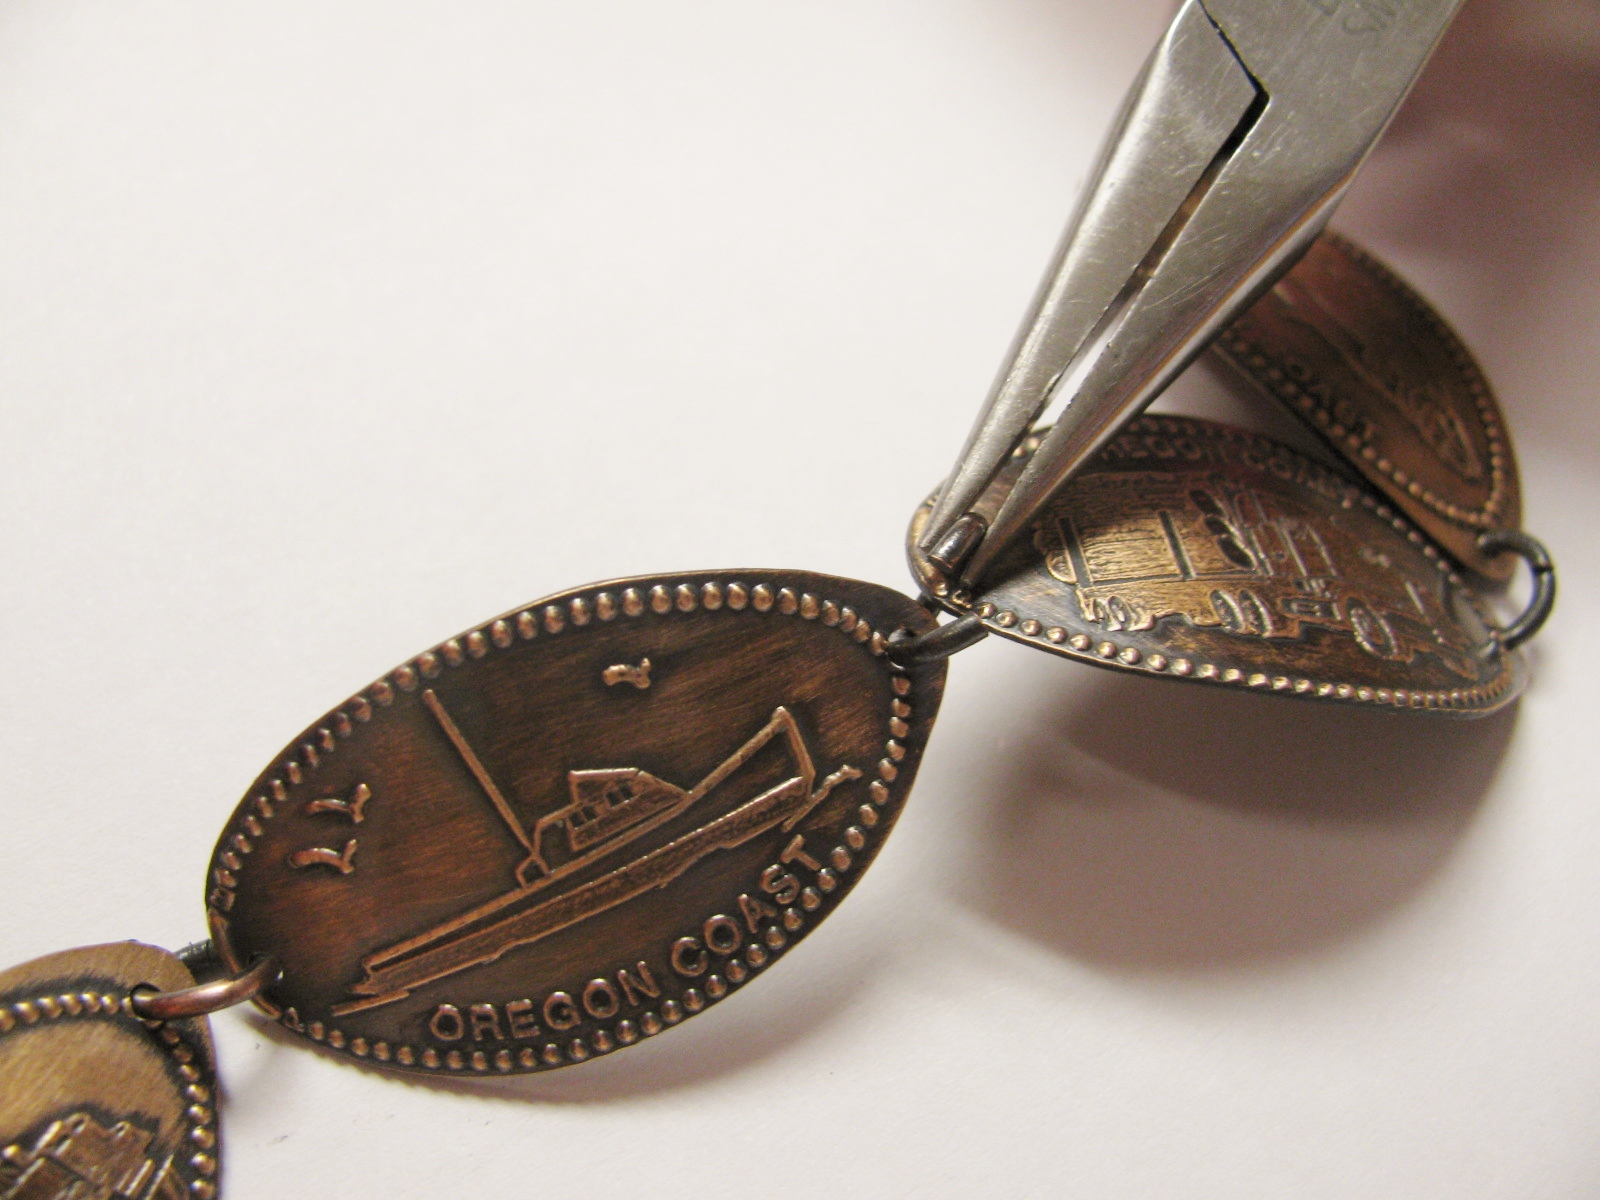
Use the chain nose pliers to attach the pennies together with oval jump rings. In between two of the pennies add a lobster claw clasp. Remember to always open your jump rings by pulling them apart sideways.
7. Enjoy your new bracelet!
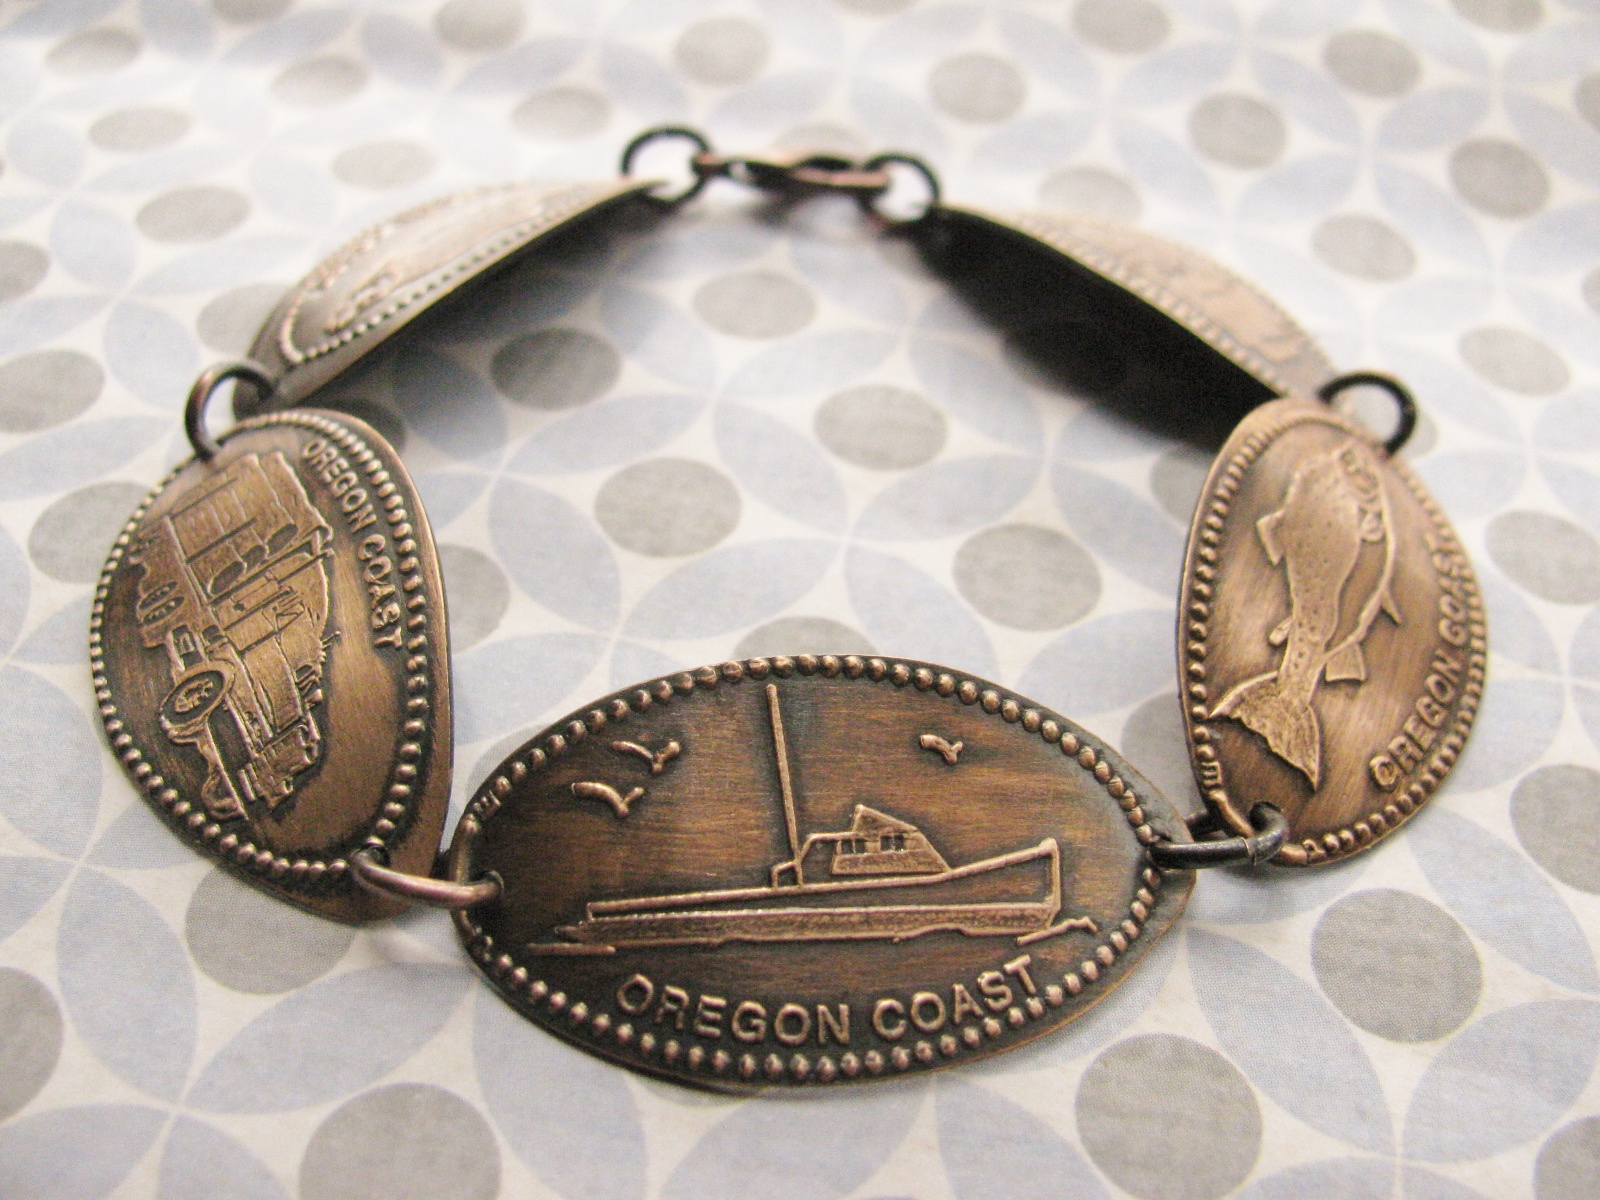
Now that your bracelet is all done, the only thing left to do is wear it and wait for the compliments!
Hopefully I have inspired you to make something fun with all your smashed souvenir pennies! Happy travels!
~~Tiffany