
If you are looking to make colorful things, here are two products sure to please: “Mirage Beads” and “Mermaid Scales”. Both come in bold bright colors and the possible design combinations are (almost) endless. I chose to make dangly earrings using my favorite Mirage bee beads and bright purple Mermaid scales. Read on for instructions and inspiration…what will you make?
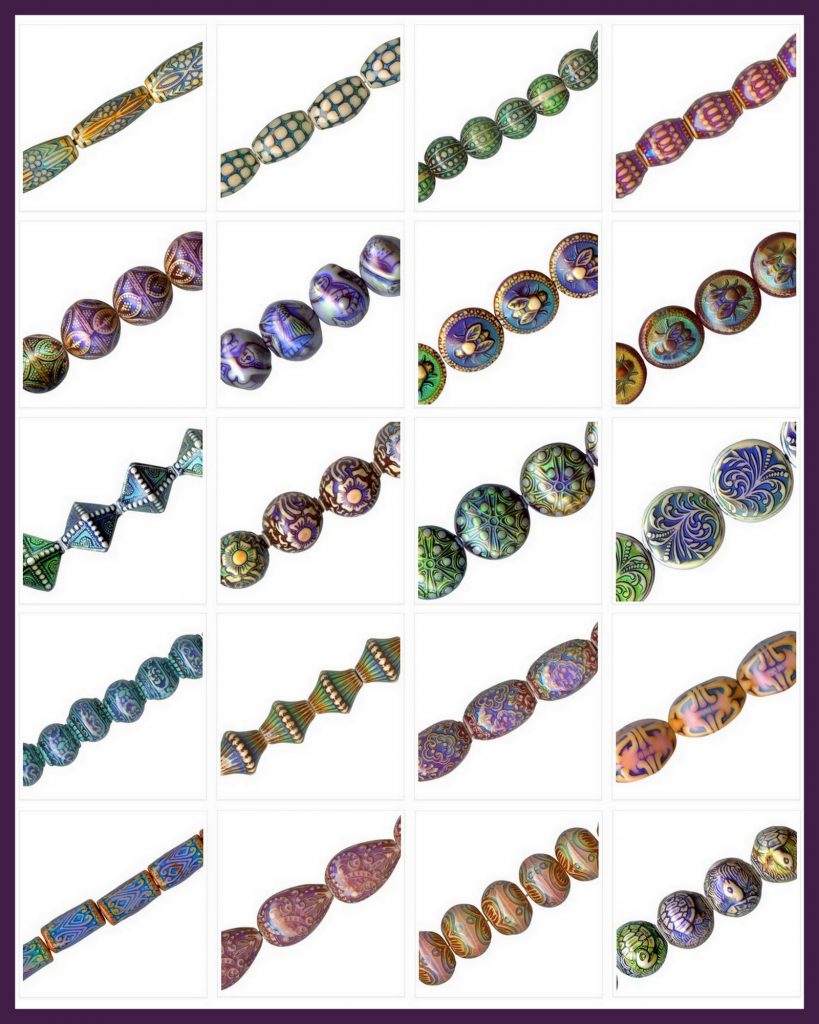
Color-Changing Mirage Beads are inspired by the mood jewelry of the ’60s and ’70s. The color-changing, thermo-sensitive polymer beads change color with small temperature changes and display a range of rainbow-like colors. Mirage beads are available in several styles.

Mirage beads come with an informative card to help you decipher your hot and cold emotions!
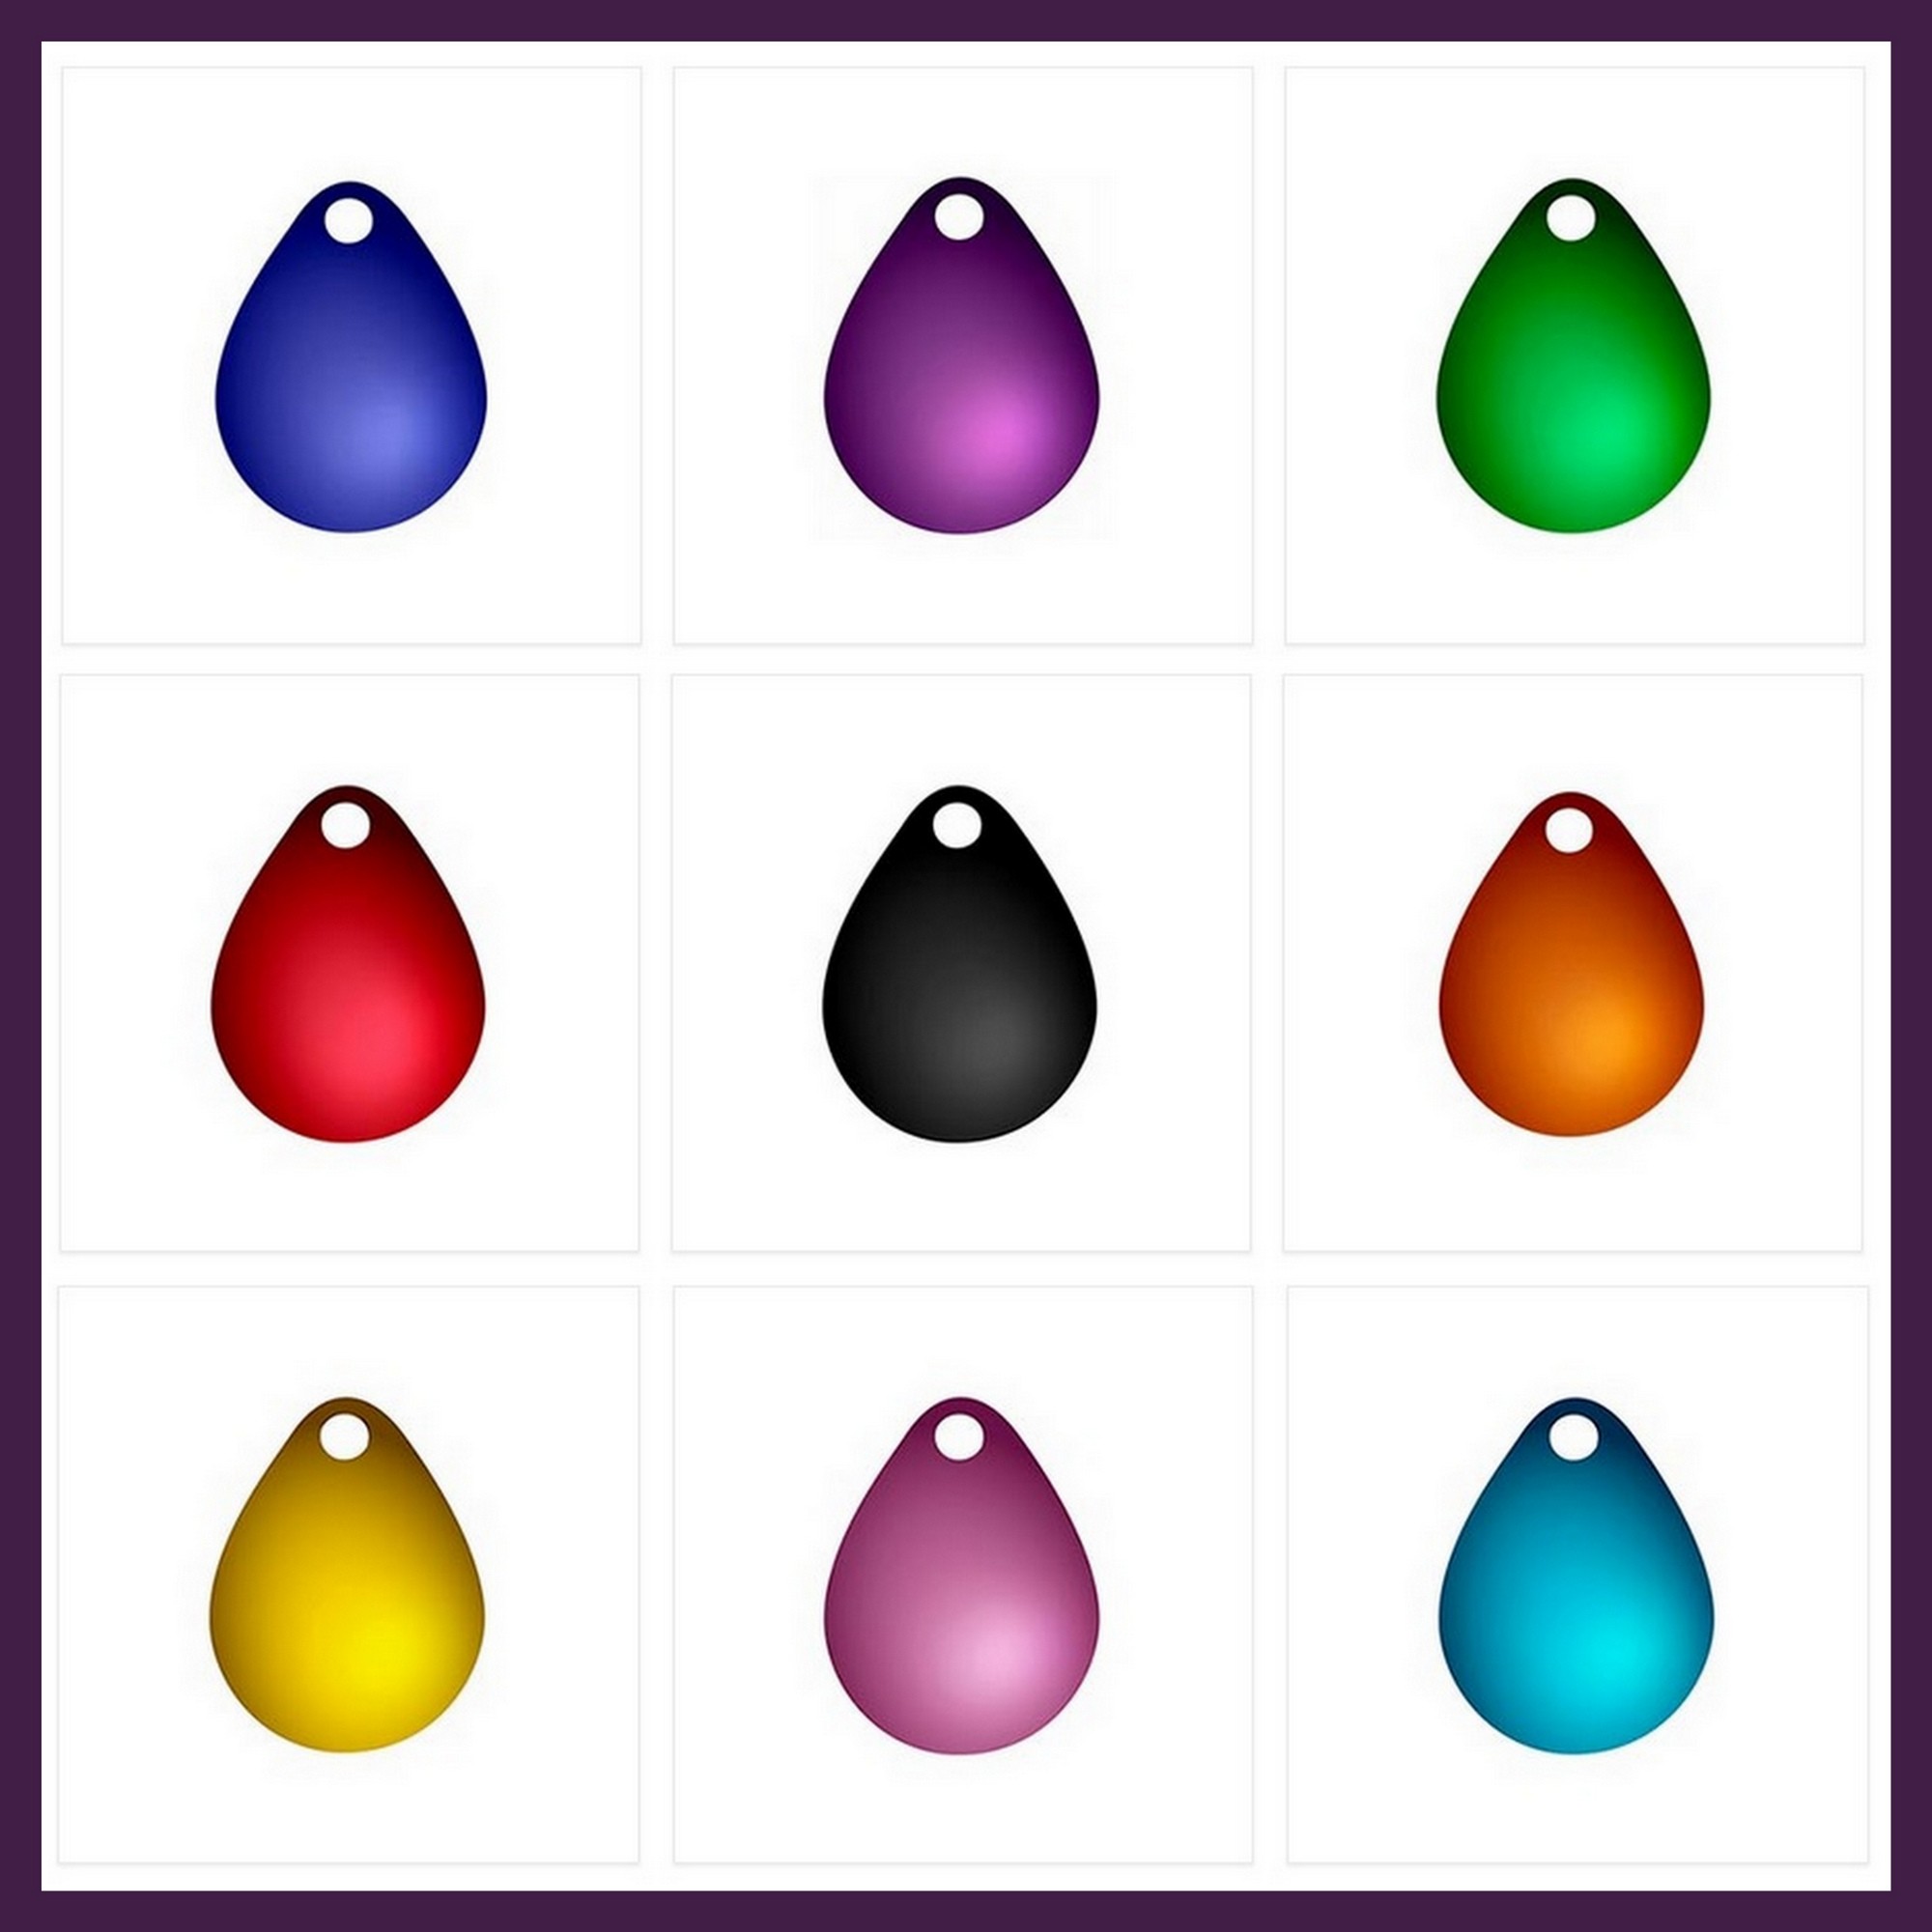
Weave Got Maille Mermaid Scales are lightweight domed teardrop-shaped drops made from powder-coated 316L steel. They are available in three sizes and a wave of vivid and reflective colors.
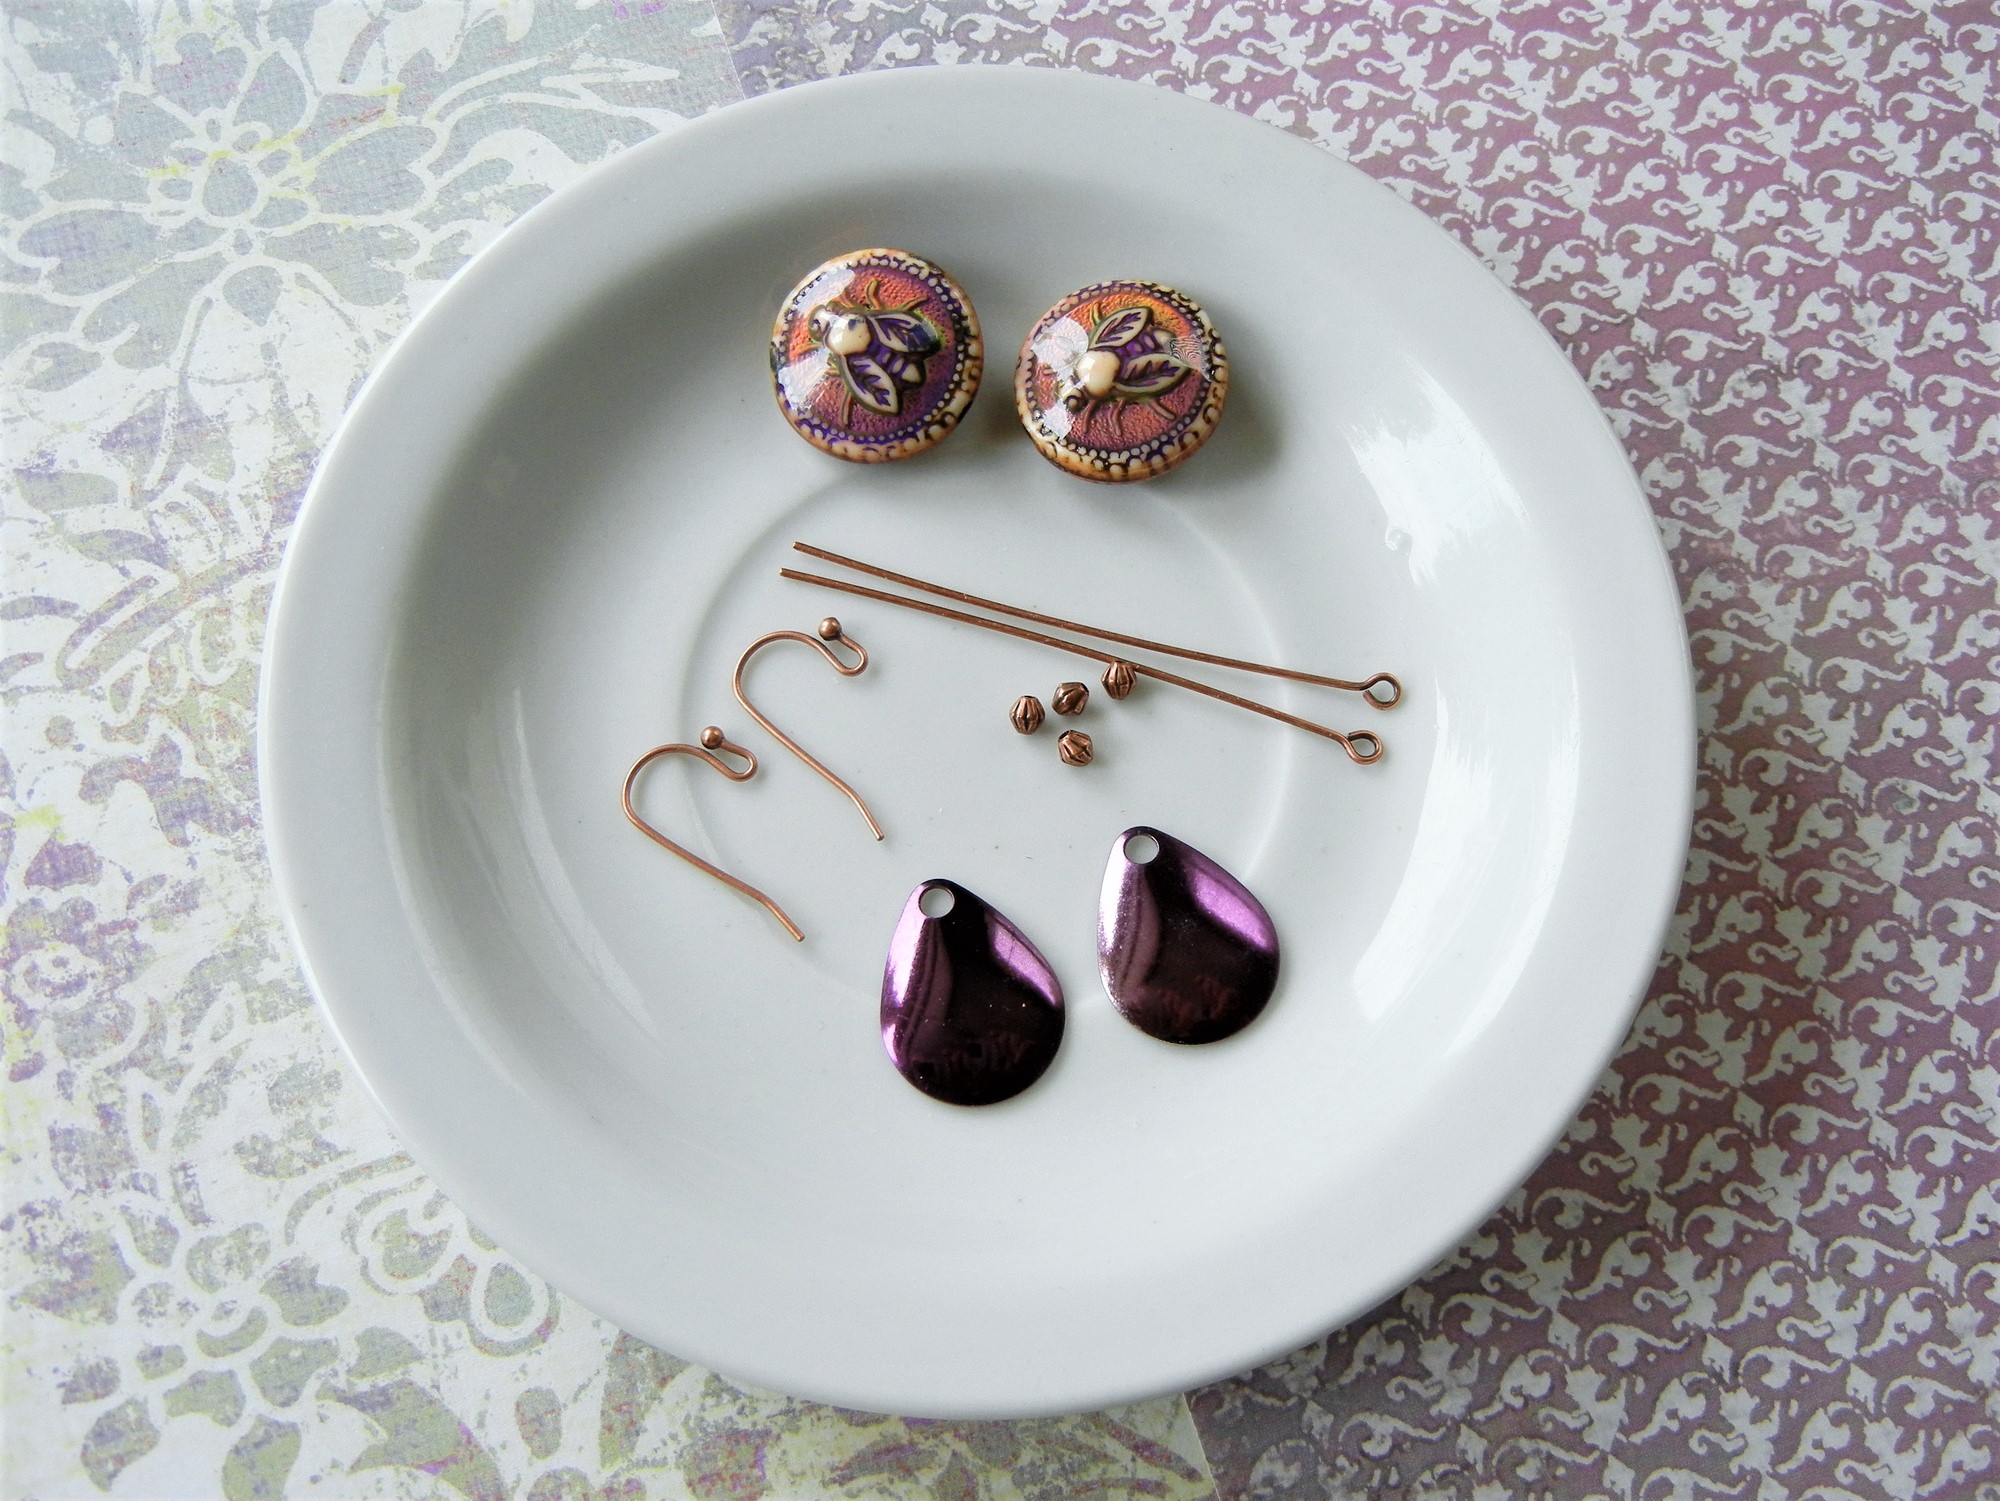
You will need these supplies:
- 2 each Color-Changing Mirage beads (I used item #27-398-18)
- 2 each Weave Got Maille Mermaid Scales (I used item #46-950-002-02).
- 4 each 3mm Fluted Hogan Beads (I used item #26-453-7).
- 2 each Plated Eye Pins (I used item #37-722-7).
- 1 pair French Hook Ear Wires (I used item #34-398-7).
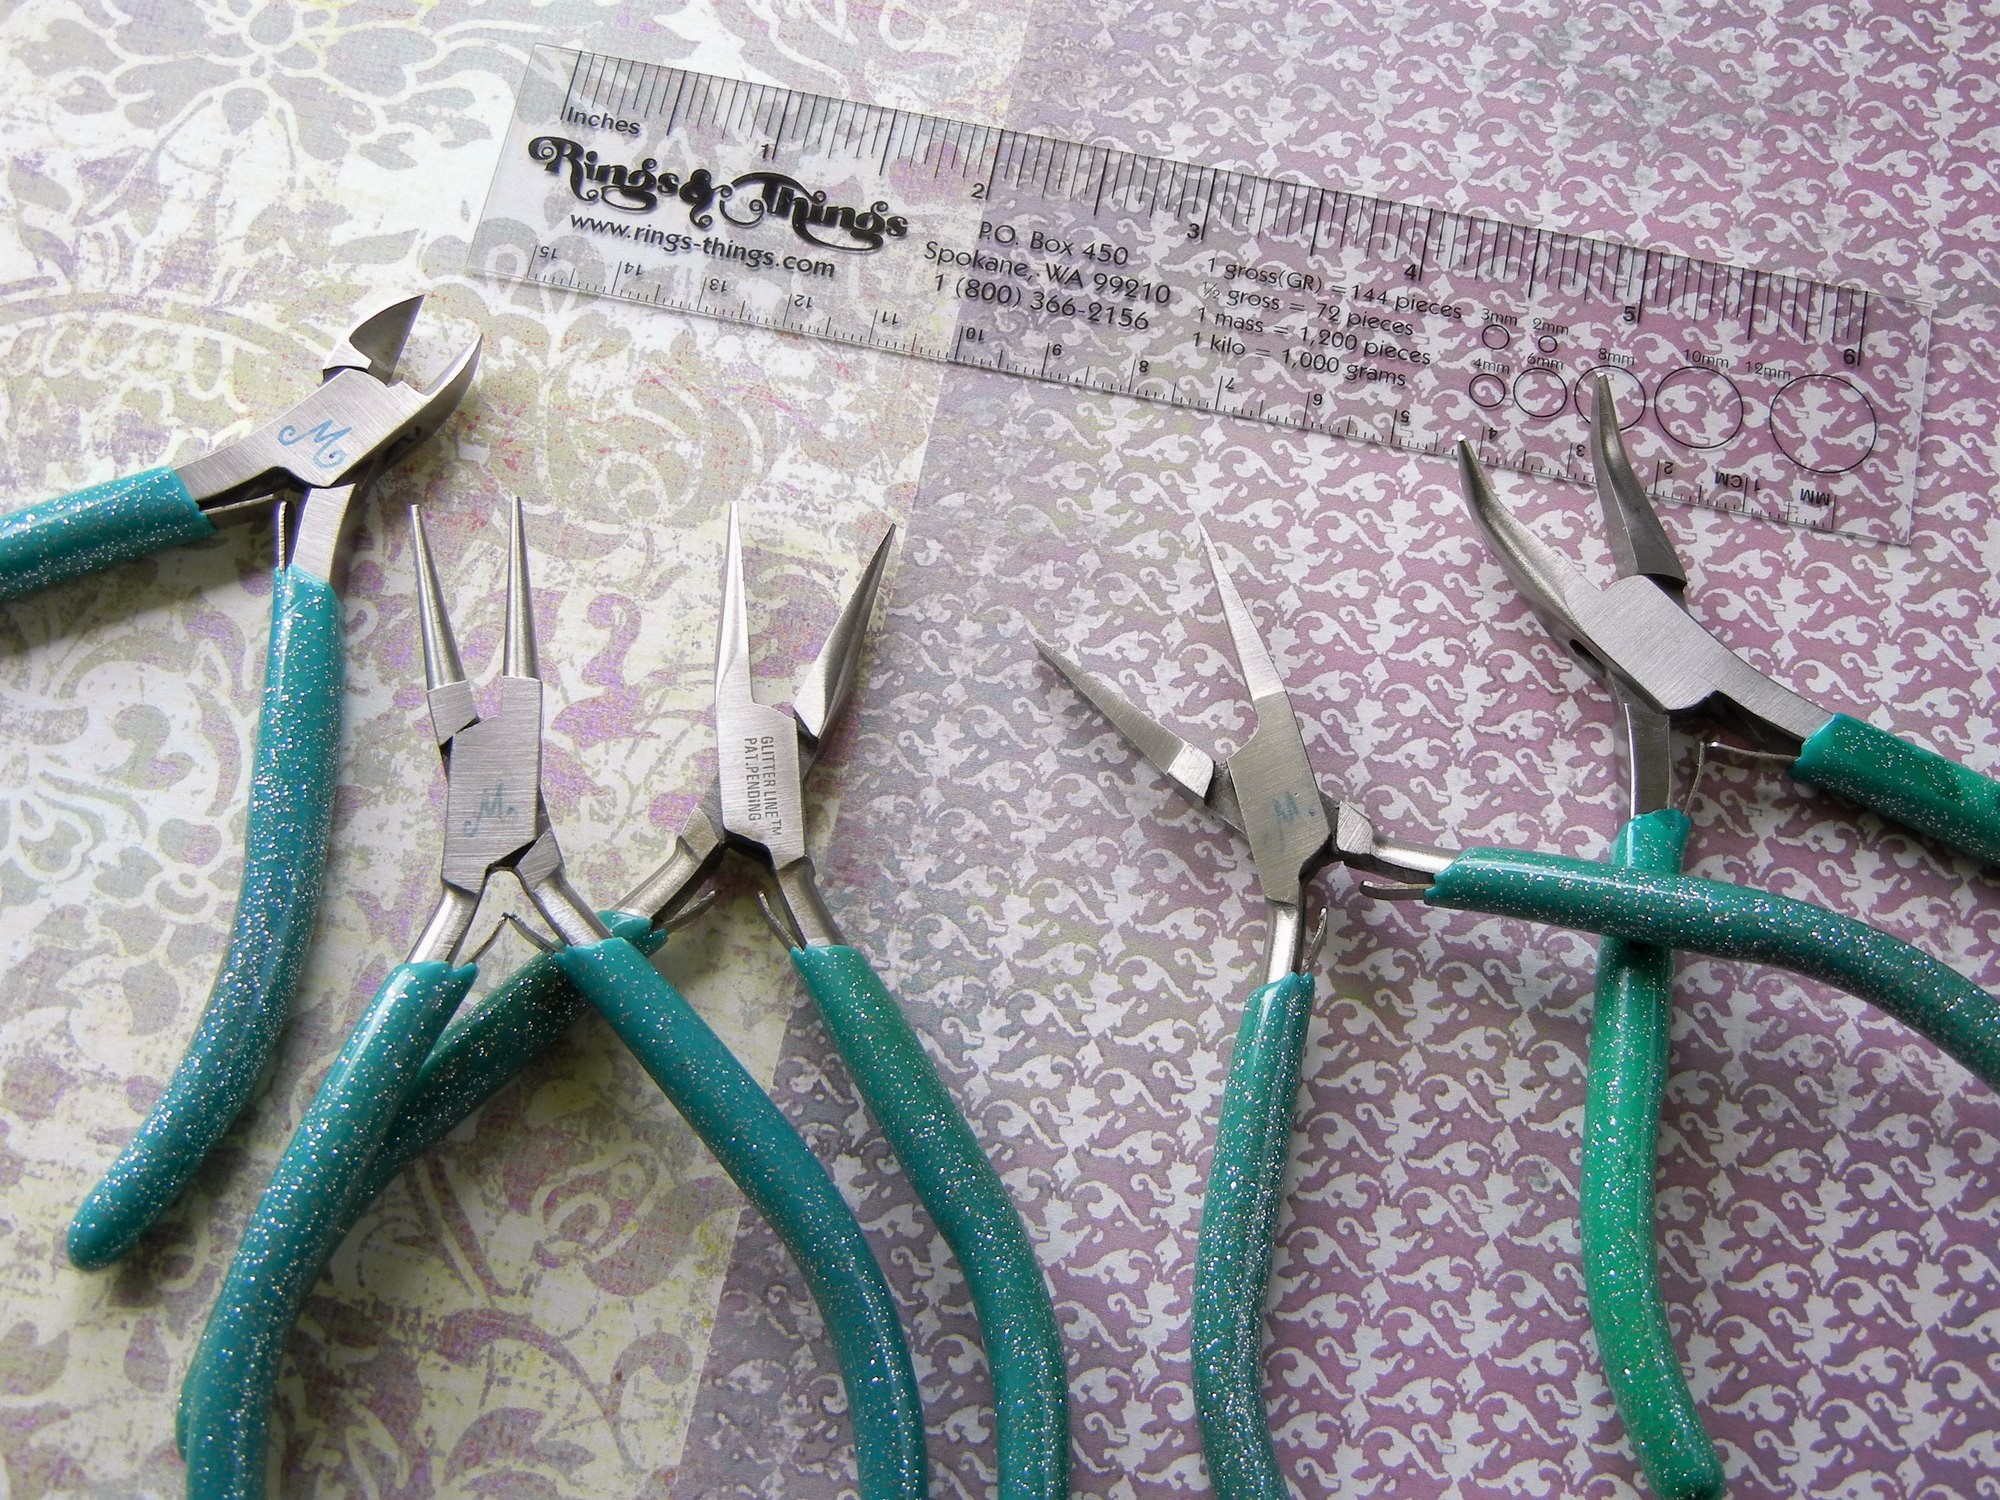
You will need these tools:
- #69-271-02 EURO TOOL Glitter, Round-Nose Jewelry Pliers
- #69-271-03 EURO TOOL Glitter, Chain-Nose Jewelry Pliers
- #69-271-08 EURO TOOL Glitter, Flat-Nose Jewelry Pliers
- #69-271-05 EURO TOOL Glitter, Semi-Flush Side Cutter
- #69-271-06 EURO TOOL Glitter, Bent Chain-Nose Jewelry Pliers (optional, but I love these)
OR you can get a jewelry-making tool set:

EURO TOOL Glitter, Five-Piece Set
The EURO TOOL® GlitterLine™ basic jewelry tool set includes five tools. The set has chain-nose pliers, flat-nose pliers, bent chain-nose pliers, round-nose pliers, and semi-flush side cutters–and they are all stored in a handy roll-up pouch. The comfortable 4.5-inch pliers have glittery PVC grips, precision ground tips, and box-joint construction with double-leaf springs for comfort. This kit is a Rings & Things’ “Staff Choice” and a “Best Seller”.

Mermaid scales are domed, the “front” convex side being a powder-coated color and the “back” concave side being a reflective silvertone.

Twist open the eye pin loop, then thread on a mermaid scale charm. Finally, twist the eye pin loop closed. I used a single mermaid scale per earring, displaying purple on the front and silver on the backside. You can also layer two mermaid scales back-to-back on the eye pin so that purple is visible from both sides.

String the beads onto the eye pin in this pattern: metal fluted hogan (bicone) bead, Mirage bead, and metal fluted hogan bead.

Mirage beads have a large hole that is approximately 2-to-3mm in size, which tends to fit sloppily on a head pin. The metal fluted hogan beads nestle down into the bead holes and act as bead aligners, centering the Mirage bead snuggly on the head pin.

Finish the eye pin end with a wrapped loop. For the finished earring to hang in the correct direction, the wrapped loop should be perpendicular to the lower loop attached to the mermaid scale.

Use semi-flush side cutters to clip off the remaining eye-pin tail. For a clean straight cut, face the flat side of the cutter’s jaw next to the wrapped coil. Then use chain-nose pliers to flatten down the cut wire end.

Thread the top loop of the beaded adornment onto the ear wire with the finished side facing outward. With ball-end ear wires, you don’t usually need to twist open the loop; with just a little pressure, the adornment will slide over the ball end and rest securely in the ear wire loop.

Now that you have made one earring, repeat the steps to make the second earring. To add interest, I chose to flip the direction of the bee in my second earring.

“Lavender Honey” Earrings by Rings & Things Designer Mollie Valente.
Rings & Things Jewelry Design Gallery
Make things!
Mollie
P.S. Purchase bee and pollinator-related items from Rings & Things and we will make a donation to the Pollinator Partnership!

1 Comment
I would like to know from where to buy the one step looper and the price please.