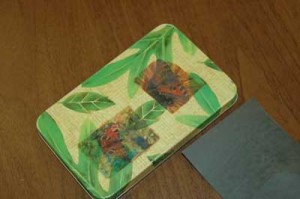
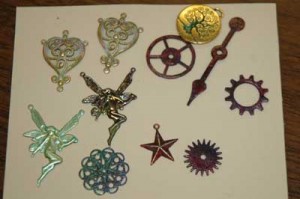
While R&T’s online store is down for a bit, getting upgraded today, I’m making us useful…Let’s have a giveaway!
Thanks to Making Jewellery magazine out of the UK, for sending me a beautiful promo copy of their new March 2010 issue. Inside the plastic wrap it includes an 86-piece jewelry kit. All of this can be yours in today’s drawing. Just Tweet/FB/comment below with your favorite crafts tip!
Here are the entries, live-blogged (need I point out, you should follow these Tweeters & Facebookers):
- idolyzer my tip – don’t let the cats near your beading…. seriously 😉
- swimmer_chick Use empty medicine bottles for bead storage- easy to label and see what’s inside!
- Clayshion tip: when smoothing out polymer clay, dip your finger in water and rub your finger lightly over the project. Takes out prints.
- Elaine Carroll Embree To finish a stretchy bracelet, I use a grill lighter to heat up my flat-nosed pliers and press firmly on the knot. This makes the knot much more stable.
- Julia Grosz For my fellow math dyslexics: use a popsicle stick to mark the length of wire needed for a link or piece to keep them all uniform. For those without a jump ring mandrel, coat your round nose pliers in R&T’s Tool Magic and use different color sharpies to mark where to bend for consistently-sized loops.
- MABJewelry tip: Beaders, plastic bowl lids make great little bead trays. Just fold to repour beads back into bags or tubes.
- Priscilla Hennen well I don’t know if this is the BEST tip, but it’s one i’ve used recently. 🙂 when making polymer clay bangles, a soda can is the perfect size/shape for curing them on!
- all_about_savin Type up directions and place in a 3 ring binder with finished pictures. Separate by occasion. Easy reference tool.
- silentgoddess -When needing a tight soldering joint, I use the edge of my bench block to file stock even & straight. Perfect fit each time.
- makeupkat1959 I use a thread spool holder hung on the wall to sort my bead strands
- Katherine Gibson James I love using scraps from other projects-scrapbook paper especially. you can make wall art, lamp shades, wrapping paper, cute covers for book ect..
- jessicaleap if out of storage containers for beads, you can use a devilled egg dish to hold beads 🙂
- lanieekat I save old 35mm film canisters for storage of all things small and crafty. They are perfect 4 beads
- justicejewelry Candy boxes, like whitmans, & valentines hearts, ones with plastic inserts for individual cholates, are great 4 sorting beads!
- Deb Gilchrist The plastic, resealable baby food containers are the perfect size for organizing smaller beads and findings – see-through and stackable.
- HerArtSheLoves I use clay softer and gloves, then I feel like I’m in of those of CSI type shows.
- Karen Potter Naylor One of my favorite tips for organizing bead projects…I scoured thrift stores and bought all of the MINI muffin pans I could find. They were about $.25 ea and I spray painted them white, let them dry and then I use them for projects with lots of parts & possibilities: clasps, head pins, cute wire, beads, charms, jump rings etc. and even better, they stack on top of each other! When i am ready for a particular project I just get the pan and a beading mat and I am ready to go….Another design tip: I also look at wallpaper patterns, paint chips with fun finishes to inspire me. I get a lot of ideas from looking at furniture decorating and fashion magazines… I cut the pics out when I can, put them into a document protector inside a notebook and when I am lacking a creative idea, I just pull those things out and look at them… Not to copy but to get the creative neurons firing again by looking at things I love.
- MelanDesigns Always carry a digital camera and small sketch notebook! When something inspires you take notes, sketch it or snap a picture!
- Miz Fit Leather – leather is the greatest asset to any jewelry makers inventory. It is the universal element, creating great jewelry for males and females. You can make fun bulky designs by braiding it, or use it to display a simple pendant. Why limit your customer base to just female customers, open up your designs to anyone!
- murphygracehome I put a white cloth on the table while beading.Not only does it make the beads that I drop easier to find, they don’t roll!
- Alison Nappi My secret to making the perfectly shaped earwire is a pen! 1. Cut the wire to length (I use about 2″ of wire) 2. Debur one end and make a loop at the other 3. Slide the looped end under the pen cap (make sure the loop doesn’t lay flat against the pen. It should lay perpendicular to the pen) 4. Hold the “tail” of the pen cap and bend the wire around the pen. 5. Bend the deburred end of the earwire slightly 6. Make any ajustments (if needed) and vuala! the perfectly shaped earwire!
- glitz_glitter Baking soda is perfect for polishing your oxidized silver. It is easy to clean up, and leaves the silver with a lovely sheen
- Janeen Sorensen I hope this will count, but my tip is that I utilize my local library! I check out books on techniques that are new to me, and use them for inspiration and to expand my design capabilities. It’s a free way to challenge yourself to be a better and more wide-ranged designer.
- leahmichon I use argentium silver and fuse it instead of soldering – this way, no harmful chemicals from flux or pickle.
- Nesrin Akdemir If you’re working on a project(s) that needs multiple pieces of chain that all have to be the same length. I’ve found for me the fastest way to do it is to measure and cut 1 piece of chain, string it onto a long headpin. Then string one end of your spool of chain onto the same headpin, hold the headpin up and measure and cut it the second piece using the first one as your guid, and repeat as many times as you need. I hope that made sense. It saves me a lot of time.
- yay4renee tip: don’t be afraid to think outside the box and explore different possibilities.
- Latisha Leppert I hope this counts as a tip…it is more in dealing with the creative process…When trying to create something unique- pick a 1 or 2 items to begin with then build on those things. When you try to look at a lot of different items (paper, beads, yarn, fabric-whatever your craft is) you can become overwhelmed by things and it gives you what I call craft block. If you simplify it down then you can get your creative juices going and not be overwhelmed with all the possibilities.
- Mortira Craft Tip: Plastic snack cups from kids’ lunches are perfect for holding beads, glitter, buttons, or just about any small bits
- Lynn OBrien If you are like me and do a lot of different crafts, I organize my tools by using clear locking lid mini boxes. I can label them for easy finding, as well as see through them to see what I have. I store all my mini-totes on shelves so that I can have easy access to them.
- BeadGoesOn We tumble our Thai silver with Dawn (blue) dish soap & water. Does the best job for us! Loose beads only!
- Emily Hale mine is to look at the trends, what are people wearing now, and what will people be wearing 6 months from now? maybe not so much a tip? but it helps me focus on what i plan on designing…
- whimsybeading Turn left over strung beads/crystals into knitting stitch markers using tigertail wire, 1 crimp bead and a touch of glue.
- Maureen Connolly my jewelry making has veered into the more ‘metal-than-bead’ genre – mainly copper – so my tip is to use (pre-1984) pennies in place of copper discs. I always have a bowl of them in some sand on top of my woodstove so when I need one, it’s warm to start with so it flattens easier and more uniformly.
- PepperPaige I use a hardware organizer with clear drawers to organize my beads. Tons of little drawers that are perfect for all supplies.
- genedotts When storing your finished pieces of sliver jewelry. Put a peice of Chaulk in some Cheese Cloth and keep it stored with it.
See the comments below for more tips, and our winner!


