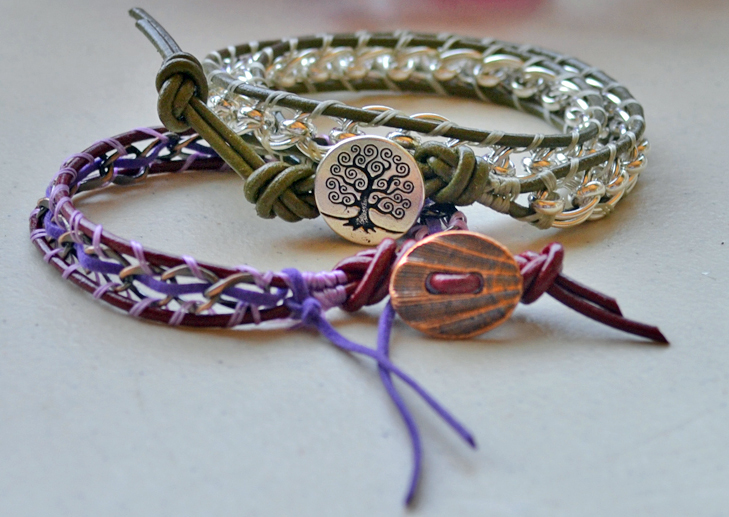
Lashed wrapped leather bracelets aren’t just popular because they look great — they’re also a hit because once you know a couple tricks to get started, they are an easy and fun DIY jewelry project to make! A great twist on this hugely popular style is to lash chain instead of beads to leather cord. Read on to make your own leather and chain wrap bracelets! Continue Reading…
Create a Healing Shrine
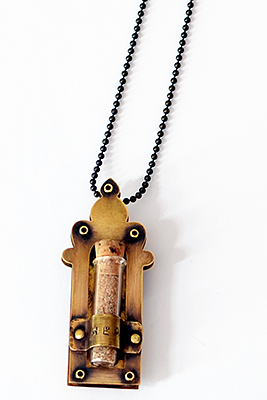
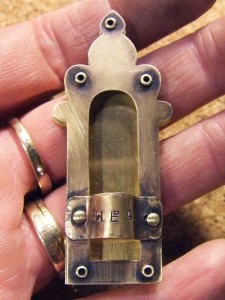
June 6, 2013Making handmade jewelry for someone is a unique and inspiring way to show you care. This “Healing Shrine” was created for a friend suffering from cancer. It was inspired by our new brass “window” blank shapes and a recent trip to Santa Fe, NM.
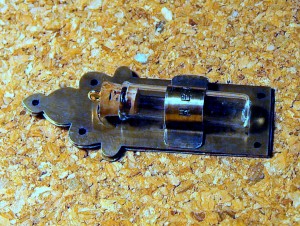
Each year, thousands of people pilgrimage to El Santuario de Chimayo seeking blessings. Many visitors take a small amount of “holy dirt” from the site, in hopes of a miraculous cure for themselves or someone who could not make the trip. I chose to encase my “holy dirt” in a glass portal, that I nested inside a brass reliquary. Following are instructions for how-to create this DIY jewelry design using stacked brass layers and cold connections.
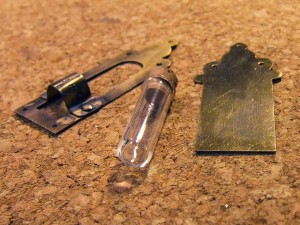
First, envision your shrine and decide how you want it to look and feel. Decide on contents for your glass bottle. Unscrew the top loop from the cork in the glass vial. Measure, mark and punch holes for rivets (using the small side of the hole punch).
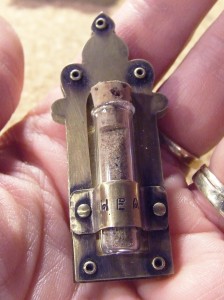
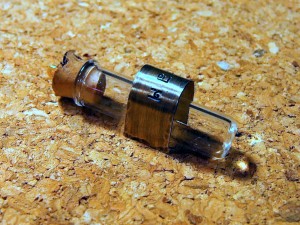
Stamp word “heal” on the metal band designed to hold the glass vial. Measure the band to ensure that it is going to fit.
Using bail making pliers, bend the center of the band into a curved shape, leaving each end flat. Cut to shorten as needed. File the ends.
Rivet the stamped metal band into place after double-checking that it will snugly hold the glass once it is assembled.
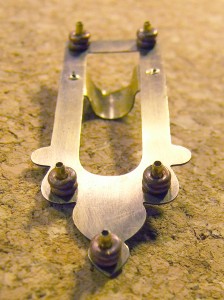
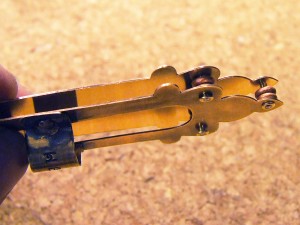
Insert tube rivets in holes between the front and back of shrine, stacking copper heishi trade beads between the layers (to fill the space and strengthen the connection between the top and bottom layers).
Rivet them into place. Note: Be careful, it is very difficult to reinstall the heishi spacer beads if they fall off the tubes!
Patina and clean. Using two-part epoxy, attach a magnet to the back side of the shrine. Carefully fill vial with contents.
Once the glue has cured, pop the glass vial inside the band. This DIY jewelry project can be a pendant, magnet or pin.
How to Macramé a Hemp Bracelet
May 7, 2013Growing up in the 1970’s, I predictably spent part of my childhood making macramé. In fact, I spent hours tied to the ends of masses of cording creating the ubiquitous plant hangers that have become an icon of the era. Call me sentimental, but I got a warm and fuzzy feeling when asked to dust off my knotting fingers and make a hemp macramé bracelet for Rings & Things’ Blog.
Continue Reading…An Easy Way to Translate Websites
January 24, 2013Translating websites that aren’t in your native language, or just translating them for fun, is easier then ever. Google’s translation software for websites is automatically installed in the Chrome browser and in its sister browser, Iron. It is also available as an Add-On in many of the other browsers. Here at Rings & Things we recommend Chrome, or for the more privacy-conscious, the Iron Browser as your default web browser.
To begin you will need do download and install the browser if you don’t already have Chrome or Iron. You can find free downloads here:
Google Chrome: https://www.google.com/intl/en/chrome/browser/
Iron: http://www.srware.net/en/software_srware_iron_download.php
Cosmetically and functionally the browsers are almost identical, with most of the differences being internal. What are the internal differences? Iron removes the unique ID that Google gives to every install of Chrome, removes all optional settings that would allow Google to track your browsing habits, and removes the automatic update feature.
Installation of either browser is simple and should only take a few minutes.
Once it is installed there is nothing else to do to get Google’s translation software. When browsing a site in a foreign language each browser should automatically offer to translate the page to your native language. If it doesn’t, or if you want to translate from your language to another, just right-click on the page for a list of options and chose (in my case) “Translate to English”. This will bring a bar below your tabs that will tell you what language it is translating from and to. If you choose, you can change the language it is translating to any language you wish.
Cheers!
Todd, Rings & Things Web Guru
Mark your calendars NOW for Fall 2012 Bead Shows!
July 16, 2012Hi bloglandia! It is finally SUMMER. BEAUTIFUL SUMMER. And yet – what did I see at the store last night? That’s right: row after row of back to school supplies! While I found this to be a bit of a bummer, it did serve as a good reminder that summer really will be over before we know it. That isn’t all bad news, though, for in September Rings & Things’ nationwide Bead Shows start up again!
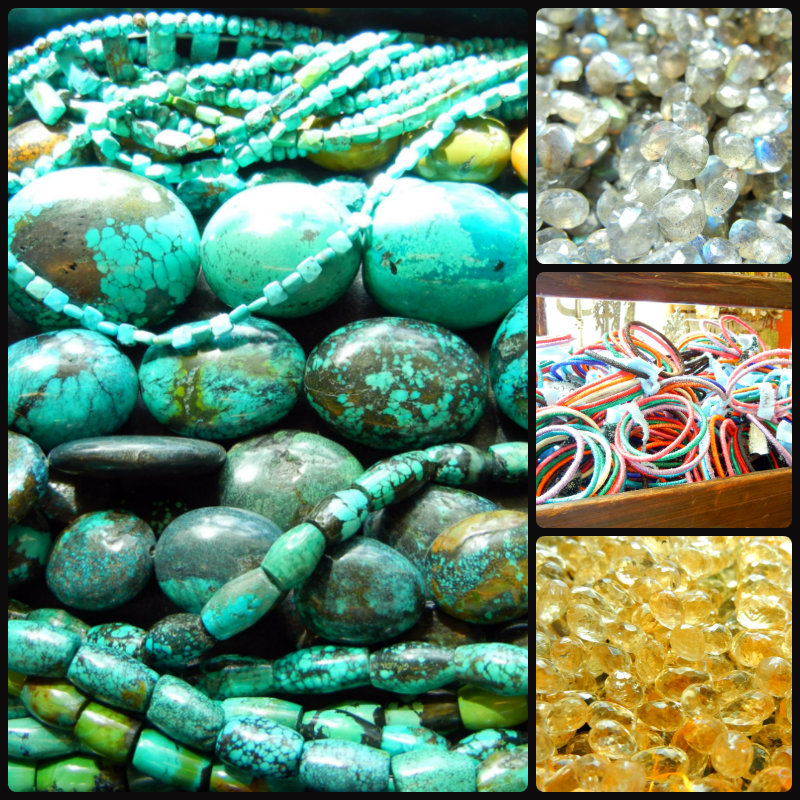
Turquoise, labradorite and citrine are very popular gemstones at our shows. Plus, we sometimes have great deals on bracelets like the African bangles in the center pic.
The first show is September 9 in Minneapolis. For two months, the shows keep coming until November 7 in Missoula. So please take a moment to take a look at our Fall Schedule and see when the beads will be in a town near you! It is always so, so tragic when people post on Facebook about the bead show they just missed. Don’t let that happen to you! 🙂
Also, if you aren’t already familiar with her beautiful work, be sure to check out Heather Powers at HumbleBeads Blog – she did a great write up with photos about our 2012 spring show in Grand Rapids! ~ Cindy
Summer Road Trip part 3
June 29, 2012Hi bloglandia! Today is the deadline for entering the Vintaj Summer Road Trip design challenge. Mollie was a little late in getting her inspiration piece completed…seems her idea of a summer road trip is wandering in the woods. There are no clocks or calendars in the wilderness! Her “Day in the Woods” necklace is well worth waiting for, however. She combined a number of sweet little elements together to make this piece. We’ll have to look closely to see them all, as the sunlight can be a bit distracting!

The vial hangs with a cluster of wire-wrapped bicones in shades of smoky blue and gray from olive green velvet ribbon.
Mollie painted a wee brass feather charm with Vintaj Patina in a muted blue-green color before hanging it inside a glass vial. The vial top is adorned with a Vintaj bead cap, Swarovski rhinestone wheel and a crystal bicone from our new Idewild Blue Crystal Jam mix.
A DecoEmbossed Vintaj leaf and a metal stamped and dapped round Vintaj charm complete the grouping.
And here is a view of how Mollie finished the ends – ribbon clamps (simply flatten with pliers -the teeth inside grip the ribbon securely) and a Vintaj clasp.
With jewelry this pretty, who wouldn’t want to wander in the woods? Hope you all have a lovely weekend! ~ Cindy
Vintaj Summer Road Trip Jewelry Inspirations part 2
June 26, 2012Hi bloglandia! For me, a summer road trip means just one thing: camping. I’ve never met a national park I didn’t like, but I especially love Yellowstone. However, I never saw a bear the whole time I was there. Fortunately, the National Park Service has an amazing online archive of public domain images which includes vintage photos of bears in Yellowstone! I put the image in a bezel, covered it in resin and layered it over a stamped Vintaj natural brass disk to create my centerpiece.
 For the tassel, I hung clusters and clusters of wire-wrapped crystals from our new Wild Flower Crystal Jam with a few imperial jasper rondelles. The way the dusky rose, green, tan and slate hues of this particular jasper coordinates with the crystal mix was what inspired this whole design! The cover for this craziness is a Vintaj bead cap. I really like our drawn cable chain because the links open and close like jump rings – so the whole thing is connected by chain links!
 Multi-strand designs can become kind of high maintenance, so I like to layer coordinating pieces together instead. And since knotting is a jewelry technique that is super easy to do on a road trip (so long as you’re not the driver!) I made a long strand of jasper on 0.5mm natural hemp.
 There a few 6mm crystal metallic light gold rondelles randomly interspersed on the strand to add a bit of bling.
You know what I am really terrible at? Taking photos of myself. Hence the blurry headless photo above. But I wanted to show how the two pieces look together, and laying them on a table just wasn’t working. This probably isn’t much better, but I hope you get the idea…and that you are busy making your own Summer Road Trip jewelry ideas into reality! Only a few days left to enter… ~ Cindy
Vintaj Road Trip Design Challenge!
June 20, 2012 Hi bloglandia! We are really excited to be partnering with Vintaj for their Summer Road Trip design challenge this month. Visit their blog to see the great jewelry their designers created by pairing beads & components from Rings & Things with Vintaj products. The Vintaj blog also has all the details about how to enter the contest! Submissions are due by NOON (CST) Friday, June 29. But wait – don’t go yet!
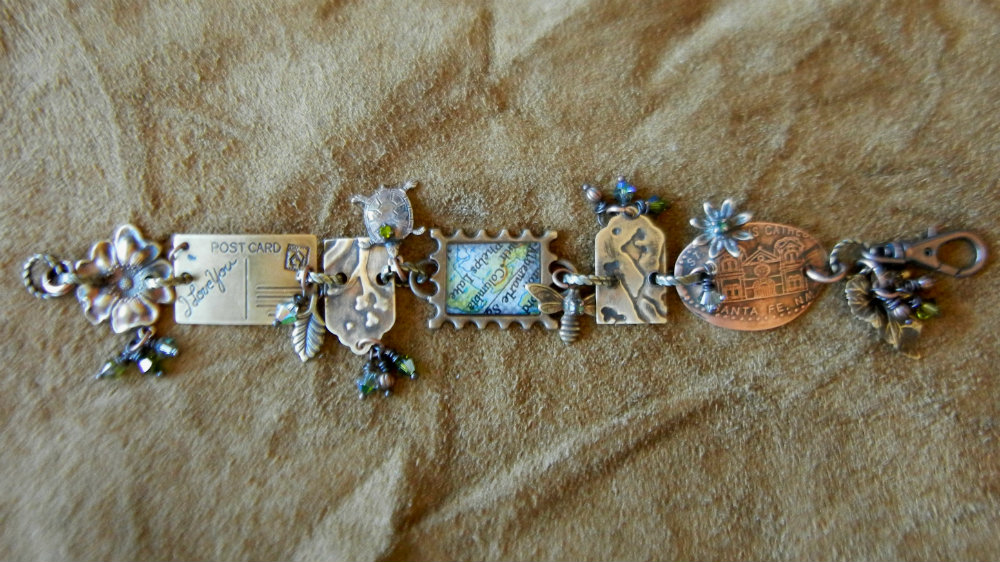
Over the next couple of weeks we’ll share some of our own Summer Road Trip jewelry pieces, starting with Sondra’s “The Trail Less Traveled” bracelet:
She used so many fun techniques that I’m sure I’ll miss a few, but here are the highlights:
The Vintaj luggage tags were DecoEmbossed with the Sizzix BigKICK. Sondra punched holes to in the tags to link them with textured locking jump rings.
She curved the postcard charm and souvenir penny using bracelet bending pliers.
The Vintaj bee and several other charms have the tips of rhinestone crystal head pins soldered onto them for extra bling.
The memoir stamp bezel from Vintaj is filled with a scrap of map coated with SuperClear resin.
The rest of the sparklies are from our Karma Chameleon Crystal Jam. Check out our Crystal Jam color themed design boards on Pinterest!
Ok. Now you can go get started on your own Summer Road Trip design challenge piece! We can’t wait to see what you create! ~ Cindy
Copper and brass bracelet design challenge results
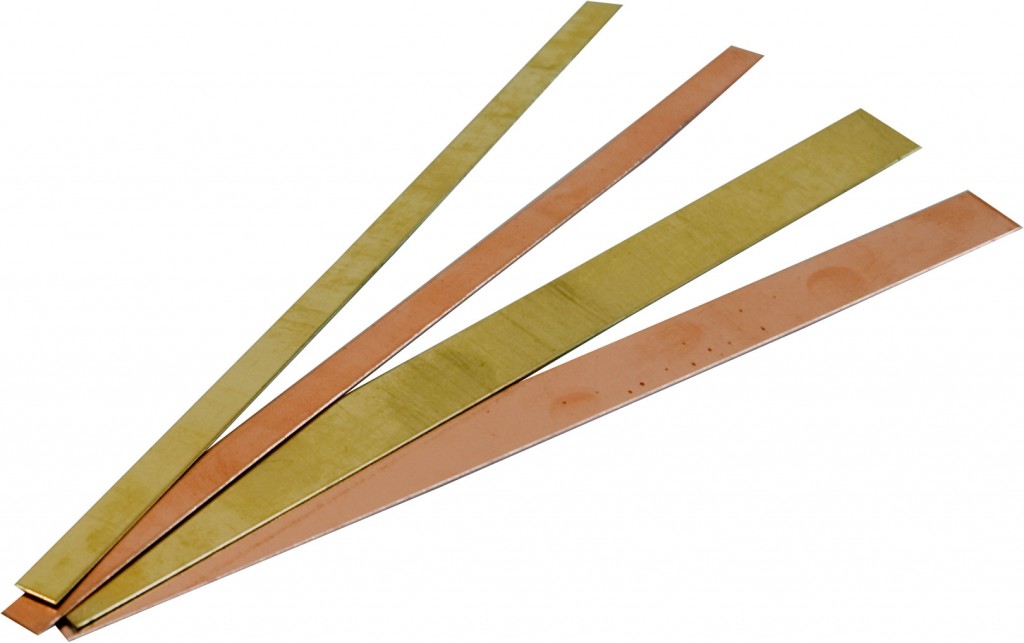
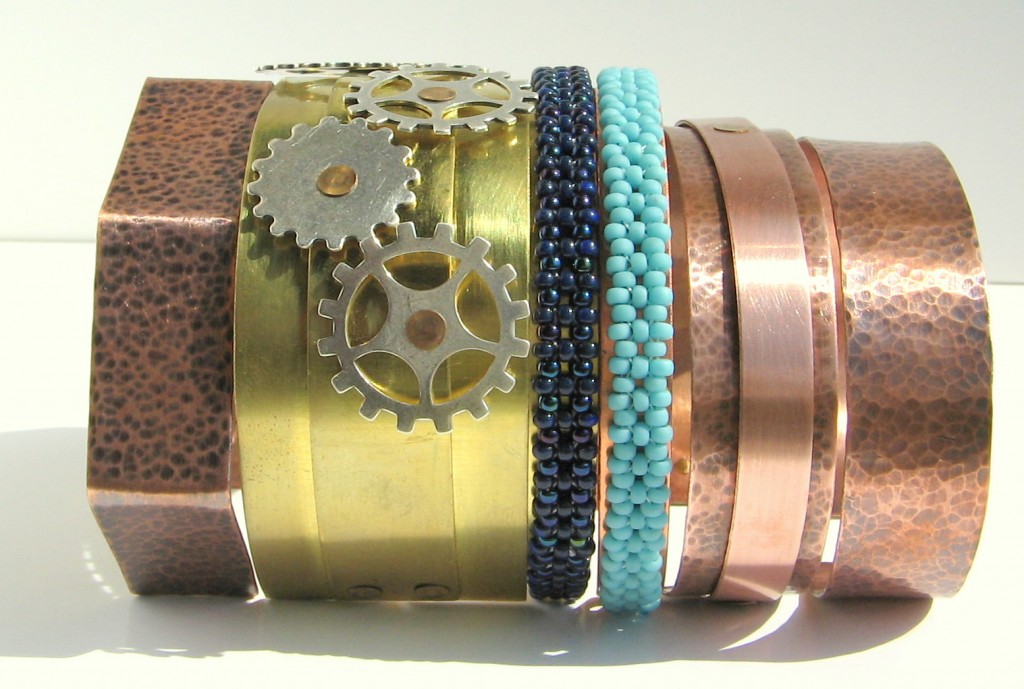
August 8, 2011In July, we sent ten of our blog partners sample packs of our new 24-gauge metal bracelet strips. With summer in full swing, it isn’t surprising that not everyone completed projects (at least not yet) … but the WOW, those who did really brought their A-game!
Helena Fritz hammered, riveted and even bead-weaved her way to an armful of gorgeous bangle bracelets – her lovely blog has more photos. Helena specializes in beadwork, which makes her first attempt at metalwork even more impressive.
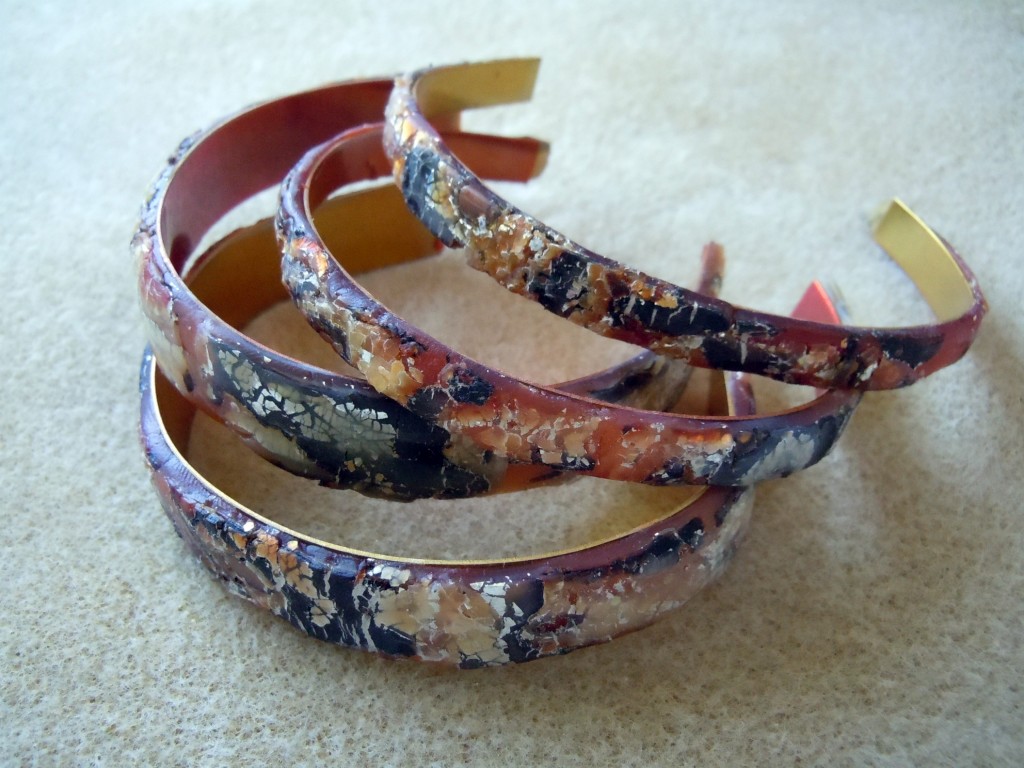
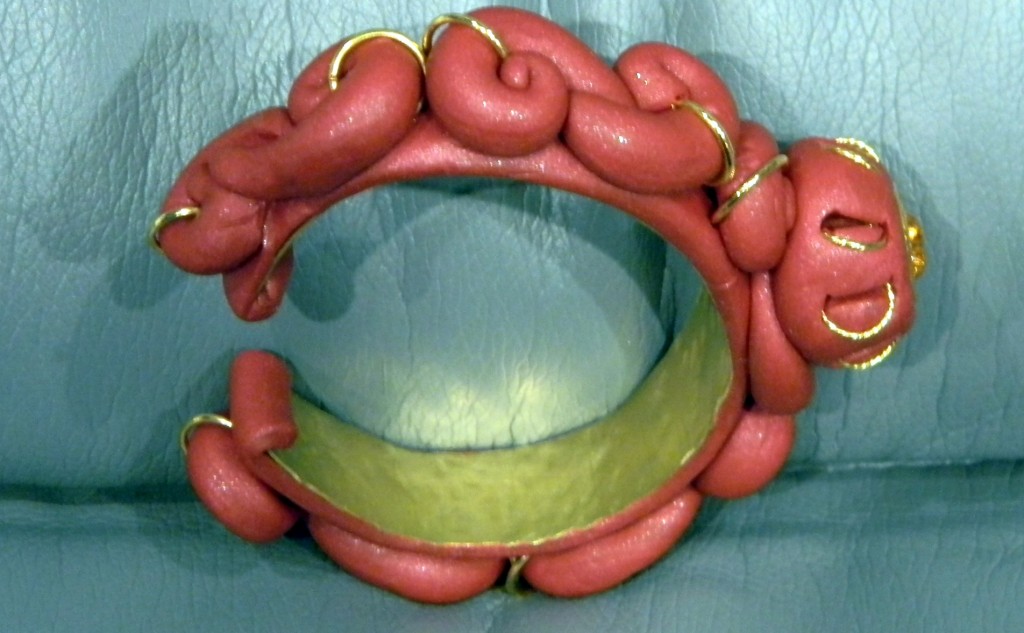
Carole Carlson stepped out of her comfort zone and into the world of polymer clay with these fun bracelets. She found that the copper was easier to work with than the brass, which makes sense since it is a softer metal. Check out her blog for more info.
Carolyn Fiene also used polymer clay, but she preferred the brass as a base. Even though it is harder to form, she felt is held its shape better. Link to her blog showing other designs that combine chain and bezel cups with polymer coming soon.
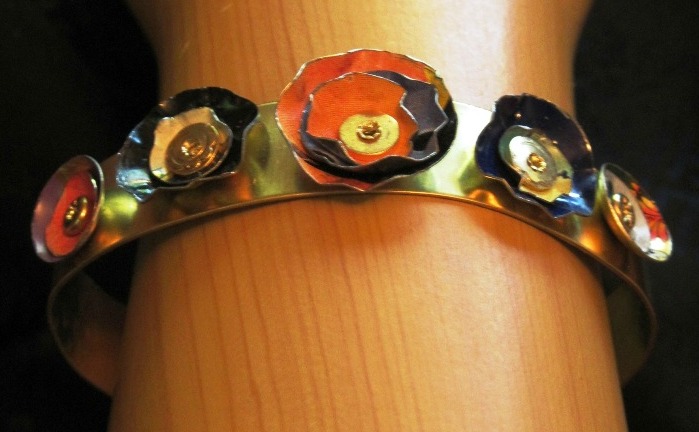
Jan O’Banion made several great designs by layering different elements onto the bracelets. She used recycled tins to make flowers on the “Trashy Tinsel” bracelet above. Visit her blog to get a peek inside her creative world.
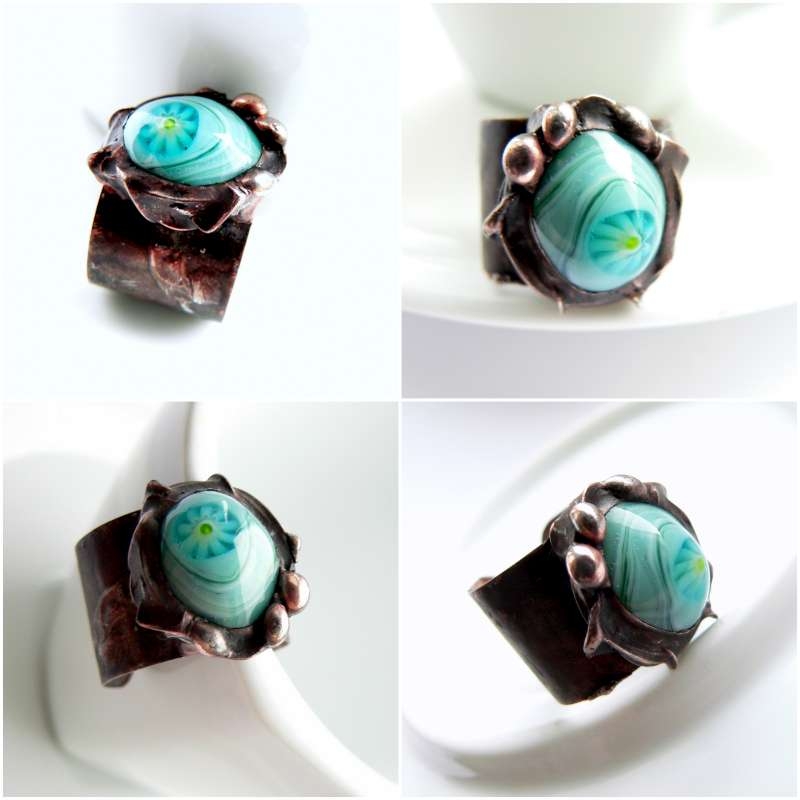
Lubica Vinicenko used the strips as the base of some truly elaborate rings. You can see more pictures at her blog.
As you can see, these metal “bracelet” strips are extremely versatile and fun to experiment with. Am I the only one surprised to see polymer clay and seed beads combined with sheet metal?
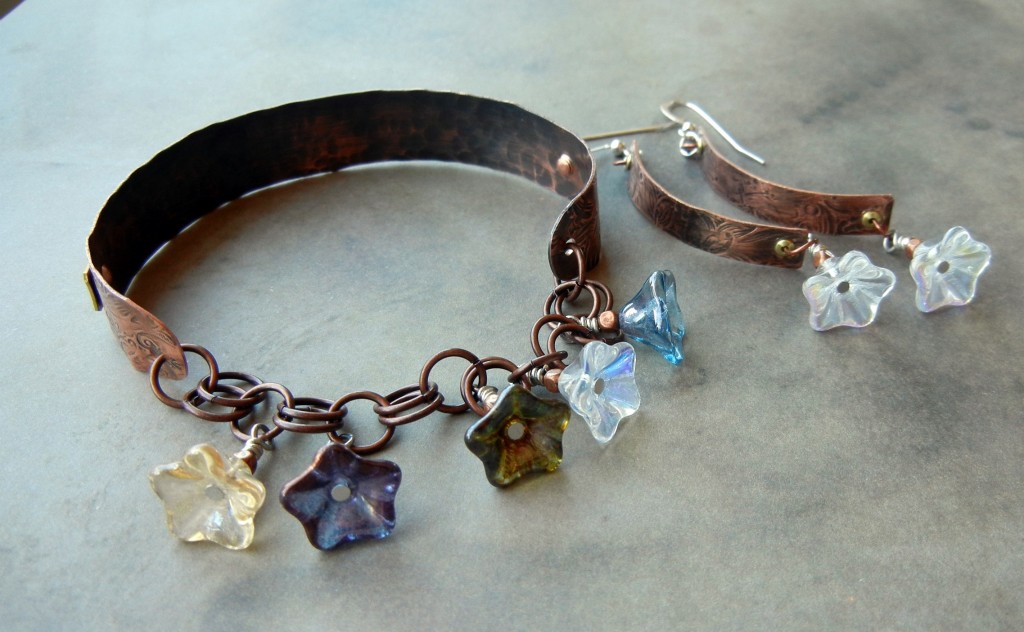
The back of my layered stamped bracelet. I curved short strips with my wood dapping set to make the matching earrings.
I’ve been having a blast stamping and texturing them. You can see the front of – and how I made – the “Earth Laughs in Flowers” bracelet in our design gallery. Texturing metal with
brass texture sheets is great stress relief, I must say!
Although July is already behind us, we’re always happy to see and share what you create. Be sure to send us some photos of what you make with these metal strips! ~ Cindy
PS – Molly Alexander posted her etching and mixed metal results to a photostream on Flickr – be sure to check them out!
Best of 2010
February 8, 2011At Rings & Things, we like to save the year-end festivities till things calm down a bit 🙂 Let’s look back at our blog’s Best of 2010!
What’s your favorite?

