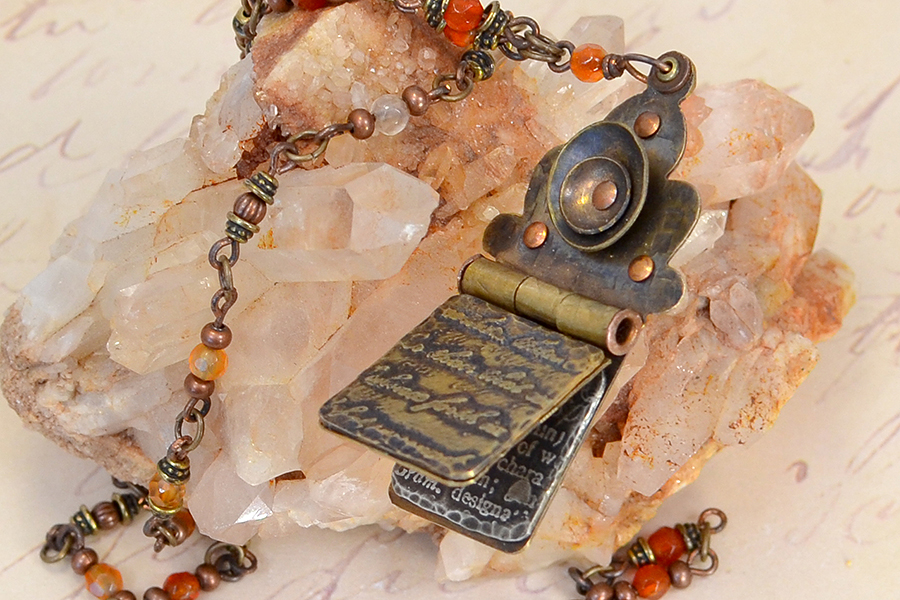
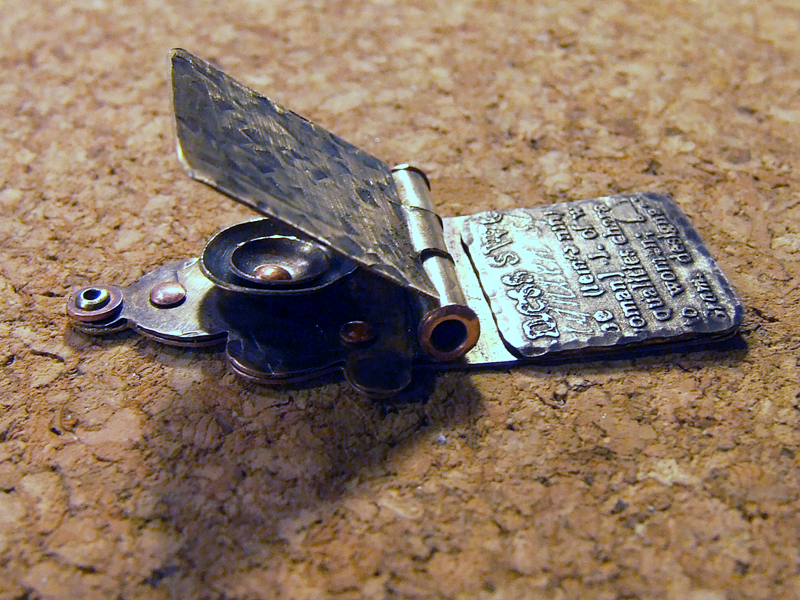
Use a hinge to turn shrine-shaped metal blanks into a journal!
Decide on the layout, location of the hinge and other decorative elements. Using a checkered hammer, apply texture to the top and bottom panels of the journal. Patina, file rough edges and clean.
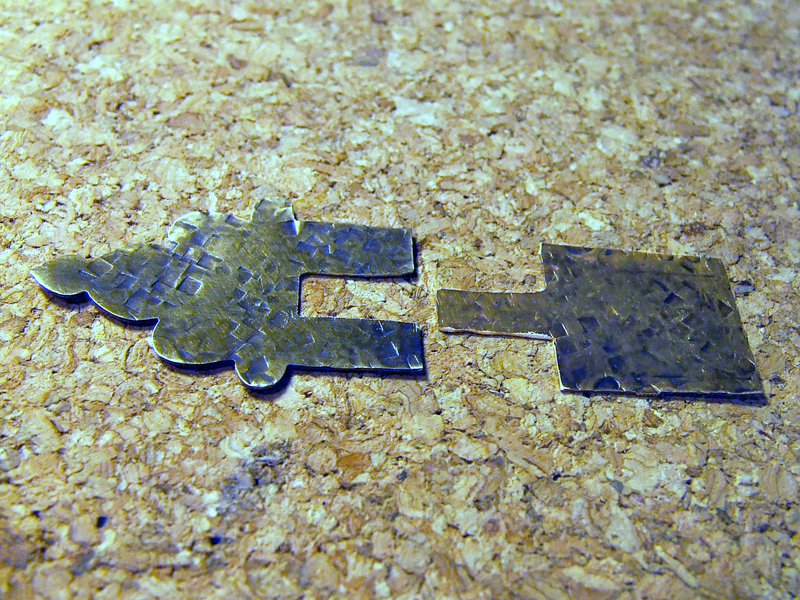
Layout
Cut the hinges, which can be as wide or as narrow as you choose. For 3/32 tubing, make hinges that are one-half inch deep. You need an odd number of hinge tabs. Measure, mark and saw tabs into the top panel. Use plenty of cut lube to prevent the saw blade from sticking when cornering.
Create Hinge Tabs
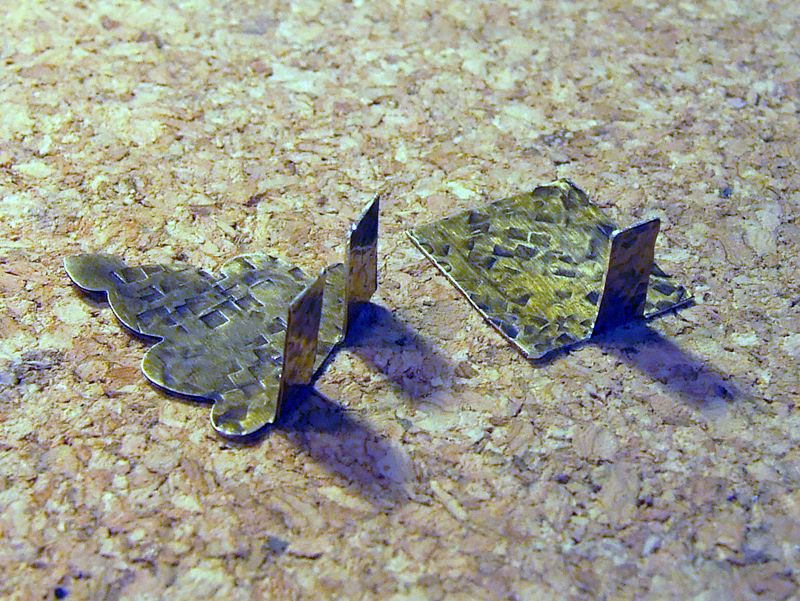
Using wide, flat nose pliers, crease and fold each tabs up to a 90 degree angle. The position of the fold determines whether the hinge will be visible from the front of the pendant, or only from the back side. Keep the textured sides face up, so the design is consistent.
Carefully roll tabs into cylinders using chain nose pliers or medium bail making pliers. Leave hinges a bit loose until after you have inserted the tubing, then you can tighten for best fit.

Roll Into Cylinders
Use a tube cutting jig to cut a length of tube 1mm longer than the width of your piece (for 1/2mm on each side).
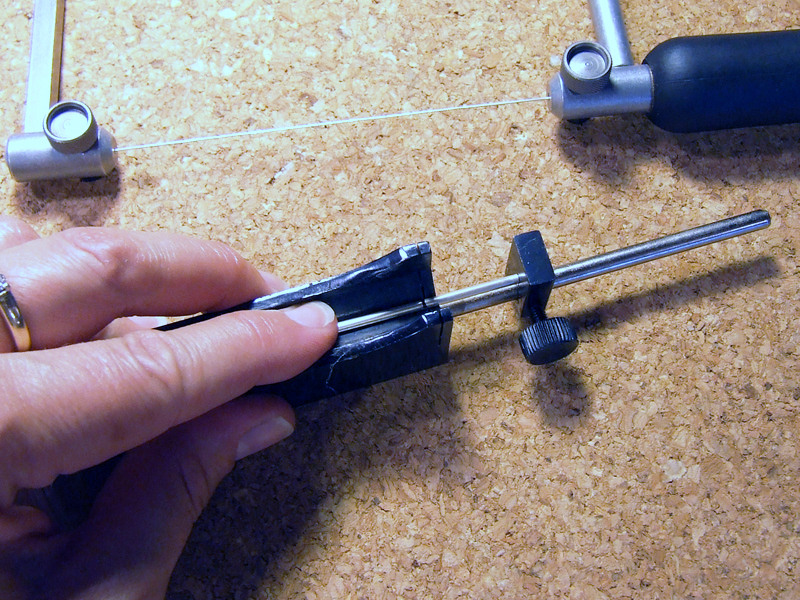
Cut Tubing
Slide tubing down the channel and finesse hinges as needed. Rivet tubing into place to finish the hinge. Open and close hinge to ensure a proper fit.
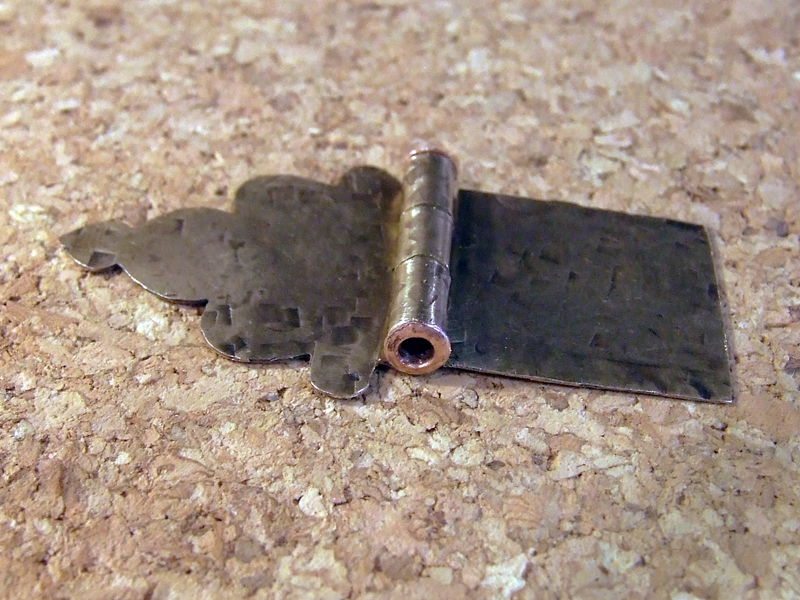
Assemble Hinge and Insert Tubing
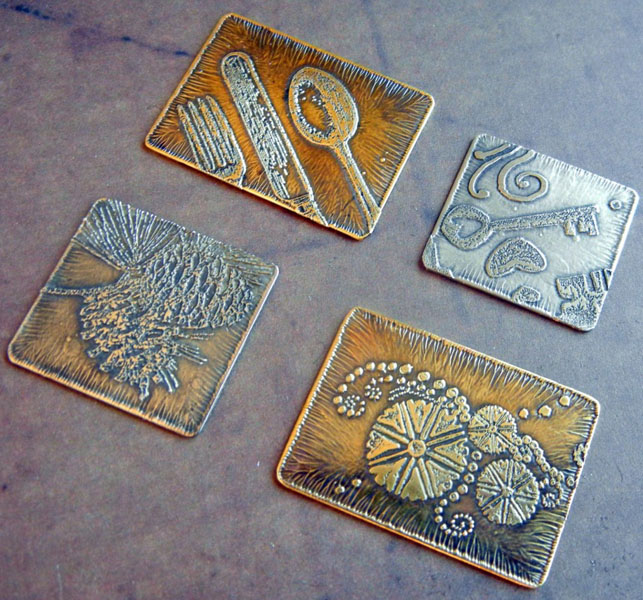
Working with the bottom panel, lay out etched metal pieces for the cover and inside page. Cut, file and patina as necessary. Leave sufficient room for the hinge to lay flat against the bottom panel.
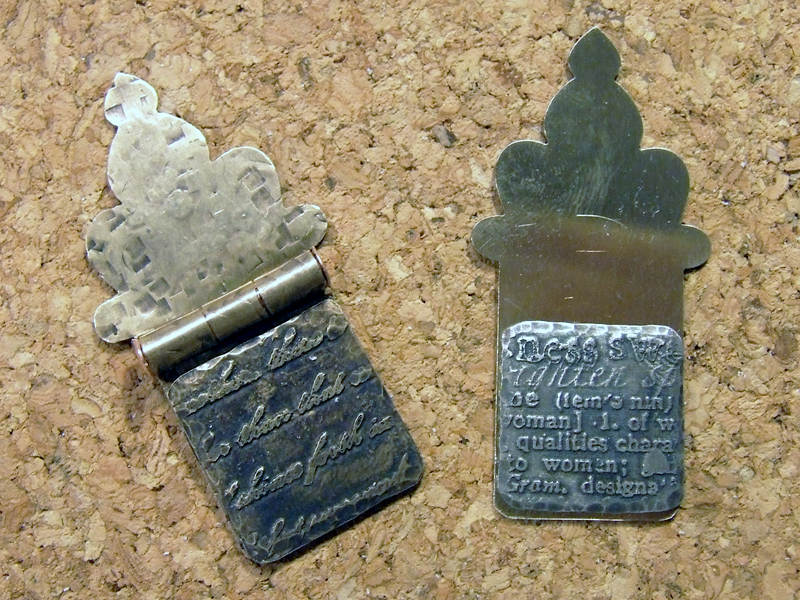
Lay out Etched Metal Page
Measure, mark and punch holes for decorative rivets, accents and center piece (using the small side of the hole punch).

Prepare Embellishments
Using two-part epoxy, carefully glue the etched metal panels into place.
Lay out Etched Metal Page
Using a dapping set, dome two small round shapes that can nest one inside the other. Patina, file away any rough edges and clean the domed metal. Layer, and rivet domed metal nests onto the top panel. Connect top and bottom panel with rivets. Use a tube rivet at the top so that you can thread a jump ring through it (if you choose).
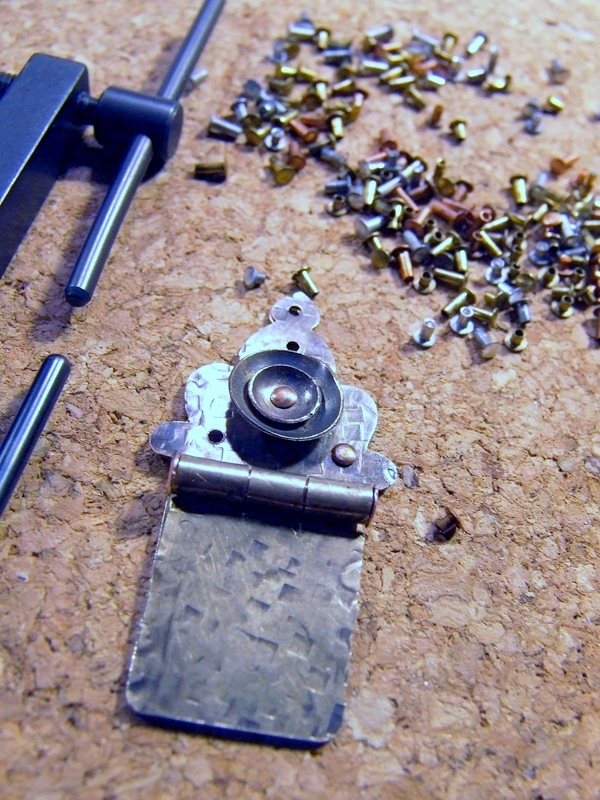
Rivet Domes Into Place
Carefully clean and polish the pendant before attaching the necklace chain.
Clean Finished Pendant
Handmade jewelry looks great on a custom beaded necklace, on leather cording, silk ribbon or chain. I created a necklace by making individual links using the one-step looping plier, eye pins, metal beads and natural agates. The links were connected using jump rings.
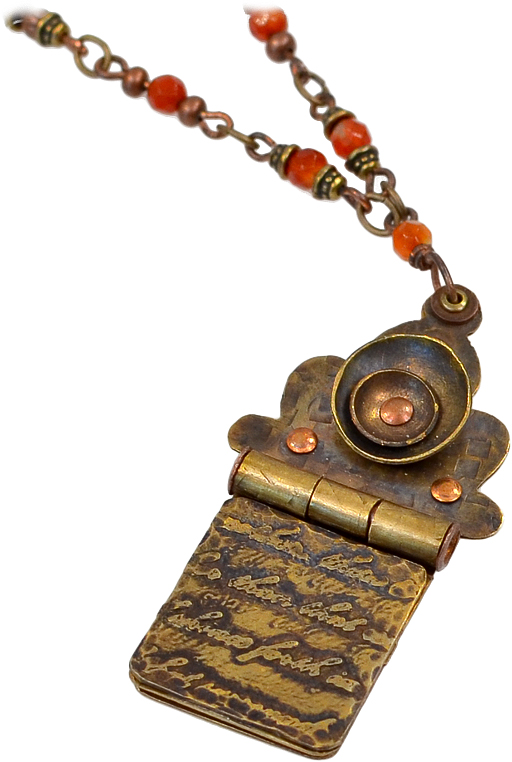
Memory Journal Necklace
This free DIY Memory Journal pendant was created by designer Sondra Barrington of Rings & Things. This necklace features riveting, metal etching, antique brass shrine stamping blanks, dapping, and metal stamping. The chain was created in an ombre pattern using natural agate gemstone beads, TierraCast antique brass bead caps, metal heishi trade beads and the one-step looping plier with antique copper head pins.