I have noticed bullet casing jewelry trending for awhile now. And I love it! It has a rustic, masculine feel. I also love etching metal with ferric chloride acid, something I have been doing for the last couple of years. Etching bullet casings seemed like the next logical step. I thought they would be a great gift for Dad (or Mom, depending on how you make them)! So round up your bullet casings and let me show you how to make these awesome necklaces!
Supplies needed:
- Bullet Casings (drilled with a hand drill on the ends to create a hole)
- Permanent Marker
- Baking Soda
- Scotch Tape
- Plastic Container
- Penny Brite Cleaner
- Ferric Chloride Acid
- Sanding Pads
- Novacan Black
- 20g Vintaj Bronze Wire
- Antique Brass Cable Chain
- Antique Brass Jump Rings
- Antique Brass Lobster Clasp
- 8mm Gemstone Bead
Tools:
If you’ve never etched metal with ferric chloride acid before, I highly recommend you read the two blogs linked here for techniques and safety before you get started:
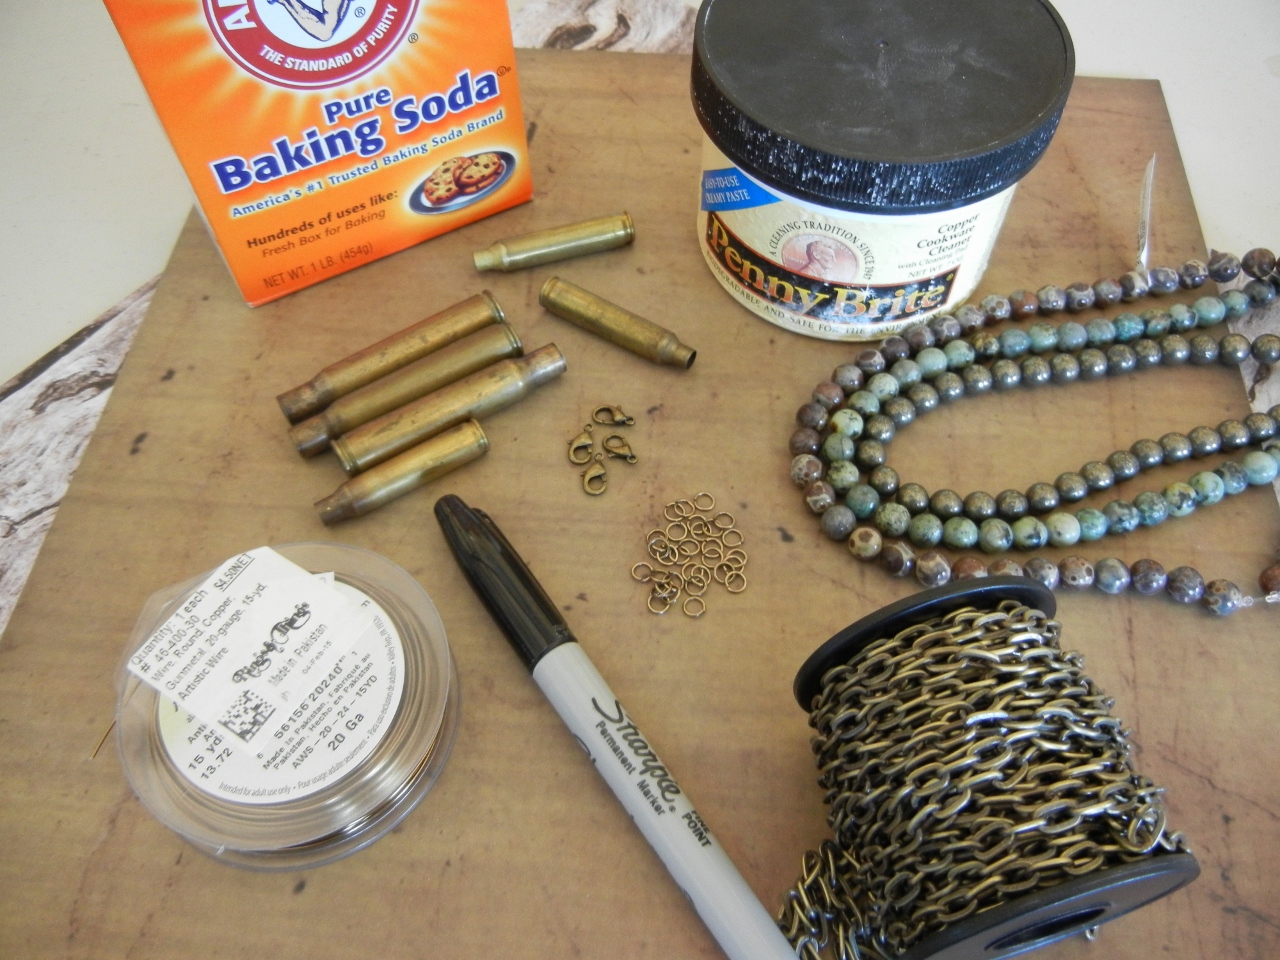
To make these necklaces you need a few supplies! For a full list see above.
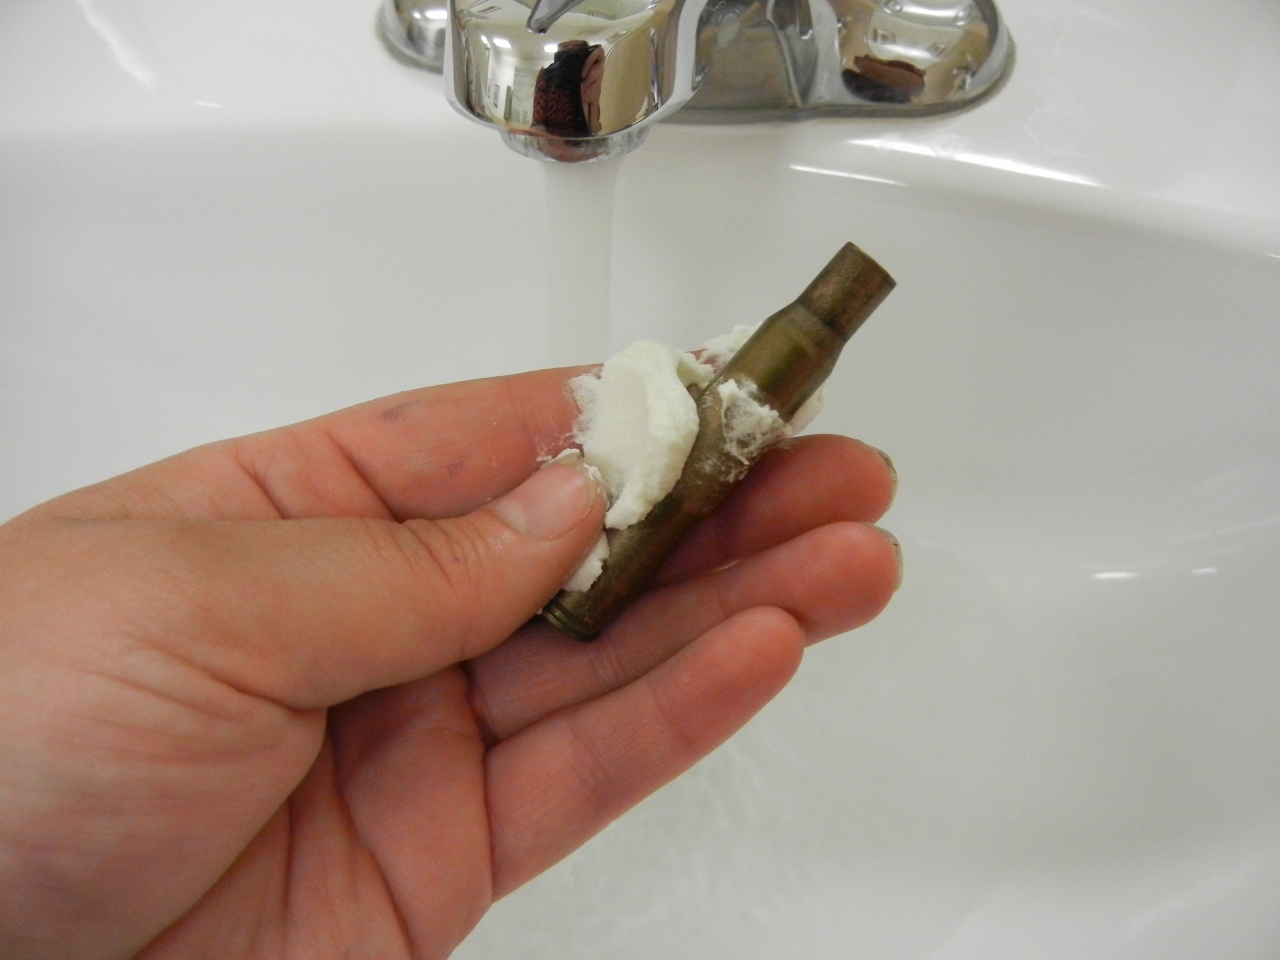
Use the Penny Brite to clean the bullet casings. They will take off all the grime and any oils and make them look shiny and new!
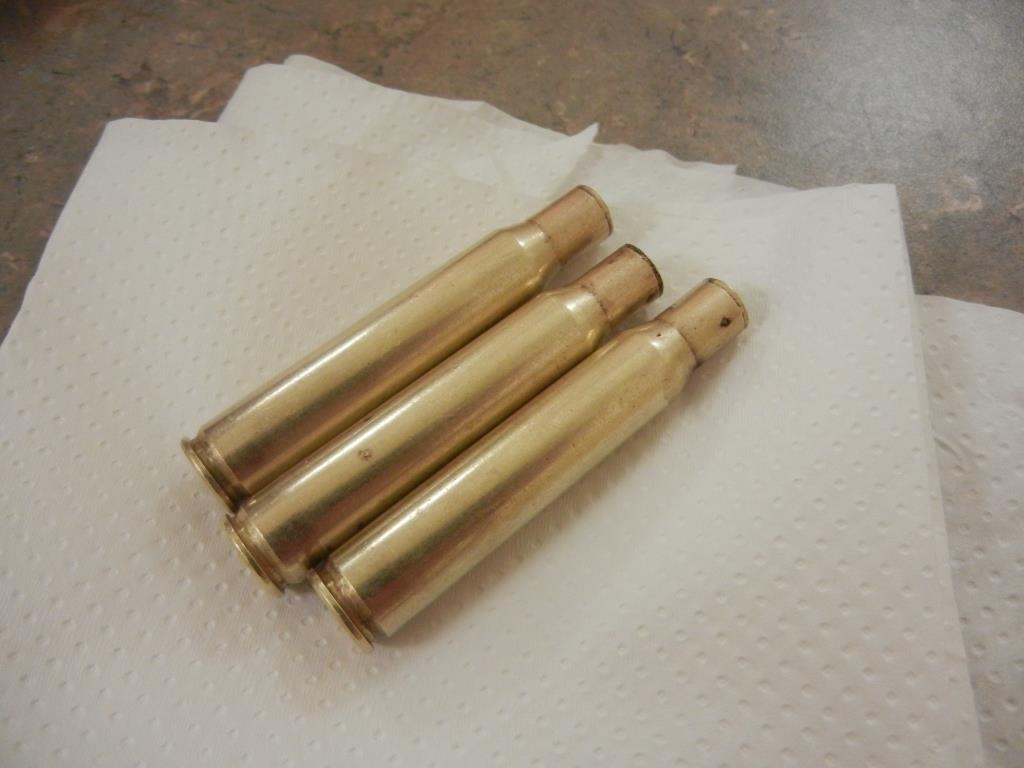
After you have used the Penny Brite on the bullet casings, they will be shiny like new. Try to touch them as little as possible with your fingers, as oil from your skin on the metal can affect the etching.

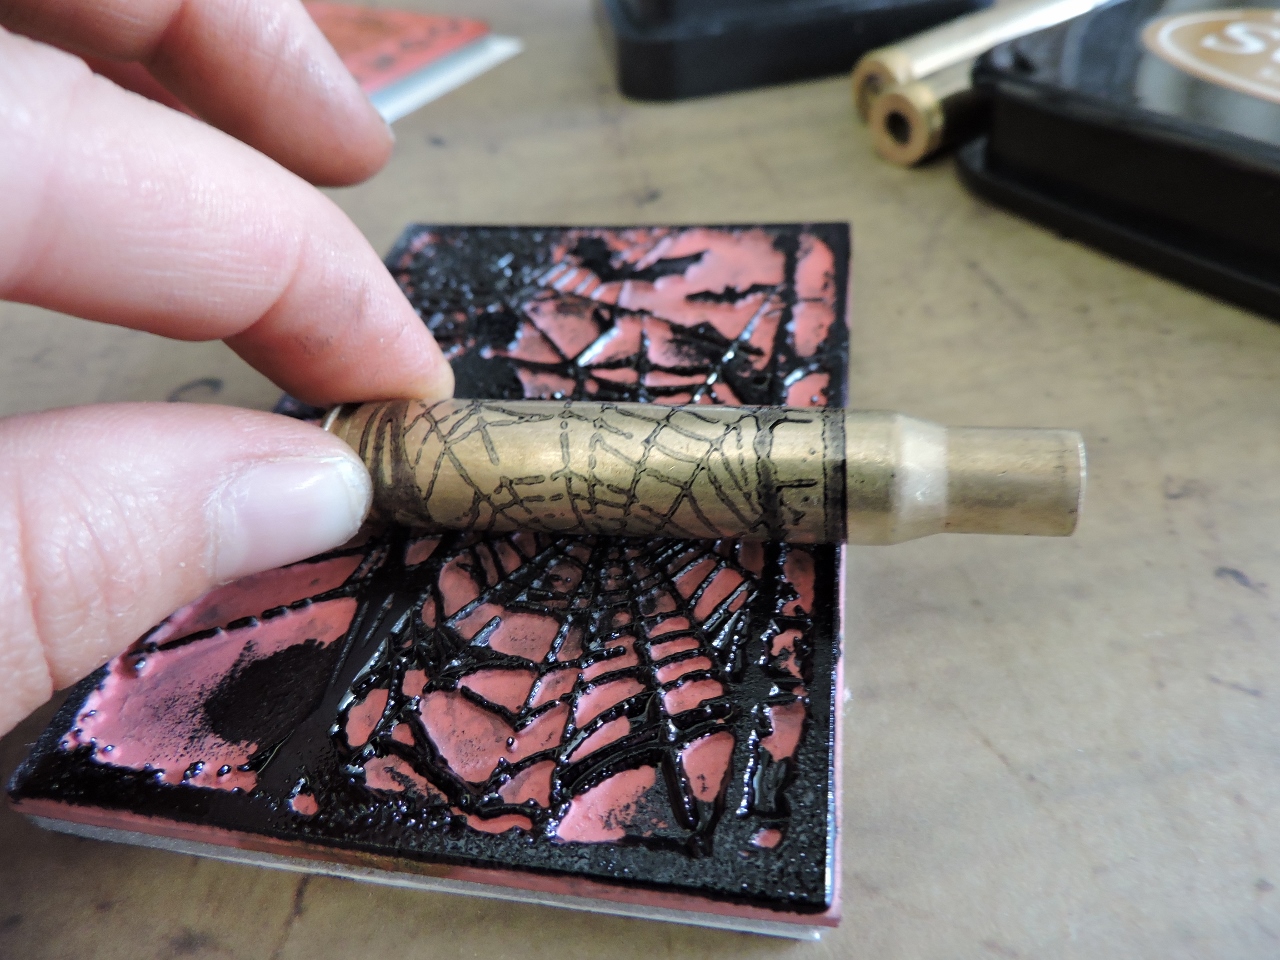
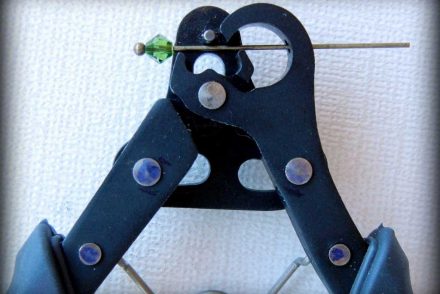
Use a sharpie marker to add your own custom name or design to the bullet casings. This is a resistance technique, so anywhere there is ink, the metal will not etch.
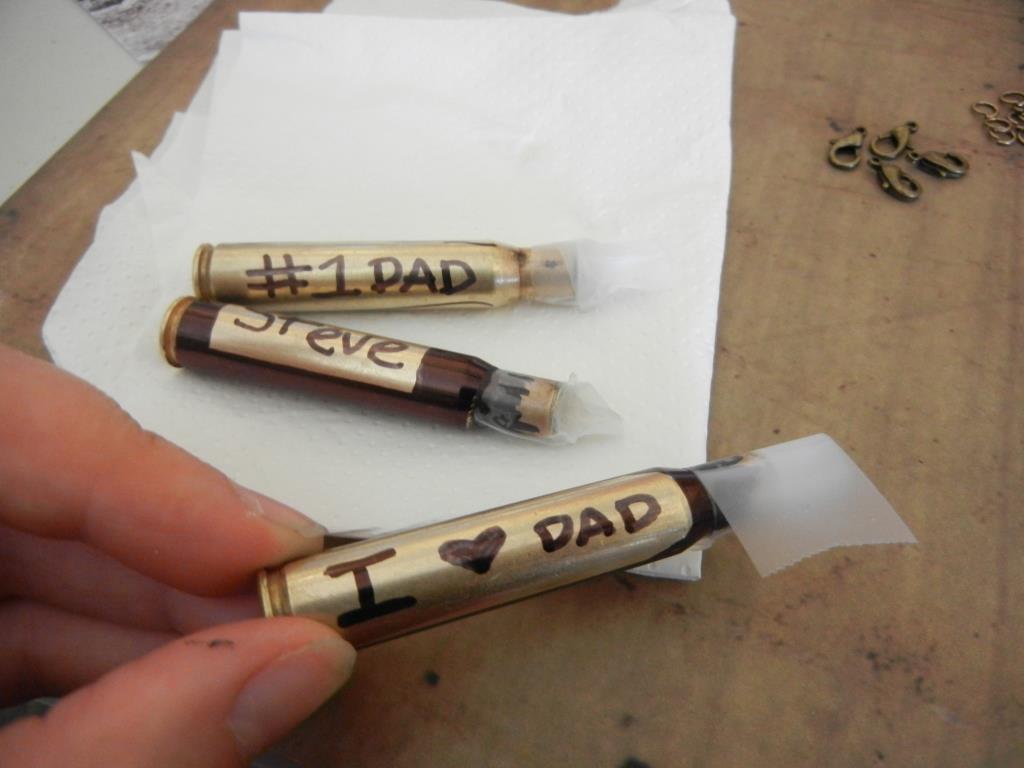
After you get the design you like, use scotch tape to seal the top of the bullet casings.
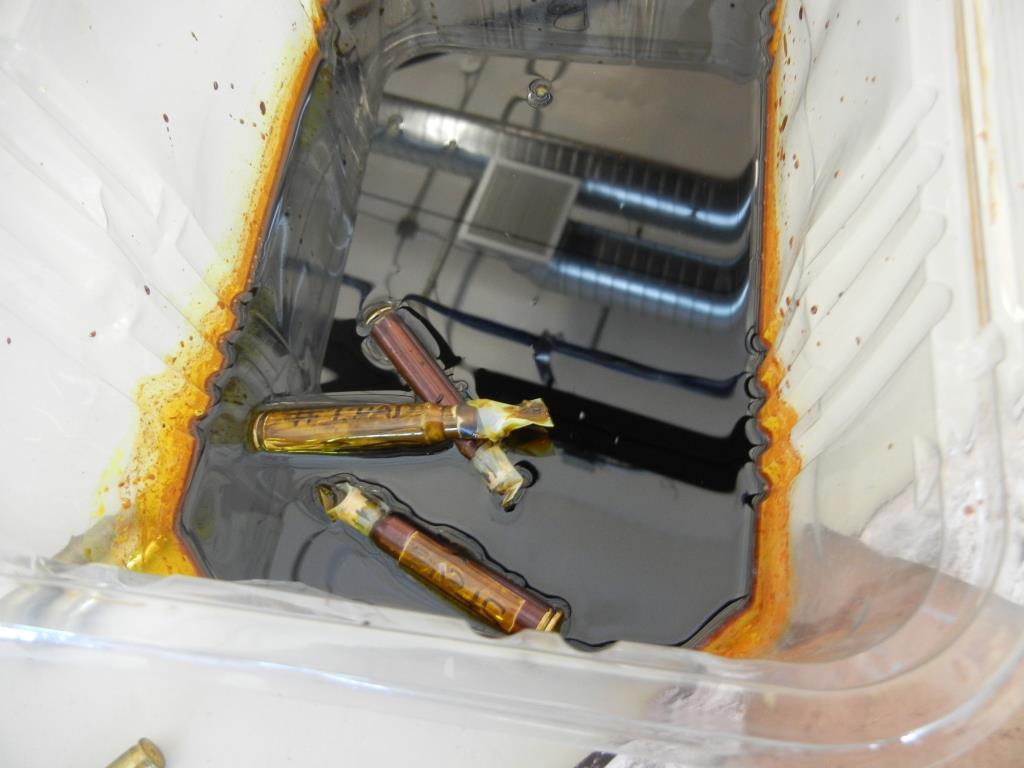
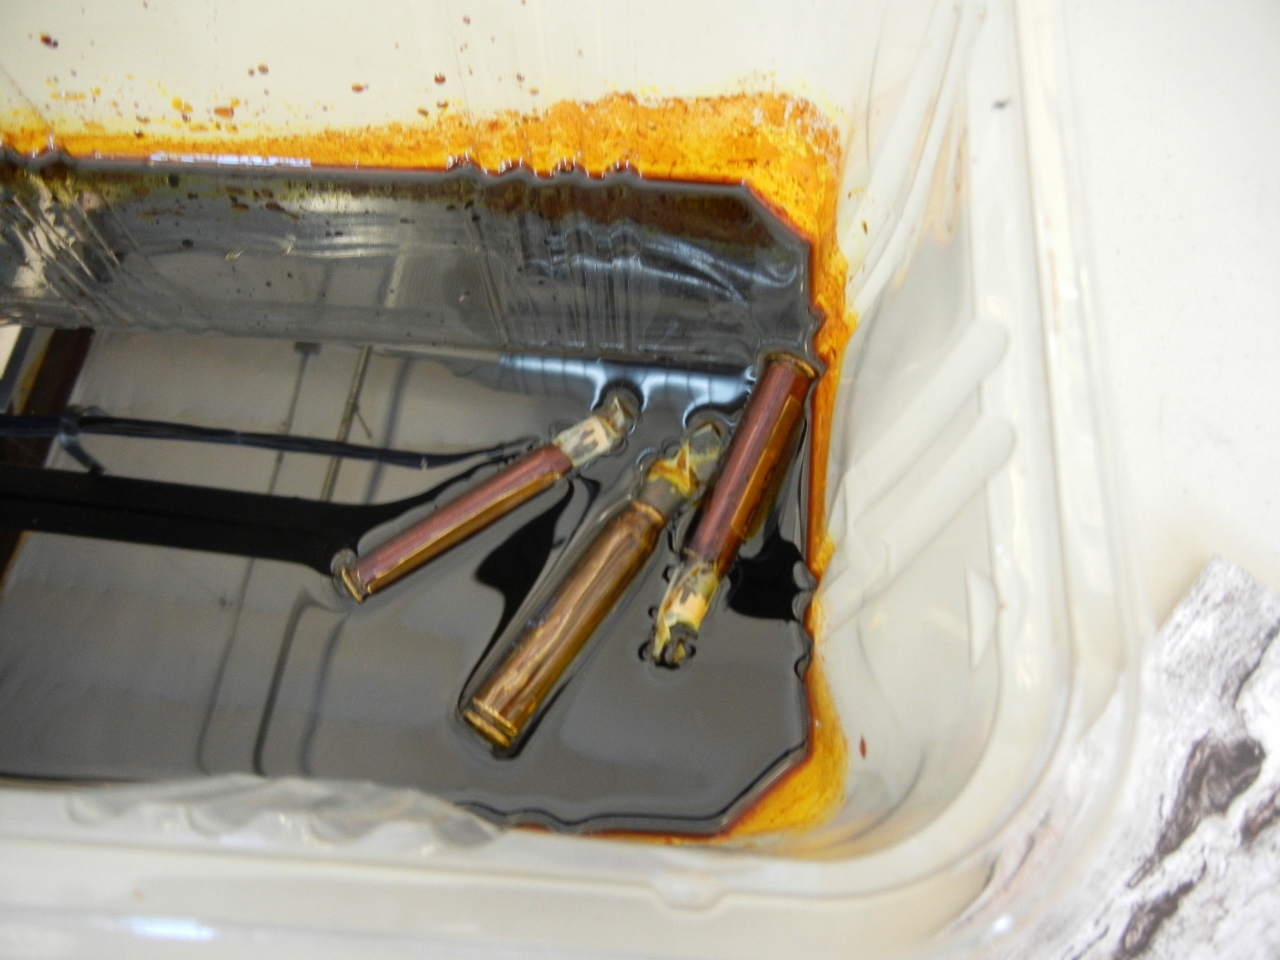
Wear gloves the entire time you’re working with acid to protect your hands! Pour some ferric chloride acid into a disposable plastic container, and submerge your bullet casings into the ferric chloride bath. They will need to soak in the acid for about 20-30 minutes.

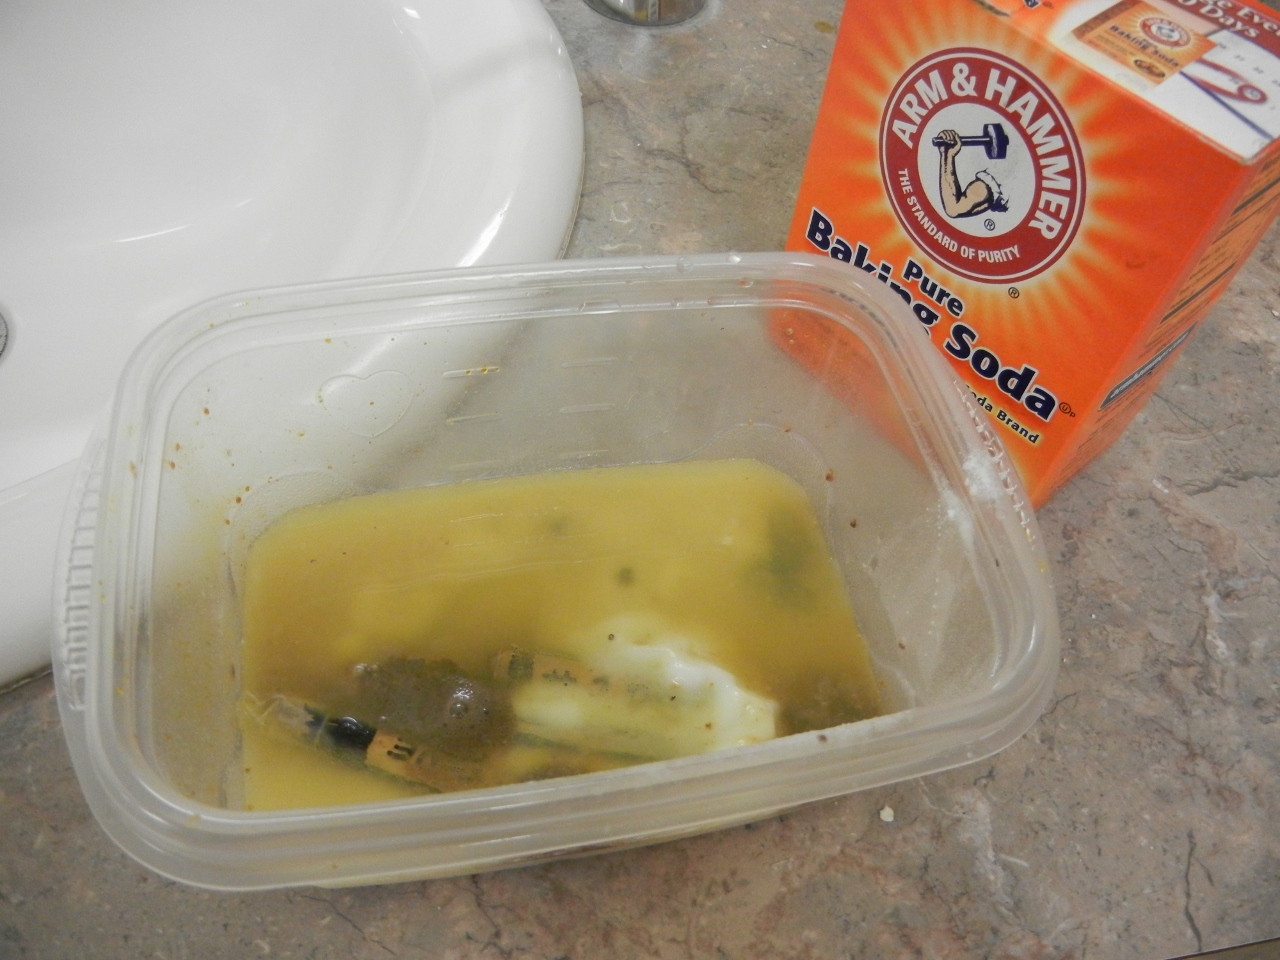
Use gloves or plastic tongs to remove the bullet casings from the acid, and place them into another plastic container. Pour a fairly large amount of baking soda into the container and add warm water. The baking soda will bubble up and neutralize the residual acid on the bullets. The remaining acid can stay in the other container, just add a lid. It can be used several times to etch. When it has lost its etching power, dispose of the acid at your local hazardous waste facility.

The bullet casings look like this when they have been etched and cleaned of acid with baking soda.
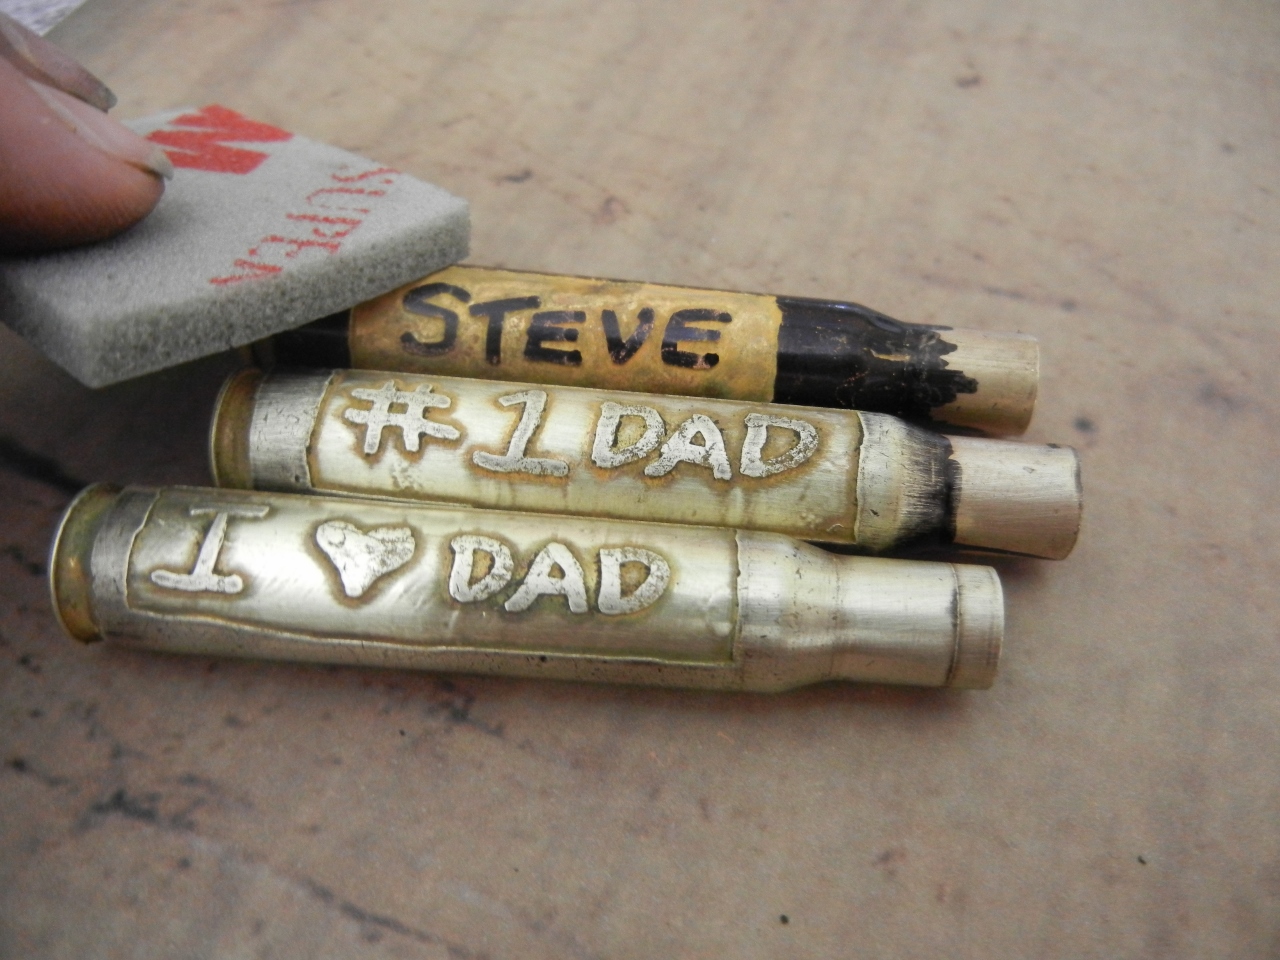
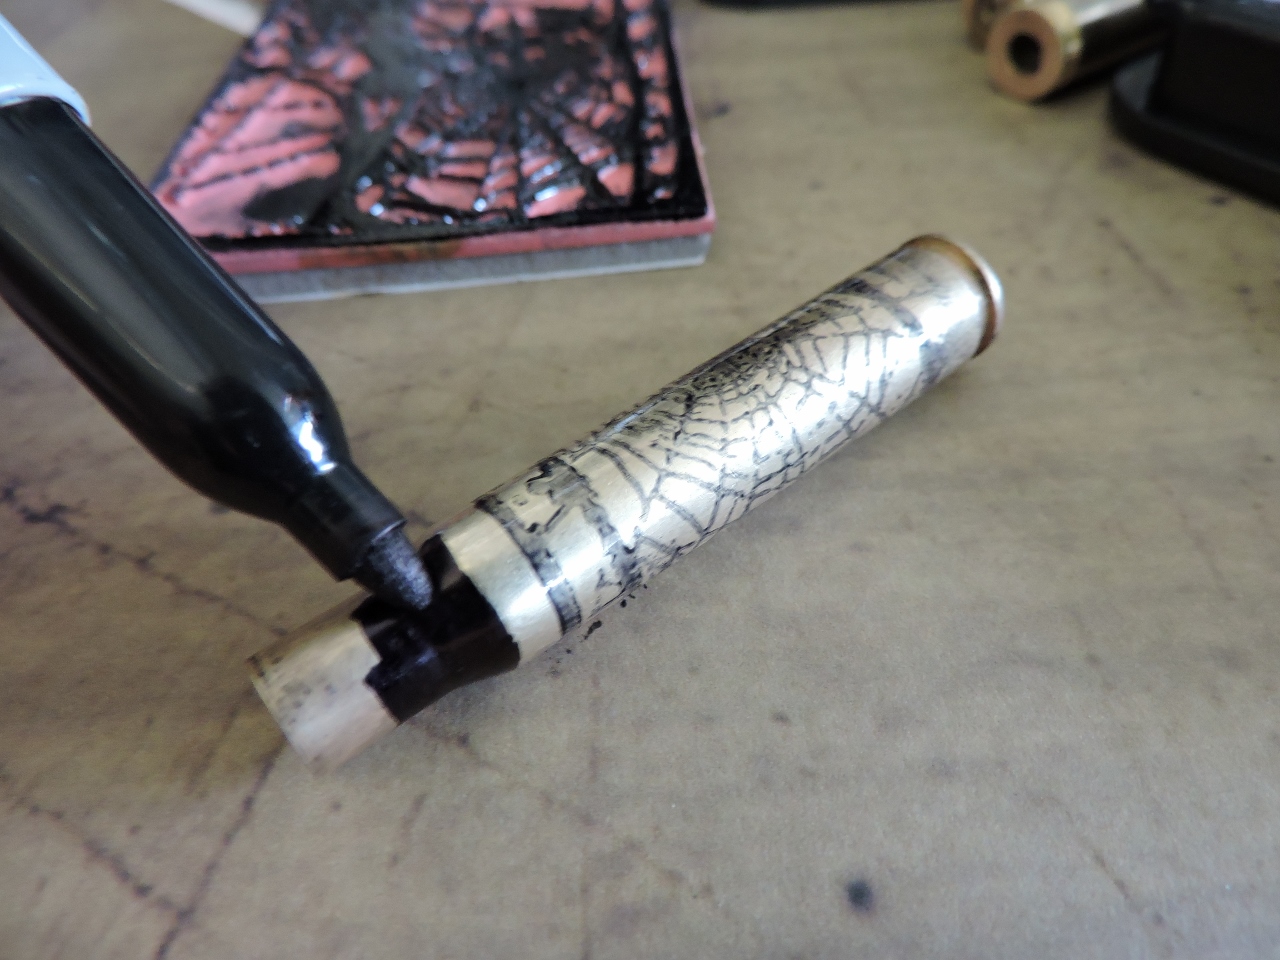
Use a sanding pad to remove the permanent marker from the bullets.
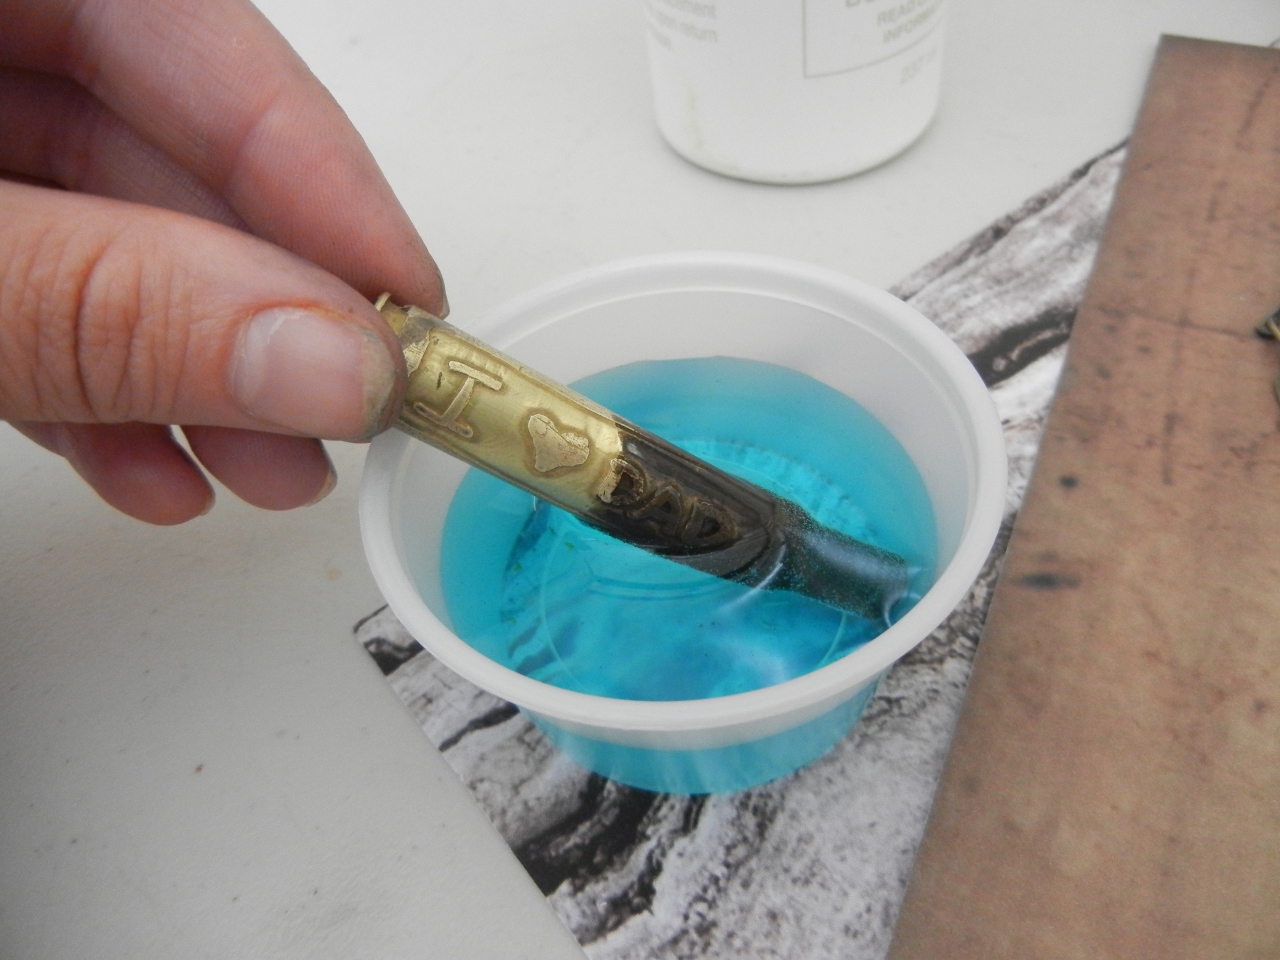
Dip the bullet into the Novacan Black to antique the metal black.
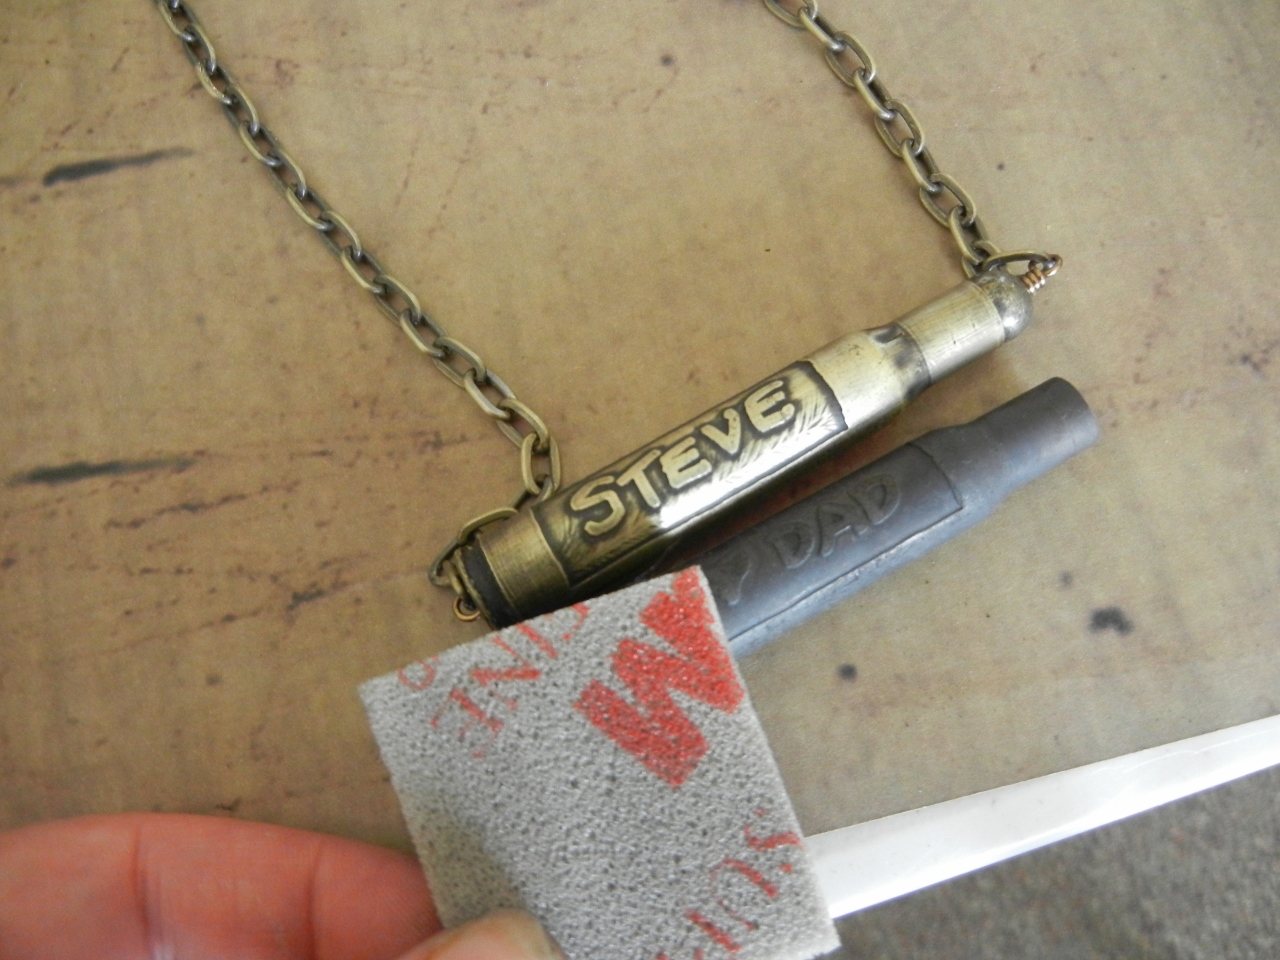
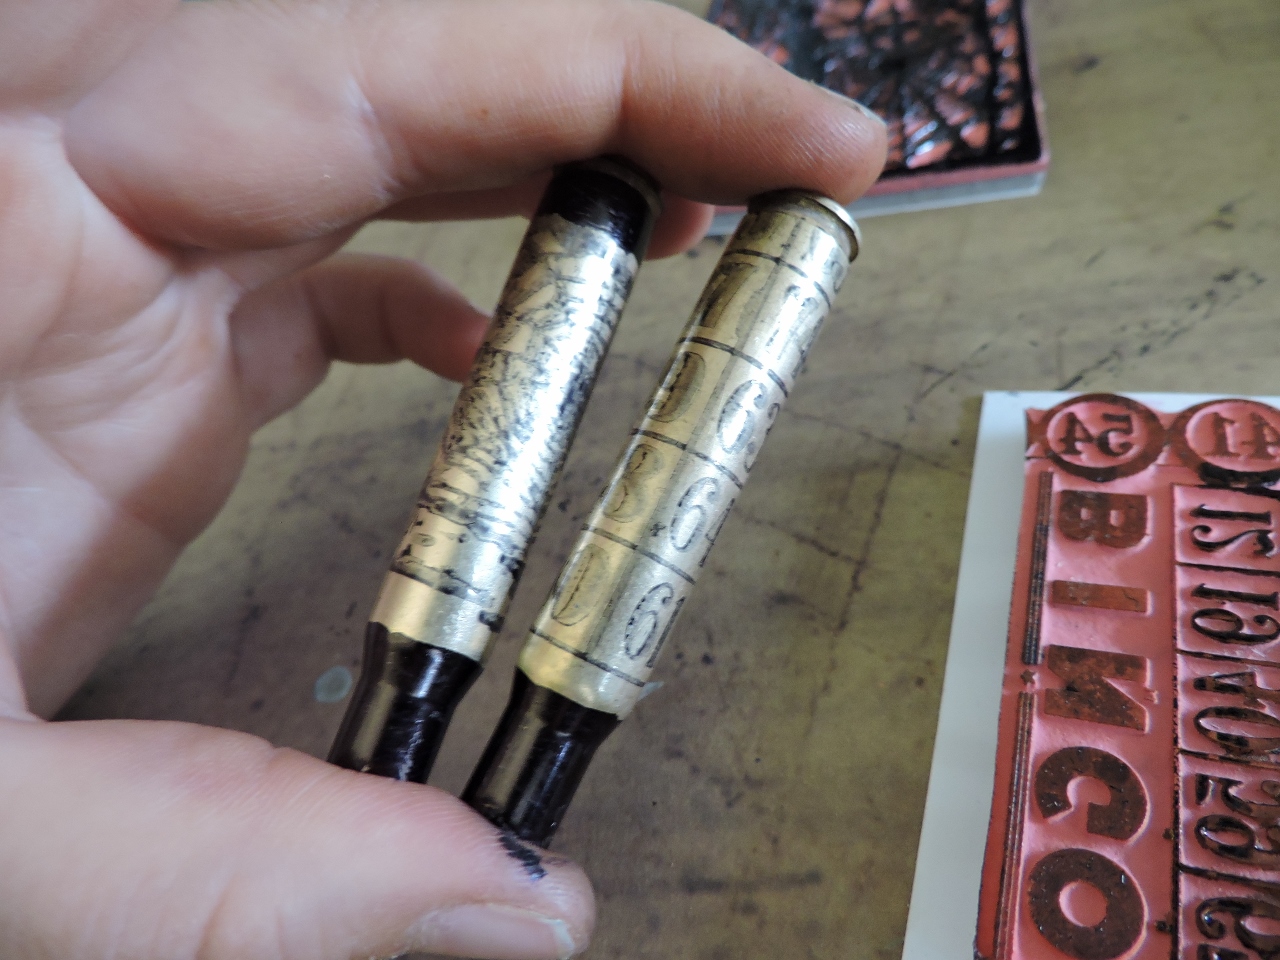
Now use the sanding pad to remove the patina. This will make the design really stand out.
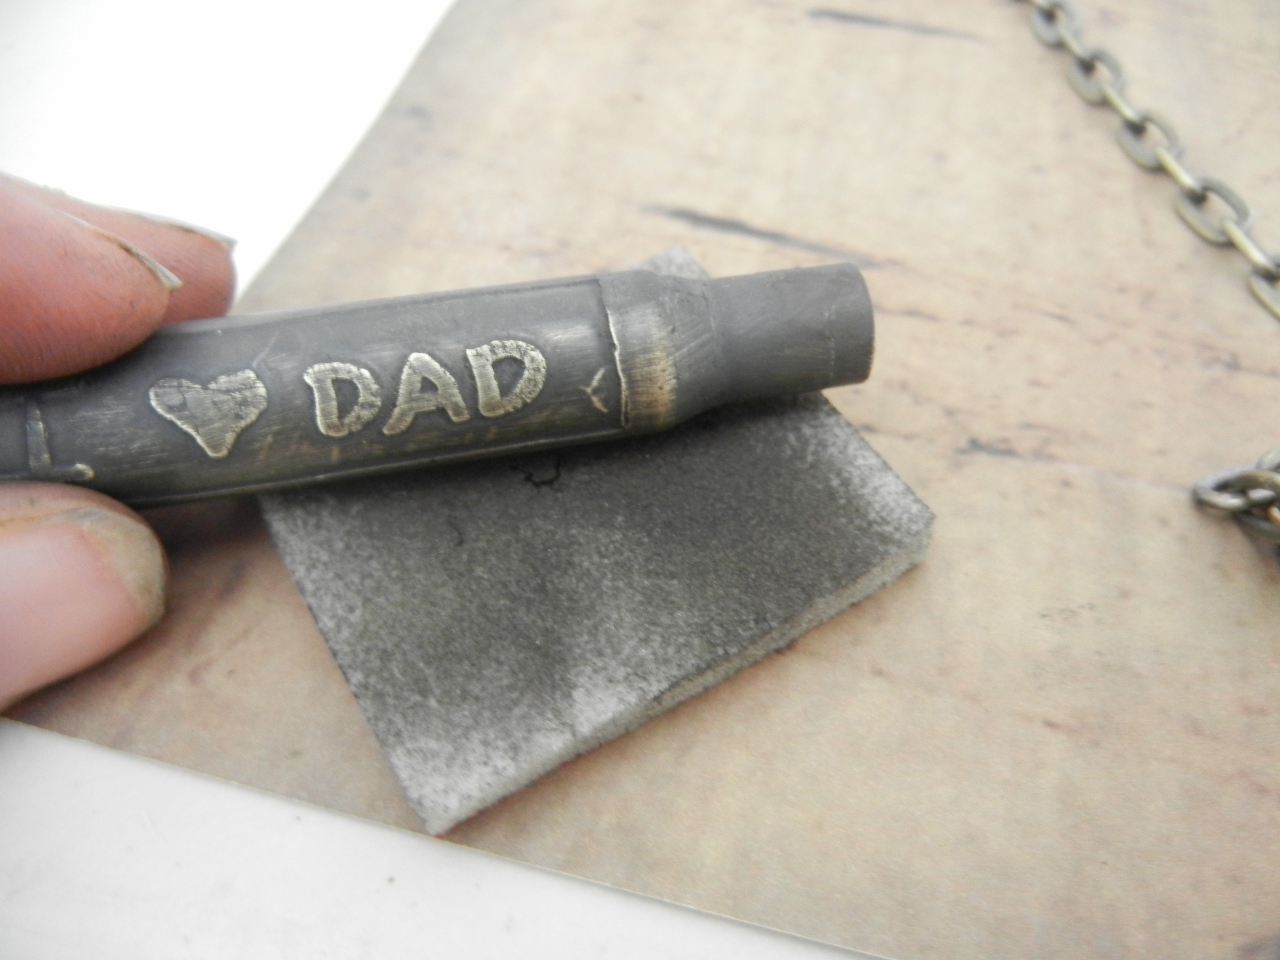
It can be a little messy to remove the patina!

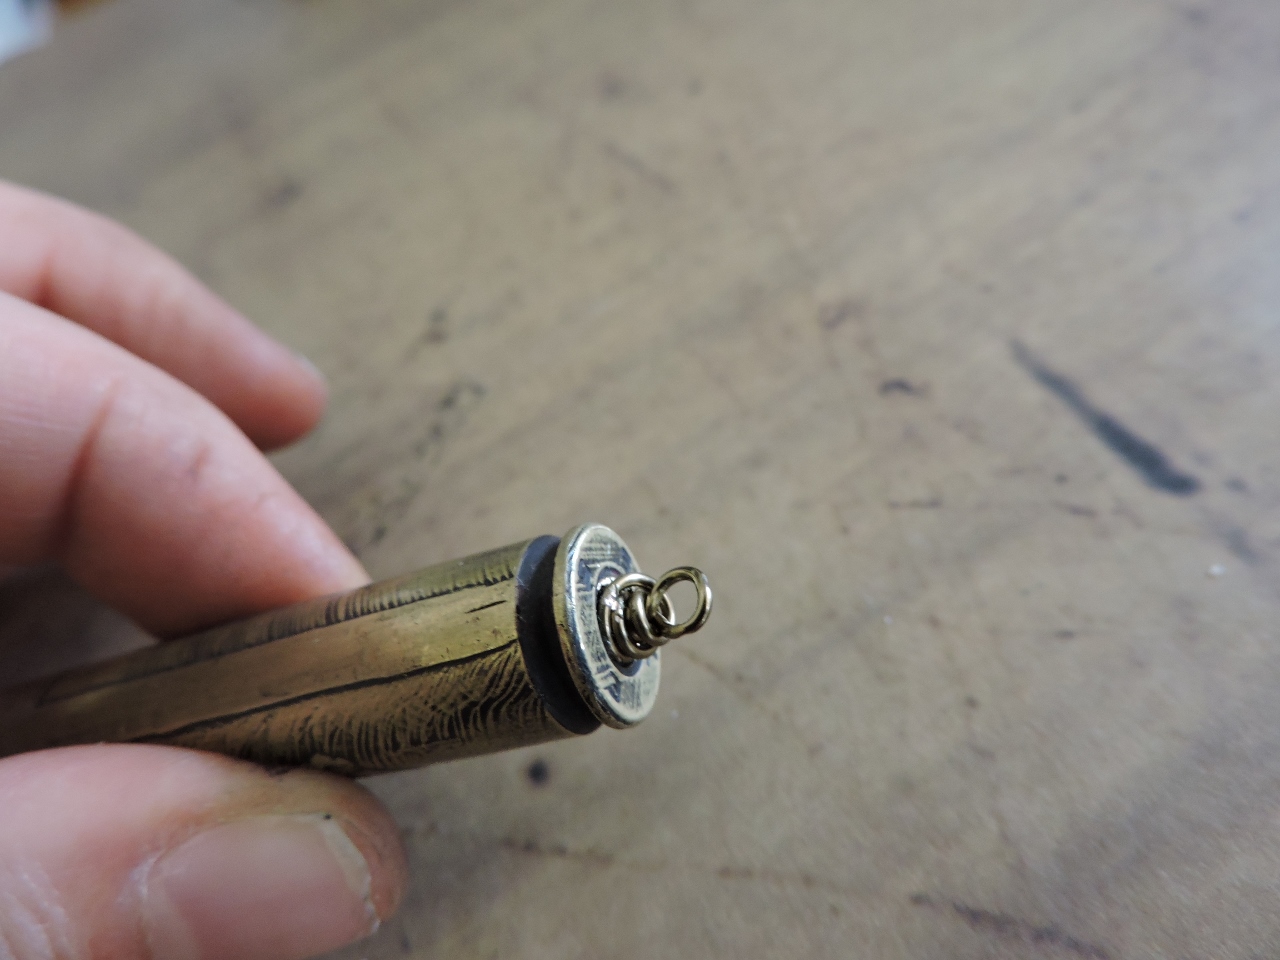
Make a wrapped loop with bronze-colored Artistic Wire using your round nose pliers.
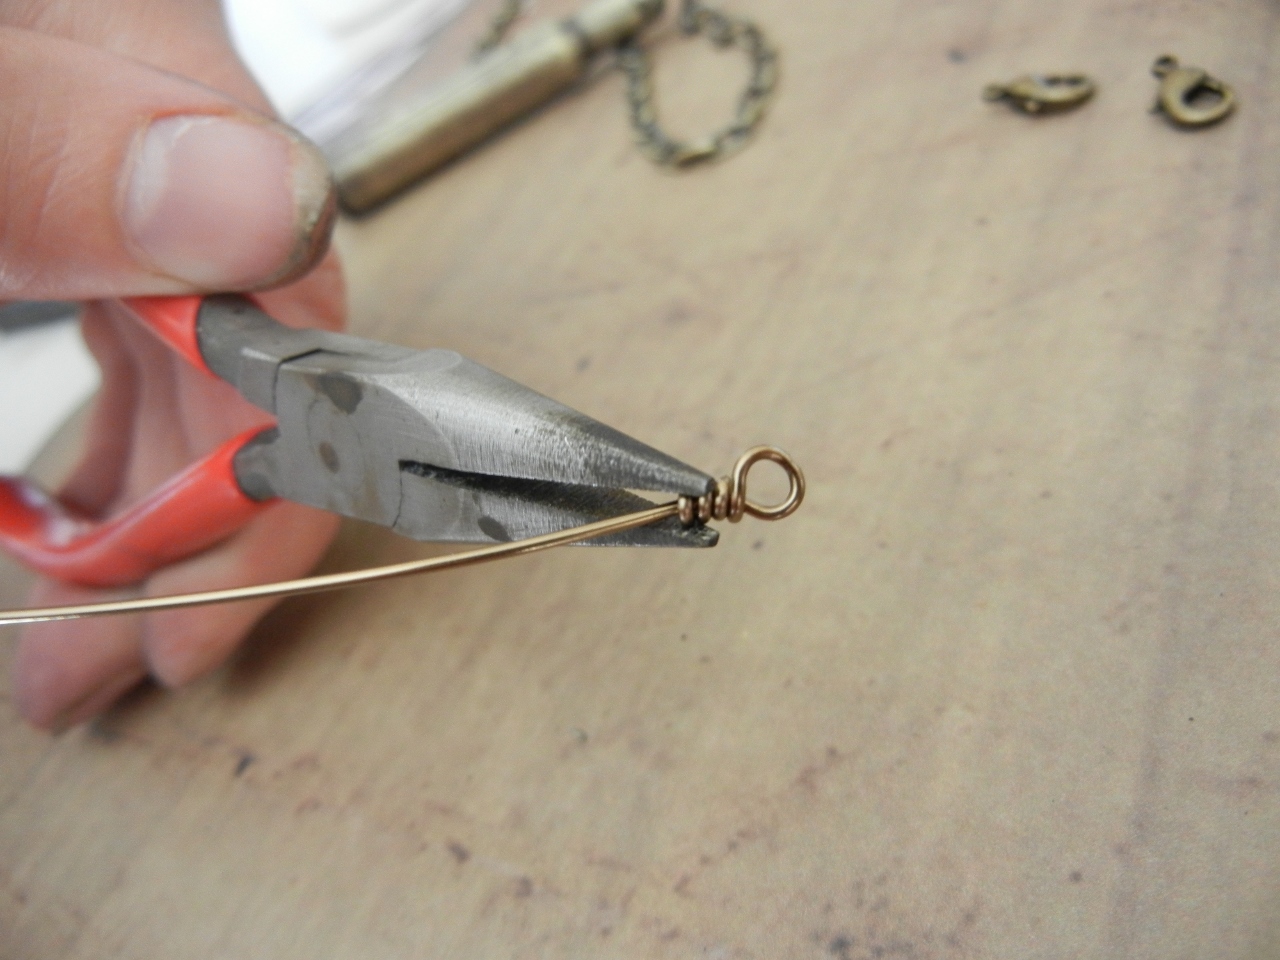
Use your chain nose pliers to smush the wire down so there is no sharp end.
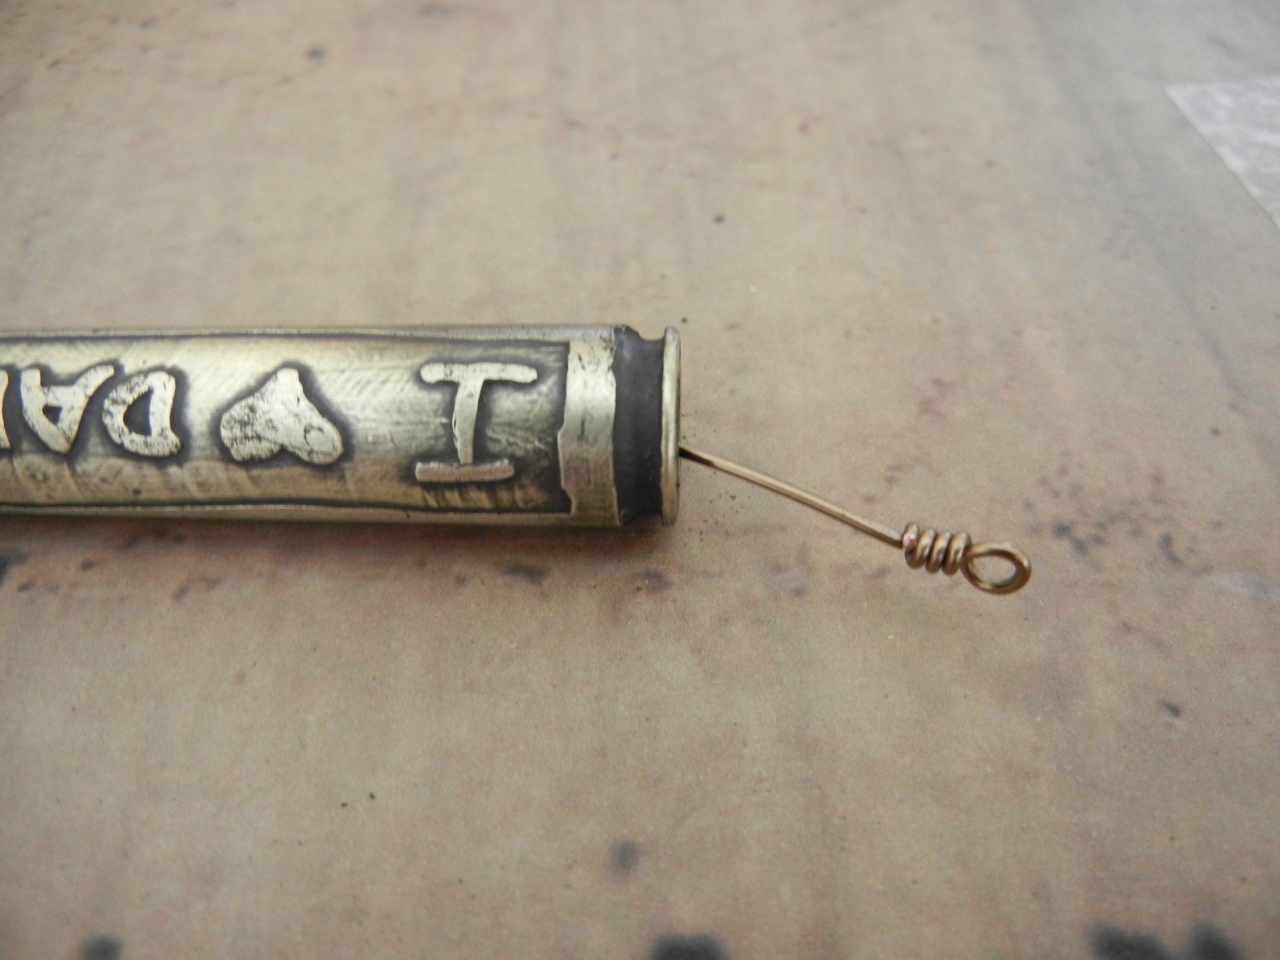
Insert the wrapped loop into the back hole on the bullet casing and thread it through to the other (top) hole.

On the other end, add a gemstone bead and wrap the wire like you did on the other side.

Wrap the wire down to make a nice wrapped loop.

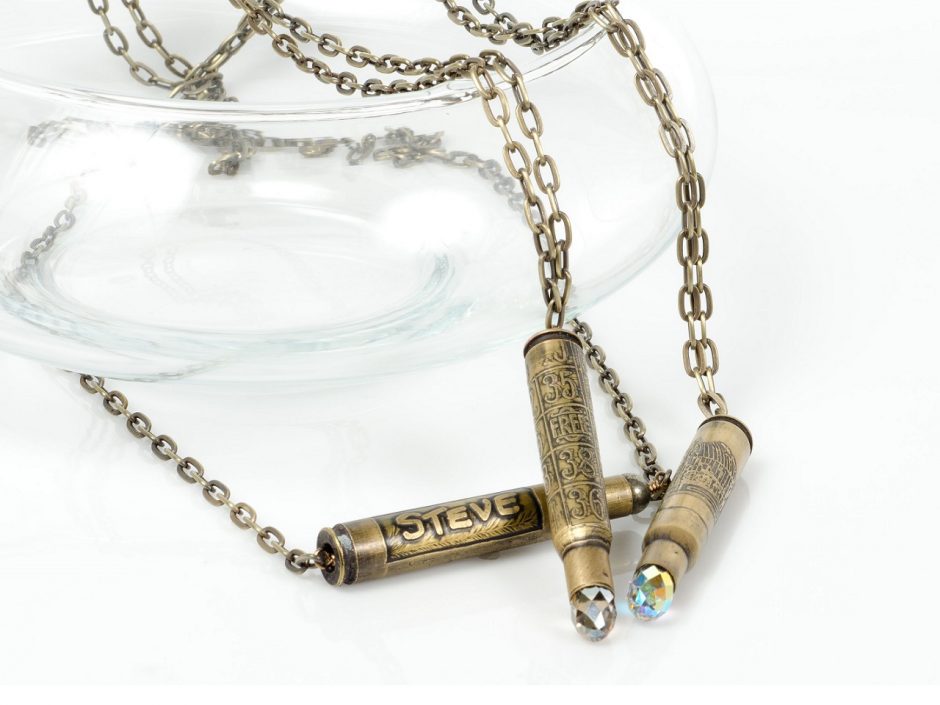
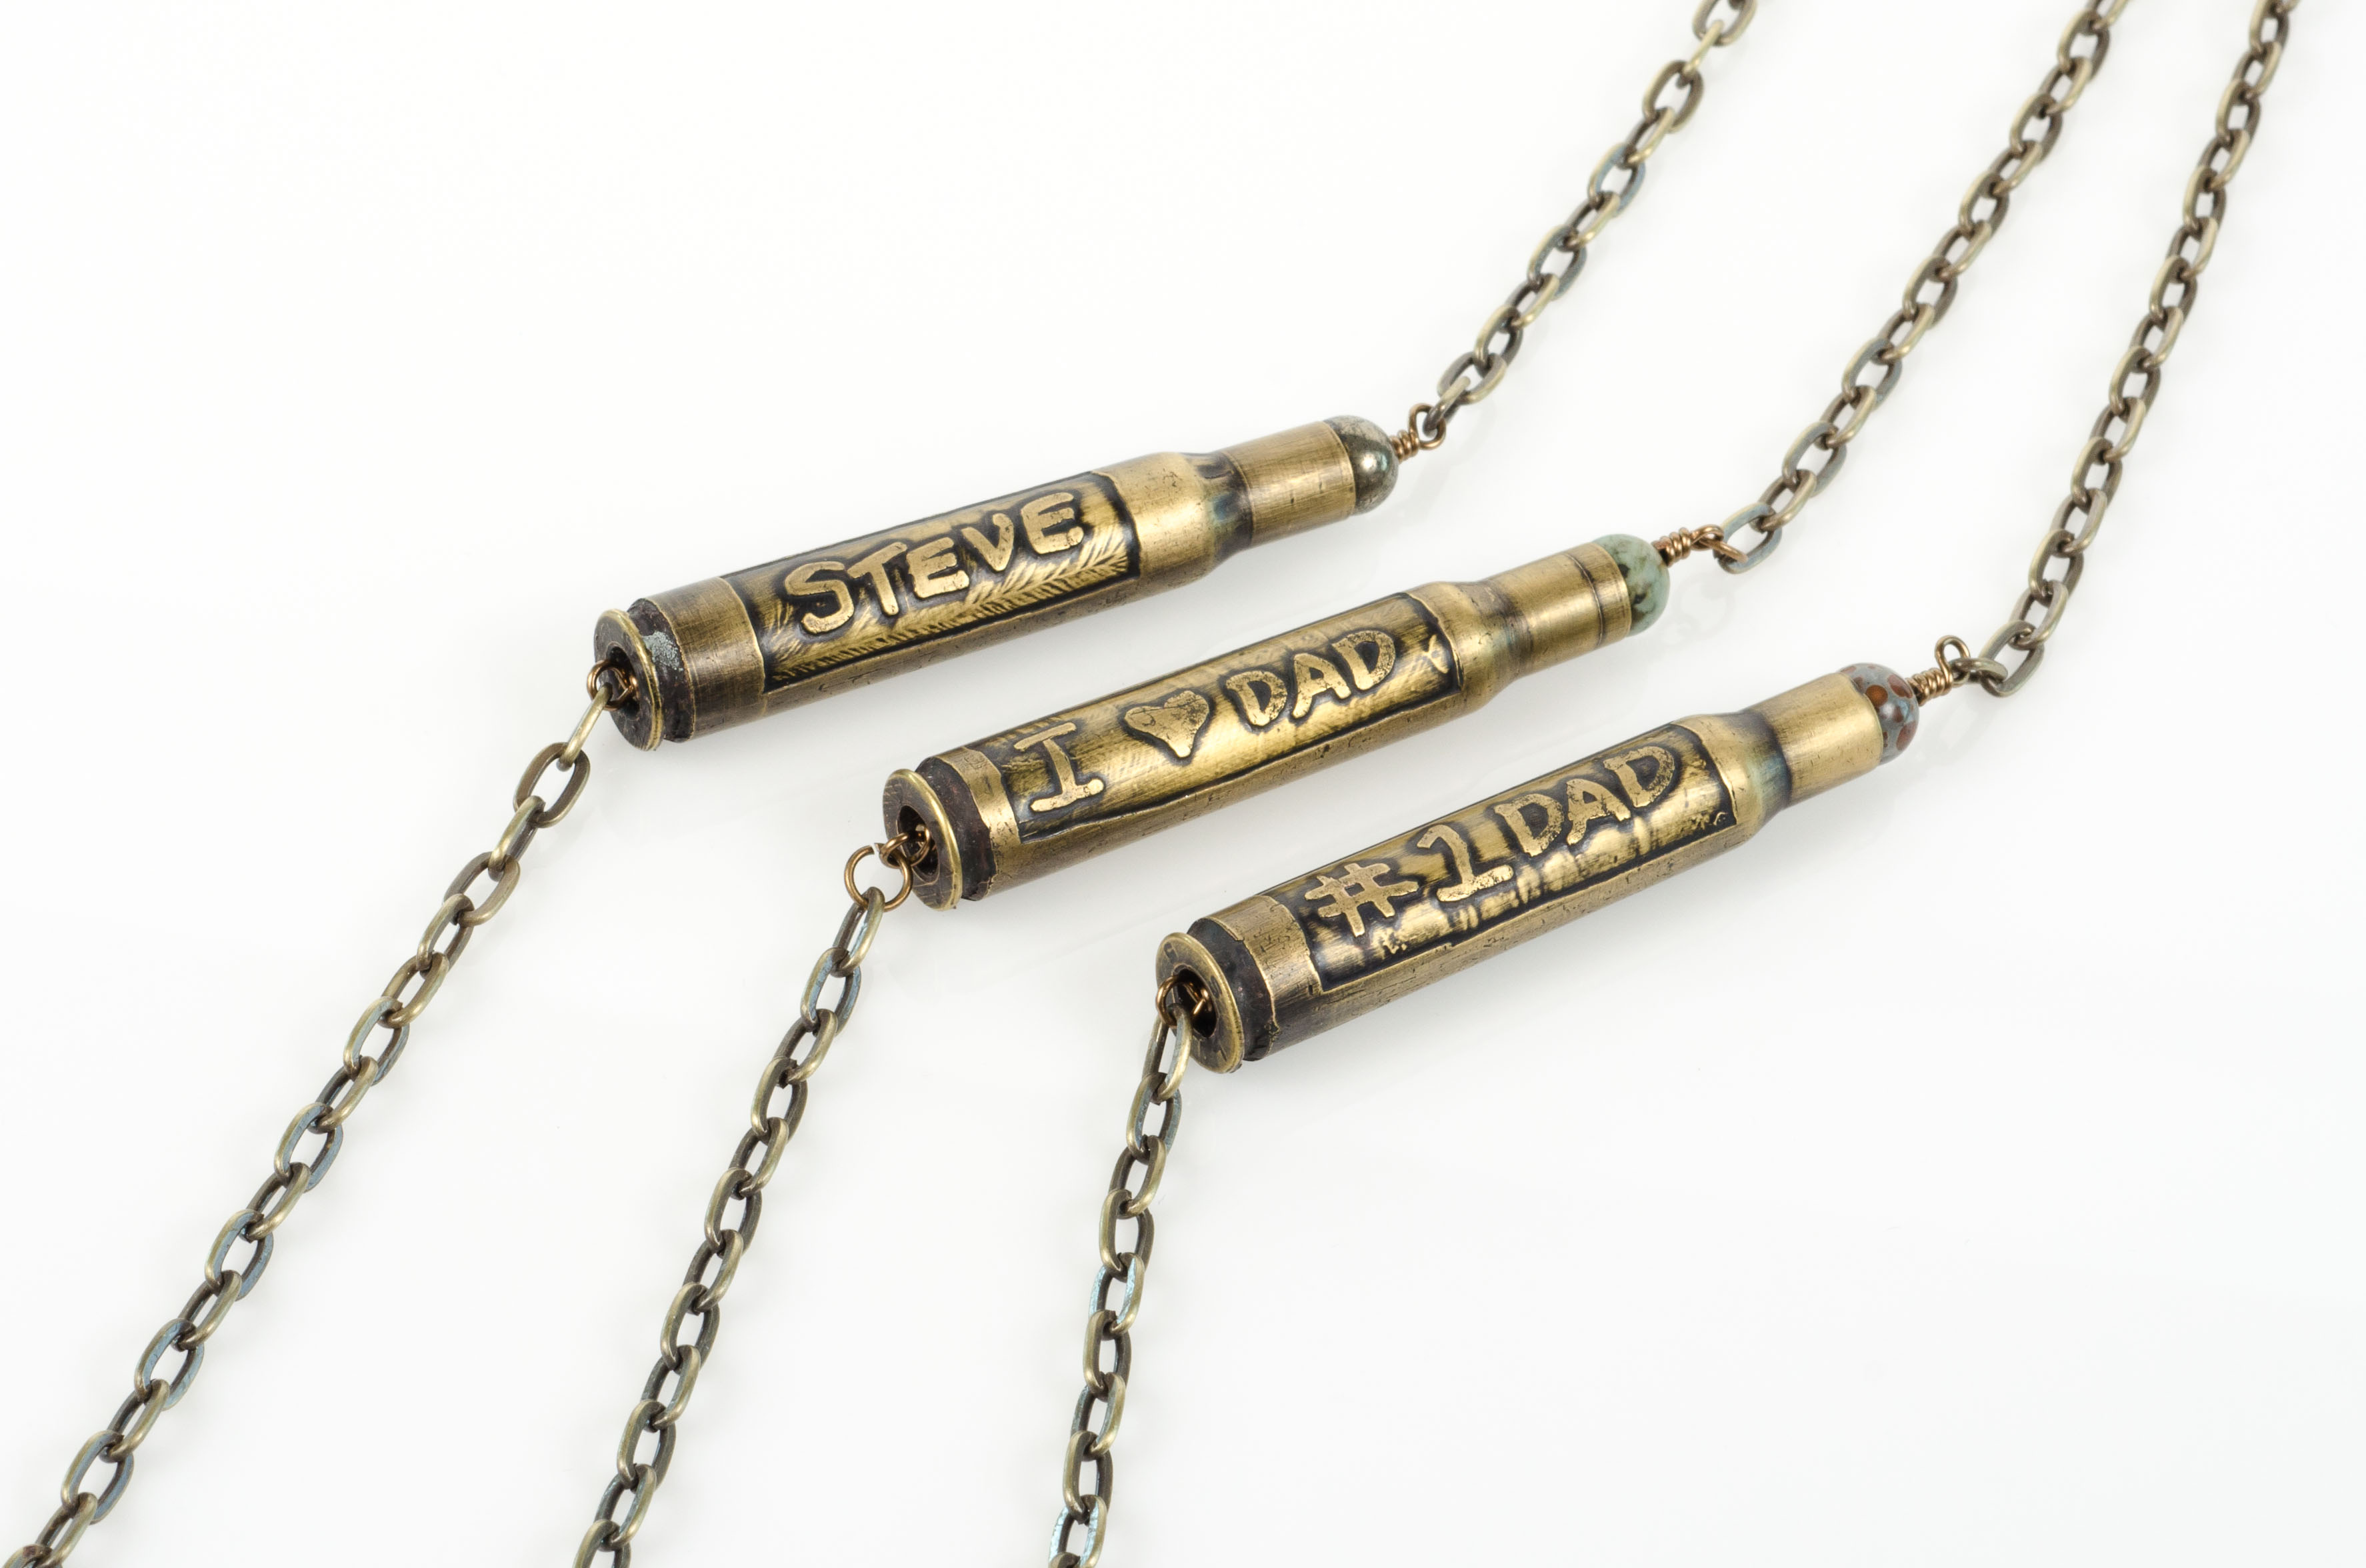
Add chain to the sides to make a necklace! Gemstones from top to bottom are Birdseye Rhyolite, Pyrite, and African Turquoise
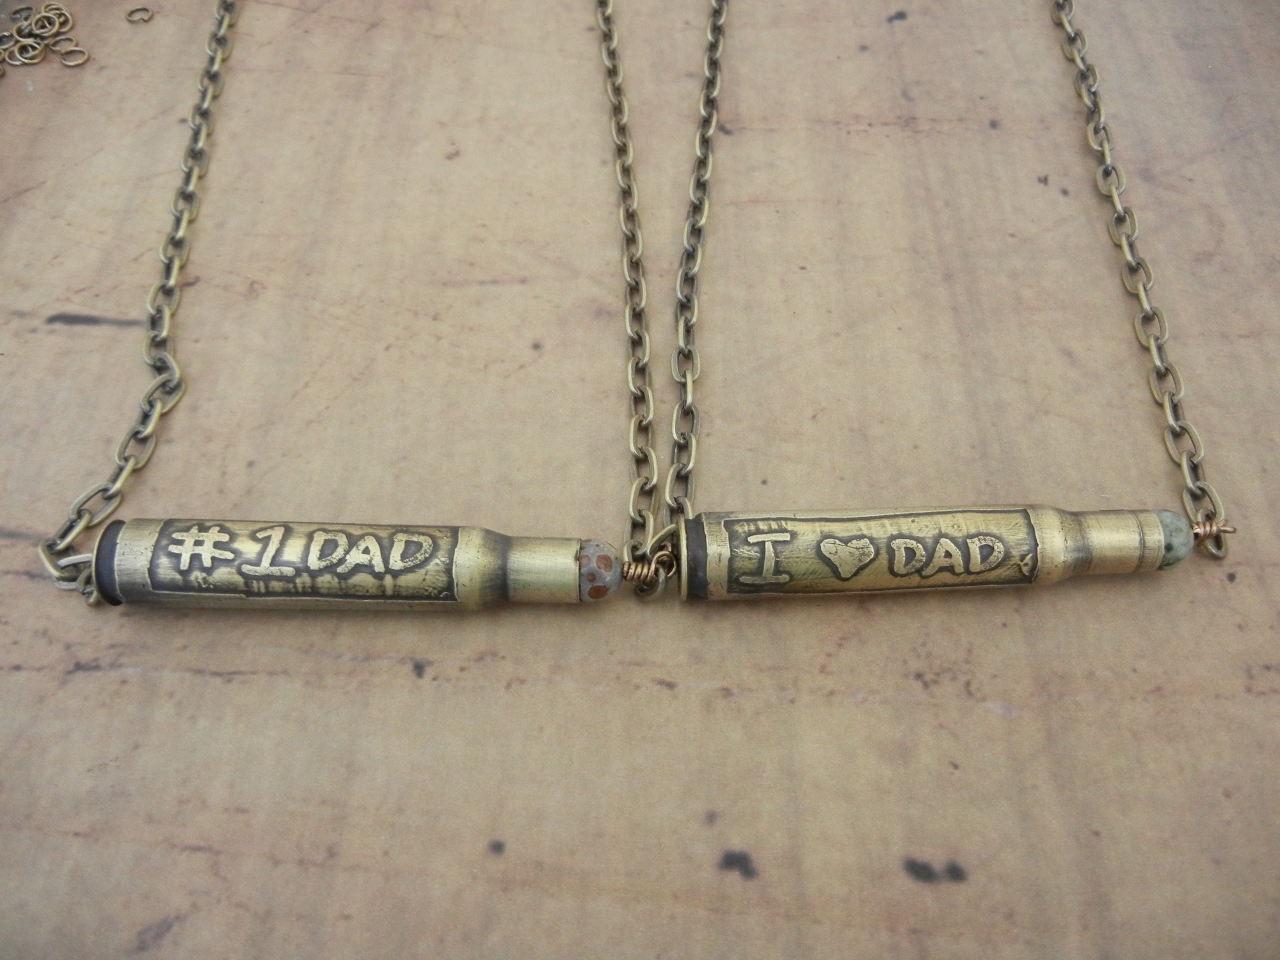
Completed necklaces!
“Man” Necklaces! Perfect for that hunter in your life!
Or make a stamped, more feminine version for her!
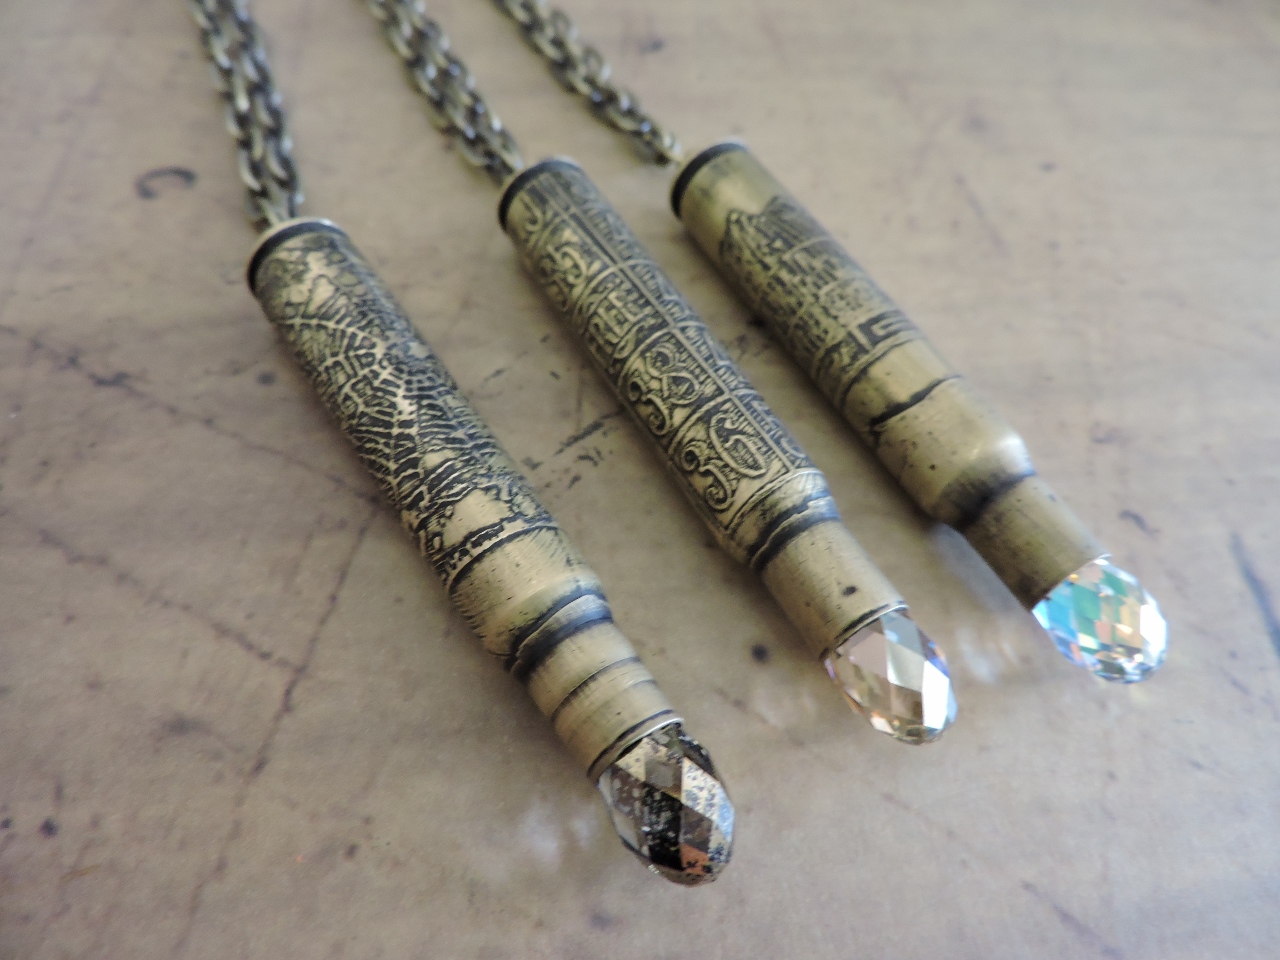
These etched bullet casing necklaces feature Swarovski crystals for extra sparkle! The 13mm Swarovski Briolette is perfect here!
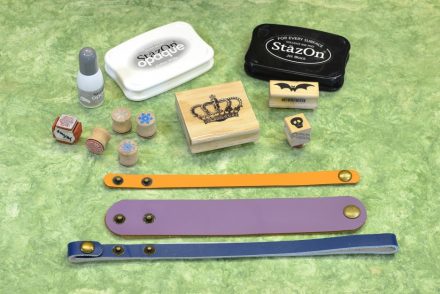
To make a stamped version the process is very similar. Instead of applying the image by hand, we will use rubber stamps and permanent ink. Follow the simple steps below to make this version.
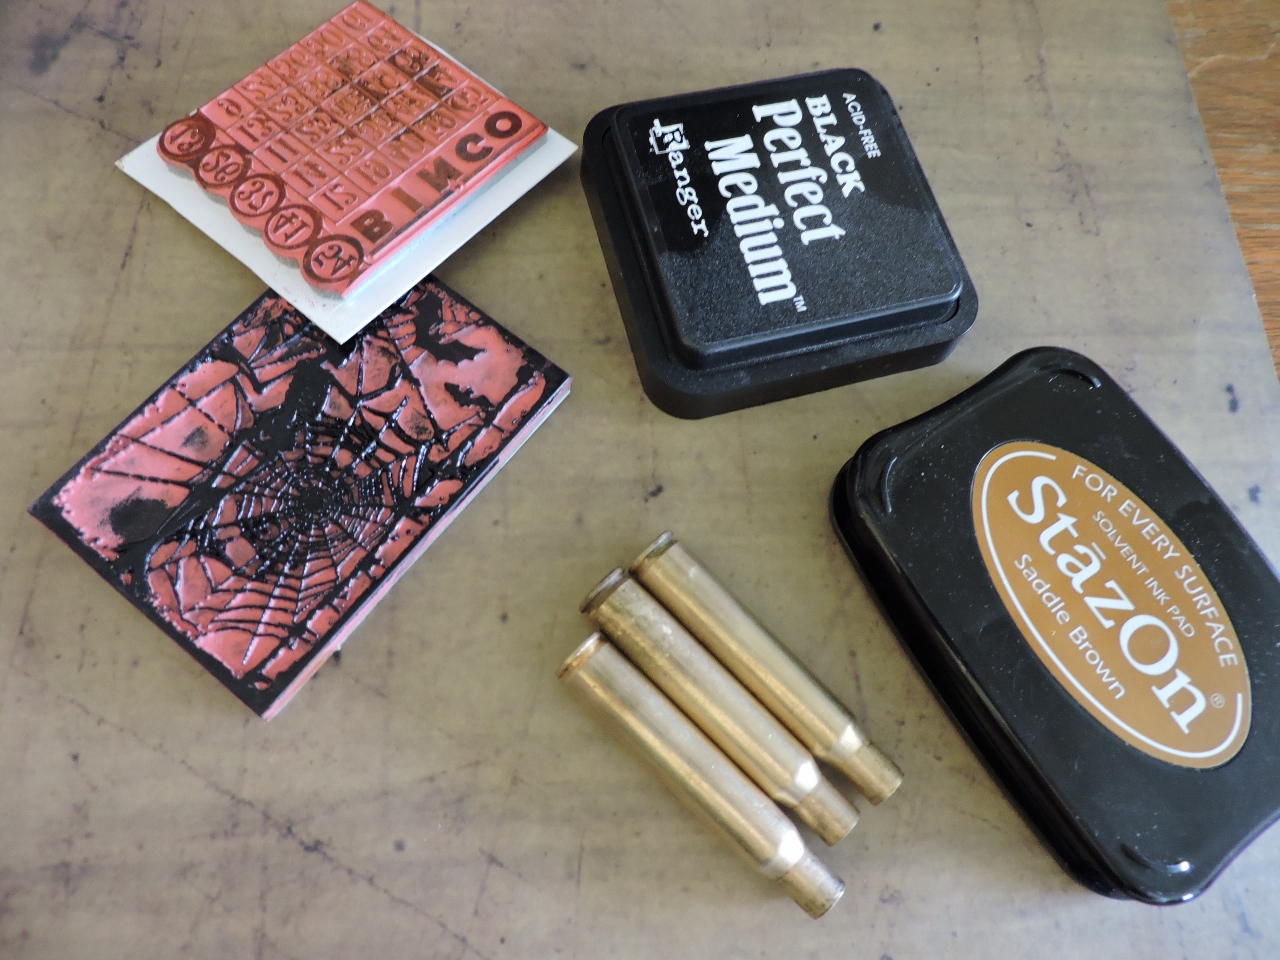
Clean the bullets with Penny Brite, as mentioned above. To stamp the bullets, use large rubber stamps and permanent ink pads.
Ink up the stamp well with the permanent ink pad. Then roll the bullet onto the stamp to transfer the image to the bullet casing.
Use permanent marker to color where you don’t want the acid to etch.
After you have colored where you want with the permanent marker, tape up the bottom and top with scotch tape like we did with the previous bullets.
Remember to protect your hands with gloves while working with acid! Soak the bullet casings in the ferric chloride acid for approximately half and hour.
Like before, pull the bullet casings out of the acid, cover in baking soda, and rinse with warm water. Reserve the remaining acid for future etching.

After you remove the bullets from the baking soda bath, repeat the same steps as listed above for etching bullet casings. Use a sanding pad to remove the sharpie, then antique the metal with Novacan Black. Use a sanding pad again to remove the patina.
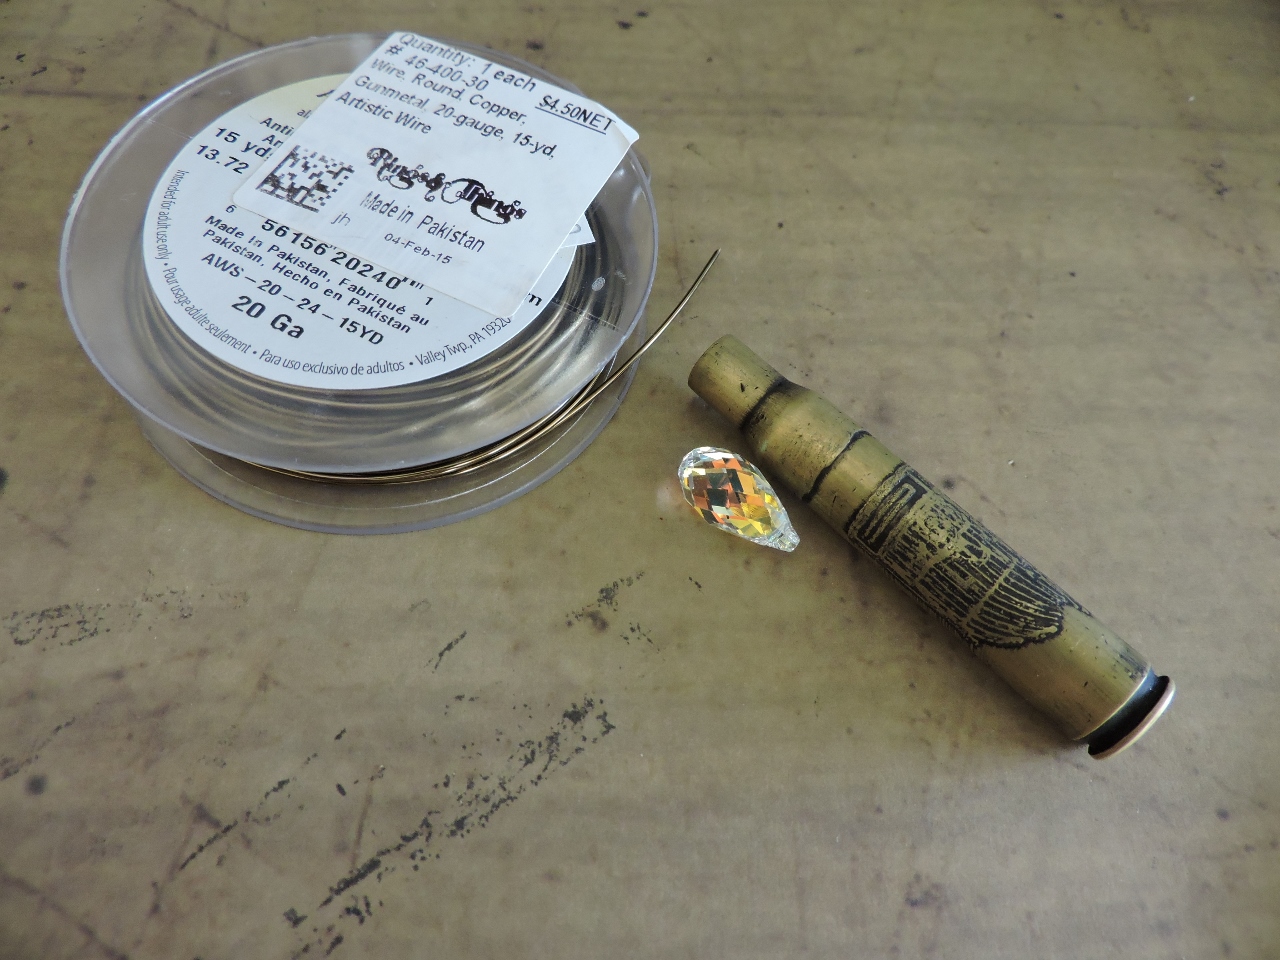
After you have the bullet casings etched, you can add Swarovski crystal briolettes to the bottom of the bullets. Use the same 20 gauge Artistic Wire in Bronze to do this.
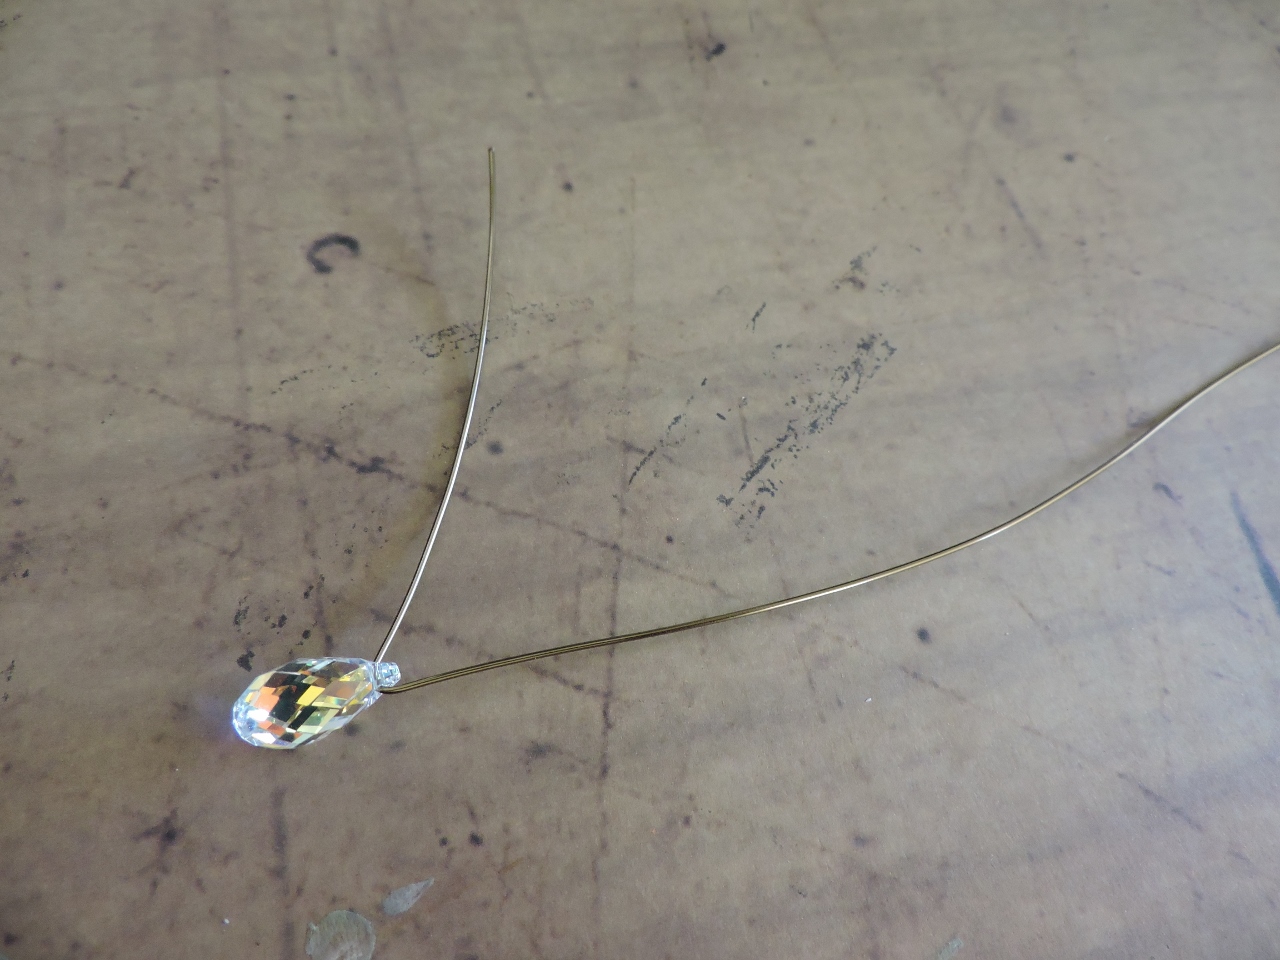
Cut a piece of wire about 9 inches long and string the crystal onto the wire with 3 inches on one side.

Wrap the shorter wire around the longer wire several times.
String the wire through the hole in the bullet and pull it tight.
Wrap the wire into a messy wrapped loop on the other side of the bullet.

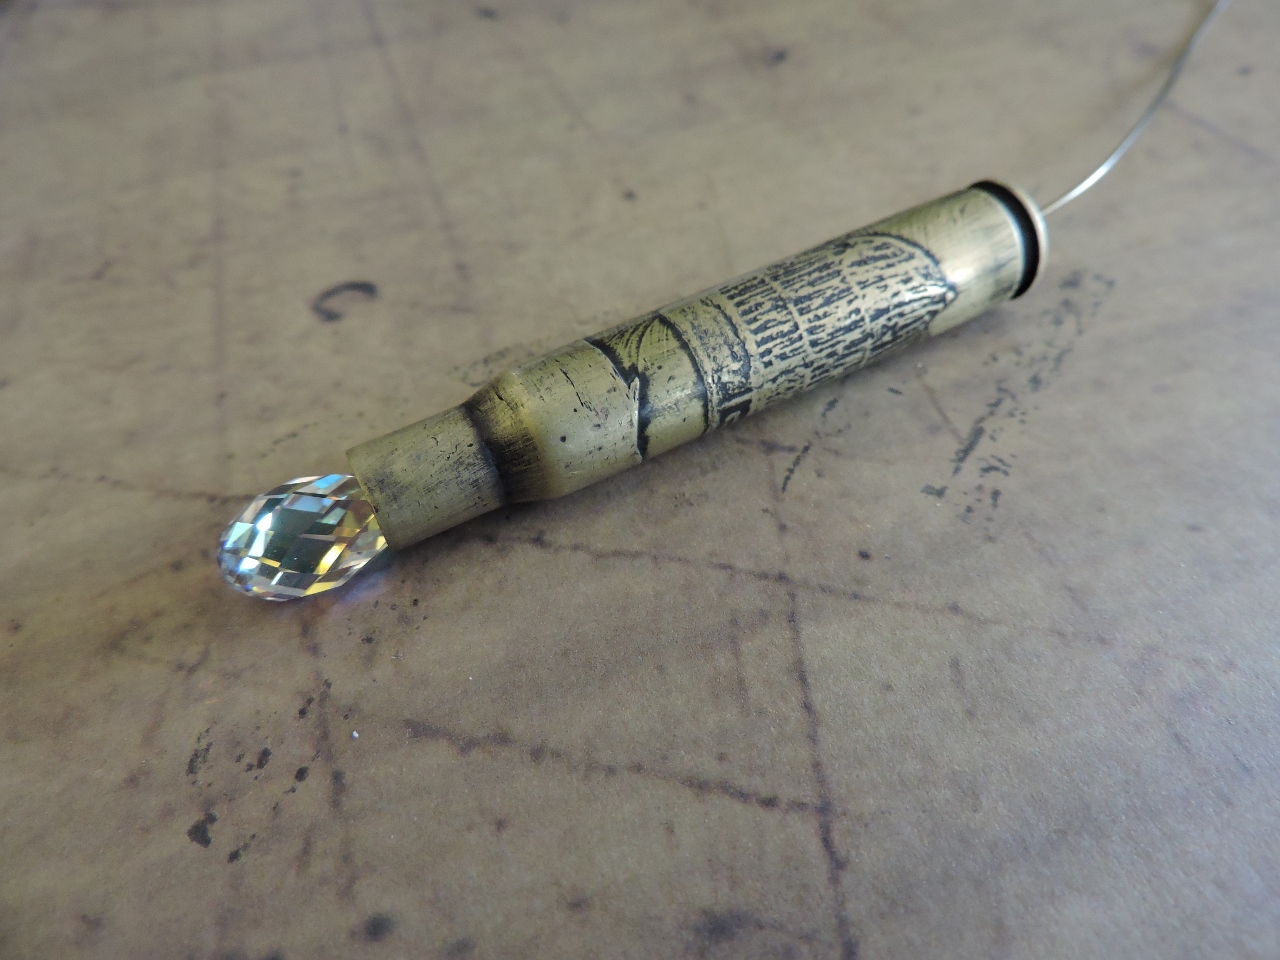
Completed Swarovski and etched bullet casing pendant.
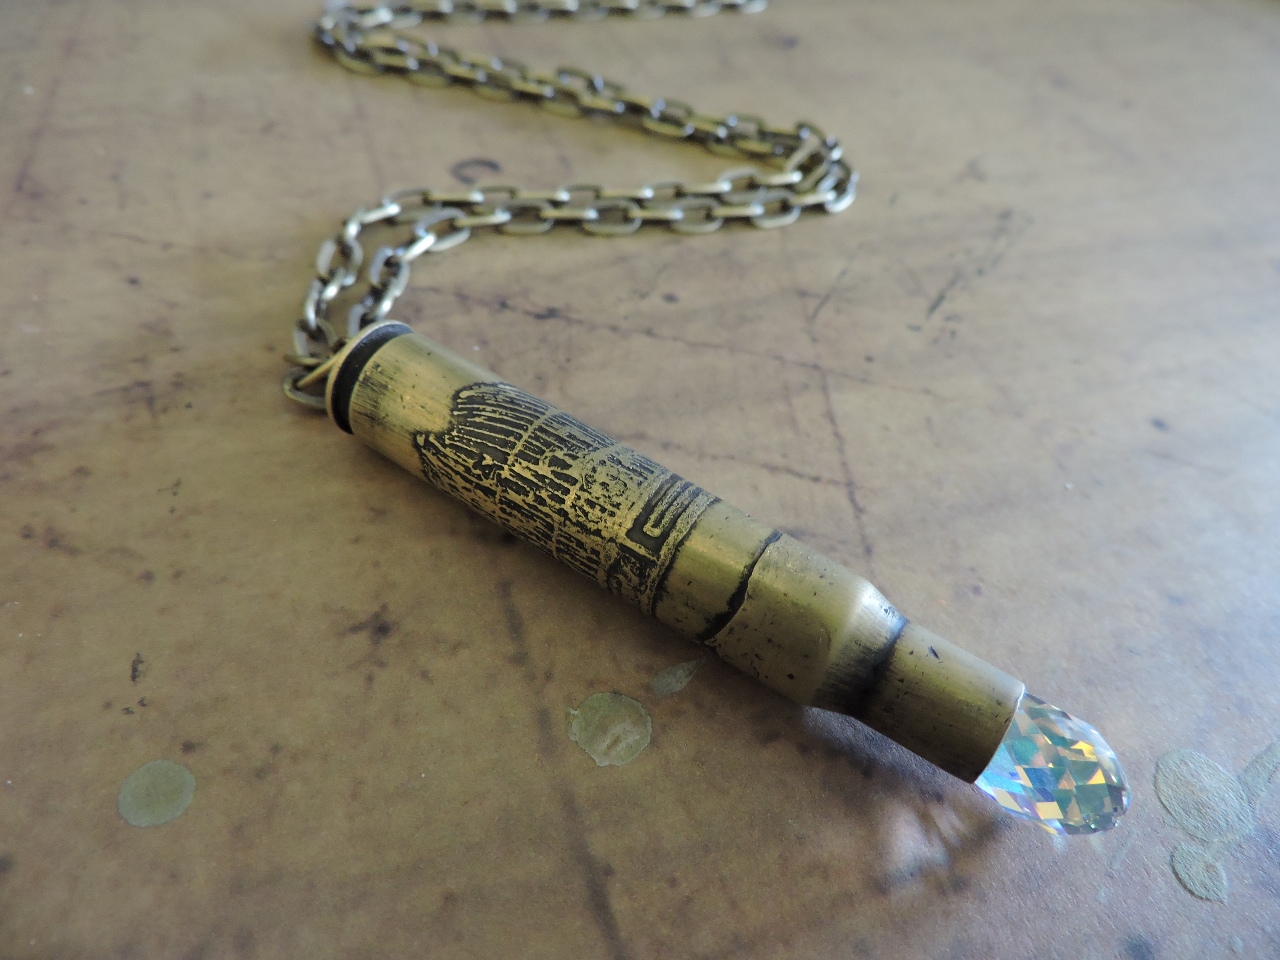
Add chain to the pendant to make it into a necklace. I like a long chain, like 30 inches so that you don’t need a clasp.
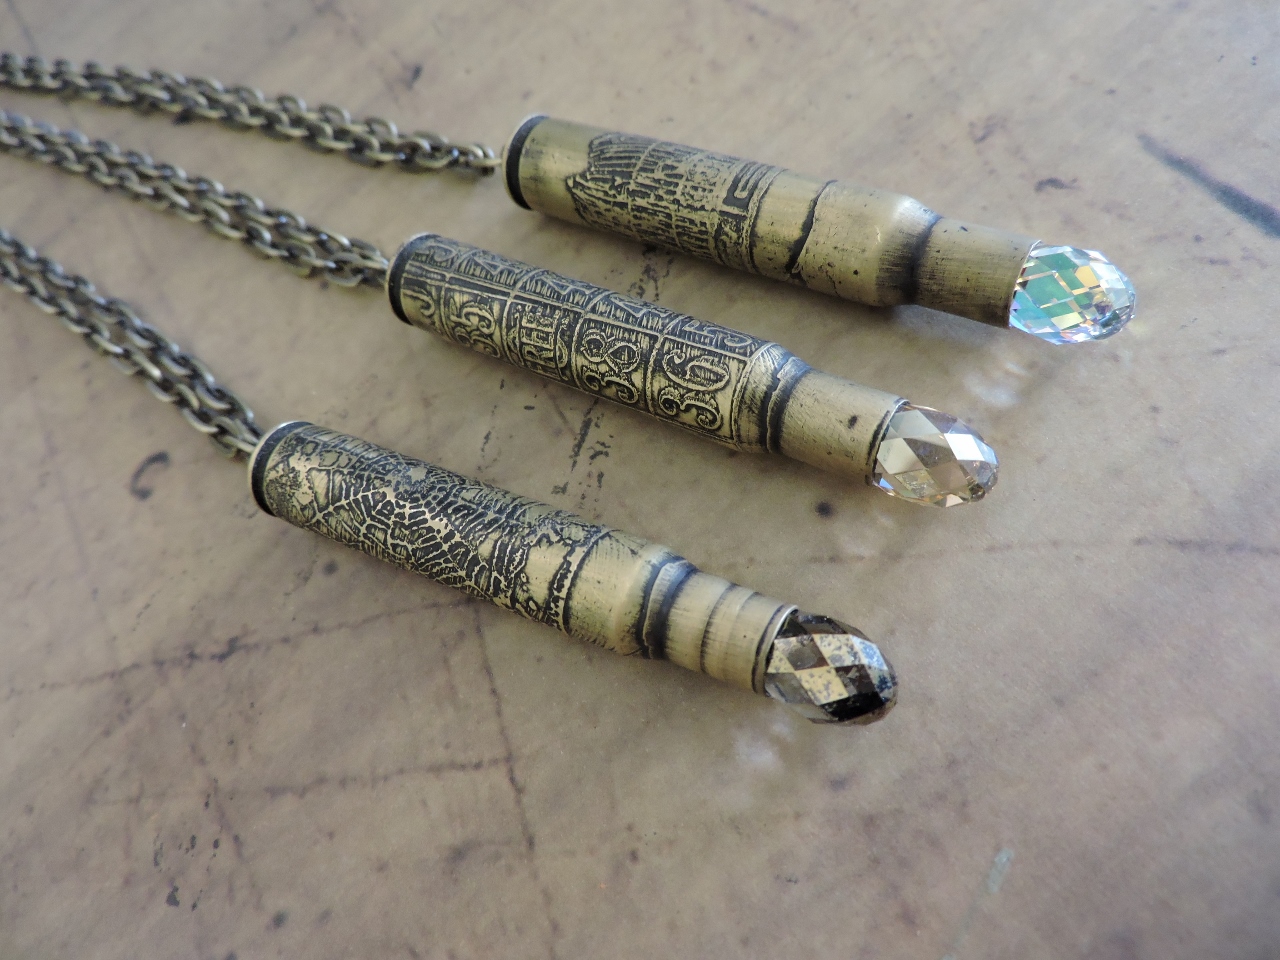
Three different bullet casing necklaces! The crystal colors from left to right are Gold Patina, Golden Shadow and Aurora Borealis.
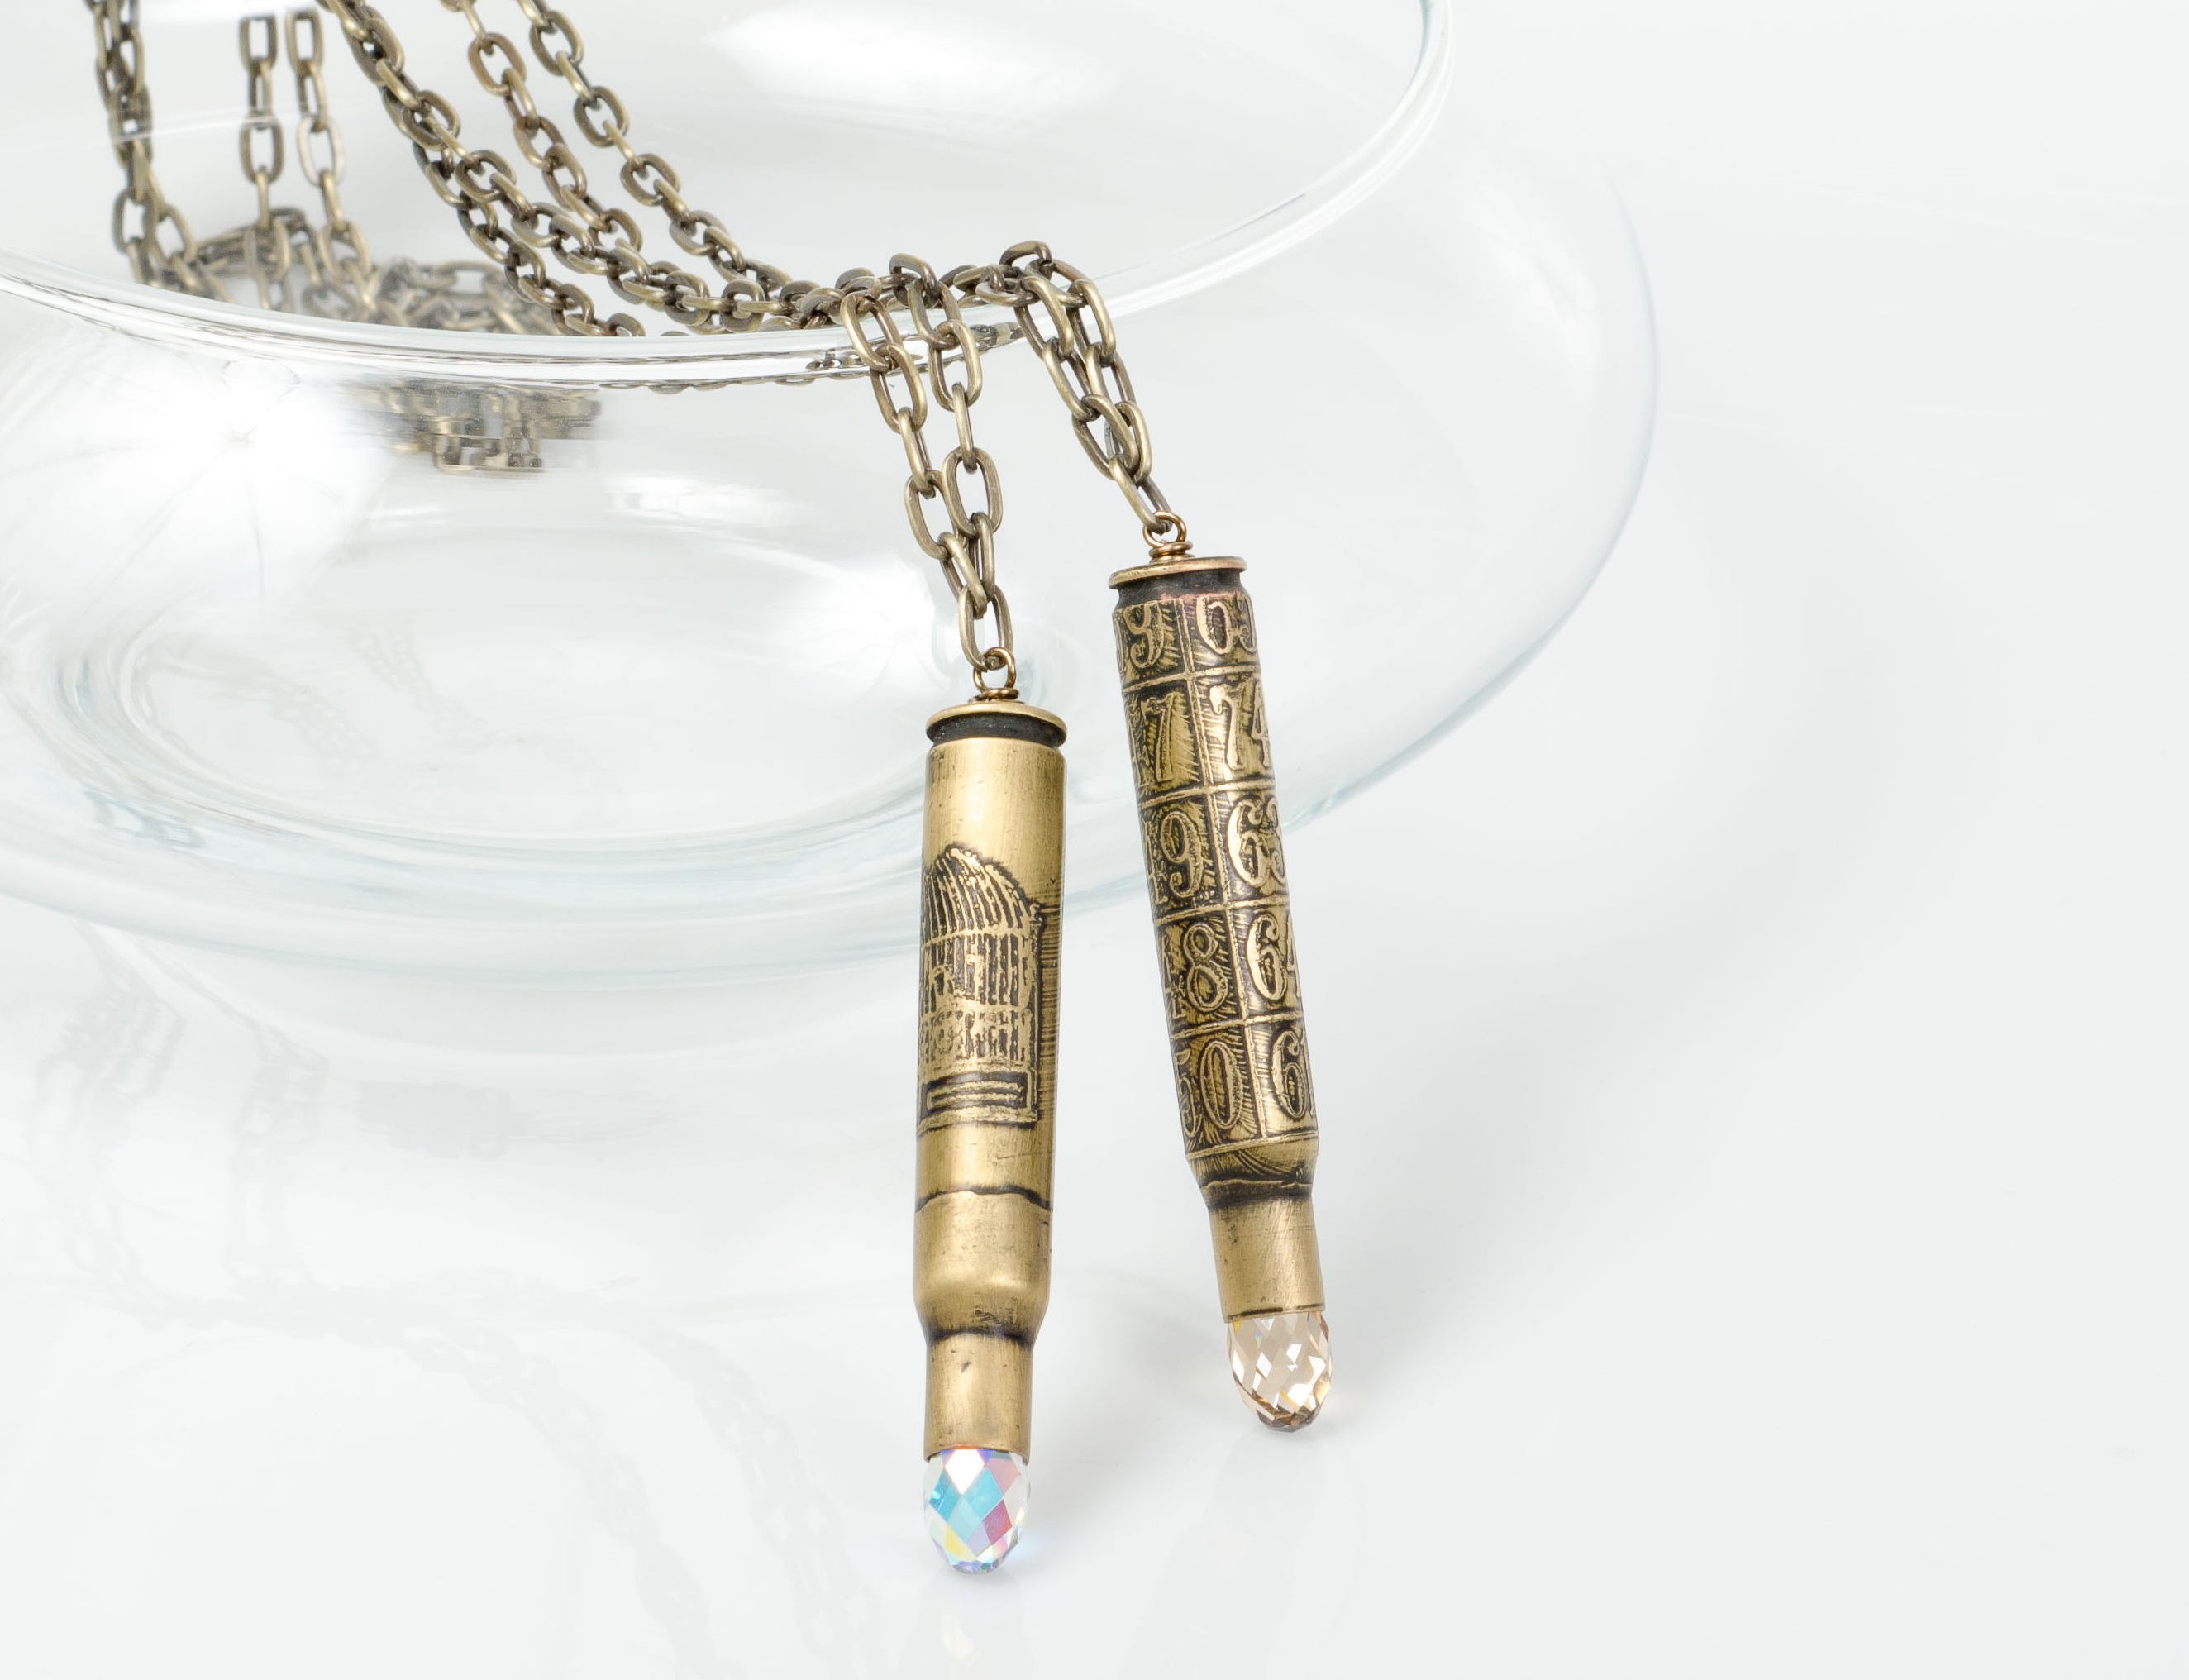
Bird Cage and Bingo Card Etched Bullet Casing Necklaces
Well I hope you enjoyed learning how to etch bullets! It is really so much fun, and a way to turn something otherwise considered trash, into a pretty piece of jewelry! ~Tiffany

13 Comments
Can you use this method on nickel shell casings as well?
Hi April,
We haven’t tried it, so we’re not sure. It depends on what the alloy of nickel is — how much copper and other stuff is in the nickel alloy, since it’s the copper portion that’s actually being etched.
Our nickel silver sheet is Nickel silver 770-H02. ASTM B122, so it is 55% Copper, 27% Zinc, and 18% Nickel. Brass cartidges are usually about 70% copper, and 29.7% zinc and the rest can be trace elements. This is about the same as our brass sheet. The nickel silver etches slower than the brass cartridges or sheet, because it has less copper. I usually leave my nickel in the ferric chloride etchant about 30-60 minutes longer than the brass.
If you have the ASTM # or other cryptic phrases that your nickel cartridges are made of, you can google them along with the word “alloy” to find technical websites that will tell you how much copper is in that type of nickel.
I have tried the nickel casings and it has dissolved my casings. I am using an diluted mixure and within the same time frame as my other bullets it dissolves them, and turns my other bullets an copper color.
How do you keep the bullet from slipping when rolling it on the stamp? I’ve been trying for 2 days now, and it just slips and smears the ink… any tips?
Hi Bobby,
Excellent question. There is no easy answer… other than skipping the stamp completely, and free-hand drawing designs on the casing.
When I stamp casings, I place a fingertip at each end and slowly roll it along the stamp with one continuous motion. I let it dry completely, even if the stamping isn’t ‘perfect’. I remove excess from the smeary areas using tiny dabbers moistened with rubbing alcohol. I re-touch as needed using a fine point permanent marker.
Hope this helps!
Sondra
Does the scotch tape go on over the entire bullet? And does it stay on while in the acid.
Hi Kat,
To see how the scotch tape is used, take a look at the image that has this caption “After you get the design you like, use scotch tape to seal the top of the bullet casings.” and then also click on the image below it, to view a close-up.
The scotch tape is being used to seal off the bullet casing so you don’t get ferric chloride inside the bullet casing.
~Polly
I have done several casings using different soaking times and they all come out scratchy looking where there is no design. Is this normal? I’ve switched over to fresh ferric chloride and shortened the time only to get a very light etched image with scratchy inlay. I’ve left it in longer and gotten a better etched image still to only get a scratchy inlay. Any suggestions?
Hi Charlene, If you take a close look at our photos, I think you’ll see the same thing. So in my mind, this is normal, and while at first it bothered me, now I like the look and I take it into consideration when planning my design.
However, I believe you can eliminate it if you constantly (gently) agitate the container while it is etching. I haven’t tried to do this, but I’ve considered setting it on a washing machine that’s in use (and keeping an eye on it so it doesn’t wiggle off), or perhaps some more sophisticated method of keeping it lightly agitated while etching.
–Polly
You could also use a bubbler from a fish tank that would move the water around to avoid those
Any ideas on sealing the casings? This technique is amazing and tutorial was extremely easy to follow. I’m just finding I’m still getting the black from the novacan on my fingers when handling. Tried washing them and they started tarnishing. Maybe a quick spray with a clear spray paint?
Hi Bethany,
After applying the Novacan Black Patina to metal items, I polish off all the high spots; this leaves the patina mostly in the crevices. By finishing the patinaed surface in this method, I don’t have issues with the blackened surface coming off. I use both a 3M sanding sponge and a EuroTool ultra polishing pad to achieve this finish.
3M Sanding Sponges:
http://www.rings-things.com/Products/Jewelry-Files-and-Sanding-Tools/3M-Sanding-Sponges-800-1000-Grit.html
http://www.rings-things.com/Products/Jewelry-Files-and-Sanding-Tools/3M-Sanding-Sponges-1200-1500-Grit.html
EuroTool Ultra Polishing Pads:
http://www.rings-things.com/Products/Cleaners-and-Polishers/EURO-TOOL-Polishing-Pads-Ultra-2×2.html
If you are wanting to finish your pieces with a heavier patina, you can try sealing them. The spray-on lacquer type are probably the easiest to achieve a professional finish. As with any technique, doing some test pieces is worth the extra time.
Here are a variety of sealers:
http://www.rings-things.com/Products/GlazOn-Protective-Layer/
(Please note that some items, such as the spray-on finishes, require shipping by UPS Ground.)
I hope this helps!
Mollie Valente
Rings & Things
May I ask what caliber bullet casing you are using for the 13mm brios? Hubby & his friends are enthusiasts, so I have access to lots of casings, but before I order Swarovski, I would like to be sure they fit.