Hello, bloglandia! Today I finally decided to finish the ends of a flat braid I made with a square Kumihimo disk. I recently blogged how to finish the ends of round Kumihimo braids (versions of which can be made with either the square or the round disk). What stalled me on finishing my flat braid was lack of a needle.

It just takes a few quick stitches to secure the braid before you cut off the knot and add a cord end. Make sure to use thread that matches your project so you don’t notice the stitches.
Since the flat braid is well, flat, you need stitch through the braid to keep it from unraveling. Sadly, needles and I don’t get along too well. It is never the poor needle’s fault. It is my fault for not choosing the right needle. When you treat all needles the same, instead of appreciating their unique qualities and character quirks, you can quickly run into frustration.
So today when Amy loaned me a needle, warning me it was a size 15, I said, “oh, that’s fine!” even though I had no idea what she meant. After several frustrating minutes trying to thread the darn thing, I learned. Size 15 is tiny. Check out this great bead needle and thread size chart from New Native Nation. You gotta love Spudmama!
While I’d long suspected that beading needles must be different than regular sewing needles, now I know why. As Spudmama explains, beading needles don’t “bulge” around the eye – this is what allows them to pass through seed beads multiple times for bead stitching and bead weaving projects. The smaller the number, the bigger the needle. (ex. size 10 needles are larger than size 15). Plus, “sharps” are stiffer than standard beading needles. Therefore, the smaller the project, the tinier and flex-ier the needle should be.
So, if you need a needle for something other than seed beading (like finishing a flat braid or making a wrapped leather bracelet) I recommend using size 12 sharp beading needles since they are (relatively) large and sturdy.

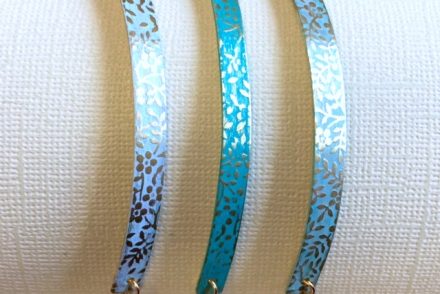
I used “choker clamps” designed for flat ribbon, such as velvet and organza, to finish the ends of my braid. There are teeth inside the clamp, so once you flatten the clamp firmly with pliers, it won’t slide off.
If you are brave enough to make tiny seed bead jewelry, refer to Spudmama’s chart and stock up on aspirin and magnifying glasses! Oh, and needle threaders! ~ Cindy

4 Comments
I have been beading for over 55 years and when I first started there were NO BEADING NEEDLES! You get to use clear nail polish and your fingers to make a tiny stiff end on thread….no bead thread back then only cotten sewing thread or very fine fishing line that you burned the ends on to make sure the knot didn’t come on done! I use size 13 to 18 seed beads and yes threading a size 15 bead needle is a little tough but try to bead without a needle! I made so many different things from earrings to bead work on the bottom of my bell bottom jeans on the way to seeing the Door’s in concert. So keep on beadding!
Thanks, Diane, for the trip down memory lane!
I’ve used that “self-needle” trick on thread too. Sometimes I’ll still do it if I can’t find a needle. (But now I usually have superglue on hand, rather than clear fingernail polish.)
We used to take clear fingernail polish everywhere and used it for everything – sealing the Sharpie’d prices on the back of sterling jewelry, sealing knots, making “needles”, stopping runs in nylons…
Now I just have a sparkly purple shade of polish to mark which tools are mine.
howdy there,
hope to get info for ur craft and do u have sign up newsletter for ur website? where I can find it and hope to place an orders whether u are selling many of them in stock? thanks,
Hi Elizabeth,
We have a few newsletters: one with tips and techniques, one for locals near the Spokane (eastern Washington state) area, and one that notifies you of weekly sales.
You can pick which newsletters to subscribe to here: http://visitor.r20.constantcontact.com/manage/optin/ea?v=001ij2LuZv1dpbXRjibqvH4Mg%3D%3D
We have over 20,000 jewelry-making items in stock — beads, beading needles, cording, leather, necklace ends… you name it!