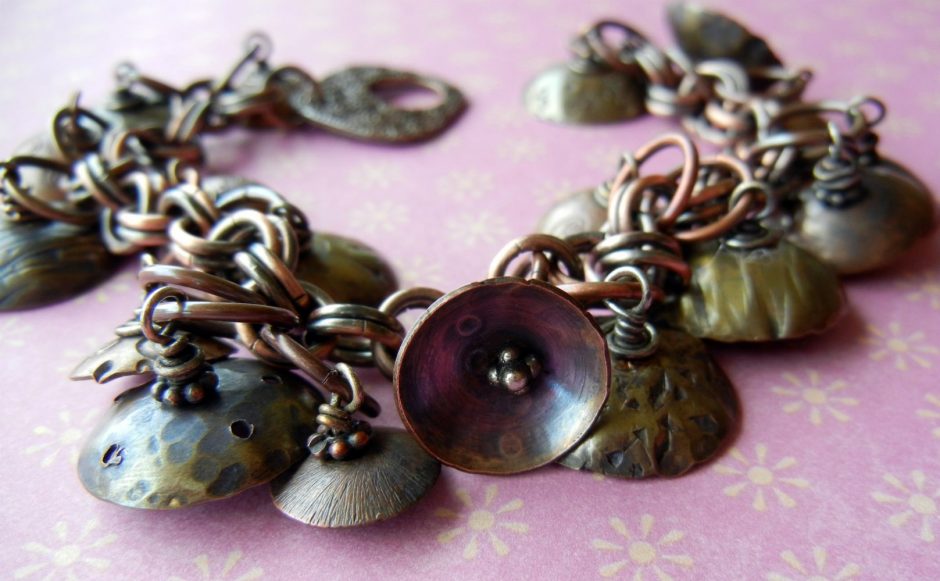
Cymbals of Happiness bracelet by Sondra:
stamped, textured and domed copper and brass disks make a tinkling charm bracelet.
It took me awhile to accept “dapping” as a real word. Even now that I am obsessed with dapping every flat piece of metal that crosses my path, I still find the term awkward. Spell check, ignoring the facts as usual, still doesn’t believe.
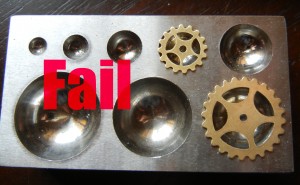
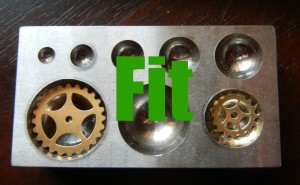
In jewelry making, dapping simply means taking a flat piece of metal and curving it into a dome with special dies and punches, called a dapping set. The dapping block (or die if you prefer) has a series of concave impressions that correspond in size with the dapping punches.

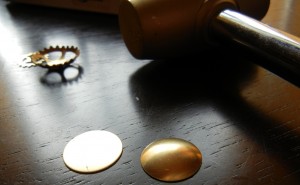
Rings & Things #69-199 dapping set by Eurotool, and a variety of flat and dapped metal pieces.
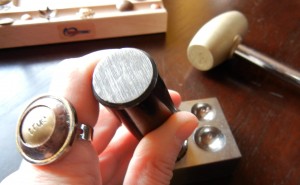
Simply place your metal piece in the block and use a hammer (preferably brass) to repeatedly tap the punch into the metal. I say tap because your goal is to gently bend the metal into a smooth, even curve. If you just whack as hard as you can, the metal won’t shape up evenly.
Another tip: don’t hammer straight down on your metal. Hold the dapping punch at and angle, and tap tap tap with your hammer, turning your metal after every few taps to ensure that it is shaping up nicely.
As you dap (tap, dome, whatever!), the height of the metal piece increases, while the width decreases. So after you’ve dapped as much as you can in one impression, you can move the metal into the next smallest hole and dap it with the next smallest punch to get a deeper dome.
Doming adds a professional quality to your work. Even just a slight curve instantly makes a metal disk reflect more light.
Brass, copper, aluminum and sterling silver are all excellent soft metals to dap (most of my images are of raw brass blanks). Even copper coins can all be dapped, although coins are thick and will require you to apply a bit more muscle. If you want to stamp, texture, punch holes, or otherwise adorn your metal (and you will!) do all that before you dap for beautiful results:

Use stamps to monogram brass disks for easy, elegant earrings.

Dapped pieces can be layered too, like on my copper and brass ring. (See bottom of this blog for tips about making this ring.)
One word of warning – you might need to upgrade your photography equipment to get good pictures of your dapped jewelry! I think the only way to get a clear picture of Mollie’s “God Save the Queen” necklace would be to use a professional light box. The domed Canadian penny is amazingly reflective. Since my photo-editing software lacks a “rhinestone-reflection remover tool,” this is as good of a shot as I could get. Believe me, the necklace is stunning in person!

A domed penny, brass filigree and snippet of rhinestone chain, all soldered onto a brass disk, forms the centerpiece.
I know you are quicker on the uptake than my computer: add dapping to your jewelry-making vocabulary today! ~ Cindy
—————– postscript: —————–
We’ve gotten a bunch of questions about Cindy’s copper and brass “True” ring above, but she has moved away, so I’ll do my best to answer. The ring uses only 3 parts:
- a round bezel ring (#51-205-02-1) as the base
- a textured and dapped copper ring/washer blank (#44-780-25 or -26)
- a dapped brass disk blank
Texture the copper washer using this technique, or simply give it a nice hammered texture with a chasing or ballpein hammer. Stamp “true” on the disk following these metal stamping instructions or this metal stamping article. Then dap (dome) the washer and the brass disk, and glue them into the bezel ring with your favorite adhesive. Cindy used E-6000. ~Polly


37 Comments
Way to add value to pennies! 🙂
Very Cool Dave! Gonna order the wood one. Will that work as well? Tight budget 🙁
Hi Debbie! The wood one also works – you won’t be able to get a really deep dome with it, and you would have a tough time doming thick items (like coins), but on the plus side you can use slightly larger disks than with the metal set. Have fun!
Thanks Cindy. Most appreciated. I will also get the other one as the money pours in from my sales 🙂
http://etsy.me/eoTuKE
Flower & Bud Handcrafted Jewelry
Recently purchased a wood one until I can afford a better model. Thanks for the tips!
*drool* I am in love!!!!!
Awesome! Thanks for the great tips, Cindy!! I have a wood dapping set & am adding the R&T’s metal dapping to my wish list. Got my R&T’s brass discs so I am ready to dap-a-dee-doo-dah now 🙂 I wasn’t sure whether to stamp, punch, texture before or after dapping, thanks for clearing that up!
Great tutorial and ideas! I am addicted to my set, constantly liking for new things to done.
I have a hard time wrapping my brain around the word:) I’ll stick with doming ~ it sounds prettier!
Any chance of getting some hints on how to make that beautiful ring??? Thanks for this great post!
The ring uses a round bezel ring (#51-205-02-1) as the base – I’d been using the rings with resin and by chance discovered that dapping copper ring/washer blanks (#44-780-25 or -26) made them the right size to squeeze into the bezel. The brass disk and copper washer are glued to the ring base with E-6000.
Hope this helps! Happy doming 🙂
Thank you!!!
I am looking for instructions on dapping bottle caps……I’m not having any luck. My caps finish askew and scratched…..there must be an easier way. Thanks so much for any help.
Like Susan, I am after information on dappling bottle caps (also would you recommend a wooden or a steel kit for the purpose?)
Hi Rebecca! The darn spam filter must have eaten the reply I posted for Susan. Sorry about that. Anyway, for dapping bottle caps, I actually recommend using both the wooden and metal dapping sets! The reason is the bottle caps are too big for the metal set (at least for mine) and so I like to start with the wood set and then move to the metal. Steel on steel can mar the surface, so it takes practice to hit them hard enough to reshape them but not so hard that you ding them up. Hope this helps! Happy crafting 🙂
I would love a tutorial on how to make the penny necklace :0)
A tutorial on the ring too
Thank goodness for your blog post explaining what ‘dapping’ means…I looked it up and apparently it meant something entirely different in colloquial terms…not safe for work, for certain. Thanks again for the article!
I meant I Googled it.
Oh no! That’s funny … I’m glad you found our blog to explain the jewelry definition. I’m at work (plus a bit worried about what I’d find) so I’m NOT going to go look up the meaning you found. :/
Hello,
Please,which is the material needed to make this bracelet (first photo) and ring (true)?
waiting for your reply
Hi Luciana,
The “Cymbals of Happiness” mixed-metal bracelet was made in our Spokane Showroom. Several customers helped to create each of the cymbals!
Here are the parts (materials), with instructions:
1) Cut the chain (#40-099-48-7) to the size of bracelet you desire. Attach a clasp at one end.
2) Using a two-pound brass hammer (#69-345) and a disk cutter (#69-106), create a variety of cymbal sizes (or flat disks). Or, metal shears (#69-230) will cut 24-gauge brass (#64-990-24) and copper (#64-980-24) sheet metal as needed.
3) Using the Eurotool punch (#69-235), make a hole in the center of each cymbal. The punch can also be used to create interesting holes in the cymbals as well.
4) Texture each cymbal before dapping using a multi-head hammer (#65-910).
5) Dap each cymbal using the dapping set (#69-199) and a two pound brass hammer.
6) Wire-wrap each cymbal using a dotted-flower head pin (#37-482-04-ap). Use an assortment of daisy spacer beads (#49-954-04-ac, #49-954-05-ac, #49-954-06-ac, etc.) on the top and bottom of each cymbal, as needed, to stabilize the wire wrap.
7) Patina and polish each cymbal.
8) Attach cymbals to chain in a random pattern using large jump rings (#37-178-7).
9) Wear and enjoy the tinkling sound and compliments!
(Links updated March 2019)
I believe the ring was made via a similar process. The “bezel” that the parts are set in, is: http://www.rings-things.com/Products/Rings-with-Bezel-Cups/Silver-Plated-Finger-Ring-Blank-Adjustable-Bezel-Round.html.
And instructions for stamping “true” are at the “How to Make a Metal-Stamped Charm” technique sheet in our Resources page: http://www.rings-things.com/Learn/Metal-Stamping/
Please let me know if we’ve missed anything!
Actually, someone just reminded me that we have more details about the ring here:
http://blog.rings-things.com/2011/04/08/how-to-dap-and-dome-metal-jewelry-2/#comment-1648
Please, Where do I find the tutorial and the material to make the photo ring? Wiaiting and thank you!
Hi Luciana,
I added some brief instructions for the ring, to the end of the blog. Please let us know if you have more questions! ~Polly
hi,
where can i purchase the equipment needed to dome coins, and approximately how much do the necessary items cost? i have three u.s.a. coins, a liberty walking half dollar and two mercury dimes that i want domed and small rings soldered to the backs so they can be attached to a hat. if the equipment is very expensive, can you recommend someone who can do this work for me.
thank you,
eric king
Hi Eric,
In the blog above are links to each of the tools suggested. You will need to measure your coins, and click into the links to see which size tool sets will work for your coins. Plus it sounds like you’ll need to invest in soldering supplies as well, unless you already have those.
Not knowing what part of the country (or world!) you are in, it’s tough for me to recommend someone. Ok, it would be tough even if you were here in Spokane! =)
Here are a few suggestions: Call rock shops (or lapidary shops) in your area, and ask if they have someone on staff who can dap/dome and and solder. It’s a bit of a long shot, but worth a try. Or call jewelry-repair shops that work on coins and silver (not just gold — it has a MUCH higher melting temp). Or when the weather supports local higher-end arts & crafts shows, walk the show looking for silversmiths or other jewelry-makers and ask if they can dome/dap your coins and solder loops. Another possibility is to google your town name + handmade jewelry, looking for jewelers. Skip over wire-workers and bead stringers unless they ALSO have designs you can tell are soldered or otherwise metal-worked.
Good luck; it can be a challenge to find jewelry-makers who are willing to take a risk on your treasured coins / keepsakes, and it can be a challenge to find custom/repair shops who have experience working on materials other than karat gold or platinum.
Polly
You finally showed me the set of tools I’ve been looking for AND the name. One question: What do I need to stamp letters in like youve done. I have googled everything and all I can find are expensive tools. Your ring is great and I just want to add that to my growng jewelry tool box
Hi Lynn,
They are alphabet metal stamping sets (http://www.rings-things.com/Metal-Stamping-Tools-and-Metal-Stamping-Supplies/), and are available at a variety of price points. Very cheap sets from Harbor Freight frequently have missing (and doubled-up!) letters in their set. Very expensive sets are either unique fonts that aren’t in high production, or exceptional high quality shaping and tool-steel or simply overpriced. =)
I hope in the above link you find a font you love for a good price — that’s our goal; we try to provide good quality for a reasonable price, rather than go for the extremely cheap or the extremely expensive.
Thank you for this post, great information.
what size is the dapping tool that’s used for a standard beer bottle cap?
thx- Mike
Would love to give this a try!
It’s fun! And easier than you might expect. The tool set looks a little daunting at first but one you get a few tips (like the ones in this blog), you find out it’s not hard at all!
What gauge metal discs for earrings???
Hi Lauren,
24-gauge is nice to work with, especially if you’re just getting started with dappping and metalwork. It’s light enough to make large earrings without the earrings getting too heavy, yet thick enough to nicely hold its shape. Anything roughly in the range of 24-gauge to 20-gauge is great, but you can go a few gauges thinner or heavier without much worry. We like to dap these wavy disk beads: http://www.rings-things.com/Products/?search=wavy%20disks They’are already punched so they make great bead caps.
–Polly
Hi
I love that ring TRUE any chance I can’t buy?
Best Regards
Hi Vera,
Thanks for the kudos! I’m sorry, that ring is long gone. But thank you for the reminder that I need to update the links to the parts for making it. (We upgraded our website recently and haven’t gotten a chance to update the links in all our older blog articles — so I’m getting this one right now!)