Hi bloglandia! Today’s blog is about how to use a jeweler’s saw. Why? Because if you want to cut clean shapes out of metal without bending the metal, you need a saw. All metal shears, even the really nice ones, bend the metal, at least a bit. It is just the nature of the beast. Also, unless you have the hand strength of ~ I don’t even know who! ~ you probably need a saw to cut metal thicker than 24 gauge.
A saw also allows you to cut very intricate designs. Pierced is the term for designs that are cut from within the metal, as opposed to coming in from the edge. However, “pierced jewelry” brings up a whole different category of jewelry when you search online!
Supplies needed for sawing your own metal shapes:
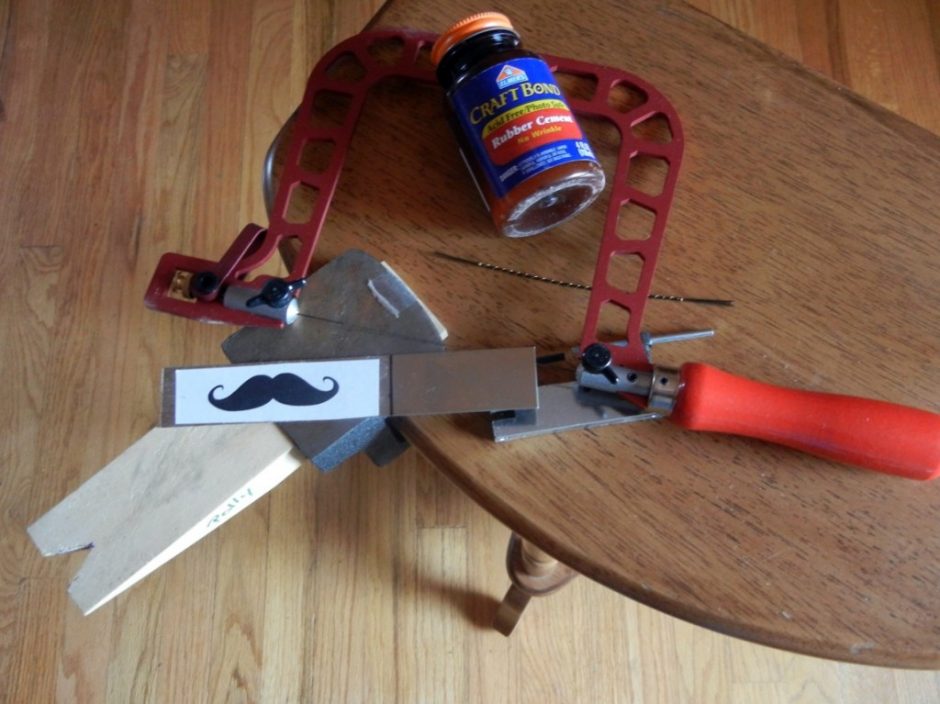
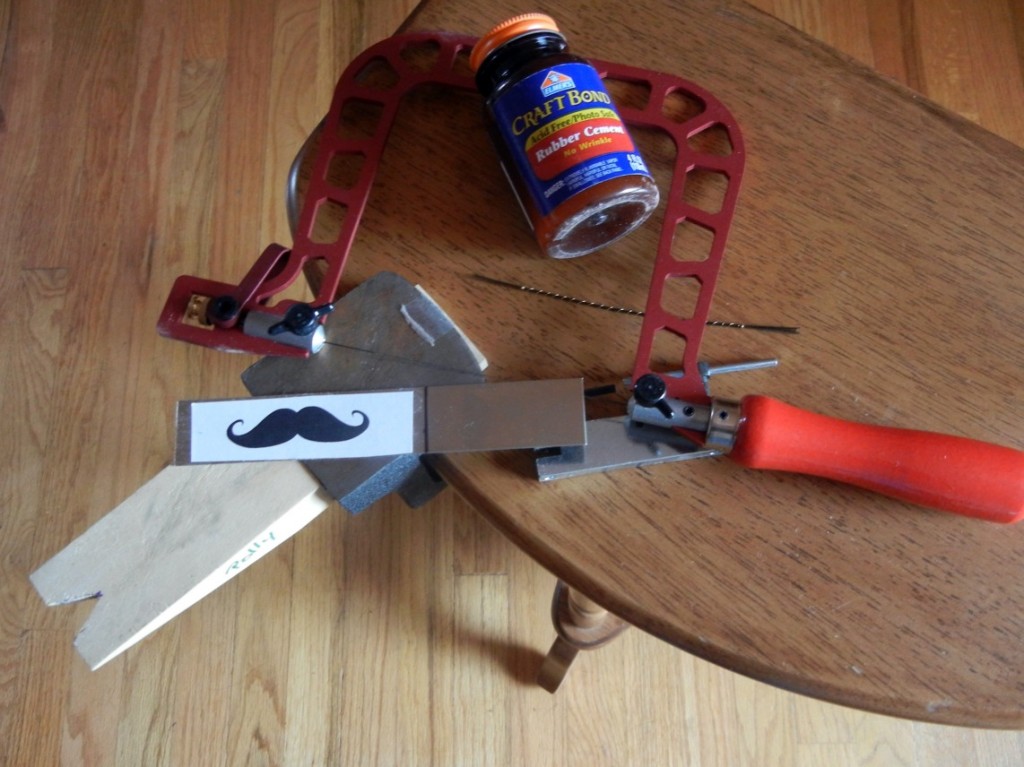
- Jeweler’s saw frame – I’m using a pretty lux Knew Concepts frame, but the technique is the same no matter which saw frame you use.
- Saw blades – Rings & Things offers both Form d’Arte (entry level) and Antilope (higher quality) saw blades. I think the higher quality is worth the price for less breakage, but it is up to you. Make sure to use the right size for the gauge of metal you are cutting.
- Sheet metal – I like working with 20 gauge, but you might choose thinner metal if you’re planning to layer the pieces, or if you are working with pricey sterling silver.
- Bench pin/ – I’m using a bench pin that’s been modified for sawing. Our bench block already has a V cutout. You’ll see why this V is necessary shortly.
- Paper design – the more ornate the shape, the more you will challenge your skills!
- Rubber cement – for adhering your design to the metal. Don’t think that you can draw your design onto the metal with a marker – it will smudge and blur and be impossible to follow. “Permanent” is a relative term!
- Hole punch – optional – to pierce metal, you need to drill or punch a hole to insert the saw blade into. If you are sawing in from the edge of the metal, you don’t need a hole.
- Cut Lube or beeswax – optional or not, depending on who you ask. Many people swear by it, but I typically prefer to saw without it. The lubricant is meant to keep the blade moving easily across the metal, but sometimes it gunks up the shavings and clogs the blade, so use it sparingly at first.
How to saw metal:
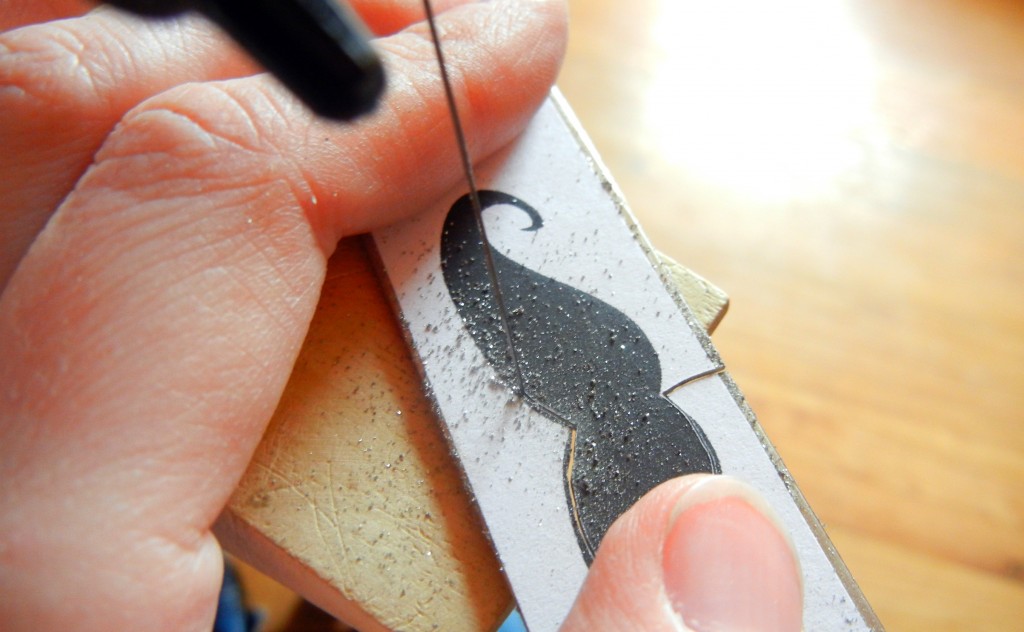
Adhere your design to sheet metal with rubber cement and let dry.
Insert saw blade into saw frame with the teeth pointing out (away from frame) and down (towards floor). Make sure you have the blade in there good and tight – a loose blade very quickly becomes a broken blade! Tension is key. (If you haven’t used a jeweler’s saw before, see post about Knew Concepts frames and tensioning.)
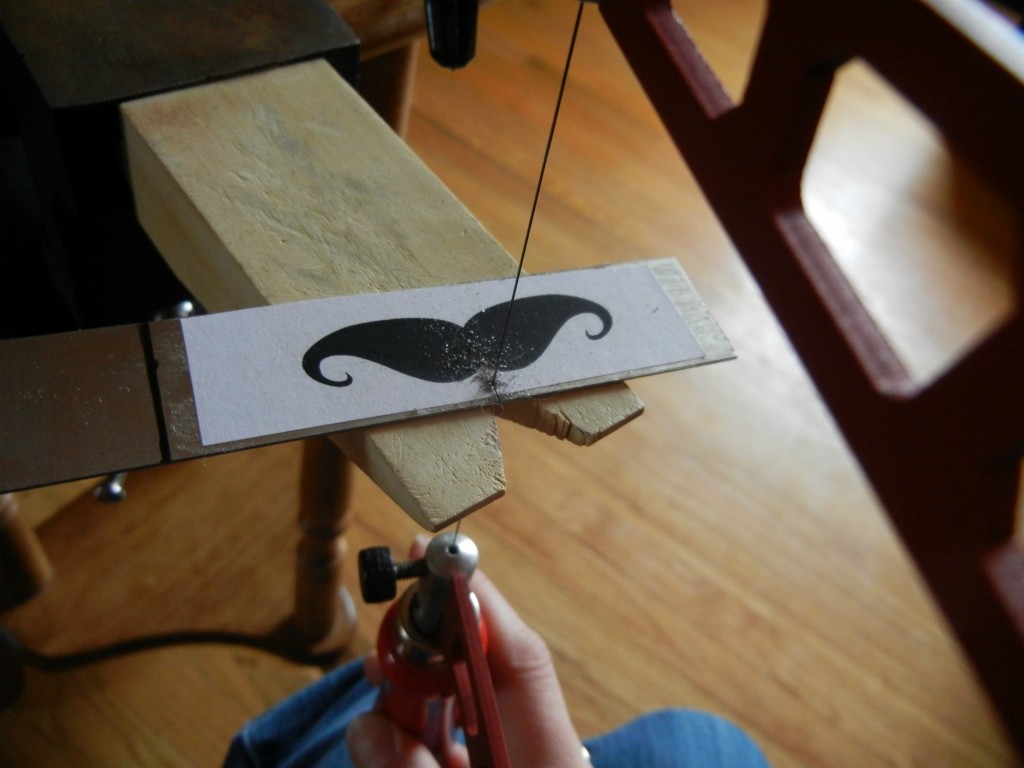
Hold your metal in place on the bench pin with your non-dominant hand.
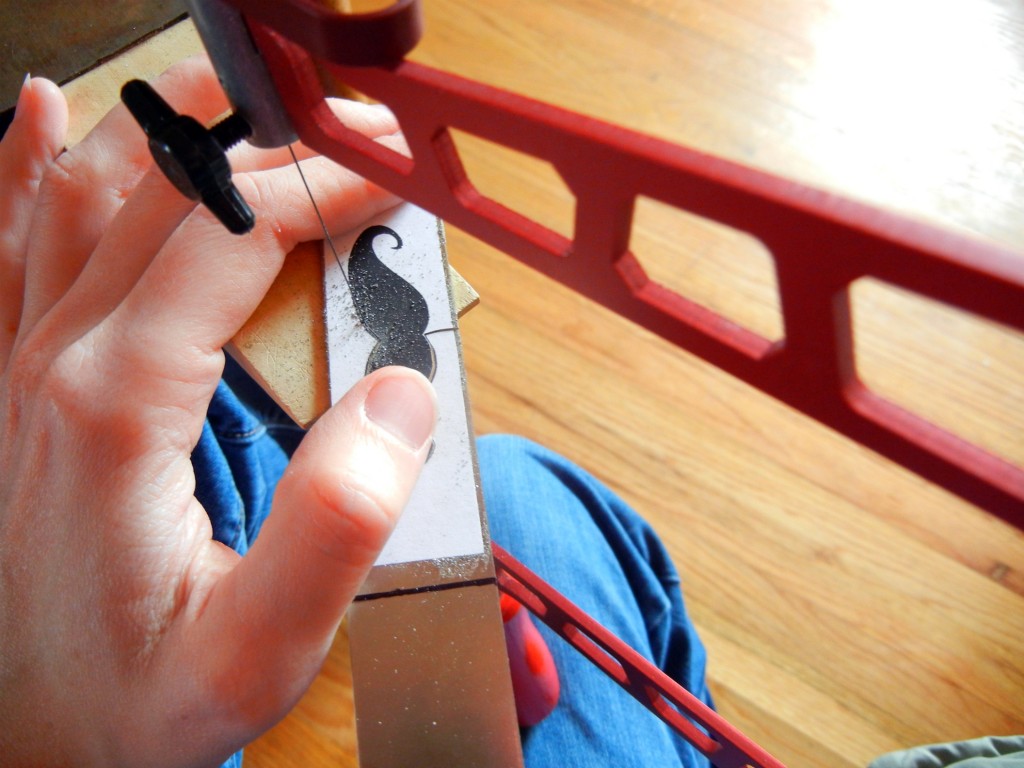
Hold the saw frame between 90 and 45 degrees to your metal and start sawing. You are only sawing (removing metal) on the down stroke, but try to keep the sawing motion smooth and even on both the upstroke and down stroke.
Follow your design! It takes practice, but you’ll pretty quickly learn how to maneuver your metal and/or saw to follow curves. Blow away the shavings every so often so you can stay true to your pattern. If the blade seems to be catching or it feels jerky, check your tension and/or apply a little lubricant to the blade.
Moving too quickly, especially when changing direction, is an easy way to break your blade. Smooth and steady wins the race. One of the most difficult things at first is not pressing too hard with the hand that’s holding the metal down. Hand cramps hurt, so take frequent breaks and be conscious of what you’re doing. It doesn’t take much pressure to keep your metal in place. It does, however, take that V-cut bench pin. You will (er, I did) break lots of blades and have tons of problems if you try to hang your metal off the edge of a table rather than supporting it on both sides of that V.
It is always a good idea to wear safety glasses while you are sawing. Everyone – yes EVERYONE – breaks blades, and you’ll notice yourself getting your face closer and closer to your project. So again, take frequent breaks and also be sure to set up your sawing station at a height that is comfortable for you.
Happy sawing!
Edited January 2022 to update links.


22 Comments
Thanks so much for posting this info on sawing. It helps a bunch to know that everybody breaks blades, no matter what. It’s also good to know that speed is NOT necessary. We newbies need this kind of reassurance and instruction.
love this! i was wonder what size saw blade you were using?
oops, I misguessed my “captcha” test so by the time I got it right, WordPress decided to put my reply below as a separate post.
Hi Kayla,
It depends on the gauge of the metal you are cutting, but to be honest, most of us use whichever one is still in the frame =)
Antilope blades:
Size #0 – 53.5 teeth per inch – Use with 18g to 22g metal.
Size #1 – 51 teeth per inch – Use with 18g to 22g metal
Size #2 – 43 teeth per inch – Use with 16g to 18g metal
Size #2/0 – 56 teeth per inch – Use with 20g to 22g metal
Size #3/0 – 61 teeth per inch – Use with 22g metal
Size #4/0 – 66 teeth per inch – Use with 22g metal
Size #5/0 – 73 teeth per inch – Use with 24g metal
Size #6/0 – 76 teeth per inch – Use with 24g metal
Forme d’Art blades:
Size #0 – 53.5 teeth per inch – Use with 18g to 22g metal
Size #1 – 51 teeth per inch – Use with 18g to 22g metal
Size #2 – 43 teeth per inch – Use with 16g to 18g metal
Size #2/0 – 56 teeth per inch – Use with 20g to 22g metal
Size #3/0 – 61 teeth per inch – Use with 22g metal
Size #4/0 – 66 teeth per inch – Use with 22g metal
Size #6/0 – 76 teeth per inch – Use with 24g metal
In both brands, more teeth = finer blade.
So if you’re doing fancy cuts with lots of wiggles and switchbacks, get the finer blade that’s recommended for your preferred sheet gauge. But if you’re doing simple straight cuts, the more generic size #0, #1 or #2 blade works fine.
Hi, I am using jewelers frame saw blade to cut small pieces of samples we prepare for scientific purposes. blade doesn’t cut or it takes long time and we usually break many of these blades. Could you explain why it is so? Hardness of these samples are not harder than these sheet metals. The size is approximately 0.5×0.25×0.1 cc. Thank you
Hi Laziz,
It could be:
1) The blade’s tension could be too loose. When you pluck it like a music string, does it make a nice high “ping” sound, or a low, dull “thunk” sound? If it makes a “thunk” sound, you must tighten your blade.
2) Are you turning corners, making curves, or cutting straight lines? Moving too quickly, especially when changing direction, is an sure way to break your blade.
3) Are you using a cutting lubricant of any type? If not, find the part of this blog post that says “Cut lube or beeswax” — hopefully one of those will work your scientific samples.
4) Jeweler’s saw blades only cut one direction. Place the blade in your frame so the teeth cut downward (so their pattern is pointed like a Christmas or pine tree). They do not cut when going up AND down, just down.
5) Do not push hard. The saw blade itself should do the work, not your hand. A gentle touch cuts just as fast, and you break less blades.
Hopefully one of those ideas helps!
How do you remove the remaining paper and rubber cement residue from the cut piece?
looking for someone who is skilled can cut a design out of sheet metal with a jewelers saw and do a decent job. The design is a wolfs hook, 1 1/16″ length and 3/4″ wide. 20 guage or thicker nickel silver alloy.
Hi Richard,
Try local jewelers (places that do both repairs and custom work), see if there is a Jeweler’s Guild in your town, and/or try local Lapidary (Rock) shops to see if someone who works (or shops) there can do this for you. Also walk local arts & crafts shows (higher-end shows are more likely than flea market) and talk to jewelry-makers who look like they make similar goods.
You can also search etsy.com to see if you can find someone who does custom work like this. Don’t be surprised if it is expensive — it’s not easy to do a nice job cutting out a complicated pattern. (Aside from all that … I have a question. What is a wolf’s hook? Is it the same as a claw shape?)
~Polly
I can cut out *most* shapes! Find examples at http://www.etsy.com/shop/roxyscreations and let me know if I can help!
Thanks Carrie, that’s great!
Hey Polly! I haven’t tried to cut metal yet, but I’d love to add this technique to my repertoire! Once the metal is cut, is there a way to smooth the edges? Or give the metal a brushed finish? What tools would I need for this? Also, not sure if you’ll know, but if I want to use sheet metal to create a setting for a stone, do a weld the stone in place? Is there some way to secure the stone like this for example: https://www.etsy.com/listing/38669363/sterling-silver-and-pearl-ring-classic?ref=shop_home_active
Thanks in advance! 🙂
Hi Haleigh,
Filing and sanding! Needle files (in a variety of shapes) help you clean up rough spots in corners and small areas. Sanding (starting with a course grit like 400, and ending with a fine grit like 8000) smooths even more and eliminates scratches and scrapes. Steel wool (the basic stuff from the hardware store) is very popular for giving a nice brushed finish and fairly quickly hides scrapes.
Files and Sandpaper: https://www.rings-things.com/Products/Jewelry-Files-and-Sanding-Tools/
For soldering bezels, you’re best off taking a class. But if one isn’t available, or you prefer to go the self-taught route, I highly recommend “simple soldering” by Kate Ferrant Richbourg. Follow the tutorials in this book and you will save yourself soooooooo much trial-and-error heartache and time. (We no longer carry the book, but I love my copy.)
Jeff Fulkerson also offers a few e-books, plus teaches classes around the country. As of late 2019, this link works for his ebooks: https://artistjefffulkerson.com/collections/ebooks
Is there a template source somewhere? As it is, I google images to use as a pattern using “silhouette” and “vector” which usually gives me a decent image to print out and adhere to my metal, but choices are pretty limited. If anyone could point me in the right direction, I’d really appreciate it. I don’t mind paying for patterns if that gives me more selection.
Hi Cherie,
Not that I’m aware of. But another thing you can do is convert images to b&w and print them out, or hopefully find a friend or local artist who finds it easy to do simple black & white outlines. (Personally, I have to rely on Google.) ~Polly
Does your splendid list also apply to steel wire and sheet ie. 24to 18g?
Hi Edb,
I’m afraid not. Our jewelers’ saw blades are all intended for soft metals (sterling, copper, most brass, some nickel), but not steel. You’ll need to check at a hardware store to find tools for cutting steel.
~Polly
What gauge and size blade would I need to use if I am cutting into old Spanish coins keep in mind that I would only want to cut out the eagle portion of the coin which is in the middle for a necklace. Okay
Thanks for a great post about sawing. I’m sharing this in the FB group Hand piercing and Sawing Metal/Jewelry/Art.
It will help a lot of people.
Lora Lee
Thank you so much for giving the information regarding tips for sawing sheet metal with a jeweler’s saw. We beginners require this sort of consolation and direction.
Super 77 by 3m is better than rubber cement. Intricate designs may shift with rubber cement but this contact cement will insure a stable template. Follow the directions on the can.
When cutting with a saw use the 45 degree side of your wooden bench pin up. This places the metal at an angle to the blade so it will not snag on the edge. The flat side of the pin is for filing.
For those of you having problems relax your grip on the saw. A tight grip breaks blades.
Then practice, I’ve been teaching metal smithing for 40 years, you’ll be accomplished at sawing and piercing in no time.
Thanks so much for adding these tips!