Browsing Category

DIY Jewelry Projects

The Man Cuff: How to make a Manly Etched Metal and Leather Cuff

September 10, 2012

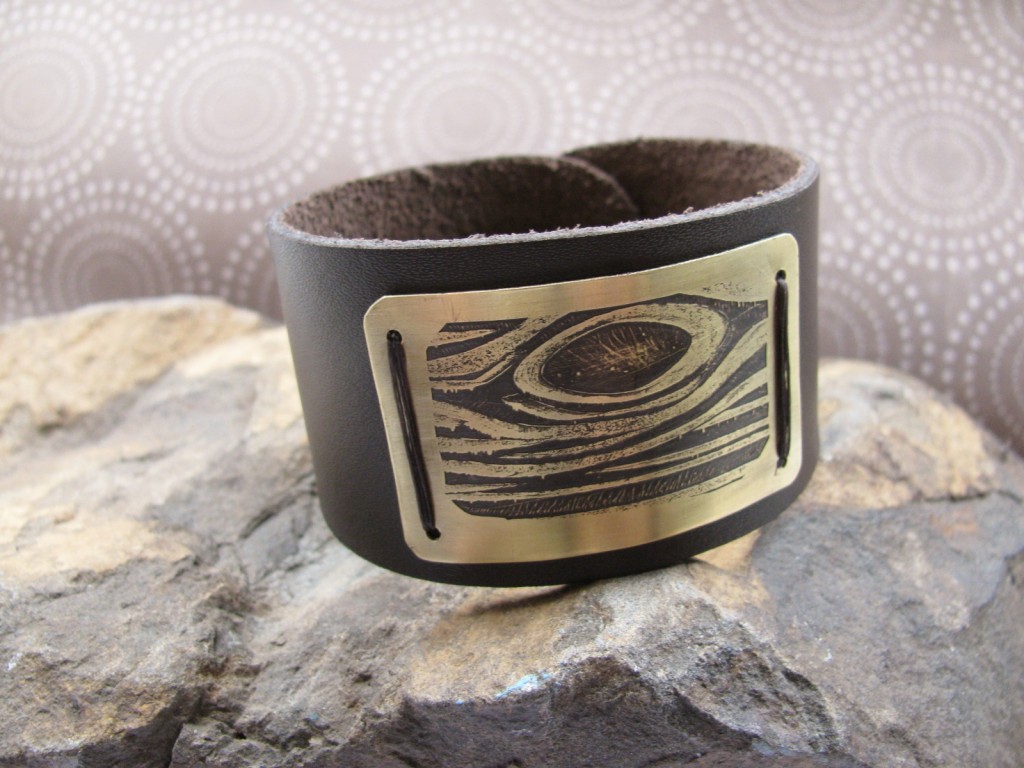
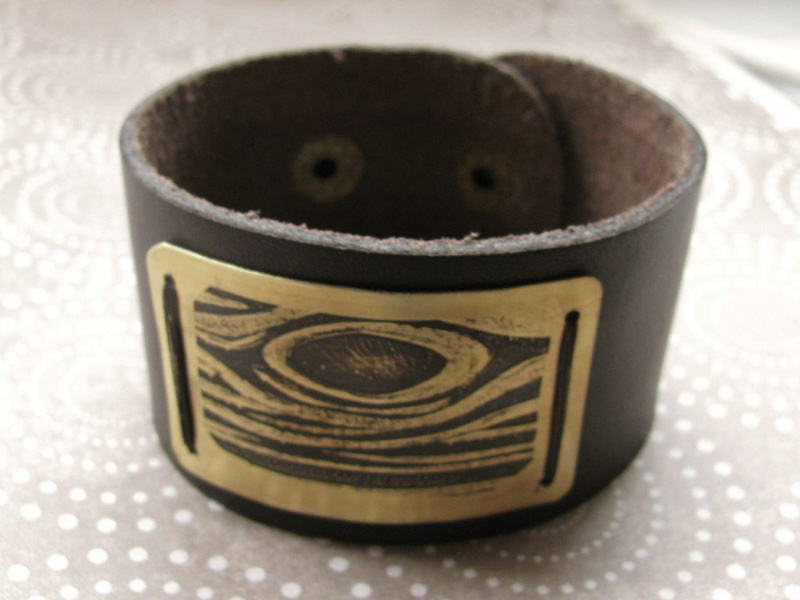
The Man Cuff. The perfect gift for that hard to shop for guy in your life!

As a jewelry maker, one of the most difficult things for me to do is make men’s jewelry. I think it is just my instinct to make things that are pretty and feminine. My husband has been begging me to make him a “cool” bracelet for years. I always kind of shrug off his request, but keep the idea simmering on the way back burner. Recently I began etching metal, and this seemed like the perfect opportunity to finally make something masculine. Etching metal gives you the freedom to incorporate any design into your work, even manly ones.

For this bracelet, I am going to briefly show how to etch metal using ferric chloride acid. If you plan on etching metal, I highly recommend that you read through our metal etching blog and all the safety guidelines associated with etching metal.

You can also do this project by using metal stamps to create phrases or designs, if you are not ready to dive head first into etching.

Items needed to make this bracelet:

To start this project, first etch the metal piece that will be the center of the bracelet. The way that the etching process works, acid eats away at the metal where there is no ink. Therefore, you can stamp any image onto your brass or copper sheet metal, and any exposed metal will be etched. I have done a wood grain pattern for this bracelet, but any masculine image would work. It seems like images of fish, guns, tools, bicycles, or anything sports-related would work well, depending on the hobbies of the recipient.
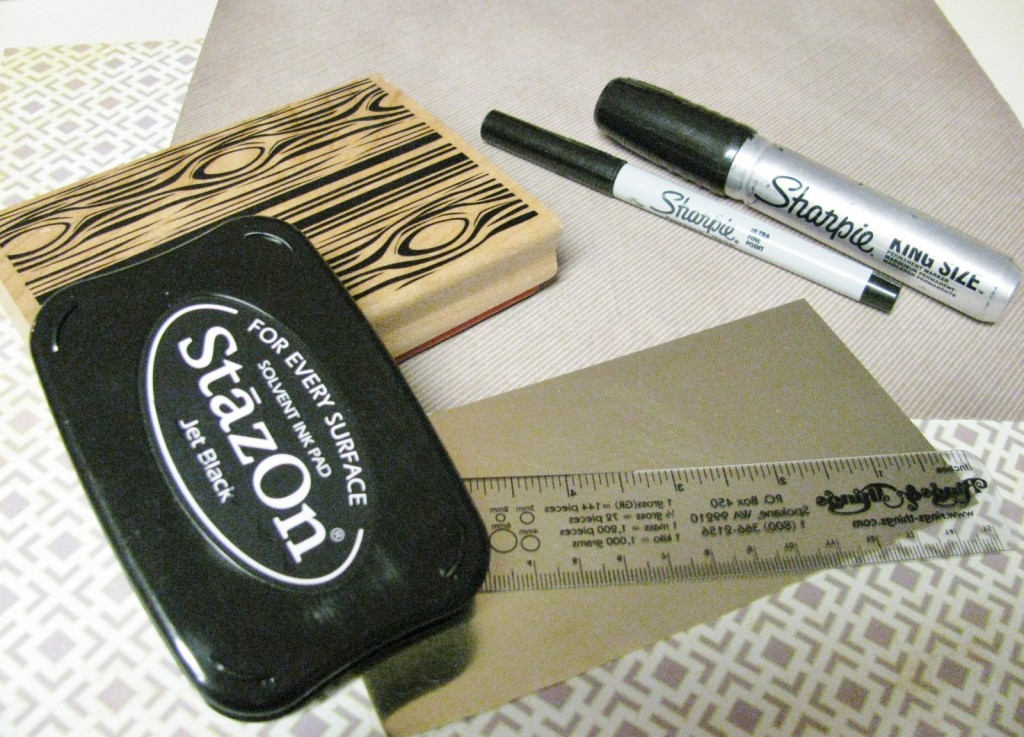
Use permanent ink to put your desired image on the metal. Make sure your metal is clean and free of any oils or dirt before stamping. I like to use a kitchen scrubbie to make sure it’s really clean first.
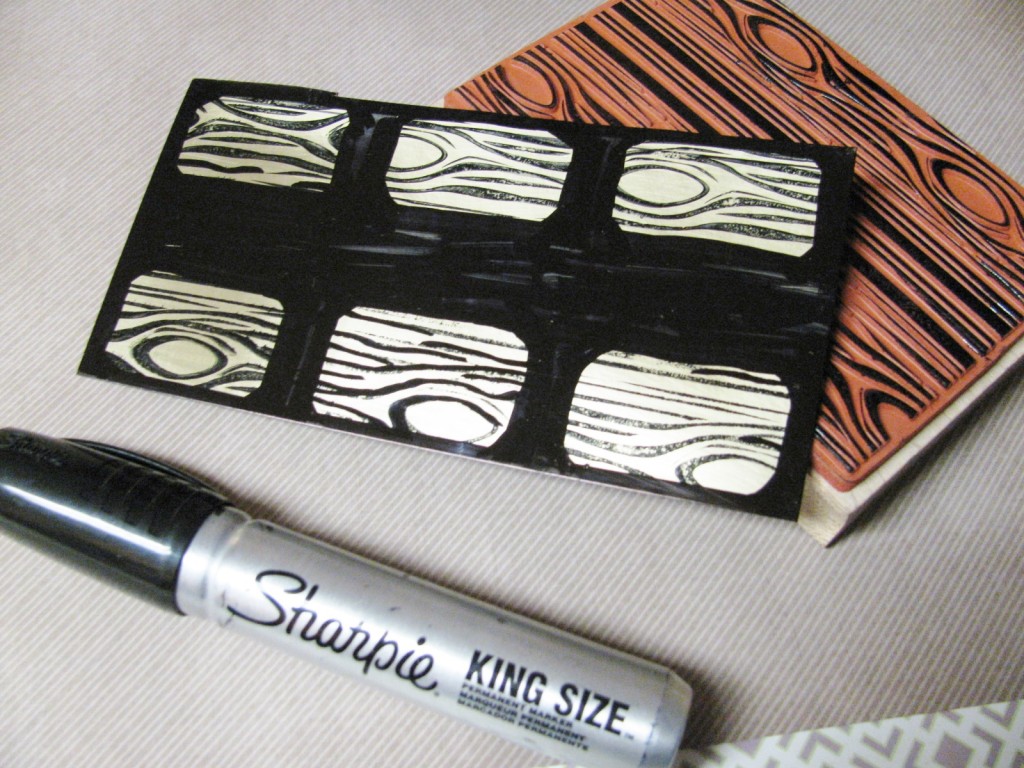

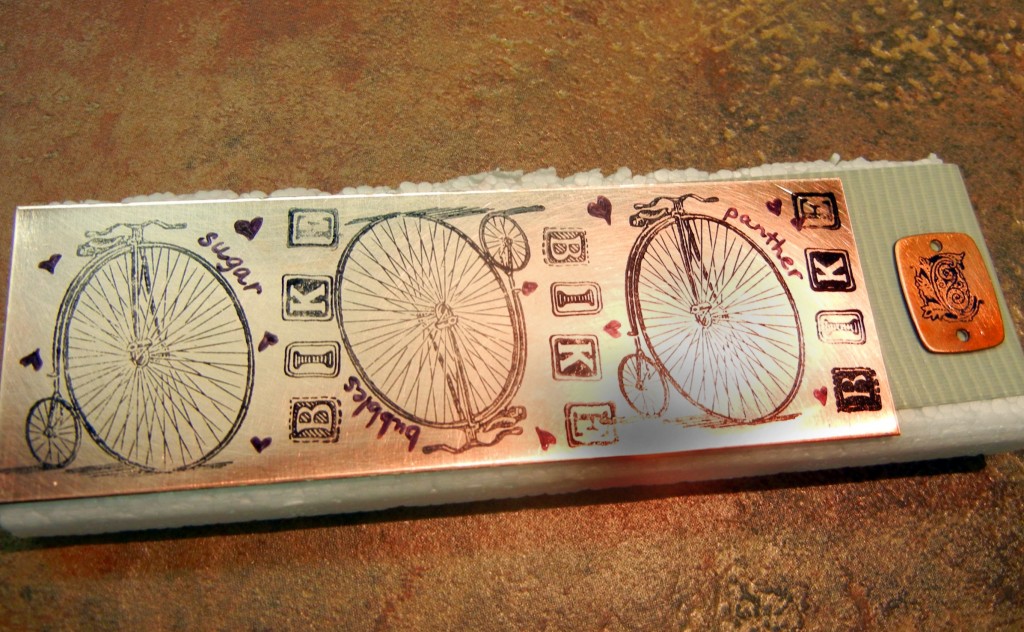
I made six pieces at once, by stamping first with the rubber stamp, then outlining the areas with a permanent black marker. If you want to make just one piece I would aim for dimensions around 1 by 2 inches. Also, make sure to cover the back of the metal with permanent ink.
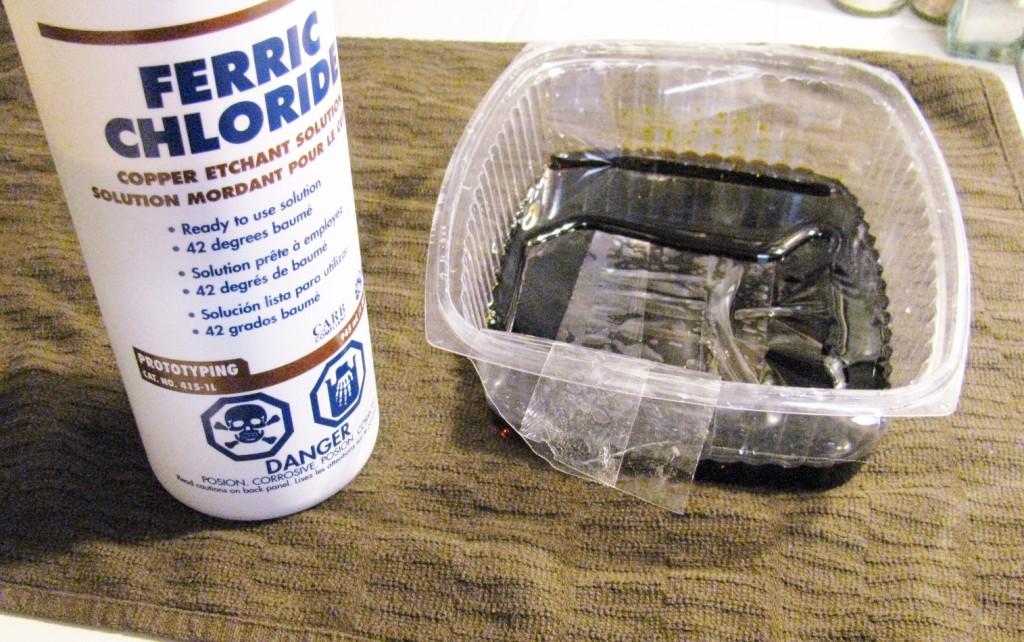

Place the metal on packing tape and float it in a bath of ferric chloride, just enough so all the metal is touching the liquid. Remember to use gloves, safety glasses and read through the safety guidelines first! For a detailed explanation of how to use this product please read our blog on etching and on safety considerations when etching.
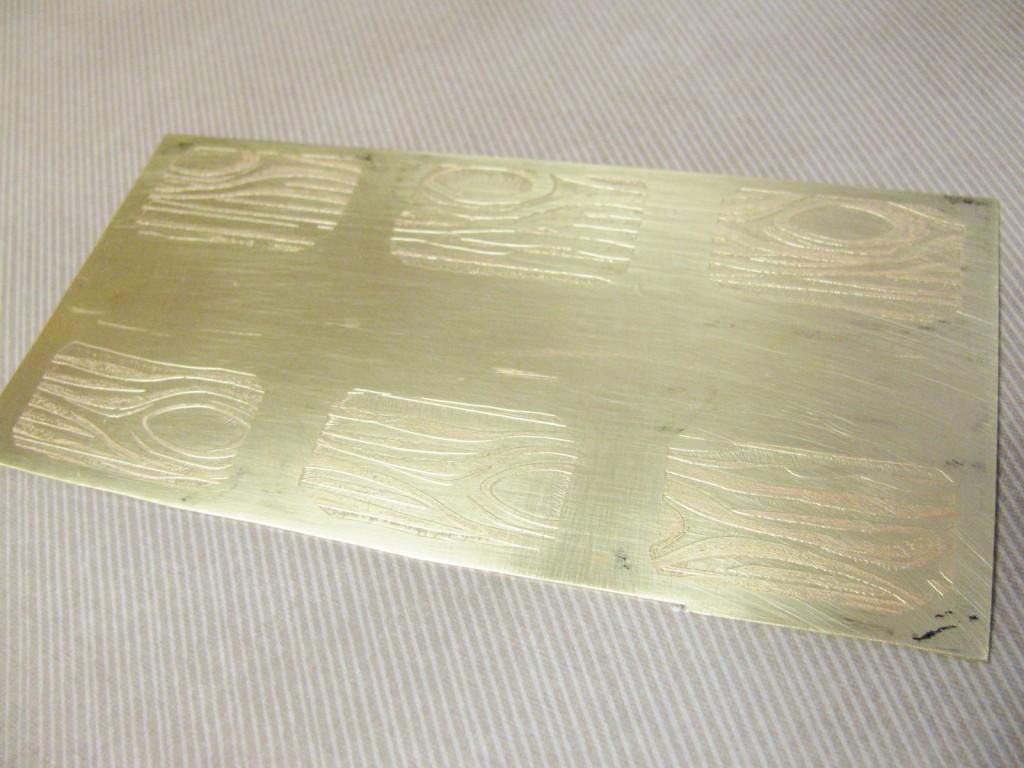

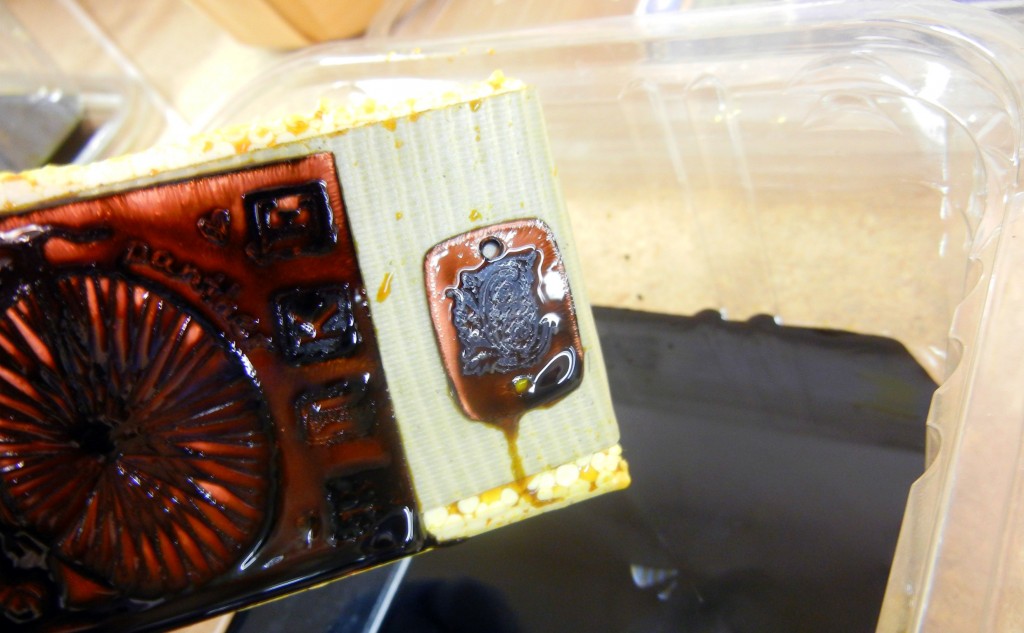
After about 30 minutes in the solution, your design will be etched nicely into the metal. Use baking soda, a scrubbie and warm water to clean your metal in a plastic container. Make sure to wear gloves. You can keep the remaining acid to etch more metal later; the acid will etch 3 or 4 times (or even more! but it takes a bit longer each time you use it). When it has lost all etching power, it must be brought to a waste disposal facility. Do not throw it away with the garbage or down the drain! Do you really want to find out what happens to your house when you etch the pipes?
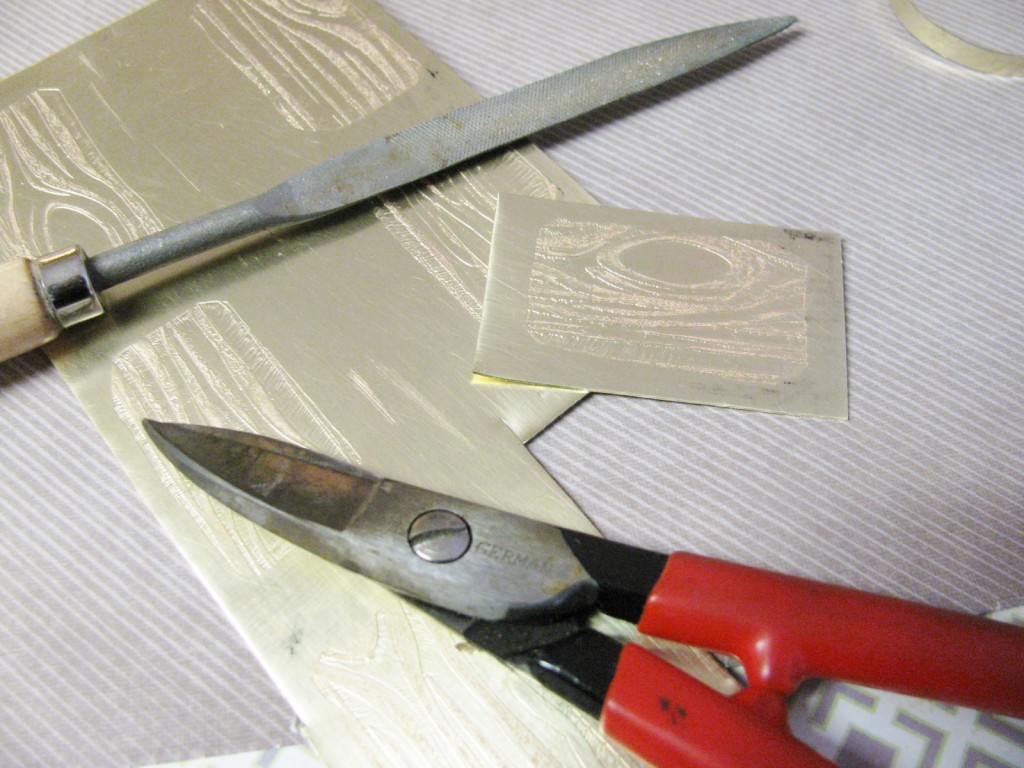

Cut your piece using metal shears (if you only made one piece, you could have done this step before etching) and file the edges smooth. The image won’t show up very well yet, but after it is darkened with patina it will be easy to see.
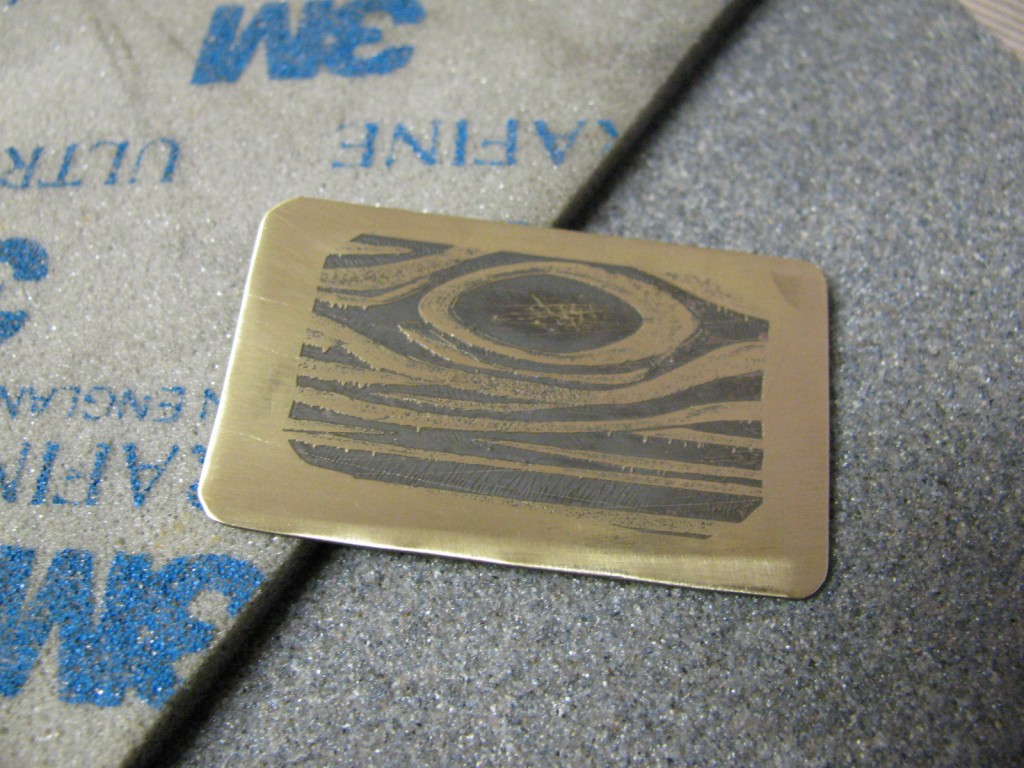

Blacken the metal by dabbing on a little Novacan Black patina solution. I usually just use a cotton ball or paper towel to apply it. Rinse the piece in water, and then use a fine sanding sponge or steel wool to remove the patina on the raised parts of the metal.
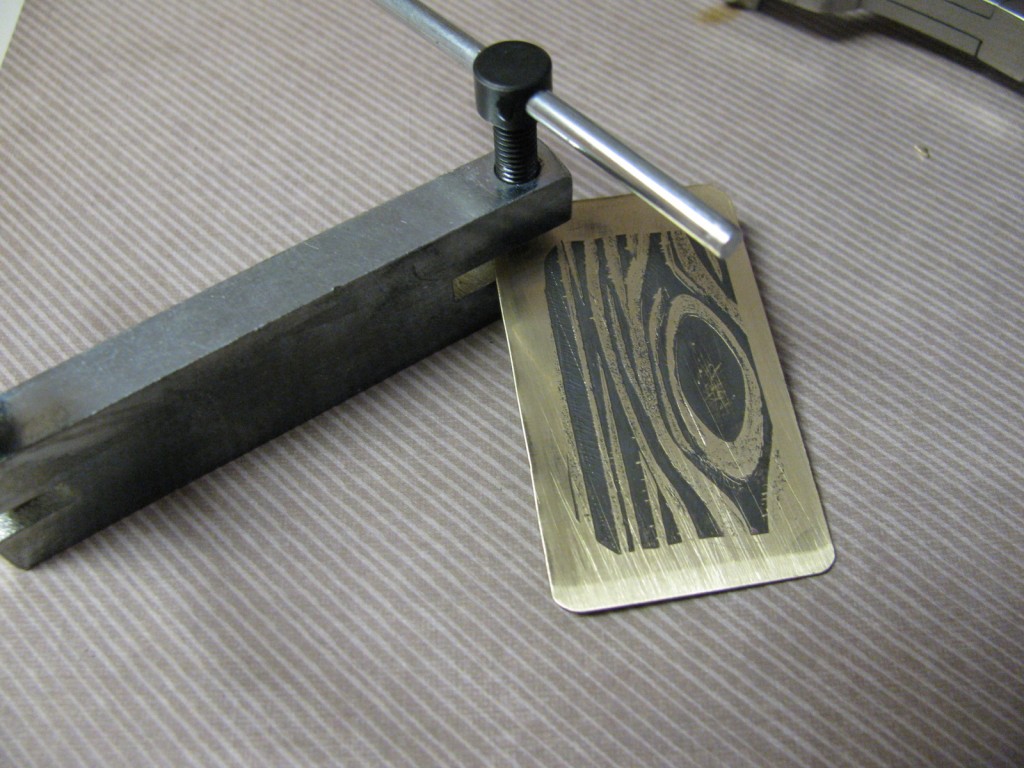

Use a metal hole punch to make four holes on the corners of the etched piece of metal.
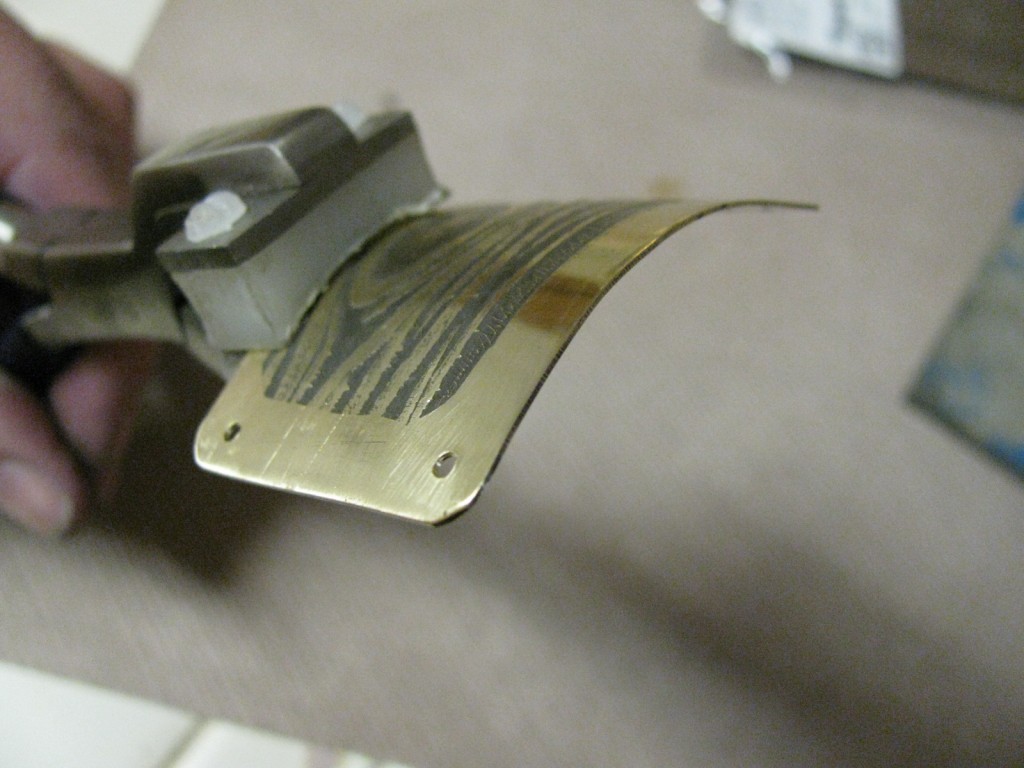

Bend the metal using H. If you don’t have these pliers, you can get a curve by bending the metal over a can of soup. It doesn’t work quite as well, but it will get the job done.
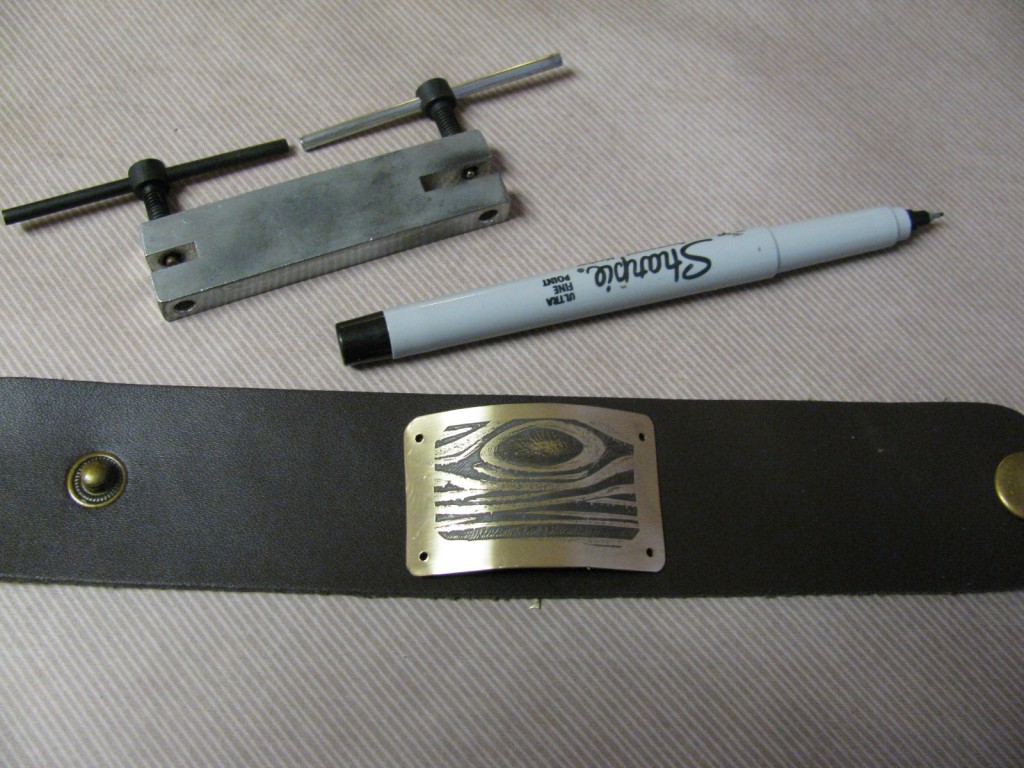

Place your piece of metal over the leather bracelet cuff. Use a small pen or marker to mark where the holes are onto the leather.
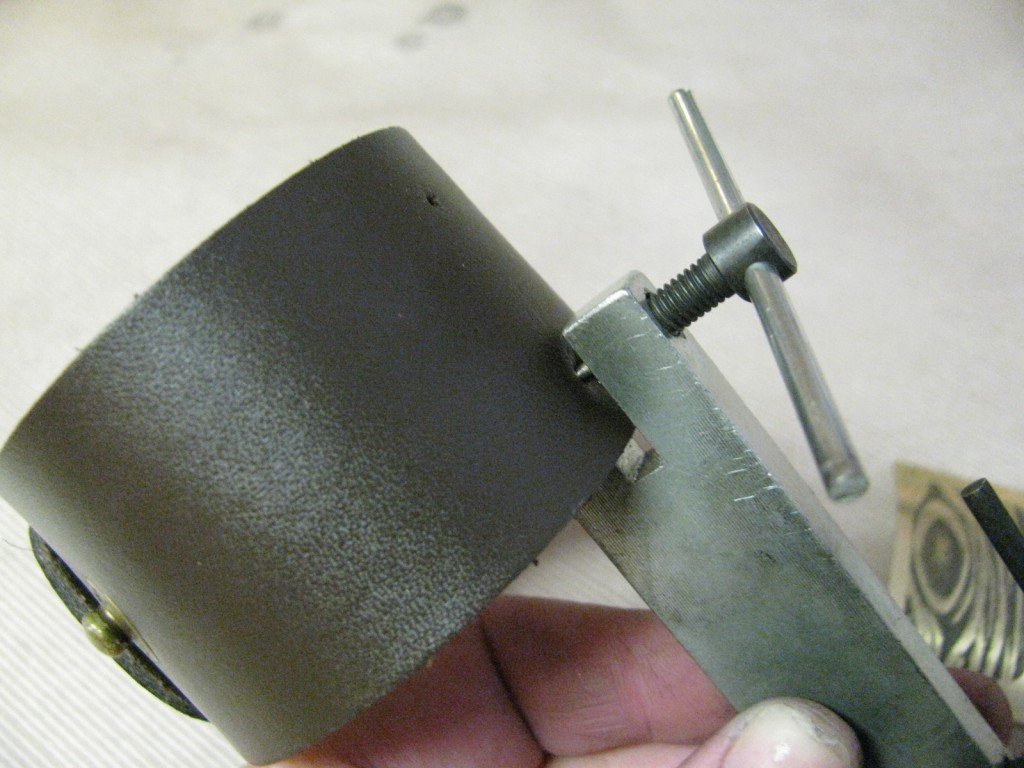

Using the metal hole punch, punch holes into the leather where you marked it.
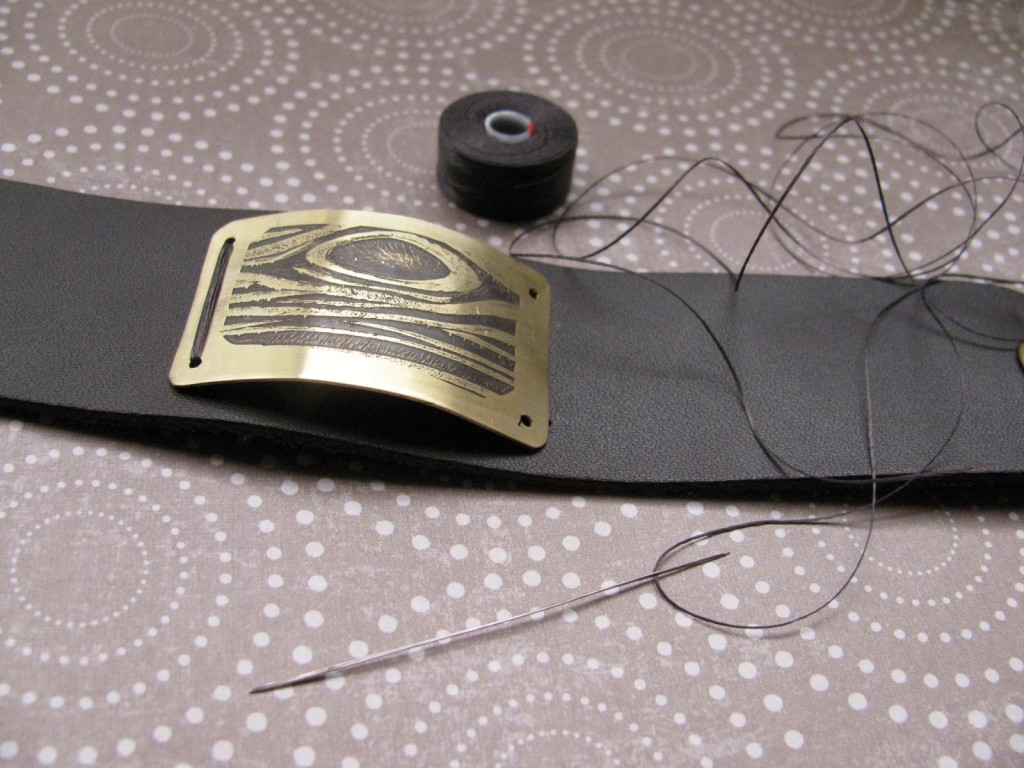

Use a
needle and thread to secure the metal to the leather. I like to use
Superlon thread and a Big Eye needle, since I can never thread a beading needle.
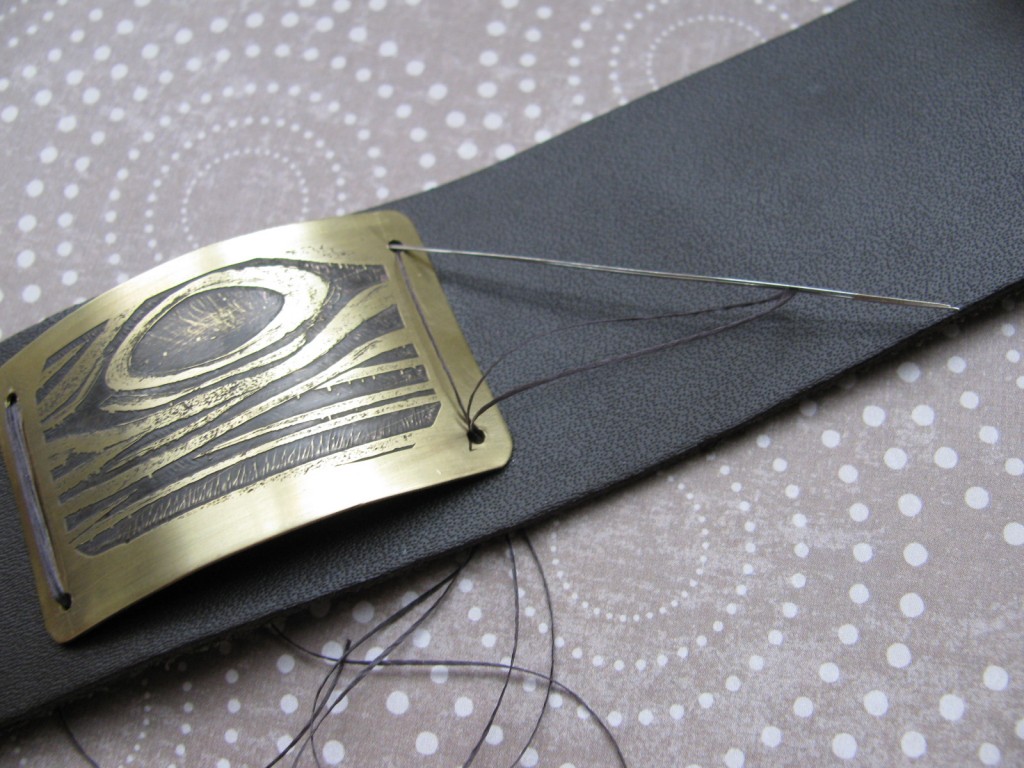

I secured the metal by going around 7 times and then tying the two threads together tight on the back of the bracelet. Cut the thread short and for extra security add a dab of glue onto the knot.


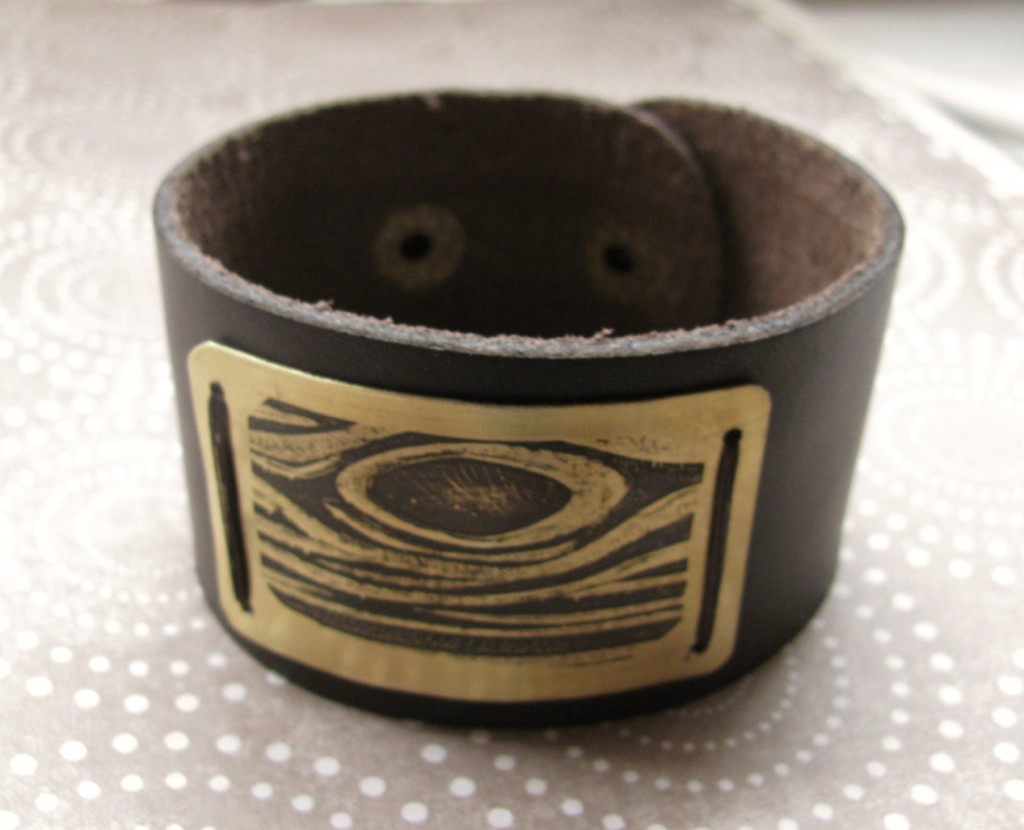
Completed Bracelet! These leather blanks are great because they have two size adjustments and come in a variety of colors.


The Man Cuff

Well I hope I have inspired you to make something masculine! But of course you can still make these girly if you want with flowers and unicorns. That is the beauty of etching! Feel free to ask me any questions you might have about what I have done here.

~~Tiffany

If you are loving this leather cuff, here are a few more free jewelry-making designs from the Rings & Things Design Gallery:
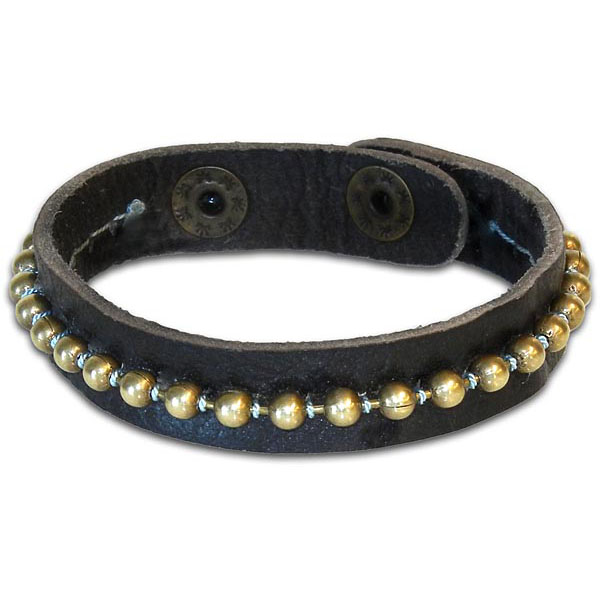
“Having a Ball Bracelet” created by Rings & Things designer Valorie Nygaard-Pouzar.
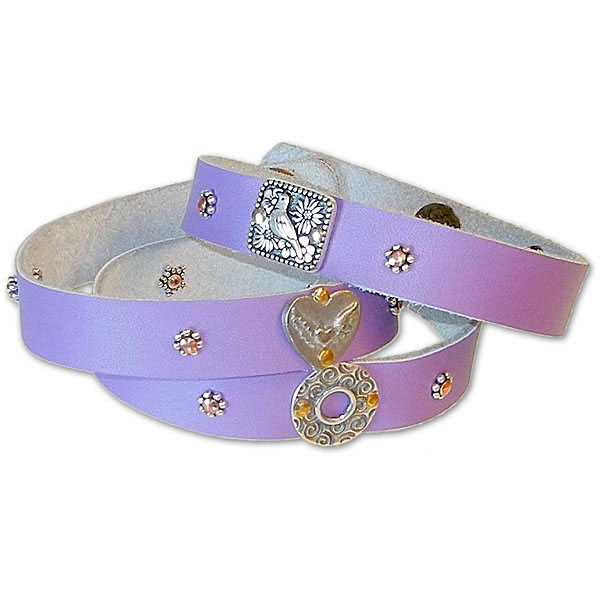
“Palomita Wrapped Leather Bracelet” created by Rings & Things designer Polly Nobbs-LaRue.
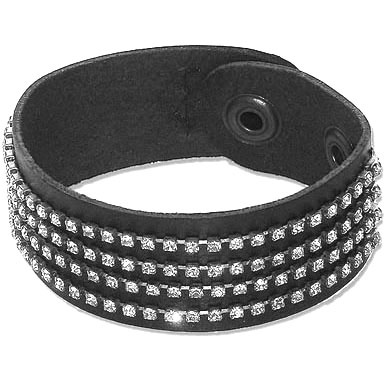
“Tough Girl Rhinestone Chain and Leather Bracelet” created by Rings & Things designer Rita Hutchinson.

DIY Project: Souvenir Penny Bracelet

August 13, 2012

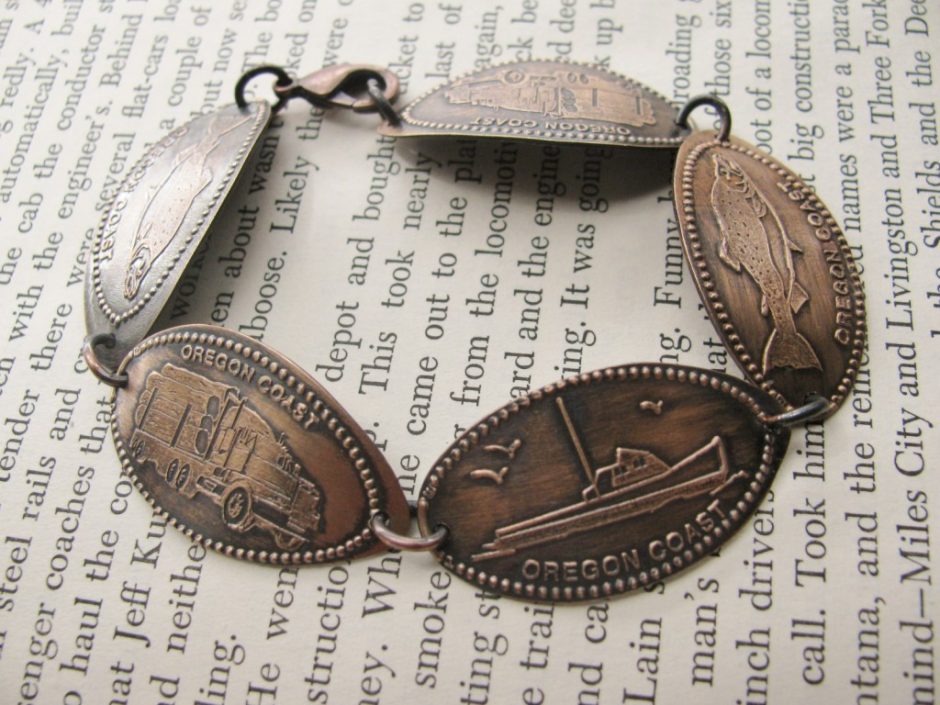
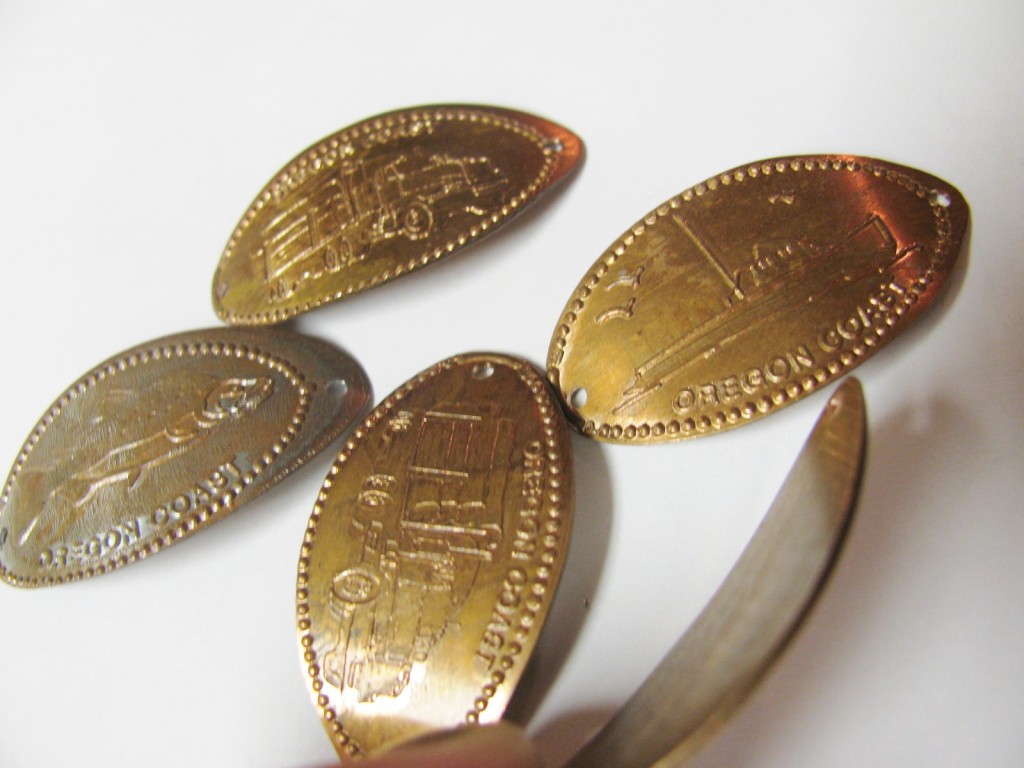
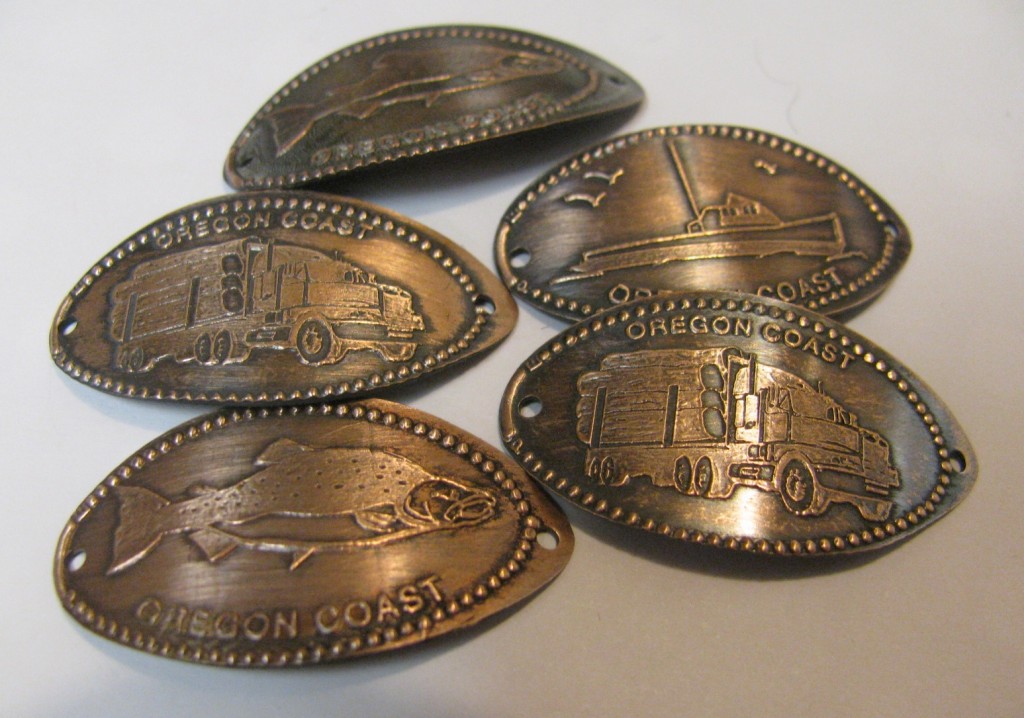
Hello bloglandia! Tiffany here. I just recently returned from a fabulous week on the Oregon Coast with my family. While there, I succumbed to one of those touristy penny smashing machines. For some silly reason, I can never resist those machines! Perhaps they remind me of being a kid again and smashing pennies on the railroad tracks. Well anyway, upon my arrival home, I found myself with a pocketful of pennies stamped with fish and boat images. I was about to throw them into one of my many junk drawers to be lost forever when I had an epiphany! I thought to myself, aren’t you a jewelry maker? and couldn’t you possibly make something wearable with these souvenir pennies? Well, since the answer to both of these questions was yes, the Souvenir Penny Bracelet was born!

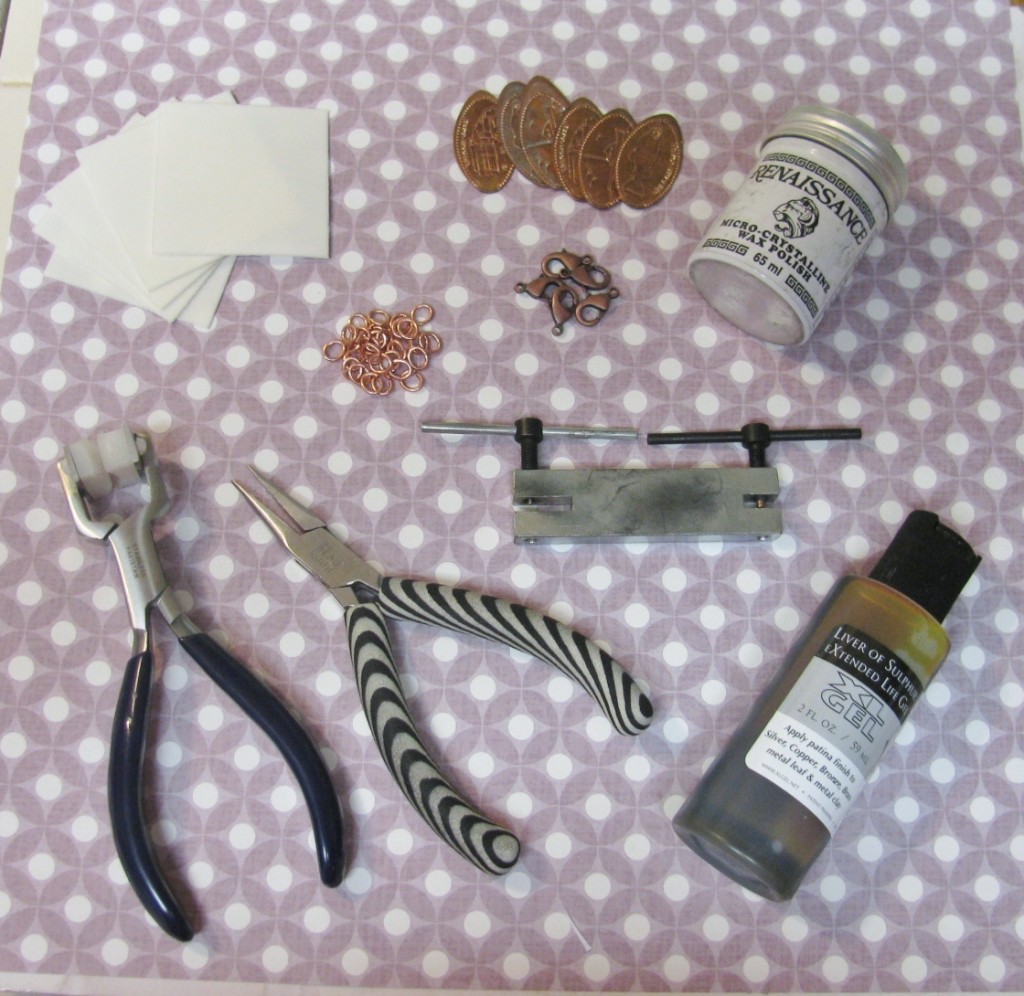
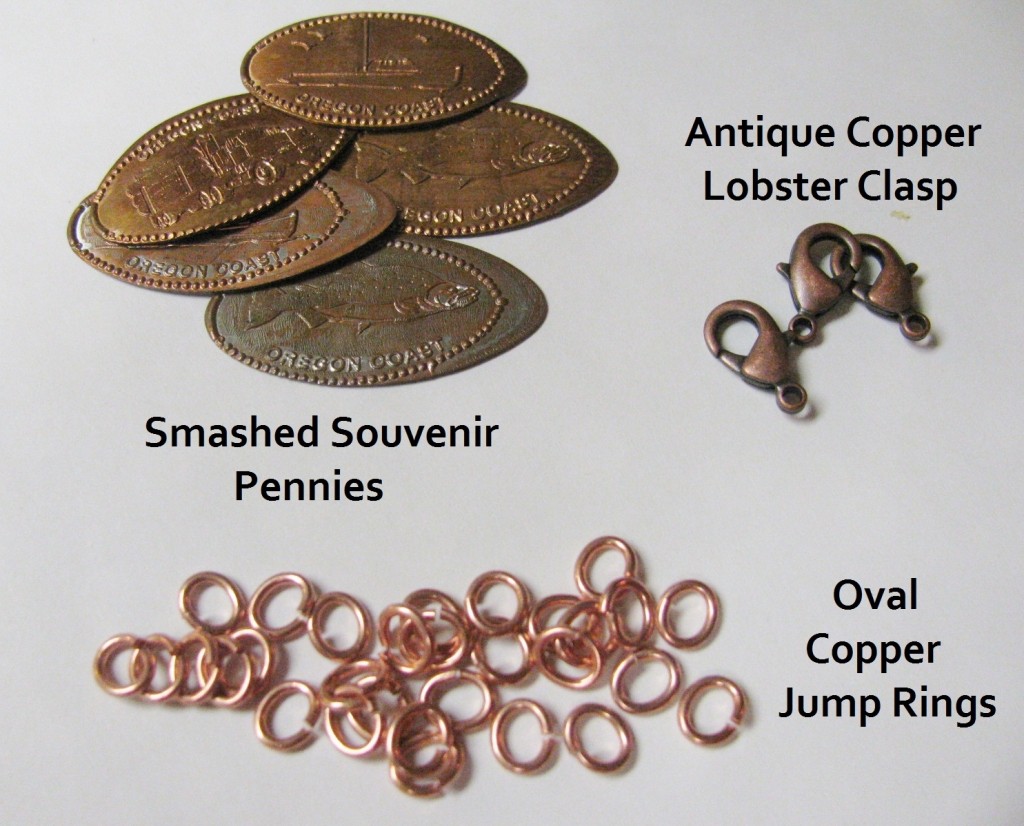
Everything needed to make the Souvenir Penny Bracelet. Look below for close-ups of all these items.

This bracelet is really easy to make. To get started you need the following items:

Smashed pennies, copper oval jump rings, and antique copper lobster clasp. When smashing the pennies, try to pick pennies that are older than 1981, because they are solid copper. The solid copper will take to the patina better.

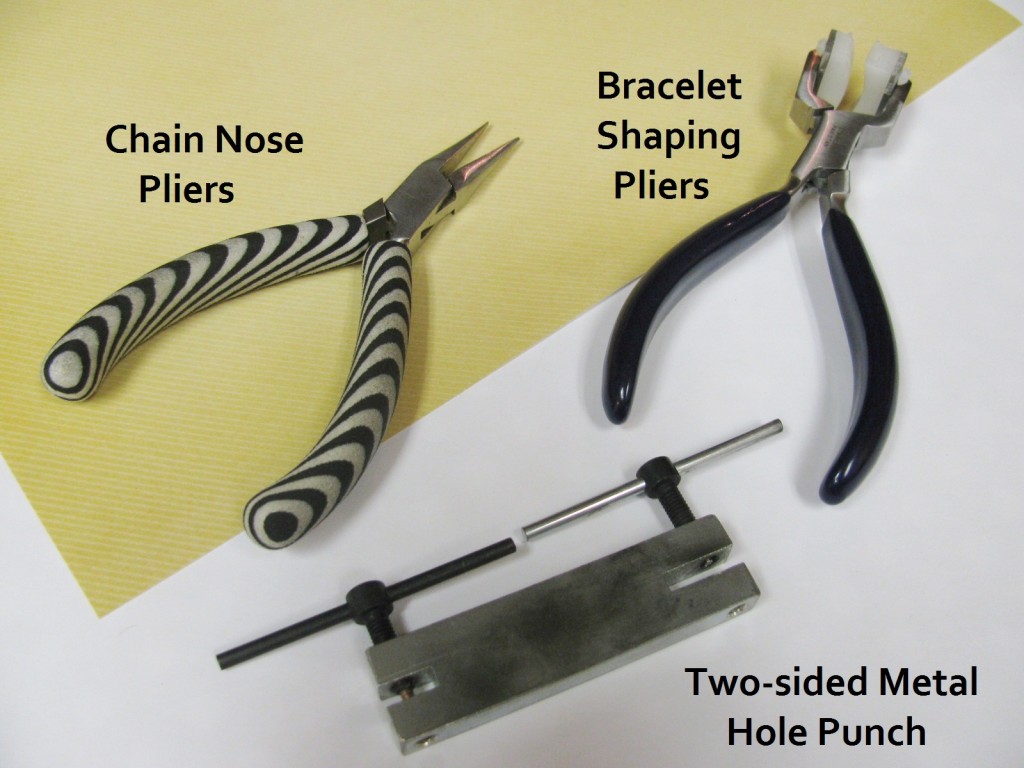
Tools for making the bracelets. Chain nose pliers, bracelet shaping pliers, two-hole metal punch. The bracelet shaping pliers are optional, but they really create a great shape.

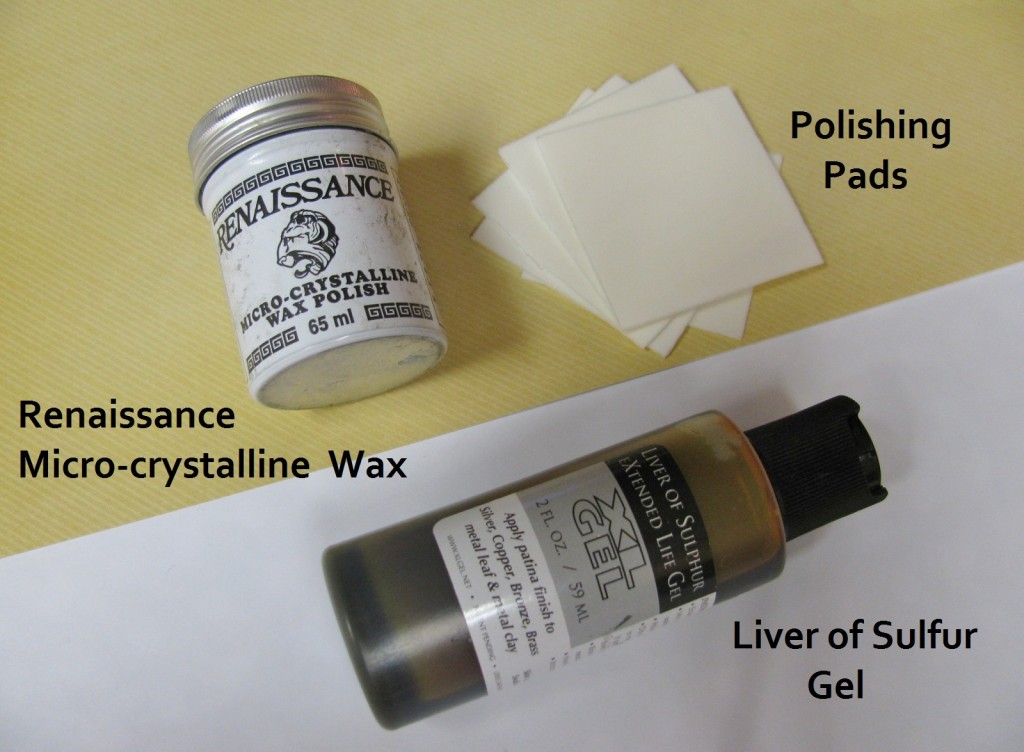
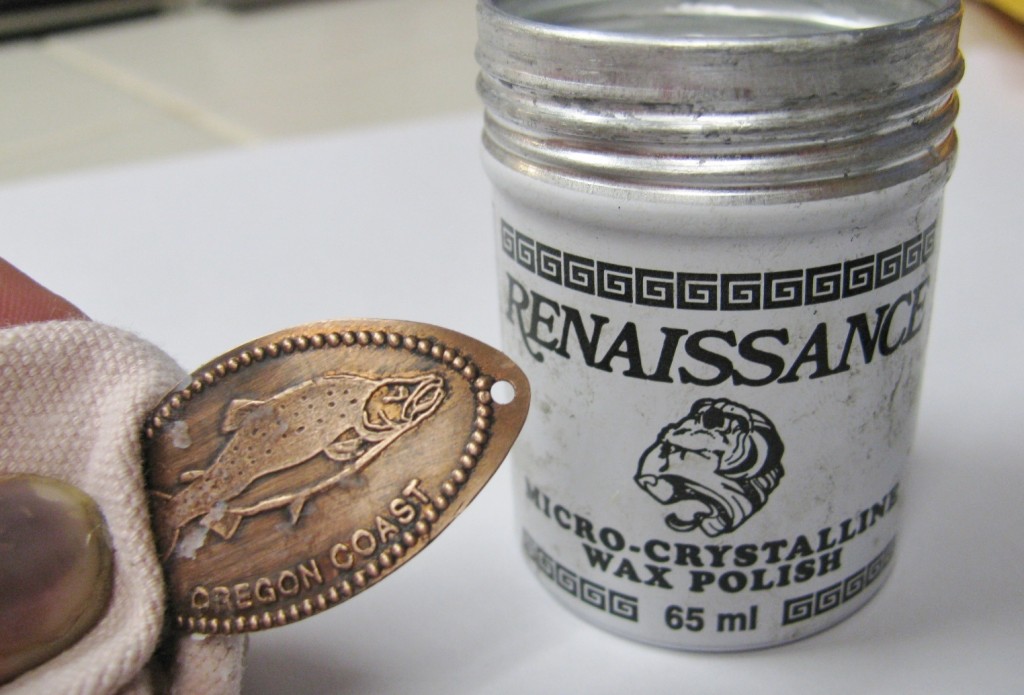
Renaissance Wax for sealing the copper. Polishing pads for buffing away patina. Liver of Sulfur for blackening the copper.

Now that you have all the tools and supplies, there are a few easy steps to follow.

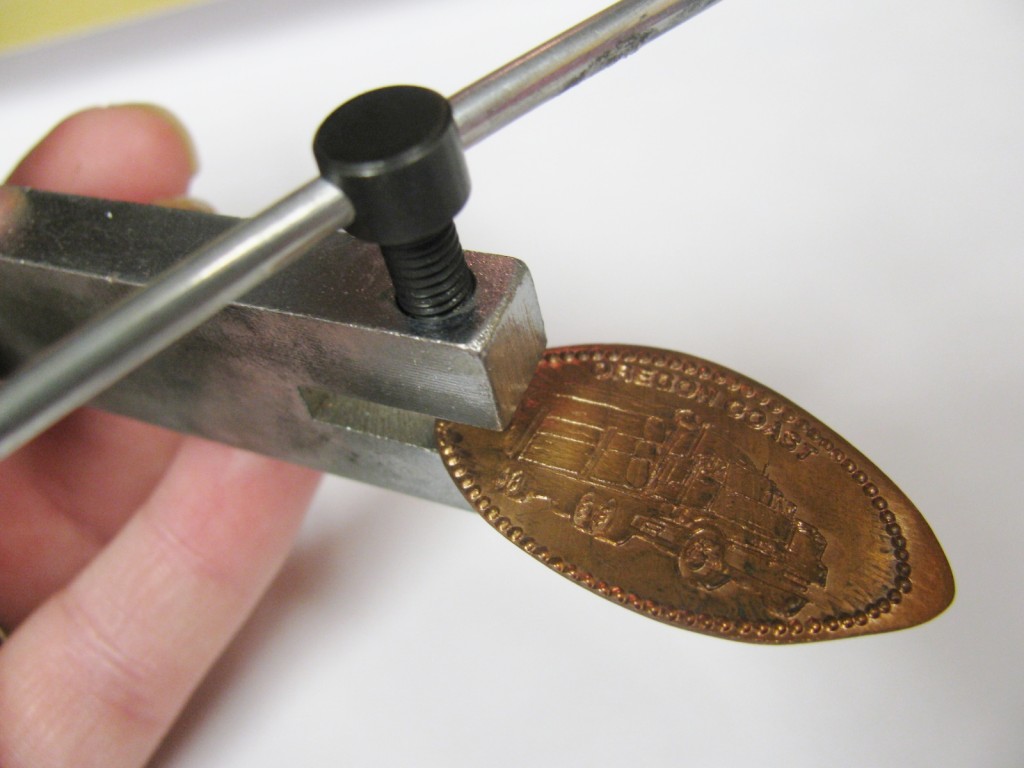
1. Punch holes in the pennies.

Just twist the handle on the top of the punch to make the holes. There are two sizes, I prefer the smaller size.

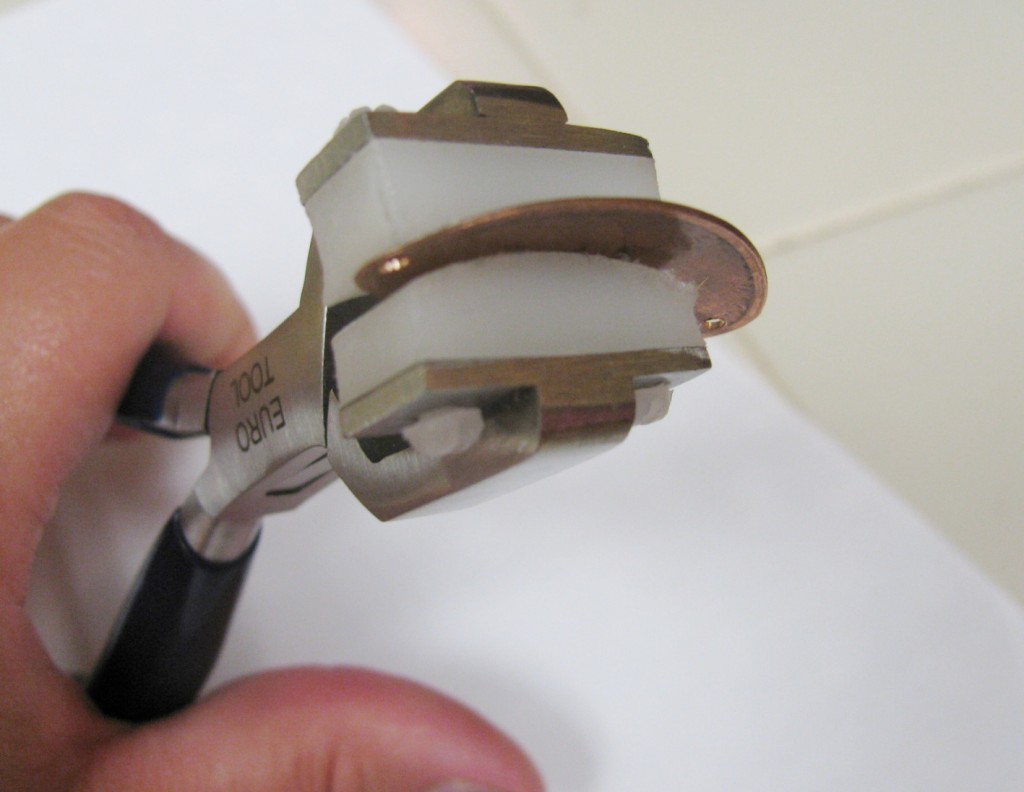
2. Use the bracelet shaping pliers to bend the pennies into a curved shaped. This will help the pennies shape to your wrist better and give the bracelet a polished, professional look.

Simply place the pennies in the pliers and they will do the work for you! Sorry mine are kind of worn looking, I use them a lot!

Use the pliers to bend all the pennies. This will help them to lay better on your wrist!

3. Antique the pennies and jump rings. I like to use liver of sulfur, though there are several antiquing solutions that will work on copper.

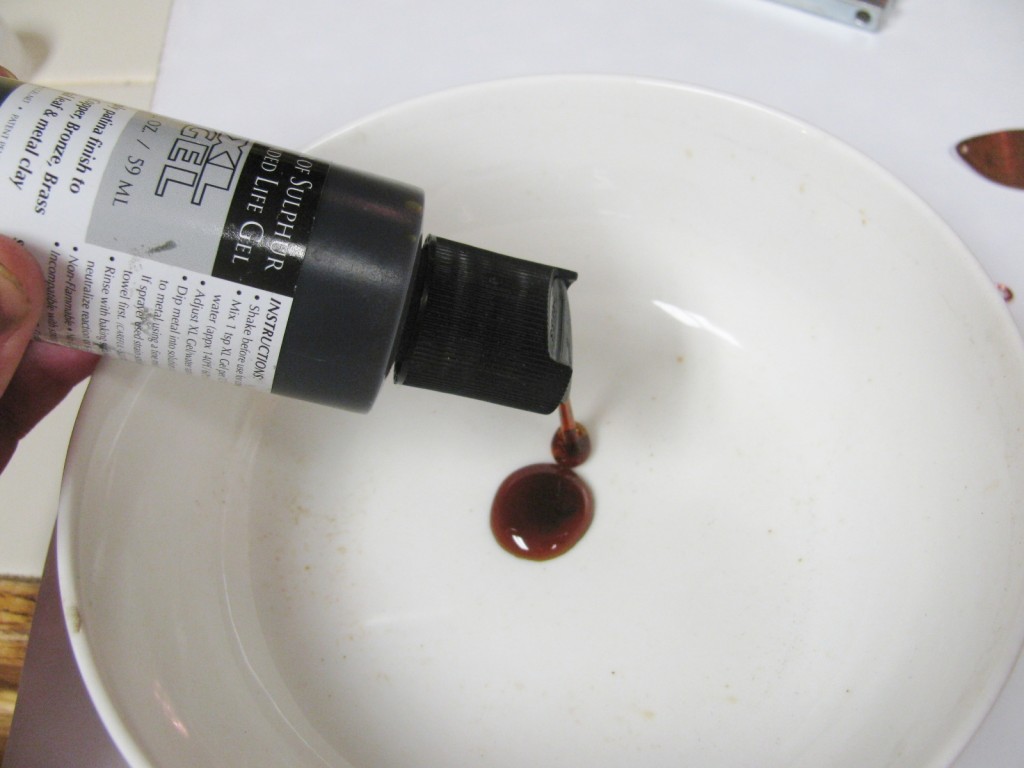
Squeeze a small amount of Liver or Sulfur gel into a small container. I use a small glass bowl as my designated antiquing container.

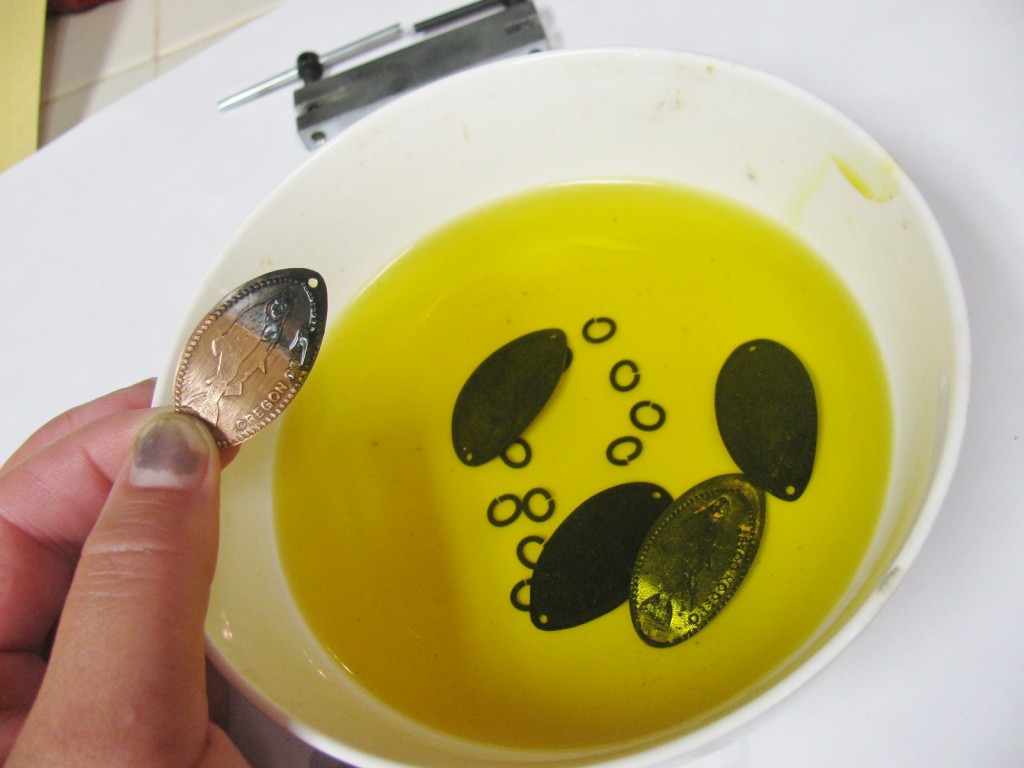
Add warm water to the liver of sulfur gel and stir the mixture. It will stink like rotten eggs. Place your smashed pennies and copper jump rings in the solution. You may need to clean the surface of the pennies and jump rings with some fine grit steel wool. This will take off any oils, dirt, or coatings that will keep the patina from penetrating the copper.

After a little bath in the liver of sulfur, the pennies will turn black. You can see on the last penny, the difference a patina makes.

4. Buff and polish the pennies.

Use the steel wool first to remove the majority of the patina. Then use the polishing pads to make the copper shiny. The patina helps to make the images and lettering really stand out.

5. Seal the pennies with the Renaissance wax.

Rub a layer of wax on with either a paper towel or soft cloth. This will seal the patina, prevent further tarnishing and protect your skin from any possible reaction with the copper.

6. Assemble the bracelet.

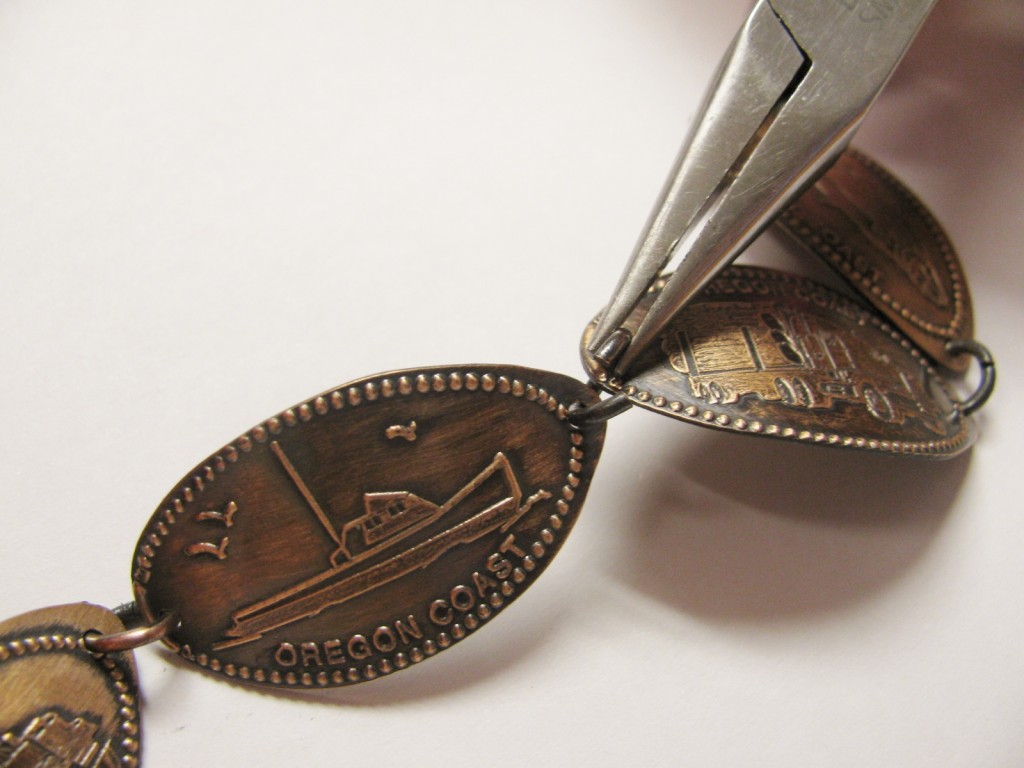
Use the chain nose pliers to attach the pennies together with oval jump rings. In between two of the pennies add a lobster claw clasp. Remember to always open your jump rings by pulling them apart sideways.

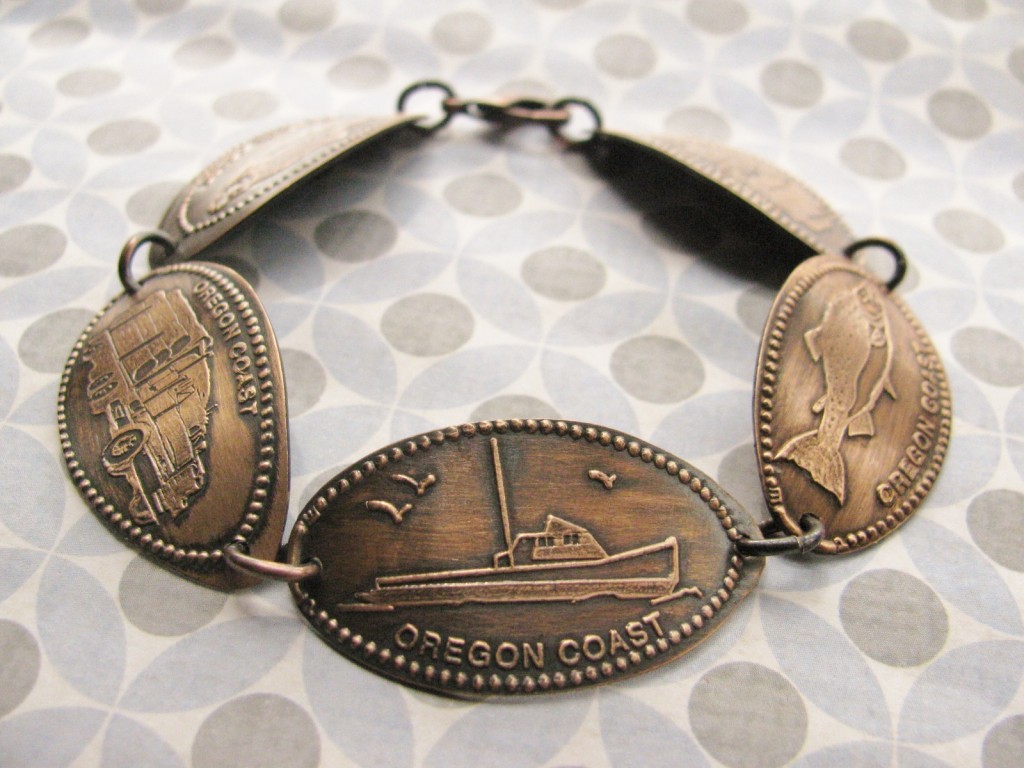
7. Enjoy your new bracelet!

Now that your bracelet is all done, the only thing left to do is wear it and wait for the compliments!

Hopefully I have inspired you to make something fun with all your smashed souvenir pennies! Happy travels!

~~Tiffany

Vintaj Road Trip Design Challenge!

June 20, 2012

vintaj rings & things road trip design challengeHi bloglandia! We are really excited to be partnering with Vintaj for their Summer Road Trip design challenge this month. Visit their blog to see the great jewelry their designers created by pairing beads & components from Rings & Things with Vintaj products. The Vintaj blog also has all the details about how to enter the contest! Submissions are due by NOON (CST) Friday, June 29. But wait – don’t go yet!

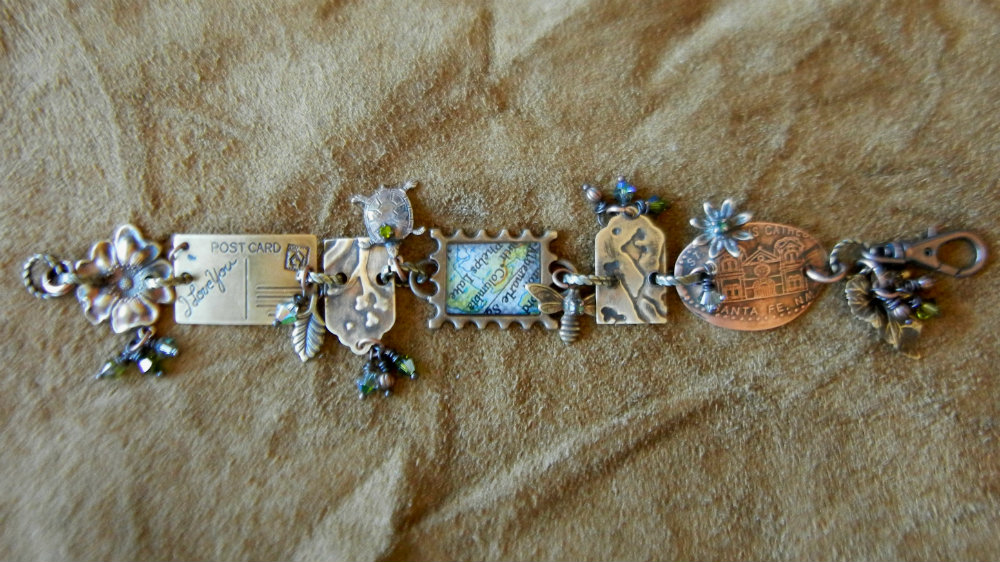
Over the next couple of weeks we’ll share some of our own Summer Road Trip jewelry pieces, starting with Sondra’s “The Trail Less Traveled” bracelet:

trail-less-traveled-bracelet

This mixed metal bracelet contains all kinds of mementos!

She used so many fun techniques that I’m sure I’ll miss a few, but here are the highlights:

sondra barrington vintaj swarovski pressed penny

The Vintaj luggage tags were DecoEmbossed with the Sizzix BigKICK. Sondra punched holes to in the tags to link them with textured locking jump rings.

postcard-bracelet sondra barrington vintaj swarovski pressed penny

She curved the postcard charm and souvenir penny using bracelet bending pliers.

vintaj-bee-soldered-crystal sondra barrington vintaj swarovski pressed penny

The Vintaj bee and several other charms have the tips of rhinestone crystal head pins soldered onto them for extra bling.

vintaj-turtle-charm sondra barrington vintaj swarovski pressed penny

The memoir stamp bezel from Vintaj is filled with a scrap of map coated with SuperClear resin.

vintaj-leaf-crystal-clasp sondra barrington vintaj swarovski pressed penny

The rest of the sparklies are from our Karma Chameleon Crystal Jam. Check out our Crystal Jam color themed design boards on Pinterest!

Ok. Now you can go get started on your own Summer Road Trip design challenge piece! We can’t wait to see what you create! ~ Cindy

spring bling

April 9, 2012

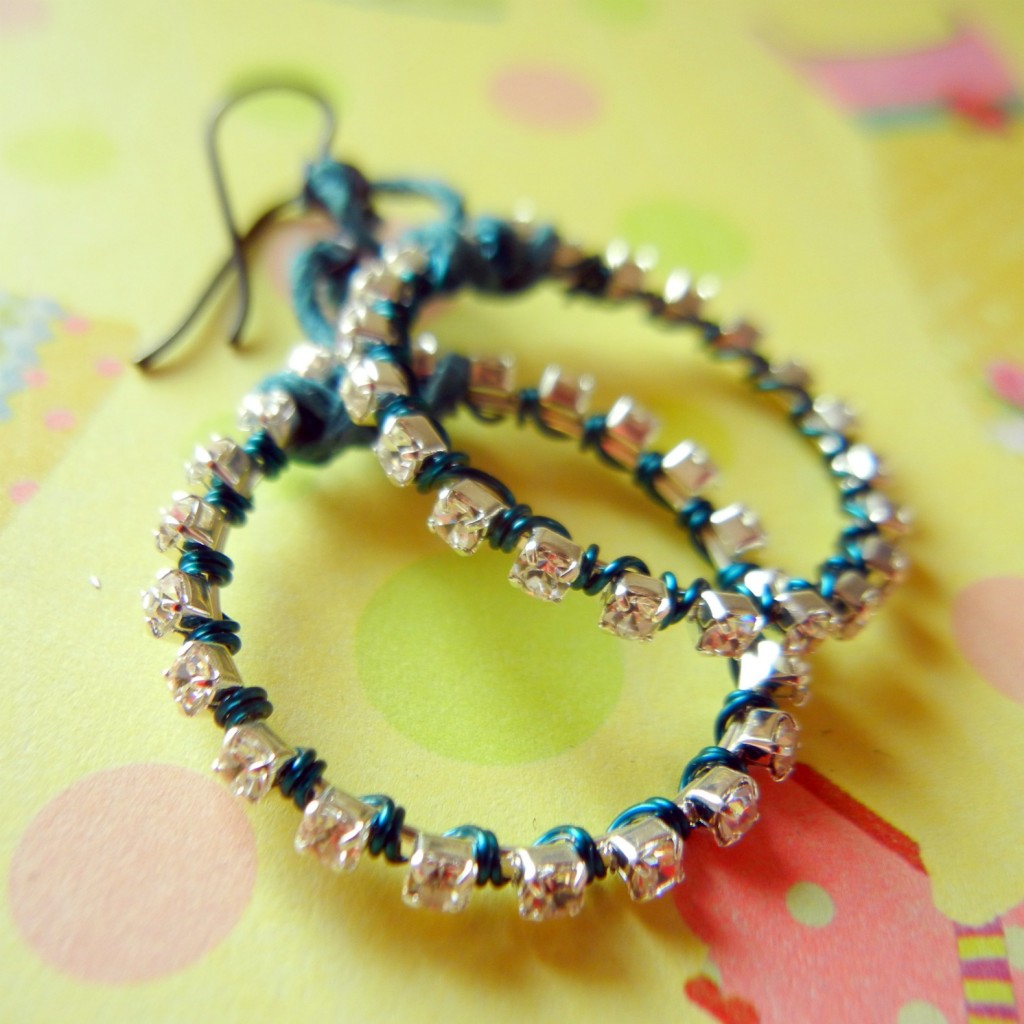
Hi bloglandia! Today we had a make n’ take event in our Spokane showroom. I taught customers how to make wire-lashed bling pendants using rhinestone chain and 24-gauge Artistic Wire. Very fun! You get a lot of sparkle in a very short amount of time.

rhinestone-chain-earrings

Rhinestone chain wrapped onto hoops with turquoise wire.

A common complaint we get is that our showroom is just too far away for most of our customers, who happen to live all over the world. Sadly, we can’t transport our showroom to y’all, but I thought I would let you know that the techniques we used today are available here on this blog and in our design gallery. Plus I wanted to show off the insanely sparkly earrings I made while teaching. Happy Monday! Hope you find time to do something creative! ~ Cindy

Hoppy DIY Easter Jewelry Ideas!

March 27, 2012

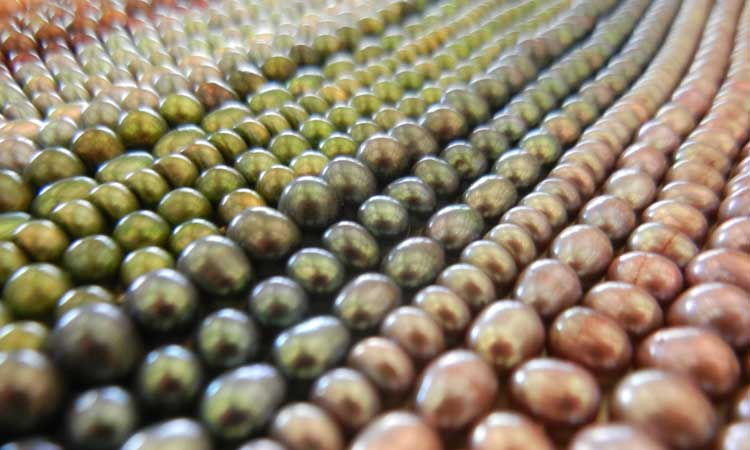
I just spied this new selection of freshwater pearls over in our sales department and suddenly I realized – Easter is almost here! There is something about the egg-shaped pearls that is just so very…what’s the word…eggy?

eggs-pearls-easter

Freshwater pearls in candy-delicious colors.

Hop over to our design gallery – we have a whole category devoted to spring and Easter jewelry. We make all of our designs “copyright free” meaning you are welcome to replicate them exactly, or to just as eye candy (eye jelly beans?) get your creative ideas flowing. Several of the designs are official “Create Your Style with Swarovski Elements” designs that use crystal pearls and sparkly crystal beads. No matter what materials you choose, now is the perfect time to add a pop of spring color to your wardrobe…unless you are Bill. Bill already has enough color – if you’ve ever placed an order by phone you’ve probably experienced it! ~ Cindy

rings-things-bill-style

I don’t remember what I said to get the “oh no you didn’t!!” finger wag, but it must have been good. Or maybe he is dancing? Hmmm. One never can tell wtih Bill!

Tips for sawing sheet metal with a jeweler's saw

February 15, 2012

Hi bloglandia! Today’s blog is about how to use a jeweler’s saw. Why? Because if you want to cut clean shapes out of metal without bending the metal, you need a saw. All metal shears, even the really nice ones, bend the metal, at least a bit. It is just the nature of the beast. Also, unless you have the hand strength of ~ I don’t even know who! ~ you probably need a saw to cut metal thicker than 24 gauge.

A saw also allows you to cut very intricate designs. Pierced is the term for designs that are cut from within the metal, as opposed to coming in from the edge. However, “pierced jewelry” brings up a whole different category of jewelry when you search online!

sawing-tools-rings-things
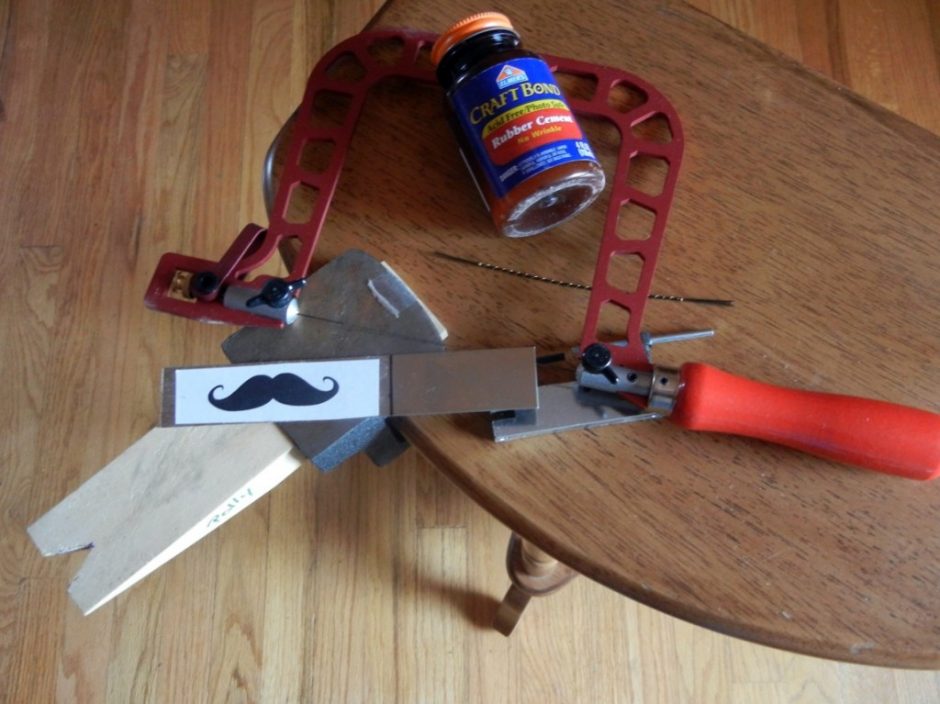
The basic tools needed for sawing metal.

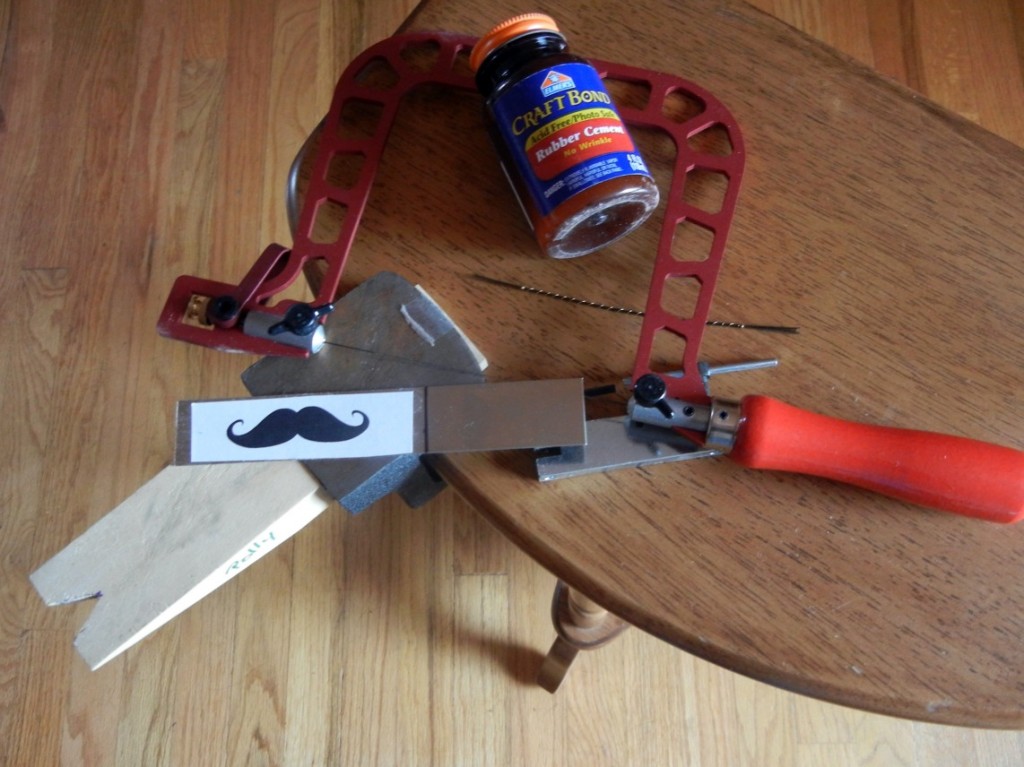
Supplies needed for sawing your own metal shapes:

  • Jeweler’s saw frame – I’m using a pretty lux Knew Concepts frame, but the technique is the same no matter which saw frame you use.
  • Saw blades – Rings & Things offers both Form d’Arte (entry level) and Antilope (higher quality) saw blades. I think the higher quality is worth the price for less breakage, but it is up to you. Make sure to use the right size for the gauge of metal you are cutting.
  • Sheet metal – I like working with 20 gauge, but you might choose thinner metal if you’re planning to layer the pieces, or if you are working with pricey sterling silver.
  • Bench pin/ – I’m using a bench pin that’s been modified for sawing. Our bench block already has a V cutout. You’ll see why this V is necessary shortly.
  • Paper design – the more ornate the shape, the more you will challenge your skills!
  • Rubber cement – for adhering your design to the metal. Don’t think that you can draw your design onto the metal with a marker – it will smudge and blur and be impossible to follow. “Permanent” is a relative term!
  • Hole punch – optional – to pierce metal, you need to drill or punch a hole to insert the saw blade into. If you are sawing in from the edge of the metal, you don’t need a hole.
  • Cut Lube or beeswax – optional or not, depending on who you ask. Many people swear by it, but I typically prefer to saw without it. The lubricant is meant to keep the blade moving easily across the metal, but sometimes it gunks up the shavings and clogs the blade, so use it sparingly at first.

How to saw metal:

Adhere your design to sheet metal with rubber cement and let dry.

Insert saw blade into saw frame with the teeth pointing out (away from frame) and down (towards floor). Make sure you have the blade in there good and tight – a loose blade very quickly becomes a broken blade! Tension is key. (If you haven’t used a jeweler’s saw before, see post about Knew Concepts frames and tensioning.)

sawing-metal-rings-things
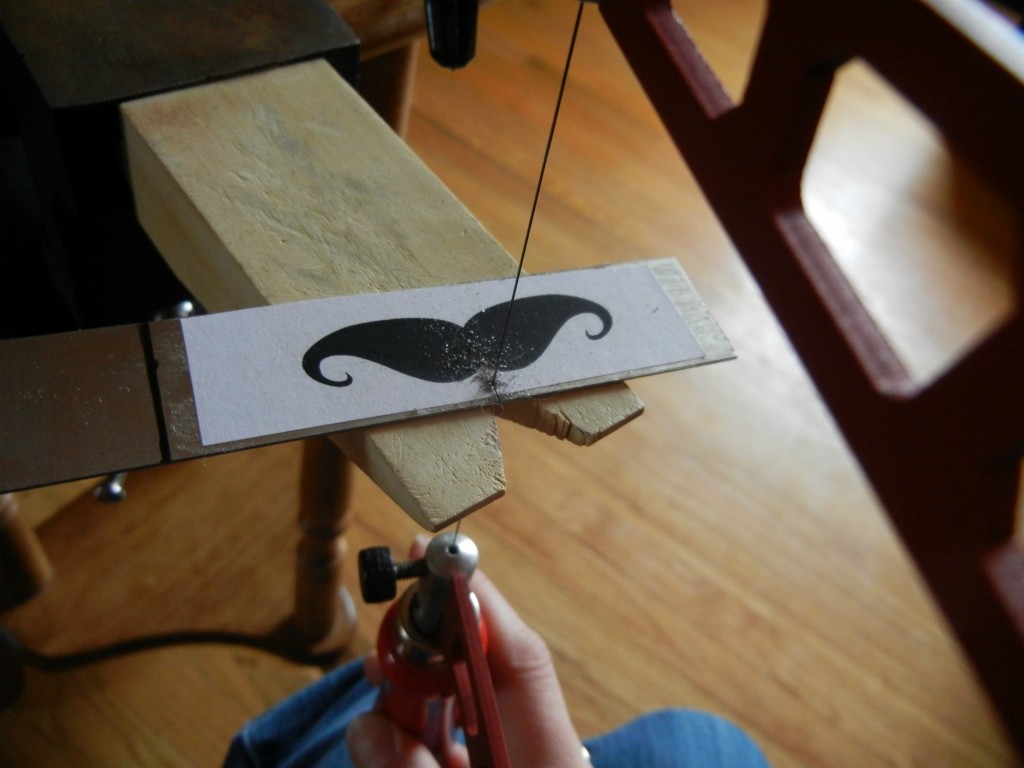
My left hand is holding the camera is this shot, but really it needs to be holding the metal down on both sides of the blade while I’m sawing.

Hold your metal in place on the bench pin with your non-dominant hand.

sawing metal rings and things tutorial
Supporting the metal on both sides of the blade keeps it from wobbling. Less wobbling = easier sawing.

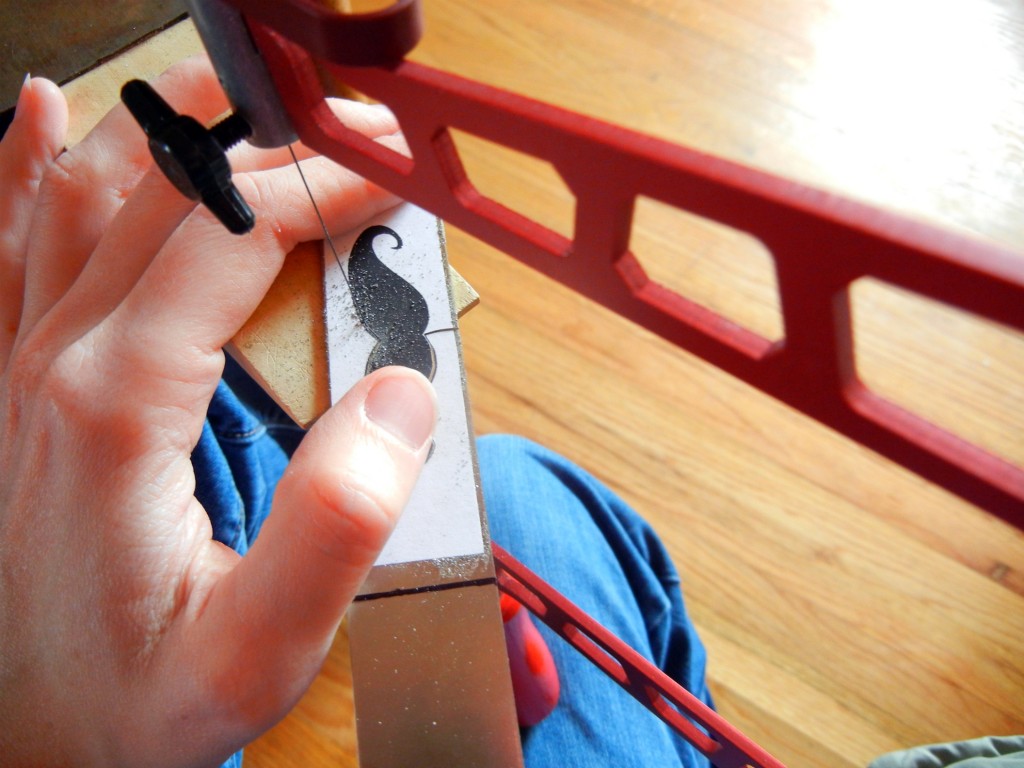
Hold the saw frame between 90 and 45 degrees to your metal and start sawing. You are only sawing (removing metal) on the down stroke, but try to keep the sawing motion smooth and even on both the upstroke and down stroke.

sawing-nickel-silver-rings-things
I try to keep the saw fairly stationary and rotate the metal to follow my pattern.

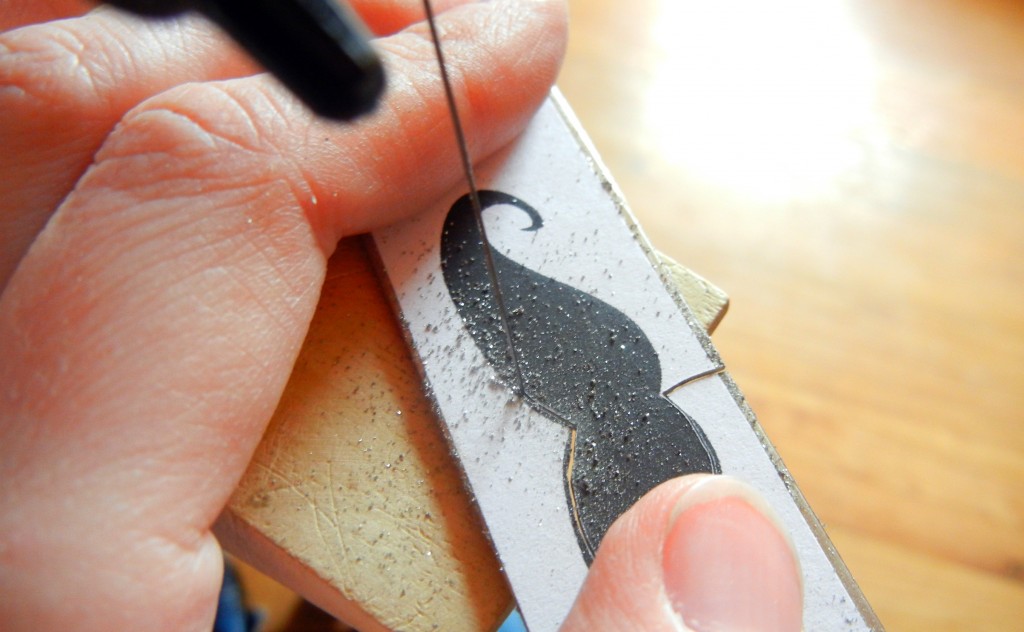
Follow your design! It takes practice, but you’ll pretty quickly learn how to maneuver your metal and/or saw to follow curves. Blow away the shavings every so often so you can stay true to your pattern. If the blade seems to be catching or it feels jerky, check your tension and/or apply a little lubricant to the blade.

Moving too quickly, especially when changing direction, is an easy way to break your blade. Smooth and steady wins the race. One of the most difficult things at first is not pressing too hard with the hand that’s holding the metal down. Hand cramps hurt, so take frequent breaks and be conscious of what you’re doing. It doesn’t take much pressure to keep your metal in place. It does, however, take that V-cut bench pin. You will (er, I did) break lots of blades and have tons of problems if you try to hang your metal off the edge of a table rather than supporting it on both sides of that V.

It is always a good idea to wear safety glasses while you are sawing. Everyone – yes EVERYONE – breaks blades, and you’ll notice yourself getting your face closer and closer to your project. So again, take frequent breaks and also be sure to set up your sawing station at a height that is comfortable for you.

Happy sawing!

Edited January 2022 to update links.

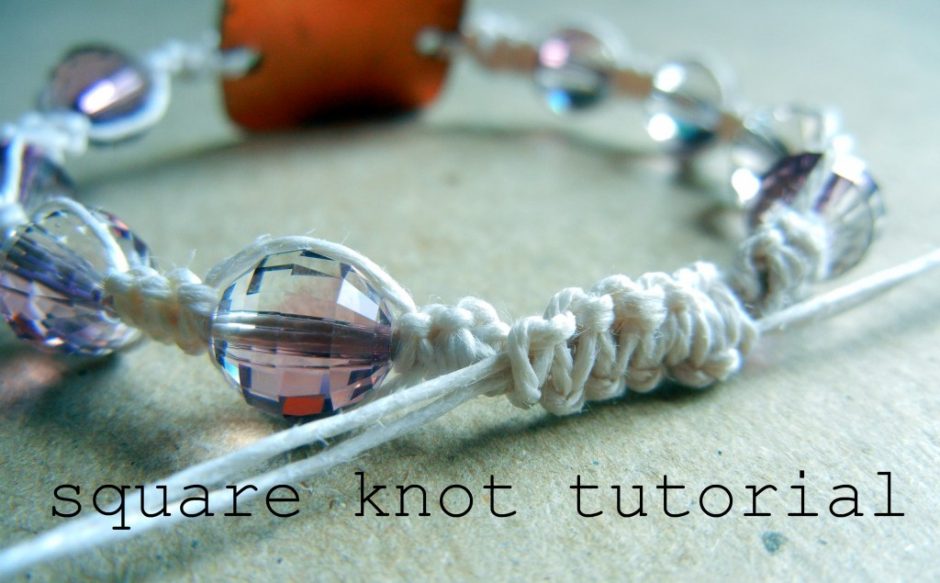
DIY Shamballa style macrame bracelet tutorial

January 8, 2012

Square knot macrame bracelets have been given new life due to the influence of high end designers. I’ve got the “Circle of Life” from The Lion King playing in my head as I write this. How else to explain how a simple macrame bracelet design, which has spent years as a summer camp staple and a tourist shop standard, has been reborn as the chic “Shamballa” brand must-have look?

I think it is a great example of how basic techniques can be adapted to suit nearly any style or budget. Have hemp cord and plastic pony beads? You can make this bracelet. Have premium knotting cord and diamond-studded platinum beads? You too can make this bracelet! The trickiest part is making the sliding clasp, but like any type of magic, once you know the trick, it is no problem.

Rings & Things actually made a square knot (aka half knot) macrame bracelet instruction sheet years ago (updated macrame bracelet instructions here). The sliding clasp instructions were also published as part of our “Meteor” macrame bracelet, which has a totally different look. It is past time to update the tutorial with some photographs!

Supplies needed for square-knot macrame bracelet with sliding clasp:

Cord – hemp, Chinese knotting cord, linen, cotton – whatever you like. You’ll need about 12 feet total.

Beads – again, whatever you like – but the holes must be large enough for two strands of your selected cord to fit through. Depending on your knot to bead ratio, you might need one bead or 20.

Scissors, needle, a clipboard (or a work surface and a binder clip), and flat or chain-nose pliers.

Cut two 2′ pieces of cord and one about 6′ long. Leaving approx. 8″ tails, clip the two anchor cords to your work surface. Center the long cord under the two anchors. (For the sake of photos only, the anchors are blue and the knotting cord is black.) You can start with either side, but I start from the right:

2-right-loop

3-left-through-loop

Pull to tighten the cords, and you’ve completed 1/2 of a square knot. The second 1/2 is the same, just from the left:

4-left loop

5-right-through-left

Pull tight and you have a complete square knot.
Tip: If you want your knots to spiral, then skip this “second side” step… just repeat the first half of the knot, always starting from the same side of the knot.

6-keep-knotting

It is totally up to you how many knots to tie between beads, but odd numbers (1, 3, 5, etc.) look best. Tie a few knots, slide a bead onto the anchor cords, tie a few more knots…it is really quite fun! Continue until you have the length you want. Keep in mind that the clasp will add about 1/2″ to the overall length.

Since you started knotting with a single long piece of cord, the starting end is “finished” while the tail end has….tails. To remedy this, sew the tails (one by one) up through the last section of knots. I needed to use pliers to pull the needle through.

7-sewing-up-end

Snip off the ends and it is like they were never there!

8-magic-clean

Now that you know how to make square knots and finish the ends, let’s make the “magic” part – the sliding clasp. Make your bracelet into a circle and overlap the anchor cords. Use bits of cord to bundle them together for the moment.

9-ready-to-tie-clasp

Now clip the top to your work surface. Cut a 12″ piece of cord and center it under your four anchor cords. Start tying square knots, just like you did for the bracelet itself. Continue for about 1/2″, then sew the ends back in. This section of knots should be able to slide back and forth on the anchor cords. Now, for the tails: they serve an important purpose. Make slip knots an inch or two away from the clasp on each pair of anchor ends. Tie beads on too if you like. These knots/beads act as stoppers, ensuring the ends don’t slide out of the clasp. Make sure you leave enough length to make the bracelet big enough to get over your hand. And ta-da! Adjustable bracelet bliss.

10-sliding-clasp

***

FREE Rings & Things Design Gallery Projects

Rainbow Bead Macrame Bracelet Tutorial” created by Rings & Things designer Michelle Horning.

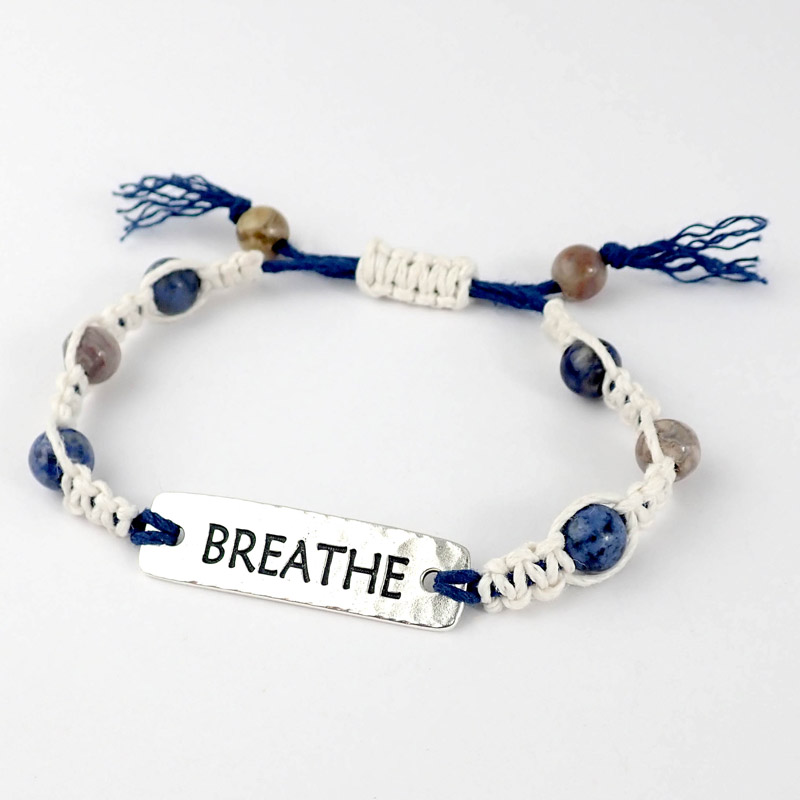
Remember to Breathe Bracelet Tutorial” created by Rings & Things designer Michelle Horning.

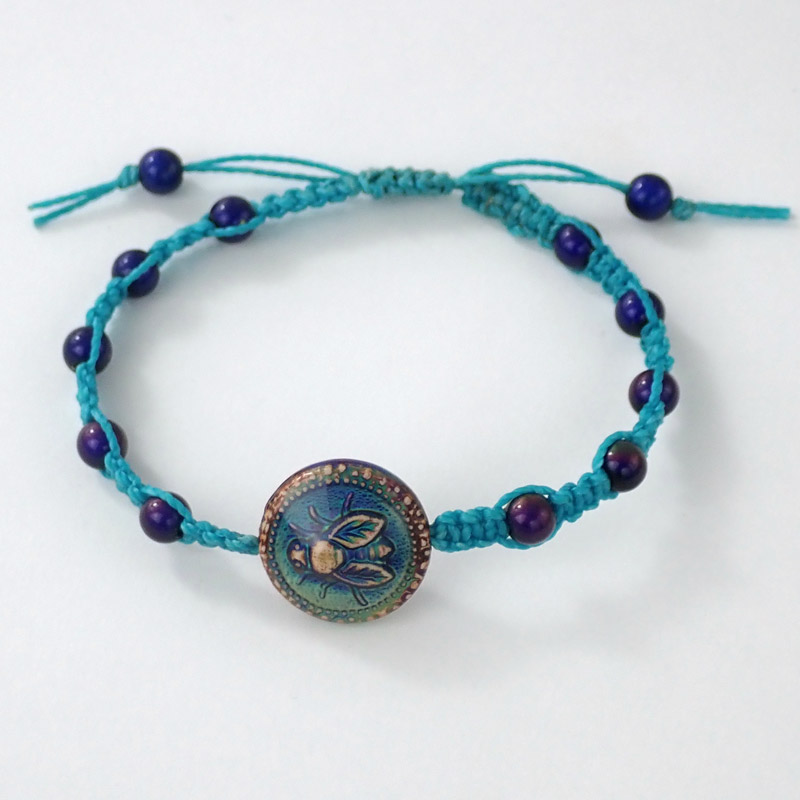
Bee Moody Bracelet Tutorial” created by Rings & Things designer Michelle Horning.

***

Happy knotting! Please let me know if you have questions, and have fun making your own bracelets! ~ Cindy

www.rings-things.com

DIY copper etching tutorial

December 28, 2011

It is easy to etch your own designs into metal for jewelry. This tutorial will teach you how! (Check out our etching kit too!)

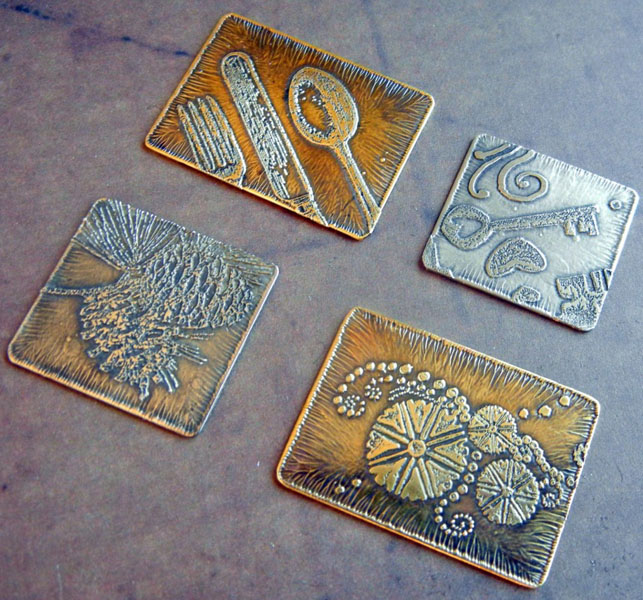
etched-stamped-metal
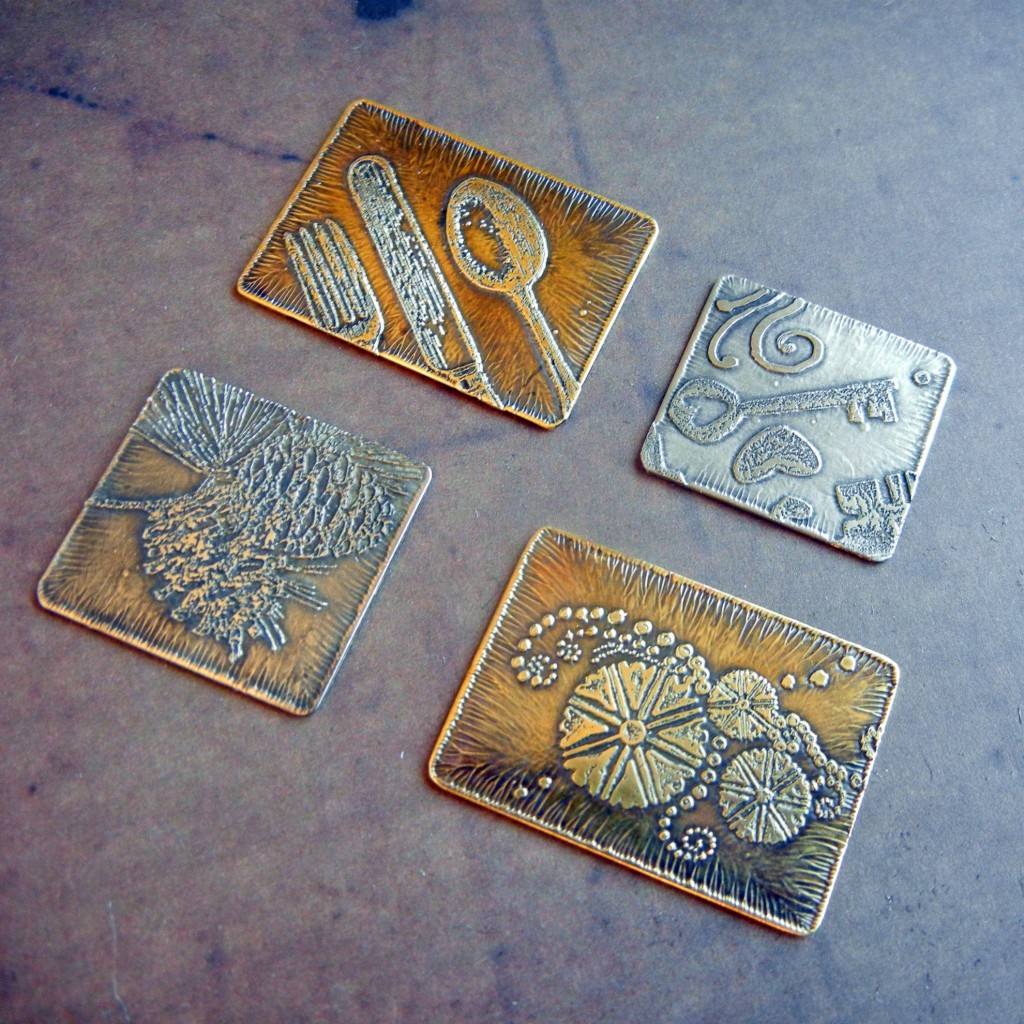
Rubber stamp designs etched into brass sheet metal.

Before you begin, please read the safety considerations for etching metal with chemicals blog post.

You’ll also probably want to read the design considerations for etching metal blog post too!

Now, here are the steps for etching metal with ferric chloride:

1. Choose your metal(s). Ferric chloride works on copper, brass and nickel silver. It will not work on actual silver (fine or sterling). Do NOT use ferric chloride on aluminum. Metal as thin as 24-gauge can be etched – just leave it in for less time than you would for thicker metal. If you want to etch both sides or etch really deeply, use at least 20-gauge metal.

2. Clean metal with Penny Brite (our favorite) or an abrasive cleaner and scrubbie. The metal must be very clean. Water will sheet off (not bead up) on the surface when it is truly clean.

3. Apply resist. Stazon ink, Sharpies, toner transfers – there are many options! (Read the design considerations.)

Continue Reading…

Safety considerations for etching metal with chemicals

December 28, 2011

Using chemicals doesn’t have to be dangerous, so long as you take basic steps to set up your work area to avoid problems. For chemical etching, you need:

  1. Rubber gloves (latex or nitrile).
  2. Safety goggles. The etching solution might splash, and you don’t want that in your eyes.
  3. Shop apron. The etchant will stain your clothes and anything else it touches.
  4. Good ventilation (open a window if possible or run an exhaust fan). Never etch in a small enclosed space. Chemical fumes and gases that aren’t noticeable in the proper setup can build to dangerous levels in a small space. Outdoors is a great place to etch, weather permitting.
  5. Plastic or glass containers for the etchant “bath.” We like using the clear plastic tubs from spinach or salad mixes.
  6. Baking soda to neutralize the acid.
  7. Secure screw-top plastic container to dispose of used etchant.

resisted-taped-ready

Metal with designs applied, ready to etch!

ferric-chloride-etching

See how the acid has eaten away the metal? Keep your work area safe and don’t get chemicals on you!

The basic rules for working with chemicals are simple, but worth revisiting:

  1. Keep pets and children out of the area.
  2. Don’t get it on your skin or in your eyes. Wash any splashes off immediately.
  3. Be careful about heating any chemical – there is a potential for toxic gases to form. Ferric chloride works faster when it is slightly warmed. You can accomplish this by putting the bottle in a warm water bath or a heat-plate set on low. Don’t try to heat it up on a stove top or in a microwave.
  4. Get plenty of fresh air.
  5. Don’t breathe in fumes or dust. It is best to clean the etched metal under water to avoid distributing particles into the air.
  6. Use disposable scrubbies or steel wool to clean your etched metal to avoid contaminating your good brushes, for example, with chemical residues.
  7. Soak up any spills with baking soda and/or kitty litter.

I know a guy who doesn’t really have any feeling left in his fingertips. You probably know someone like this too. Years of hard work have left his hands extremely callused and insensitive. For this reason, he can grab hot things with his bare hands, somehow not get splinters doing things where normal people would get splinters. I (and most anyone else) need oven mitts and work gloves for tasks he takes on bare handed.

I tell you this because sometimes I worry a bit about some of the advice on the internet. Take chemical etching. The chemicals used to etch metals are called mordants. By nature they are caustic – they eat through metal. Yet, for whatever reason, some people are extremely casual about their usage. For example, not using proper ventilation, sticking their bare hands into a chemical bath, not bothering with safety glasses, pouring the chemicals into their gardens … I’ve seen a lot of stuff that just isn’t safe. Maybe the guy on YouTube hasn’t gotten hurt doing what he’s doing – yet – but it is way better to be safe than sorry!

Obviously, it is up to each individual to determine the level of risk he or she is ok with. Some chemicals – such as the ferric chloride we use for etching copper and brass –  are relatively safe, but they are still chemicals and need to be treated with care. It isn’t complicated.

In case you are wondering, ferric chloride is much, much safer than ferric nitrate and nitric acid, two mordants which are used to etch silver.  While you don’t want to get it on you, ferric chloride will not eat through your skin (muriatic/hydrochloric acid, which is used in some etching recipes, will!).

And, ferric chloride in liquid form, like Rings & Things sells, is much safer than dry ferric chloride. Ferric chloride can be used more than once. Once it stops etching, follow the hazardous waste guidelines for where you live. Spokane’s are found here: https://my.spokanecity.org/solidwaste/hazardous/. Please be responsible and do not pour chemicals down the drain. (Note: all etching, even “chemical-free” etching, leaves bits of metal in the etching solution and must be disposed of properly.)

Now that you’ve read the safety guidelines,  read the DIY etching tutorial and start etching!

Be safe – and have fun! ~ Cindy

Turn it upside down!

December 22, 2011

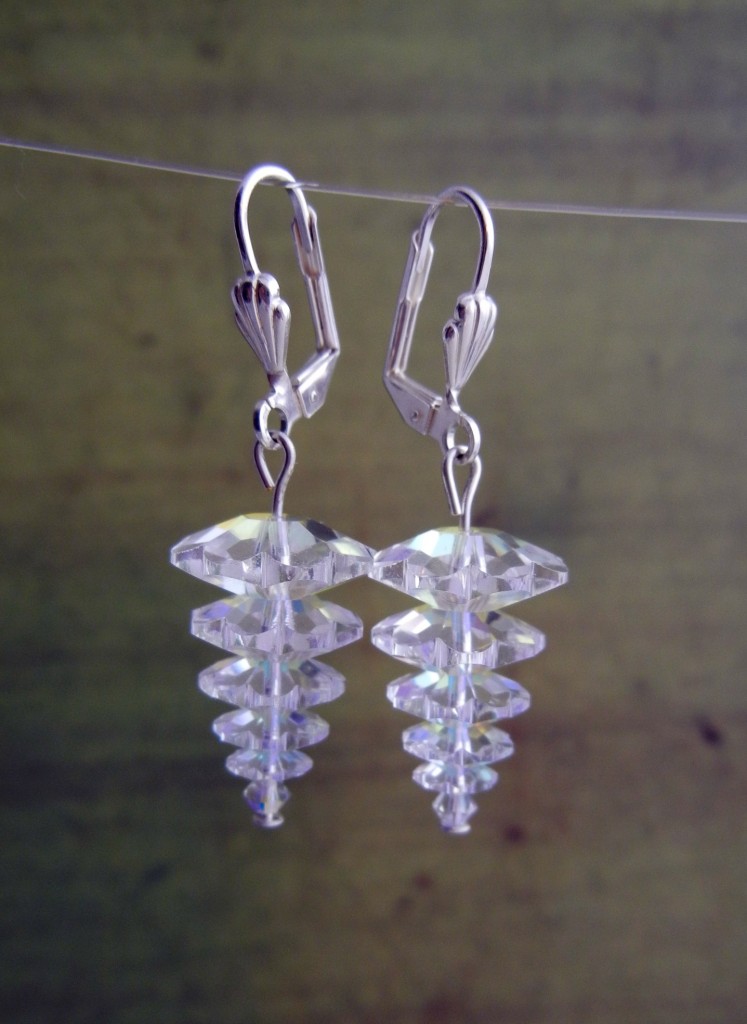
What happens when you take the oh-so-popular Swarovski crystal tree charm pattern and turn it upside down? Beautiful, festive crystal earrings that can be worn year-round!

melissa-earrings

The French clips are another nice touch. Melissa made these classic clear crystal margarita earrings while on vacation with her mom and I snatched them off her ears as soon as I saw them. I think they look like frosty pine cones or icicles, but in a subtle way. Unlike the “real” crystal trees, they’ll still look appropriate in June. Something to keep in mind if you’re making last-minute gifts! ~ Cindy