Browsing Category

How-To

CzechMates Memory Wire Bracelet Tutorial

September 25, 2014

I love the Picasso finishes and and unusual colors of CzechMate 2-hole tile beads and other CzechMate 2-hole beads. But it’s hard to find a project with them that doesn’t involve needles and intricate beadweaving.

So … here it is! When I discovered pliers designed for looping ends of memory wire, I decided on an ombre chevron cuff bracelet. This 4- to 6-row ombre chevron design takes advantage of the CzechMate color combinations, and is easy to “string” on memory wire. The outside row uses a few seed beads (or bugle beads) near the edges, because their sizes are so compatible with these 2-hole beads.
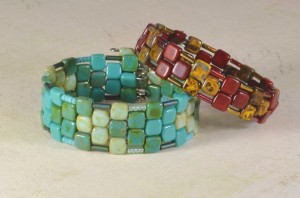
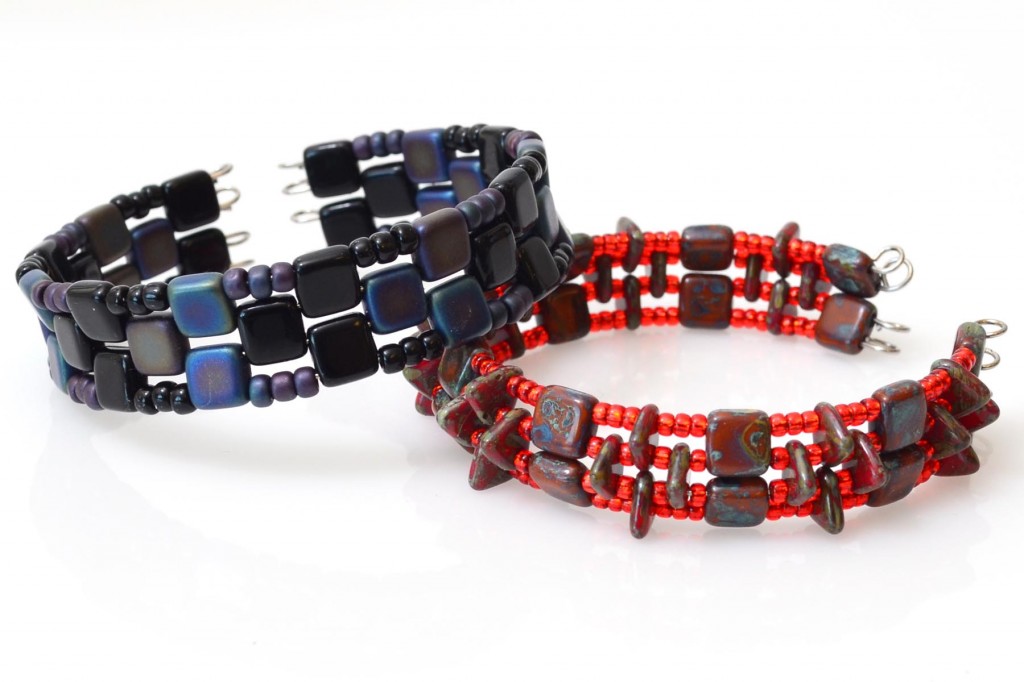
Memory Wire bracelet made with 2-hole CzechMate tile beads

My first 2 ombre CzechMate bracelets. Rather than wrapping the memory wire around your wrist three times like most memory wire bracelets, these are cuff bracelets.

For a petite wrist, use standard stainless steel memory wire. For larger wrists or a looser fit, use stainless steel anklet memory wire. (Don’t be swayed by the word “anklet” — it’s actually an excellent bracelet size.)

Cutting Memory Wire:

When cutting any type of wire, wear eye protection, or at least make sure your bits of wire will end up someplace safe, not in anyone’s eye. Cup your free hand over the end, and aim the wire downward at a soft surface like a flocked bead mat.

Tools and Memory Wire:

Memory wire is strong, springy steel — much tougher than most jewelry wire. It requires strong, durable tools, both for cutting and bending. I tried cutting steel wire with my cheap cutters and one blade SNAPPED, shooting across the room in 3 pieces. I also dented high quality cutters that were not designed to cut steel. I strongly suggest a pair of heavy-duty flush cutters and a pair of memory wire looping pliers. They aren’t too expensive, and they work great for lighter-duty projects as well.

Step 1. Practice Making Loops:

Although Memory Wire Pliers make it easy to make consistent-sized loops, steel wire is tougher to bend than other jewelry wire. I recommend practicing memory wire loops before you begin adding beads. This helps you make all your loops at the same angle, and avoid chipping your end beads.

CzechMate Memory Wire Bracelet - Practice

Cut four 2″ pieces (each about 1/4 of a circle). Practice making a loop at each end, with both loops on the same plane (or angle).

Memory Wire - How to Make Nice Loops

How to Make Nice Loops with Memory Wire

1. Grip one end of the wire firmly in the pliers and use your fingers to smoothly wrap the wire around the small side of the pliers. Don’t let it twist upward or downward.
2. About halfway around the pliers, release the plier grip on the wire, and get a new grip so you can finish making your circle.
3. Close the loop ALL the way — don’t leave a spot for beads to slide down inside a gap in the loop.

Repeat at other end. Grip the wire’s tip, push around, release, re-grip, and finish pushing. Take a look at your circles — are they the same size and angle, or are they twisting ickily in random directions? Make a few more until it’s easy to make nice consistent loops on the same plane. Also note that these loops are all to the OUTside of the circle, not the inside:

Memory Wire Loop - Do and Don't

For bracelet comfort, make all loops curve to the outside, not the inside of the arc.

Step 2. Assemble your beads:

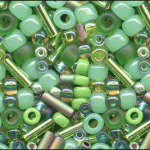
Appletini TOHO Seed & Bugle Bead Mix

Appletini TOHO Seed & Bugle Bead Mix

TOHO seed bead mixes work excellently with CzechMate 2-hole tile beads. There are great color mixes to choose from, and you can use 3 large seed beads, 4 small seed beads, or a single bugle bead as perfect-size spacers.

A few beads from each assortment are too tiny to fit on memory wire, or too big to fit next to a Czechmate, so save those for future projects.

Step 3. Make the bracelet:
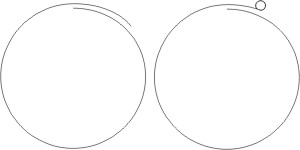
Cut 4 pieces of wire, each about 1-1/8 coils long (Like going all the way around the clock face from midnight to 2pm.).

3a. Cut 4 pieces of wire, each 1 to 1-1/8 coil long. Make sure they are all the same length.
Carefully round 1 end of each wire.

CzechMate Memory Wire Bracelet Step 3b

3b. For a 2-color bracelet, count out 21 tile beads of each color, in sets of 3.

For a 1-color bracelet, use approximately 42 beads. For a 3-color bracelet, count out 15 tile beads of each color in sets of 3. Lay them out in the order that you’ll use them. You might not use all the beads you laid out, but it’s easier to keep your pattern going correctly if you lay out the beads in advance.

String 1 bead.

3c. String 1 tile bead.

Pick up a 2nd wire, and string 1 bead. String a 3rd bead onto both wires.

3d. Pick up a 2nd wire, and string 1 tile bead.
String a 3rd tile bead onto both wires.

String 2nd color using same pattern.

3e. String 2nd color using same pattern.

Don't worry that the beads and strands flip and flop around at this point.

Don’t worry that the beads and strands flip and flop around at this point.

End with 2 tile beads. Make sure you have at least 1/2" (12mm) of wire left.

3f. End with 2 tile beads. Make sure you have at least 1/2″ (12mm) of wire left.

3g. After your last 2 beads, push beads snug (but not super tight), and trim wire to approx. 1/2″ if necessary. Next, very carefully round the end wires for both strands (one wire at a time). Abrupt / harsh movements may chip the end bead.

Take another of your prepared wires, and string 4 seed beads, or a single bugle bead. Place these next to your strung CzechMates … do they look good? If not, pick a different color or size and test it before you begin the next step.

Back at the beginning, feed a new piece of prepared wire through the other hole in one of your first beads.

3h. Back at the beginning, feed a new piece of prepared wire through the other hole in one of your first beads.

3i. Where the wire comes out, add 3-5 seed beads (or a bugle bead) so they are the same total length as a Czechmate tile bead or slightly shorter.

Feed through next CzechMate, add bugle or seed beads, repeat to end of bracelet.

3j. Feed through next CzechMate, add bugle or seed beads, repeat to end of bracelet.

Repeat for 4th row, trim excess if necessary, and carefully round the ends.

3k. Repeat for 4th row, trim excess if necessary, and carefully round the ends. (Click image for close-up.)

Tips & Errata:

Do your best to make the loops all face the same direction, but don’t be hard on yourself if they don’t. Here is my first bracelet, with wonky ends and a chipped bead. When I taught a class on how to make this bracelet, I introduced the “practice making loops” step, and not a single person chipped a bead!
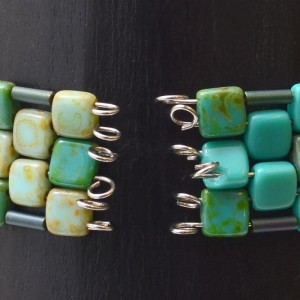
Example of bad loops on my first memory wire bracelet.

Close-up of bad loops on my first bracelet. The tips listed above should help you make better loops and avoid chipped beads.

By my 3rd bracelet, I realized it’s much easier to finish the ends if the strands (after looping) are tiny bit shorter than one full coil, so now I design these more like cuffs than bangles.
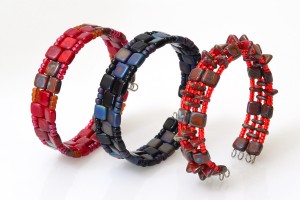
Czechmate and Memory Wire - Finished Cuff-Style bracelets

It’s much easier to finish the ends, if each strand, after looping, is slightly shorter than one full coil, more like a cuff than the bangles I originally envisioned.

You’ll soon perfect your ability to make all your loops at the same angle. After that, these are quick and easy to make, so make a bunch for gifts or to sell!

Czechmate Memory Wire Bracelets

Variations on a theme.

Depending on the size of your spacer beads, some bracelets spike up a bit in the middle, and others curve up at the outside edges. This is part of the fun with these designs. Used in this pattern, I think the CzechMates™ Two Hole Triangle Beads look like tiny Stegosaurus / dragon spikes.

Parts & Supplies:

Any questions? Please ask! (Click on “Comments” or “Leave a Reply” below.)

Say it Your Way with Easy Metal Stamped Jewelry

September 10, 2014

You don’t have to be Frank Sinatra to do things your own way! That’s the beauty of metal stamping as a jewelry technique. Not only do you get to assemble components, you get to make your own components – and they can say whatever you want them to say!

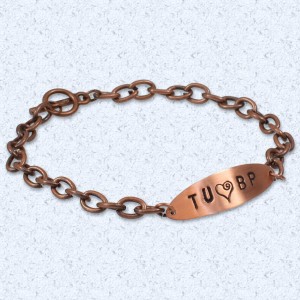
Young Love Bracelet Tutorial

This Young Love bracelet is a perfect example of how you can easily customize jewelry with metal stamps!

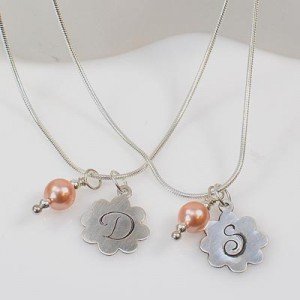
Letter stamps are the perfect way to create monogram jewelry, plus jewelry with names or inspirational sayings. Design metal stamps are the perfect way to add cuteness and panache.

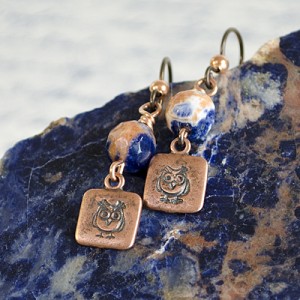
Hootie and the Sodalite Earrings

Learn to make these simple metal stamped earrings – just click the image above for the complete parts, ready to buy.

Designer Amy Mickelson’s “Hootie and the Sodalite Earrings” feature custom owl charms she made using an ImpressArt Metal Stamp and a JBB Antiqued Copper Plated Square Tag Charm. These JBB tags are plated especially for stampers – pretty amazing! For more on these components, see the full parts list and tutorial here.

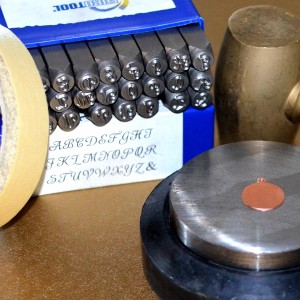
Supplies for metal stamping a charm.

First, gather your supplies.

The basics of jewelry stamping are easy and only require a few tools. The tools are a small investment, but will last for years and thousands of impressions!

Supplies you’ll want:

The basic steps to jewelry stamping:

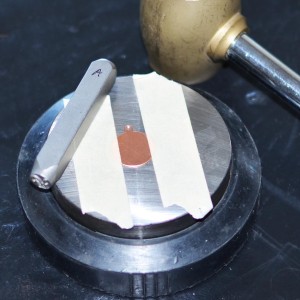
Getting ready to make a metal stamp impression.

Once you’ve planned your design, secure your metal tag or blank onto your steel block with tape. Stamp Straight Tape by ImpressArt is more expensive than masking tape, but it offers a sturdier edge and does not leave sticky residue.

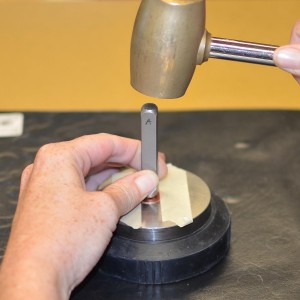
How to get a good metal stamped impression.

Strike the perfectly vertical stamp with one firm blow. This is important for achieving a clear impression.

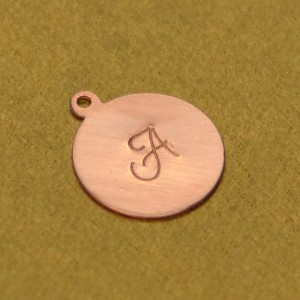
A successfully stamped metal blank charm.

Now you’ve got a custom made charm that’s uniquely made by you!

That’s all there is to it! It really is that simple. Then, you can use your completed stamped charms to make earrings, necklaces, bracelets, gift tags, and more!

Ava's Ladies in Waiting Necklace Tutorial

Click this picture for all the parts and instructions you need to make these pretty necklaces.

For a great monogram jewelry tutorial, see “Ava’s Ladies in Waiting” Necklace Tutorial in our Design Gallery.

Hootie and the Sodalite Earrings

Click this picture for all the parts and instructions you need to make adorable metal stamped owl earrings.

To make fun owl earrings, see the “Hootie and the Sodalite” Earrings Tutorial.

Young Love Bracelet Tutorial

Click this picture for all the parts and instructions you need to make a simple metal stamped bracelet.

For the full how-to on making a metal stamped chain bracelet, see our “Young Love” Bracelet Tutorial.

Rings & Things offers a huge variety of metal stamping blanks, plus jewelry stamping tools and supplies with fast shipping and free returns.

So what are you waiting for? Isn’t it time to say things your way! ~ Melissa

Make a Simple, Dainty Sterling Silver Necklace

September 5, 2014

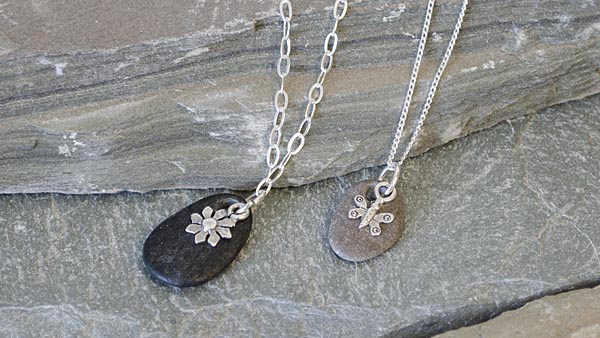
Sometimes when it comes to jewelry, less is more. That’s the case when it comes to these adorable river rock and sterling silver charm necklaces designed by Rings & Things’ Amy Mickelson. This project is easy, yet really pretty! Plus there are a ton of different sterling silver charms to pick from!

These necklaces only require one tool and a few simple components to make! The sterling silver chain necklaces are already finished with a clasp, making them a breeze to use. Plus, I just adore the contrast between the natural river rock and the dainty sterling silver charms.

Supplies and Tools Needed:

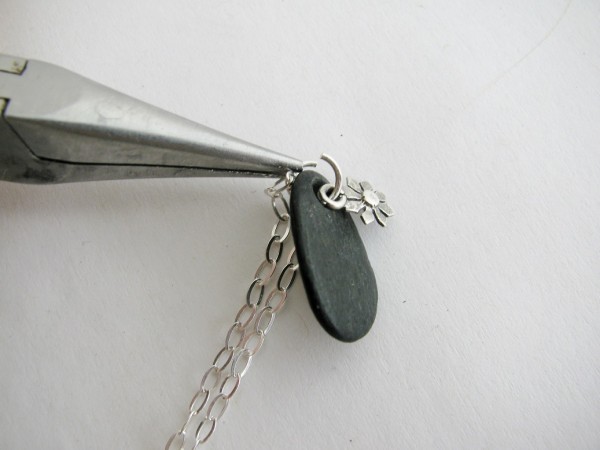
Simply layer the items on the sterling silver jump ring. Chain first, then river rock pendant, then sterling charm.

Simply layer the items on the sterling silver jump ring. Chain first, then river rock pendant, then sterling charm.

Creating this necklace couldn’t be easier! Using your chain-nose pliers, pry open the jump ring a little. You only need to open it enough so that you can layer the three elements together. When opening jump rings, remember to always twist the ends in opposite directions to separate them. Do not “oval” the ring by pulling the ends apart.

Place the chain first, then the rock pendant, then your sterling silver charm onto the jump ring. Close the jump ring carefully, so that the ends line up flush.

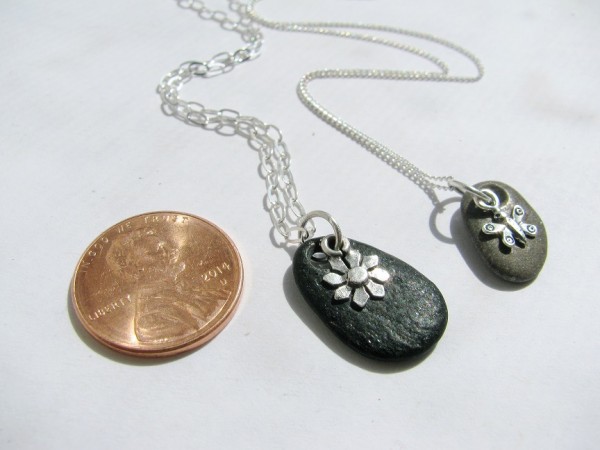
These dainty pendants are so cute! And smaller than a penny!

These dainty pendants are so cute! And smaller than a penny!

Each finished dangle is smaller than a penny!

So cute in the palm of my hand!

So cute in the palm of my hand!

If you like this look, buy the parts to make these necklaces now!

These lovely necklaces by Amy Mickelson combine rustic river rock and dainty sterling silver charms!

All the parts are ready to buy in our Gallery – just click this image to go there.

You can check out additional possibilities by browsing our huge selection of sterling silver charms and sterling silver chain necklaces! My personal favorite chain is the sterling faceted ball chain, because it sparkles!

~ Tiffany

How to Make a Glass Vial Necklace

August 28, 2014

There is no denying that little glass bottle necklaces are adorable, and as keepsake jewelry they are easily adaptable for a multitude of themes. Whether you want to make the featured “Beachcomber” Vial Necklace, or a variation–this style of jewelry is easy to make. You might also consider filling your little bottle with dried flower petals, dandelion wishes, a lock of baby hair, a printed parchment scroll, tiny photos, sea shells, moss, feathers, ashes, or the other seemingly endless possibilities.

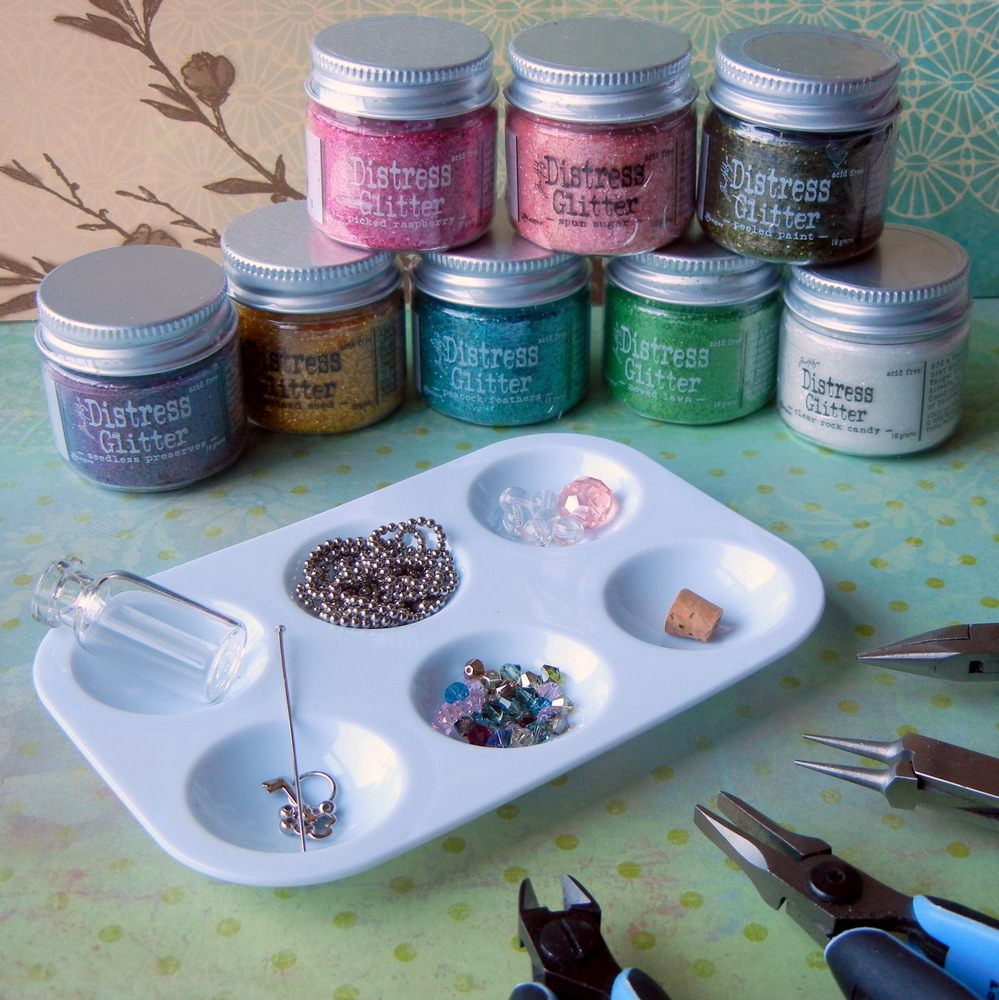
Necessary supplies for making a glitter and crystal filled vial necklace from www.rings-things.com

Step 1: Gather your supplies needed to make the Beachcomber Vial Necklace.

You will need the following supplies:

1 each 8mm round jump ring (I used item #37-167-1: 8mm round, white-plated jump ring)

3 each 3.2mm rondelle spacer beads (I used item #26-155-32-1: 3.2mm white-plated rondelle spacer bead)

1 each 2″standard head pin (I used item #37-422-1: 2″ white-plated standard head pin)

1 each clear glass bottle (I used item #30-187-3515: 32x15mm clear glass bottle)

1 each 12mm faceted rondelle crystal bead

1 each ball chain clasp (I used item #40-801-1: 2.4mm white-plated ball chain clasp)

24 inches ball chain (I used item #40-889-1: 1.8mm white-plated ball chain)

And Treasures to fill your vial:

20 each 4mm Swarovski crystal bicone beads (I used #05-328-04-116, #05-328-04-124, #05-328-04-407, #05-328-04-90, and #05-328-06-138.)
1 each 17x7mm white-plated key charm

Glitter (I used Tim Holtz Distressed Glitter “Clear Rock Candy“)
You will need the following tools:

awl

rubber block

4 piece tool kit

mini spoon / tiny glitter scoop

Use an awl to make a centered hole running top to botton through the cork stopper on www.rings-things.com

Step 2: Remove the cork stopper from the vial; use the awl to make a centered hole running from the top of the cork through to the bottom.

How to make a decorative beaded cork and vial necklace from www.rings-things.com

Step 3: To make the beaded cork stopper, string the following parts onto a 2″ head pin: a white-plated rondelle spacer bead, the cork, a faceted glass bead, and a bicone crystal bead.

Finish the beaded cork stopper with a wire-wrapped loop; how to make a vial necklace from www.rings-things.com

Step 4: Finish the beaded cork stopper with a wire-wrapped loop. Follow the instructions for making wire-wrapped loops in Rings & Things “Jewelry Basics 101″.

Add an adorned jump ring to hang your vial necklace. Tutorial from www.rings-things.com

Step 5: Add a jump ring to the top loop of the beaded cork stopper. Adorn the jump ring by adding two white-plated rondelle spacer beads prior to closing it. Follow the instructions for opening and closing jump rings in Rings & Things “Jewelry Basics 101″.

Fill your vial necklace with beads, crystals, and charms. DIY instructions to make a vial necklace at www.rings-things.com

Step 6: Fill the vial with your combination of beads, crystals, and charms (or other tiny treasures). When selecting items to go in the vial, keep in mind the neck of the vial has a diameter of approximately 7mm.

DIY Vial necklace tutorial from www.rings-things.com Add Tim Holtz Distressed Glitter to your vial necklace.

Step 7: Add glitter to the vial. Rings & Things’ tiny spoon charm #44-639-0 makes a perfect scoop! Once your vial is filled, add the beaded cork stopper to the vial.

Finish your beaded vial necklace with ball chain. Easy jewelry-making instructions from Rings & Things.

Step 8: Finish your necklace with chain. Measure and cut the ball chain to your desired length. Add the ball chain clasp to one end of the chain and string on the vial pendant. Connect the open end of the ball chain to the clasp. Enjoy!

♥Get Inspired! If you loved making the “Beachcomber” Vial Necklace, visit the Rings & Things Design Gallery and get inspired! You will find instructions for making the following necklaces (just click the image for details):

www.rings-things.com, terrarium jewelry, plant jewelry, mini terrarium, wearable plants, DIY, tutoriall, supplies

Fairy garden terrarium tutorial by Sondra Barrington & the Rings & Things Showroom crew

Tiny Living Terrarium Tutorial by Summer Melaas of Rings & Things Showroom

Free DIY riveted jewelry tutorial from www.rings-things.com Sondra Barrington

Healing Shrine Necklace Tutorial by Rings & Things Designer Sondra Barrington

Make things!

Mollie

How to make Wire Links with Wubbers Mandrel Pliers

August 7, 2014
How to make wire links with the four shapes of Wubbers mandrel pliers

That’s right, happiness is a pair (or more) of Wubbers Mandrel Pliers!


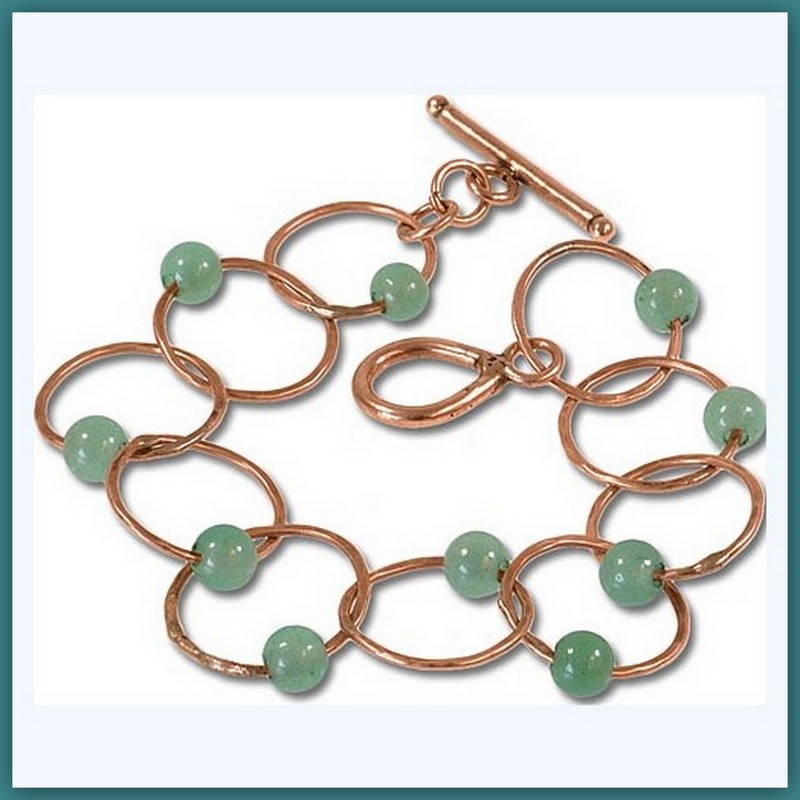
If you are looking to expand your tool selection, Wubbers® Pliers are a great addition to any jeweler’s bench.  The pliers have comfy padded handles, are made of high quality stainless steel, and have box-joint construction.  Wubbers offers traditional jewelry pliers in two sizes (which are awesome), but the pliers that caught my eye are the mandrel pliers.  Mandrel pliers are available in several shapes and sizes.  And best of all, they are perfect for forming wire links, like those featured in designer Polly Nobbs-LaRue’s two blog posts on making soldered-link bracelets: “I Love Copper Solder!” and “Copper Soldering Tutorial – Part 2”.


Blog Wubber Mandrel Pliers12-001

“Captured Aventurine” Bracelet Tutorial by Rings & Things’ designer Polly Nobbs-LaRue


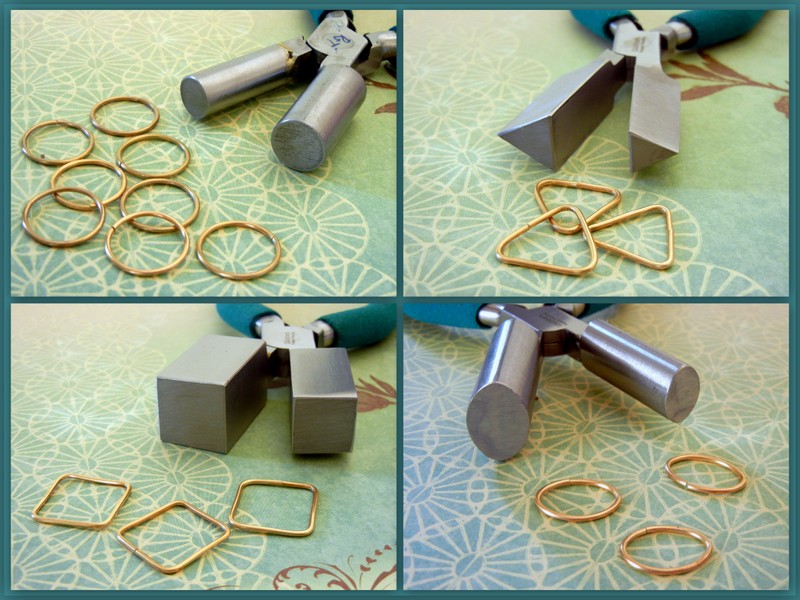
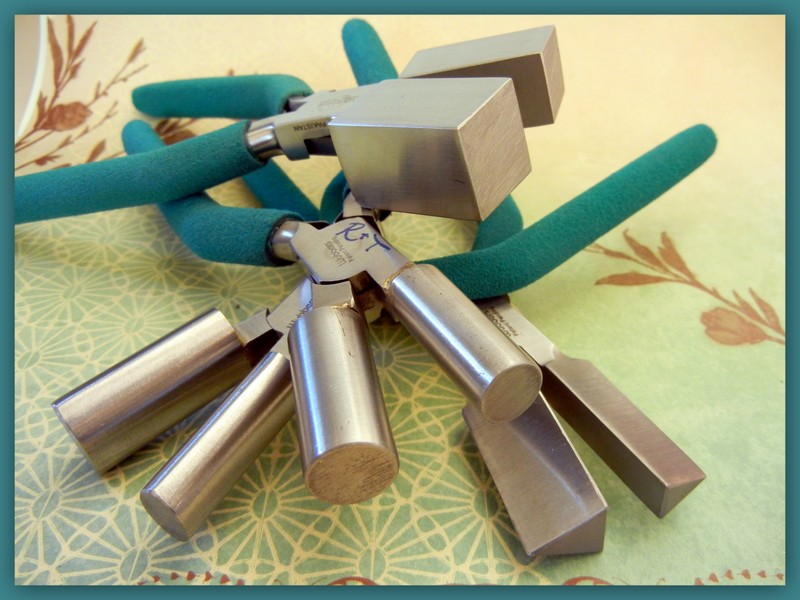
Wubbers mandrel pliers come in four shapes:  round, square, triangle, and oval; availble at www.rings-things.com

Wubbers mandrel pliers are available in several shapes: round, square, triangle, oval, and half-round (not pictured). Each shape is available in a variety of sizes. Plus each pliers’ jaw has two mandrel sizes.


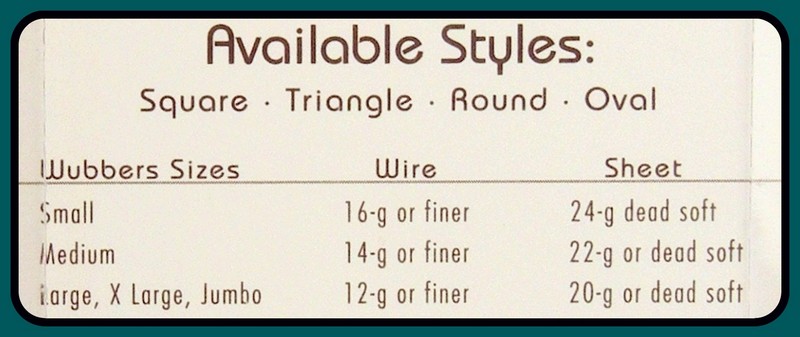
Wubbers packaging includes guage recommendation for wire and sheet metal plus an access code for Wubbers University.

Check out the Wubbers packaging for gauge recommendations and an access code for Wubbers University.


An added bonus: inside each package is your invitation and access code for free online classes and tutorials at Wubbers University!  You will find a wide variety of classes for the beginning to advanced jewelry maker; just what you need to build new skills.


Wubbers Mandrel Pliers wire and sheet metal use chart.

Follow the wire and sheet metal gauge recommendations for your size of mandrel pliers — an easy to follow chart is featured on each package.


Recommended tools for the jeweler’s bench:


Follow these steps to form and cut wire links using Wubbers mandrel pliers and a jeweler’s saw:


Use nylon-jaw flat-nose pliers to easily straighten wire for jewelry making.

Step 1: Begin by straightening the wire. Pull the wire through nylon-jaw flat-nose pliers to easily straighten it. If you are planning to solder your links, avoid plated wire; instead use solid brass, copper, nickel, sterling or silver-filled wire.


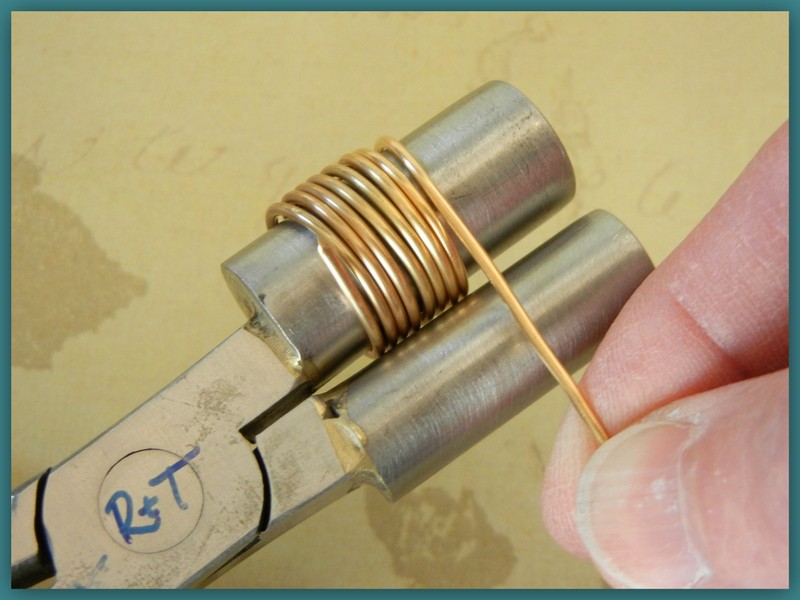
To make wire links for jewelry, twist the wire around the Wubbers mandrel pliers.

Step 2: Begin wrapping the wire around your mandrel of choice. As you coil, maintain even pressure so the links come out uniform. With the round mandrels, you can rotate the wire on the mandrel to make a continuous coil; for other shaped pliers, you will need to open and close the pliers’ jaw with each complete pass.


Continue coiling the wire to make wire links for chain making.

Step 3: Continue coiling the wire. Make a coil that is two wraps more than the number of links you need; the first and last coil will not make a complete link.


Tape wire coils before cutting with a jeweler's saw.

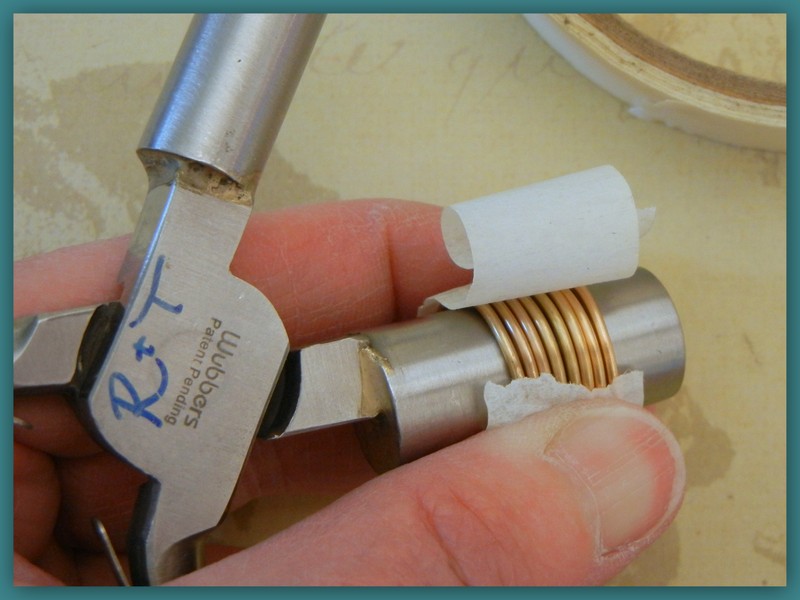
Step 4: Pinch the wire coils tightly together, and apply a layer of low-tack masking tape around the coil. This will keep the wire in place while sawing. Slide the taped coil off the mandrel pliers.


Sawing metal wire links with a jeweler's saw and bench vise.

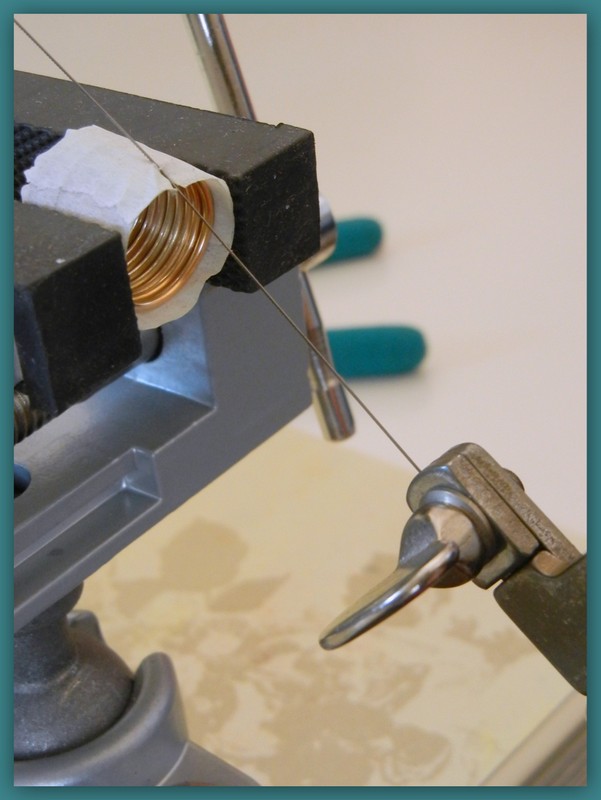
Step 5 – Version A: Attach a swivel vise to your workbench and place the wire coil in the padded jaw. Gently tighten the jaw so the wire coil is held firmly in place–but not so tightly the coil becomes misshapen. Thread your jeweler’s saw with the blade’s teeth facing down and out. You are ready to begin sawing. To avoid nicking the wire, angle the saw blade slightly so the blade only touches the wire being cut.


How to cut wire links with a jeweler's saw frame and saw blades.

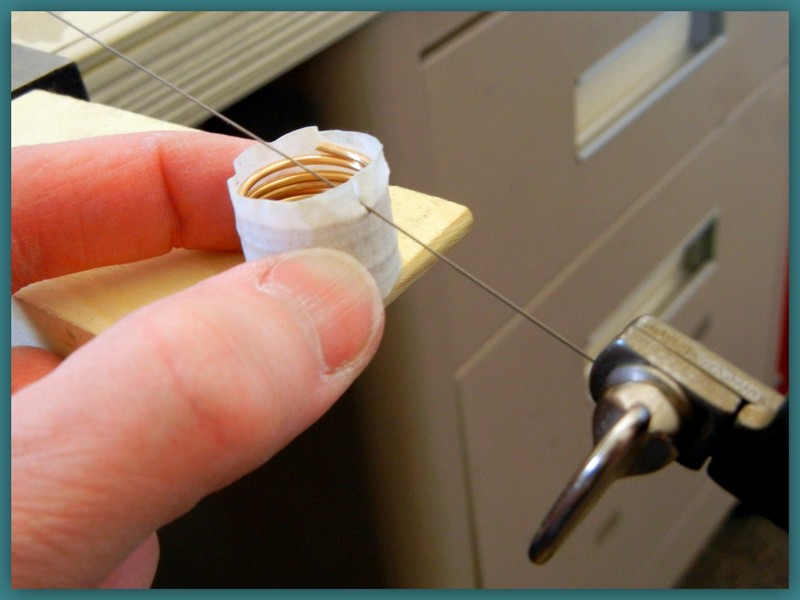
Step 5 – Version B: Attach a bench pin to your workbench and firmly hold the wire coil on the edge of he pin. Use a jeweler’s saw to cut the wire coil from top to bottom. To avoid nicking the wire, angle the saw blade slightly so the blade only touches the wire being cut.


Align the ends of your wire links with flat-nose pliers so the fit is snug.

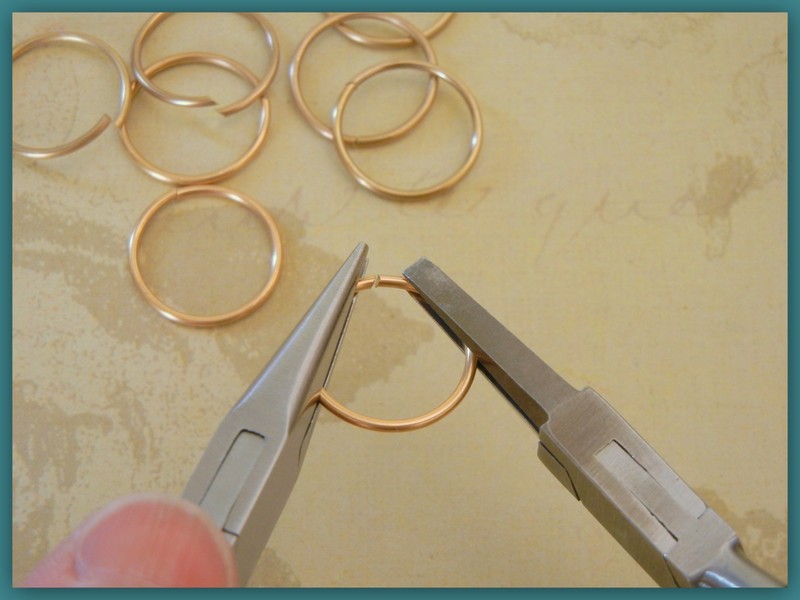
Step 6: Use flat-nose and chain-nose pliers to align the cut ends of the wire links. The cut ends need to fit snugly together for soldering.  Your wire links are ready to solder.


Wubbers Mandrel Pliers are perfect for forming handmade wire jewelry components.

Wire links in four fun shapes — handmade and ready for your jewelry-making project.


Make things!

Mollie

How to Make an Adjustable Wire Bangle Bracelet

July 9, 2014

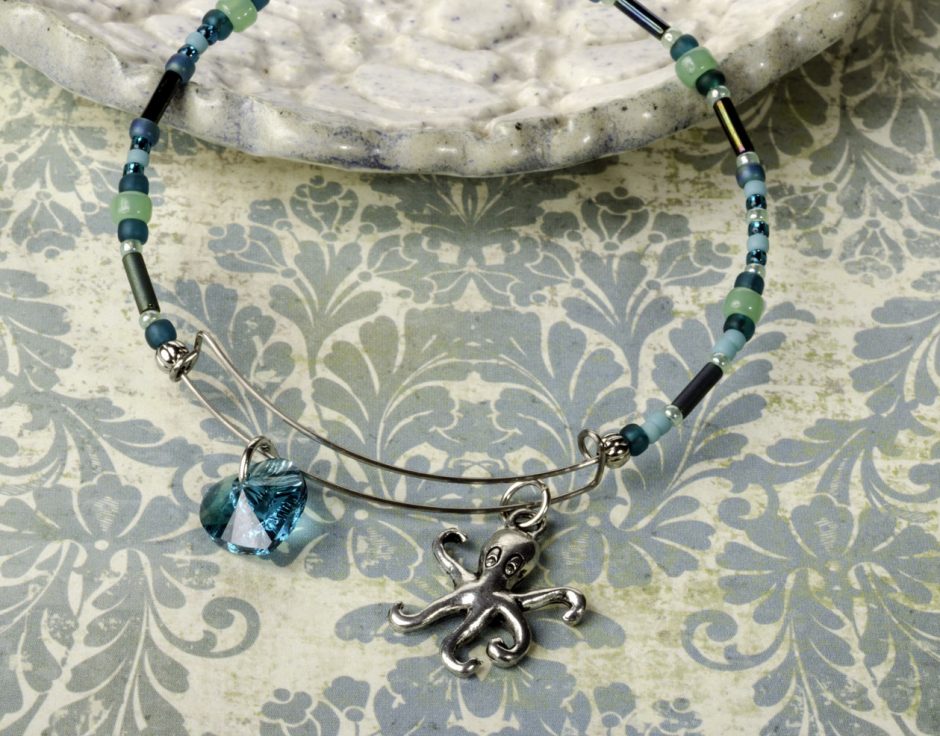
I love the charm-adorned “Alex & Ani” style adjustable wire bracelets that have been gaining popularity, and of course wanted to make my own version. For ease, I chose to fabricate my bracelet from Memory Wire. Memory Wire is made of durable stainless steel, and comes in the perfect round bracelet shape and the additional wire forming can be easily made with Memory Wire bending pliers. An added benefit to using Memory Wire is it can be adorned with colorful beads from Toho Seed Bead Cocktail Mixes. Here are the step-by-step instructions to make my “Happy Octopus” Adjustable Wire Bangle Bracelet. Continue Reading…

Fast & Fun DIY Flower Cabochon Bobby Pins

May 24, 2014

Cabochon flowers are a super easy way to add a splash of color to your life! With flat backs for easy gluing, they’re a cinch to add to any number of craft projects. This tutorial shows you how to embellish the flowers then add them to bobby pins to make sparkling DIY hair accessories. It’s a great project for kids, seniors, girly get-togethers and parties.

Only a few supplies are required:

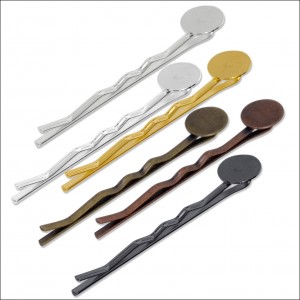
Flat Pad Bobby Pins
Flower Cabochons
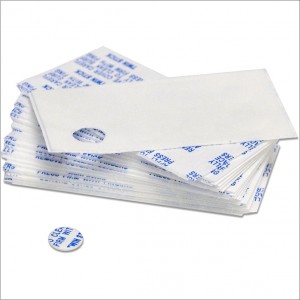
Adhesive Dots
Paint Dabbers
Glitter!
White Glue Paint Brushes or Cotton Swabs for Glue

If desired, color the flower using paint dabbers. While the paint is still wet, dip the outer petals into glitter. If you’re not coloring your flower first, add a light layer of glue to the outer petals before dipping them in the glitter.

Apply the adhesive dot to the pad of the bobby pin.

Attached your embellished posie and you’re done!

Have fun & sparkle on!

Did you know? …
You can buy the supplies to make this project now:

adhesive dots

Click to Shop Adhesive Dots

How to make chain maille (from a kit)

May 14, 2014

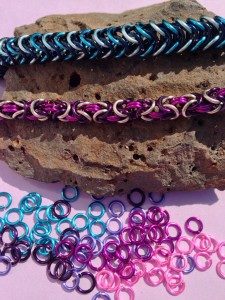
Rings & Things has added a whole new line of enameled copper jump rings and clasps from Weave Got Maille, and a handful of Byzantine kits and box chain kits to go with them.

Weave got Maille Bracelet Kits and Jump Rings

Weave got Maille Bracelet Kits and Jump Rings

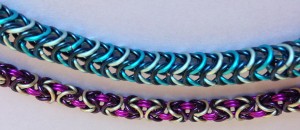
Melissa and I tested the kits, to produce some quick example pieces for our website, and I have to say, I think the kits are a great way to go for anyone who is new to chain maille, or to a specific weave of maille.

Weave Got Maille kit Chain Maille Bracelets

Weave Got Maille kit Chain Maille Bracelets

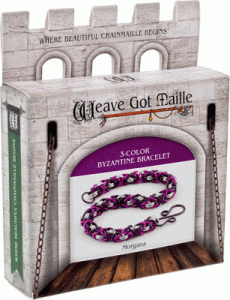
I chose to use the Morgana kit, which produces a 3-color byzantine chain maille bracelet. There are enough rings in the kit to make a bracelet up to 8 1/2″ long, but the final length can be shortened easily by stopping at the end of any completed unit.

Morgana Bracelet Kit

Morgana Bracelet Kit

The instructions are the property of the kit maker, so I won’t be listing the step by step instructions here, but the step-by-step sheet included has great close-up pictures and is easy to follow (and once you have made up the kit project, you have the instructions to make as many more as you like, by just purchasing additional jump rings and clasps).

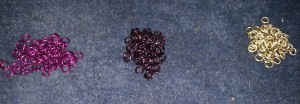
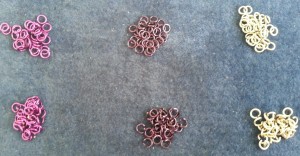
Jump rings from Weave Got Maille kit

Jump rings from Weave Got Maille kit

Here are my thought and hints for weaving chain maille painlessly.

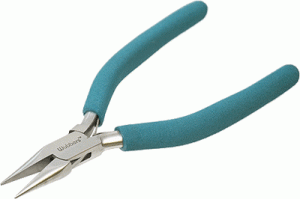
  • Yes, you do need two pair of chain nose pliers. Do not try using a pair of flat nose or a pair of round nose as a substitute. They can both be regular, or bent, or a combination of styles, but you want smooth pliers, because serrated nose pliers will mar the finish on the rings. The smaller the rings that you are using, the more important it is to have pliers with a narrow tip, and ones that are comfortable to hold. My personal choice for comfort and pricing are the full size wubbers pliers. The longer cushioned handle helps prevent hand fatigue and the tips are reasonably narrow. For extremely narrow tips, lindstrom pliers can’t be beat, but they are a definite investment.

Wubbers Chain Nose Pliers

Wubbers Chain Nose Pliers

  • To weave the maille quickly, you will need to pre-open some rings, and pre-close others. Only open the rings as wide as you need to slip them over the appropriate quantity of other rings. If you open the rings too wide, it is harder to close them neatly and tightly. For the pre-closed rings, make the closure as seamless as possible. It is much easier to close the rings neatly at this stage than it is when weaving. An illustration of the correct way to open and close rings is included in the instructions.

Opened and Closed rings from Weave Got Maille Kit

Opened and Closed rings from Weave Got Maille Kit

  • Use a soft surface to work on. The bead mats are ideal, since they allow you to “scoop” up the closed rings without catching on the material, and the rings that you drop (and you will) don’t go very far.
  • When weaving, rest your hands on the surface, or as close as you can comfortably be to the surface. The extra support will help prevent the project from slipping and rings from escaping.

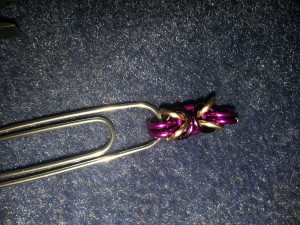
One of the tools in the kit is a large paperclip. Attaching this to the beginning of the project accomplishes two things, it gives you a “handle” to work on the chain while it is short, and it reminds you which end you are working on.

Byzantine Chain first unit

Byzantine Chain first unit

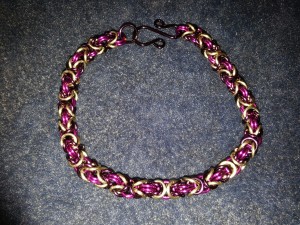
Here is my finished project. You may notice that the design doesn’t quite match the design on the box. This is because I made a mistake on the second unit of the chain, by reversing my “b” and “c” colors. Rather than take it apart and re-do the section, I chose to work with this as a new pattern, and alternated each correct unit with an incorrect one. I kind of like the variation in the design. Sometimes errors allow for new ideas.

Melissa made a box chain bracelet, and then, having learned the pattern, designed this pair of Night in Emerald City box chain earrings.

Night in Emerald City earrings

Night in Emerald City earrings

Are you a chain maille maker? Reply below if you have any great hints to share.

~ Rita ~