Browsing Category

Rings & Things Products

Micro butane torches for jewelry

February 27, 2012

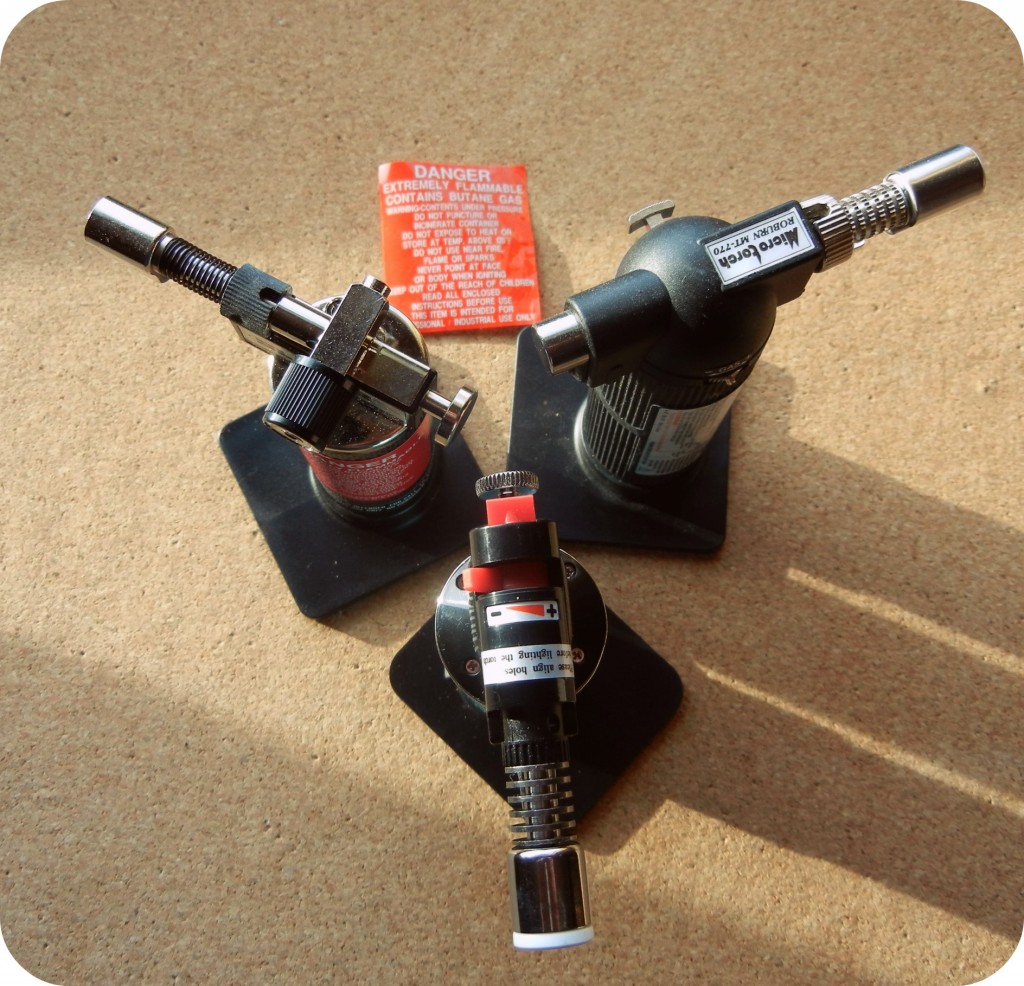
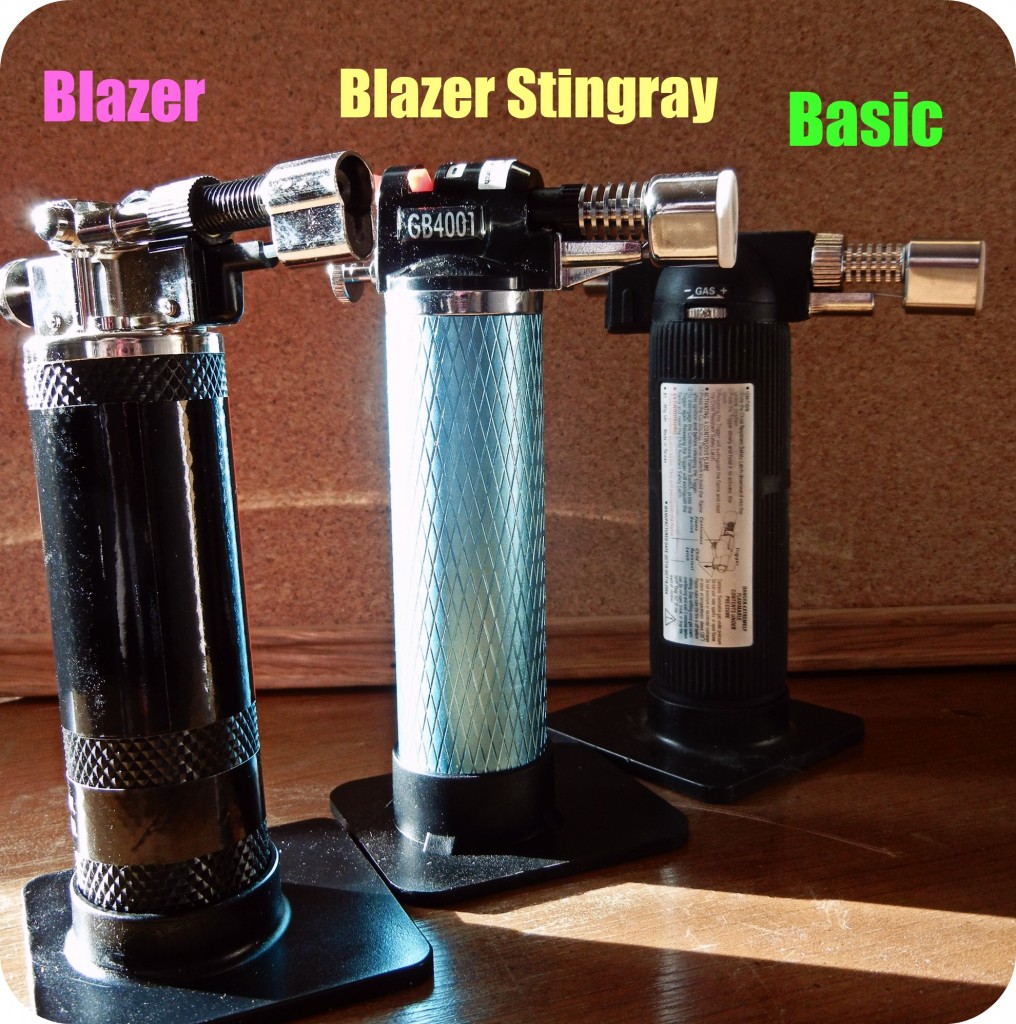
It is great to have choices – but sometimes comparison shopping is such a chore! We recently added two new Blazer brand micro-torches. While our selection of three butane torches isn’t exactly overwhelming, it still raises questions. Why choose one over the other two? They all look about the same … and in many ways, they are the same:

  • No appreciable differences in height, width or diameter.
  • All three use triple refined butane (buy it locally due to shipping restrictions).
  • All three include a plastic stand for hands-free operation.
  • All three have flame adjustment options.
three-micro-torches-rings-things
Micro butane torches are only about 6″ tall but easily reach flame temps of 2400 F. All three of these torches can handle small soldering, fusing and enameling jobs.

However, in several important ways, these three little torches do differ. The most obvious way is in price: the Blazer costs over twice as much as our original little torch. In fact, you can buy an entire mini torch kit, which includes a torch, soldering blocks, a tripod with mesh, tweezers and soldering pick, for less than the Blazer torch. Yet …

three-torches-top
Micro torches are easy and safe to use – just use common sense. Never point the flame at yourself and keep combustibles out of the way. The heat is very concentrated and easy to control.

The Blazer is by far the easiest micro torch to use! It is a professional model torch, not designed for home use. It doesn’t have a child safety lock, so if you have any concerns about unauthorized use of your tools, this might not be the best choice (I hope it goes without saying you should keep any torch out of the reach of children). However, if you hate fumbling around with levers and buttons, then you will *love* the black Blazer torch. It has a really high quality ignition system. I won’t go into boring details on that. Just know that, while trying to do a fair comparison of the three torch options, I kept instinctively reaching for the Blazer because it was just more fun to use. Good design works! Plus, its burn time is about double that of the entry-level micro torch. Refilling butane is the least fun part of using a micro torch, so that detail counts for a lot in my opinion!

I really wanted to like the Stingray model the best – it is my favorite color after all! – but the safety lock and flame control just weren’t my favorite. So if budget is the biggest factor, the our original micro torch is still a great deal. It gets the job done. But if you can afford to splurge a bit, the Blazer torch is a tool worth owning. And if you truly want middle of the road performance and price – with the prettiest color! – then the Stingray fits the bill.

Here’s the stats in handy bullet form, with torches listed from Highest/Greatest to Lowest in each category:

  • Burn time: Blazer, Stingray, Basic
  • Price: Blazer, Stingray, Basic
  • Ease of use: Blazer, Stingray, Basic
  • Safety lock: Basic, Stingray, Blazer

Whether you want to fire small Art Clay silver pieces, torch enamel, solder metals or fuse fine silver, a micro torch is a great introduction to using heat! Here’s a little tutorial on making ball-end head pins to get you started. ~ Cindy

Pretty in pearls – freshwater keishi pearls for jewelry designers

February 24, 2012

Hi bloglandia! Pearls are a standard in jewelry, yet the shapes and colors available these days are anything but!

swirls-pearls-rings-things sondra barrington santa me teresa harkins

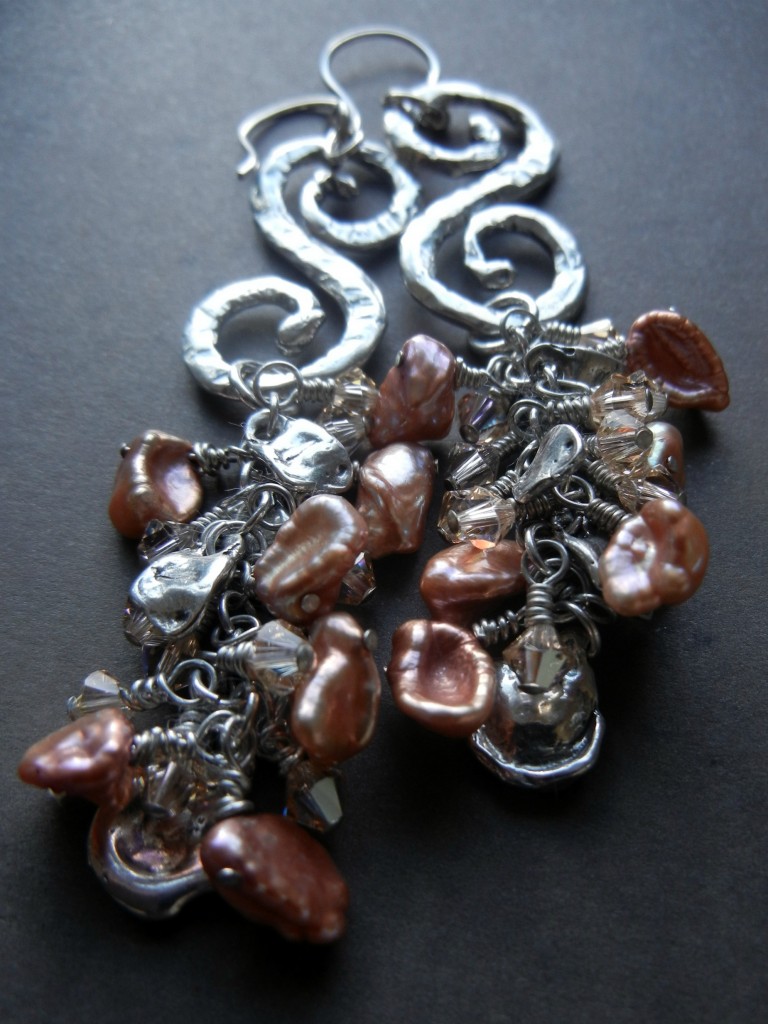
Sondra mixed freshwater keishi pearls with keishi-shaped sterling silver beads and Swarovski crystals. The clusters of pretties hang from Santa Me sterling silver swirls.

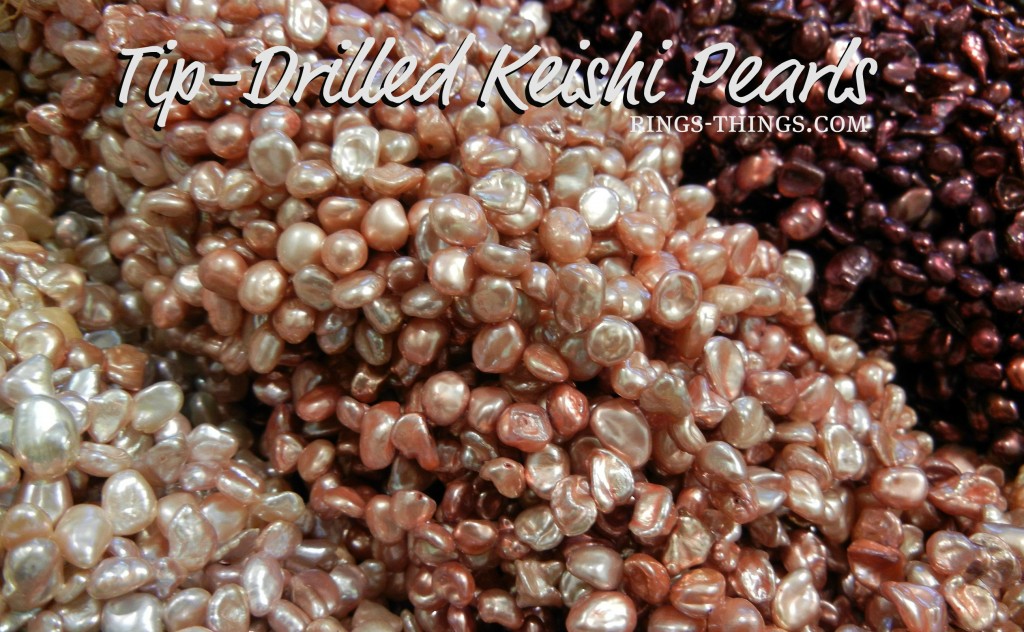
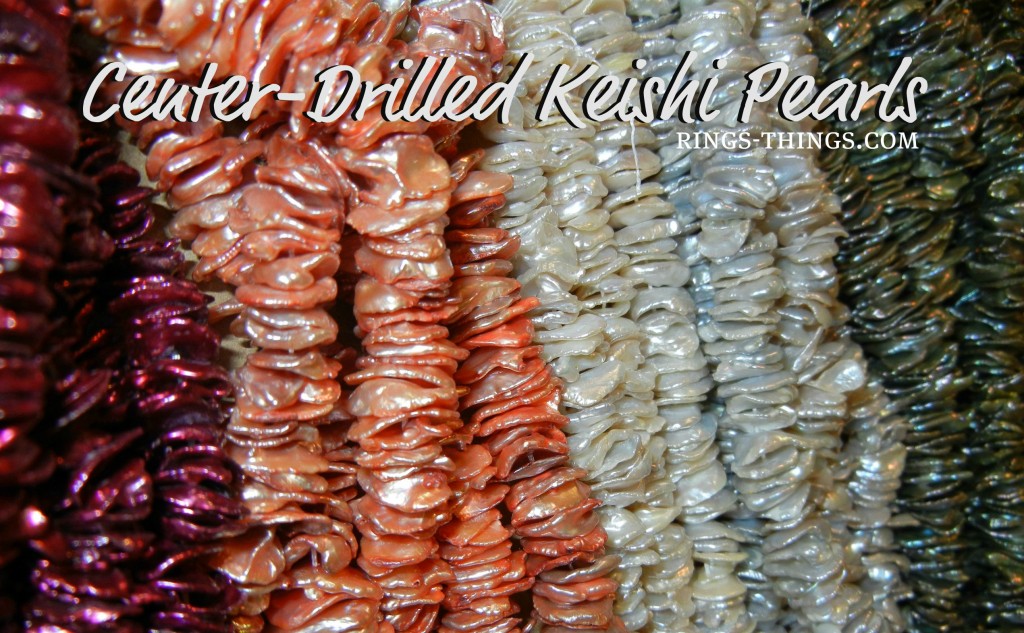
Keishi pearls are actually collapsed pearl sacs. To me they look like shimmery, shiny souffles that have drooped into ruffly, lacy waves. The picture below shows several shades of tip-drilled keishi pearls, including the rose ones Sondra used in the above earrings. Virtually all freshwater pearls are enhanced in one way or another, but I love how the colors still have such “natural” variation. Quite lovely.

tip-drilled-keishi-rings-things.com

Tip-drilled keishi pearls add great texture to strung designs too.

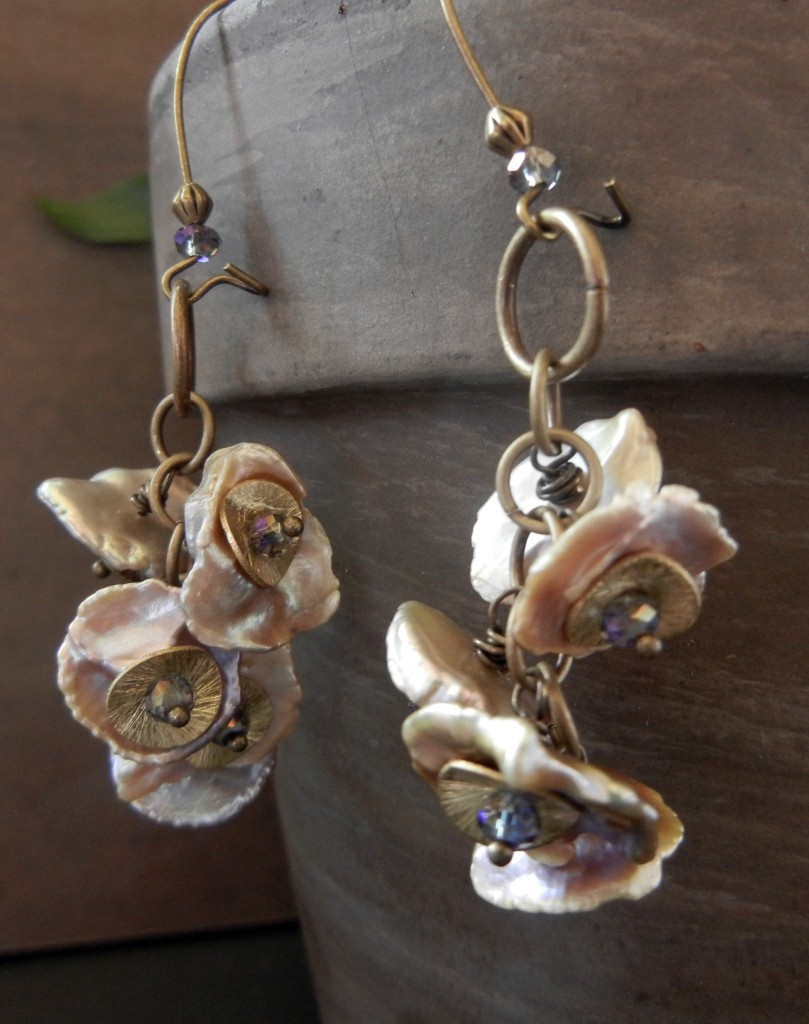
Pearls are very soft compared to other gem materials. Since earrings are generally safe from much wear and tear, they are a great way to feature pearls, like with this Rosie Posie design:

center-keishi-sparkle-rings-things

Wavy brass disks, 3mm sparkly glass rondelles and antiqued brass findings paired with center-drilled “cornflake” keishi pearls.

In addition to being soft, pearls are also sensitive to chemicals and solvents, so it is always best to put your pearl earrings on *after* you’ve applied your hairspray, perfume and such. They are pretty enough to warrant a little TLC!

I had a bit of sticker shock when I first saw the price for center-drilled keishi like the ones in the earrings above. Compared to our other freshwater pearls, they seemed pricey. But then I realized just how many of these guys you get on a strand: about 100!

keishi-rings-things.com

Each cornflake pearl is only 1-3mm thick – so 16″ strands hold a LOT of them!

If you’d like to learn more about how freshwater pearls are cultured and created – and more care recommendations! – visit our Gemstone Index. One last pointer on pearls: unless specifically noted, pearls almost always have small holes – even standard size head pins are usually too thick. Thin pins or 24-gauge wire works much better!

How to use charm bracelets to make necklaces!

February 20, 2012

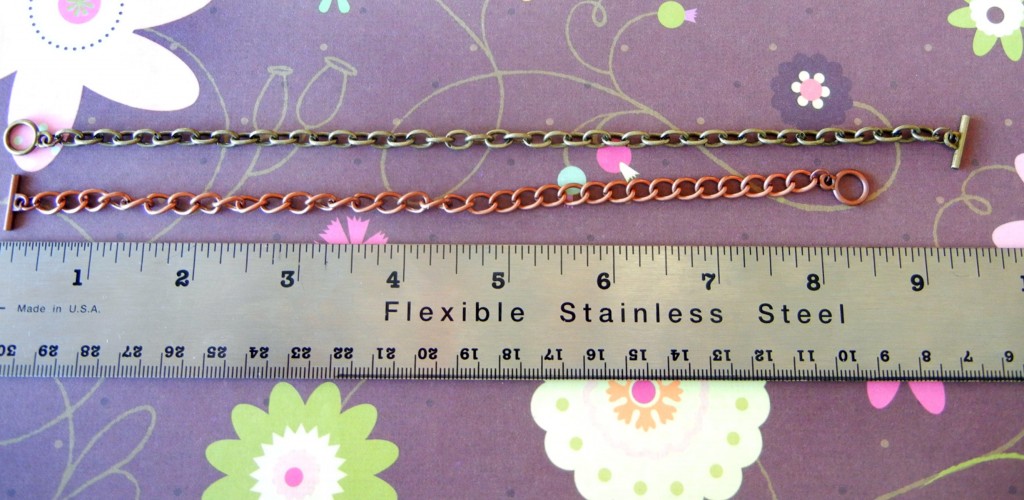
Hola, bloglandia! Today I wanted to share a quick and easy way to make necklaces using charm bracelets. Rings & Things has a great selection of ready-made chain bracelets with toggle clasps. The typical use is to leave the bracelet in one piece and add charms with jump rings for a charm bracelet. However, these bracelets are a bit longer than advertised.

long-long-bracelets

With clasps, the 7.5

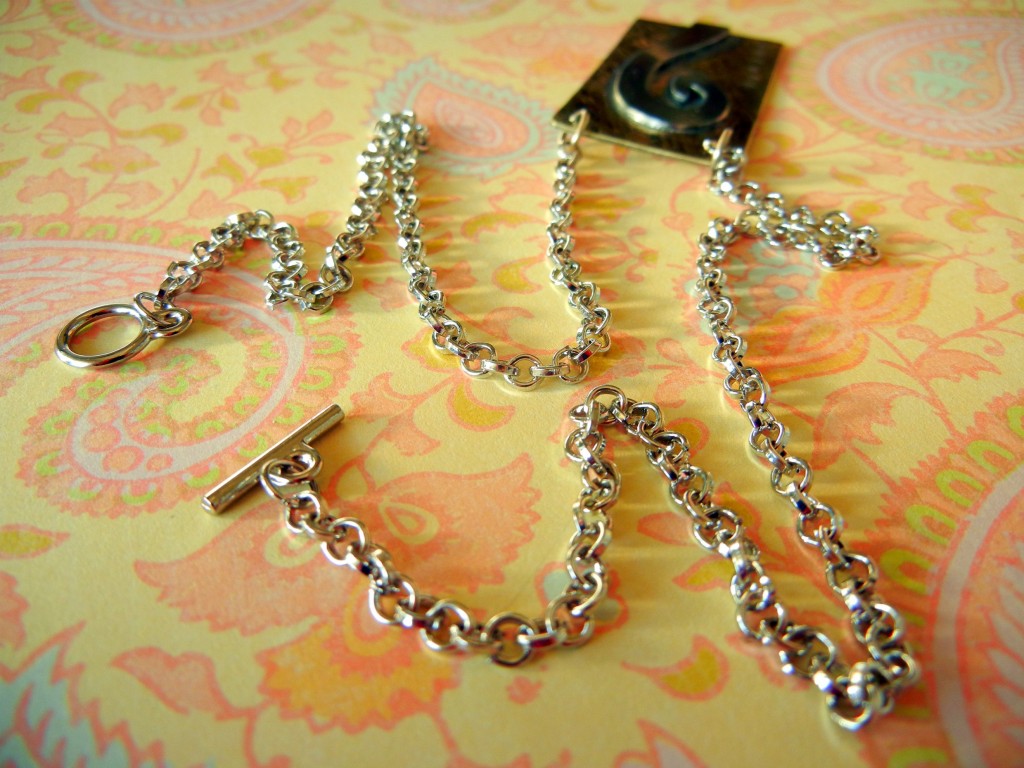
It is always better to have too much chain vs. not enough, so think of those extra links as a bonus you can use to make coordinating earrings. Or, do as I did and use two bracelets to make a necklace! Instead of removing extra links, you can also take advantage of the longer length by removing the bar from one and the loop from another to create a necklace!

convert-bracelets-into-necklace

My pendant had two holes, so I just attached on bracelet to each hole and viola! A 19

Here’s another example:

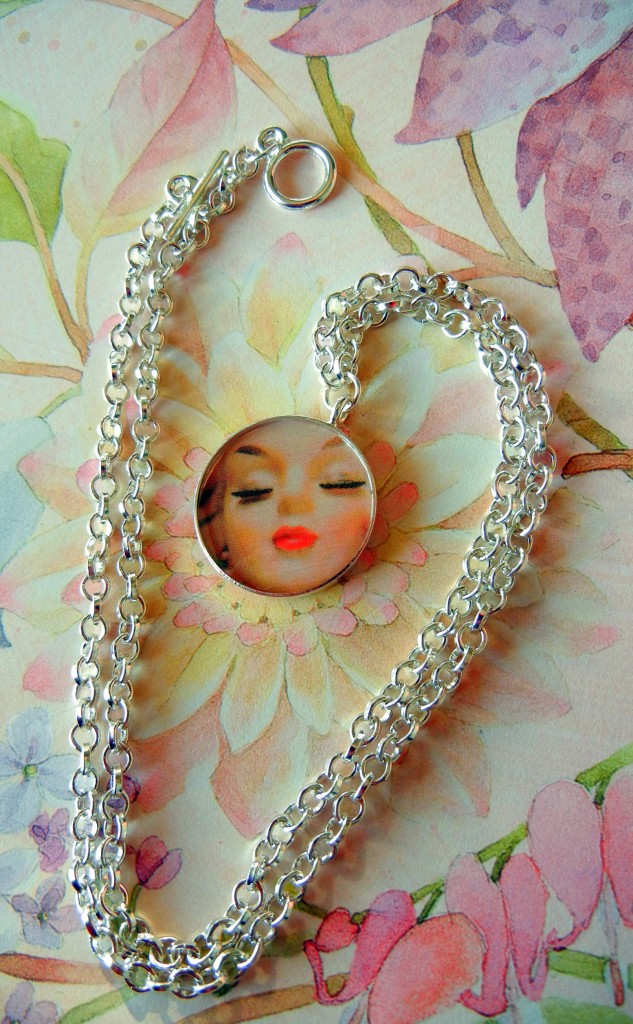
resin-necklace-pretty-lady

For this one, I attached the two bracelets with a single jump ring to my resin pendant.

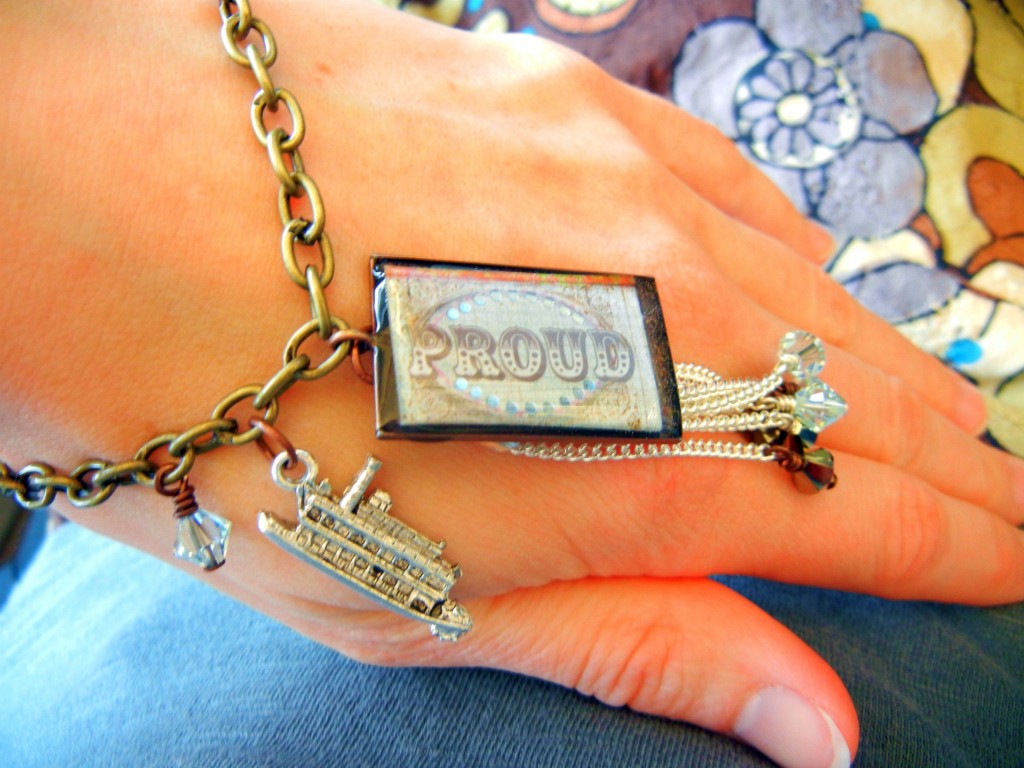
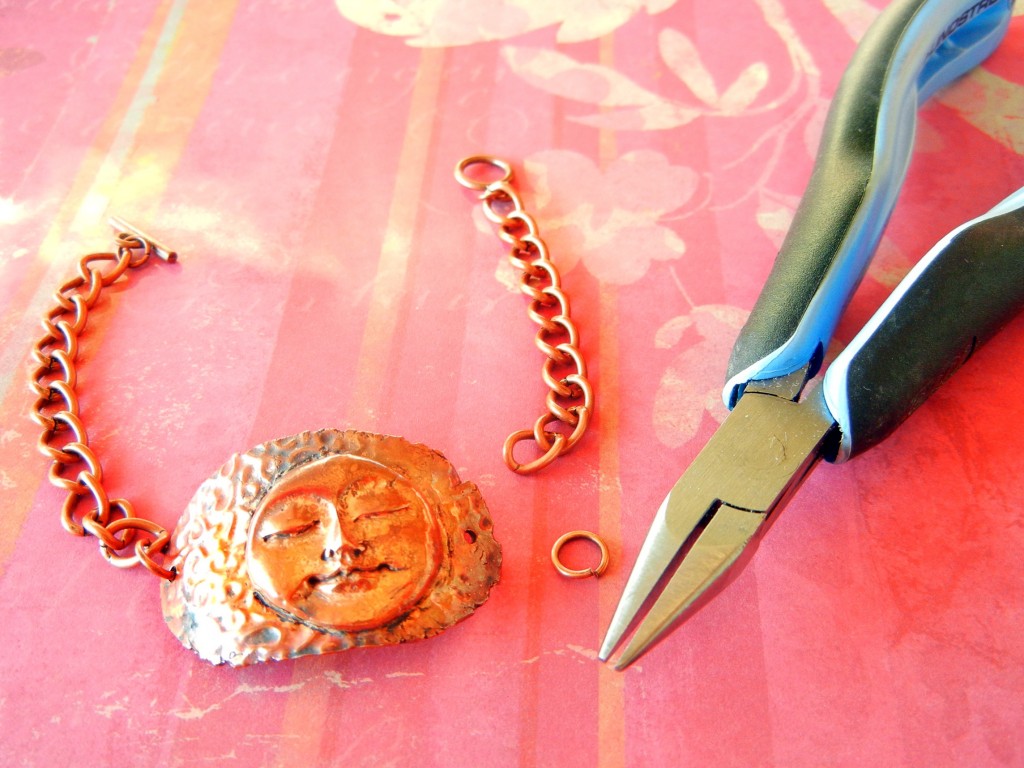
These extra long bracelets also make great anklets. And yes, they still make great bracelets! Here are two examples:

proud-mary-bracelet
altered-chain-bracelet

I simply removed a section of chain and replaced it with my handmade copper clay connector.

You might have noticed that all the focals for these pieces are handmade. Browse our resin and bezels, metal-working tools and metal clay selection to get busy making your own!

Tips for sawing sheet metal with a jeweler's saw

February 15, 2012

Hi bloglandia! Today’s blog is about how to use a jeweler’s saw. Why? Because if you want to cut clean shapes out of metal without bending the metal, you need a saw. All metal shears, even the really nice ones, bend the metal, at least a bit. It is just the nature of the beast. Also, unless you have the hand strength of ~ I don’t even know who! ~ you probably need a saw to cut metal thicker than 24 gauge.

A saw also allows you to cut very intricate designs. Pierced is the term for designs that are cut from within the metal, as opposed to coming in from the edge. However, “pierced jewelry” brings up a whole different category of jewelry when you search online!

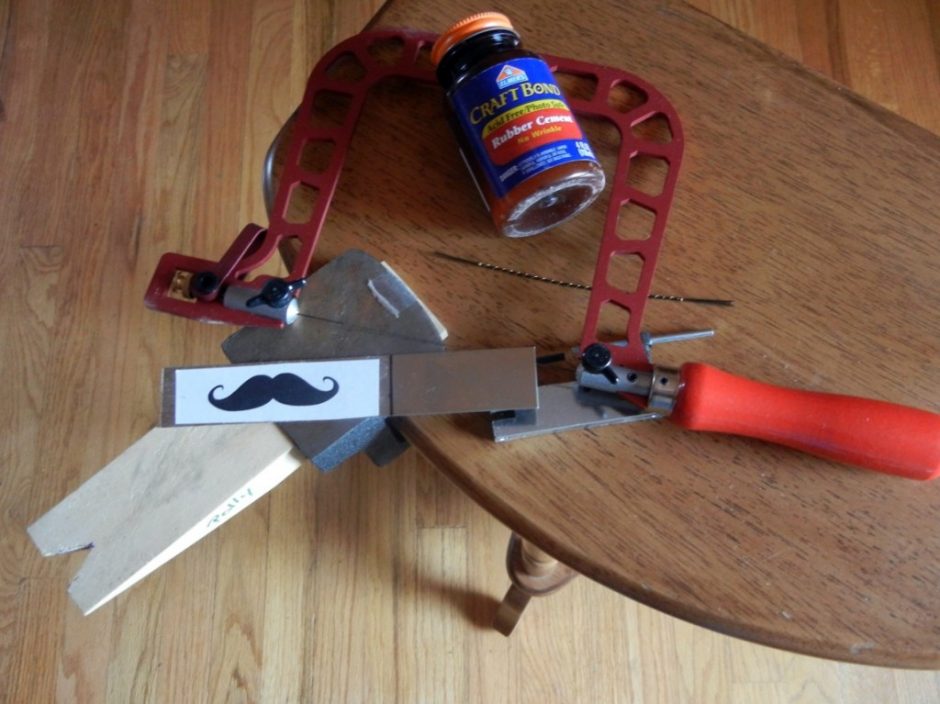
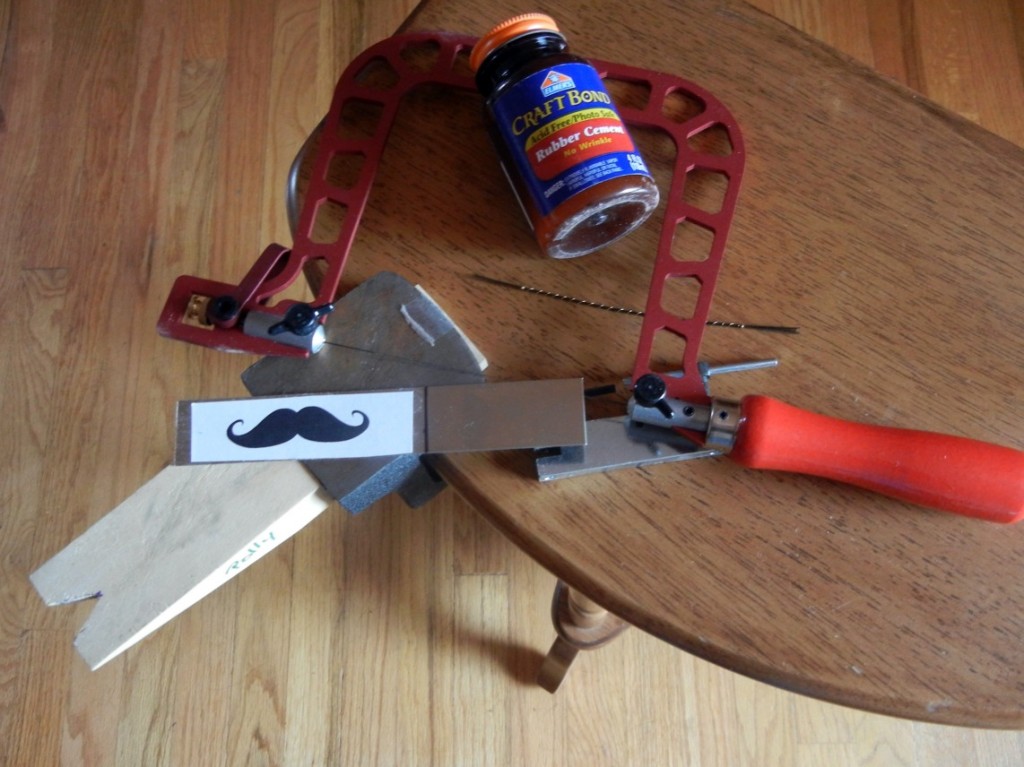
sawing-tools-rings-things
The basic tools needed for sawing metal.

Supplies needed for sawing your own metal shapes:

  • Jeweler’s saw frame – I’m using a pretty lux Knew Concepts frame, but the technique is the same no matter which saw frame you use.
  • Saw blades – Rings & Things offers both Form d’Arte (entry level) and Antilope (higher quality) saw blades. I think the higher quality is worth the price for less breakage, but it is up to you. Make sure to use the right size for the gauge of metal you are cutting.
  • Sheet metal – I like working with 20 gauge, but you might choose thinner metal if you’re planning to layer the pieces, or if you are working with pricey sterling silver.
  • Bench pin/ – I’m using a bench pin that’s been modified for sawing. Our bench block already has a V cutout. You’ll see why this V is necessary shortly.
  • Paper design – the more ornate the shape, the more you will challenge your skills!
  • Rubber cement – for adhering your design to the metal. Don’t think that you can draw your design onto the metal with a marker – it will smudge and blur and be impossible to follow. “Permanent” is a relative term!
  • Hole punch – optional – to pierce metal, you need to drill or punch a hole to insert the saw blade into. If you are sawing in from the edge of the metal, you don’t need a hole.
  • Cut Lube or beeswax – optional or not, depending on who you ask. Many people swear by it, but I typically prefer to saw without it. The lubricant is meant to keep the blade moving easily across the metal, but sometimes it gunks up the shavings and clogs the blade, so use it sparingly at first.

How to saw metal:

Adhere your design to sheet metal with rubber cement and let dry.

Insert saw blade into saw frame with the teeth pointing out (away from frame) and down (towards floor). Make sure you have the blade in there good and tight – a loose blade very quickly becomes a broken blade! Tension is key. (If you haven’t used a jeweler’s saw before, see post about Knew Concepts frames and tensioning.)

sawing-metal-rings-things
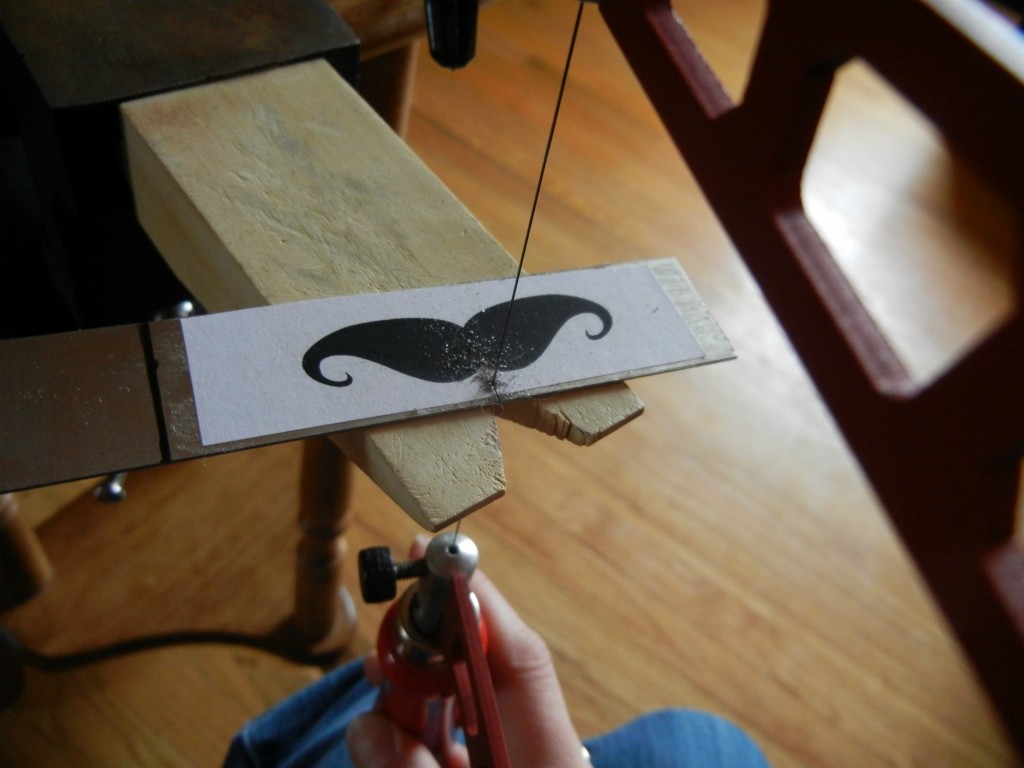
My left hand is holding the camera is this shot, but really it needs to be holding the metal down on both sides of the blade while I’m sawing.

Hold your metal in place on the bench pin with your non-dominant hand.

sawing metal rings and things tutorial
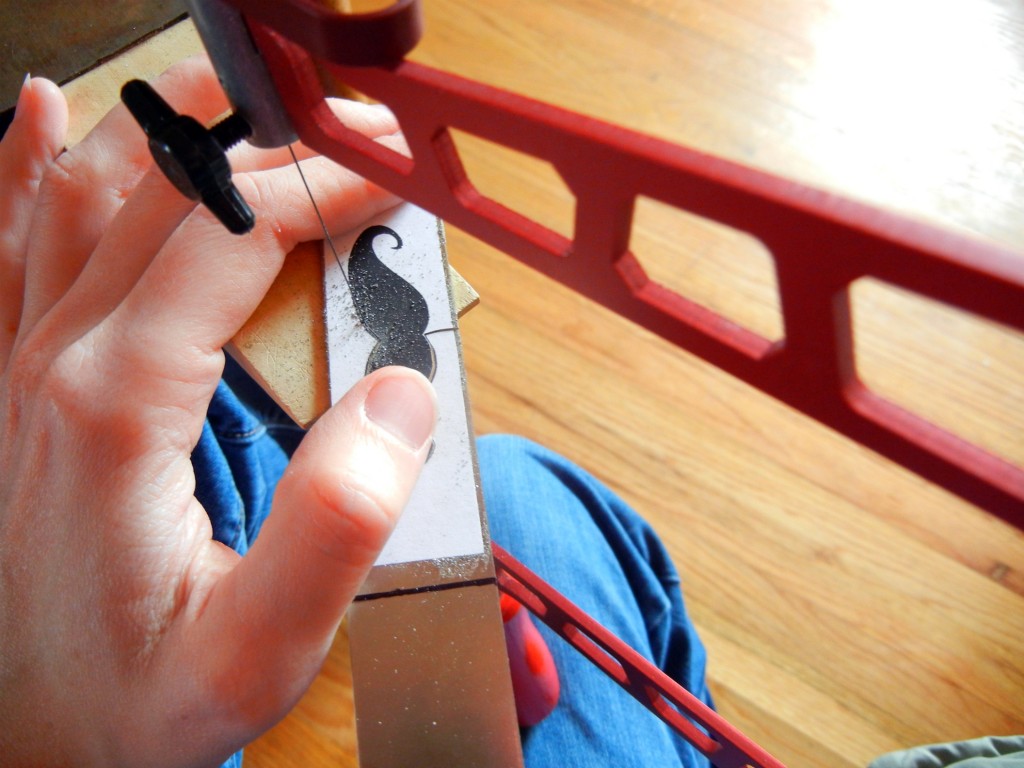
Supporting the metal on both sides of the blade keeps it from wobbling. Less wobbling = easier sawing.

Hold the saw frame between 90 and 45 degrees to your metal and start sawing. You are only sawing (removing metal) on the down stroke, but try to keep the sawing motion smooth and even on both the upstroke and down stroke.

sawing-nickel-silver-rings-things
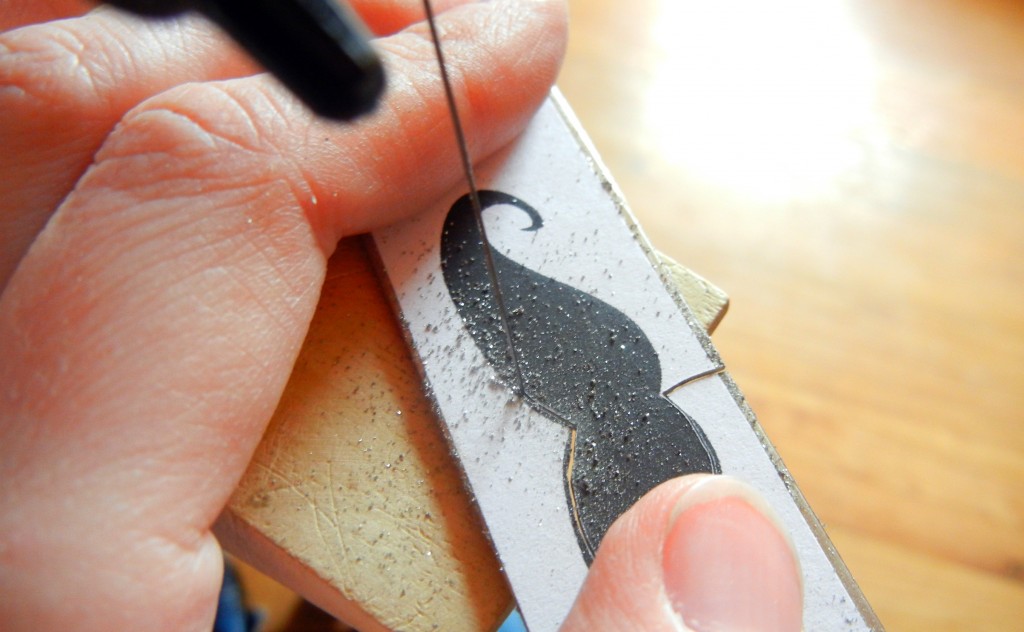
I try to keep the saw fairly stationary and rotate the metal to follow my pattern.

Follow your design! It takes practice, but you’ll pretty quickly learn how to maneuver your metal and/or saw to follow curves. Blow away the shavings every so often so you can stay true to your pattern. If the blade seems to be catching or it feels jerky, check your tension and/or apply a little lubricant to the blade.

Moving too quickly, especially when changing direction, is an easy way to break your blade. Smooth and steady wins the race. One of the most difficult things at first is not pressing too hard with the hand that’s holding the metal down. Hand cramps hurt, so take frequent breaks and be conscious of what you’re doing. It doesn’t take much pressure to keep your metal in place. It does, however, take that V-cut bench pin. You will (er, I did) break lots of blades and have tons of problems if you try to hang your metal off the edge of a table rather than supporting it on both sides of that V.

It is always a good idea to wear safety glasses while you are sawing. Everyone – yes EVERYONE – breaks blades, and you’ll notice yourself getting your face closer and closer to your project. So again, take frequent breaks and also be sure to set up your sawing station at a height that is comfortable for you.

Happy sawing!

Edited January 2022 to update links.

Bead Shows!

February 7, 2012

“For beading fanatics, it’s like being a kid in a GIGANTIC candy store.”

bead-shows-rings-things

Prepare to be dazzled.

What’s that? Tasty beads at sweet prices? Yes indeed! Our 2012 Bead Shows are starting up again in just a few weeks! Our crew kicks off the season with our Spokane Bead Frenzy and then travels all across the continental United States with a truckload full of beads and other jewelry-making goodies. We actually do put out candy dishes to help customers maintain their energy as they peruse the thousands and thousands of beads available!

If you haven’t already, now is a great time to sign up to get an invite to our shows! Admission is free. Bring a friend to help you decide – or to help carry your haul! Plus, if you plan a week or two ahead, you can have a regular stock order delivered to the show for no charge. Translation: free shipping! Then, if you purchase more than $100 at the show, you’ll get a free shipping coupon for your next phone, catalog or online order. We visit most cities on our route 2x per year, so if you keep up this cycle long enough, you might not ever pay for shipping again!

Still not convinced? Here’s what some of your beady friends have to say about Rings & Things Bead Shows:

“For those of you near the cities below, check out this schedule to make sure you don’t miss it!!” http://abeadaday.blogspot.com/2011/09/rings-and-things-bead-tour.html

“So much goodness – I can’t begin to tell you.” http://justatish.blogspot.com/2011/06/rings-things-bead-tour-and-give-away.html

“Clients want something unique, handmade, not mass produced. That’s why these trips are worth it to me…” http://lexibeads.blogspot.com/2011/06/rings-and-things-bead-tour.html

“They set up a sea of beads and allow you to browse with no pressure to buy.” http://karenlandis.com/2011/05/19/rings-things-bead-tour-in-charlotte/

“When I walked into the room, I couldn’t believe my eyes. There were tables lined up with strands and strands of beads.” http://trendygal.com/?p=77

“For beading fanatics, it’s like being a kid in a GIGANTIC candy store.” http://donnahuebsch.wordpress.com/2011/06/28/rings-things-bead-tour/

All the Bead Show details are right here. Have questions? Contact us here on the blog or via Twitter, Facebook or regular old email. Hope to see you there! ~ Cindy

How to choose a Knew Concepts saw for jewelry making

February 5, 2012

Hi bloglandia! Do your jewelry projects ever seem to stack up, one on top of another? Mine do. Maybe you are able to focus entirely on each project, finish and clean up before moving on to the next, but it seems I always have 10 different things going at once. Right now I’ve got a bunch of metal shapes to saw out and then solder together. The next few blog posts are going to use a few of these projects to highlight different tools and techniques, starting with the Knew Concepts saw frames and ending with Blazer micro torches.

sawing-tools
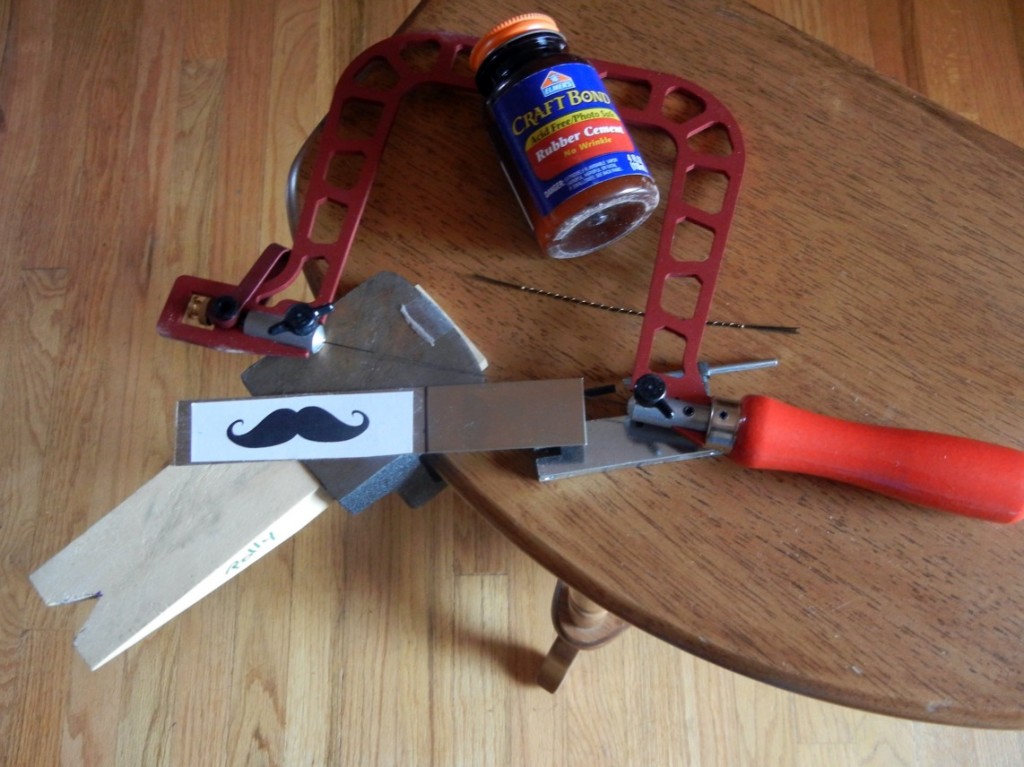
Saw frame, saw blades, bench pin, rubber cement, sheet metal and a design! Ready to saw!

So, what is new about Knew saw frames, other than their distinctive shape and bright red color? Well, most of us learned to saw with standard adjustable saw frames. In order to get the right tension on your blade with these frames, you press the frame between your body and a table or other sturdy object. By inserting the blade while the frame is bowed, the blade gets pulled tight into place when you release that bow. But – ow! That action bruised my breastbone. And when you break saw blades as often as I did starting out, it becomes a real chore.

Knew Concepts saw frames are different in a number of ways. Obviously, they are bright fire engine red. They are extremely lightweight, which makes them more comfortable to hold. And they are available in a whole lotta different models! How to pick?

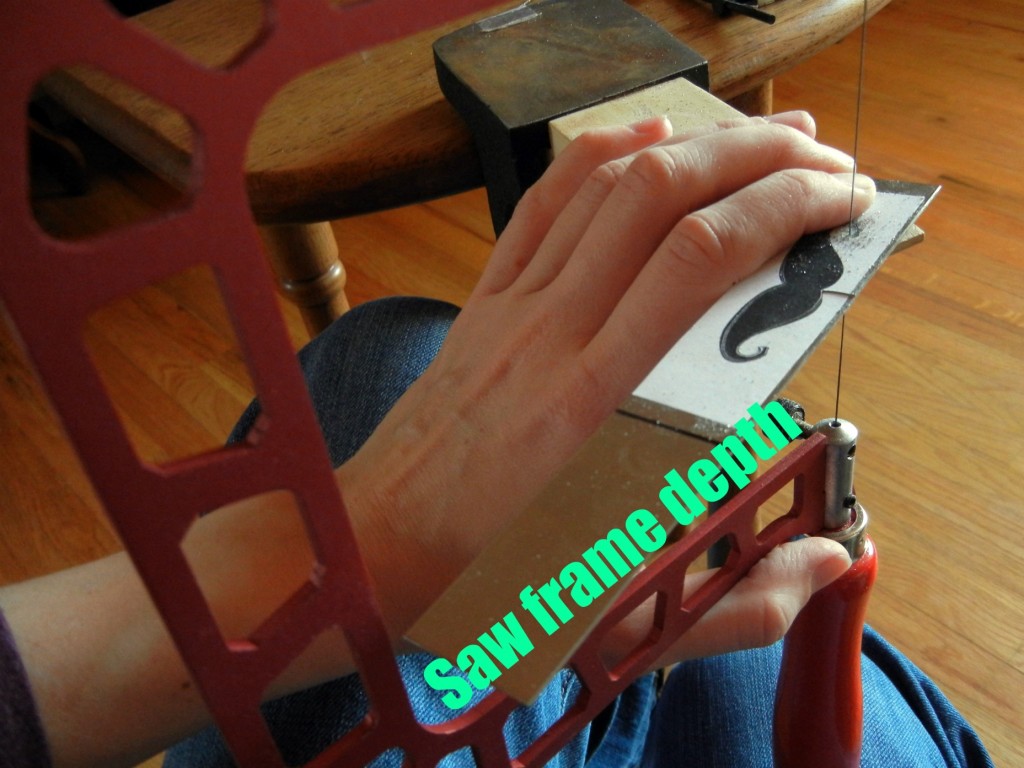
1. Size. 3″, 5″ or 8″? My vote is for 5″, unless you plan to work with very large or very long pieces of metal, in which case the 8″ frame makes sense. If your hands tire easily and you only work with small pieces, than the 3″ frame might meet your needs. I’m a middle of the road kind of girl! Note that the size refers to the depth of the frame. The height for all Knew frames is fixed. This means you won’t be able to re-use broken blades by shortening your frame. (But wouldn’t you rather not break the blade to begin with? Knew frames help with that!)

saw-frame-depth
If you want to pierce the very end of a long strip of metal, you need either a large frame or the swivel model.

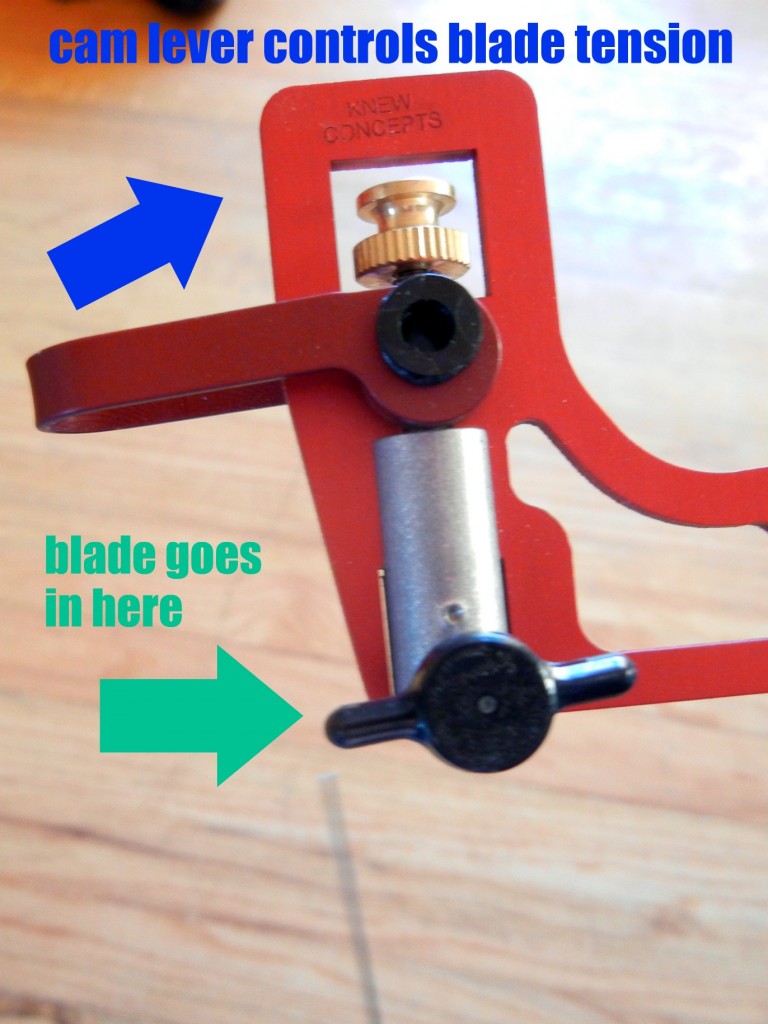
2. Blade tension options. Screw tension or cam-lever tension? I 100% endorse the cam-lever tension because the tension does not change when you switch blades. Instead of sandwiching the frame between your chest and the table every time you break a blade or move to a different area of a pierced design, you simply flip the cam-lever switch! What a relief!

cam-lever-tension
The cam-lever option is totally worth a few extra bucks.

3. To swivel – or not to swivel? That is the final question. Personally, I found the swivel to be an extra complication that I didn’t really want to mess with. However, if having a really lightweight saw that can still get into tight corners is important, buying the small 3″ saw frame with the cam-lever and swivel would accomplish that goal.

After testing the different options, I decided the 5″ Cam-Lever Tension model was my favorite (69-169-52 – it is the one with the staff choice icon in our online store). It is comfortable to hold and large enough to handle pretty much any jewelry project I would undertake.

Of course, the first question should have been: do I really need a Knew Concepts saw frame when I can buy a standard jeweler’s saw for less money? The answer depends on how you define need! If budget is the #1 concern, then maybe the answer is no. An adjustable saw frame has been the industry standard for years. However, if you want to invest in a tool that will serve you well for years, and which will make the – let’s face it – somewhat tedious job of sawing more enjoyable, then yes, you kneed a Knew frame! ~ Cindy

Edited January 2022 to update links.

Sweet heart jewelry designs – for Valentine's Day and more!

January 19, 2012

Valentine’s Day is just a few weeks away. How did that happen?!? But there is still plenty of time to make your own jewelry to wear, to gift, even to sell (how many men wait until the day before to purchase gifts, hmm?).

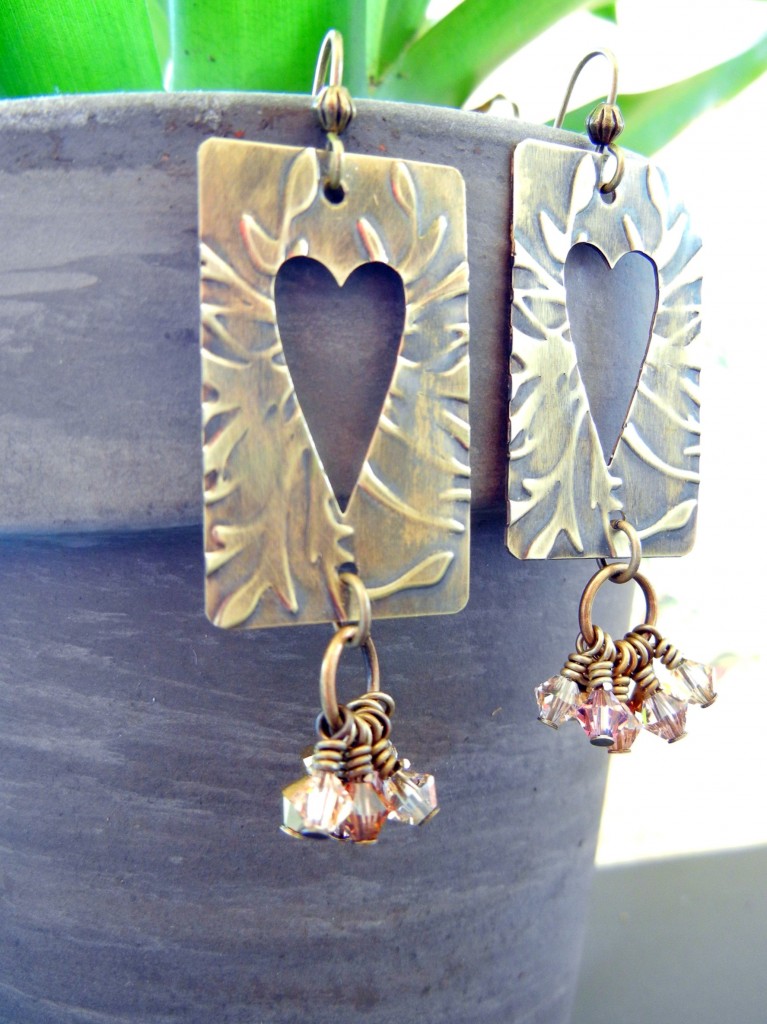
brass-heart-vintaj-earrings

Brass heart cutouts textured with the new Vintaj BIGkick machine.

Mollie made the above earrings with our brass fairy doors and the Vintaj BIGkick (tutorial coming soon!). Hearts are popular year round. Especially SWAROVSKI crystal hearts – they are so sparkly!

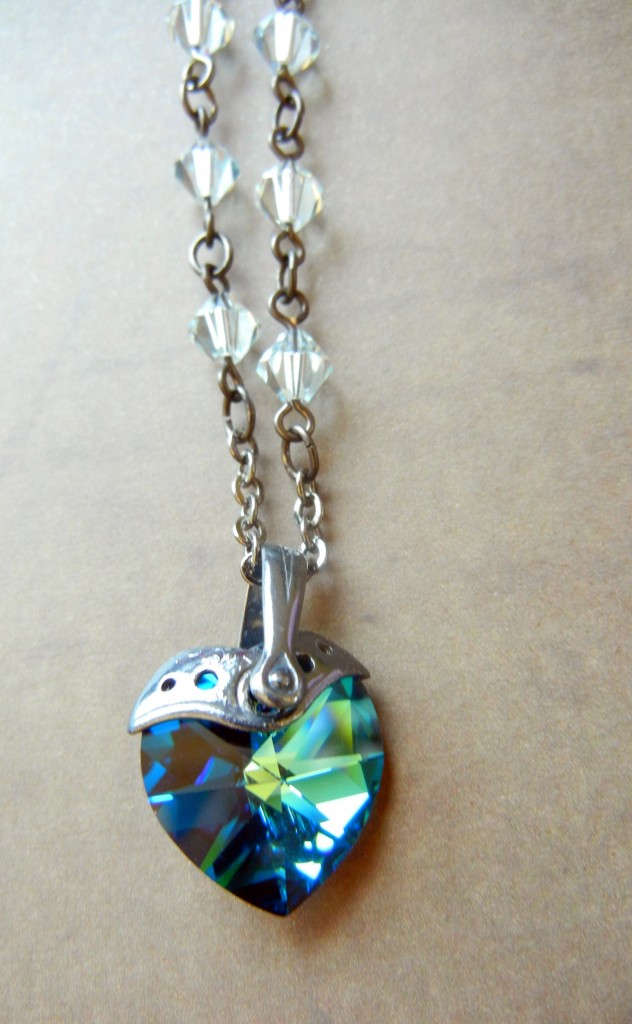
blue-valentine

Mollie’s “Blue Valentine” necklace is a classic.

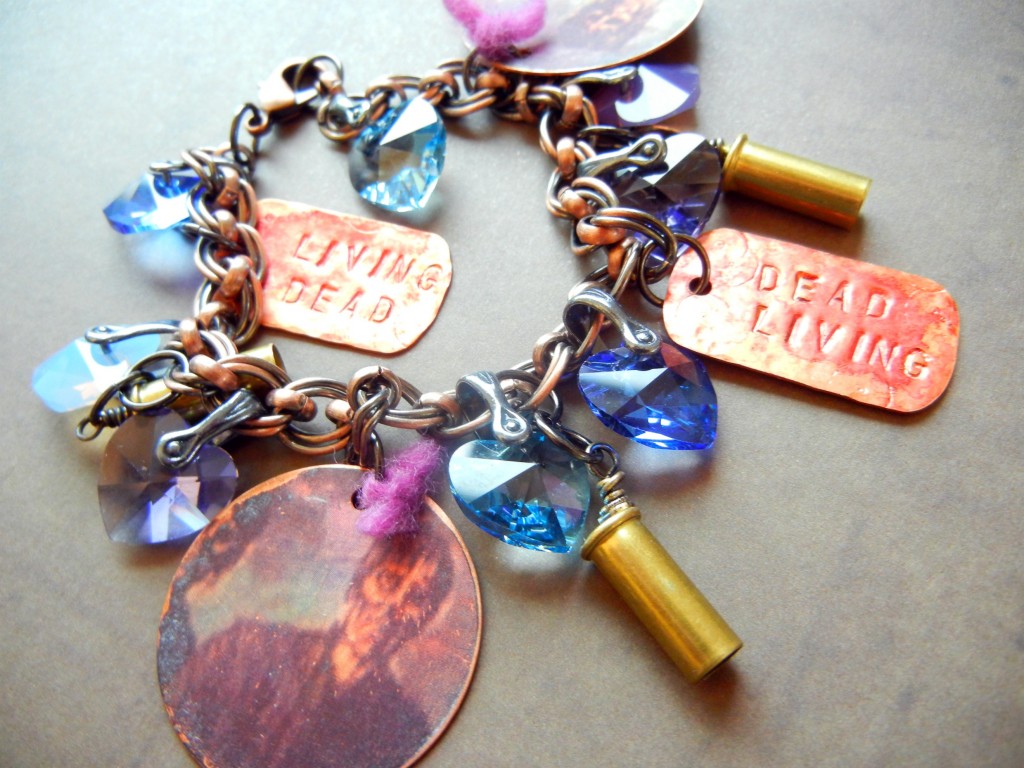
zombie-love-valentine-cindy

My zombie bracelet is not!

I used ITS (image transfer solution) to copy the zombies to the copper disks, and alcohol inks to colorize the stamped tags.

But hearts are just the beginning. Since Valentine’s Day is all about love, I think jewelry that features items you or the intended wearer love is totally appropriate. How about sweets for your sweet?

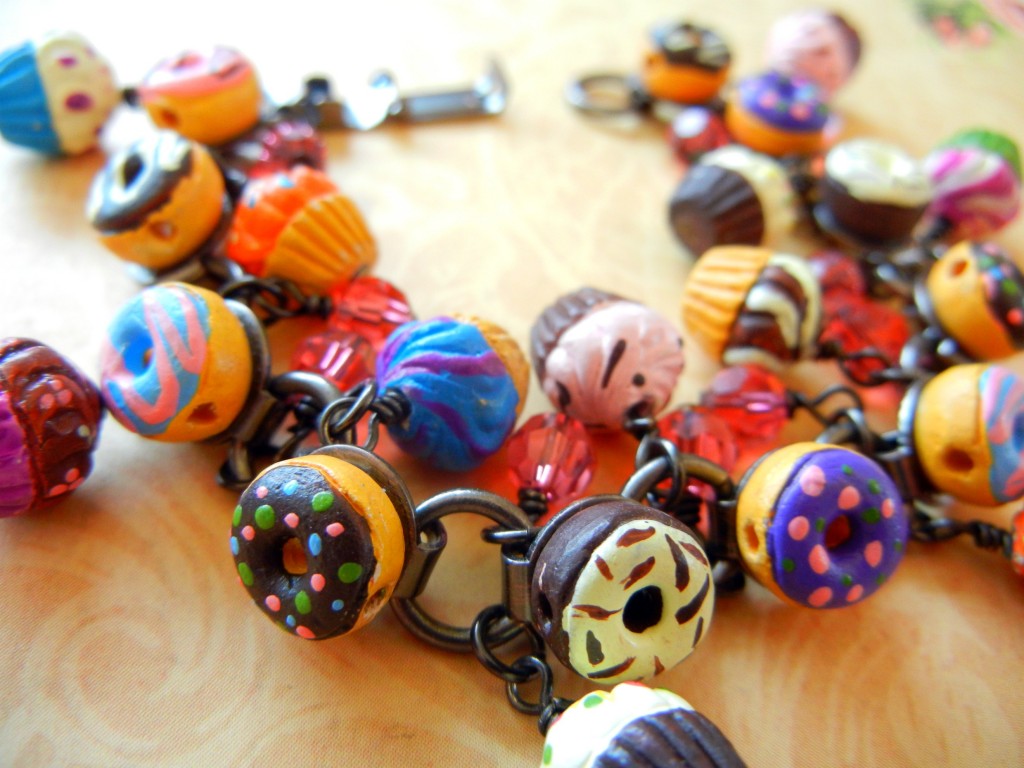
sweet-treats-bracelet

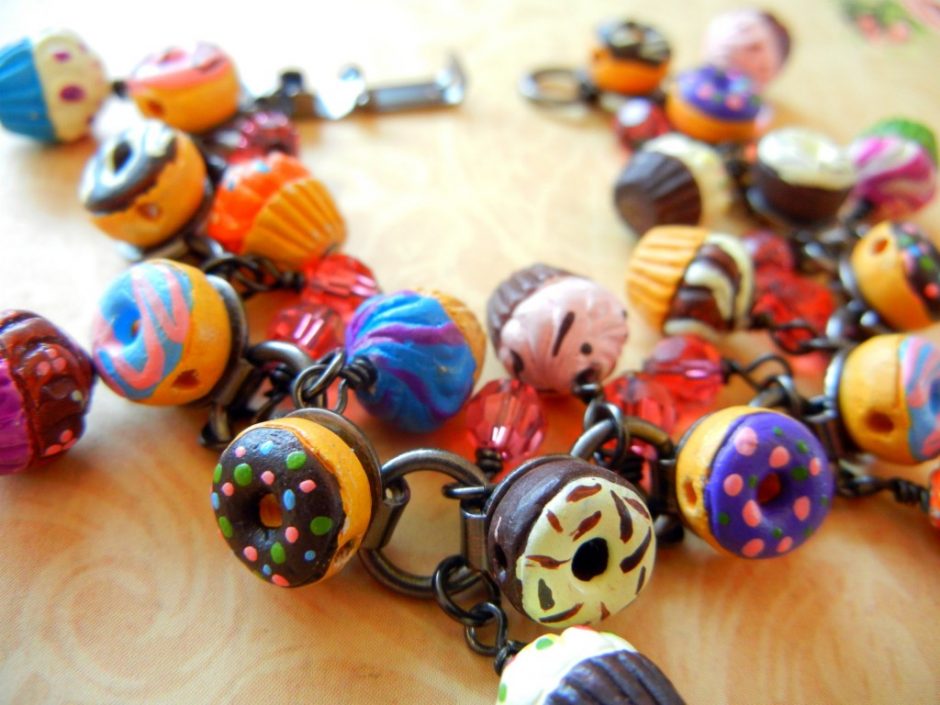
Toni’s sugar rush of a bracelet.

Tiny ceramic cupcake beads create an adorable confection. And don’t forget about toys. Who doesn’t love to play?

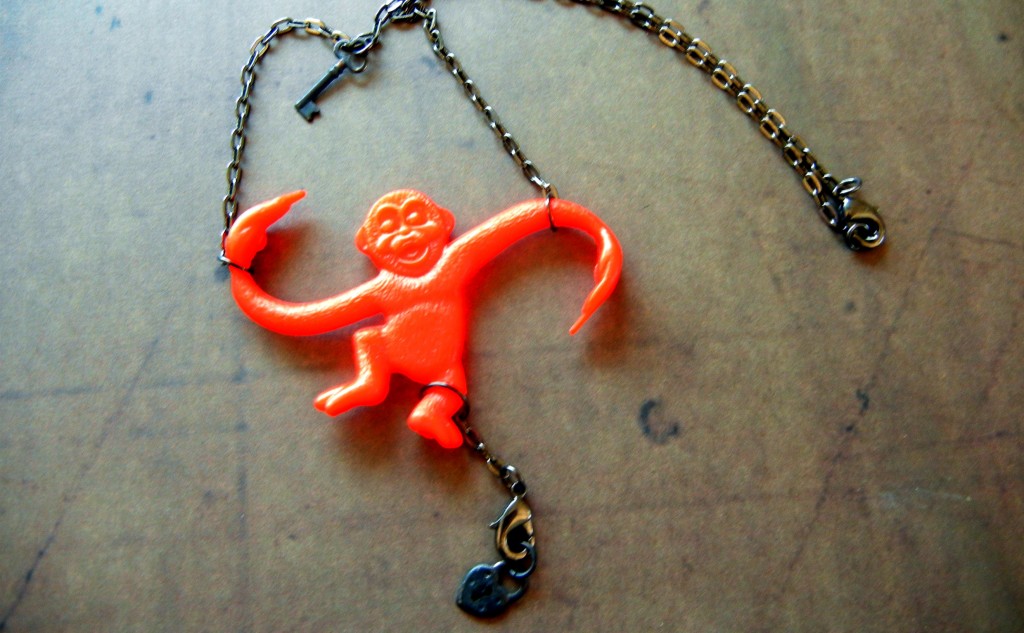
barrel-o-monkeys-necklace

Mollie’s monkey is barrels of fun!

Jump rings and chain can turn most anything into a necklace! Does anyone else think the monkey bears a striking resemblance to Dr. Quinn’s (Jane Seymour’s) open hearts? Maybe if you flip it sideways and upside down?

Whatever your style, have fun with your Valentine’s creations! ~ Cindy

DIY Shamballa style macrame bracelet tutorial

January 8, 2012

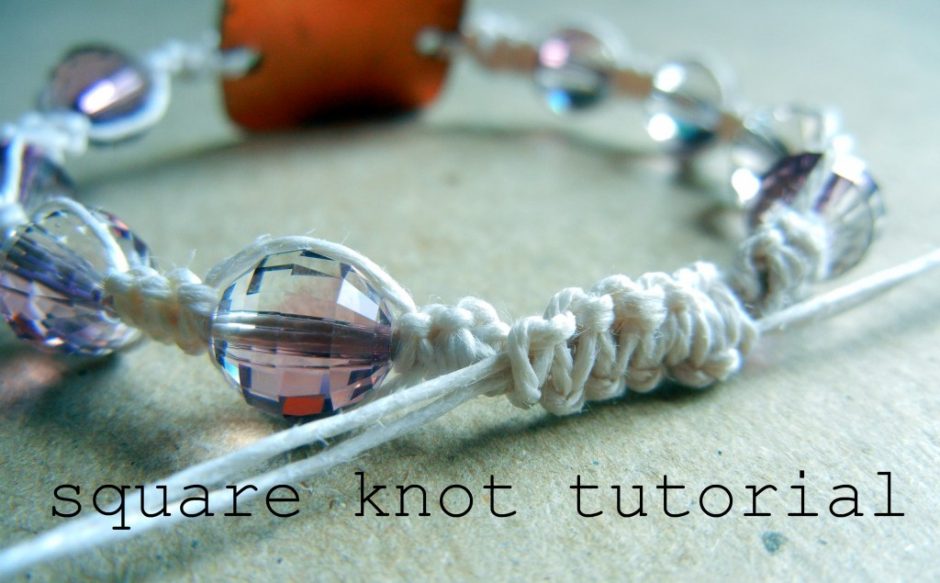
Square knot macrame bracelets have been given new life due to the influence of high end designers. I’ve got the “Circle of Life” from The Lion King playing in my head as I write this. How else to explain how a simple macrame bracelet design, which has spent years as a summer camp staple and a tourist shop standard, has been reborn as the chic “Shamballa” brand must-have look?

I think it is a great example of how basic techniques can be adapted to suit nearly any style or budget. Have hemp cord and plastic pony beads? You can make this bracelet. Have premium knotting cord and diamond-studded platinum beads? You too can make this bracelet! The trickiest part is making the sliding clasp, but like any type of magic, once you know the trick, it is no problem.

Rings & Things actually made a square knot (aka half knot) macrame bracelet instruction sheet years ago (updated macrame bracelet instructions here). The sliding clasp instructions were also published as part of our “Meteor” macrame bracelet, which has a totally different look. It is past time to update the tutorial with some photographs!

Supplies needed for square-knot macrame bracelet with sliding clasp:

Cord – hemp, Chinese knotting cord, linen, cotton – whatever you like. You’ll need about 12 feet total.

Beads – again, whatever you like – but the holes must be large enough for two strands of your selected cord to fit through. Depending on your knot to bead ratio, you might need one bead or 20.

Scissors, needle, a clipboard (or a work surface and a binder clip), and flat or chain-nose pliers.

Cut two 2′ pieces of cord and one about 6′ long. Leaving approx. 8″ tails, clip the two anchor cords to your work surface. Center the long cord under the two anchors. (For the sake of photos only, the anchors are blue and the knotting cord is black.) You can start with either side, but I start from the right:

2-right-loop

3-left-through-loop

Pull to tighten the cords, and you’ve completed 1/2 of a square knot. The second 1/2 is the same, just from the left:

4-left loop

5-right-through-left

Pull tight and you have a complete square knot.
Tip: If you want your knots to spiral, then skip this “second side” step… just repeat the first half of the knot, always starting from the same side of the knot.

6-keep-knotting

It is totally up to you how many knots to tie between beads, but odd numbers (1, 3, 5, etc.) look best. Tie a few knots, slide a bead onto the anchor cords, tie a few more knots…it is really quite fun! Continue until you have the length you want. Keep in mind that the clasp will add about 1/2″ to the overall length.

Since you started knotting with a single long piece of cord, the starting end is “finished” while the tail end has….tails. To remedy this, sew the tails (one by one) up through the last section of knots. I needed to use pliers to pull the needle through.

7-sewing-up-end

Snip off the ends and it is like they were never there!

8-magic-clean

Now that you know how to make square knots and finish the ends, let’s make the “magic” part – the sliding clasp. Make your bracelet into a circle and overlap the anchor cords. Use bits of cord to bundle them together for the moment.

9-ready-to-tie-clasp

Now clip the top to your work surface. Cut a 12″ piece of cord and center it under your four anchor cords. Start tying square knots, just like you did for the bracelet itself. Continue for about 1/2″, then sew the ends back in. This section of knots should be able to slide back and forth on the anchor cords. Now, for the tails: they serve an important purpose. Make slip knots an inch or two away from the clasp on each pair of anchor ends. Tie beads on too if you like. These knots/beads act as stoppers, ensuring the ends don’t slide out of the clasp. Make sure you leave enough length to make the bracelet big enough to get over your hand. And ta-da! Adjustable bracelet bliss.

10-sliding-clasp

***

FREE Rings & Things Design Gallery Projects

Rainbow Bead Macrame Bracelet Tutorial” created by Rings & Things designer Michelle Horning.

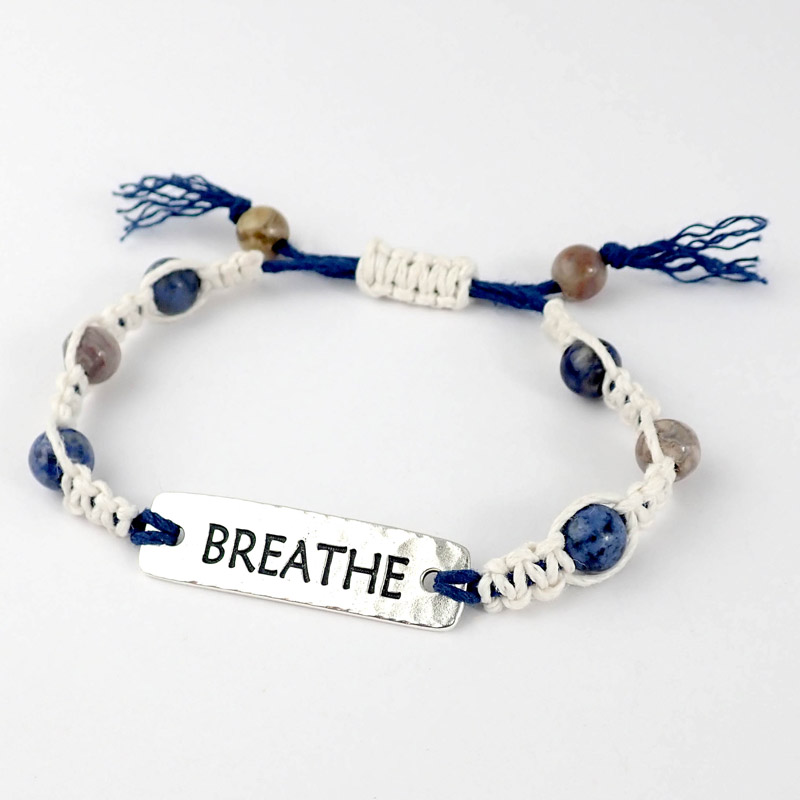
Remember to Breathe Bracelet Tutorial” created by Rings & Things designer Michelle Horning.

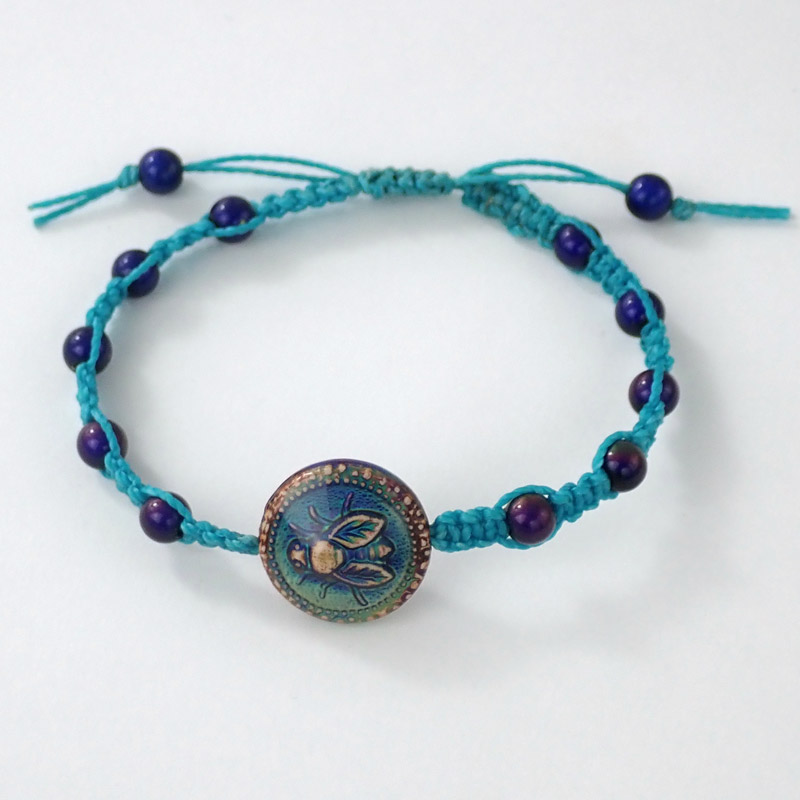
Bee Moody Bracelet Tutorial” created by Rings & Things designer Michelle Horning.

***

Happy knotting! Please let me know if you have questions, and have fun making your own bracelets! ~ Cindy

www.rings-things.com

DIY copper etching tutorial

December 28, 2011

It is easy to etch your own designs into metal for jewelry. This tutorial will teach you how! (Check out our etching kit too!)

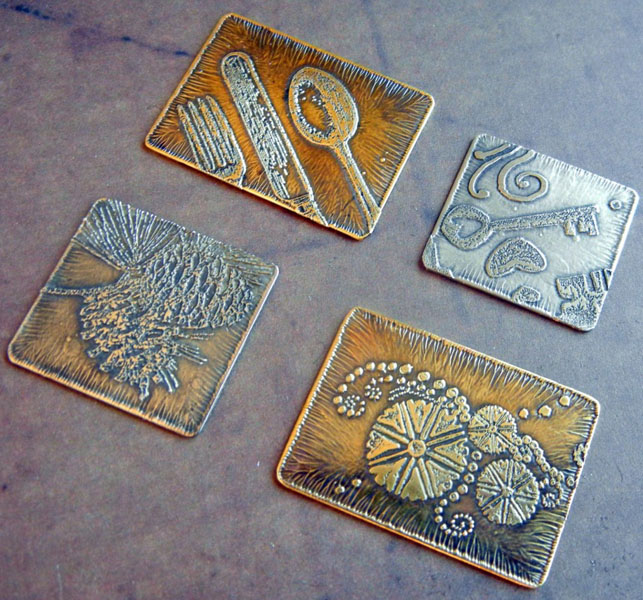
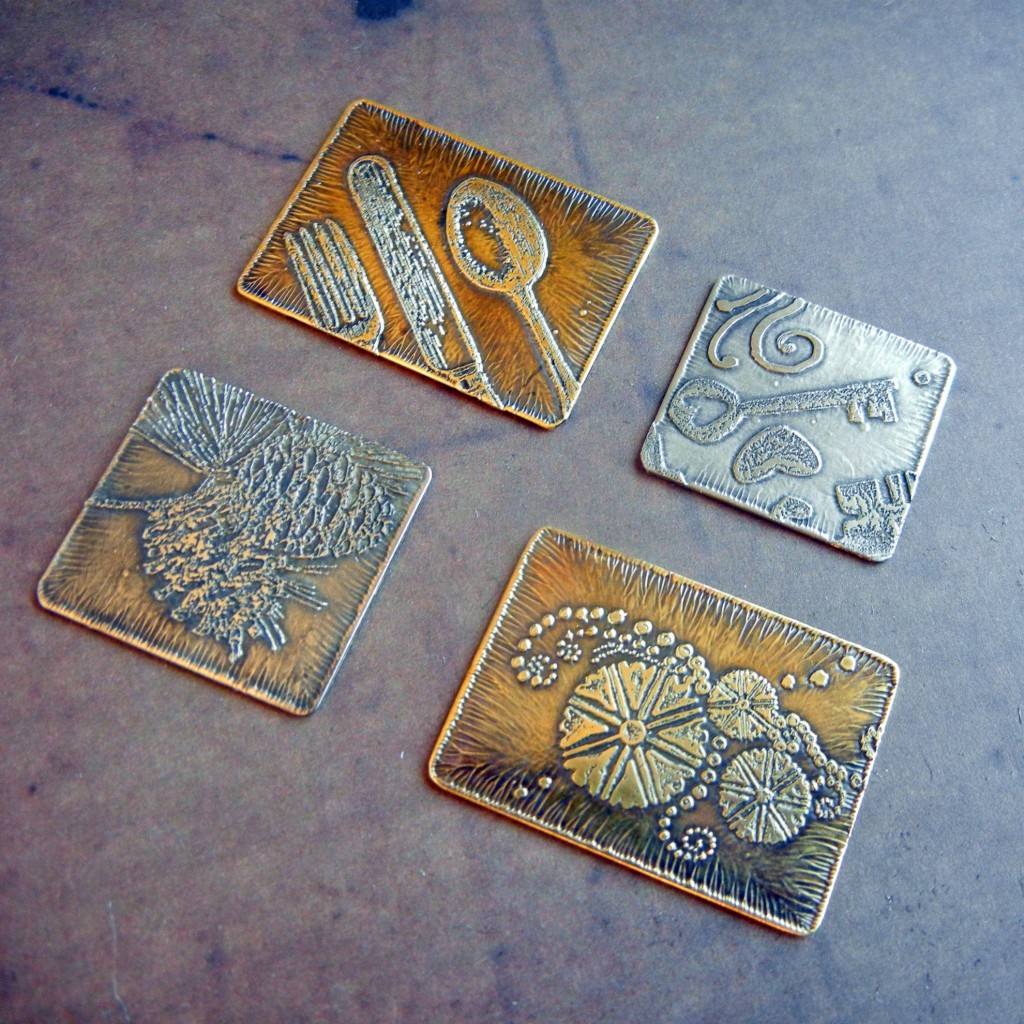
etched-stamped-metal
Rubber stamp designs etched into brass sheet metal.

Before you begin, please read the safety considerations for etching metal with chemicals blog post.

You’ll also probably want to read the design considerations for etching metal blog post too!

Now, here are the steps for etching metal with ferric chloride:

1. Choose your metal(s). Ferric chloride works on copper, brass and nickel silver. It will not work on actual silver (fine or sterling). Do NOT use ferric chloride on aluminum. Metal as thin as 24-gauge can be etched – just leave it in for less time than you would for thicker metal. If you want to etch both sides or etch really deeply, use at least 20-gauge metal.

2. Clean metal with Penny Brite (our favorite) or an abrasive cleaner and scrubbie. The metal must be very clean. Water will sheet off (not bead up) on the surface when it is truly clean.

3. Apply resist. Stazon ink, Sharpies, toner transfers – there are many options! (Read the design considerations.)

Continue Reading…

Design considerations for etching metal

December 28, 2011

Creating attractive etched metal pieces for jewelry requires masking portions of the metal to prevent the etchant from etching those areas. The unetched areas will be the high points on the metal.

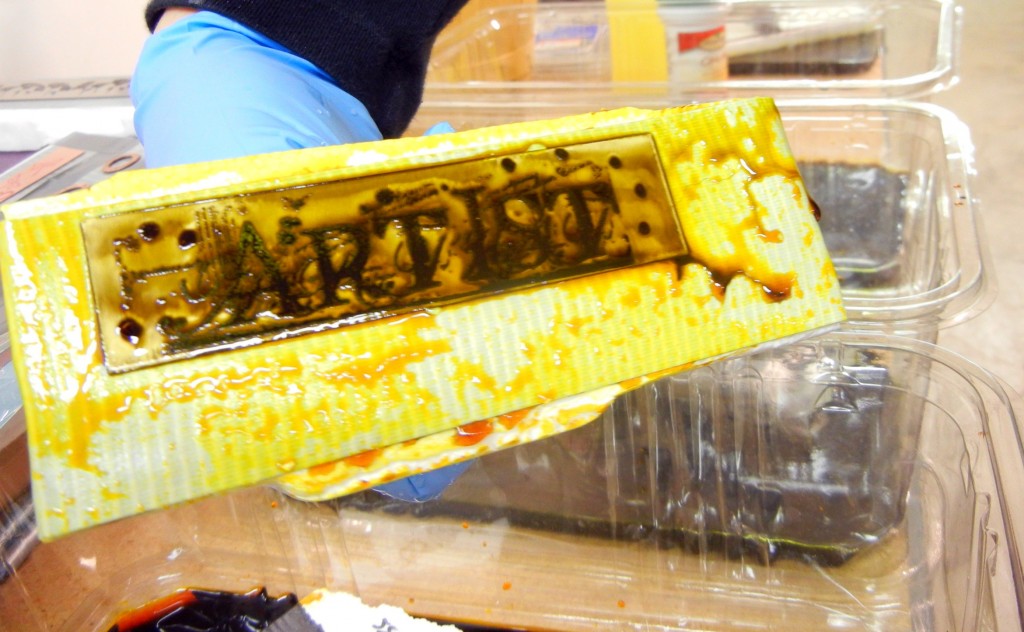
artist-etched-metal-jewelry

This rubber stamp design transferred and etched nicely.

Lines need to be at least as wide as the etch will be deep. Lines should be a little wider than how you’d like them to be when the etching is done to allow for the fact that the etchant will typically undercut your design lines a bit.

If you’re doing a deep etch, use lines that are at least 1/32″ wide. Finer details might be lost.

There are a variety of resists you can use to created etched designs on metal. Here are some of our favorites:

  • Fine point Sharpie pens
  • Staedler red ink pens
  • Stazon ink pads (black and red work best) and rubber stamps.
  • Press-n-Peel (PnP) Blue paper or other toner transfers. If using transfers, be sure to reverse the text and images before you print them.

If you mess up your design, use Stazon cleaner to remove the ink and try again. The etchant will eat through faint, blurry or thin ink, so make sure your lines are dark and crisp.

That’s basically it! Please feel free to add any experiences you’ve had with etched designs by leaving a comment. The DIY etching tutorial has full instructions for etching metal. Please also read the safety considerations. Thanks! ~ Cindy