Browsing Category

Rings & Things Products

Safety considerations for etching metal with chemicals

December 28, 2011

Using chemicals doesn’t have to be dangerous, so long as you take basic steps to set up your work area to avoid problems. For chemical etching, you need:

  1. Rubber gloves (latex or nitrile).
  2. Safety goggles. The etching solution might splash, and you don’t want that in your eyes.
  3. Shop apron. The etchant will stain your clothes and anything else it touches.
  4. Good ventilation (open a window if possible or run an exhaust fan). Never etch in a small enclosed space. Chemical fumes and gases that aren’t noticeable in the proper setup can build to dangerous levels in a small space. Outdoors is a great place to etch, weather permitting.
  5. Plastic or glass containers for the etchant “bath.” We like using the clear plastic tubs from spinach or salad mixes.
  6. Baking soda to neutralize the acid.
  7. Secure screw-top plastic container to dispose of used etchant.
resisted-taped-ready

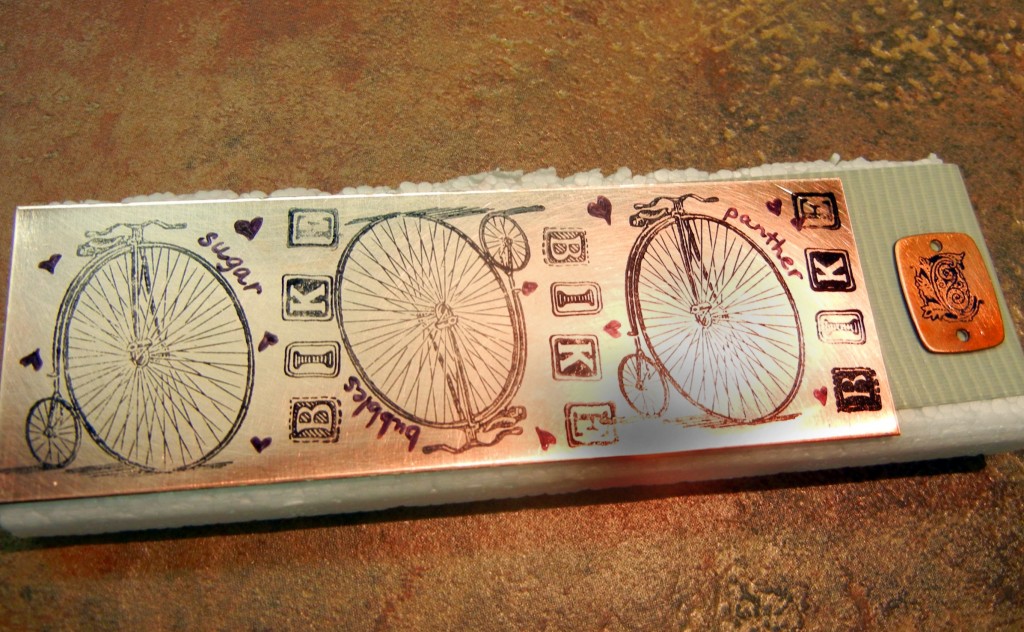
Metal with designs applied, ready to etch!

ferric-chloride-etching

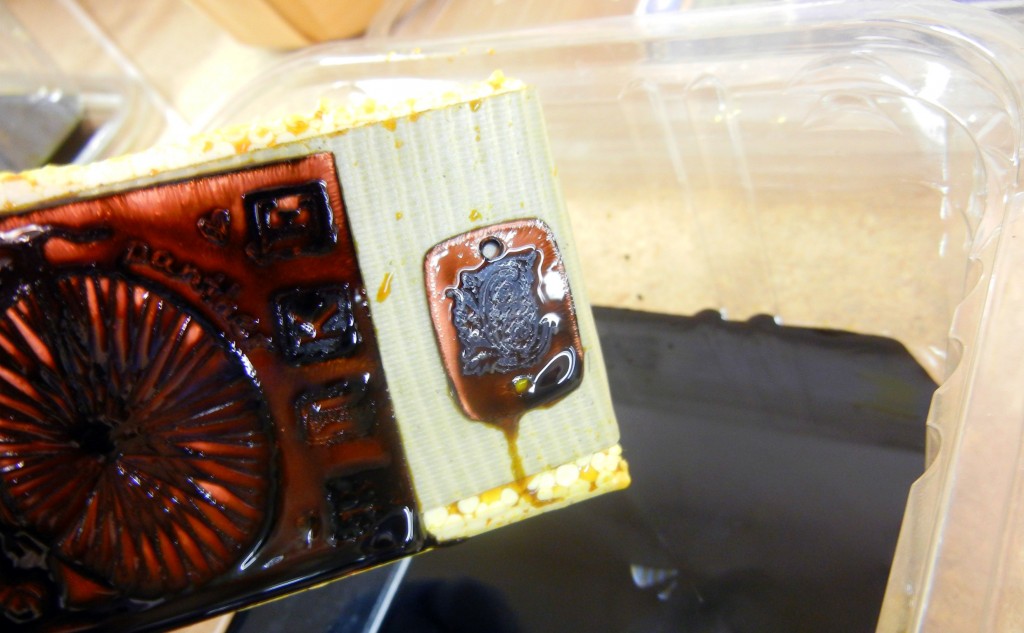
See how the acid has eaten away the metal? Keep your work area safe and don’t get chemicals on you!

The basic rules for working with chemicals are simple, but worth revisiting:

  1. Keep pets and children out of the area.
  2. Don’t get it on your skin or in your eyes. Wash any splashes off immediately.
  3. Be careful about heating any chemical – there is a potential for toxic gases to form. Ferric chloride works faster when it is slightly warmed. You can accomplish this by putting the bottle in a warm water bath or a heat-plate set on low. Don’t try to heat it up on a stove top or in a microwave.
  4. Get plenty of fresh air.
  5. Don’t breathe in fumes or dust. It is best to clean the etched metal under water to avoid distributing particles into the air.
  6. Use disposable scrubbies or steel wool to clean your etched metal to avoid contaminating your good brushes, for example, with chemical residues.
  7. Soak up any spills with baking soda and/or kitty litter.

I know a guy who doesn’t really have any feeling left in his fingertips. You probably know someone like this too. Years of hard work have left his hands extremely callused and insensitive. For this reason, he can grab hot things with his bare hands, somehow not get splinters doing things where normal people would get splinters. I (and most anyone else) need oven mitts and work gloves for tasks he takes on bare handed.

I tell you this because sometimes I worry a bit about some of the advice on the internet. Take chemical etching. The chemicals used to etch metals are called mordants. By nature they are caustic – they eat through metal. Yet, for whatever reason, some people are extremely casual about their usage. For example, not using proper ventilation, sticking their bare hands into a chemical bath, not bothering with safety glasses, pouring the chemicals into their gardens … I’ve seen a lot of stuff that just isn’t safe. Maybe the guy on YouTube hasn’t gotten hurt doing what he’s doing – yet – but it is way better to be safe than sorry!

Obviously, it is up to each individual to determine the level of risk he or she is ok with. Some chemicals – such as the ferric chloride we use for etching copper and brass –  are relatively safe, but they are still chemicals and need to be treated with care. It isn’t complicated.

In case you are wondering, ferric chloride is much, much safer than ferric nitrate and nitric acid, two mordants which are used to etch silver.  While you don’t want to get it on you, ferric chloride will not eat through your skin (muriatic/hydrochloric acid, which is used in some etching recipes, will!).

And, ferric chloride in liquid form, like Rings & Things sells, is much safer than dry ferric chloride. Ferric chloride can be used more than once. Once it stops etching, follow the hazardous waste guidelines for where you live. Spokane’s are found here: https://my.spokanecity.org/solidwaste/hazardous/. Please be responsible and do not pour chemicals down the drain. (Note: all etching, even “chemical-free” etching, leaves bits of metal in the etching solution and must be disposed of properly.)

Now that you’ve read the safety guidelines,  read the DIY etching tutorial and start etching!

Be safe – and have fun! ~ Cindy

Turn it upside down!

December 22, 2011

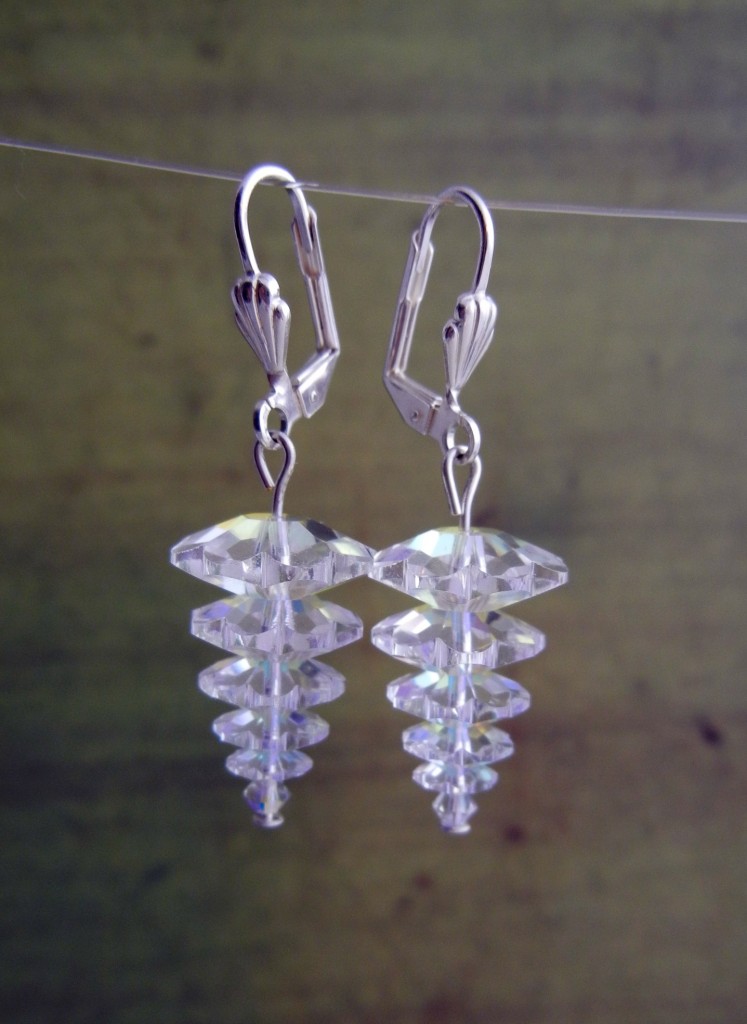
What happens when you take the oh-so-popular Swarovski crystal tree charm pattern and turn it upside down? Beautiful, festive crystal earrings that can be worn year-round!

melissa-earrings

The French clips are another nice touch. Melissa made these classic clear crystal margarita earrings while on vacation with her mom and I snatched them off her ears as soon as I saw them. I think they look like frosty pine cones or icicles, but in a subtle way. Unlike the “real” crystal trees, they’ll still look appropriate in June. Something to keep in mind if you’re making last-minute gifts! ~ Cindy

Twelve Days of Christmas Jewelry Designs: 12 – Fairy Doors

December 12, 2011

A super easy way to create some holiday magic is with our exclusive brass fairy doors. These precut metal shapes with cutouts can be stamped, hammered, riveted, painted, patinaed, layered…so, so many options! Mollie used one to make her sister a sweet keepsake necklace (Day 6). Sondra added a stamped tag to one of her designs on Day 11. Earlier this year, Polly made several sweet pins and pendants by sandwiching pieces of recycled tins between the riveted layers. Basically, the designers here are in love with them – and it isn’t just us! Sondra’s Victorian Christmas fairy door design just won Vintaj’s blog contest!

sondra barrington christmas vintaj winning design

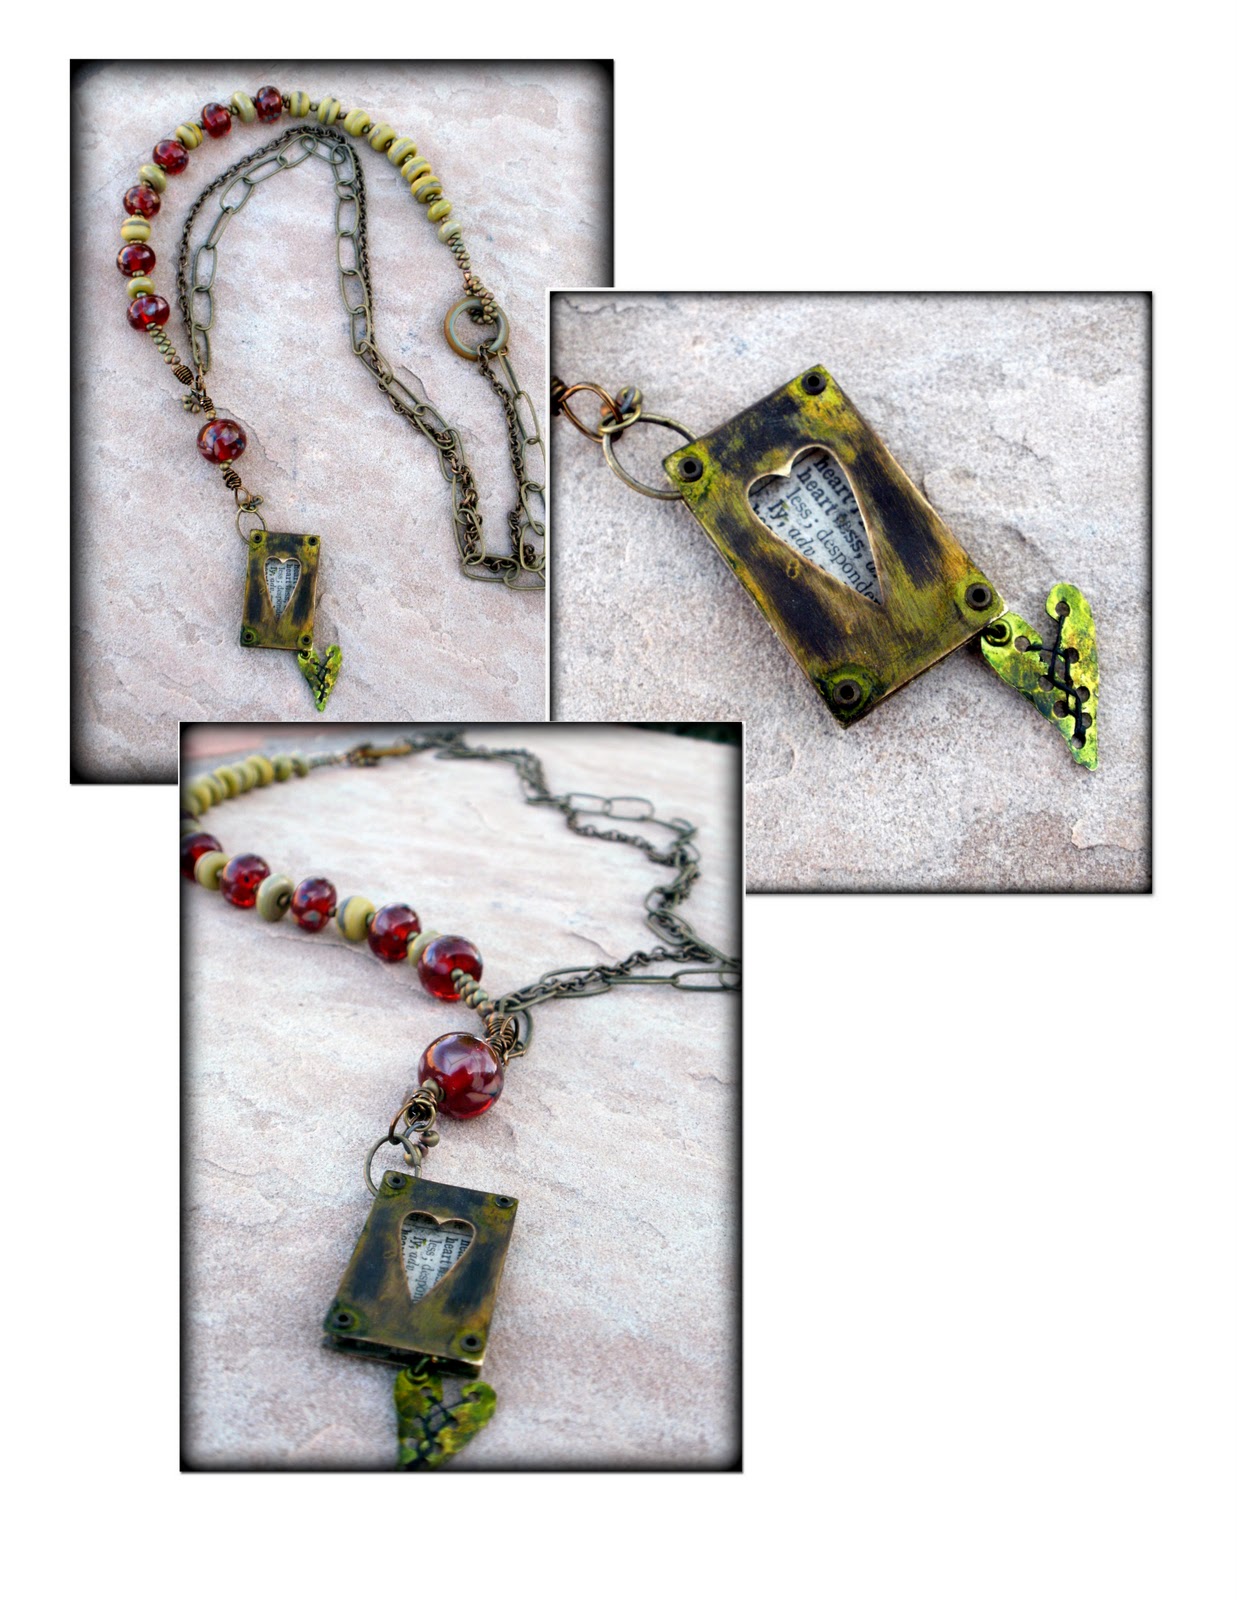
Also, jewelry designer extraordinaire Molly Alexander shared with us the design below that she created with our heart fairy doors for Art Bead Scene’s November Challenge. It is just too lovely not to share. Merry Christmas! ~ Cindy

Molly Alexander design

Twelve Days of Christmas Jewelry Designs: 11 – Stamped Metal Gift Tags

December 8, 2011

let-it-snowThe best thing about metal stamping is the ability to personalize jewelry and ornaments with the exact words, phrases and names you want. Hammering metal is one of those instant gratification crafts. In just a few minutes you can create a completely customized gift that will be functional for years. Below are some examples of custom gift tags and other gift items to inspire your Christmas crafting. Continue Reading…

Twelve Days of Christmas Jewelry Designs: 9 – Hinged Picture Frames

December 1, 2011

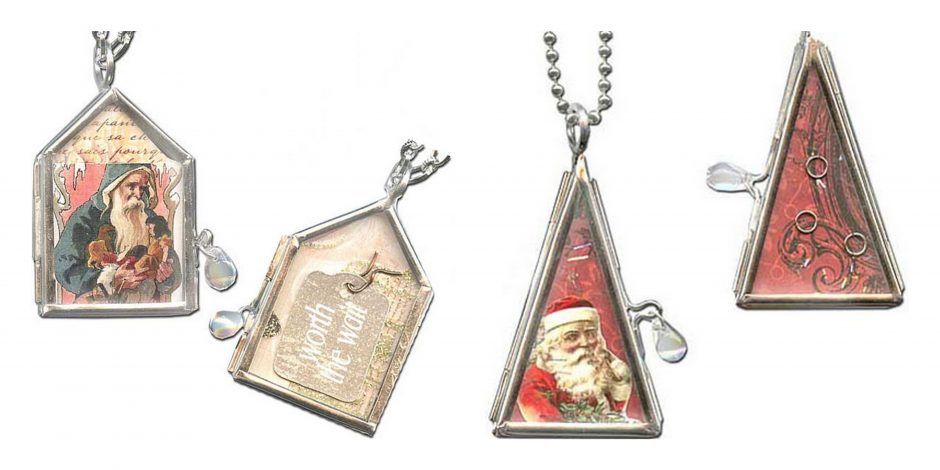
Family photos. Collages. Upcycled Christmas cards. Meaningful quotes. There are many keepsakes and bits of nostalgia that are worth framing for the holidays. It is really fun to solder your own pendants and ornaments, but if that’s not your thing – or you want unique shapes without having to cut glass – or time is of the essence – Rings & Things has a pretty amazing selection of hinged memory picture frames to choose from. Just insert two images and you have a reversible pendant or piece of art!

Continue Reading…

Twelve Days of Christmas Jewelry Designs: 8 – Ceramic Holiday Cookies Charm Bracelet

November 30, 2011

Me. Want. Cookies! When I was in junior high, one of my mom’s friends actually paid me to make Christmas cookies for her cookie exchange each December. I was thrilled to be earning money. She paid me well, but was still getting an amazing bargain considering how many hours I spent rolling dough and piping frosting.

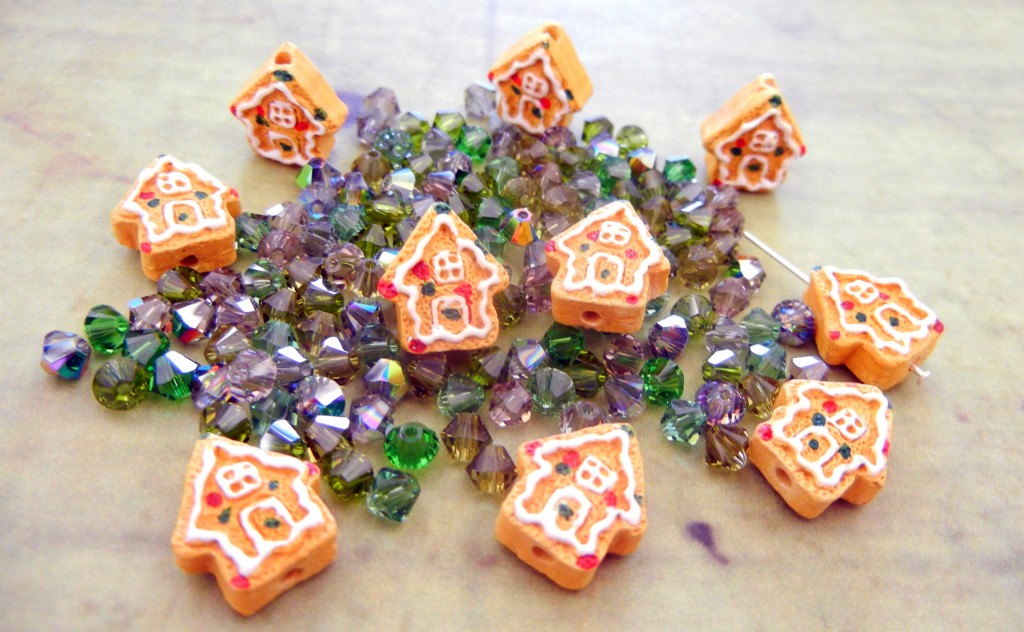
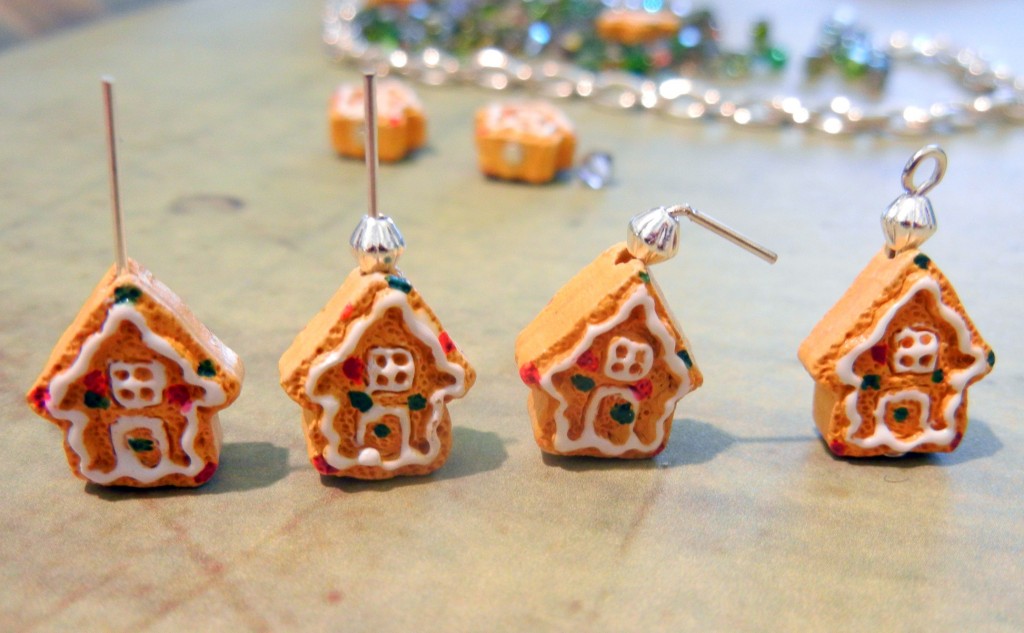
I still like baking, but chocolate chip is about as fancy as it gets. Detailed little gingerbread houses are a thing of the past – or a thing for jewelry. Check out these adorable little ceramic Christmas cookie beads:

cookie-houses-crystals

Ceramic cookie houses with Swarovski crystal bicones.

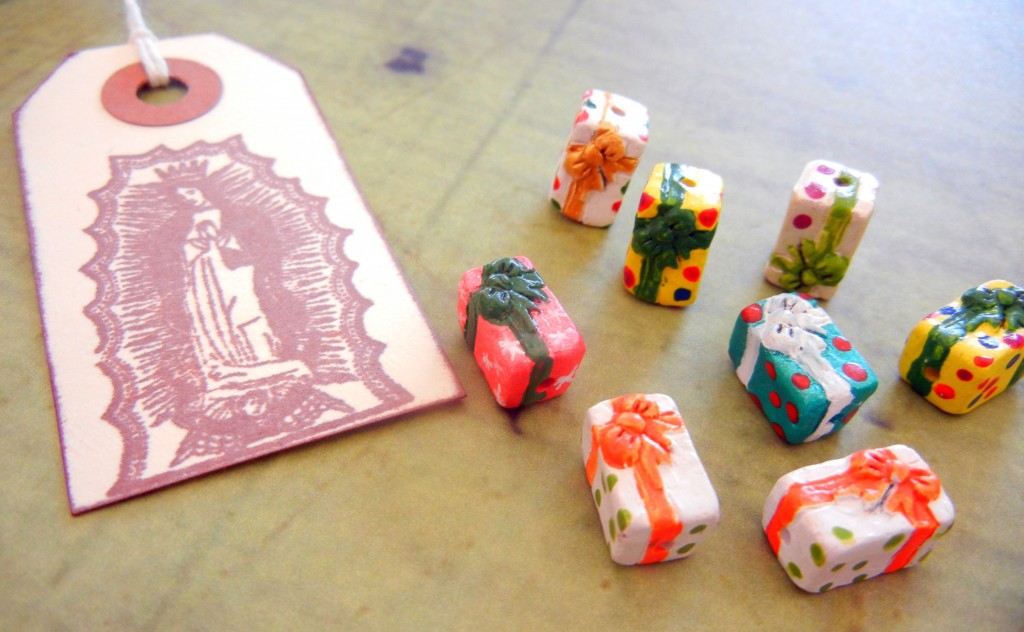
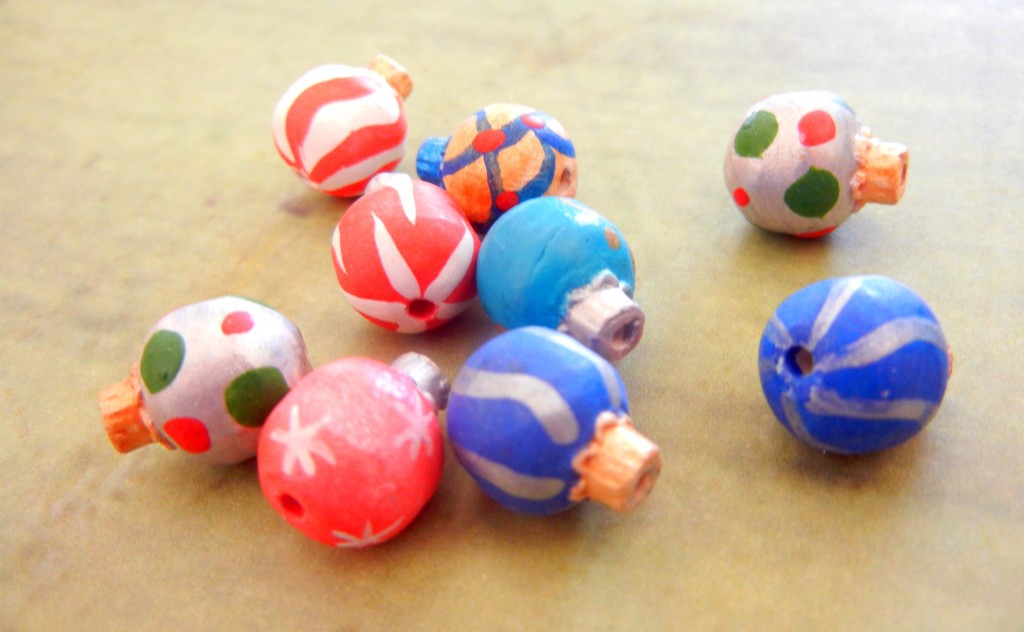
Amongst our rather large selection of hand-painted Peruvian ceramic beads I also found cute little ceramic gift boxes and ornaments:

ceramic-gift-box-beads

Presents!

ceramic-ornament-beads

These little guys would make great earrings.

There are a many other cuties available, but I digress. Today’s Christmas jewelry project is a charm bracelet using the cookie beads and sparkly little crystals.

Supplies Needed for Charm Bracelet:

Charm bracelet with toggle clasp

Head pins – you can get away with using shorties, but longer are fine too.

Ceramic cookie beads

4mm Crystal Jam bicone mix (I used Karma Chameleon)

Metal spacer beads

Jump rings

Jewelry-making tool set

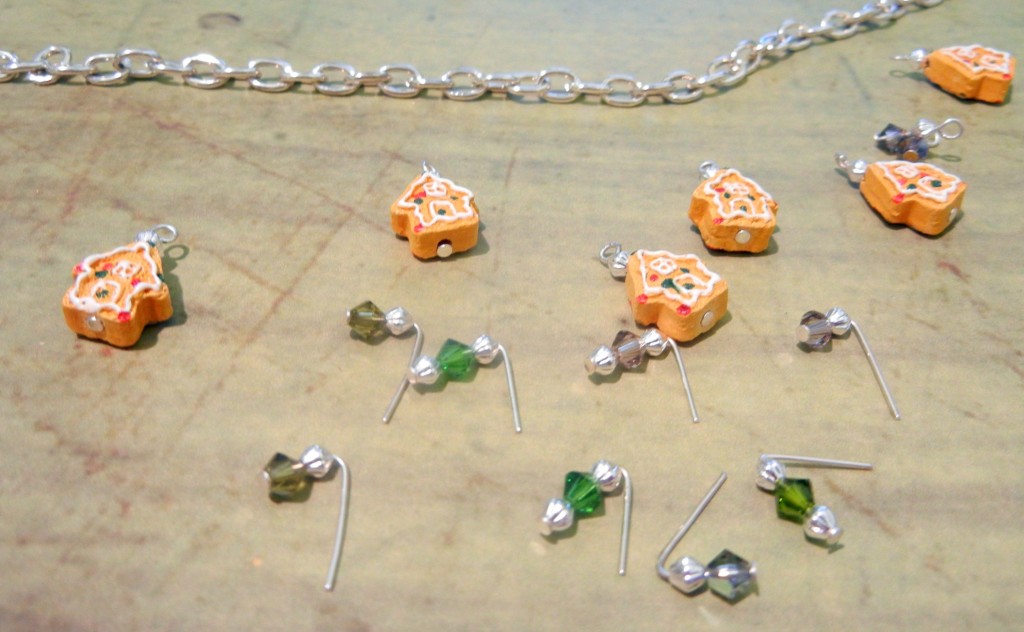
This design is a great opportunity to perfect your technique for making simple loops! Simply string beads on a pin, bend wire 90 degrees, trim the wire to about 4mm (1/6th of an inch), grab the very end of the wire with round-nose pliers and loop it back over to touch the base of the wire. The metal spacer beads are decorative, but they also help fill the ceramic bead holes.

making-wire-loops

The anatomy of a wire loop.

crystal-pins

Assembly goes faster if you make a little production line out of it.

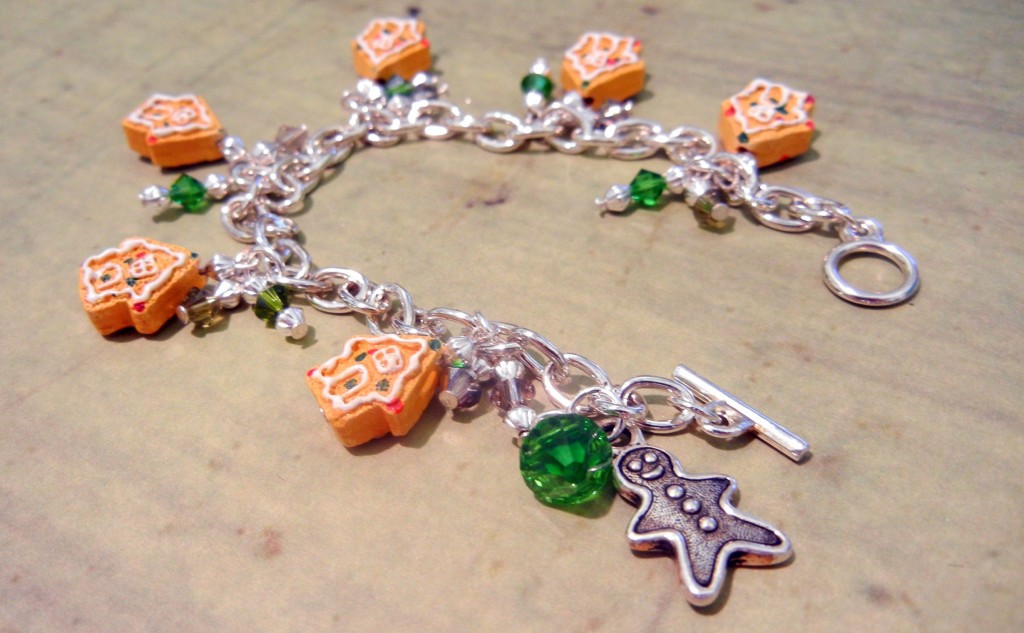
Once you have all the dangles made, group them together however you like and attach them to the bracelet using jump rings. It seemed to be missing something, so I added a TierraCast gingerbread man charm and a
fern green bicone drop as an accent near the clasp to finish my easy Christmas cookie charm bracelet.

catch-me-gingerbread-man-bracelet

Can’t catch me!

And now I’m off to find some more cookies – edible ones this time! ~ Cindy

How to make ball-end head pins with a micro torch

November 28, 2011

Little butane torches are sweet, and not just because they are often used to caramelize sugar on fancy desserts. Micro torches are great for a ton of jewelry making techniques – soldering, fusing fine silver, sintering small Art Clay Silver pieces, even enameling. One really fun and easy project for the micro torch is balling up wire to make your own ball-end head pins.

Supplies needed:

tools for balling silver wireNon-plated wire (I’m using fine silver wire. Sterling silver and copper wire also work. Brass, nickel silver, steel and coated craft wires do not.)

Micro torch

Butane (sold at most hardware and general stores)

Cross locking tweezers

Bowl of water

Making DIY head pins is addictive. Using the locking tweezers, simply hold the wire vertically above the bowl of water. Heat the end of the wire with the torch.

balling-fine-silver-wireAs the wire starts to melt, it crawls up the wire. Once you have a good size ball, quench the wire in the water. Ta da!

If you get too ambitious, the ball might get too big and drop off the wire. Not a big deal. The little balls make cute additions to other projects, and the water ensures you’re not burning down the house. A little practice is all it takes to consistently make the balls the same size.

homemade-ball-end-pinsThe balled wire also makes nice French hook ear wires. Don’t have a torch? Rings & Things micro torch kit contains everything you need to get started, except the fuel. A book such as Soldering Made Simple: Easy techniques for the kitchen-table jeweler or Melissa Manley’s Jewelry Lab will provide loads of inspiration and how-tos for more complicated projects that take full advantage of your new tool’s powers! ~ Cindy

Twelve Days of Christmas Jewelry Designs: 7 – Faux Stained Glass Soldered Ornaments

November 23, 2011
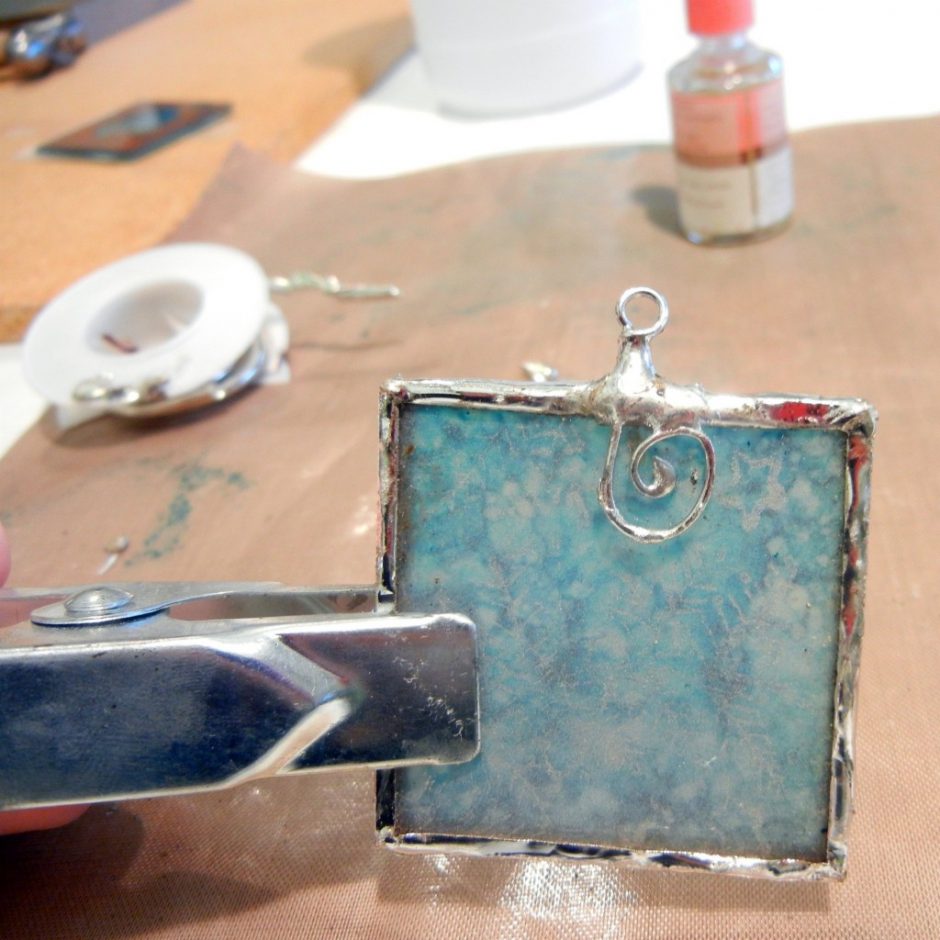
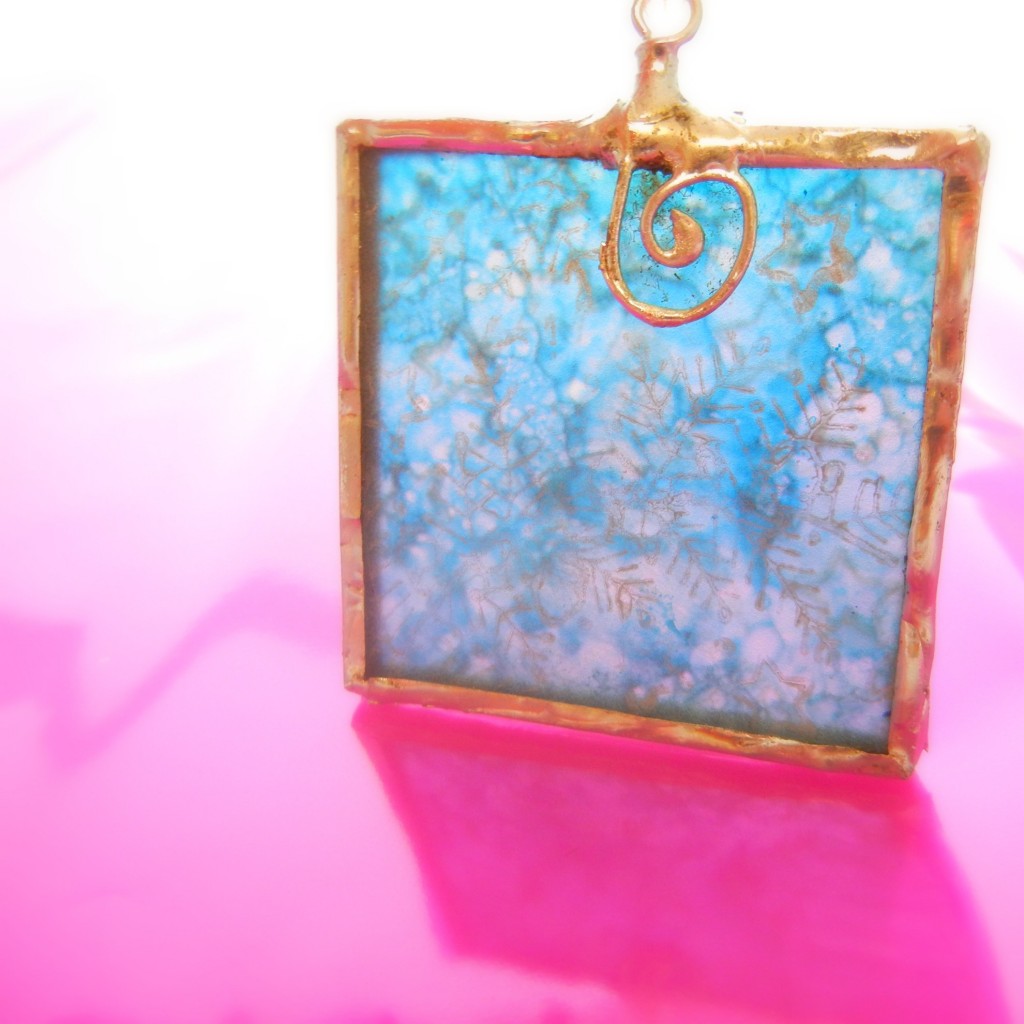
faux-stained-glass-frosted

Capture the look of snow falling – even if it is raining outside!

Have you heard of Tim Holtz? If you make jewelry, perhaps not. However, he is wildly popular and famous amongst scrapbookers or mixed-media artists. Rings & Things started carrying some of his Idea-ology trinkets and components because they make fun additions to mixed-media designs (both jewelry and jewelry displays!). And then we added his line of alcohol inks because they can be used to colorize metal and other non-porous surfaces. And now we’ve added his acrylic paint dabbers. I watched his video on how to use the paint dabbers to create a resist for alcohol inks and was intrigued. Watch the video, you’ll see what I mean.

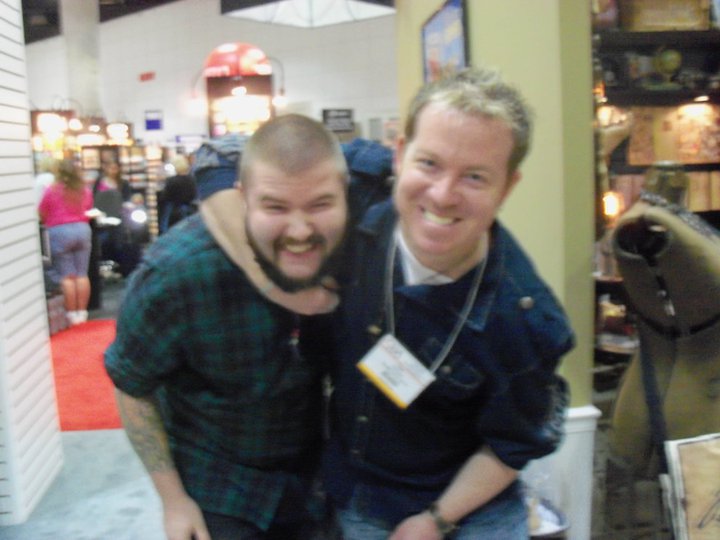
tim holtz headlock

Oh, boys.

So Tim – pictured above with our buyer Nory in a headlock! – demonstrates the inks on paper. I wanted to use the process on glass – specifically memory glass slides – in order to make a faux stained glass ornament. One of the coolest things about the alcohol inks is how you can blend them together. My theory was that if I did all my inking and painting on the inside surfaces of the glass, the colors would be safe from the ravages of time.

Continue Reading…

Twelve Days of Christmas Jewelry Designs: 6 – Family Keepsakes

November 22, 2011

Not all Christmas crafts or Christmas jewelry designs need to be Christmas-y. Sometimes the best jewelry presents are the ones with special meaning.

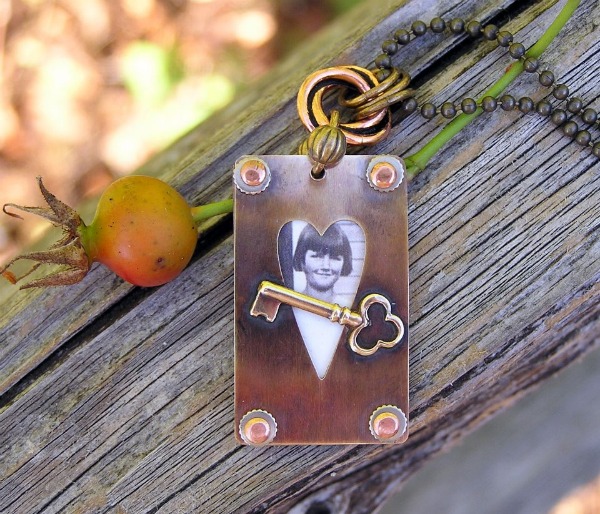
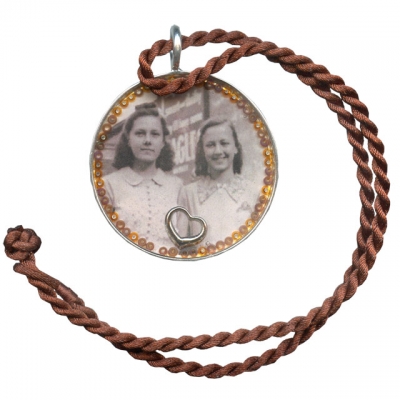
Soldered heart necklace

A perfect keepsake for a sister.

Soldered and riveted necklace by designer Mollie Valente. Photo by her sister, Janet, of Pink Poppy Studio on Etsy. The photo inside the one of a kind pendant is of their mother. (I’ll be posting a tutorial on how to sweat solder brass charms onto other metal components – just like Mollie did with the brass key charm and fairy door set – soon.)

If soldering and riveting sounds like too much work (work?!? it is fun!) then check out our hinged pendant frames. All you need to do is cut a picture to size and insert it in the frame. Here is a design by Amy that features a photo from her childhood:

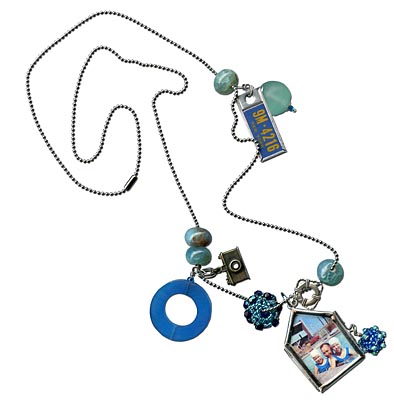
california road trip keepsake necklace

Amy and her sister are swimming with their dad in this snapshot from California road trip.

A third option is to glue an image into a bezel and cover it with jewelry resin, like Rita did for her keepsake necklace:

resin-photo-necklace

“Days Gone By”

No traditional “jewelry making skills” are required here – she simply strung the pendant on a pre-made choker.

Maybe it is time to print out some of those digital photos languishing on your computer – or make photocopies of antique originals languishing in a box – and make some keepsakes to treasure! ~ Cindy

Twelve Days of Christmas Jewelry Designs: 5 – Swarovski Crystal Holiday Lights

November 18, 2011
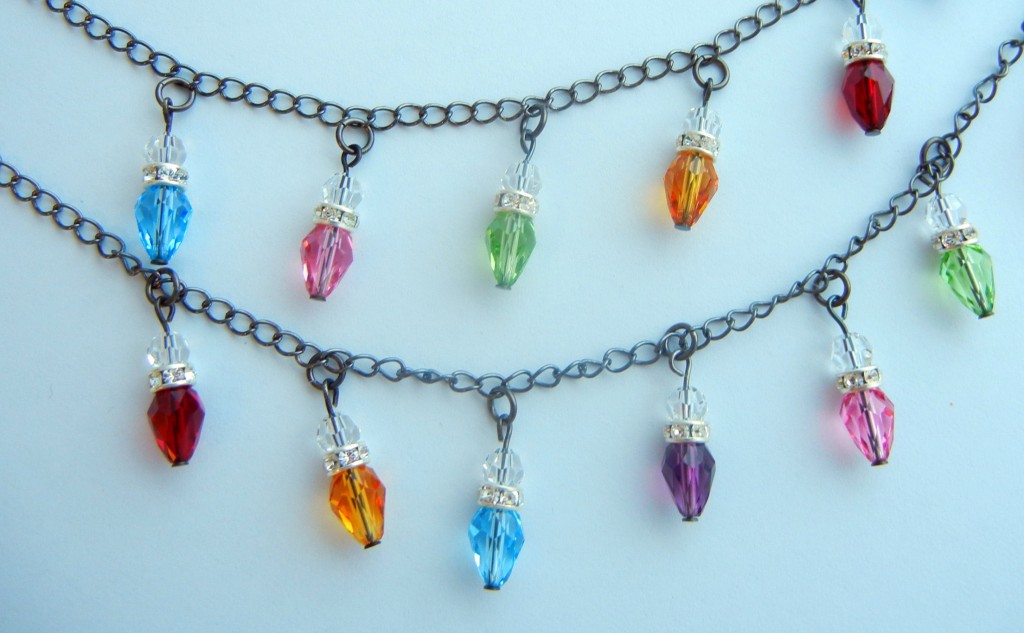
crystal holiday light charms

Swarovski crystal holiday lights

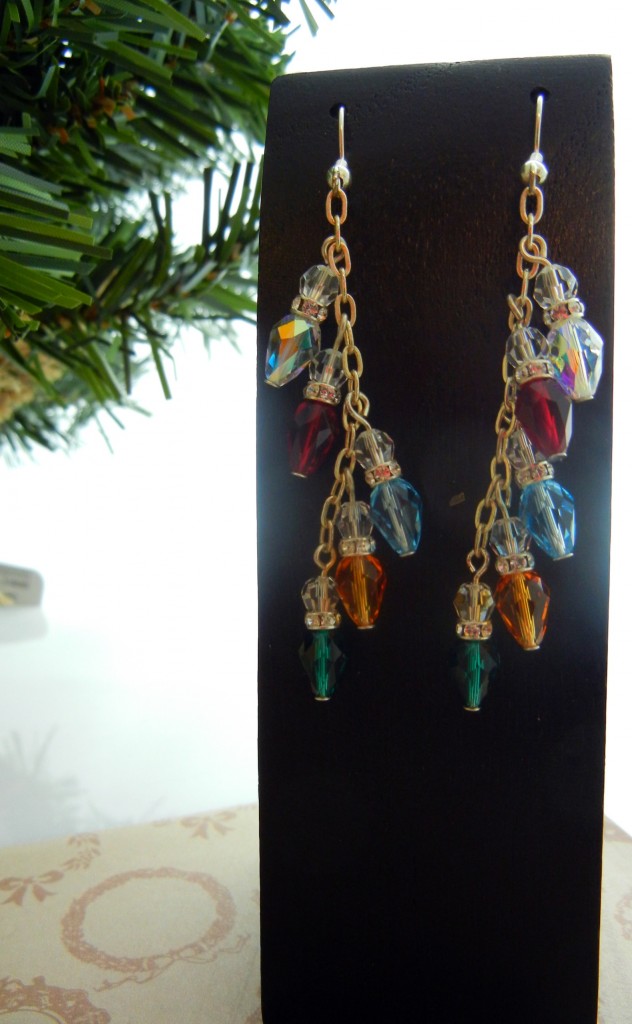
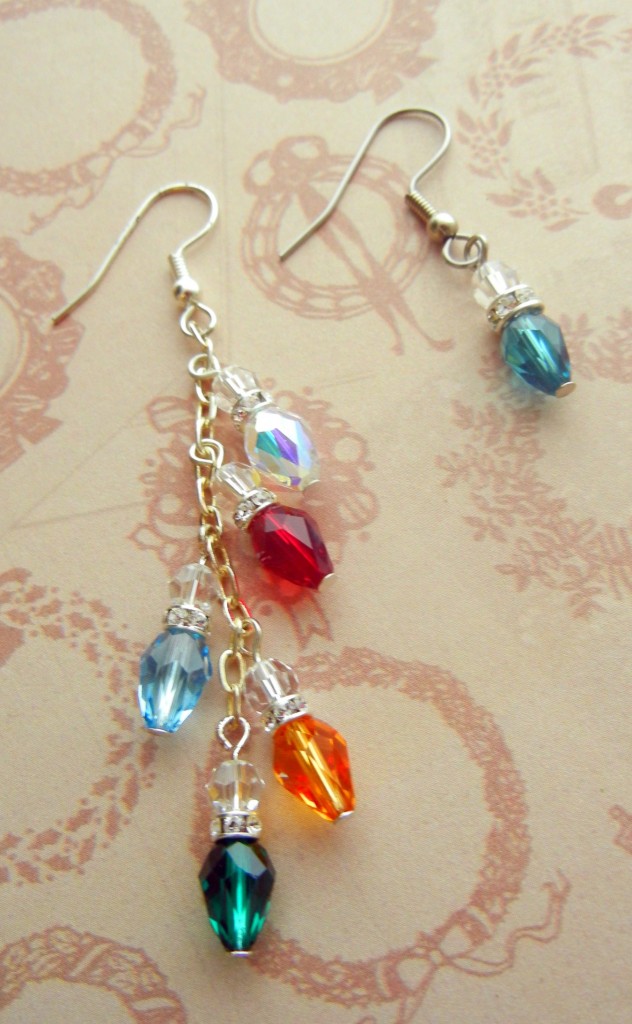
Hi bloglandia! Here is another sparkly design, courtesy of the Create Your Style with Swarovski Elements design team: holiday light charms! You need just four ingredients to make them:

9x6mm crystal teardrop beads

4mm rhinestone wheel beads

5mm round crystal beads

Head pins

Simply stack the crystals on head pins and complete each charm with a simple loop or wrapped loop. The crystal lights can be used individually or en masse to create all sorts of jewelry:

string of lights earrings

Dangly Christmas light earrings are so festive!

crystal light earrings

Holiday light earrings are also cute with just one light bulb.

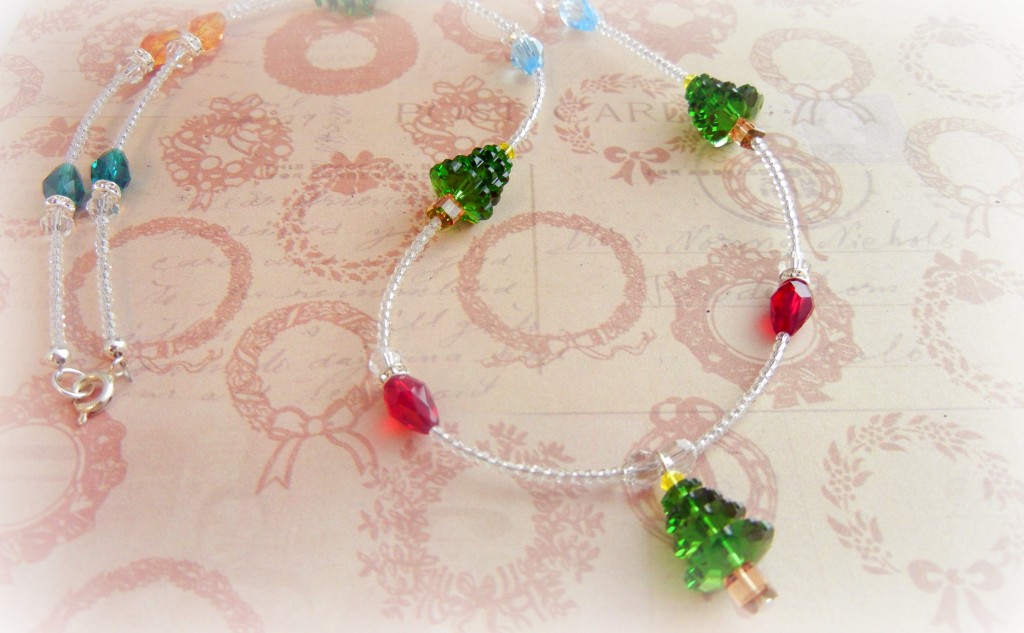
lights and trees holiday necklace

Or, instead of head pins, string the light pattern on a strand of beading cable for a necklace like this.

For easy charm bracelets, just add some lights to a toggle bracelet!

Aren’t they de-light-ful? (Sorry, that’s the cold medicine talking!) Happy Friday! ~ Cindy