Browsing Category

Rings & Things Products

Making jewelry heals in more ways than one!

June 3, 2011

While not everyone believes in the metaphysical healing powers of gemstones, it is hard to argue with the emotional benefits of creating something pretty to wear with friends while dealing with the decidedly un-pretty reality of cancer.

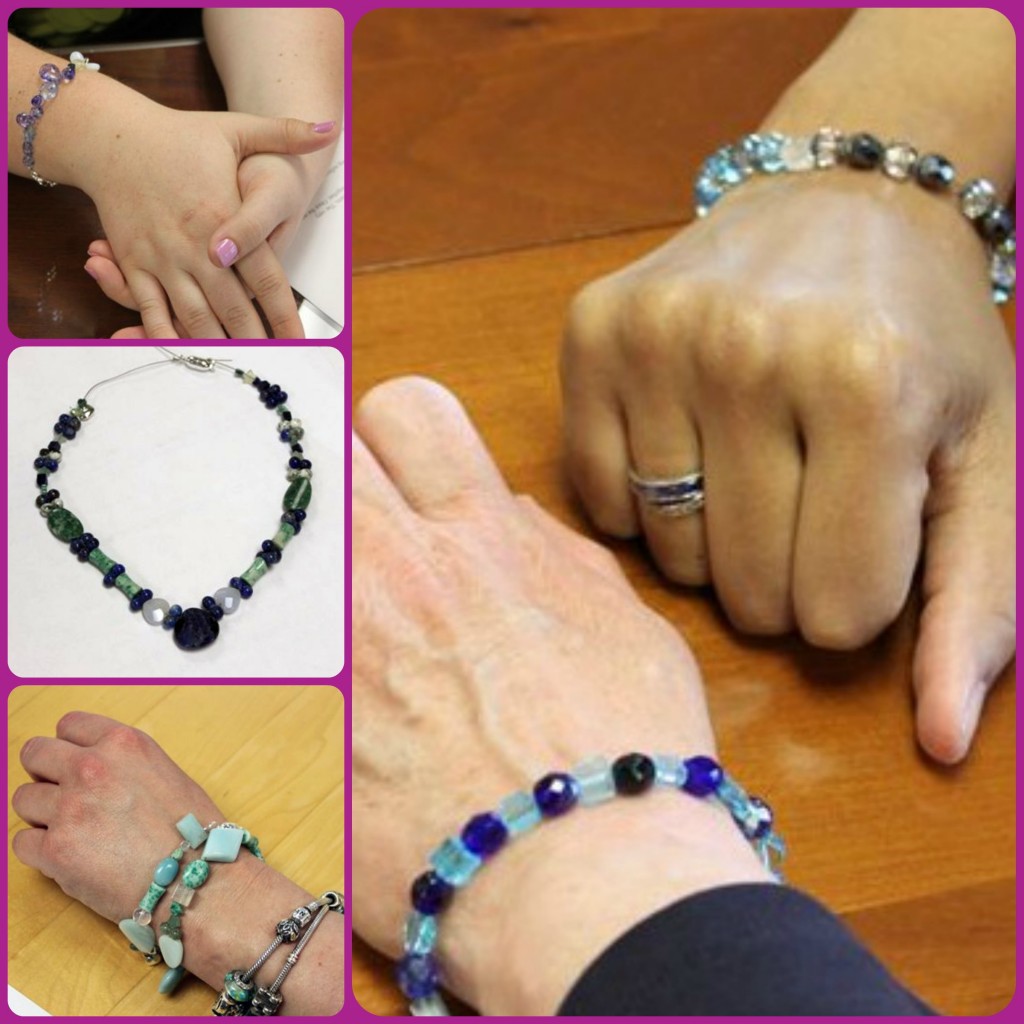
A few of the designs created at the cancer patient retreat.

We just received a lovely thank-you note from Margaret Nowak, an Art Therapist with the University of Michigan Comprehensive Cancer Center. Margaret recently hosted a retreat for women with gynecological or breast cancers. One of the activities was making jewelry, and Rings & Things was happy to donate some of the supplies. Due to the Susan G. Komen Fund and other fantastic organizations, everyone knows pink is the official color of breast cancer awareness, but I hadn’t realized that turquoise is the official color for gynecological cancers.

Margaret wrote: “The women loved making bracelets and necklaces. They all chose a theme for their jewelry that often centered on healing. I do have some beads left which I will use with patients who are here receiving chemotherapy treatments or are in the hospital. A small bracelet made during a treatment or hospital stay can leave a huge impression on someone dealing with cancer. Know that Rings & Things is appreciated for bringing a little bit of pleasure to what might be an unpleasant day for someone dealing with cancer!”

Product spotlight – new large-hole metal beads

June 1, 2011

bazillion new metal beads in our online store! Most of them have large holes, too – perfect for all the leather and Pandora-style jewelry that is so popular these days.

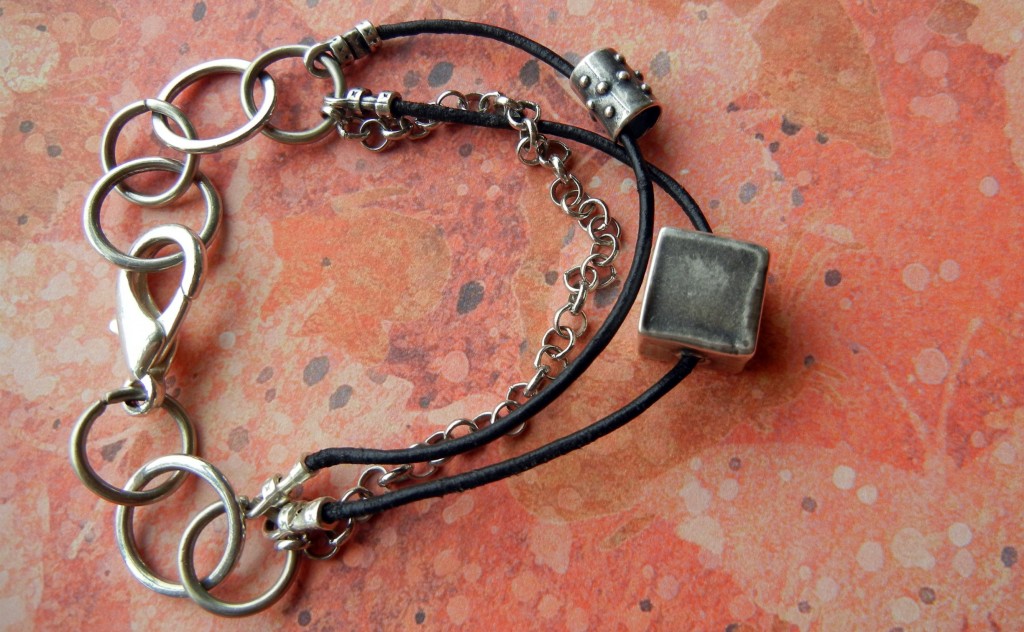
Toni’s bracelet design allows the cube bead to make a statement.

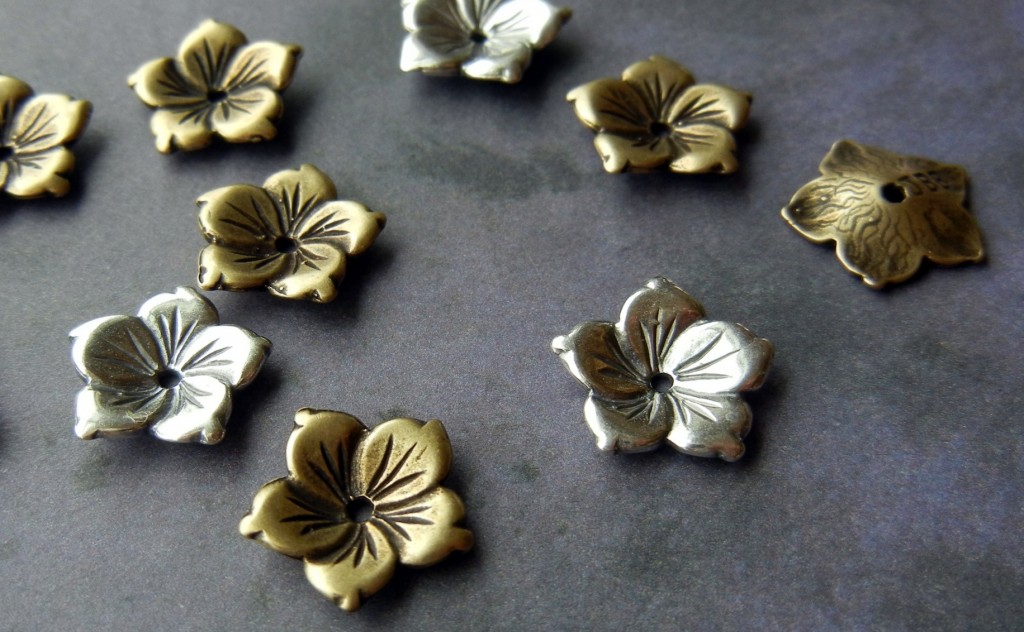
Whether you prefer antiqued silver, antiqued brass or antiqued copper in your jewelry designs, there are tons of new bead options with strong geometric shapes, fancy details and great textures. A few of my favorites include:

New summery flower beads in antiqued brass and silver.

Hollow metal barrel beads that remind me of Donkey Kong!

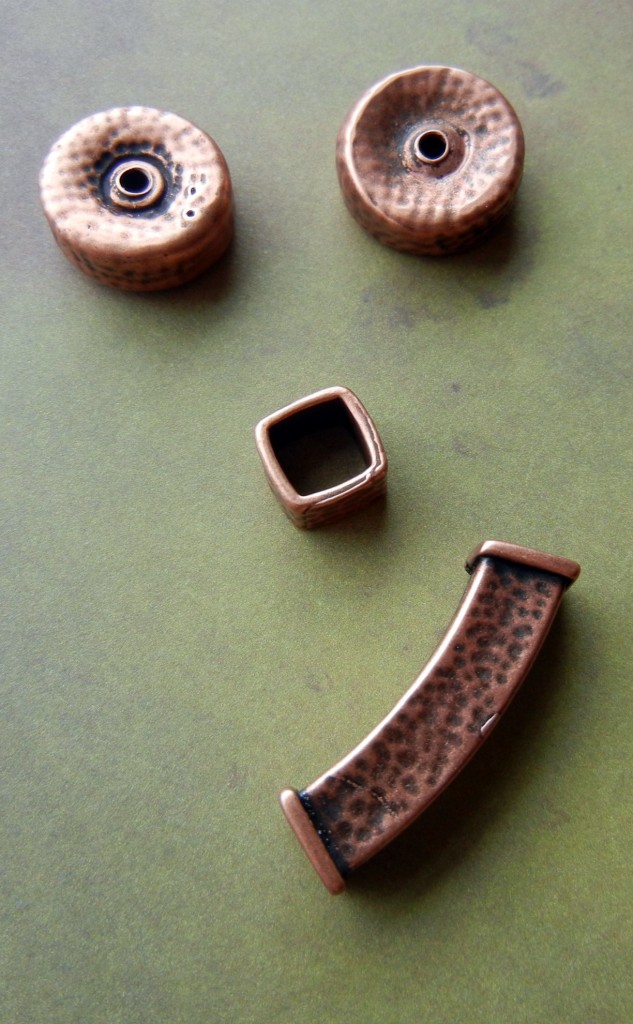
Tube beads and other unique shapes with hammered texture.

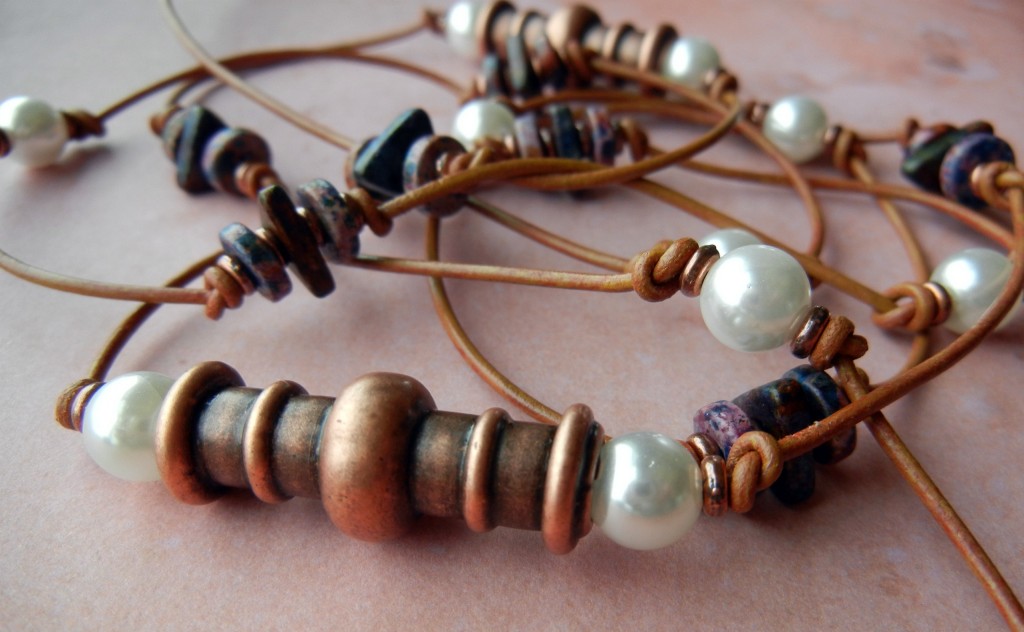
I don’t know exactly what this will end up being, but these chunky tube beads told me they wanted to be strung on leather with our new larger-hole shell pearls. We shall see!

The future of this piece is a mystery at this point!

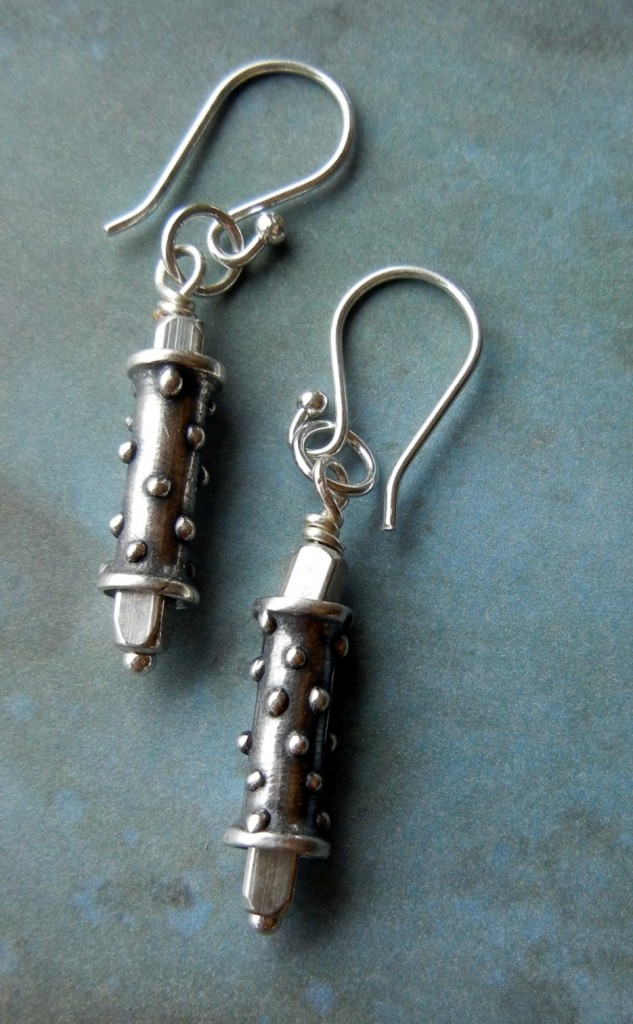
Finally, here are a pair of earrings Toni made. What a great go-with-everything design! For variety, it would be easy to add a splash of color or sparkle by capping the dotty tube beads with small gemstones or crystals.

West Yin earrings.

Do metal beads inspire you to add bright colors or to keep in neutral? I would love to hear what kind of combinations you come up with! ~ Cindy

]]>

Wire lashing: an easy way to cover your jewelry with beads or bling!

May 19, 2011
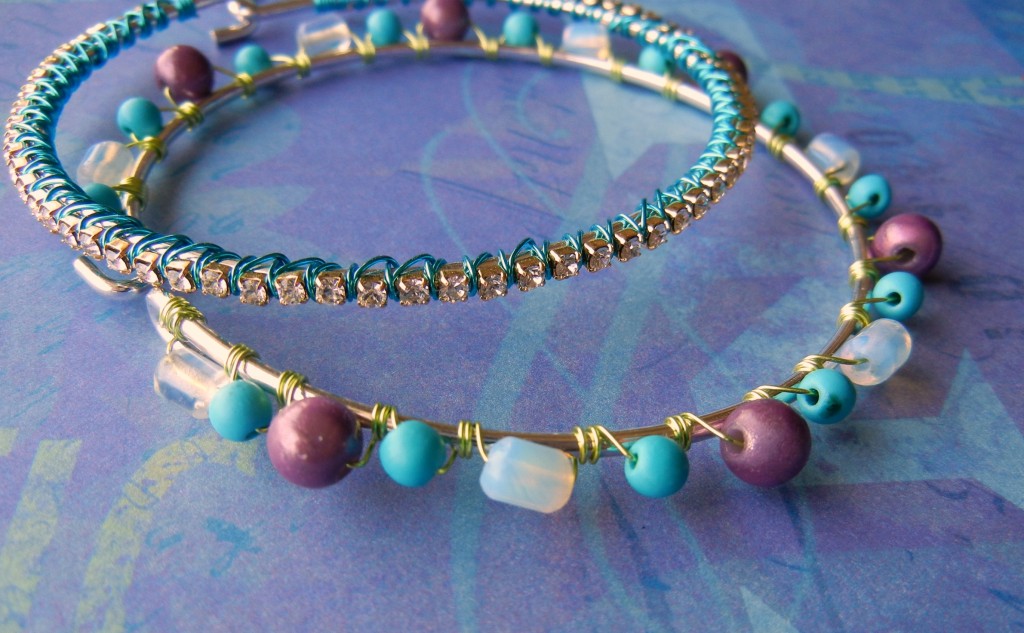
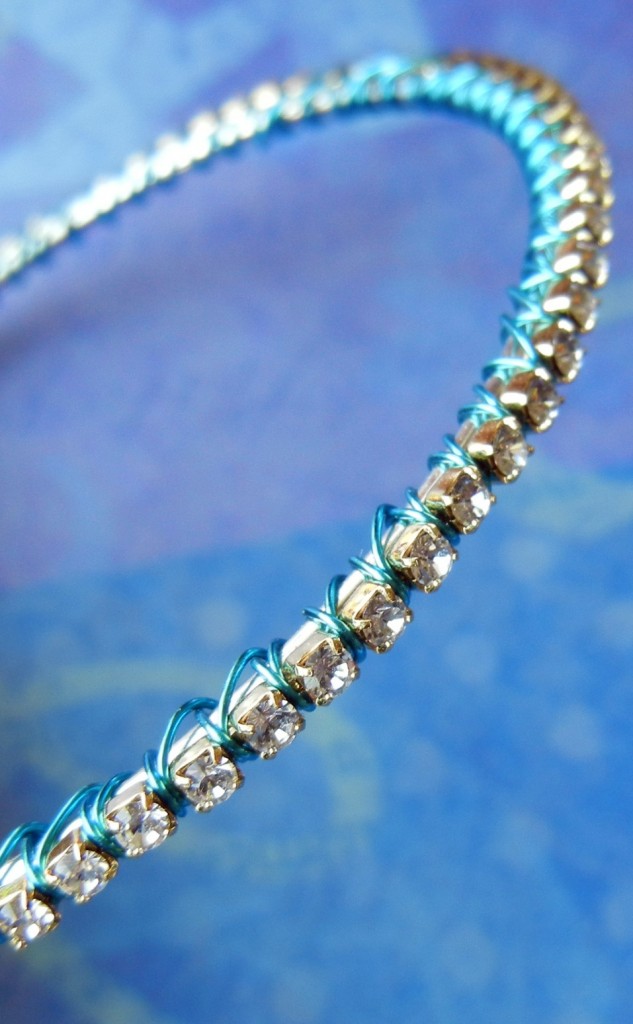
Two wire-lashed bracelets

Artistic Wire + bracelet forms = many many options!

I call this easy jewelry-making technique “wire lashing” to distinguish it from “wire wrapping” – but really, it is just wrapping thin wire around and around a component in order to cover it with beads (or chain!).

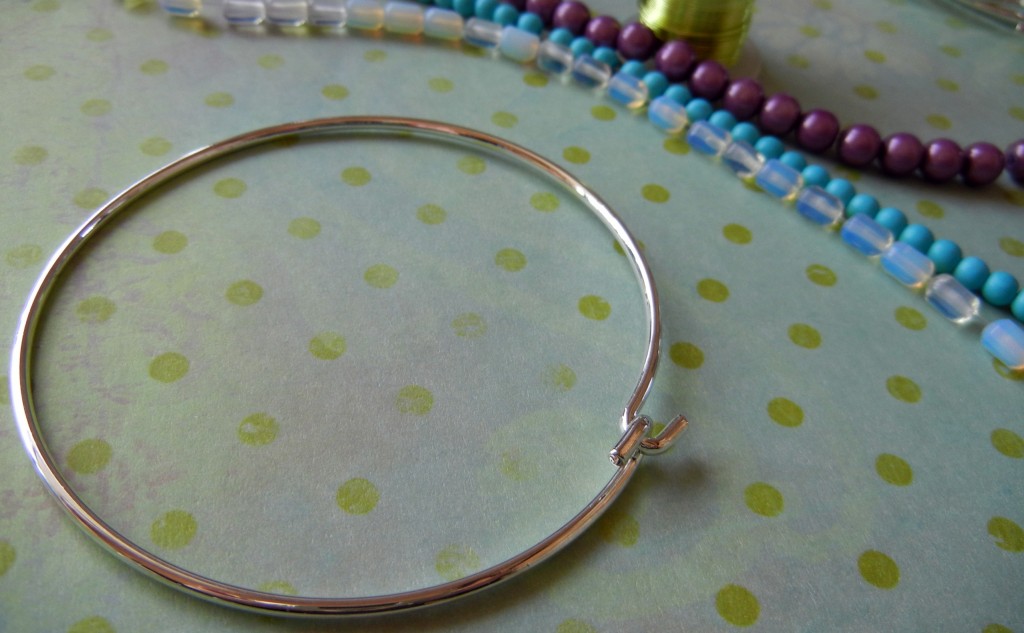
bracelet plain

A plain hook end bracelet is the perfect candidate for a good lashing!

The keys to wire lashing are simple, but oh so vital:

  1. Always begin with a few wire wraps around your base piece (in this case
    bangle bracelets) before adding beads or chain. Rather than trying to wrap the very end of the wire, leave about a 1″ tail so you have a bit of wiggle room.
  2. Always keep your wire wraps tight around the item. Pull the entire wire all the way through and around before beginning another wrap. If using beads, lay the bead against the base in the position you want it to end up in before wrapping the wire tight.
  3. Always use two or more wraps between beads to keep everything securely in place.
  4. Always stay calm if (ha – when!) the wire gets kinked or tangled. When it starts getting cranky, take a second to smooth it back out or it will grow into a major mess.
  5. When you’re all done, you can adjust the wraps and beads with your fingers to make it more uniform. Likely there will some wraps that are tighter than others. This is perfectly normal and easy to fix.

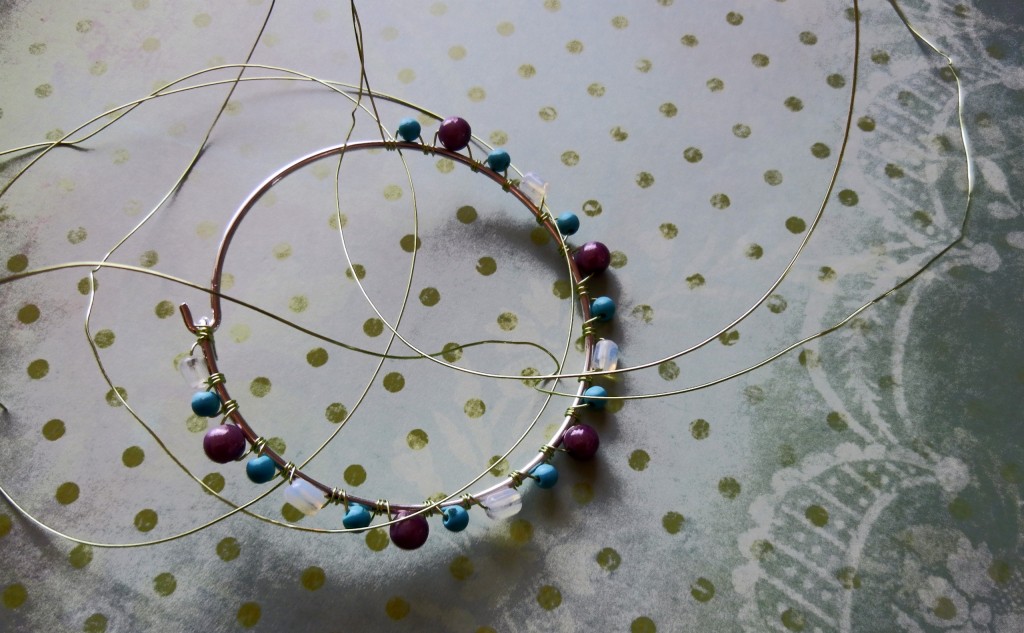
I’ve used this technique before on small items (kidney ear wires, links, ear hoops and hair combs) so decided to step up to bracelets today. The only difference is working with longer wire (about 4-5 feet for a typical bangle). You have the option of working with smaller sections of wire and adding new pieces as you go, but I really wanted to use one continuous piece. I did of course kink the wire. Repeatedly.

Looks scary, but this nightmare actually only took a few seconds to correct.

But the nice thing about using one piece of wire is that as you go along, the lashing goes faster and faster until suddenly you realize you are having fun! At the end, you feel so victorious you immediately want to make another. So you do … and realize the wire is too darn long again … but wait, now it is fun again … victory is within reach … This is how addictions start.

I like to use 24 or 26-gauge wire when lashing because it is very easy to manipulate with your fingers. Today I used several colors of Artistic Wire. The beaded bracelet has 6mm purple Miracle beads, 4mm turquoise magnesite and opalite barrel beads held in place by chartreuse Artistic Wire. It was quick and easy to make. However, I started with waaaay too much wire, so it took a little longer to add each bead than was really necessary. Impatient as always, I decided to do away with stringing beads. My next attempt uses rhinestone chain.

Sparkle mania

Sparkle mania has never been easier to achieve!

It turns out the 14pp size Swarovski Elements crystal rhinestone chain is almost exactly the same width as the bracelet form, so it stays in place nicely. I think this would be a great girl’s night jewelry project – simple, sparkly and easy to customize by adding some charms or changing up the wire color.

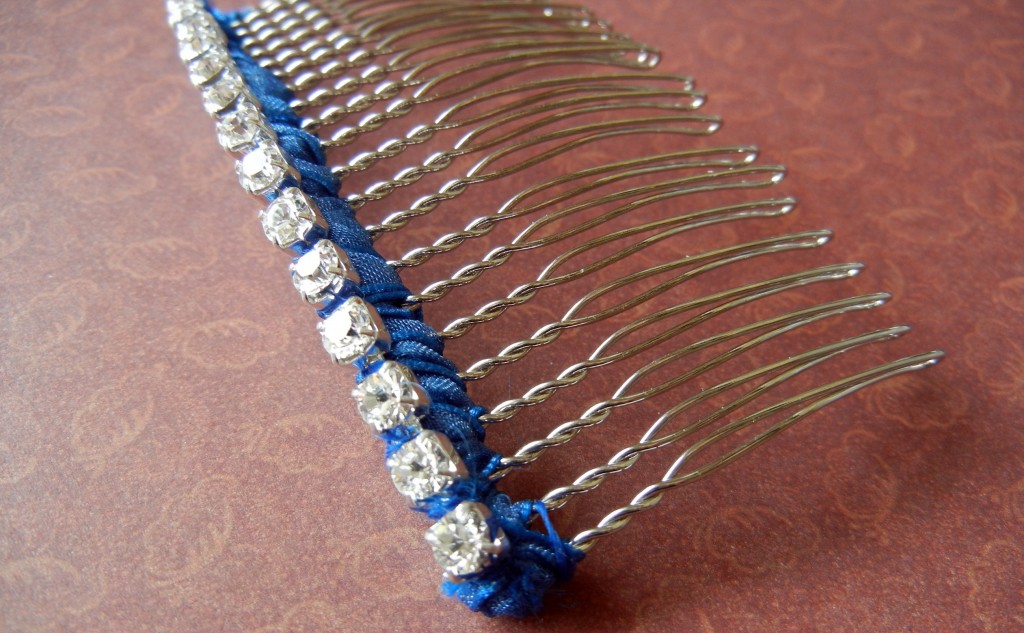
For those of you who prefer thread, check out Toni’s rhinestone hair comb – same technique, different materials.

rhinestone hair comb

Cover a comb with ribbon and rhinestones for easy elegance.

What else can we cover in rhinestone chain? Perhaps an easier question would be what can’t we cover! ~ Cindy

Another use for crimping pliers

May 13, 2011

Thanks for sharing a tip (comment below),
and thanks for sharing this blog with a friend!

Crimping pliers (crimpers) are special pliers designed for a very specific purpose: to crimp (fold) crimp beads onto beading cable such as Beadalon or SoftFlex. (Our beading cable technique sheet illustrates this very well.)

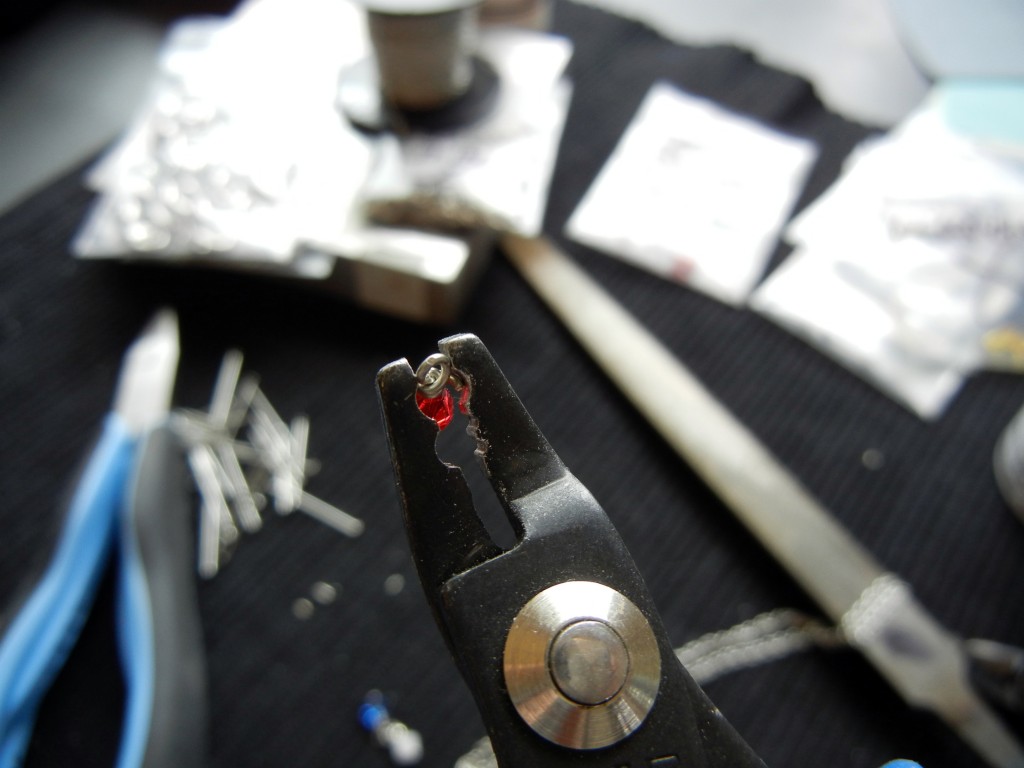
tuck wire tails with crimp pliers

No more chippies!

But here is another use for them: use your crimpers to tuck wire tails. The concave shape helps pull the wire in close to the wrap without chipping the bead underneath – especially handy when you are working with glass beads or crystal!

Snags are a drag. Do you have any similar tips for keeping wire tails tucked where they belong? ~ Cindy

Luster Gel – a new way to color silver!

May 10, 2011

Create a full rainbow of colored patinas on silver with new Luster Gel.

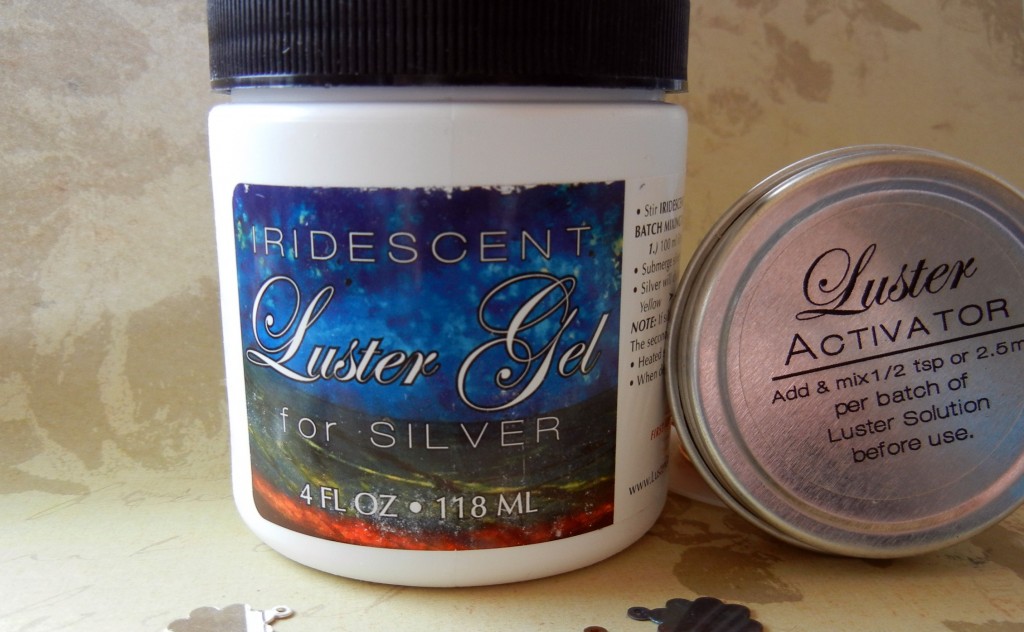
Iridescent Luster Gel for Silver is a brand-new product that makes it easy to change the color of silver jewelry. Unlike patina solutions that mostly* darken or oxidize the metal, Luster Gel creates a whole rainbow of different colors. The best part is, the colors appear in a reliable order! (*I say mostly because it is possible to get cool rainbows when using liver of sulfur… however, the process is less predictable and may require additional chemicals or heat.)

** 2020 Update: We loved Luster Gel at first, but the last couple years our customers had a lot of problems with it. It seems much less stable now, and at least half the people who used it in 2018 through early 2020, reported that it didn’t work at all and/or was discolored or dry when they received it. The others who gave us feedback said they had to use heat to get it to work, and they can achieve a similar effect with other forms of sulfur. So we no longer carry this product. **

Two options instead of Luster Gel are:

  • Search ganoksin or other jeweler’s forums, or take a class, or read a classic silversmithing book, to learn how to use traditionalย liver of sulfur (not the gel form) plus heat to produce rainbow effects similar to the photos in this blog.
  • Search the internet (especially youtube) for information on anodizing silver with sodium hydroxide (lye) and sulfur. This gives stunning colors, but it is definitely more hazardous than traditional liver of sulfur.
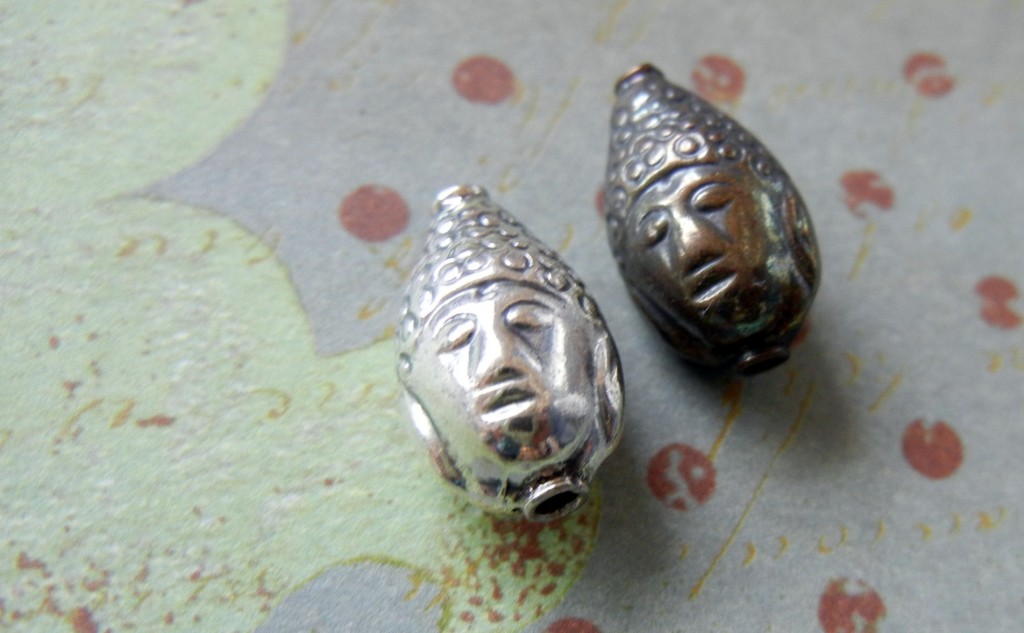
buddha beads

Sterling silver Buddha / bodhisattva beads before and after being treated with Luster Gel. The blue color takes 20-30 minutes to achieve.

Sterling silver, fine silver and silver-plated jewelry pieces can all be colorized with Luster Gel. Since patinas are created via chemical reactions, anti-tarnish treatments and coatings could interfere with the gel’s performance. Also, follow the basic chemical safety rules when working with this product: avoid skin contact, wear eye protection and work in a well-ventilated area. Don’t eat it either!

luster gel for silver

Iridescent Luster Gel for Silver

Luster Gel is sold in a 4 oz. jar and needs to be mixed with water and the included activator powder prior to use.

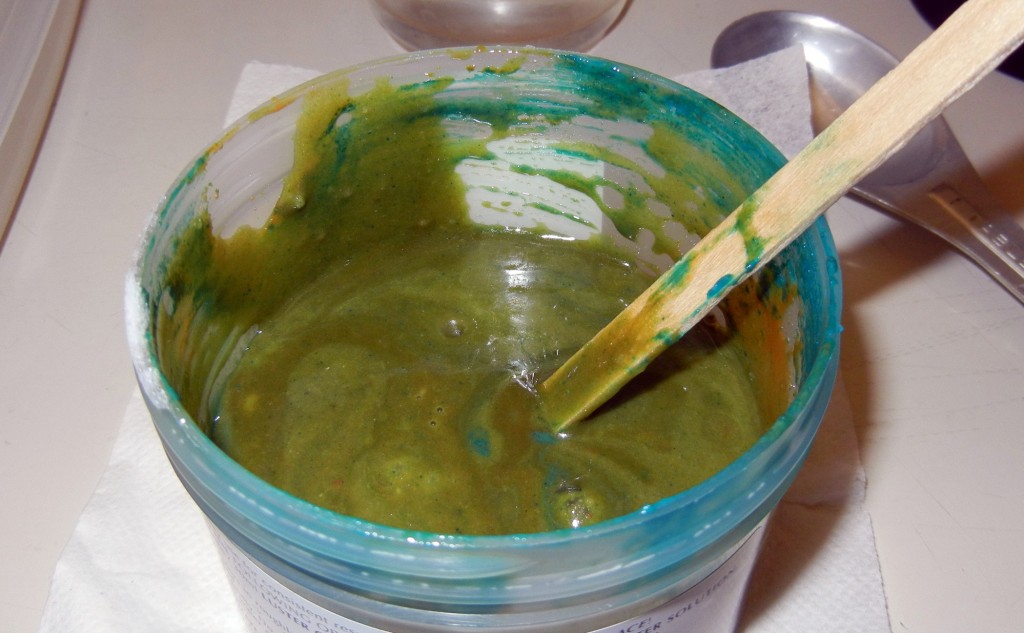
luster gel

Luster Gel gets its green color from cupric (copper) acetate.

For each batch of Luster Solution, mix, in order:

  1. 100 ml (about 3.5 oz.) filtered water (use warm – not hot – water for a more rapid color change)
  2. 30 ml (1 oz. / 2 tablespoons) Luster Gel (stir before use)
  3. 1/2 teaspoon Luster Activator (powder)
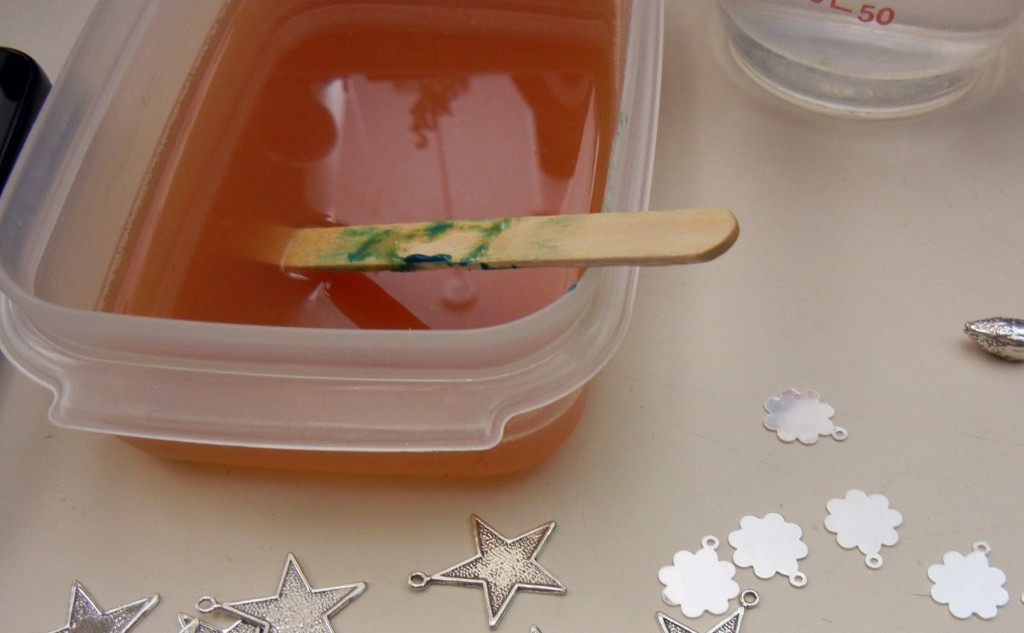
luster gel solution

Once mixed with the activator, the Luster Solution turns dark orange.

Dip your piece into the solution (use a string or a plastic hook, or wear gloves, to avoid touching the solution). Over the next 30 minutes, the silver will change from yellow to gold, then orange – red – brown – purple – and finally blue. If you leave it in longer, it will go through the same color-change process again, only this time the colors will be deeper and more iridescent.

luster gel silver rainbow

All of the colors pictured here occur within 30 minutes, starting with gold (top left) after about 5 minutes in the solution and ending with deep blue after a full 30 minutes. On the far right are plain sterling pieces to show the transformation.

Once you are happy with the color, pull your piece out of the solution, rinse with clean water and allow it to air dry. Once it is completely dry, seal it with Renaissance Wax or a clear spray sealer to protect the finish. That’s it. Super easy!

When you are done, mix baking soda into the Luster Solution to neutralize it. At that point you may safely dispose of it by washing it down the drain. Happy rainbows to you! ~ Cindy

Design challenge: who won?

May 4, 2011

Thanks to a couple hundred ๐Ÿ™‚ of you guys for jumping in on our latest Design Challenge: brushed copper beads! *And welcome to you visitors from the Rings & Things News Flash email!*

From the dozen or so
brushed copper bead recipients, Rings & Things received dozens of awesome photos showing what they designed.

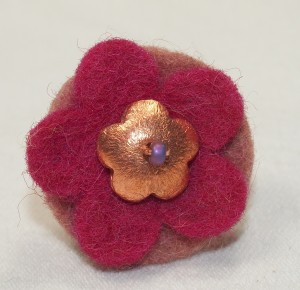
The grand prize winner is Kym Hunter! Kym built this simple but wonderful ring.

Front view (showing the flower bead)

We loved the simplicity, cleverness and cuteness of Kym’s ring! Besides two brushed copper beads (puffed flower and striped disk), Kym used just a couple of pieces of felt and some copper wire–to great effect.


BOOKMARK THIS PAGE!
GET INTO OUR NEXT CONTEST
…to be announced very very soon…


See Kym’s other brushed-copper bead creations at the original Design Challenge blog post. They’re in a photo gallery there with everyone else’s entries.

Don’t miss out! You’ll find jewelry there like Melissa Meman’s drape earrings, inventively using the small brushed disk beads (which she oxidized) as vertical design elements .

I promise you’ll have a great time browsing the photos ๐Ÿ™‚ Thanks for sending a friend the link, to share & enjoy!

Staff pick! Lucerna beads by Swarovski

May 3, 2011

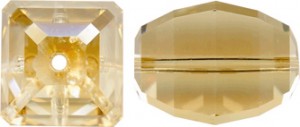
Lucerna, a definite staff pick!

These new Lucerna crystals by Swarovski, stock #05-030-08-, are stunning!

I am sure no picture can capture their lantern-like brilliance. (I’m trying, though.) ๐Ÿ™‚ Here’s a line sketch, to illuminate how neat their shape is:

When first thumbing through all the great beads & things in our new supplement, I totally overlooked these beauties.

The other day a customer brought the Lucernas to my attention, and ever since, I can’t get them off my mind.

When you get these “Swarovski 5030” crystals* in your hand and see all the rectangular facets sparkling back at you, they are hard to resist.

My mind is already racing with numerous ideas of how these treasures can be incorporated into fabulous pieces of jewelry.

Thank you Swarovski, this Lucerna crystal shape is a keeper!

–Amy in the Rings & Things showroom


* As we insiders call them ๐Ÿ˜‰

Paper beads: what is this photo doing here?

May 2, 2011

What is this photo doing here?

From the Rings & Things Showroom: What's Fresh with Freshwater Pearls

April 29, 2011

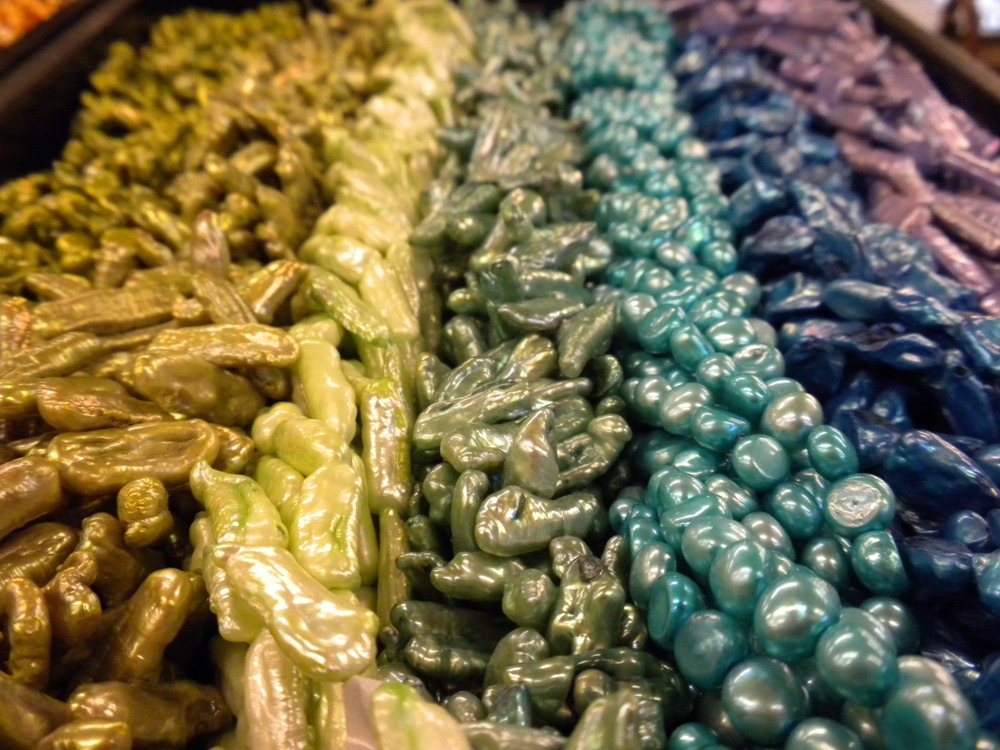
Blue and Green Freshwater Pearls

One of my favorite materials to make jewelry with is, hands down, freshwater pearls. I absolutely adore freshwater pearls! Why do I love them so much? Well first and foremost, they are beautiful! Also, they now come in so many shapes and colors, that the possibility for jewelry designs are endless. Freshwater pearls add a whimsical and organic feel to jewelry designs and plus they help me to get in touch with my inner “mermaid”!

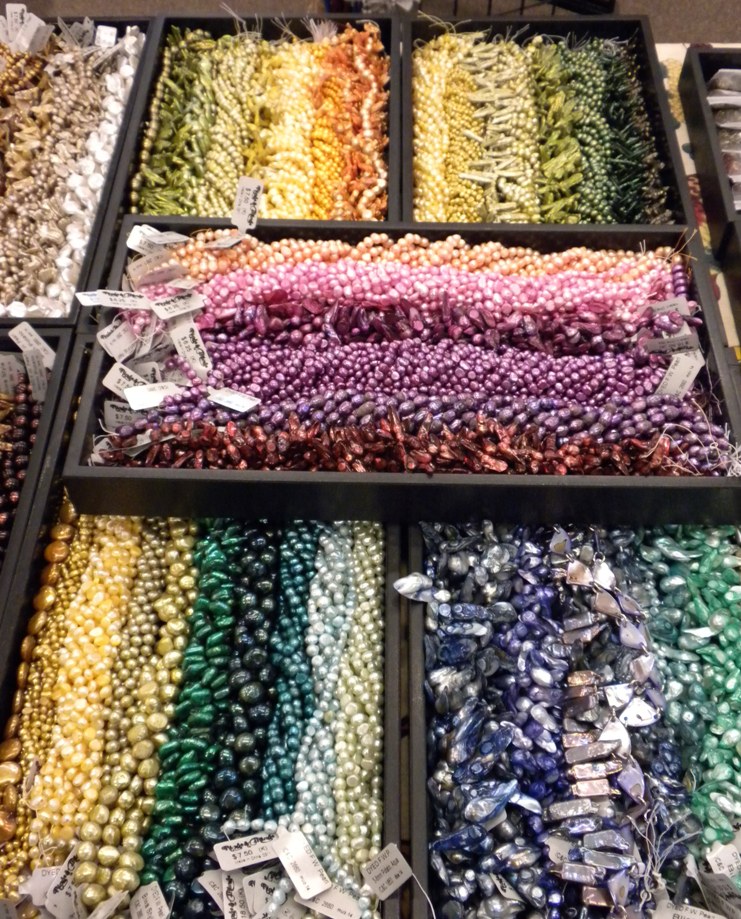
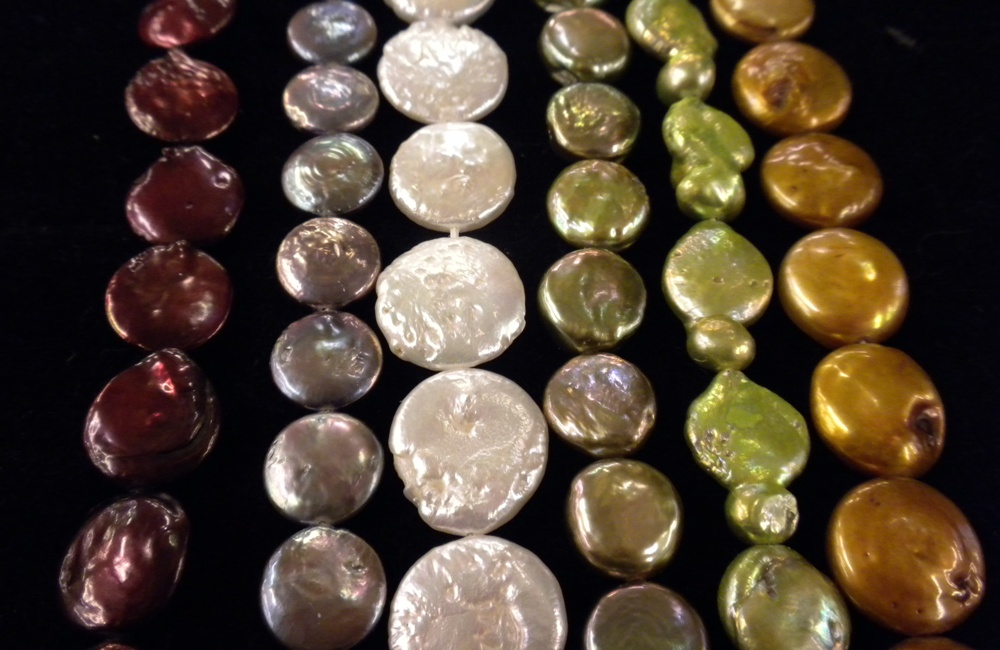
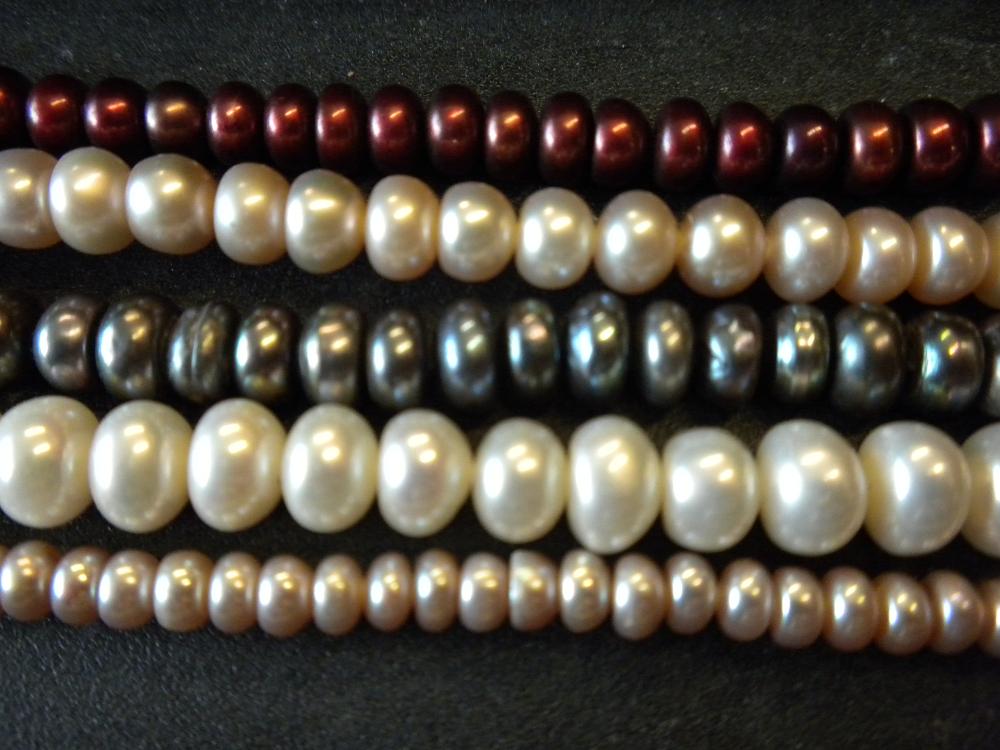
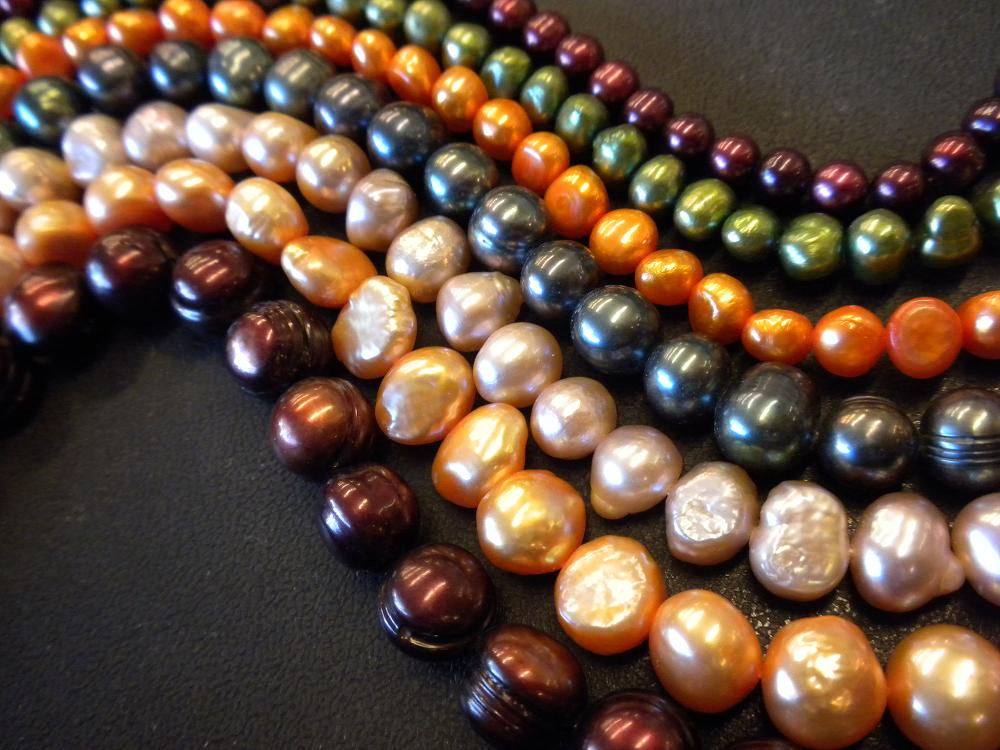
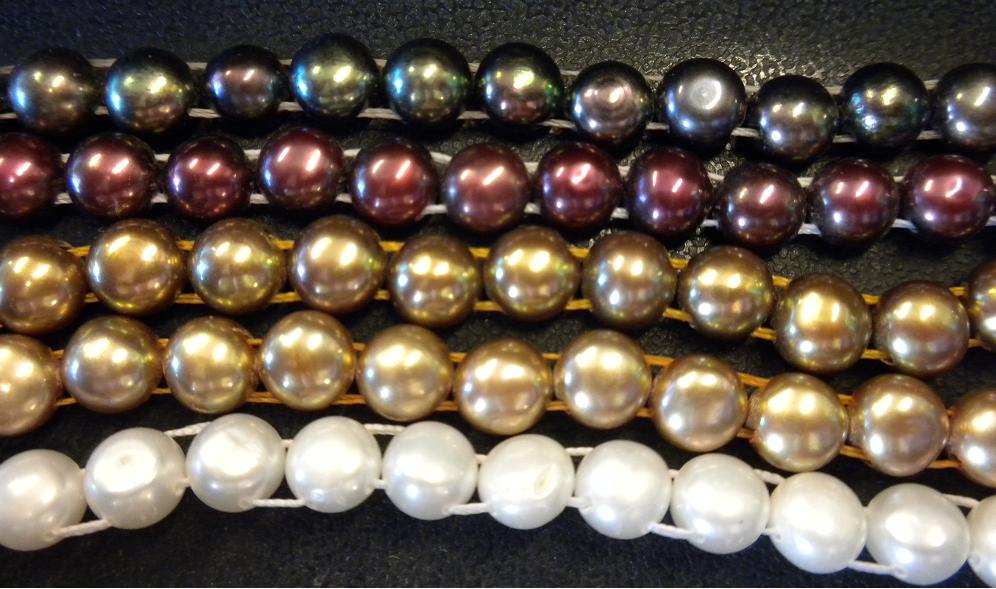
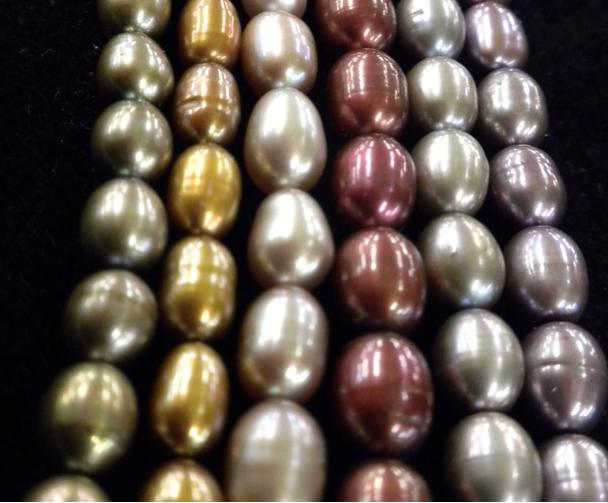
Some of the pearls we have right now at our Spokane, Washington Showroom

That being said, here at our Rings & Things Showroom in Spokane, Washington, we just received a huge shipment of beautiful pastel and jewel tone freshwater pearls (just in time to help you with your Spring jewelry designs)! Though I was tempted to keep these pearls a secret all to myself, I realized they were just too pretty to not share with our fellow jewelry “bloggies”. So I have taken some pictures to show you the rainbow of pearls we currently have on display.

So what are Freshwater Pearls?

Freshwater pearls are cultured with the use of mollusks; in particular a species of freshwater mussels. The mussels are injected with a nucleus bead that is sometimes made from a small piece of shell or mantel tissue. The shape of the injected bead helps to determine the shape of the future pearl, as nacre will form around this bead. Nacre is the silky coating layered on pearls that make them so silky and beautiful. Over the years, pearl producers have become quite skilled at creating pearls in a variety of shapes. Below is a visual guide of the most common pearl shapes and a little info about each shape. Enjoy!

Coin Pearls: These are formed by using a disc-shaped bead as the nucleus. Sometimes they are almost perfect circles, while other times the shape is much more organic.

Keishi Pearls: These are actually formed when the mussel rejects the injected bead. The result is a very free-formed shape that kind of resembles Rice Krispies! They are by far my favorite shape of pearl!

Corn Pearls: This shape is like a round, but more flat. They resemble corn kernels and are center-drilled. Corn pearls can be used where you would typically use a rondelle shaped bead.

Potato Pearls: These pearls can vary from almost perfectly round, to fairly lumpy, like a potato. This is a very common pearl shape. Sometimes potato pearls have ridges in the nacre.

Blister Pearls: These pearls are irregular and occur when a pearl grows while still attached to the inside of the shell of the mollusk. They are also sometimes called bouton pearls.

Button Pearls: These are very similiar in shape to the corn pearls. They are side-drilled with one flat side and one rounded side. The picture shows the rounded side, but they are sitting flat on the surface.

Biwa Pearls: This name originally referred to all freshwater pearls grown in Biwa Lake, Japan. However, the name now refers to any stick-shaped or rectangular pearls. Usually they are drilled horizontally in the center or tip of the stick, but as you can see sometimes they are drilled through the center lengthwise.

Rice Pearls: These pearls are smooth and oblong in shape like an oval. They are usually center-drilled, though sometimes they can be found side-drilled.

Well, I hope I have gotten you inspired and excited about freshwater pearls! We have an ever-growing supply of freshwater pearls here at Rings & Things available as regular stock all the time. If you want to see some of the fantastic bright and springy pearls we just received, then head down and see us at our Rings & Things Showroom or check out our traveling Trunk Show, heading across the country right now! (Request an invitation!)

Tiffany

Trendspotting: Tiny pearls! I mean really tiny!

April 26, 2011

As the pearl buyer at Rings & Things, I’ve been told for the last 2-3 years that pearls smaller than 6mm are getting harder to find. So imagine how excited I was to see these sweet 2mm pearls!?

Tiny 2mm freshwater potato pearl beads - stock item 20-632-011

Tiny 2mm freshwater potato pearl beads

I bought several colors in 2mm. Our #20-632-011 is the white version. These are so sweet! A tiny potato pearl.

Plus I found a 3mm potato in white, #20-633-011:

3mm cultured freshwater pearl beads - stock item 20-633-011

3mm cultured freshwater pearl beads

and a 2-2.5mm rice shape in white, #20-612-011:

2mm cultured freshwater rice pearls

2mm cultured freshwater rice pearls

I’m not sure if I can always get them, but for now… I’m just trying to think of something to make with them. What would you design with tiny pearls?

–Karin Davis, gemstone buyer