Browsing Category

Rings & Things Tutorial

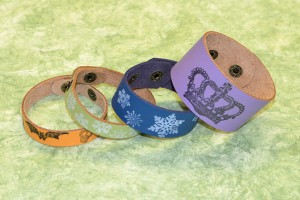
Easy to Make Rubber Stamped Leather Bracelets

September 30, 2013
rubber stamped leather bracelets

Easy to Make Bracelets

With the holidays fast approaching, why not make some simple handmade gifts for friends and family?

Using rubber stamps and permanent ink pads, you can easily embellish ready-made leather bracelets to create fun and whimsical gifts in just a few minutes.

This DIY tutorial shows you how.

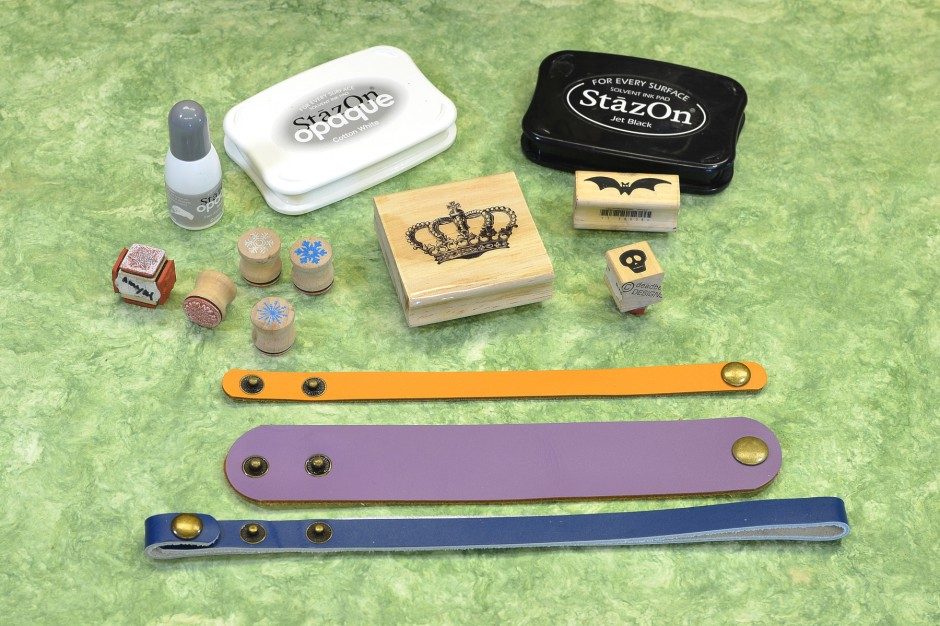
Supplies for DIY stamped leather bracelets

Gather your supplies

Gather your Supplies

You will need the following products and supplies:

Rubber Stamp Angel Policy

If you plan on selling your finished pieces, remember to check out the “angel policy” for the rubber stamps you choose. The manufacturer or stamp artist may have restrictions on using the stamped images on items created for sale.

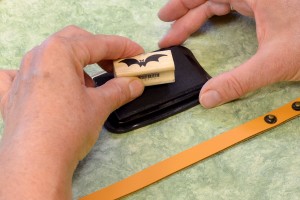
Center the stamp on the leather bracelet

Plan your Layout

Plan your Design Layout

If you want a certain stamped image to appear in a certain location, like the center of the bracelet, you should plan your design layout.

Depending on the length of leather bracelet you choose, you can plan the layout directly on the bracelet.

Or use the bracelet as a template to trace its shape on paper. Trace several, so you can practice. This is helpful when determining the spacing needed between individual letter stamps when stamping words or names.

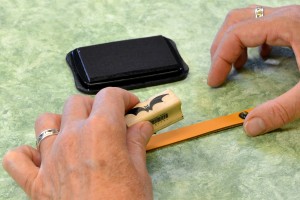
Stamp several times so the stamp picks up the ink.

Ink the Stamp

Stamp your Design

Place the rubber stamp on the ink pad and press down so the stamp picks up the ink. Repeat several times. Use plenty of ink for a dark image.

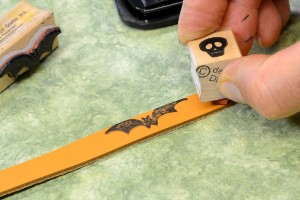
Place inked stamp over the leather bracelet

Center inked stamp over bracelet

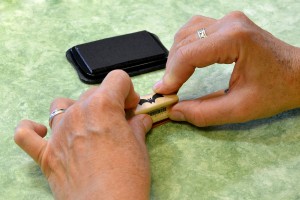
Press the stamp down on the leather bracelet

Press the stamp firmly

Press the stamp firmly on the leather bracelet and hold for a few seconds. Then gently lift off the stamp.

Let the StazOn ink dry for several minutes

Allow the ink to dry

To prevent smudging, allow the ink to dry before stamping the next image. It takes about 3-5 minutes for permanent ink to thoroughly dry, if you can wait that long.

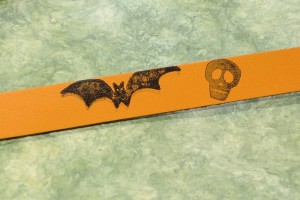
Stamp another image onto the leather bracelet

Ink another rubber stamp and press it down on the leather

Use more StazOn ink for a darker image.

Different amounts of ink create a nice contrast

Use plenty of ink for a dark image. Less ink makes for a nice contrast. Or use several different colors of the StazOn ink for your design.

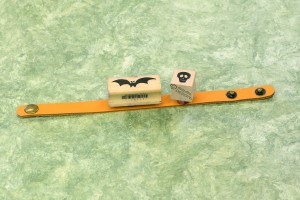
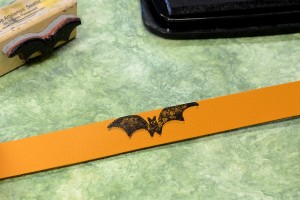
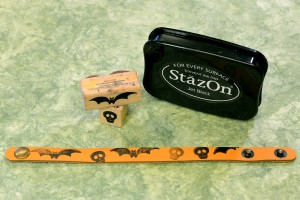
Leather bracelets and StazOn ink make fast and scarey projects.

An easy to make spooky gift

Fixing Mistakes

StazOn ink is permanent. If you make a mistake, you can remove the image with StazOn All Purpose Cleaner. But be cautious, as this cleaner is a solvent and will also remove the dye on the leather bracelet.

When you are finished, use the cleaner to remove the dried ink on the rubber stamps.

Since the StazOn ink is permanent, there is no need to apply a sealer to the bracelet.

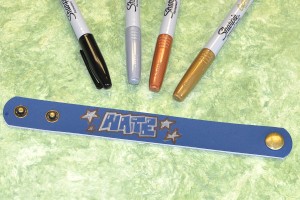
Draw your own design on leather bracelets with Sharpies

Draw freehand designs with Sharpie permanent markers

Another fast way to make a bracelet is to draw your own design on the leather using Sharpie permanent marking pens.

DIY rubber stamped leather bracelets

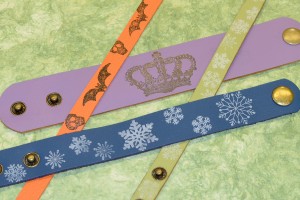
These bracelets are great for all occasions from Halloween and Christmas to Queen for a Day.

With ready-made leather bracelets, StazOn ink pads, and your favorite rubber stamps, you can start making your handmade holiday gifts now.

Amy

Beadalon® Wire Banding Pliers

August 20, 2013

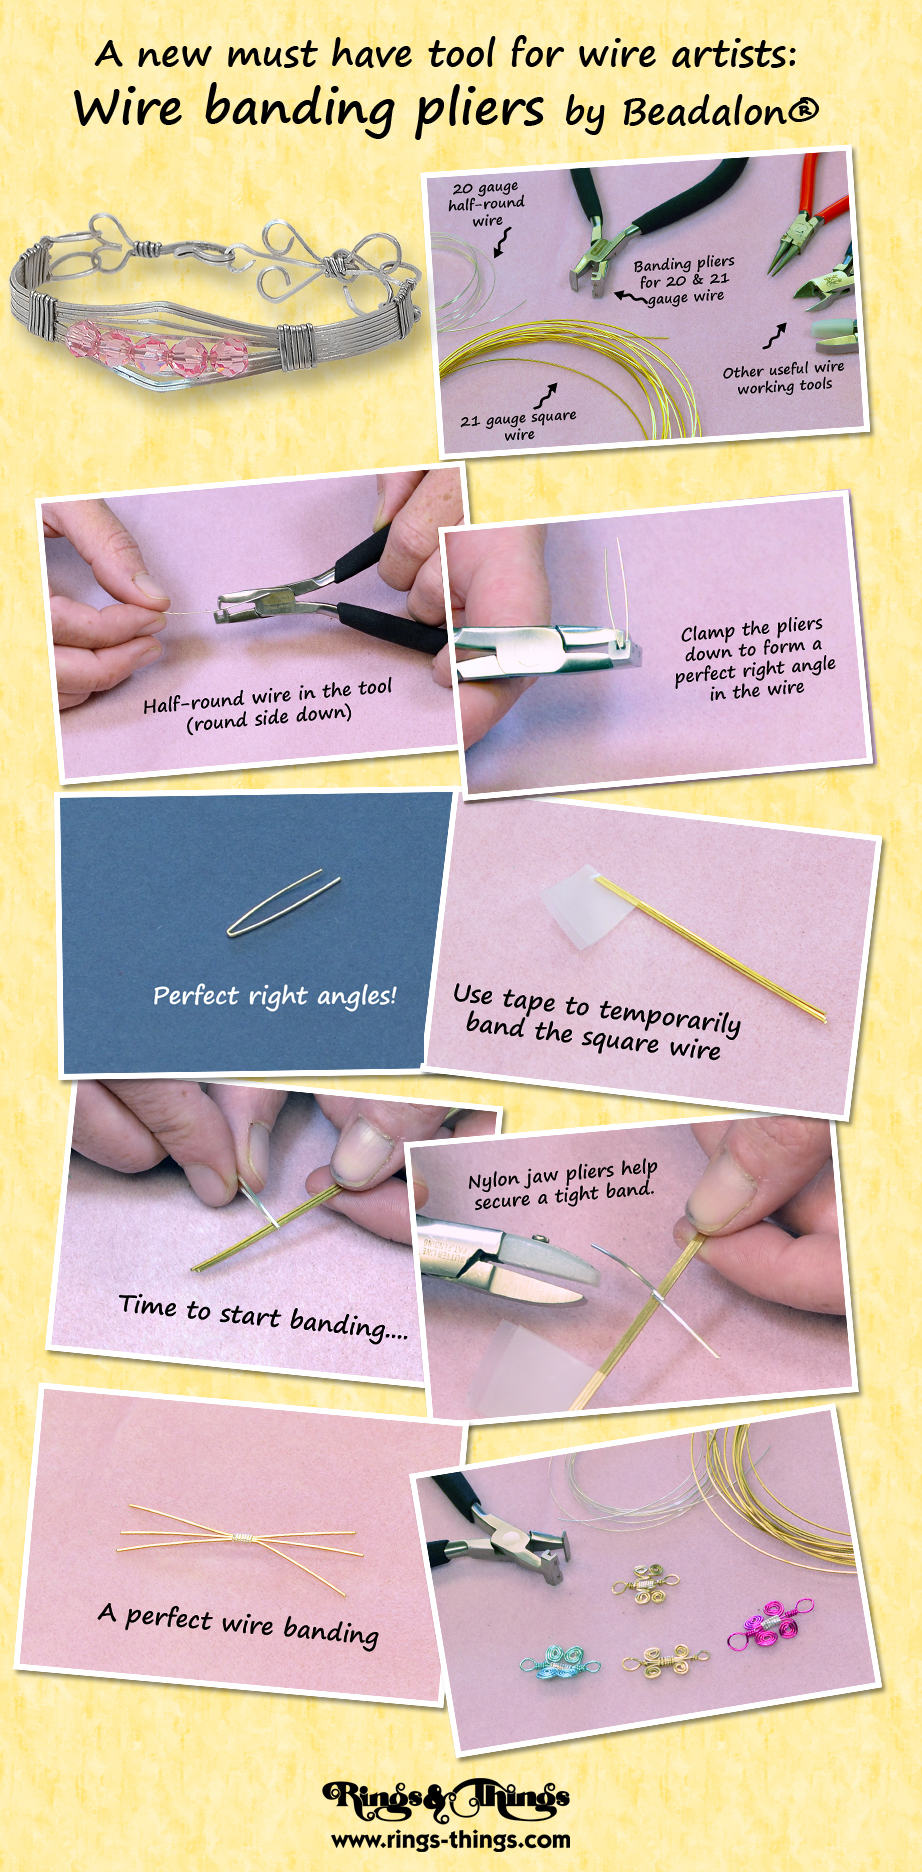
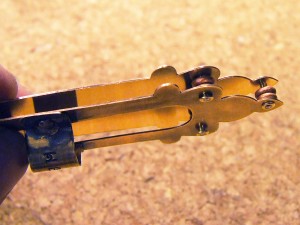
The initial bends when trying to band wire together can be frustrating. I have tried every tool, hoping to find something that would accurately bend wire into two perfectly-placed right angle bends without marring it. Now there is a specialty tool made just for perfect double right angle bends — Beadalon Wire Banding Pliers!

I am a perfectionist in the jewelry I create, and the last thing I want to do is fight with the very beginning of the project and end up with scratched banding, or having the banding bend be just a little off. Not only is it frustrating, but the accuracy of the banding can make or break the entire piece.

This tool is very easy to use — now you can quickly create two right angle bends close together, so you can neatly band the remainder of your wires together. We have created the graphic tutorial below to help you to learn how to use these cool wire banding pliers.

Please visit our Design Gallery for 100’s of free jewelry projects / tutorials, but we apologize that as of 2015 during a site upgrade, the 2 wire wrapping projects projects below have retired.

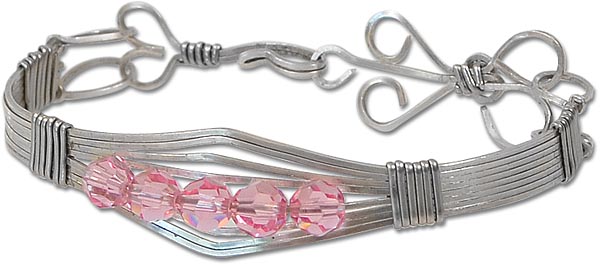
Wire wrapped bracelet project using Beadalon Wire Banding Pliers

Drusilla’s Bracelet of Submission by Amy Scalise
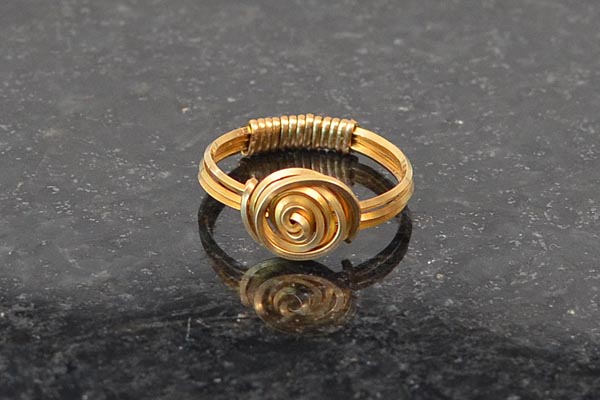
Wire wrapped bracelet project using Beadalon Wire Banding Pliers

Square Rose Ring by Valorie Nygaard-Pouzar

Although Rings & Things no longer sells any banding pliers, we’ve kept this infographic for those of you who already own some and need a quick refresher:

Make your wire bending projects easier with Beadalon Wire Banding Pliers

Beadalon Wire Banding Pliers Graphic Tutorial

Create a Hinged Metal Memory Journal

July 18, 2013

Use a hinge to turn shrine-shaped metal blanks into a journal!

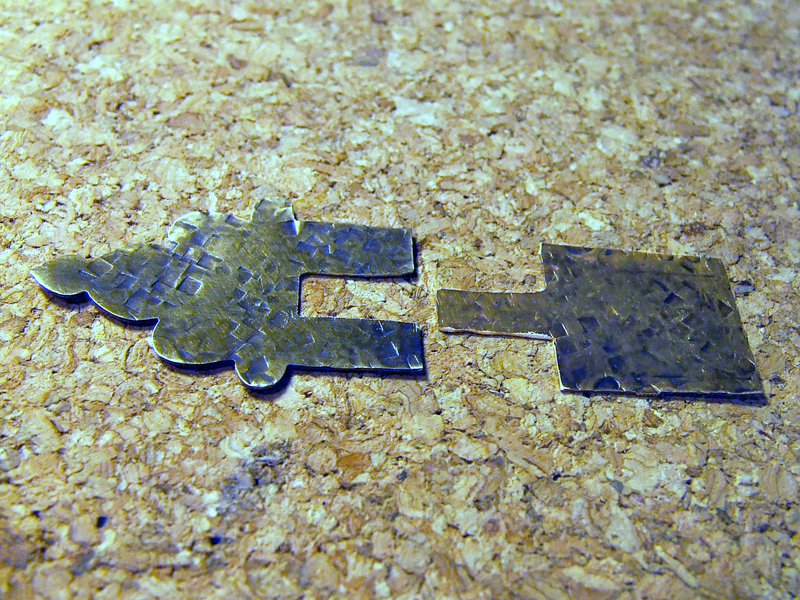
Decide on the layout, location of the hinge and other decorative elements. Using a checkered hammer, apply texture to the top and bottom panels of the journal. Patina, file rough edges and clean.
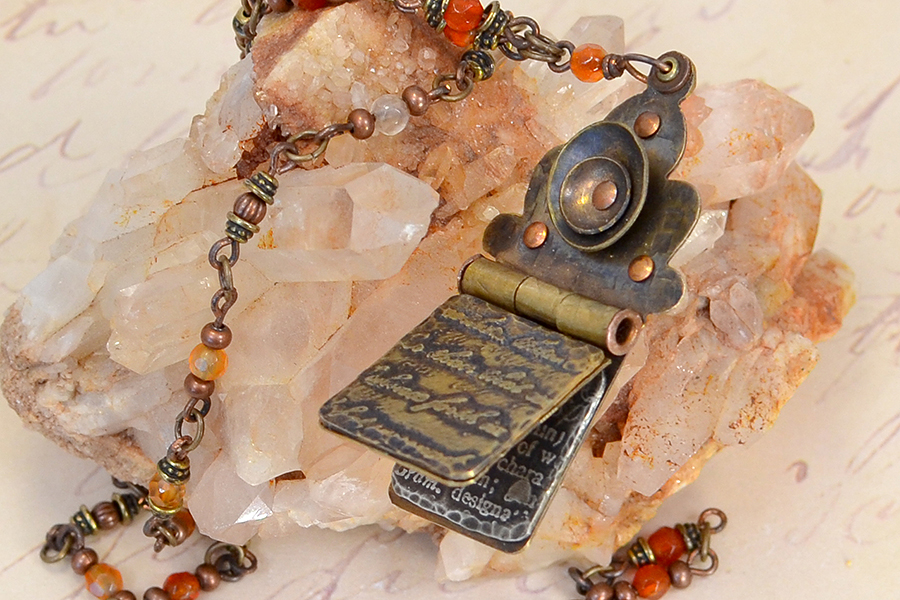
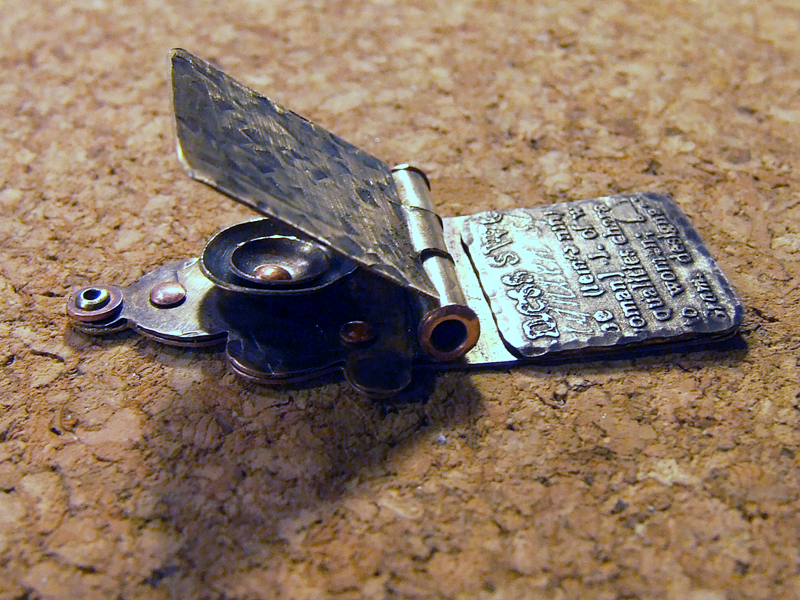
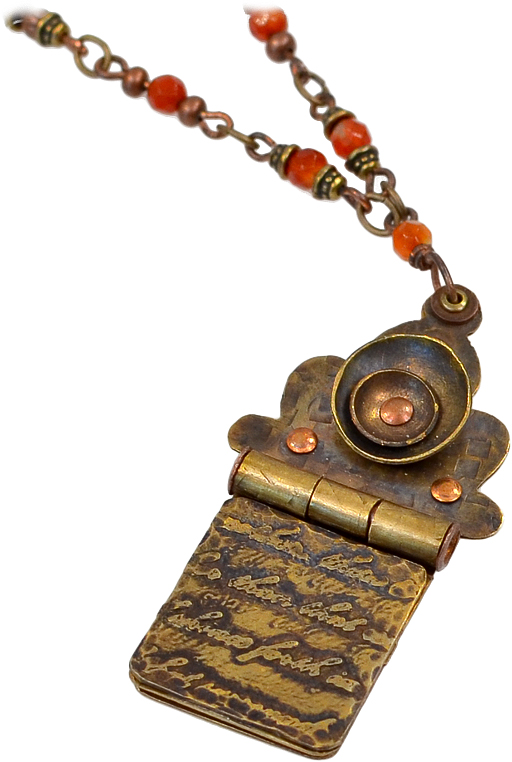
Hinged Pendant Memory Journal Rings & Things. This free DIY jewelry project features metal etching, metal stamping, dapping and riveting. Antique brass, nickel silver, copper and natural agate were used in creating this design. The one-step looping plier was used for the handmade chain.

Layout

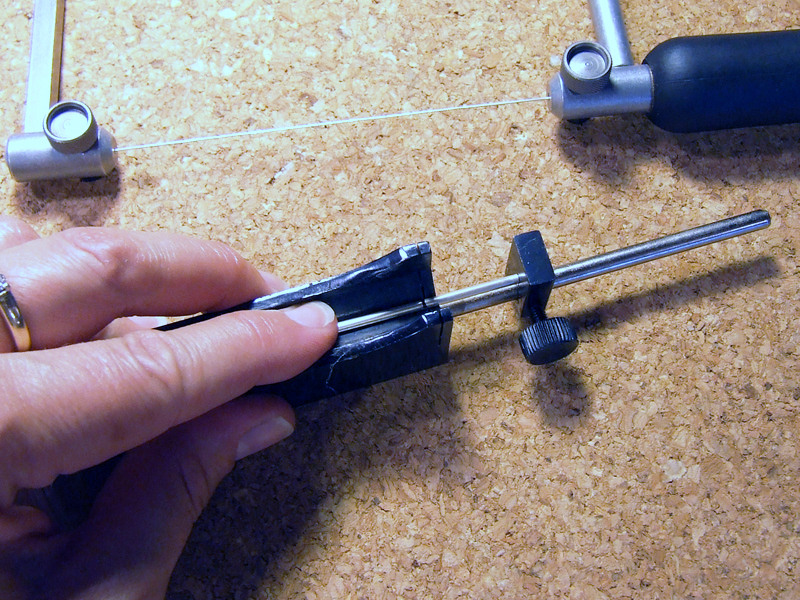
Cut the hinges, which can be as wide or as narrow as you choose. For 3/32 tubing, make hinges that are one-half inch deep. You need an odd number of hinge tabs. Measure, mark and saw tabs into the top panel. Use plenty of cut lube to prevent the saw blade from sticking when cornering.
Hinged Pendant Memory Journal Rings & Things. This free DIY jewelry project features metal etching, metal stamping, dapping and riveting. Antique brass, nickel silver, copper and natural agate were used in creating this design. The one-step looping plier was used for the handmade chain.

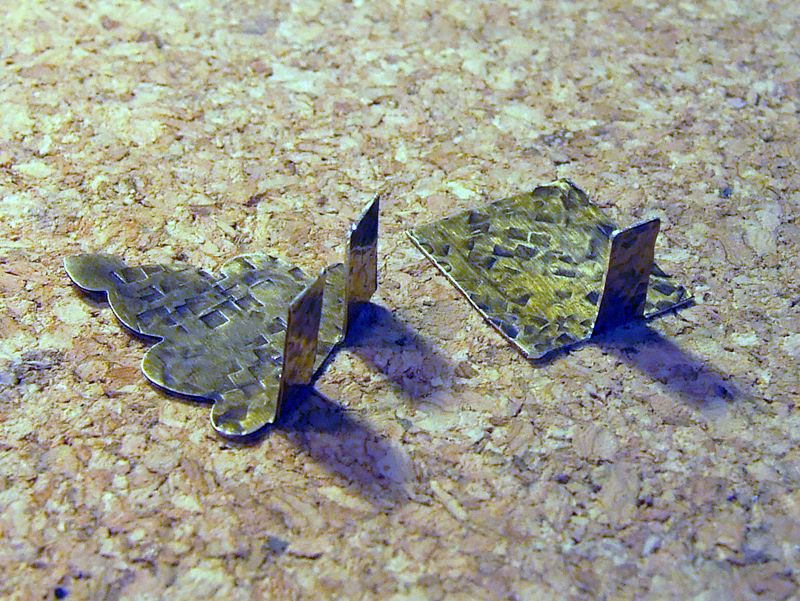
Create Hinge Tabs

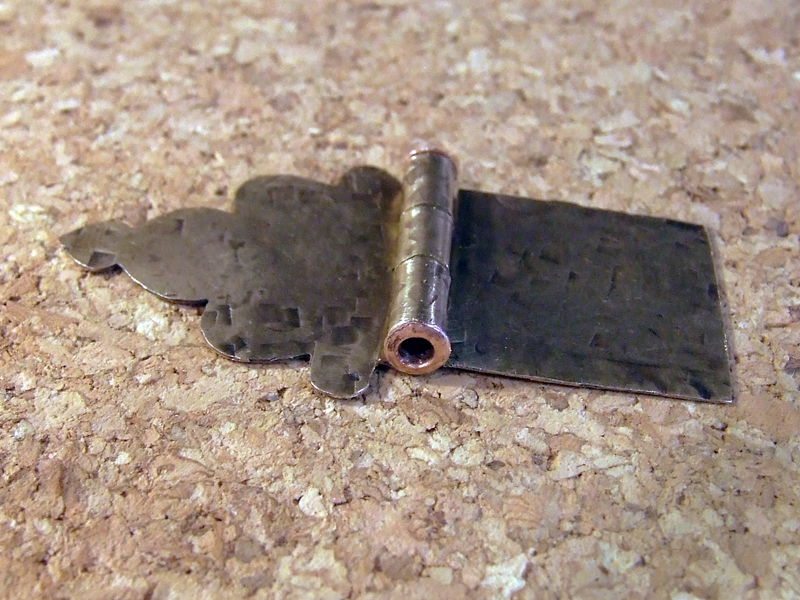
Using wide, flat nose pliers, crease and fold each tabs up to a 90 degree angle. The position of the fold determines whether the hinge will be visible from the front of the pendant, or only from the back side. Keep the textured sides face up, so the design is consistent.
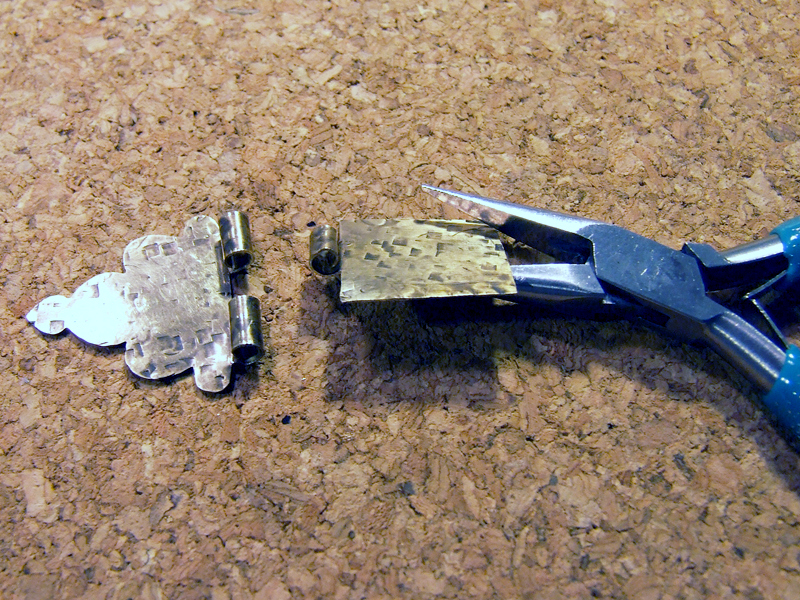
Carefully roll tabs into cylinders using chain nose pliers or medium bail making pliers. Leave hinges a bit loose until after you have inserted the tubing, then you can tighten for best fit.
Hinged Pendant Memory Journal created by Sondra Barrington of Rings & Things. This free DIY jewelry project features metal etching, metal stamping, dapping and riveting. Antique brass, nickel silver, copper and natural agate were used in creating this design. The one-step looping plier was used for the handmade chain.

Roll Into Cylinders

Use a tube cutting jig to cut a length of tube 1mm longer than the width of your piece (for 1/2mm on each side).
Hinged Pendant Memory Journal created  Rings & Things. This free DIY jewelry project features metal etching, metal stamping, dapping and riveting. Antique brass, nickel silver, copper and natural agate were used in creating this design. The one-step looping plier was used for the handmade chain.

Cut Tubing

Slide tubing down the channel and finesse hinges as needed. Rivet tubing into place to finish the hinge. Open and close hinge to ensure a proper fit.

This free DIY jewelry design by Sondra Barrington features antique brass, nickel silver, metal etching, dapping and creating hinges.

Assemble Hinge and Insert Tubing

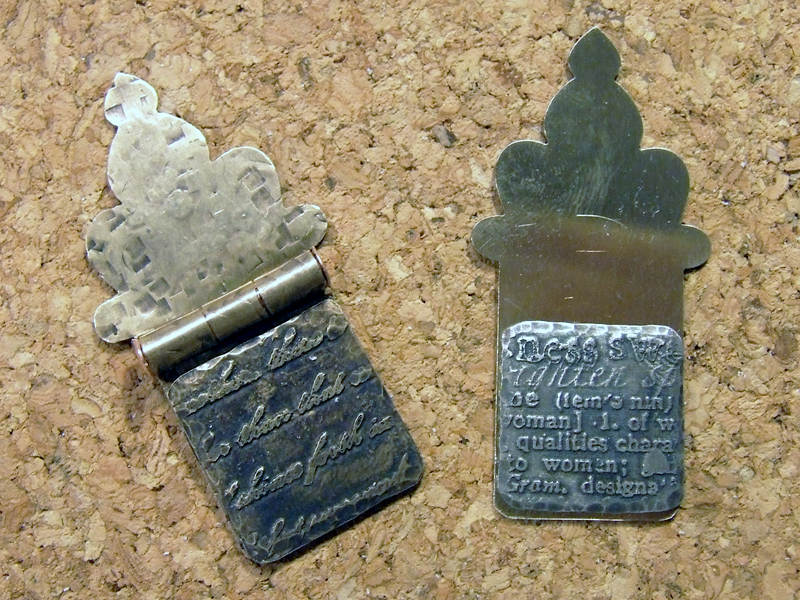
Working with the bottom panel, lay out etched metal pieces for the cover and inside page. Cut, file and patina as necessary. Leave sufficient room for the hinge to lay flat against the bottom panel.
Hinged Pendant Memory Journal created by Sondra Barrington of Rings & Things. This free DIY jewelry project features metal etching, metal stamping, dapping and riveting. Antique brass, nickel silver, copper and natural agate were used in creating this design. The one-step looping plier was used for the handmade chain.

Lay out Etched Metal Page

Measure, mark and punch holes for decorative rivets, accents and center piece (using the small side of the hole punch).
Hinged Pendant Memory Journal created by Sondra Barrington of Rings & Things. This free DIY jewelry project features metal etching, metal stamping, dapping and riveting. Antique brass, nickel silver, copper and natural agate were used in creating this design. The one-step looping plier was used for the handmade chain.

Prepare Embellishments

Using two-part epoxy, carefully glue the etched metal panels into place.
Hinged Pendant Memory Journal created Rings & Things. This free DIY jewelry project features metal etching, metal stamping, dapping and riveting. Antique brass, nickel silver, copper and natural agate were used in creating this design. The one-step looping plier was used for the handmade chain.

Lay out Etched Metal Page

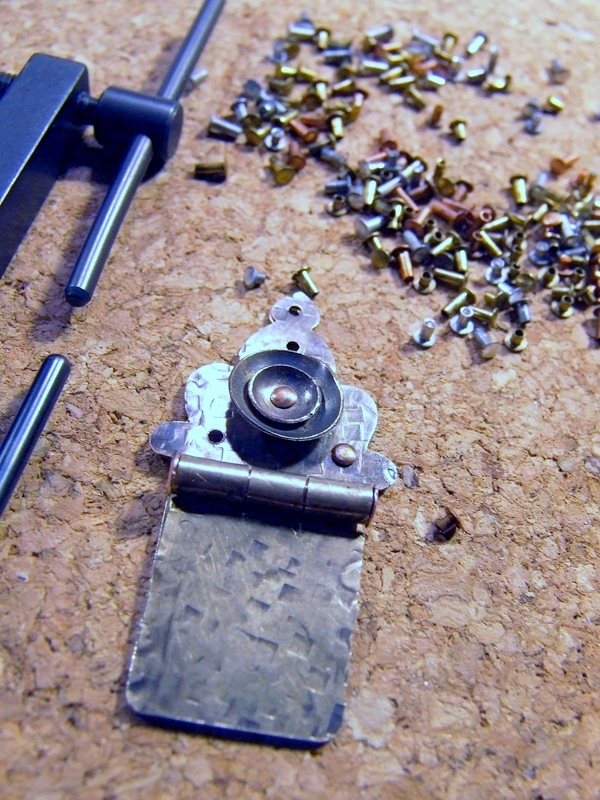
Using a dapping set, dome two small round shapes that can nest one inside the other. Patina, file away any rough edges and clean the domed metal. Layer, and rivet domed metal nests onto the top panel. Connect top and bottom panel with rivets. Use a tube rivet at the top so that you can thread a jump ring through it (if you choose).
Hinged Pendant Memory Journal created by Sondra Barrington of Rings & Things. This free DIY jewelry project features metal etching, metal stamping, dapping and riveting. Antique brass, nickel silver, copper and natural agate were used in creating this design. The one-step looping plier was used for the handmade chain.

Rivet Domes Into Place

Carefully clean and polish the pendant before attaching the necklace chain.

Hinged Pendant Memory Journal created by Sondra Barrington of Rings & Things. This free DIY jewelry project features metal etching, metal stamping, dapping and riveting. Antique brass, nickel silver, copper and natural agate were used in creating this design. The one-step looping plier was used for the handmade chain.

Clean Finished Pendant

Handmade jewelry looks great on a custom beaded necklace, on leather cording, silk ribbon or chain. I created a necklace by making individual links using the one-step looping plier, eye pins, metal beads and natural agates. The links were connected using jump rings.

Hinged Pendant Memory Journal created by Sondra Barrington of Rings & Things. This free DIY jewelry project features metal etching, metal stamping, dapping and riveting. Antique brass, nickel silver, copper and natural agate were used in creating this design. The one-step looping plier was used for the handmade chain.

Memory Journal Necklace

This free DIY Memory Journal pendant was created by designer Sondra Barrington of Rings & Things. This necklace features riveting, metal etching, antique brass shrine stamping blanks, dapping, and metal stamping. The chain was created in an ombre pattern using natural agate gemstone beads, TierraCast antique brass bead caps, metal heishi trade beads and the one-step looping plier with antique copper head pins.

How to Make a Lashed Chain & Leather Bracelet

July 2, 2013

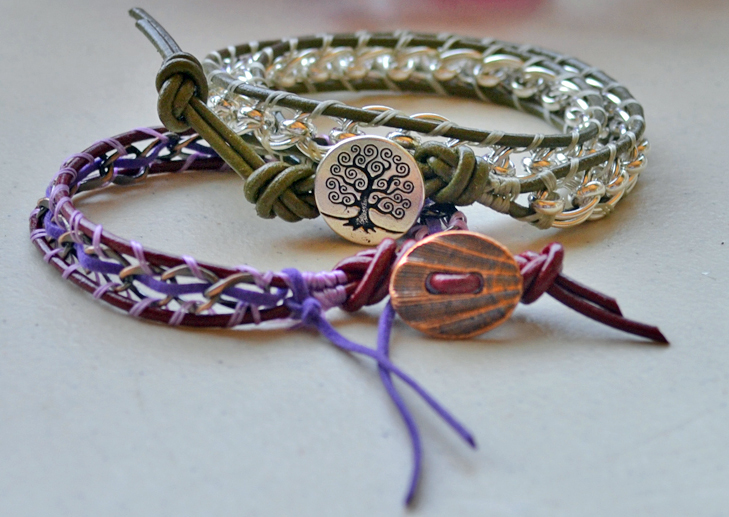
Lashed wrapped leather bracelets aren’t just popular because they look great — they’re also a hit because once you know a couple tricks to get started, they are an easy and fun DIY jewelry project to make! A great twist on this hugely popular style is to lash chain instead of beads to leather cord. Read on to make your own leather and chain wrap bracelets! Continue Reading…

Create a Healing Shrine

June 6, 2013

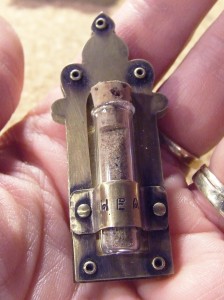
Making handmade jewelry for someone is a unique and inspiring way to show you care.  This “Healing Shrine” was created for a friend suffering from cancer.  It was inspired by our new brass “window” blank shapes and a recent trip to Santa Fe, NM.

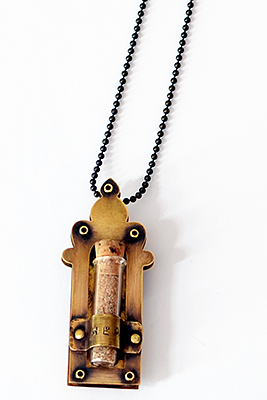
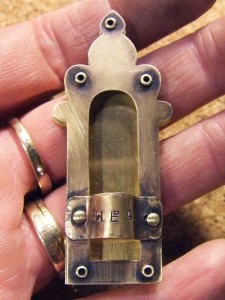
Sondra Barrington Memory Jewelry An antique brass "Healing Shrine" created for a friend suffering from cancer. The glass vial is filled with 'holy dirt' from a sacred site purported to have healing powers.

Healing Shrine

Each year, thousands of people pilgrimage to El Santuario de Chimayo seeking blessings.  Many visitors take a small amount of “holy dirt” from the site, in hopes of a miraculous cure for themselves or someone who could not make the trip.  I chose to encase my “holy dirt” in a glass portal, that I nested inside a brass reliquary.  Following are instructions for how-to create this DIY jewelry design using stacked brass layers and cold connections.

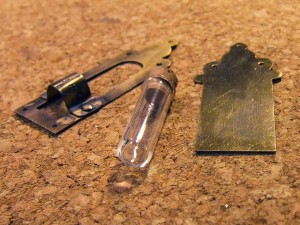
First, envision your shrine and decide how you want it to look and feel.  Decide on contents for your glass bottle.  Unscrew the top loop from the cork in the glass vial.  Measure, mark and punch holes for rivets (using the small side of the hole punch).

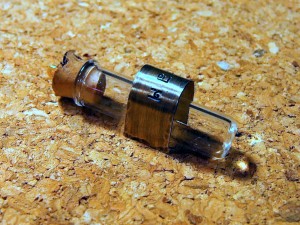
Stamp word “heal” on the metal band designed to hold the glass vial.  Measure the band to ensure that it is going to fit.

Measure metal band to fit glass vial

Measure and bend metal band to fit glass vial

Using bail making pliers, bend the center of the band into a curved shape, leaving each end flat.  Cut to shorten as needed.  File the ends.

Arrange pieces and punch metal Sondra Barrington Memory Jewelry

Arrange pieces and punch metal

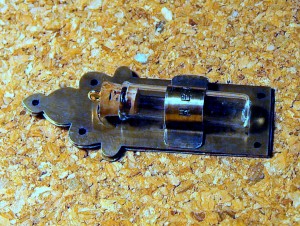
Rivet the stamped metal band into place after double-checking that it will snugly hold the glass once it is assembled.

Punch holes and rivet band to hold bottle

Rivet the band into place (to hold the vial)

Insert tube rivets in holes between the front and back of shrine, stacking copper heishi trade beads between the layers (to fill the space and strengthen the connection between the top and bottom layers).

Use metal heishi beads as spacers between the layers of metal.

Heishi beads as spacers between layers Sondra Barrington Memory Jewelry

  Rivet them into place.  Note: Be careful, it is very difficult to reinstall the heishi spacer beads if they fall off the tubes!

Place all metal heishis before riveting back panel into place

Place all  heishi beads before riveting together Sondra Barrington Memory Jewelry

Patina and clean.  Using two-part epoxy, attach a magnet to the back side of the shrine.  Carefully fill vial with contents.

Fill the bottle and install it into reliquary Sondra Barrington Memory Jewelry

Fill the vial and pop it into place

Once the glue has cured, pop the glass vial inside the band.  This DIY jewelry project can be a pendant, magnet or pin.

How to Create a Reliquary Pendant

May 20, 2013
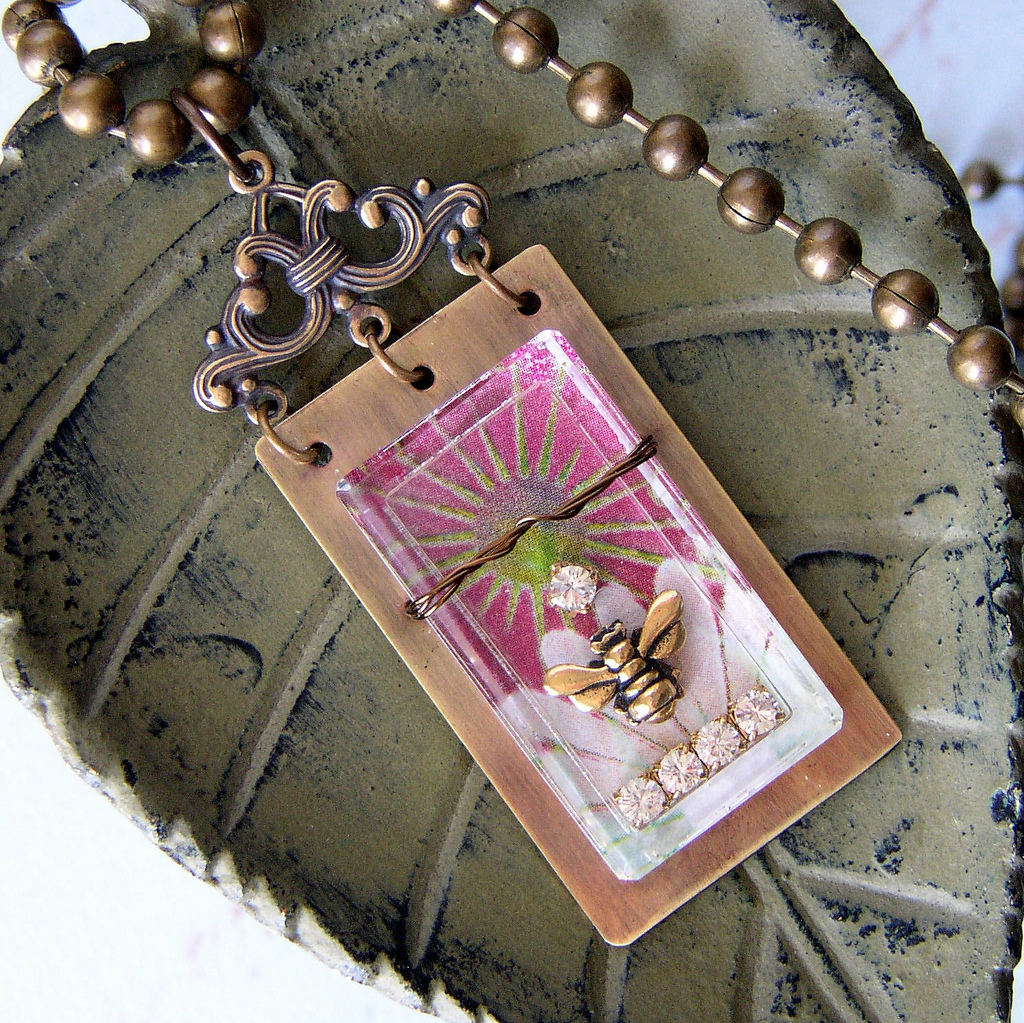
Create a personal keepsake with this free DIY reliquary pendant tutorial.

Create a personal keepsake with this free DIY shrine pendant tutorial.

I love keepsake jewelry, and this reliquary necklace is perfect for capturing mementos. You can adapt this pendant design to make your own personalized jewelry; encase a family photo, dried flower petals from a special event, or perhaps a lock of baby hair.

The following is a DIY tutorial for making a glass bezel shrine necklace.

Continue Reading…

How to Macramé a Hemp Bracelet

May 7, 2013
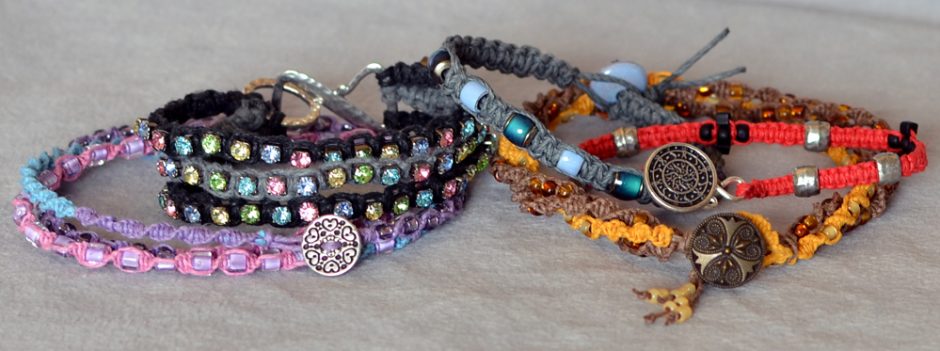
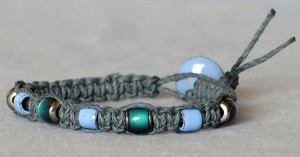
Square knot macrame bracelet.
Simple square-knot macrame bracelet.

Growing up in the 1970’s, I predictably spent part of my childhood making macramé. In fact, I spent hours tied to the ends of masses of cording creating the ubiquitous plant hangers that have become an icon of the era. Call me sentimental, but I got a warm and fuzzy feeling when asked to dust off my knotting fingers and make a hemp macramé bracelet for Rings & Things’ Blog.

Continue Reading…