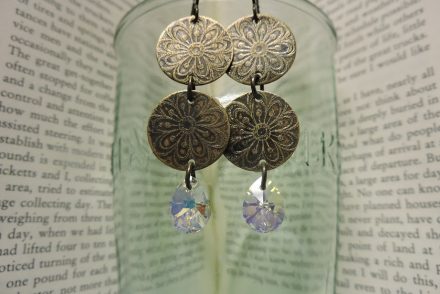
 As promised, here are some photos and instructions on how to use brass texture plates to transfer beautiful patterns – pebbles, waves, flowers and more – onto other metal. With just a hammer, you can easily (but not quietly!) transfer the patterns from the brass sheets onto copper, aluminum, silver or even … brass. Transferring from brass to brass sounds silly – why not just cut up the texture sheet and use that? – but to texture pre-cut shapes, like these
brass fairy door and window cutouts, it makes total sense.
I love hammering metal because it is cheap, fast and fun. The results are similar to what you can achieve with a rolling mill (not cheap!) and etching (not fast!). Those techniques are fun though – we will post a tutorial on etching soon. But today, we hammer:
Tape your piece face-down onto the texture plate. Cover the entire piece with tape to avoid transferring a tape-seam along with your pattern.
Place the piece on a steel block and hammer away! Make sure to hit every little bit of your piece.
 Pull back the tape part way to check the transfer. If there are any missing or faint spots, keep hammering.
 The piece will likely get a bit misshapen as you whale away on it. Not to worry.
 Once you are satisfied with the texture, remove the tape and use a rubber or rawhide mallet to flatten your piece again. You might also need to file the edges a bit.
 Tada! Before and after hammer time.
 When using a long strip of metal, like these pre-cut copper and brass bracelet strips, I just tape down one edge, texture up to the tape line and then turn the piece around to texture the other side. The strip will curl upwards as you work, but it is easy to flatten out.
 The hammered texture on the back of the piece is a nice bonus, like on my copper bracelet.
To really bring out the high and low points in the texture, apply a patina such as liver of sulfur or Win-Ox and buff the high points with steel wool (note: these patinas do not work on aluminum).
Annealing (heating) your metal piece beforehand will make it easier to transfer the pattern, but as you can see, it isn’t necessary. Have fun hammering!


18 Comments
Thank you for posting these pics! This is a must try!
Beautiful way to get the patterned detail, would certainly have to make sure the ends are taped securely to avoid blurring of the detail.
Nice technique to make a bracelet really very interesting thanks for the share. Keep posting!
what is the base you are hammering on the round shape steel thingy?
Hi salkis,
Are you referring to these “door” blanks?
Or the brass texture plates, or the steel block itself?
If I missed it – tell me which picture and I’ll try again! =)
Hi Salkis,
First of all thanks for posting this, I’ve used your method many times, I’ve also been experimenting with etching and loving it! My question is have you tried impressing texture designs into silver? I used recycled silver and it’s “hard” and I really want to figure out the best way to texture it. Etching silver requires different acid solutions that aren’t readily available to me.
Thanks
Hi Silver Leaf Designs,
If you torch anneal your sterling silver, it will be softer than the brass sheets, and you can use this exact same technique (in the blog above).
Or, a rolling mill is a great tool for texturing silver without chemicals. Rolling mills are expensive, so if you can find one that is used (and local … they aren’t cheap to ship, either!!), snap it up!
You can use rolling mills to simply flatten/thin/harden your silver, or you can run a sheet/strip of silver through with something textured such as the brass sheets above, as well as burlap, tough leaves, fine steel mesh, etc to get cool patterns.
Google “rolling mill textures” to see what I mean.
~Polly
Great post! My only question is will brass texture plates also work on stainless steel? The reason I ask is because I’m trying to re-create this texture effect (etsy link below) and I could really use any help you might be able to offer. Thank you for your time, B.
http://www.etsy.com/listing/93595006/pet-id-tagtags-dog-tag-cat-tag-dog?ref=v1_other_2
Hi Brittany,
You need to texture a softer metal with a harder metal, so to answer your question, the (harder) steel will texture the (softer) brass instead of the effect you want.
The texture on that washer is with a hammer rather than a texture plate, and letter stamps like these: https://shop.rings-things.com/cart/pc/Metal-Stamping-Tools-c2036.htm. I’m not sure exactly what type of hammer — it’s likely a ballpein hammer from the hardware store.
Stamping steel with steel does work, but you will wear out your tools (especially the letter stamps) much faster than if you are stamping on copper, brass, sterling or other softer metals.
What kind of hammer do you use for this?
Hi Marie,
Glue your image template to the metal and then do the metal piercing right away. Once your piercing is done, you should be able to peel paper right off and use your fingers to rub any cement residue off (because it is still fresh and not hardened). If you have waited to remove the paper and the rubber cement has hardened, peel off as much paper as you can and use rubbing alcohol or acetone to soften and remove the remaining paper and rubber cement.
Hi Francesca,
We suggest a steel head hammer like #69-138 chasing hammer with the slightly rounded face so you don’t have edge marks. Using a steel hammer leaves a good pattern impression on your metal (but does leave your brass relief sheet a little stretched and misshapen).
I love this technique (especially since I can’t afford a rolling mill)! Thanks so much for sharing. Your copper bracelet looks amazing.
When I used liver of sulphur on a copper bracelet, the patina rubbed off on my skin. Is that normal? Do you put anything on over the patina or did I maybe not apply it correctly?
Hi Karen,
Normally you’ll briefly polish the liver of sulphur off the smooth spots (and the inside), leaving the patina in just the crevices of the main viewing surface.
You can use a polishing cloth — but it will make your cloth messy very fast. Or use very fine jewelry-grade sandpaper like this: https://shop.rings-things.com/cart/pc/Files-Sanding-Pads-c2031.htm
~Polly
I looked for these sheets on your site after seeing them on Pinterest but don’t see them. Help!
Hi, here are the patterned brass sheets: https://shop.rings-things.com/cart/pc/Texture-Plates-Molds-Molding-Supplies-c2014.htm
“The piece will likely get a bit misshapen as you whale away on it. Not to worry.”
** wail away**
And then there’s Wales … it’s a long way away! (from Rings & Things anyhow, but I’d love to go there some day!) =)