
As a jewelry maker, I am constantly checking out the jewelry at department stores and boutiques for inspiration and current trends. When winter and fall comes, so does big statement jewelry. The kind of pieces that you wear to Christmas parties with your favorite black cocktail dress. This year, I have noticed that there are a lot of multiple chain necklaces and necklaces that end with ribbons and I just couldn’t resist the urge to create one myself. If you have a lot of leftover chain pieces this is a great way to use them up.
Items needed for this project:
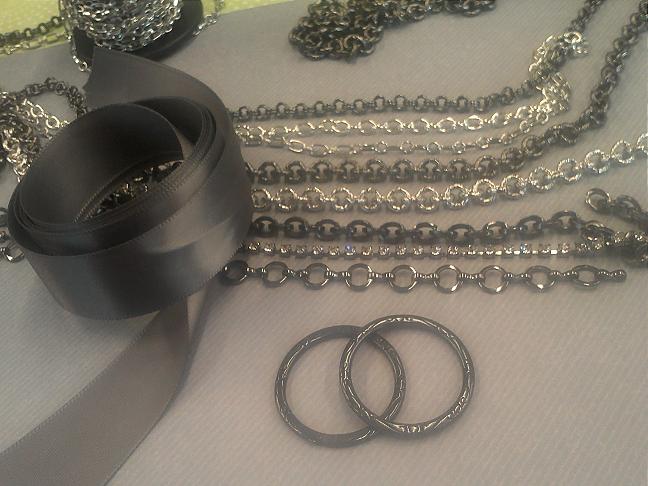
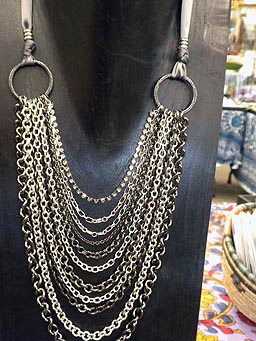
- Chain, lots of chain. You can use all the same color and style or mix and match. I have seen ones that are in all antique brass, but with several different styles. I have also seen ones with all one style, but all different platings. For my necklace I used a variety of gunmetal and silver-plated chains, plus one strand of rhinestone chain for a little extra “wow” factor. Get creative with it!
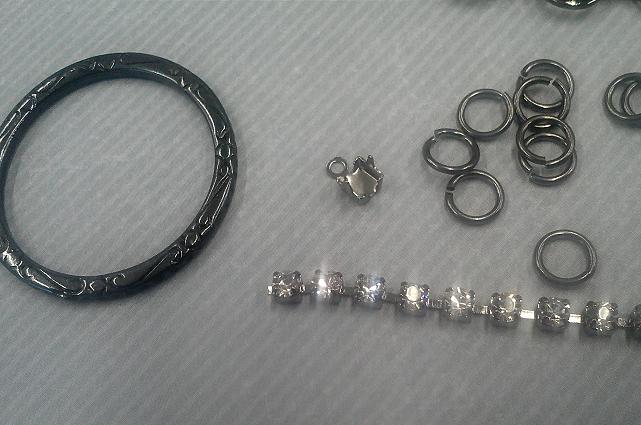
- Large connector rings. I used 32mm gunmetal rings.
- Satin Ribbon. Get this at the craft store. I like the nicer ribbon that you buy by the yard.
- Hypo Fabric Cement or fabric glue, to keep the ends of the ribbon from fraying.
- Jump rings, for the chain that has links which too small to open and close around the connector ring.
- Chain nose pliers, flat nose pliers, semi-flush cutter and scissors.
How to create it:

Step 1: Select your chain
Step 2: Pick out coordinating connector rings and ribbon
Step 3: Attach your first piece of chain to one of the connector rings. This will be the shortest length of chain. I found that 6 inches, give or take a little, was a good starting length.
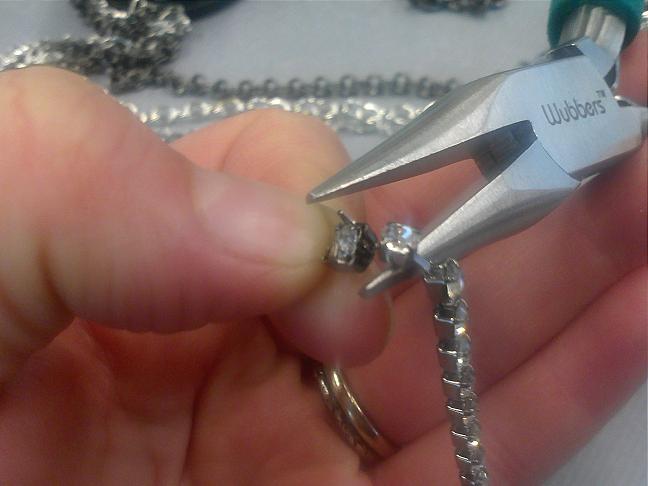
If using rhinestone chain, pinch on an end piece to the rhinestone using your chain nose pliers.
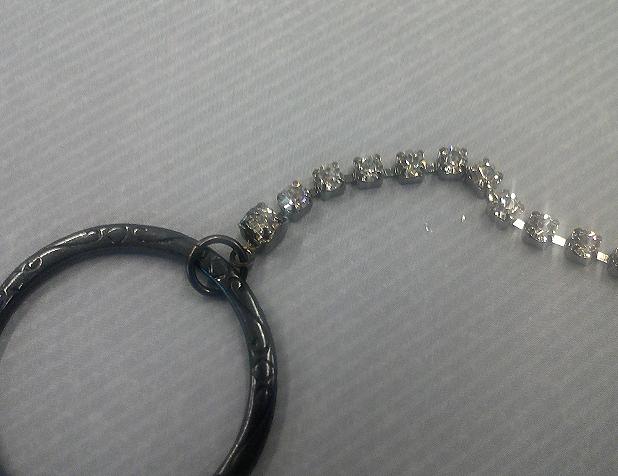
Use a jump ring if using rhinestone chain.

Step 4: Add each additional chain and attach, one at a time to the first connector link. Cut each additional chain between 1/2 inch and an inch longer than the previous chain.

This is how the necklace will look after the chain is attached on both sides.
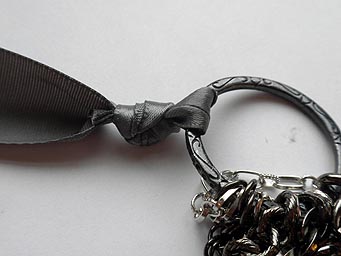
Step 6: Tie a peice of ribbon onto each connector link. Use about 16 inches on each side. Trim the short ends of the ribbon close with scissors.
Step 7: All you have to do to finish the necklace is finish the edges of the ribbon with a little anti-fray fabric glue or hypo fabric cement. I also added a few large hole metal beads for some extra pizzazze!

Showing off my new necklace in the Rings & Things Showroom 🙂
Well there you have it! If I had to rate this project on a scales of difficulty I would give it intermediate. It was a little tricky to keep my chains straight. If you do re-create a necklace like this with lots o’ chain, remember to be careful when storing it. I recommend hanging it so as to not get all the chain tangled.
~~ Tiffany
Check out these other great tutorials on our blog:

1 Comment
Love it! I’ve wanted a neclace like this for a while to wear over a grey T-shirt, now I know how to make one, thanks!