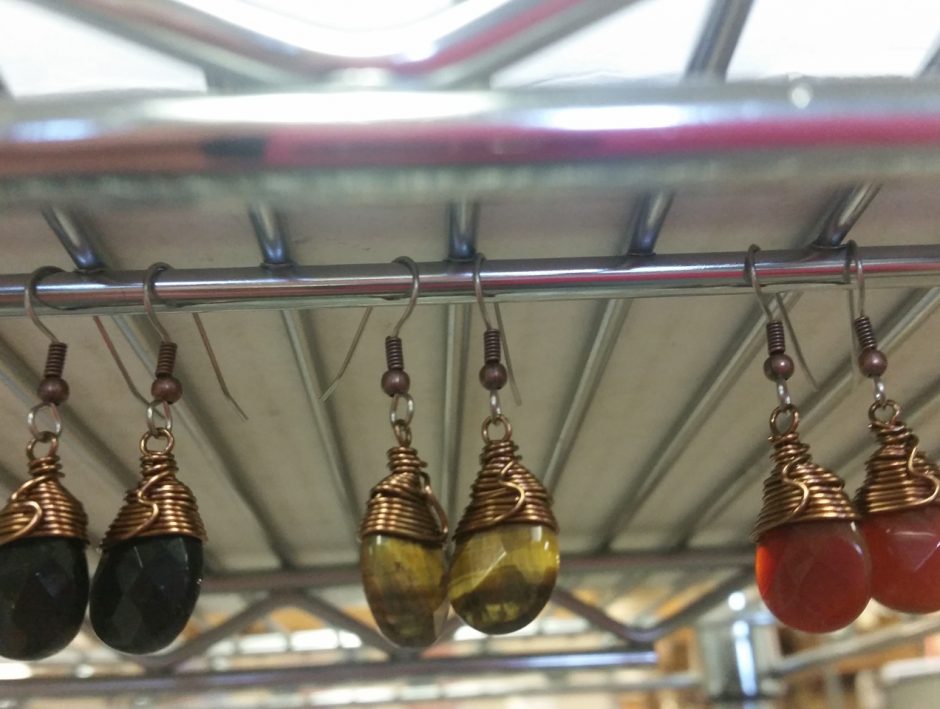
Want a simple and versatile earring design that you can replicate over and over again? This wire-wrapped briolette earring design can be used for any tip-drilled teardrop beads or briolettes. That’s what makes these some of my favorite earrings to make! The result is simple yet can look dramatically different depending on what colors and gemstone beads or crystal pendants you choose.

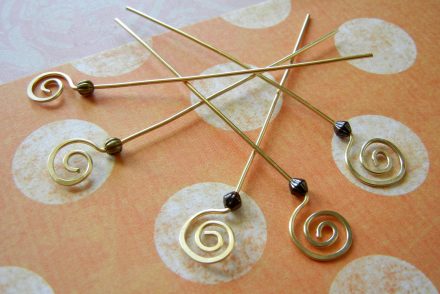
These earrings take very little to make! These are the only supplies you’ll need.
Supplies needed:
- 2 each Briolette Gemstone Beads ( I used 16x12mm)
- 2 each Stainless Steel Ear Wires
- 26 inches 22-Gauge Artistic Wire (I used Gunmetal, but you can use any color you like)
- Jewelry Pliers Sets ( I prefer the Euro Tool Glitter Set)
Steps to create these:
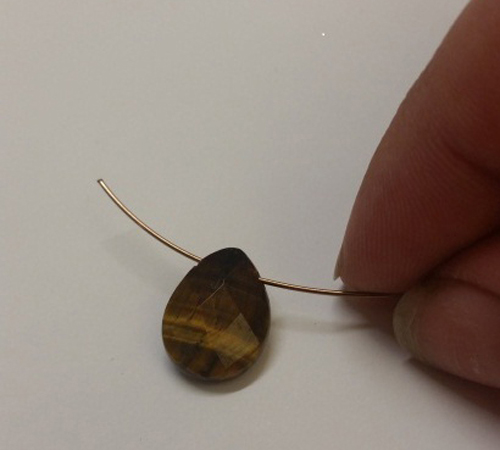
First you will cut a piece of wire approximately 13 inches in length. Feed that through the hole of your briolette.
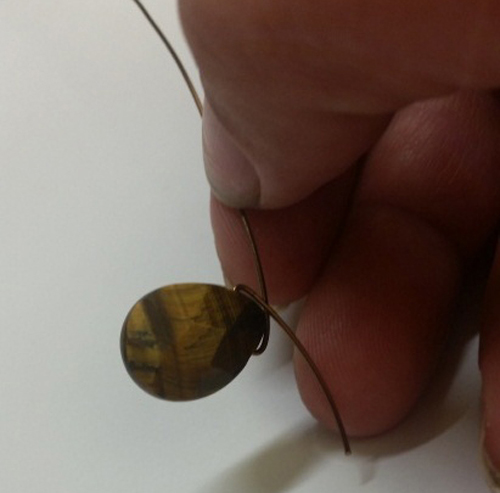
Bend your wire up to the top of your briolette and cross your wire.
Wrap your small piece of wire around the longer piece 2-3 times. (you can use your flat nose pliers to do this or your hands.) Clip off the excess wire on the small piece leaving just your long piece.

Take your round nose pliers and hold just above your wrap. Bring your wire down around your pliers creating a loop.
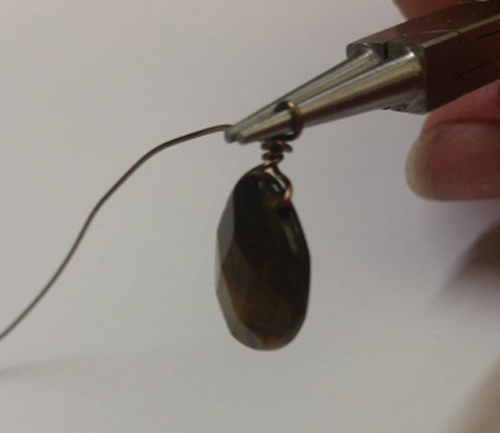
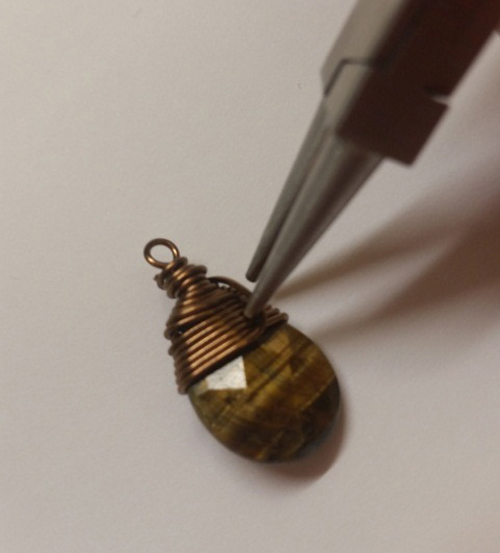
Now that you have a loop, you can start wrapping. Wrap your wire around your previous wrap and as you get down to the stone get rid of your pliers. Using your thumb and pointer finger on both hands, turn the stone with one hand and guide the wire with the other. This wire is easy to manipulate! By guiding the wire you can get a nice, tight wrap.
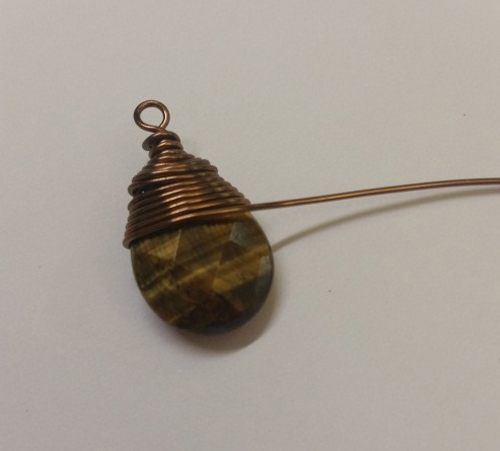
Wrap your wire until you cover the hole. You can wrap a little further down until you get your desired look.
Bring your wire back up to your loop.
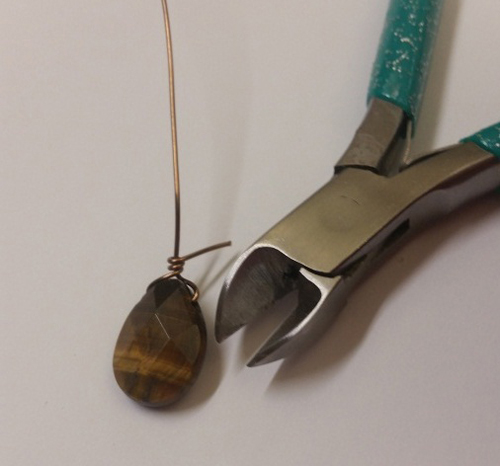
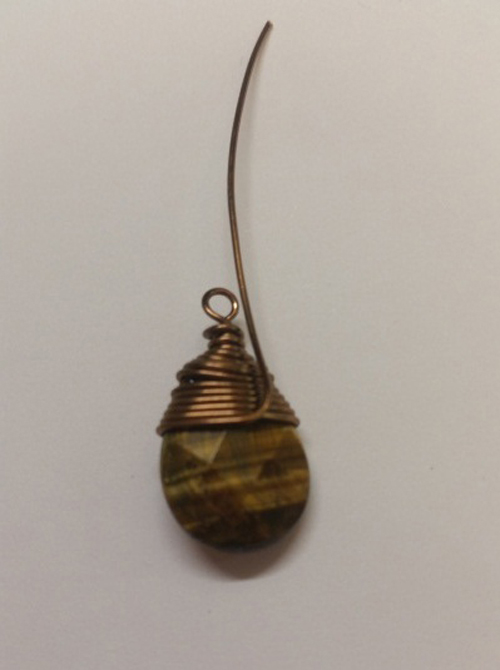
Wrap your wire around the top just above the stone 2-3 times ending on the side opposite of where you brought your wire up. Clip off excess wire at the edge of your loop (you want to clip closest to the end of your wire at the edge of the loop).
Take your round nose pliers and gently place your wire in between the 2 sides (do not close your pliers). Twist your pliers creating an “S” shape or a backwards “S”. This does two things: it tightens your wrap and it creates a fun design!
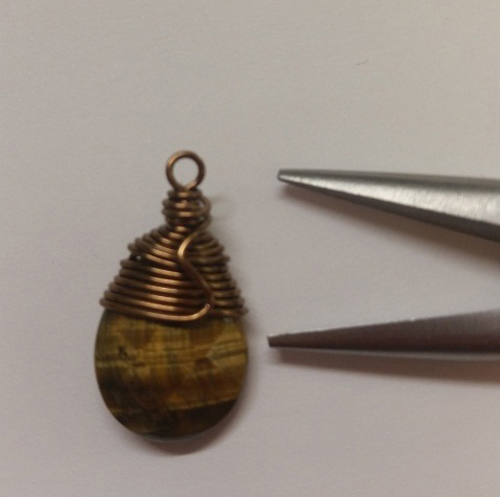
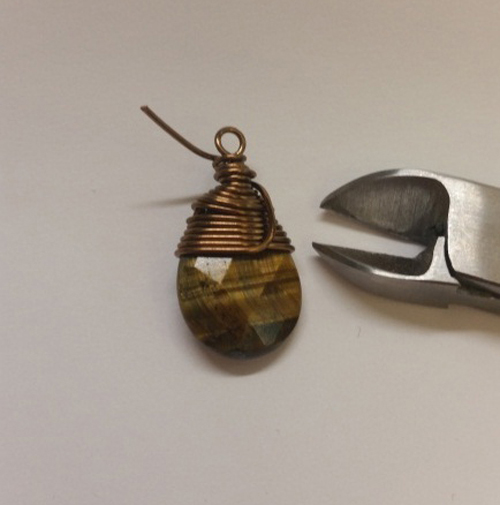
Now take your flat nose pliers and tuck your end into the loop.
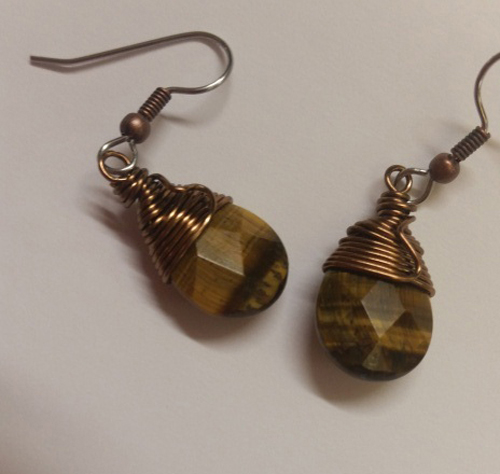
Add your earring hooks and you’re done!
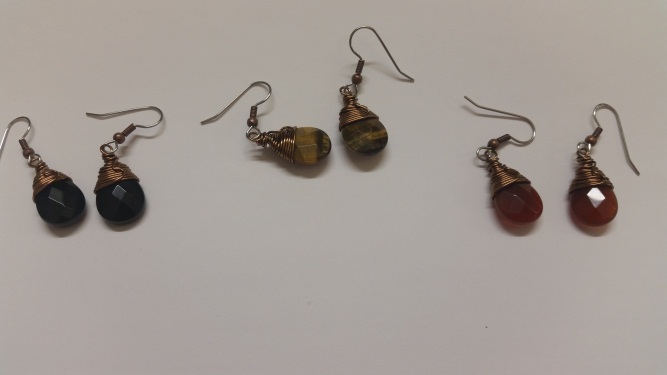
Each pair of earrings will be slightly different, and that’s what makes them unique! Enjoy, have fun, play with different colors, and make these earrings your own! ~ Always, Kayla

No Comments