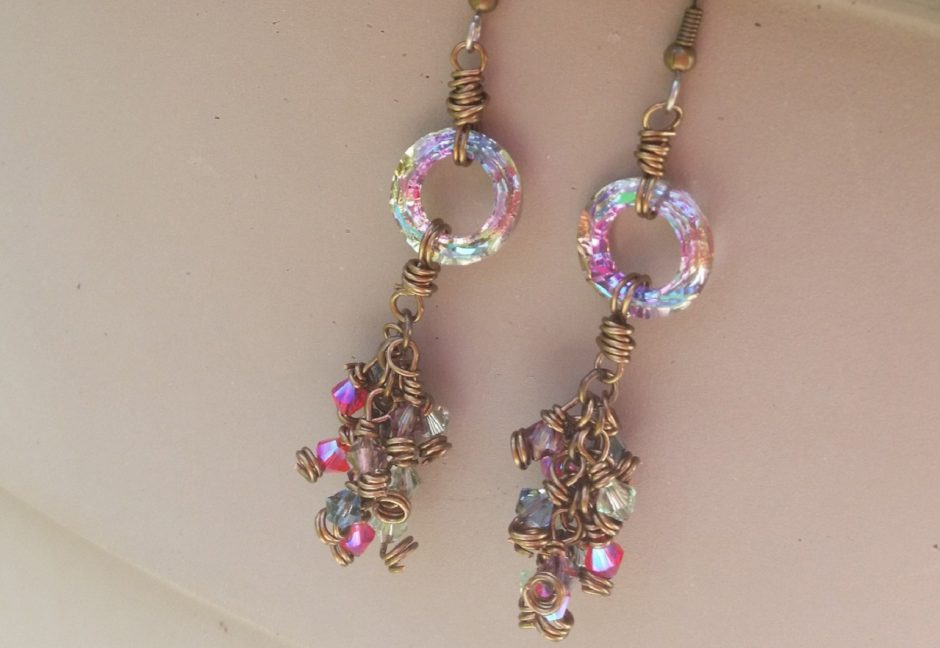
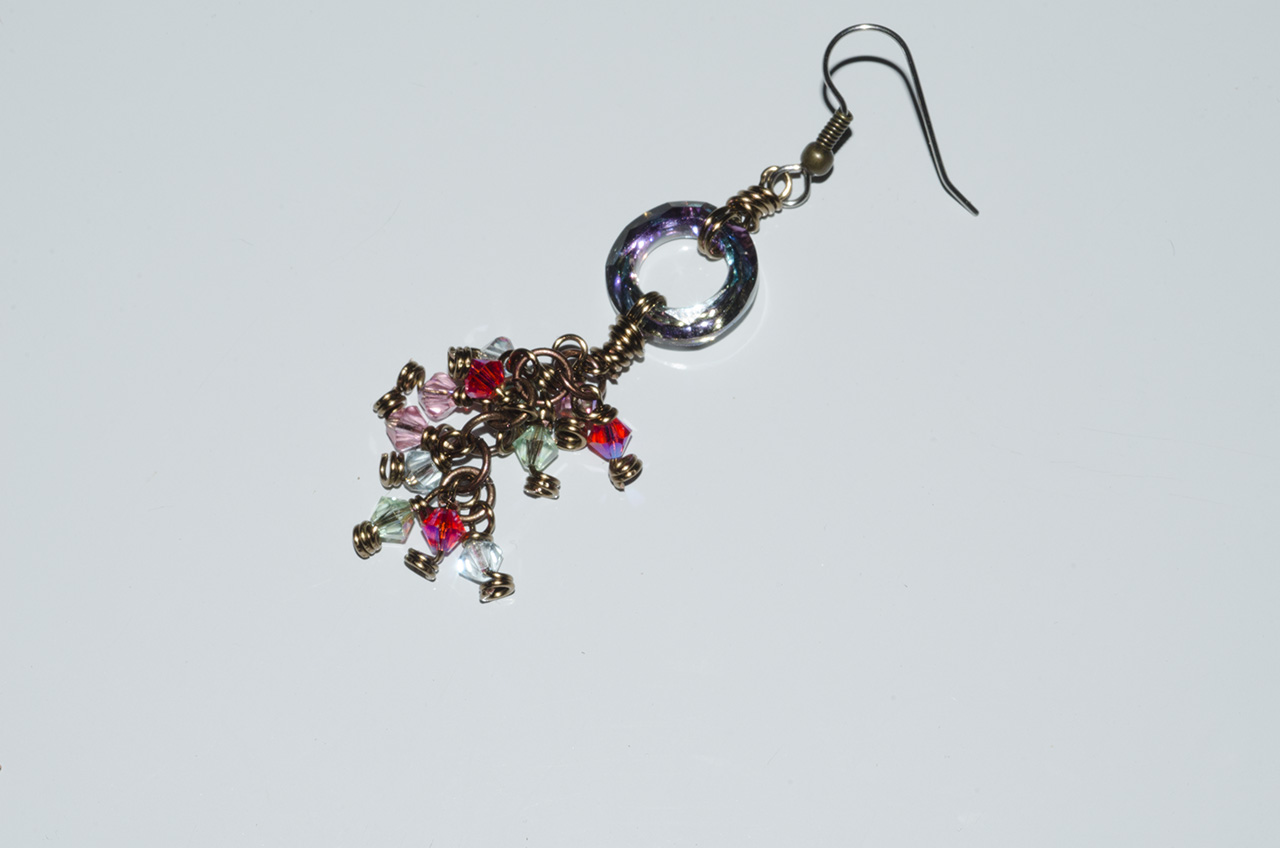
I am absolutely in love with Swarovski’s cosmic crystal rings. There are so many things you can do with these! These cosmic rings sparkle everywhere you go. Here is one of my absolute favorite designs using cosmic crystal rings from Swarovski.
You don’t need much to make these beautiful earrings.
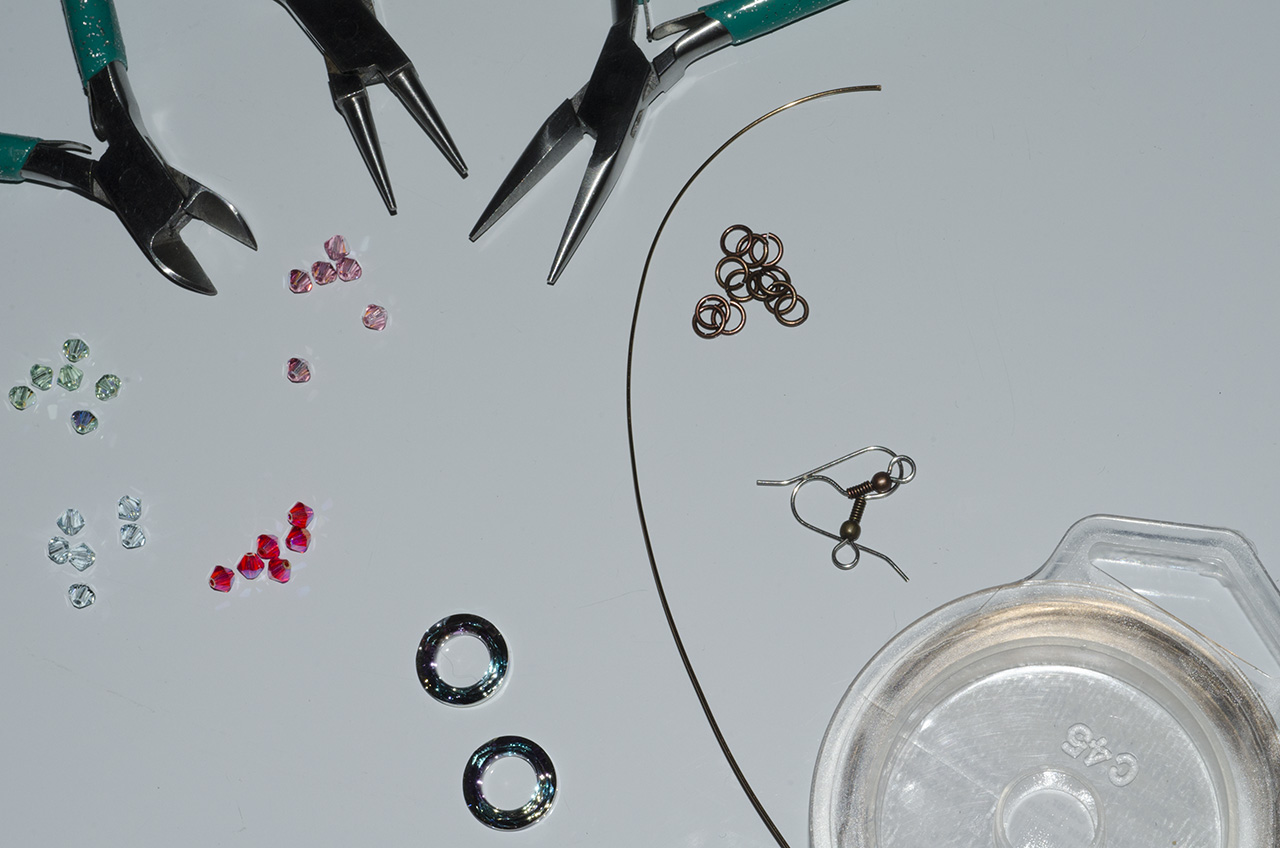
Supplies Needed
- 2 each 14mm Swarovski Cosmic Rings (Article 4139)
- 24 each Swarovski 4mm Bicone Beads (Article 5328)
- 2 each Earring Hooks
- 12 each 5mm Jump Rings (I used 5mm antique brass jump rings)
- 22-Gauge Artistic Wire® (I used antique brass color, previously called gunmetal)
- Basic Jewelry Tools Set
Follow the steps below
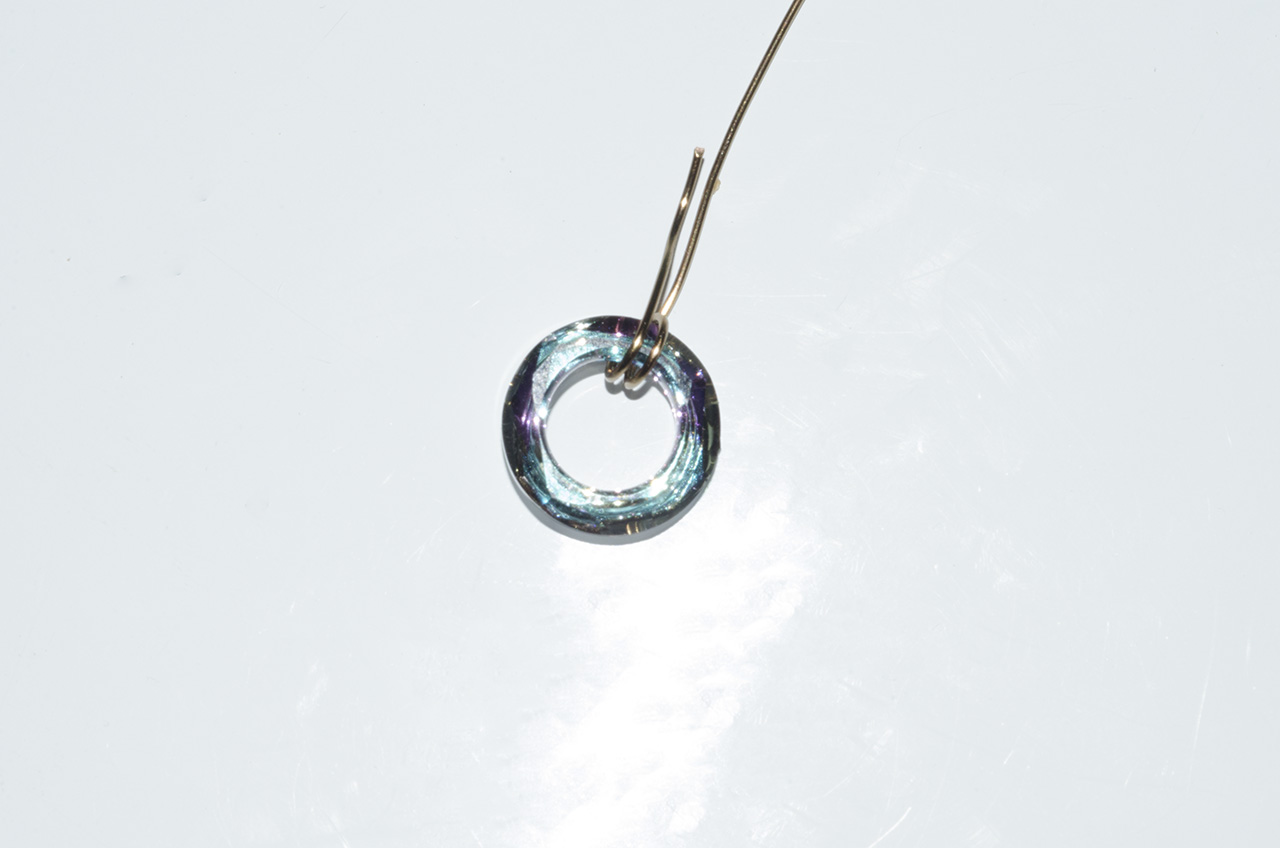
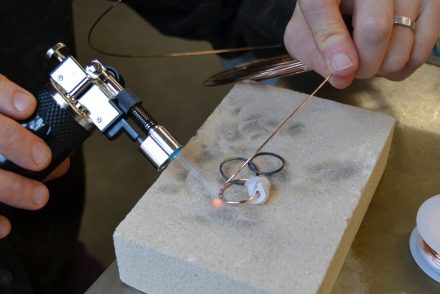
First you will need four pieces of wire, each approximately 4 inches in length. Take your first piece of wire and feed it through the center of your cosmic crystal. Wrap your wire around one side of the cosmic ring 2 times.
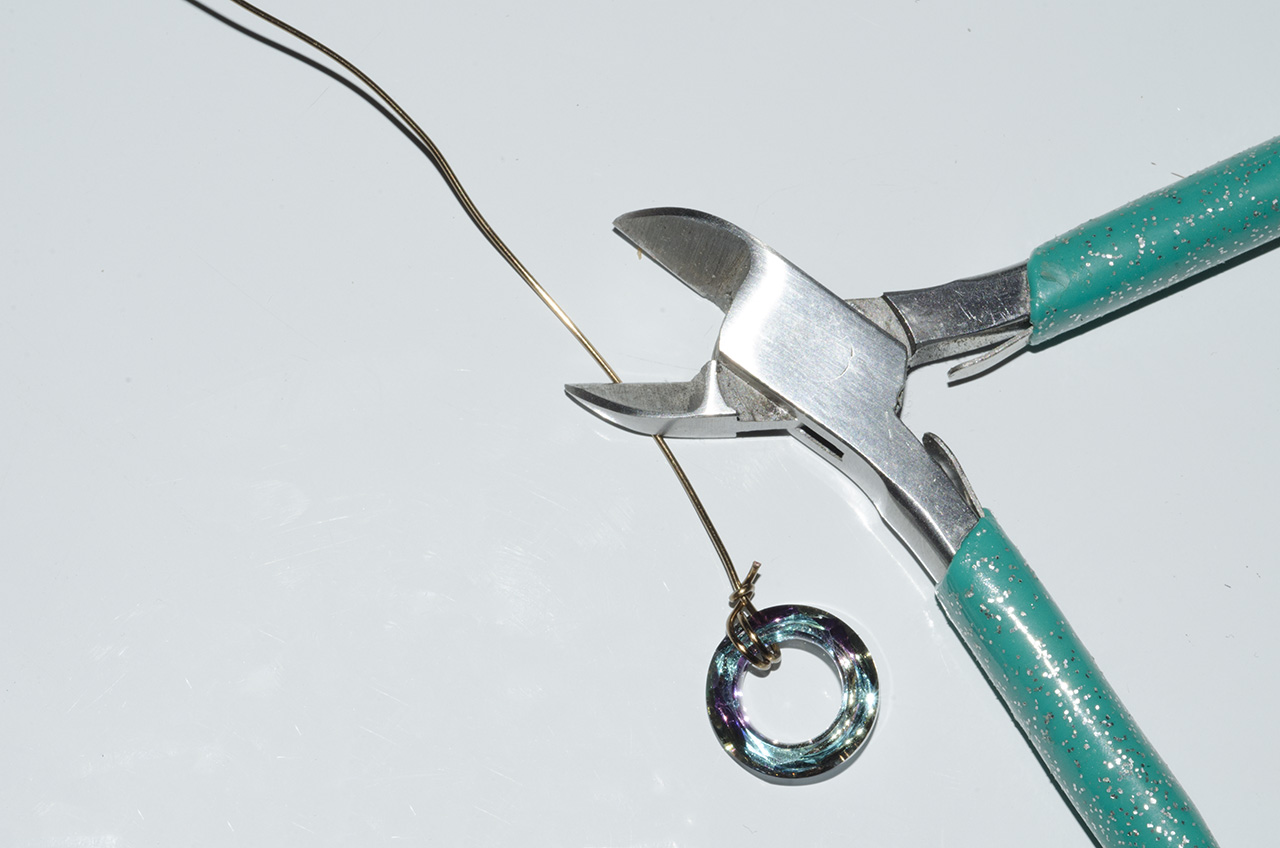
Then, use your flat-nose pliers to wrap the short end of your wire around the longer end 2-3 times. Clip off any extra wire on your short piece.
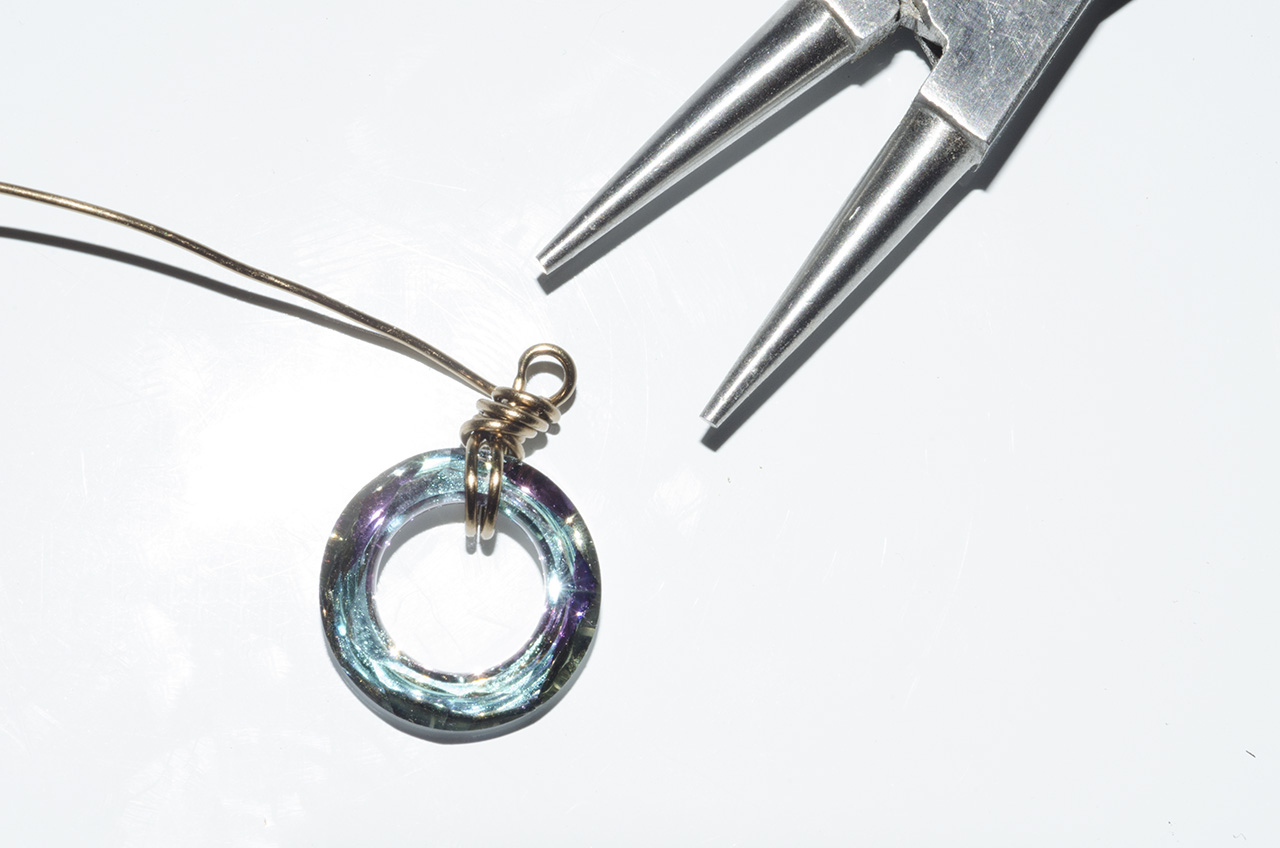
Hold the tip of your round-nose pliers just above your wrap, and create a loop with the remaining long piece of wire. Secure the loop by wrapping the wire down to the cosmic ring, over your previous wrap, and then back up to your loop.

Clip excess wire and tuck your end.
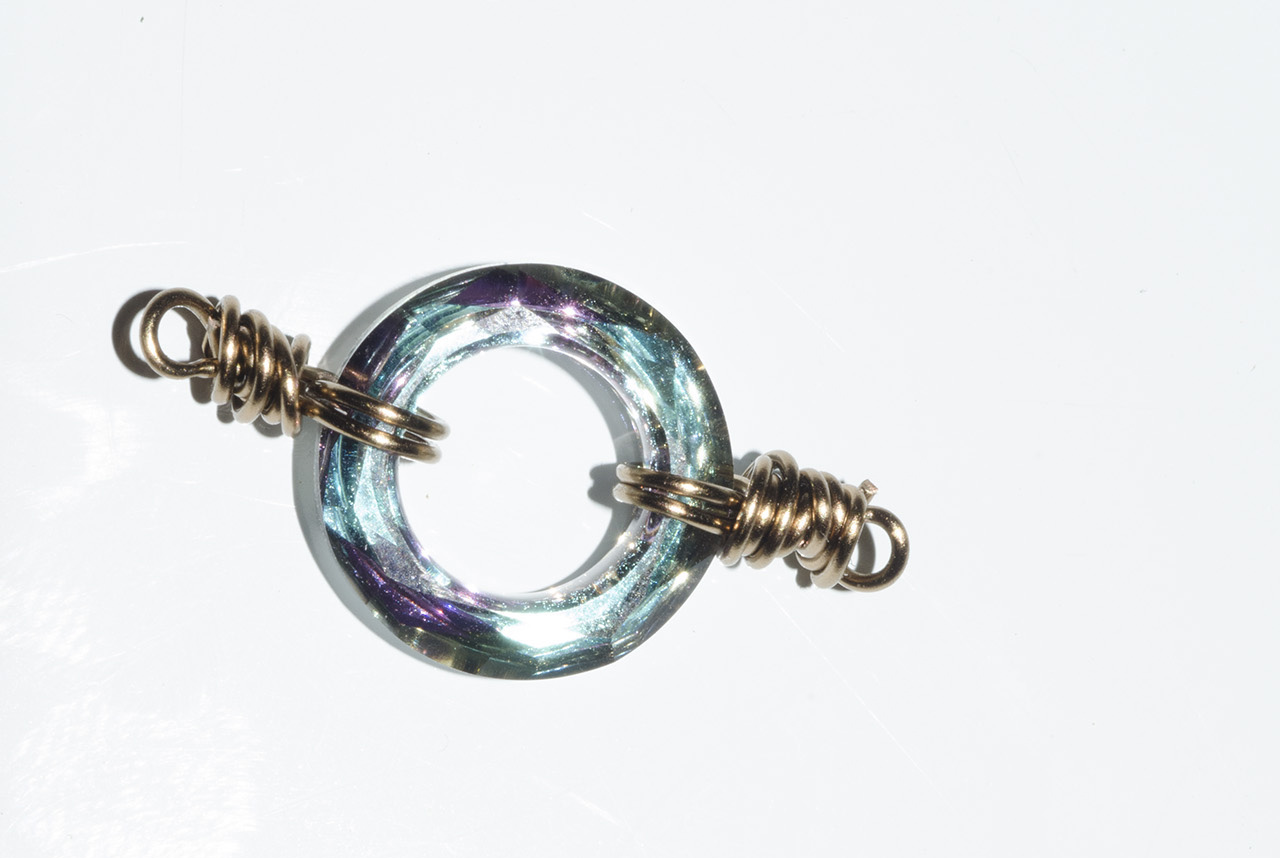
Follow the above steps to create 2 loops per cosmic ring.
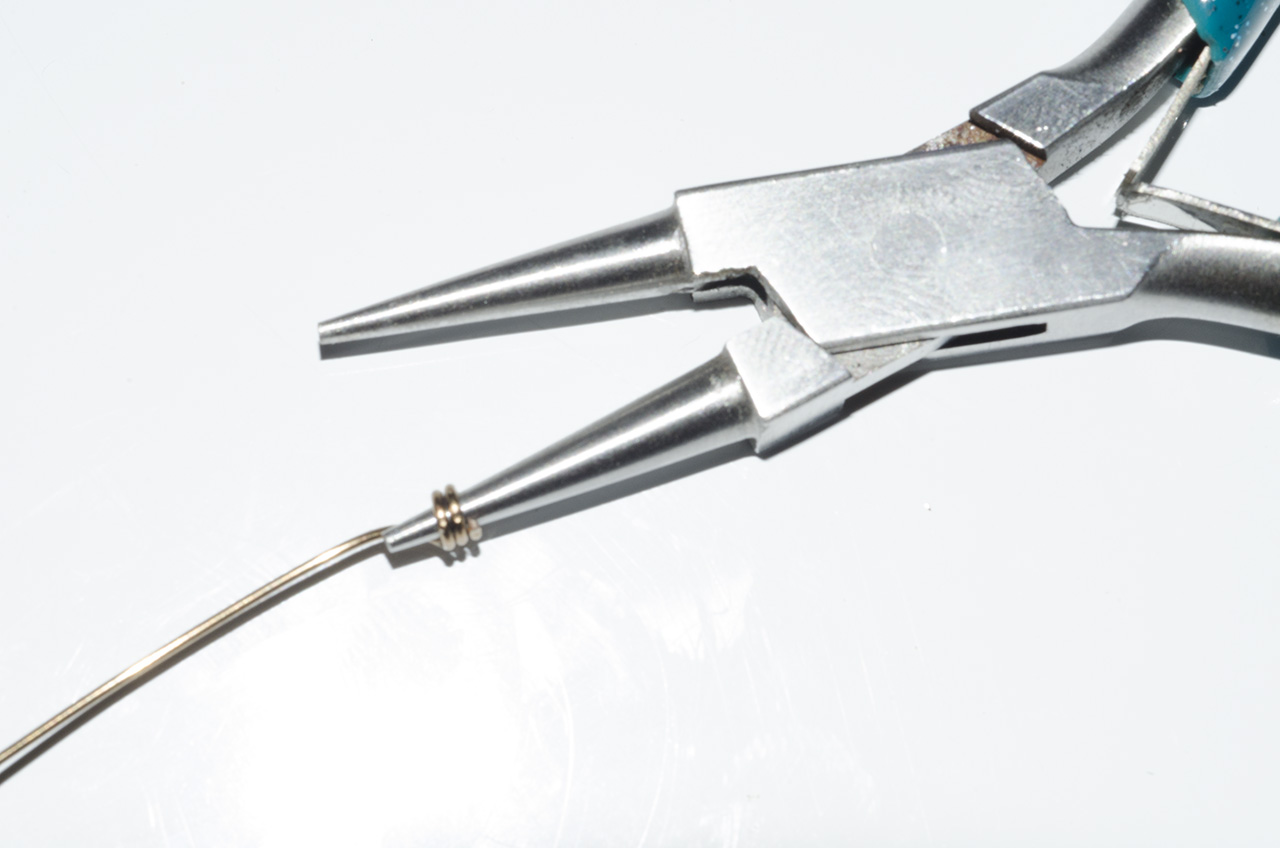
Now, cut 24 one-and-a-half inch pieces of wire. Create a coil with your first piece of wire by wrapping one end of the wire around your round-nose pliers 2-3 times. TIP: If you don’t want to make coils, you can use ball-end head pins instead of wire for a simpler look.
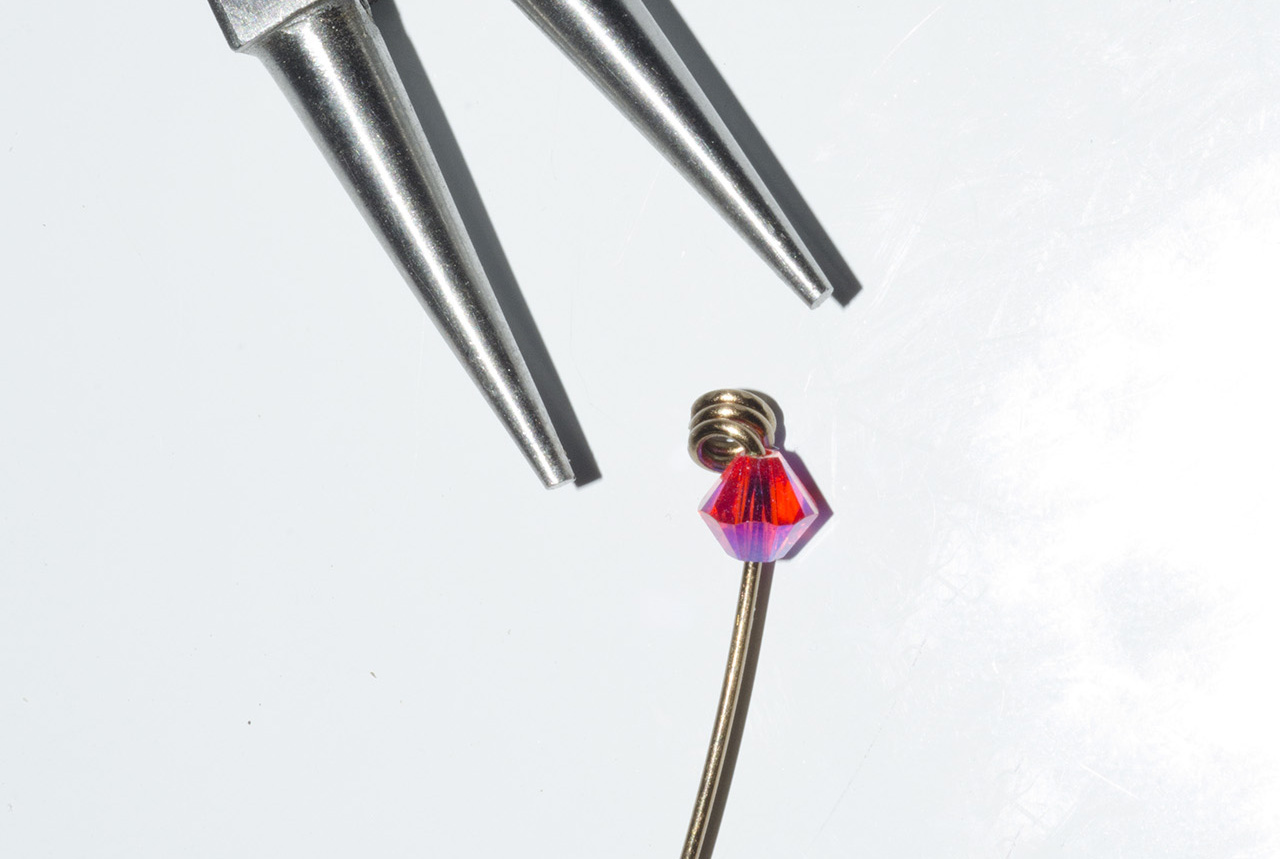
Add one of your 4mm crystals and bend the coil so it is up against your crystal.
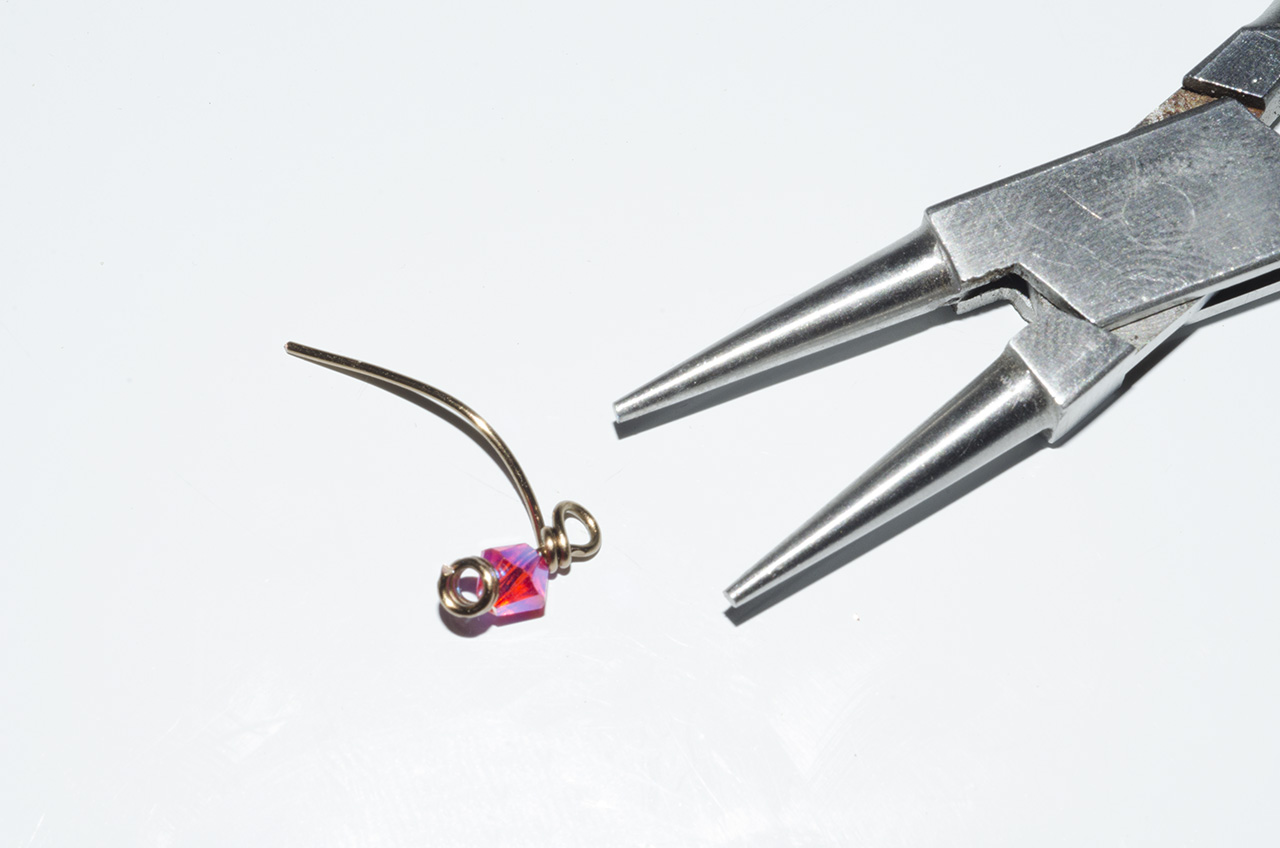
Create a loop at the top, then wrap the wire down to the crystal.
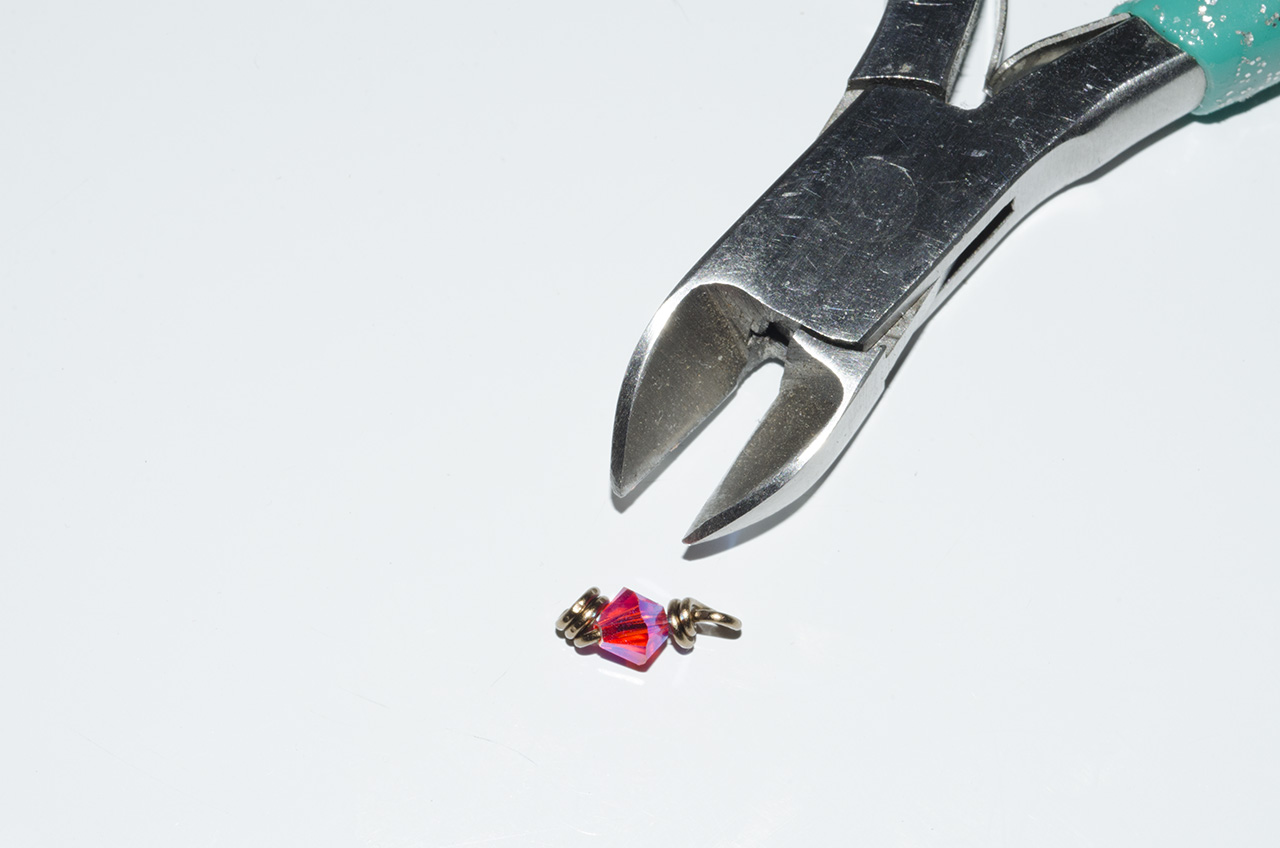
Clip off any extra wire and tuck your end.
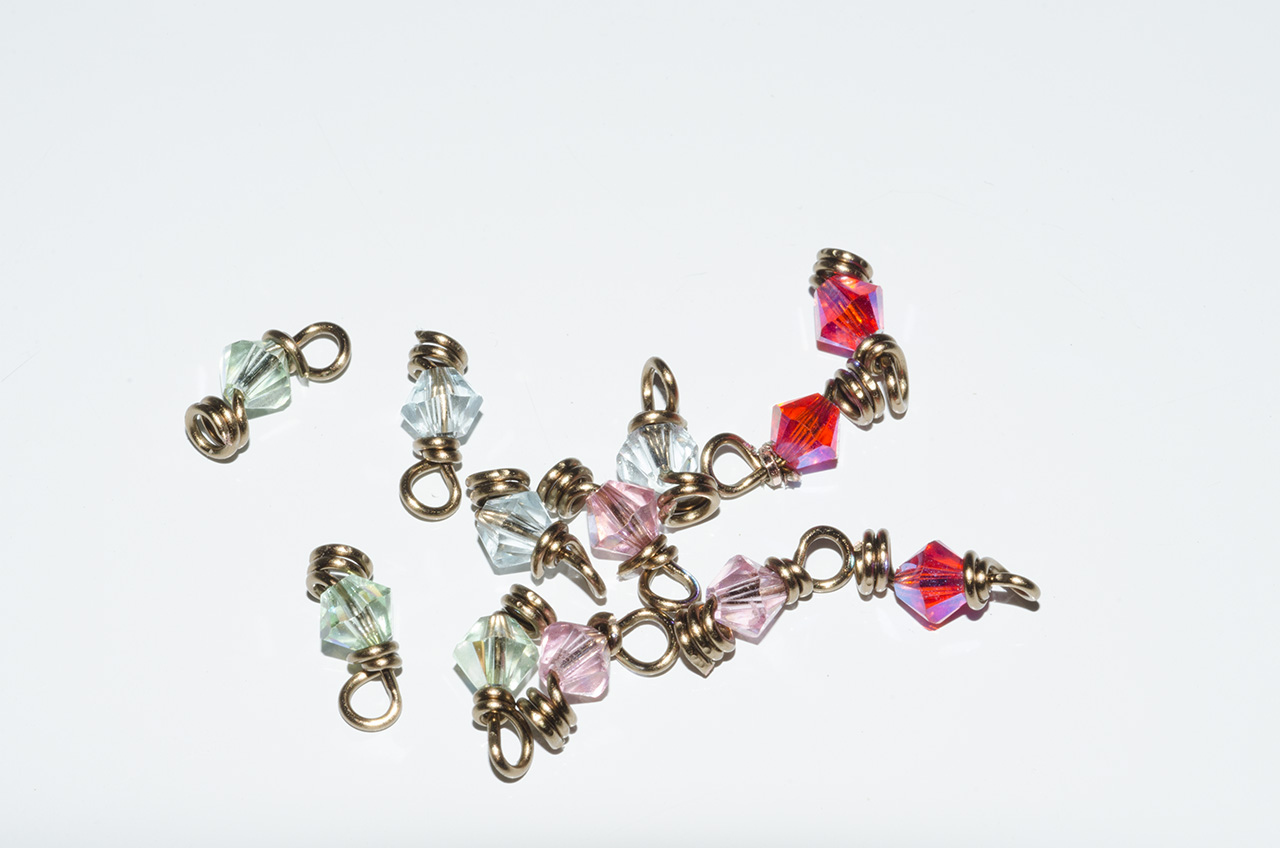
Repeat these steps for all 24 of your 4mm bicone crystal beads. Here is where the fun truly begins!
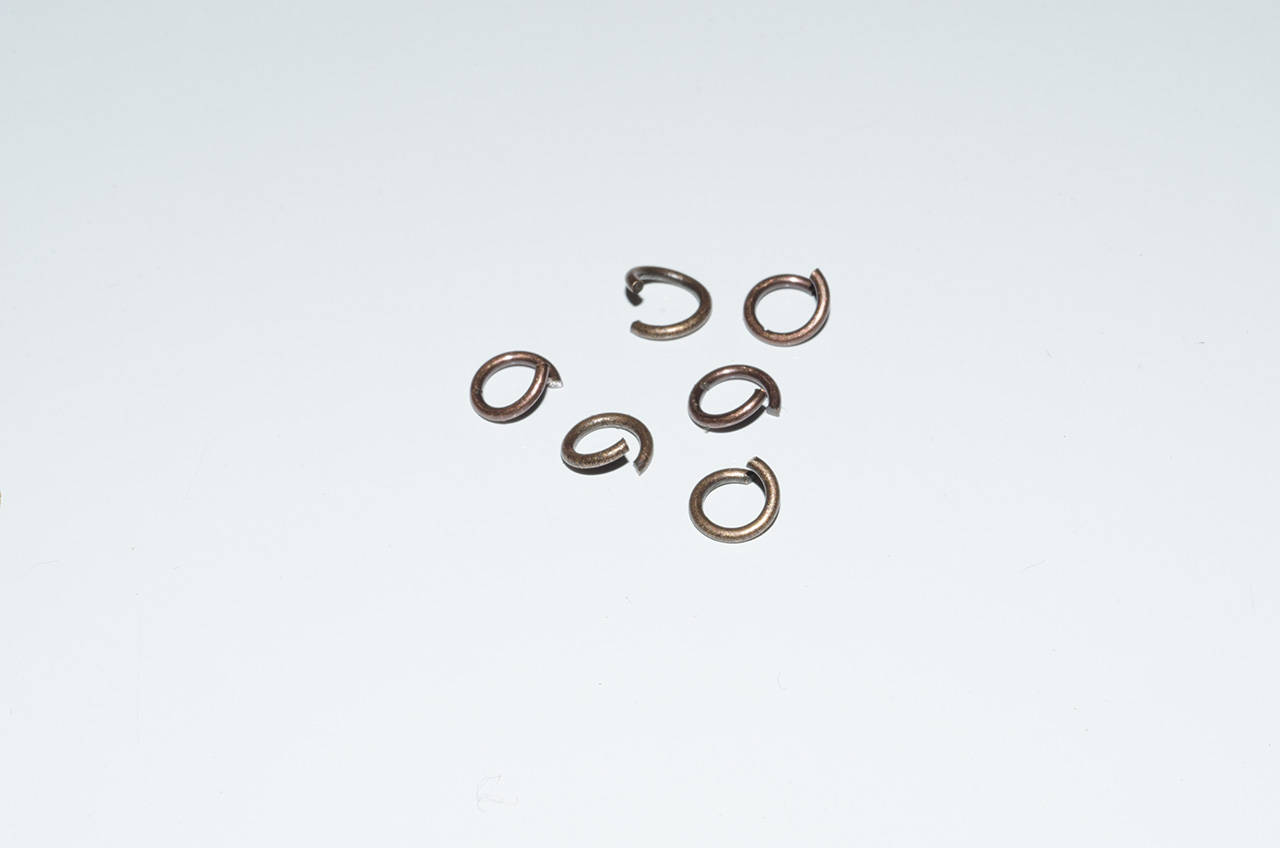
Open all of your jump rings so they are ready to grab.

Put a jump ring through one of the loops you created on your cosmic ring. Add one 4mm bead to each side of the open jump ring. Close your jump ring and grab another.

Put the next jump ring in the center of the two beads you just added. Add 2 more beads and repeat.

You will do this 6 times per cosmic ring.
Once you’ve added all your crystals, finish off your earrings by simply adding an earring hook to each one!
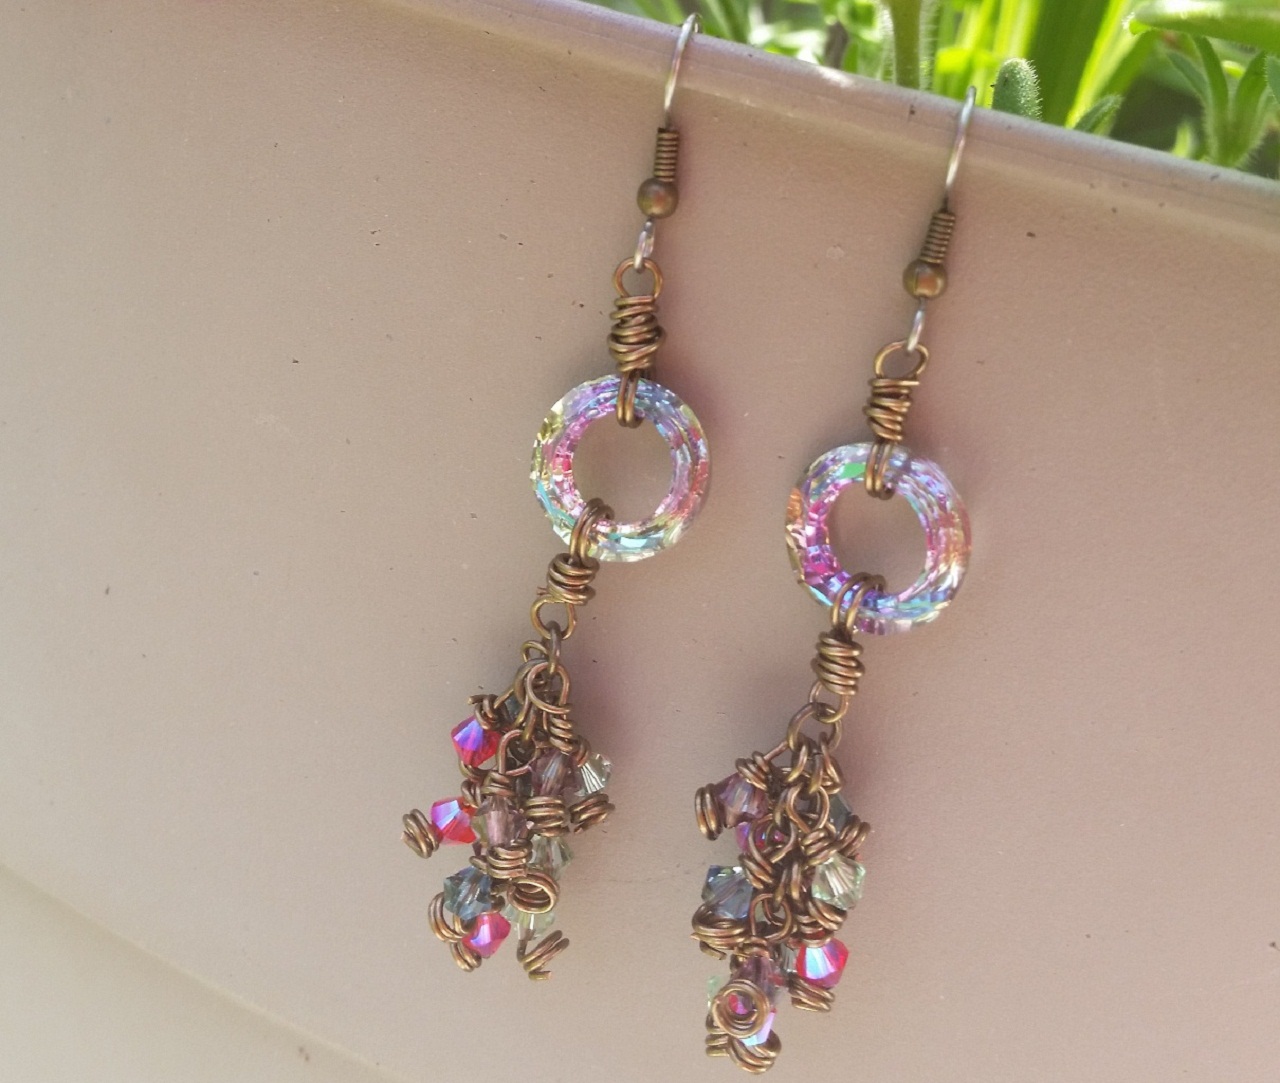
The end result is stunning! Using different colors of 4mm crystals on the same color of cosmic rings makes each pair look slightly different.
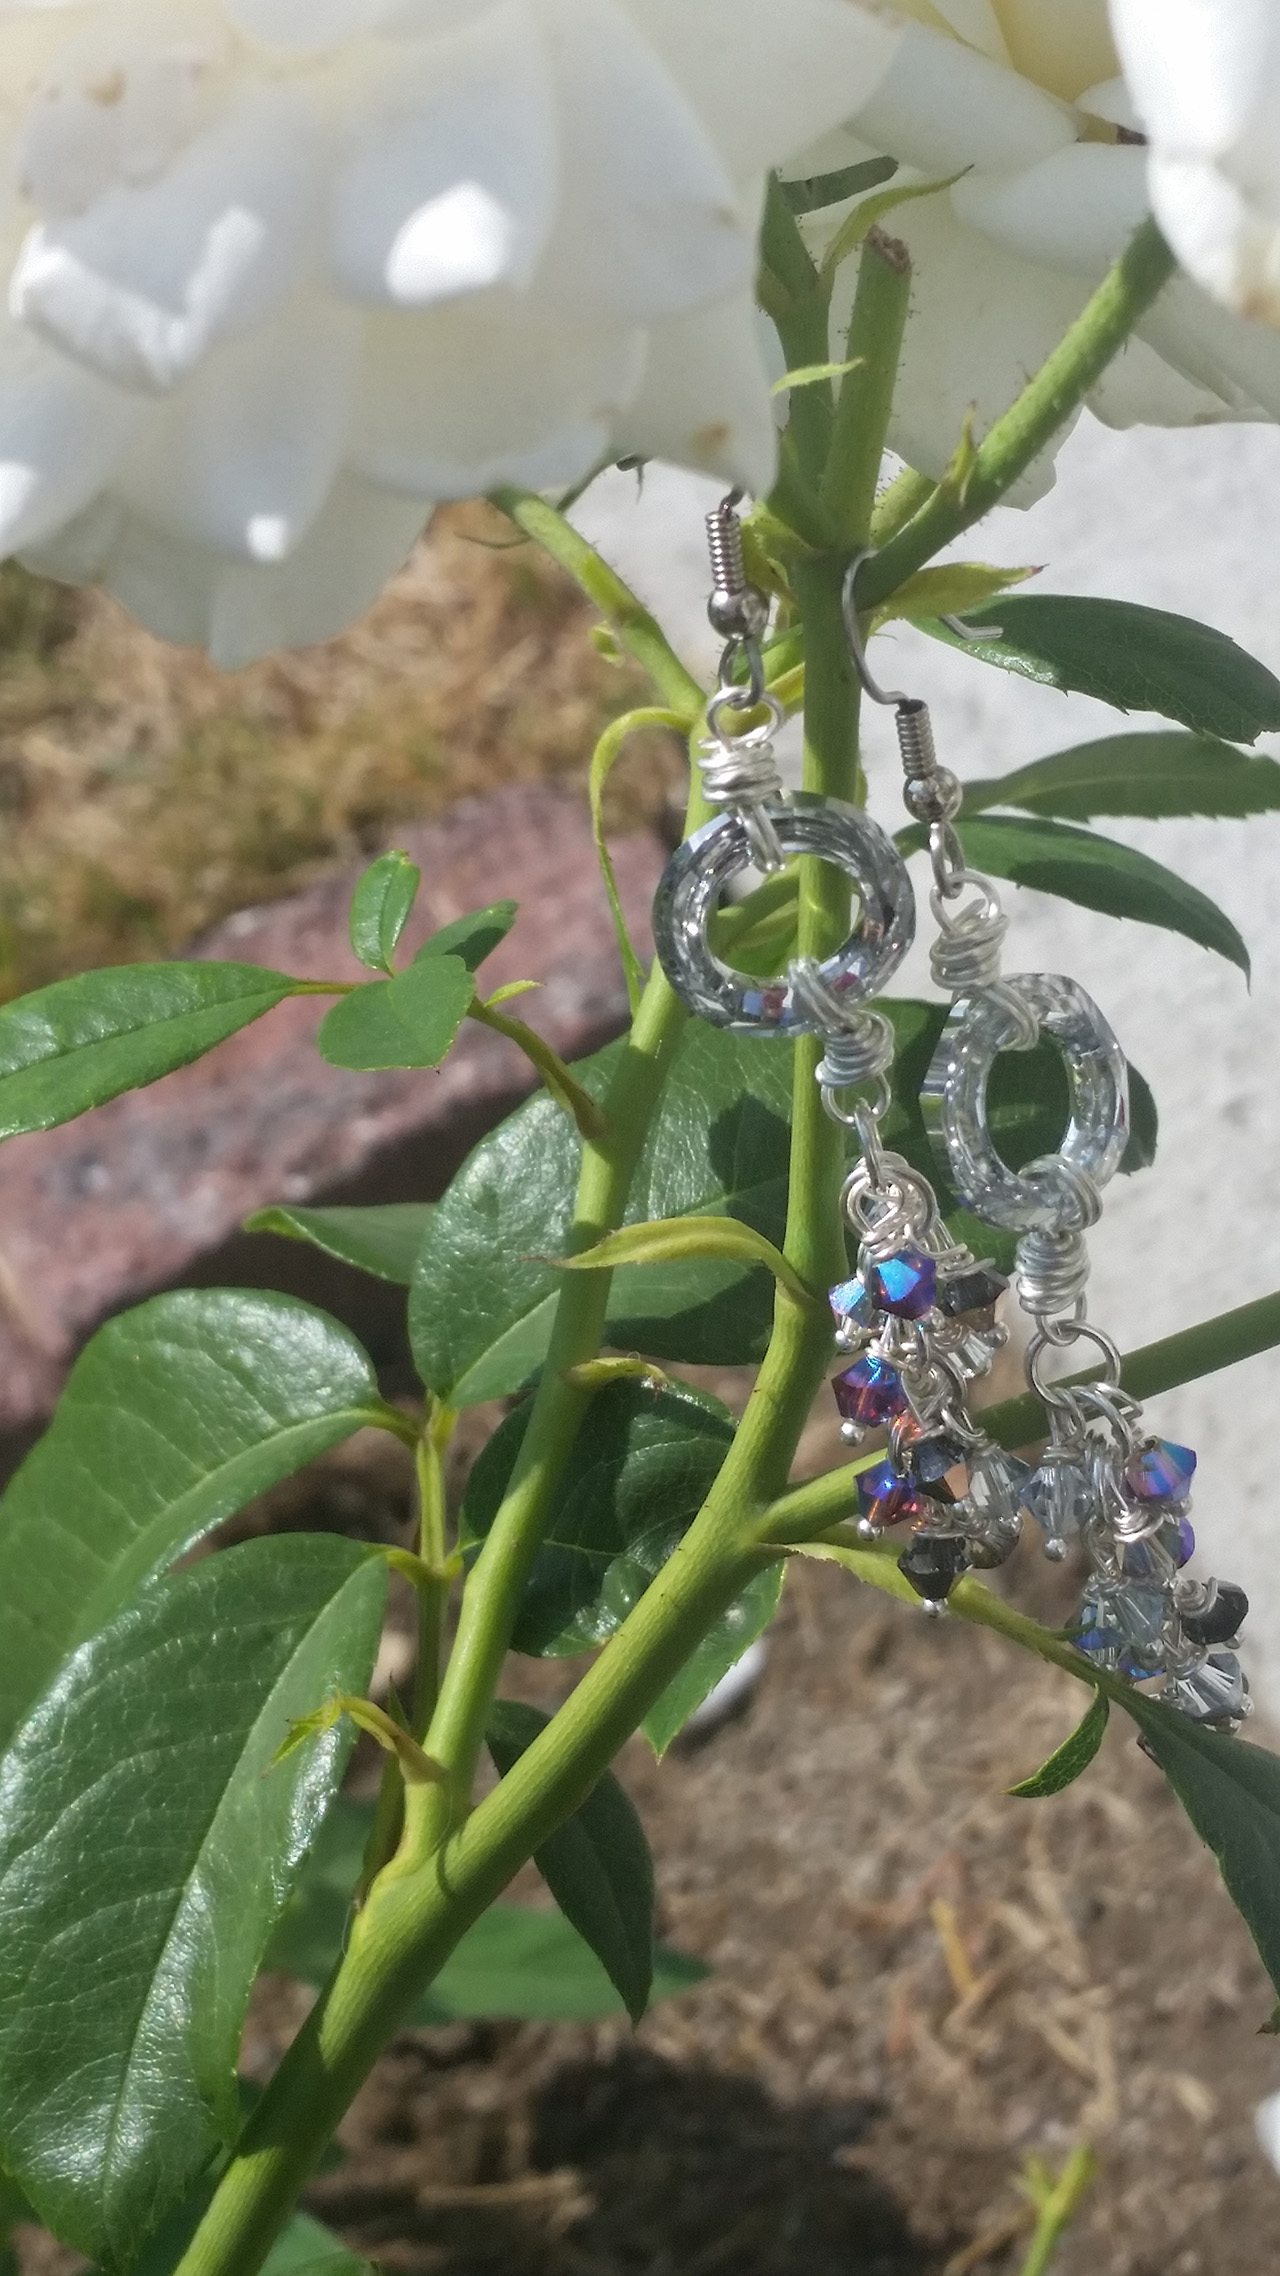
Make this earring design with different colors of crystals for variety! You can also choose different colors of Artistic Wire for varying looks!
Use colors that accent your cosmic rings. If you want to bring out a color in the ring, use tones that accent that color. If you want them longer, simply add more crystals!
Enjoy!
Always, Kayla


5 Comments
Great method of making earrings and finally it looks gorgeous. Actually i am a goldsmith and it enhanced my knowledge.
Thanks, I’ll pass along your comments to Kayla. Enjoy! ~ Melissa
I tried to print your tutorial with printer friendly and pdf versions, but the only page with text was page 1.
Hi Jackie, Thanks for the heads-up. We will check it out and see what we can do!
~Polly
Those are truly unique