The bolo tie is a truly American piece of jewelry. Appealing to diverse groups of people, bolo ties have gone in and out of fashion over the years. They recently became popular again when Prada introduced a bolo tie (that’s right, I just used “Prada” and “bolo tie” in the same sentence). But before you consider spending $300 on a Prada bolo tie, why not craft your own? Bolos can be made out of so many objects, such as vintage pins, bottle caps, old coins, buttons, or a gemstone donut. And whether you are Mid-Century Western, 1980’s New Wave, or 21st-Century Pop Culture–a bolo tie is the perfect statement piece!
Gather your Supplies
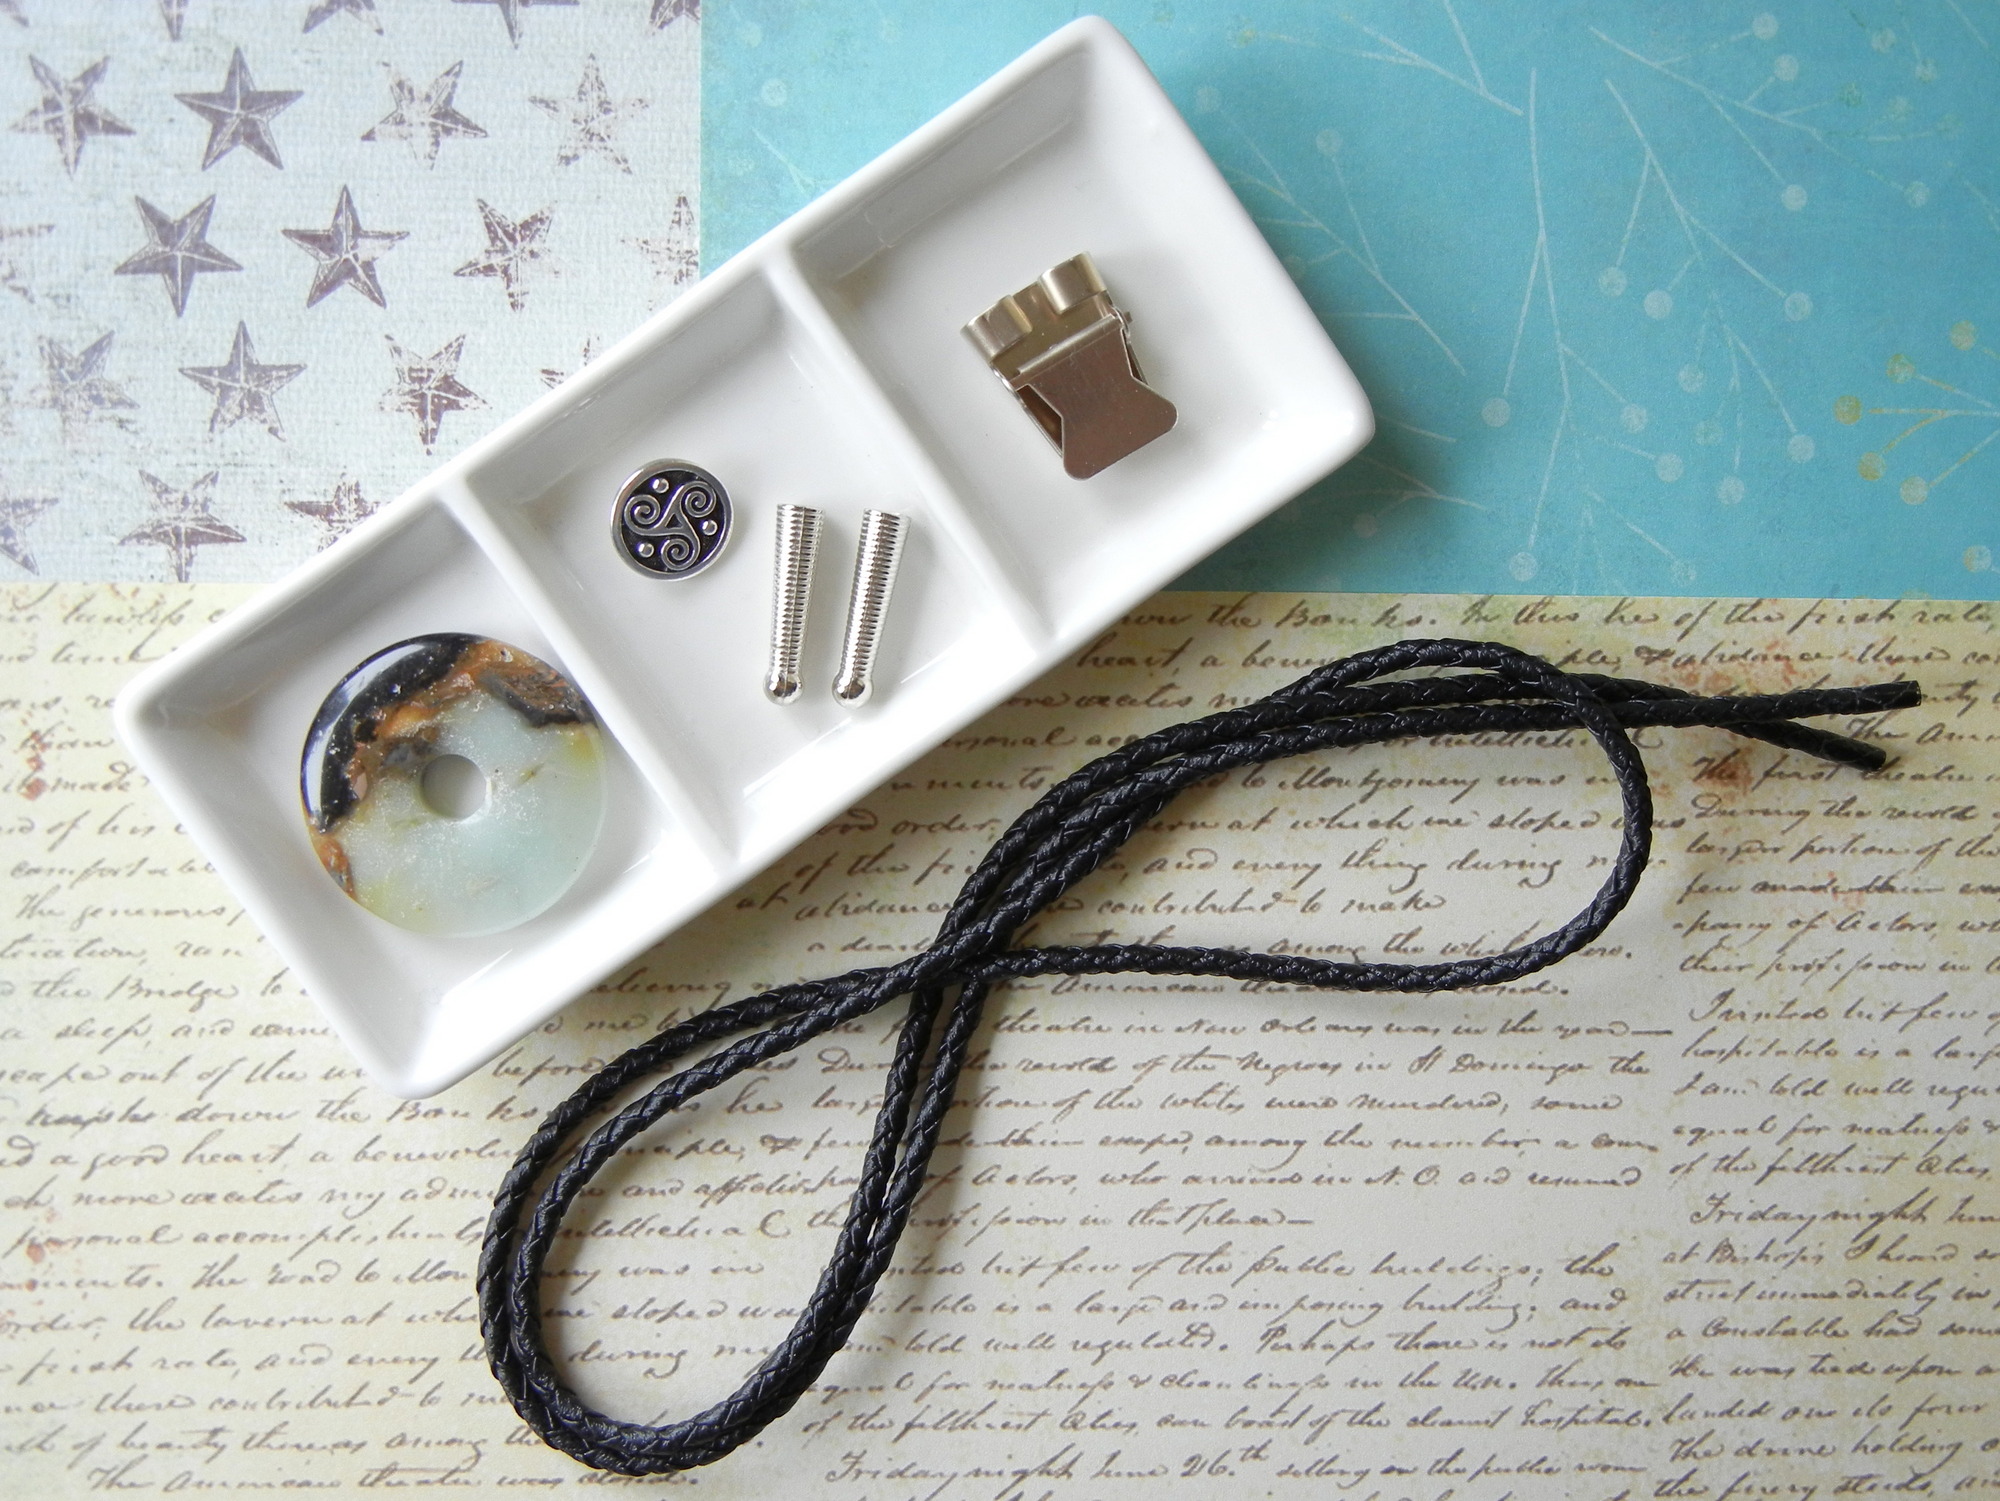
Suggested Materials
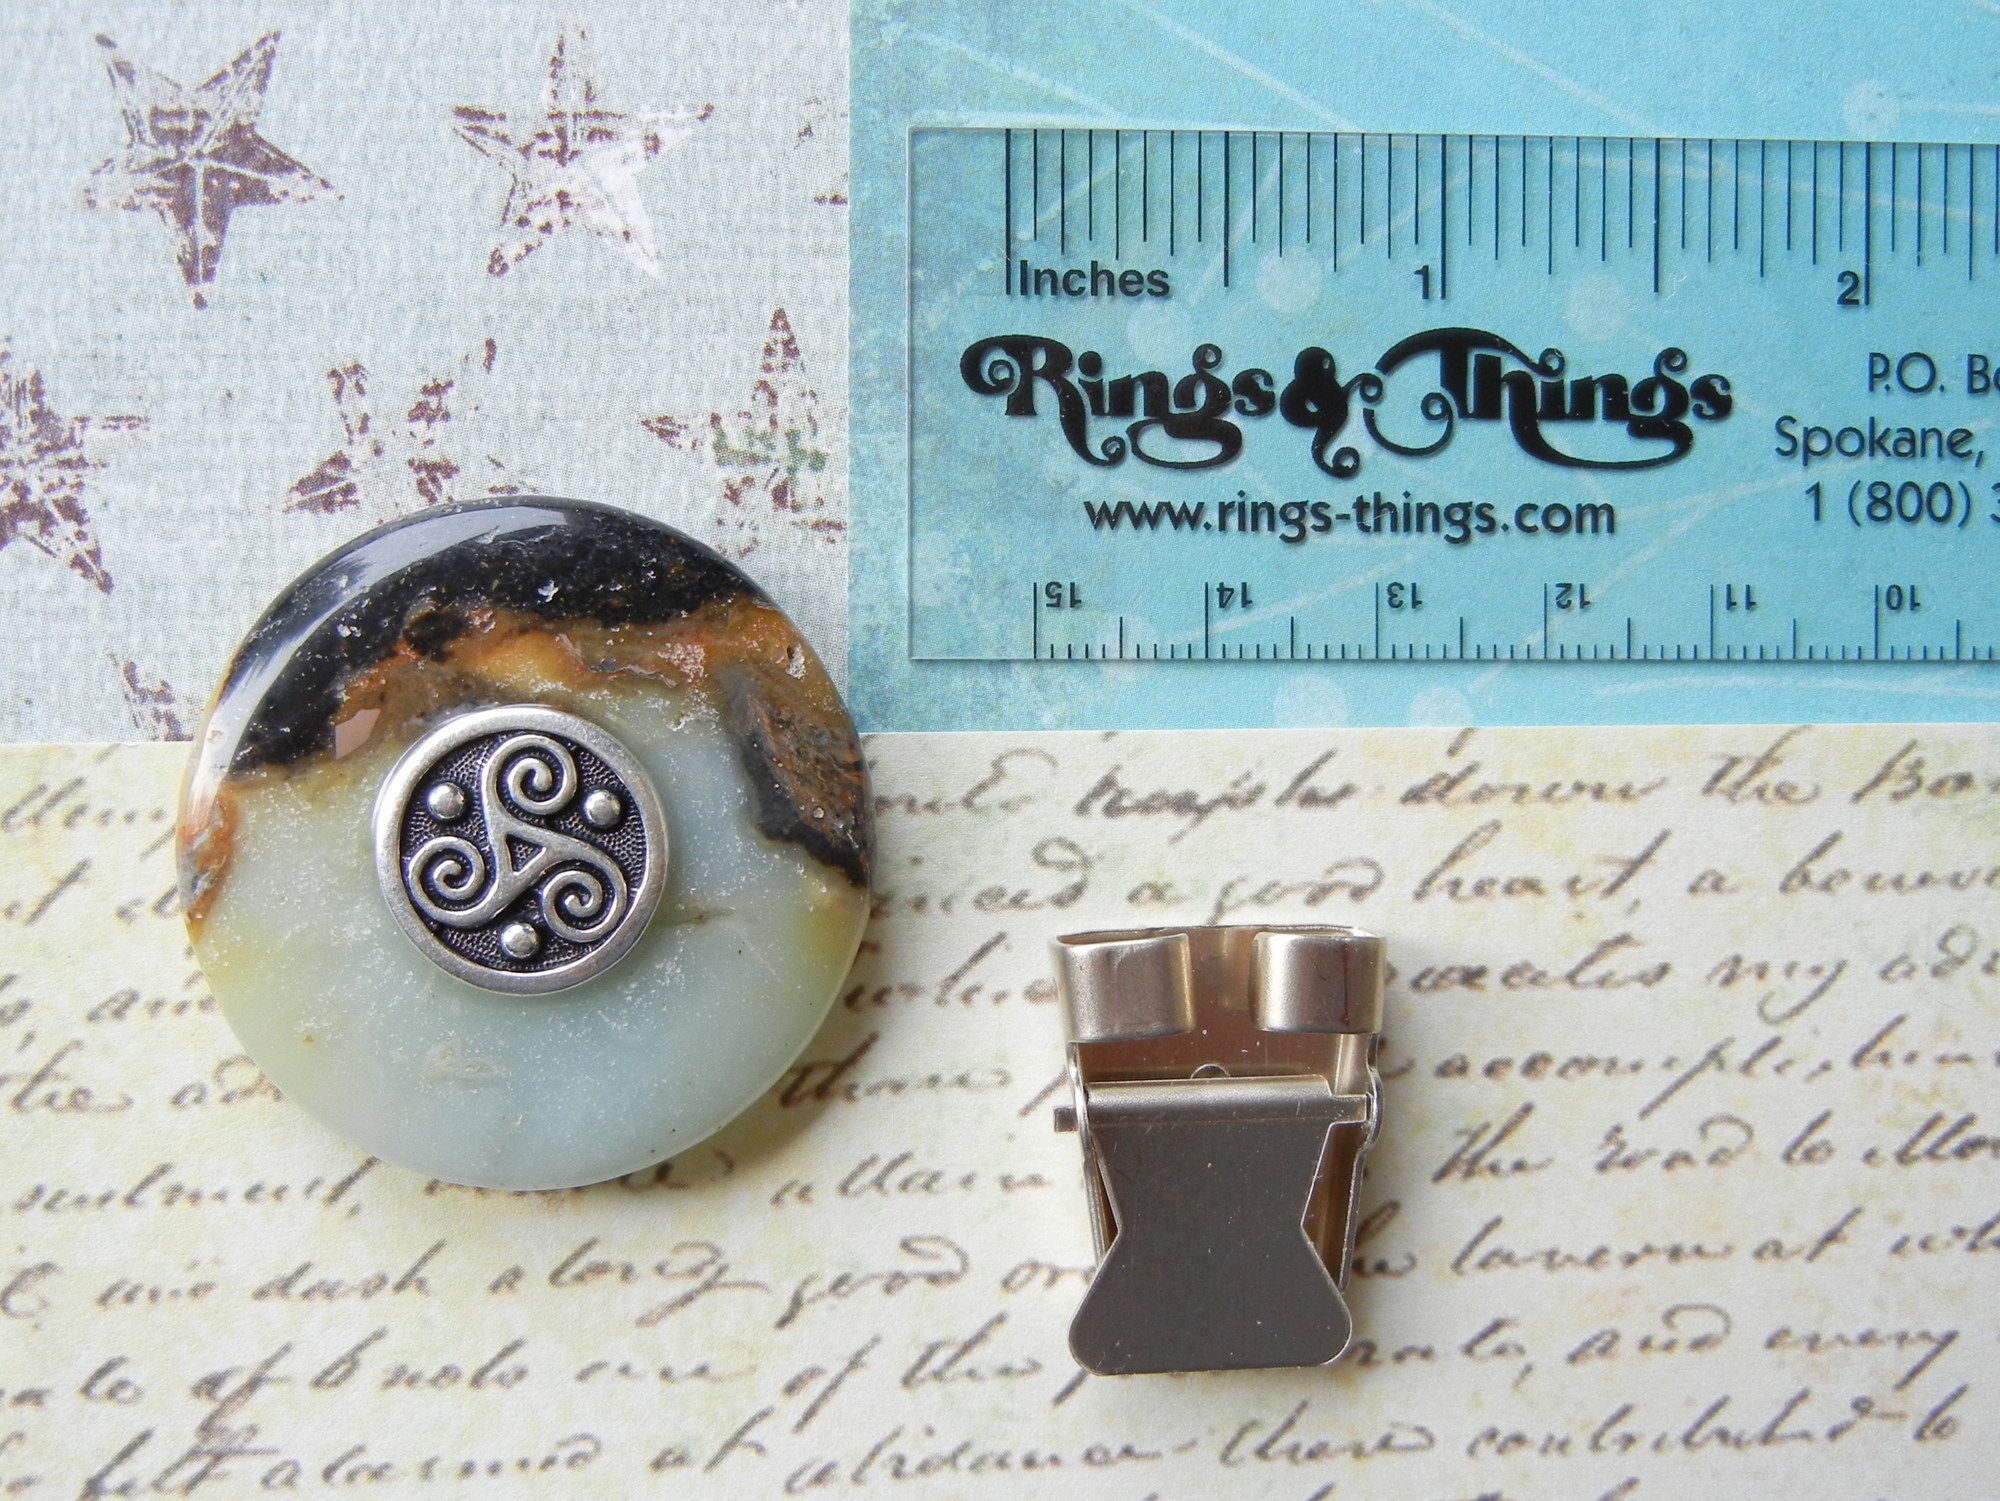
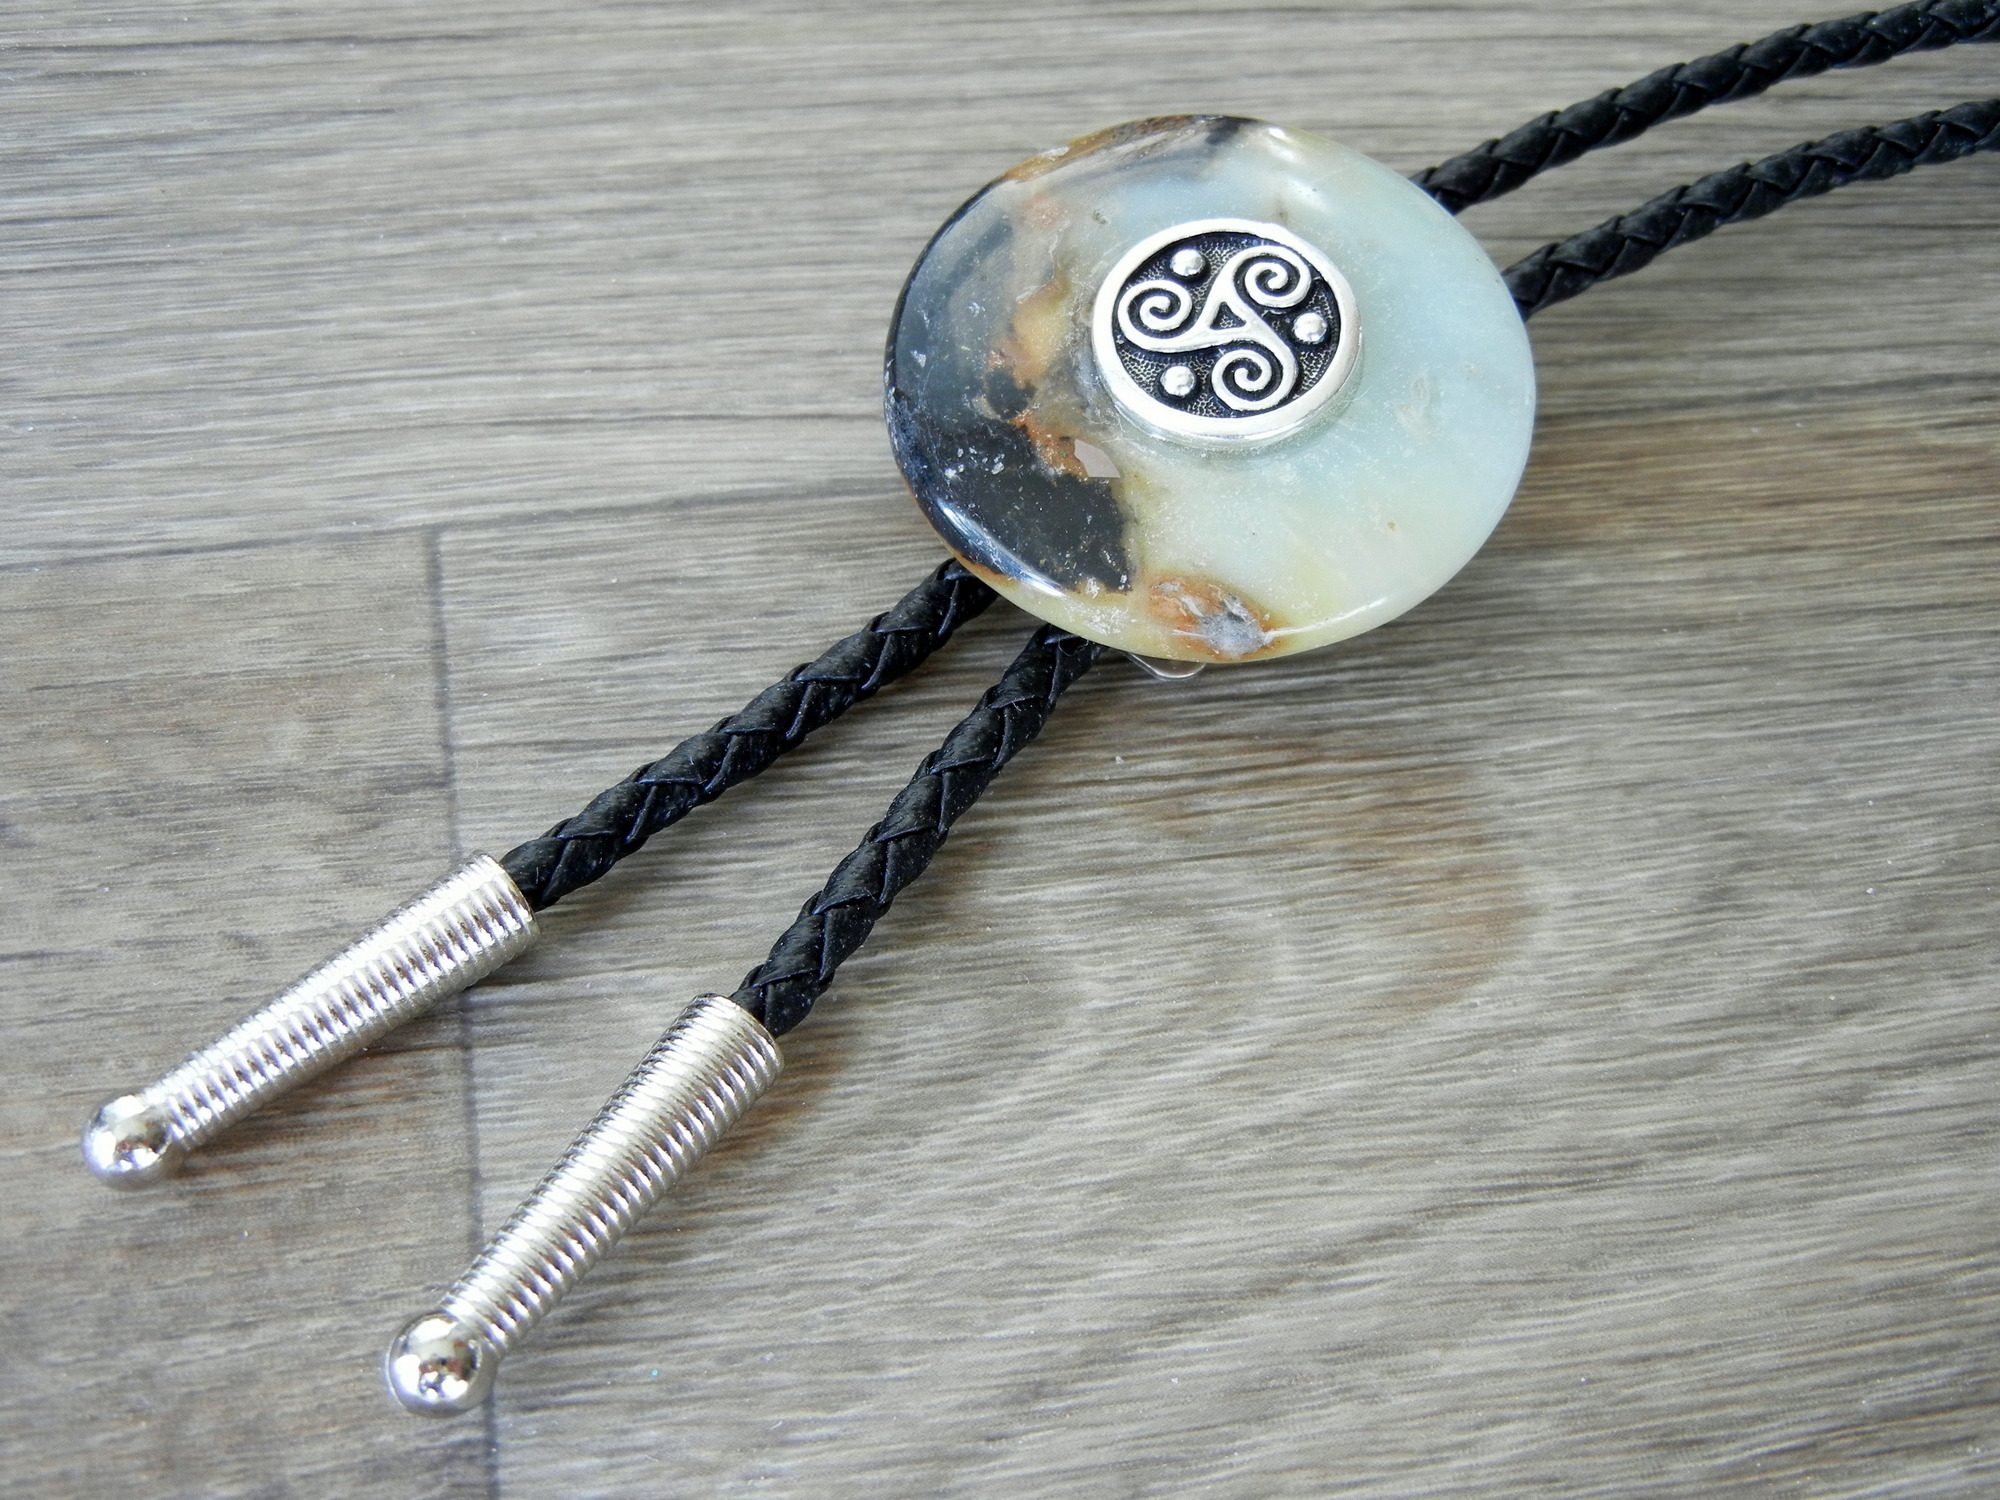
- 1 each 40mm Gemstone Donut (I used item #21-644-943)
- 1 each Button with Shank (I used item #59-100-17-AS)
- 1 each Bolo Slide (I used item #36-836)
- 1 each Bolo Cord (I used item #36-060-02)
- 2 each Bolo Tips ( I used item #36-211-1)
Other Supplies
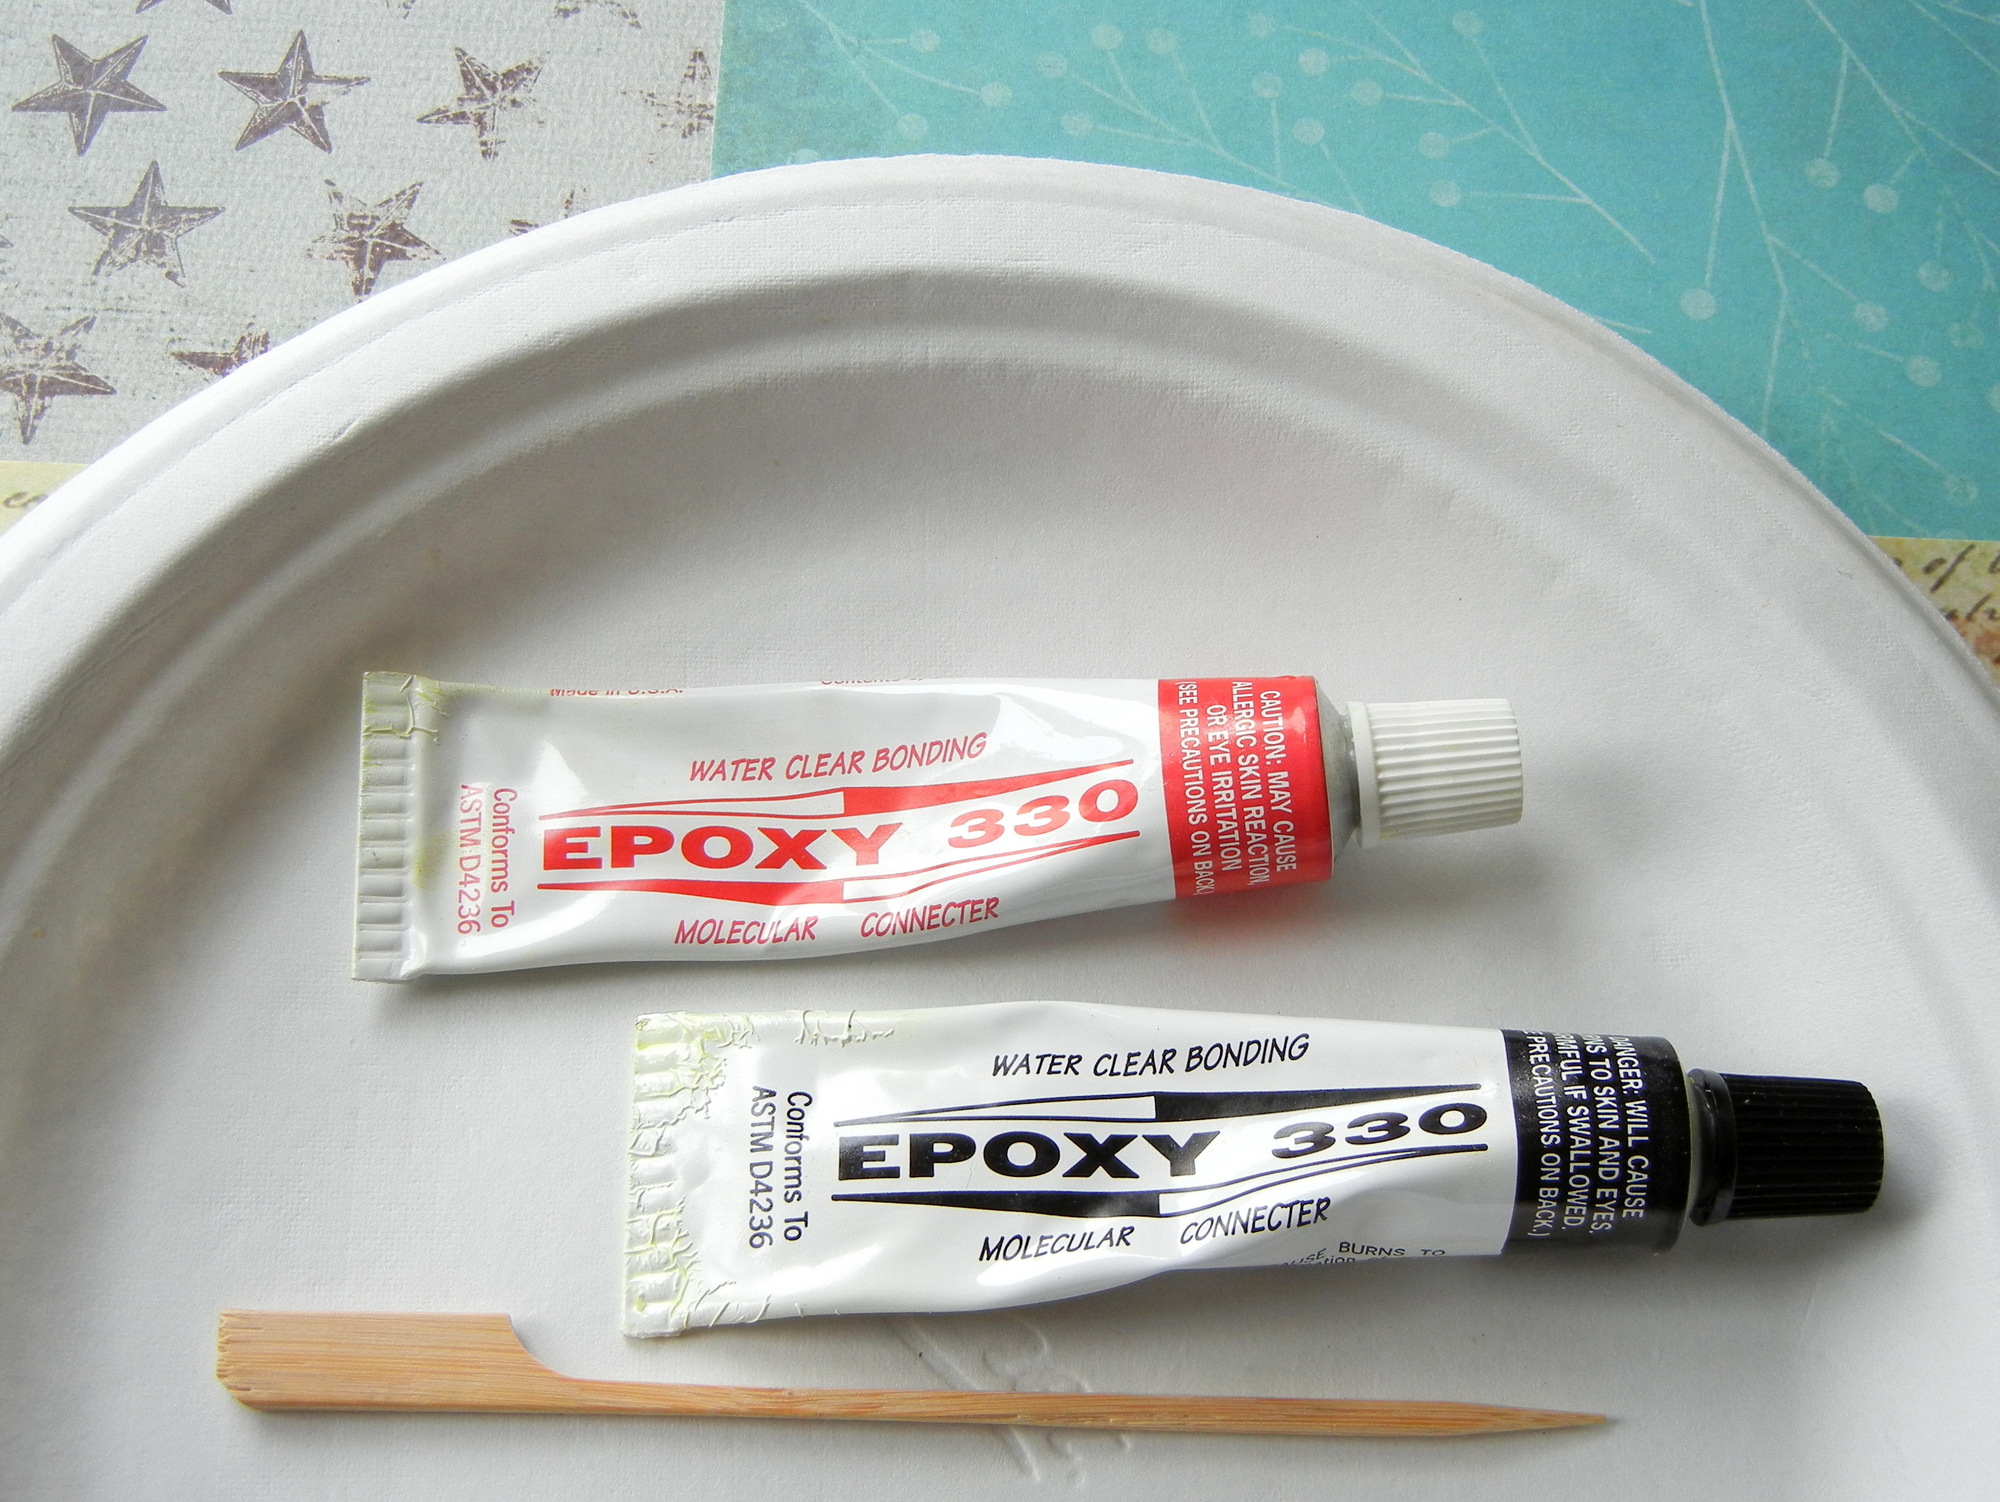
- Adhesive (I used item #60-230)
- Isopopyl alcohol
- disposable gluing surface (paper plate)
- paper towels
- stir-stick applicator
Tools
Make a Gemstone Focal Piece
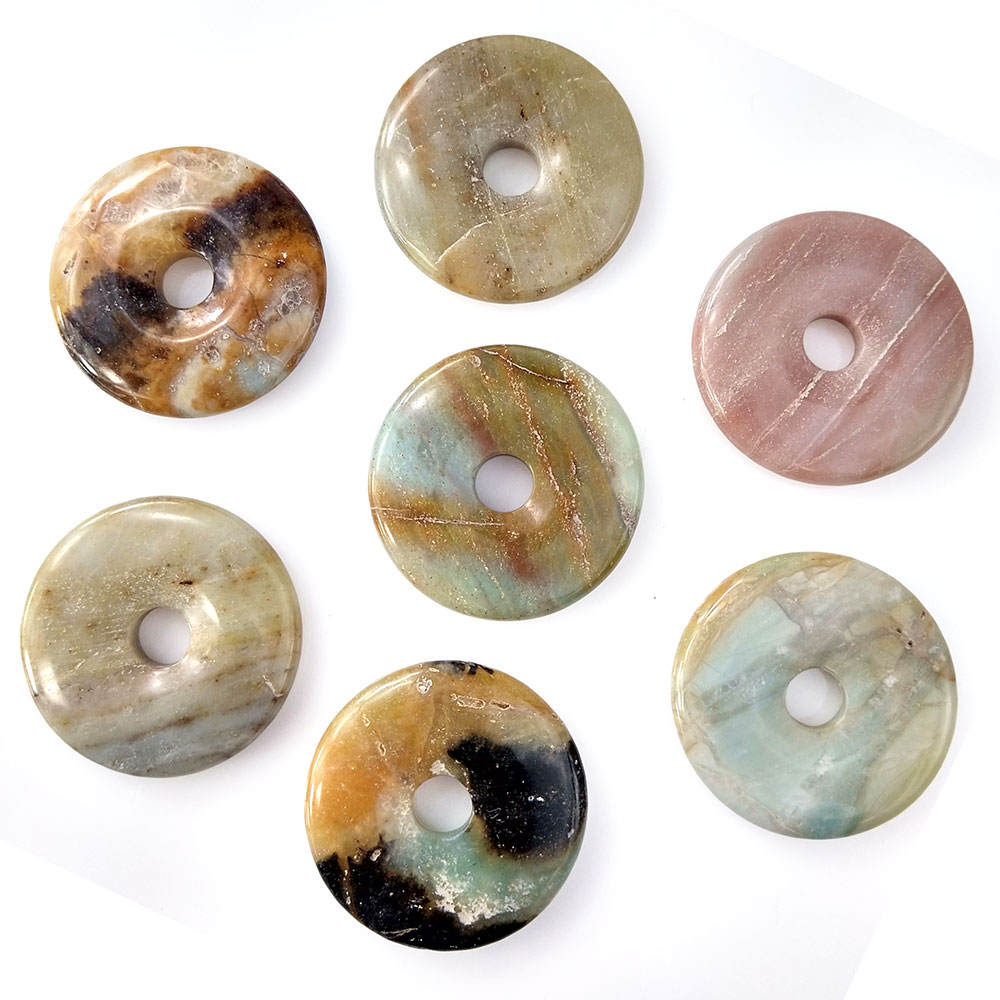
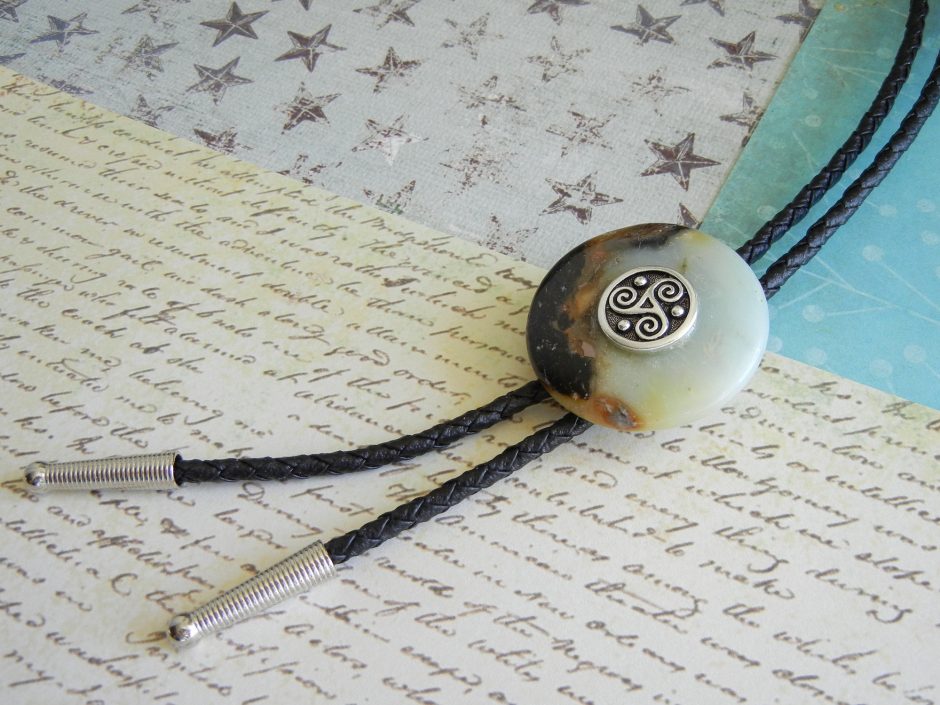
Keep in mind when purchasing gemstone donuts that the same stone can vary from donut to donut. The donuts pictured here are all black amazonite. All unique, all beautiful, and all-natural stone.
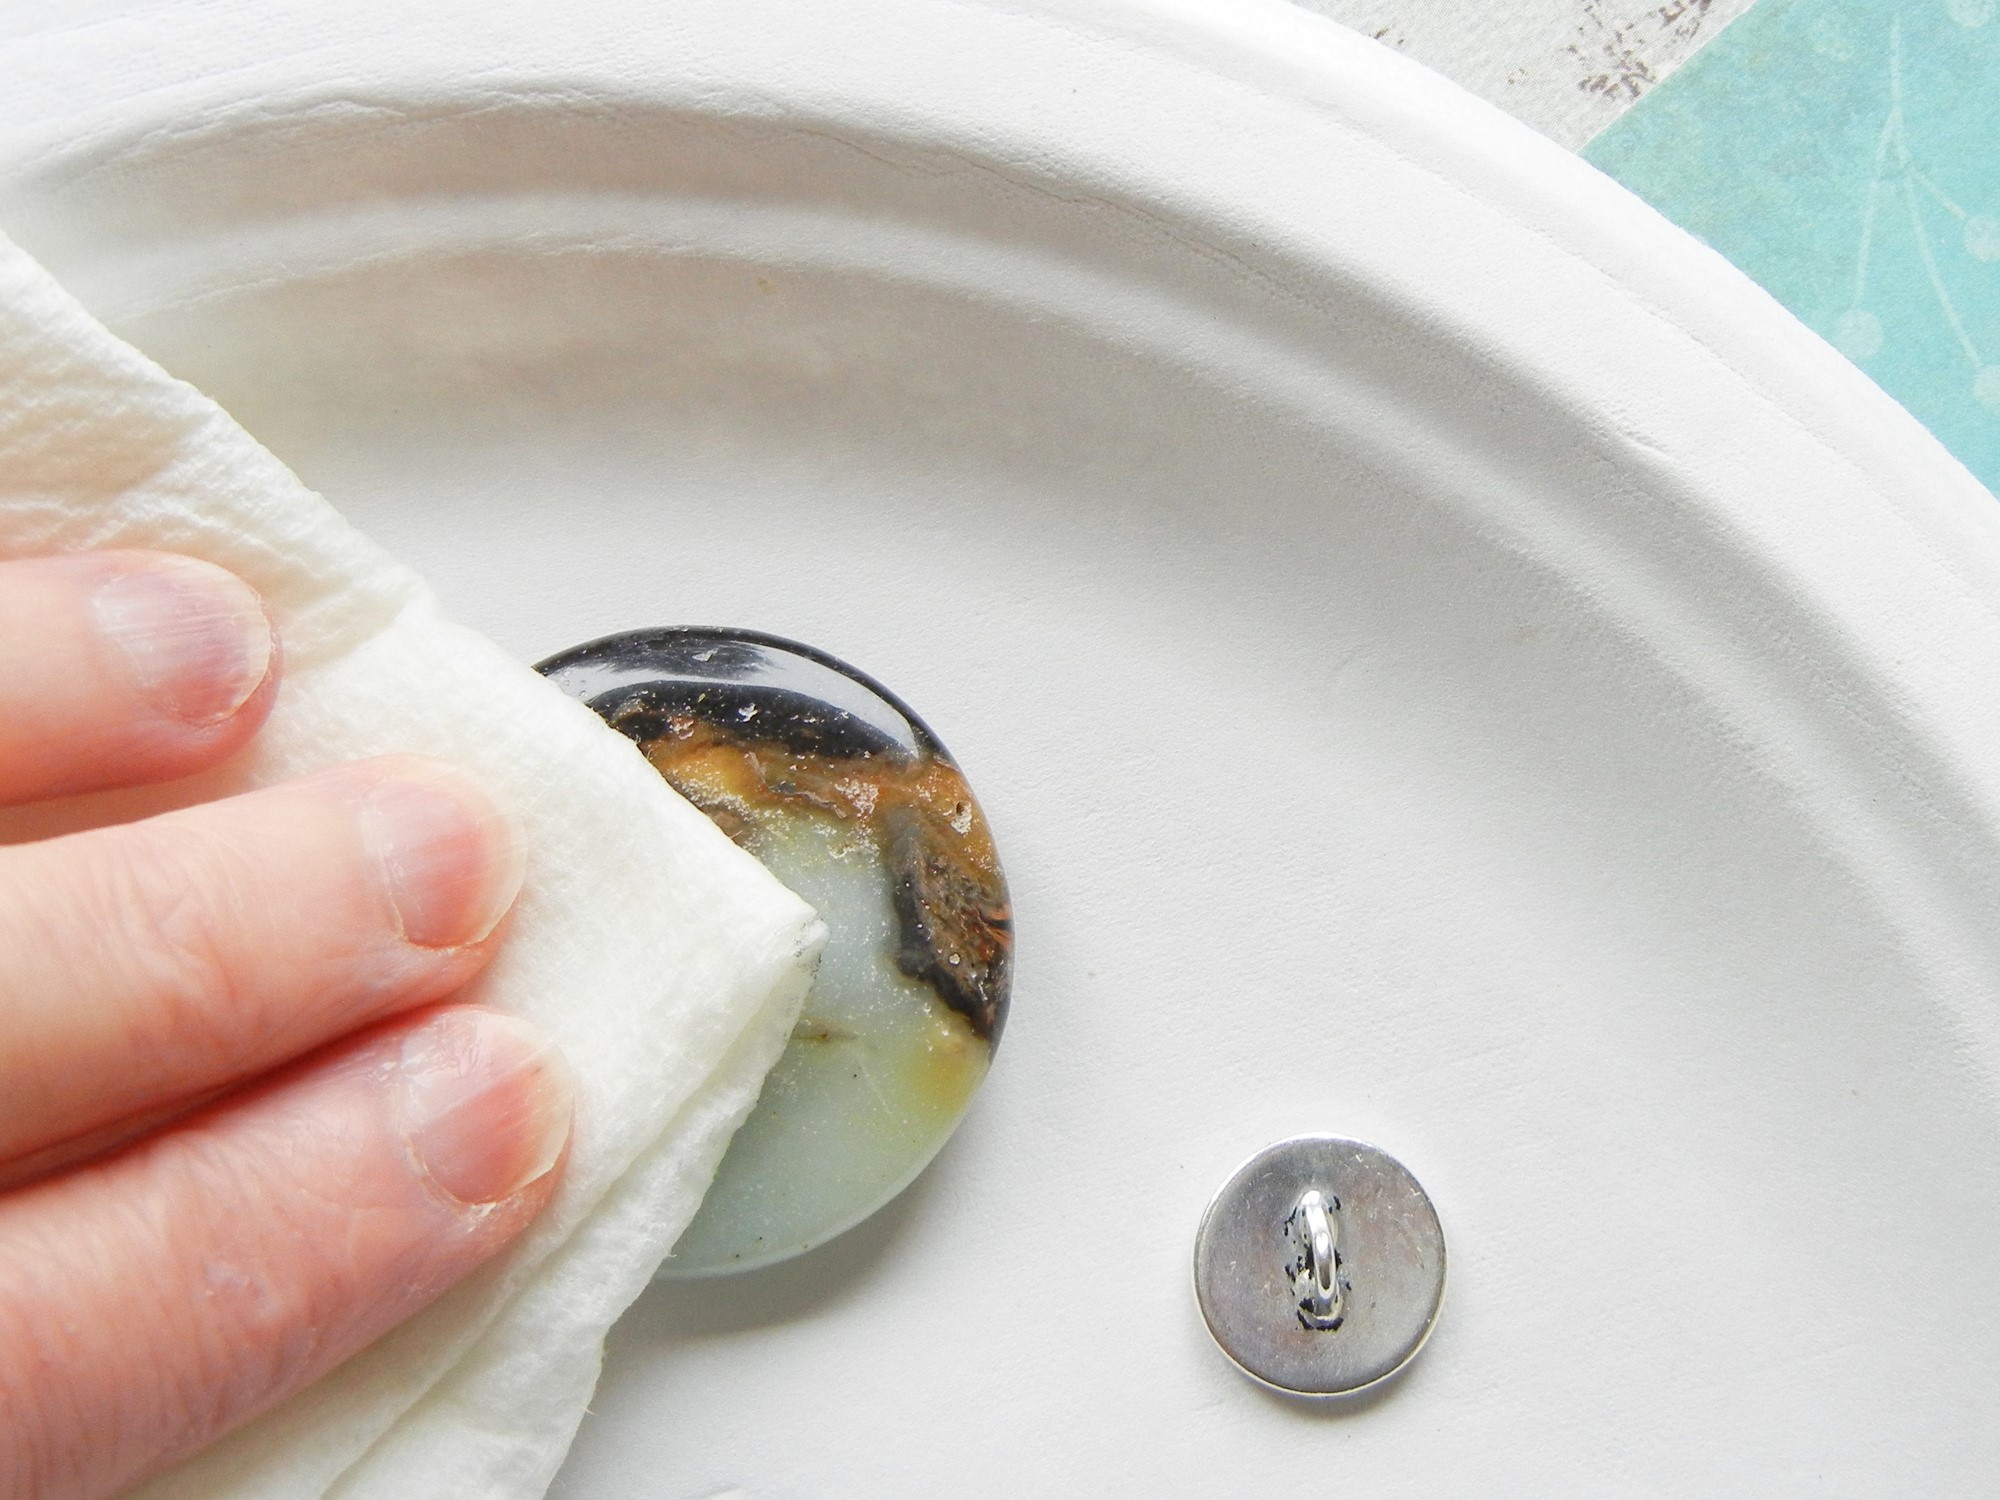
Clean the gemstone donut and button with isopropyl (rubbing) alcohol; it will remove surface contaminants that might prevent the adhesive from bonding. Rubbing alcohol is the perfect choice for this task because it evaporates quickly, so you can start your gluing project right away.
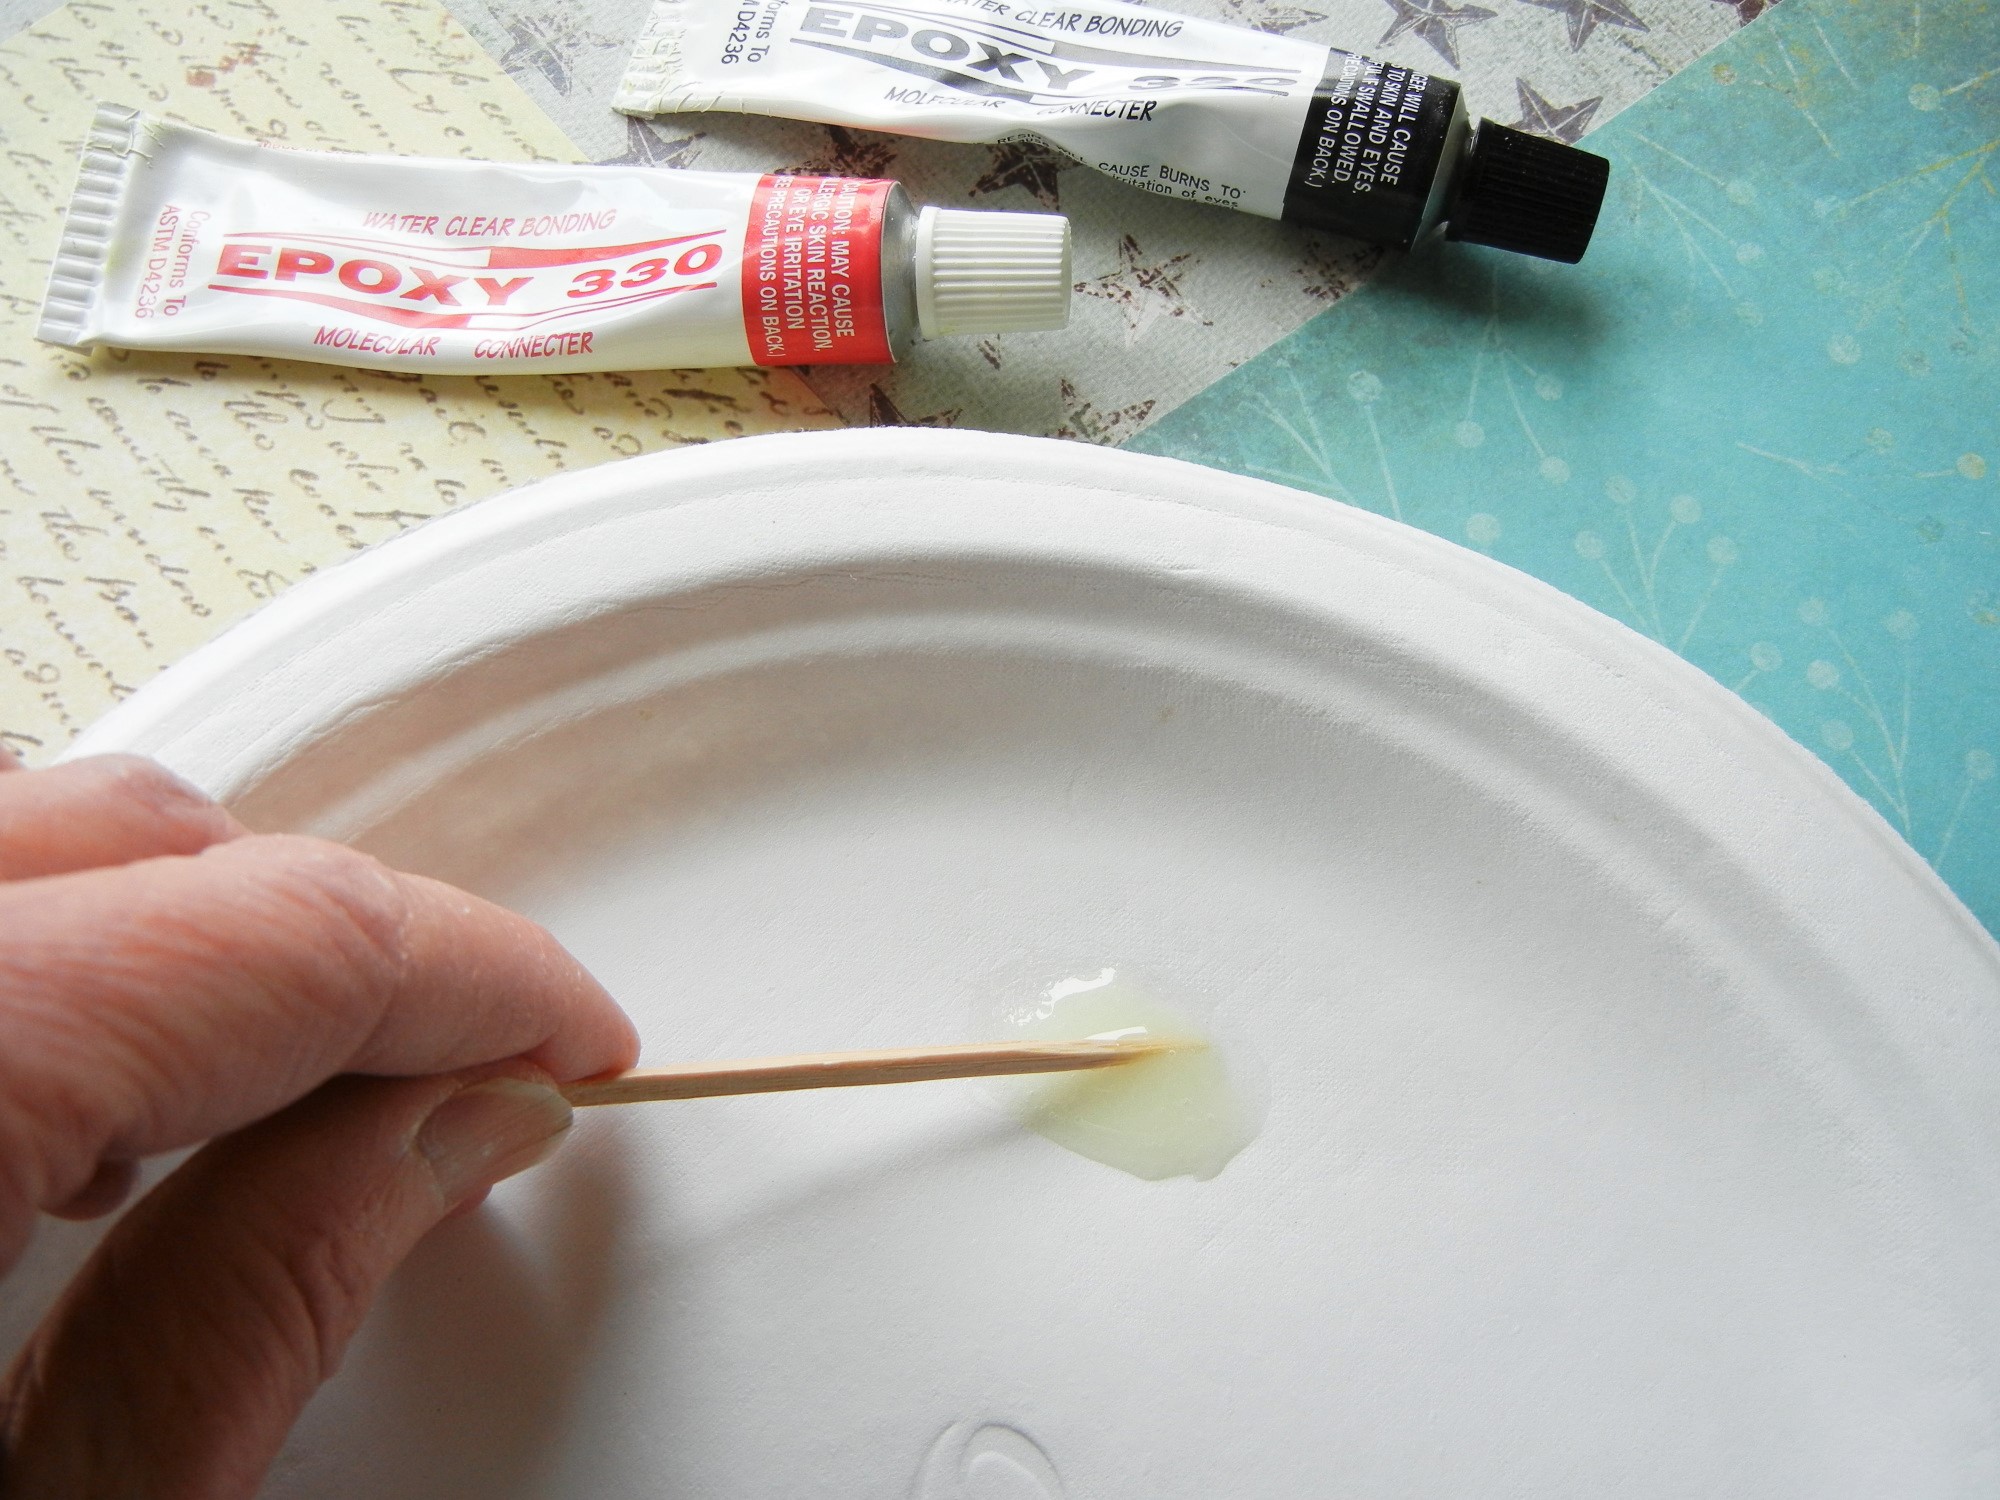
Epoxy glues form strong bonds. Most epoxy products, like Epoxy 330, instruct you to mix equal parts of resin and hardener. Gently stir the adhesive until fully mixed; refer to the instructions that come with your adhesive.
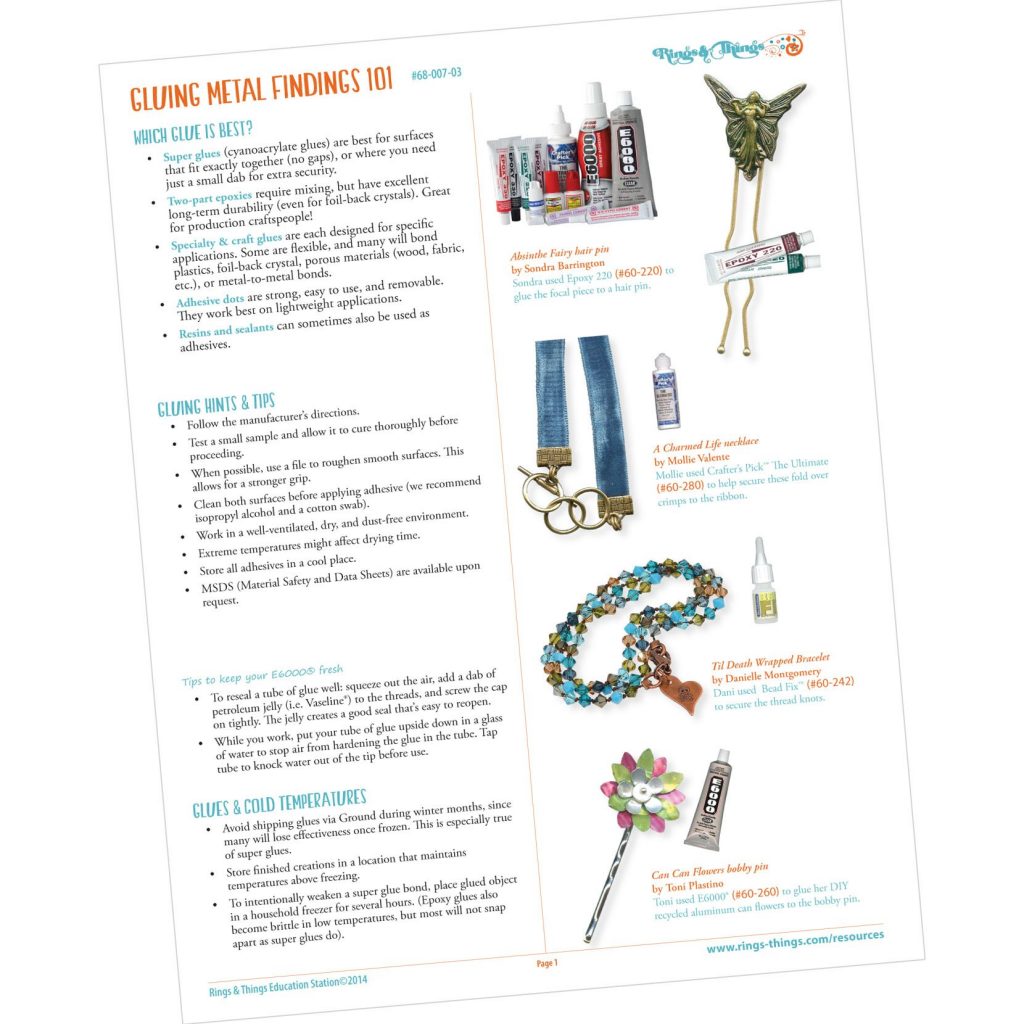
Gluing Metal Findings 101
A free printable pdf featuring helpful gluing hints and tips from Rings & Things. And don’t forget the glue.
.
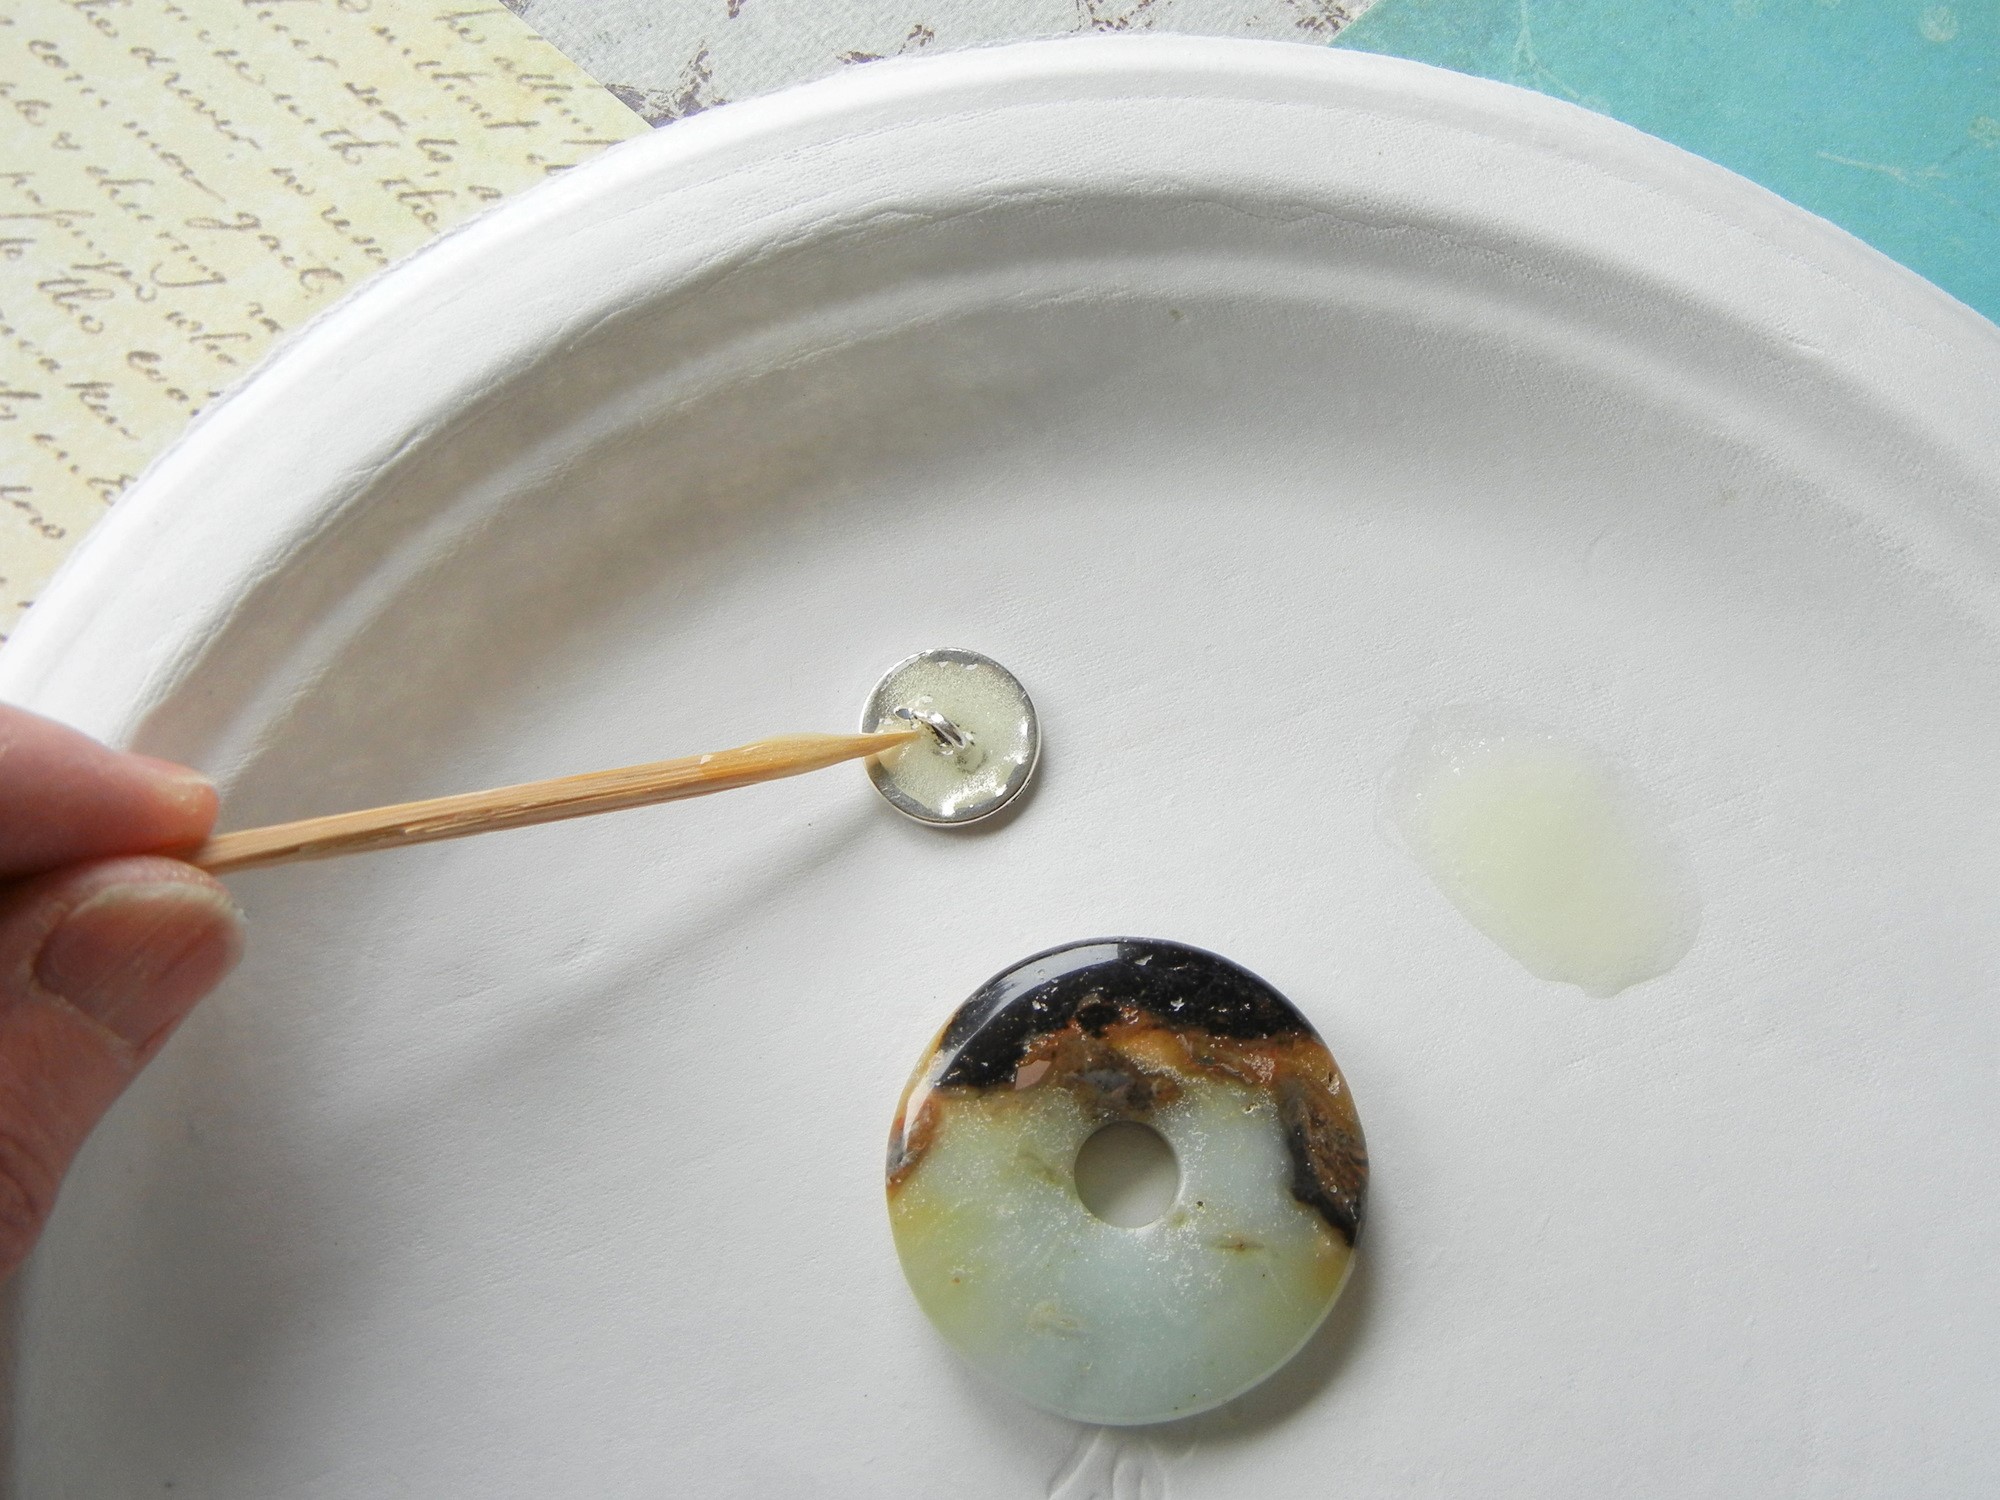
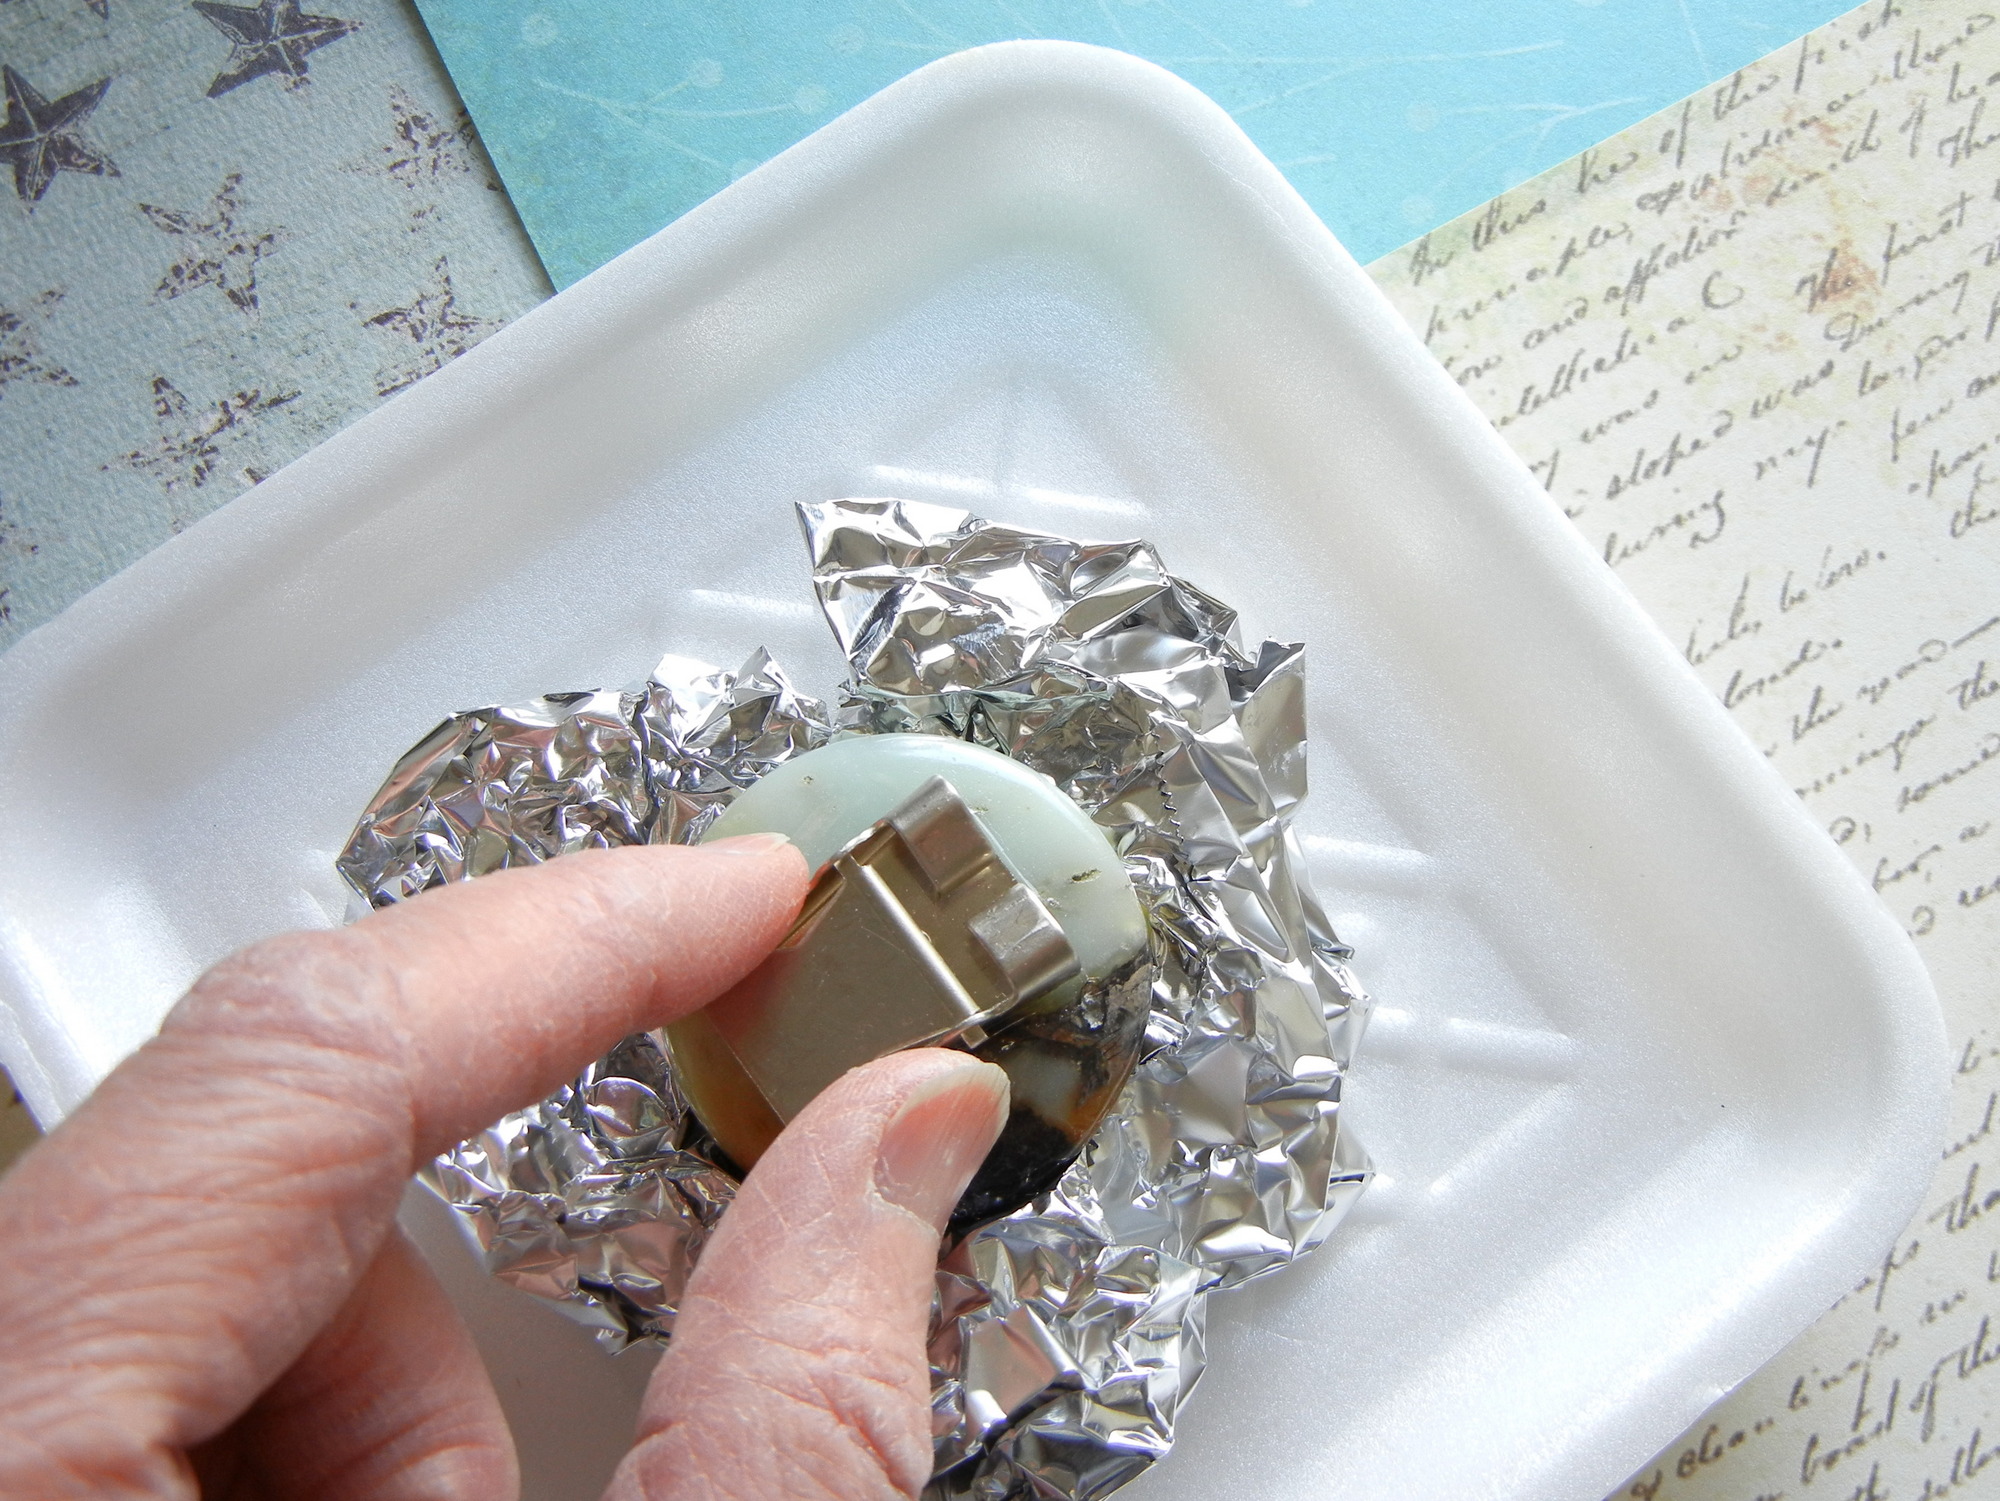
Apply a dab of glue to the backside of the button. No need to cut the button shank off, it will fit in the donut hole.
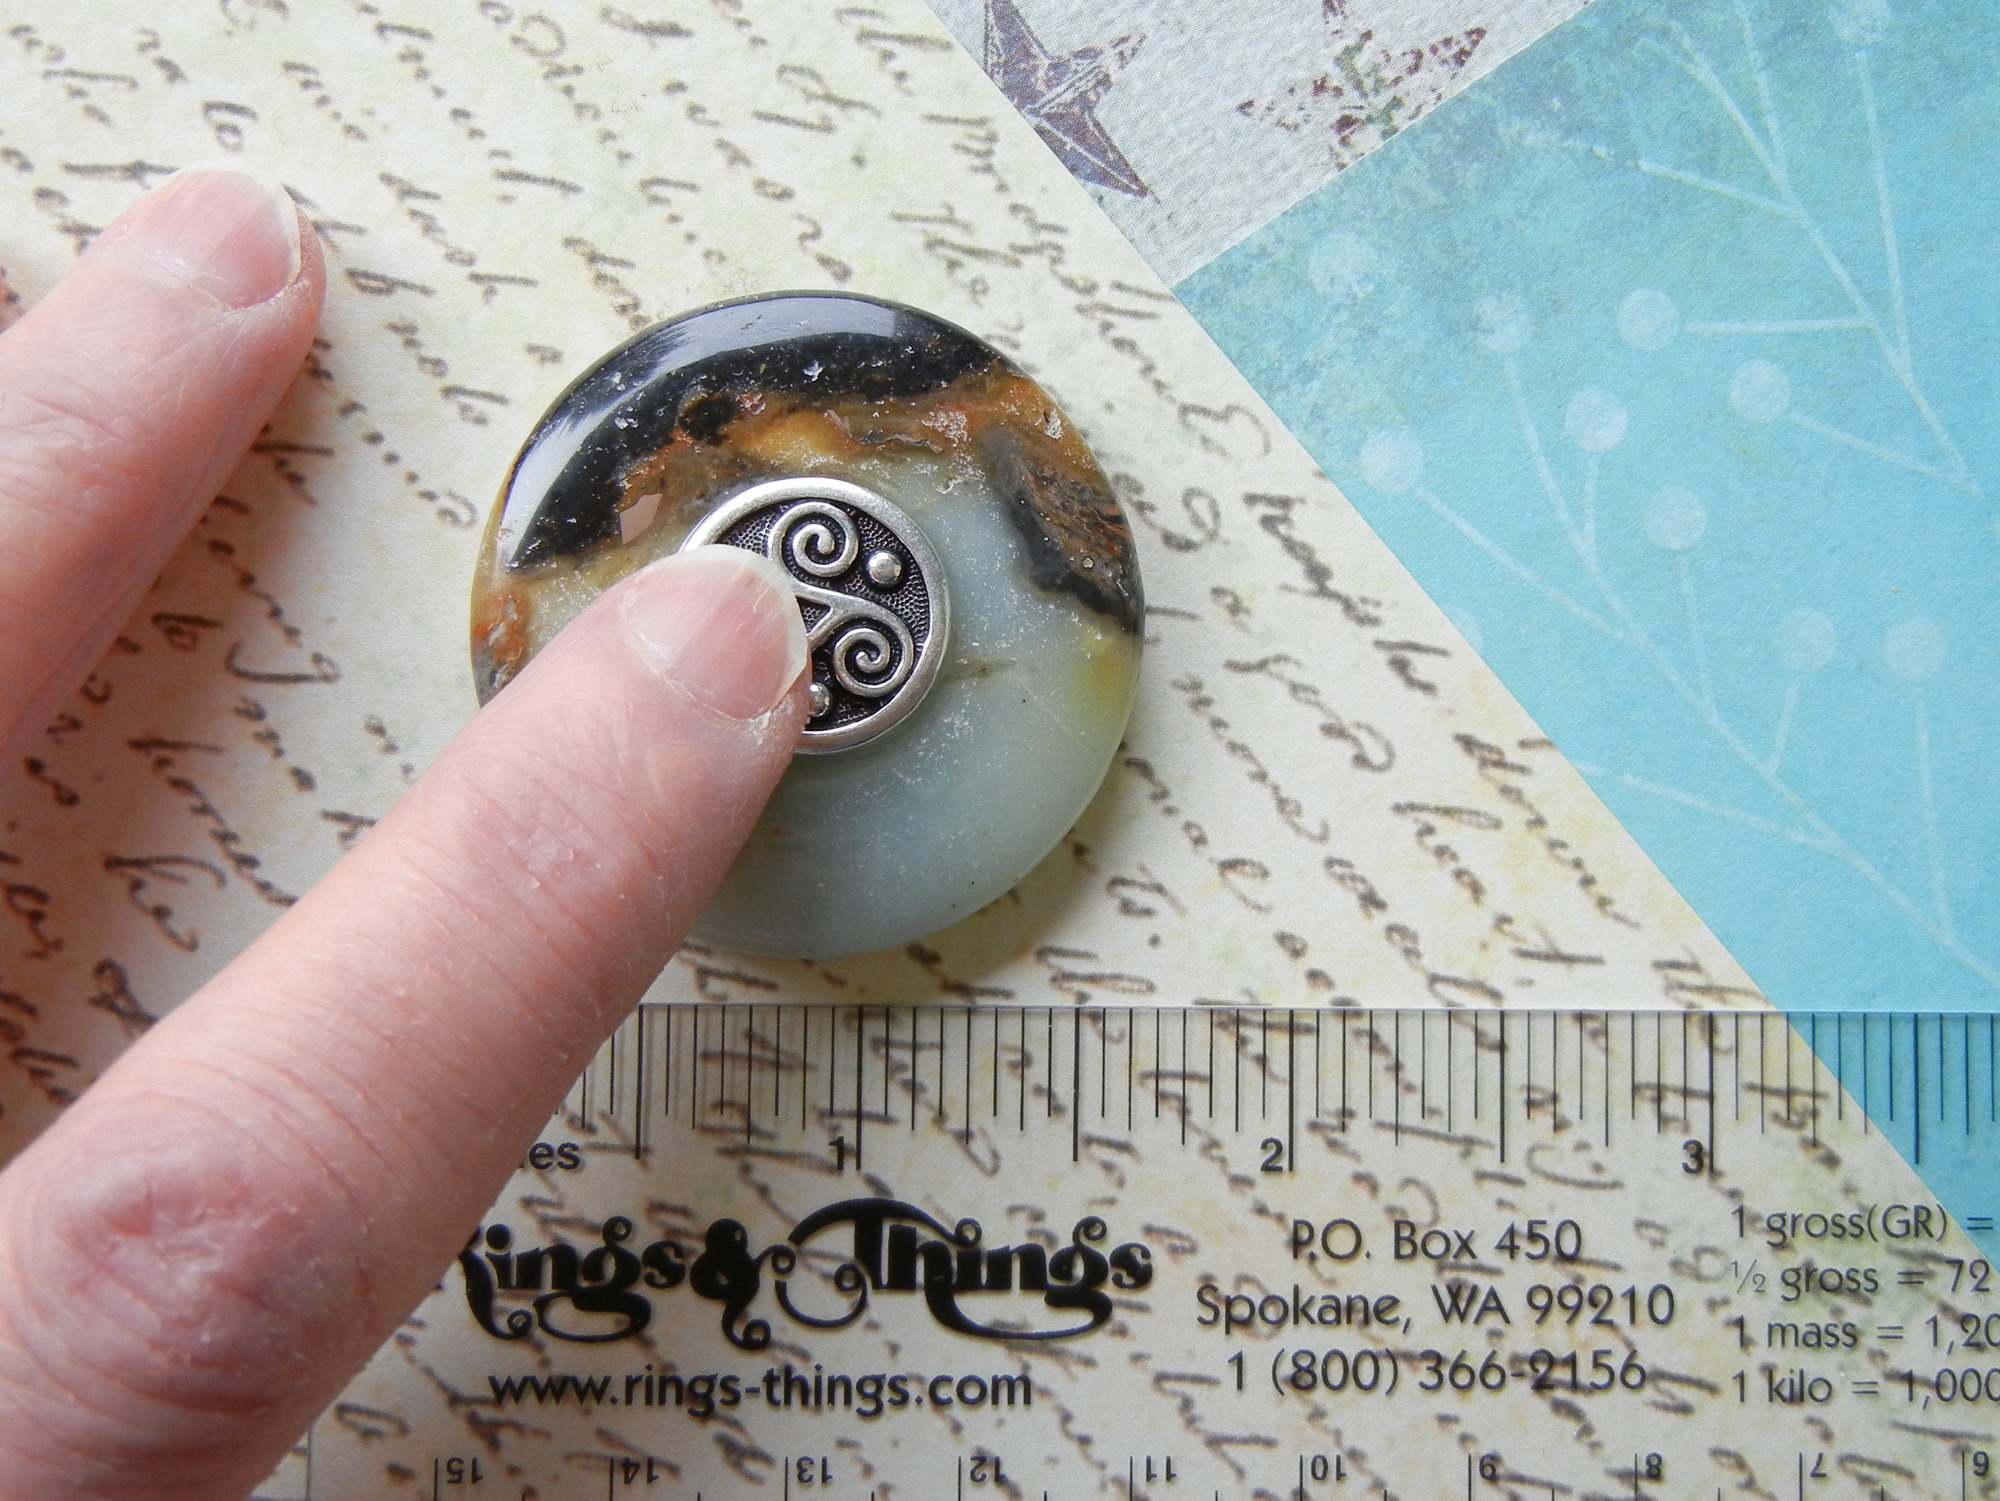
Carefully flip the button over and position it over the donut hole. Use a ruler to make sure the button is centered. Press down gently to spread the glue and create a tight bond.
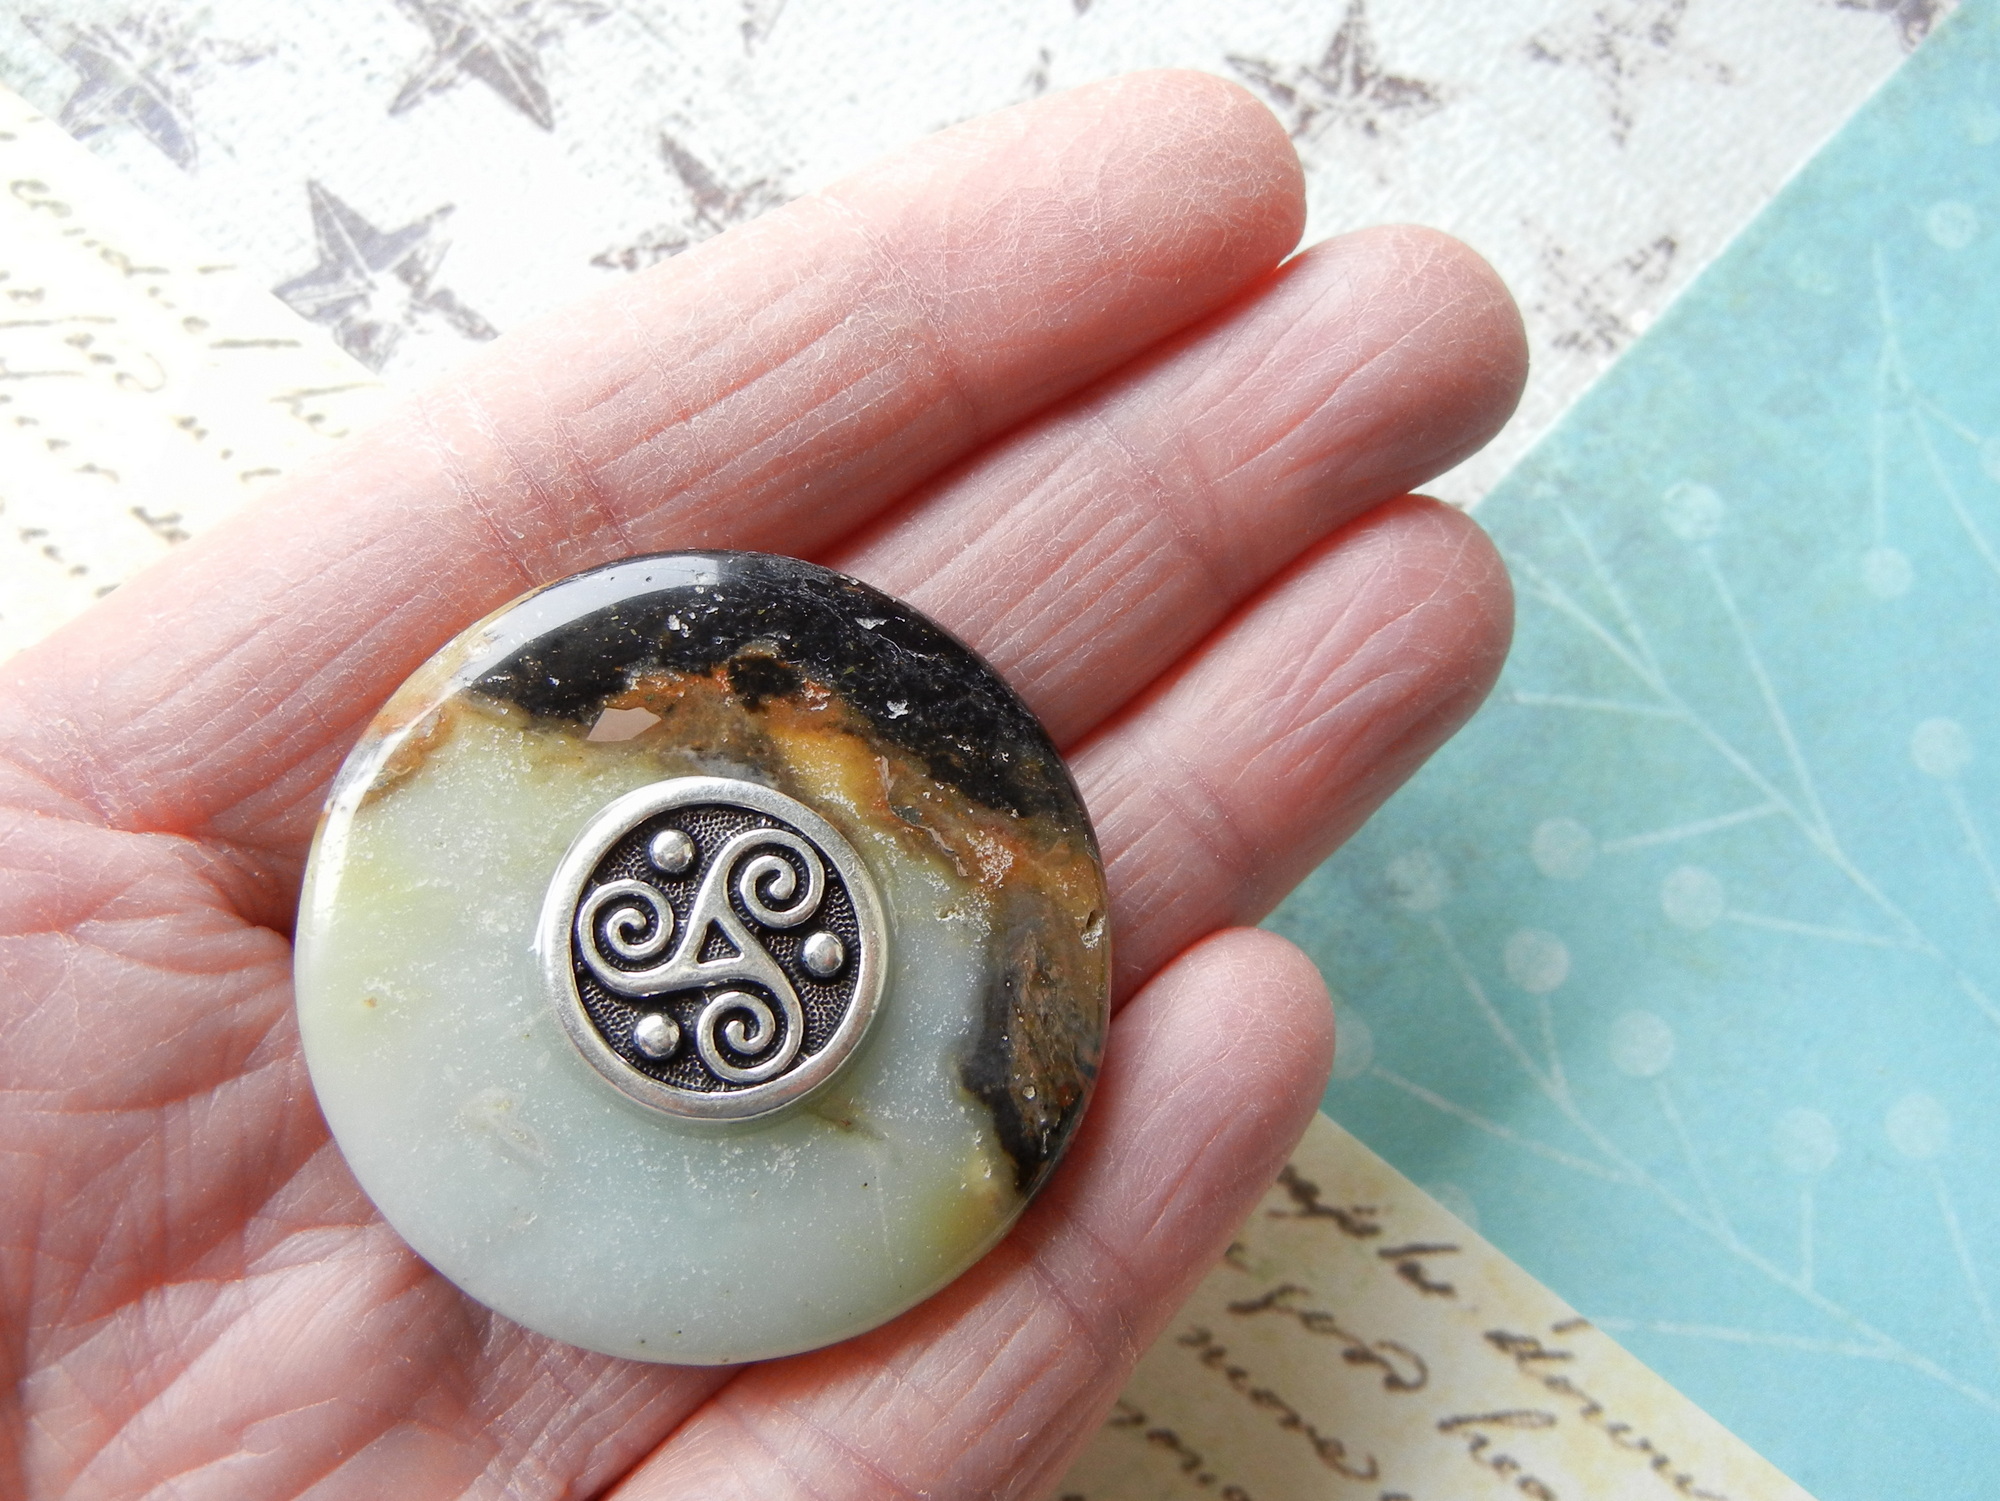
Check your work and then set the glued button-gemstone focal aside to dry. Most epoxy adhesives dry in a few hours but require a full 24 hours to cure.
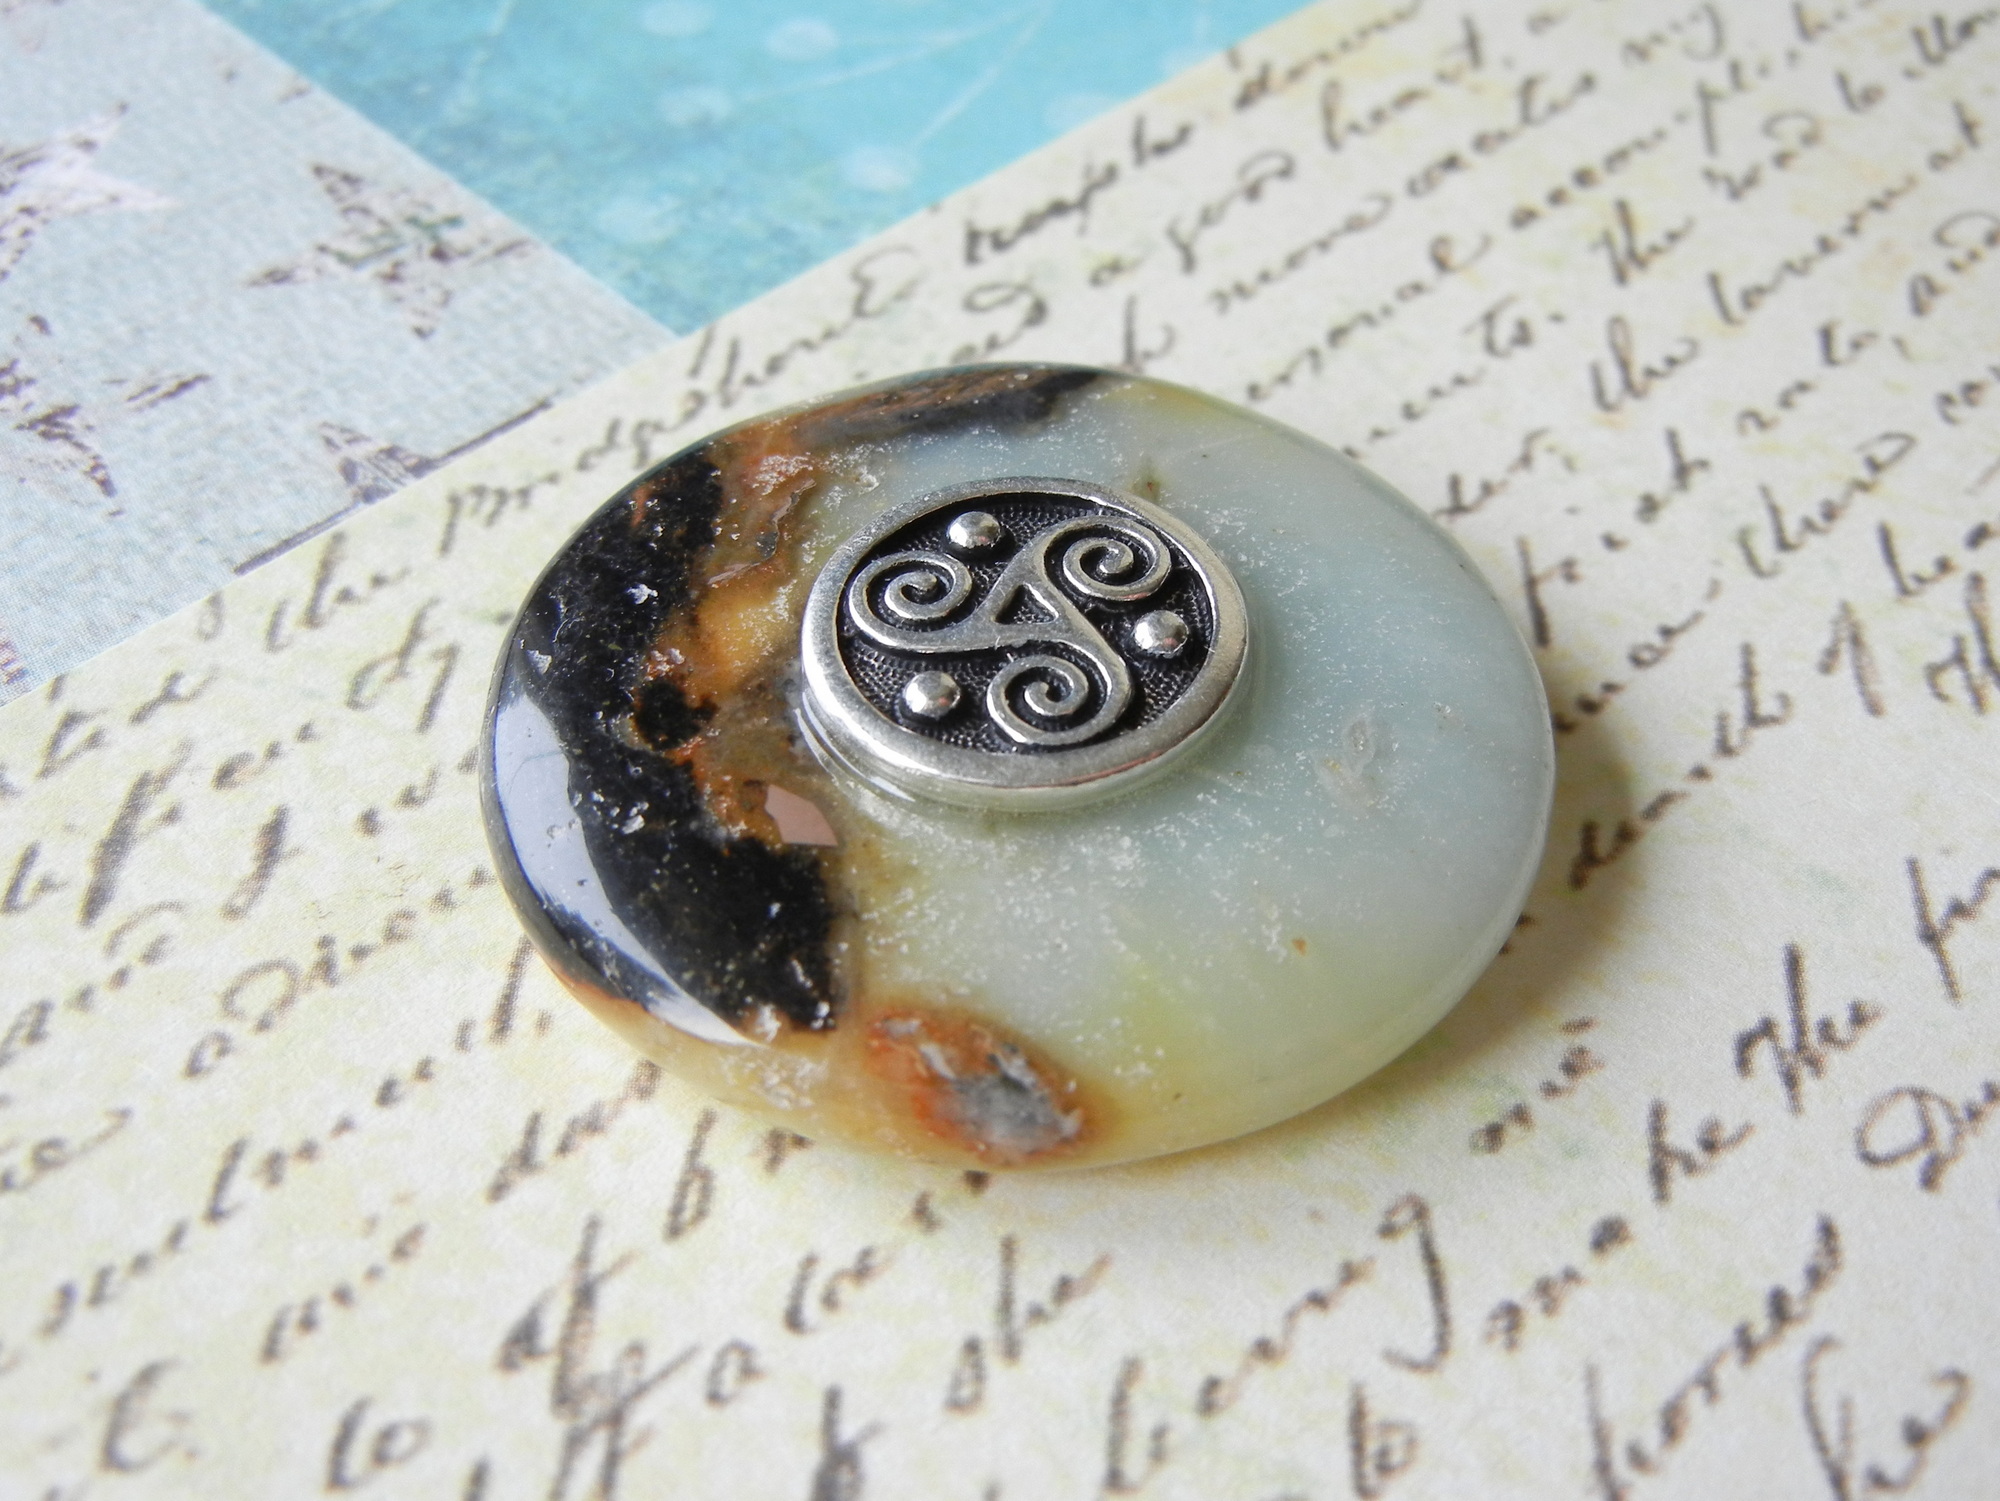
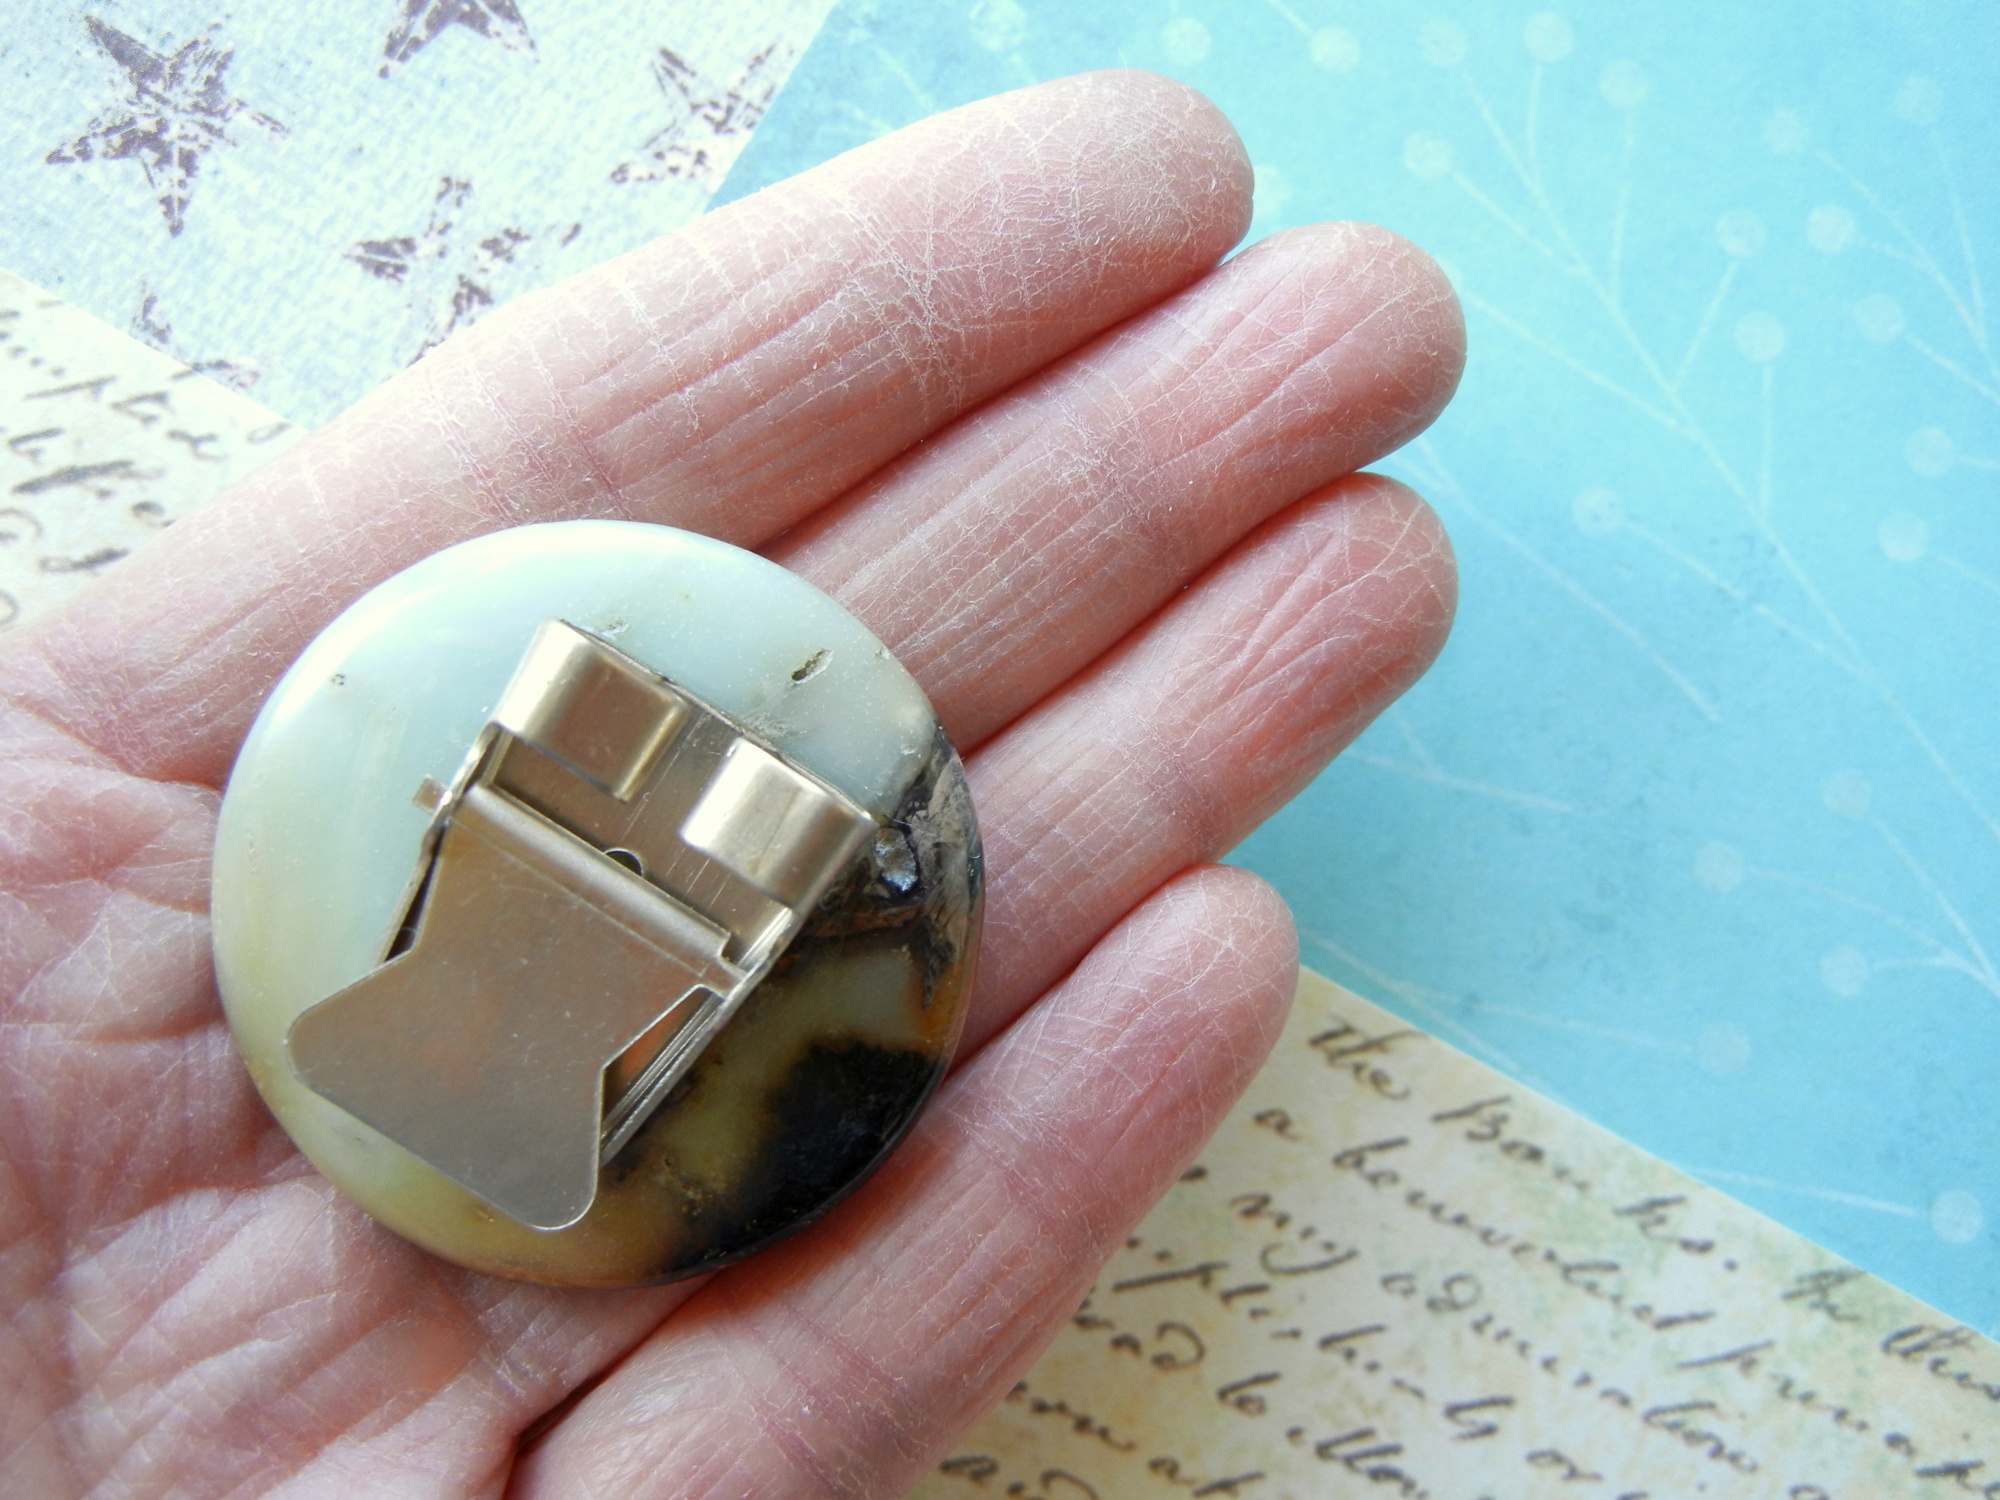
A narrow channel of epoxy may seep out from beneath the button. This almost invisible seal aids in reinforcing the cold connection.
There are a variety of bolo back slides to choose from. Make sure the one you select hides fully behind the bolo focal.
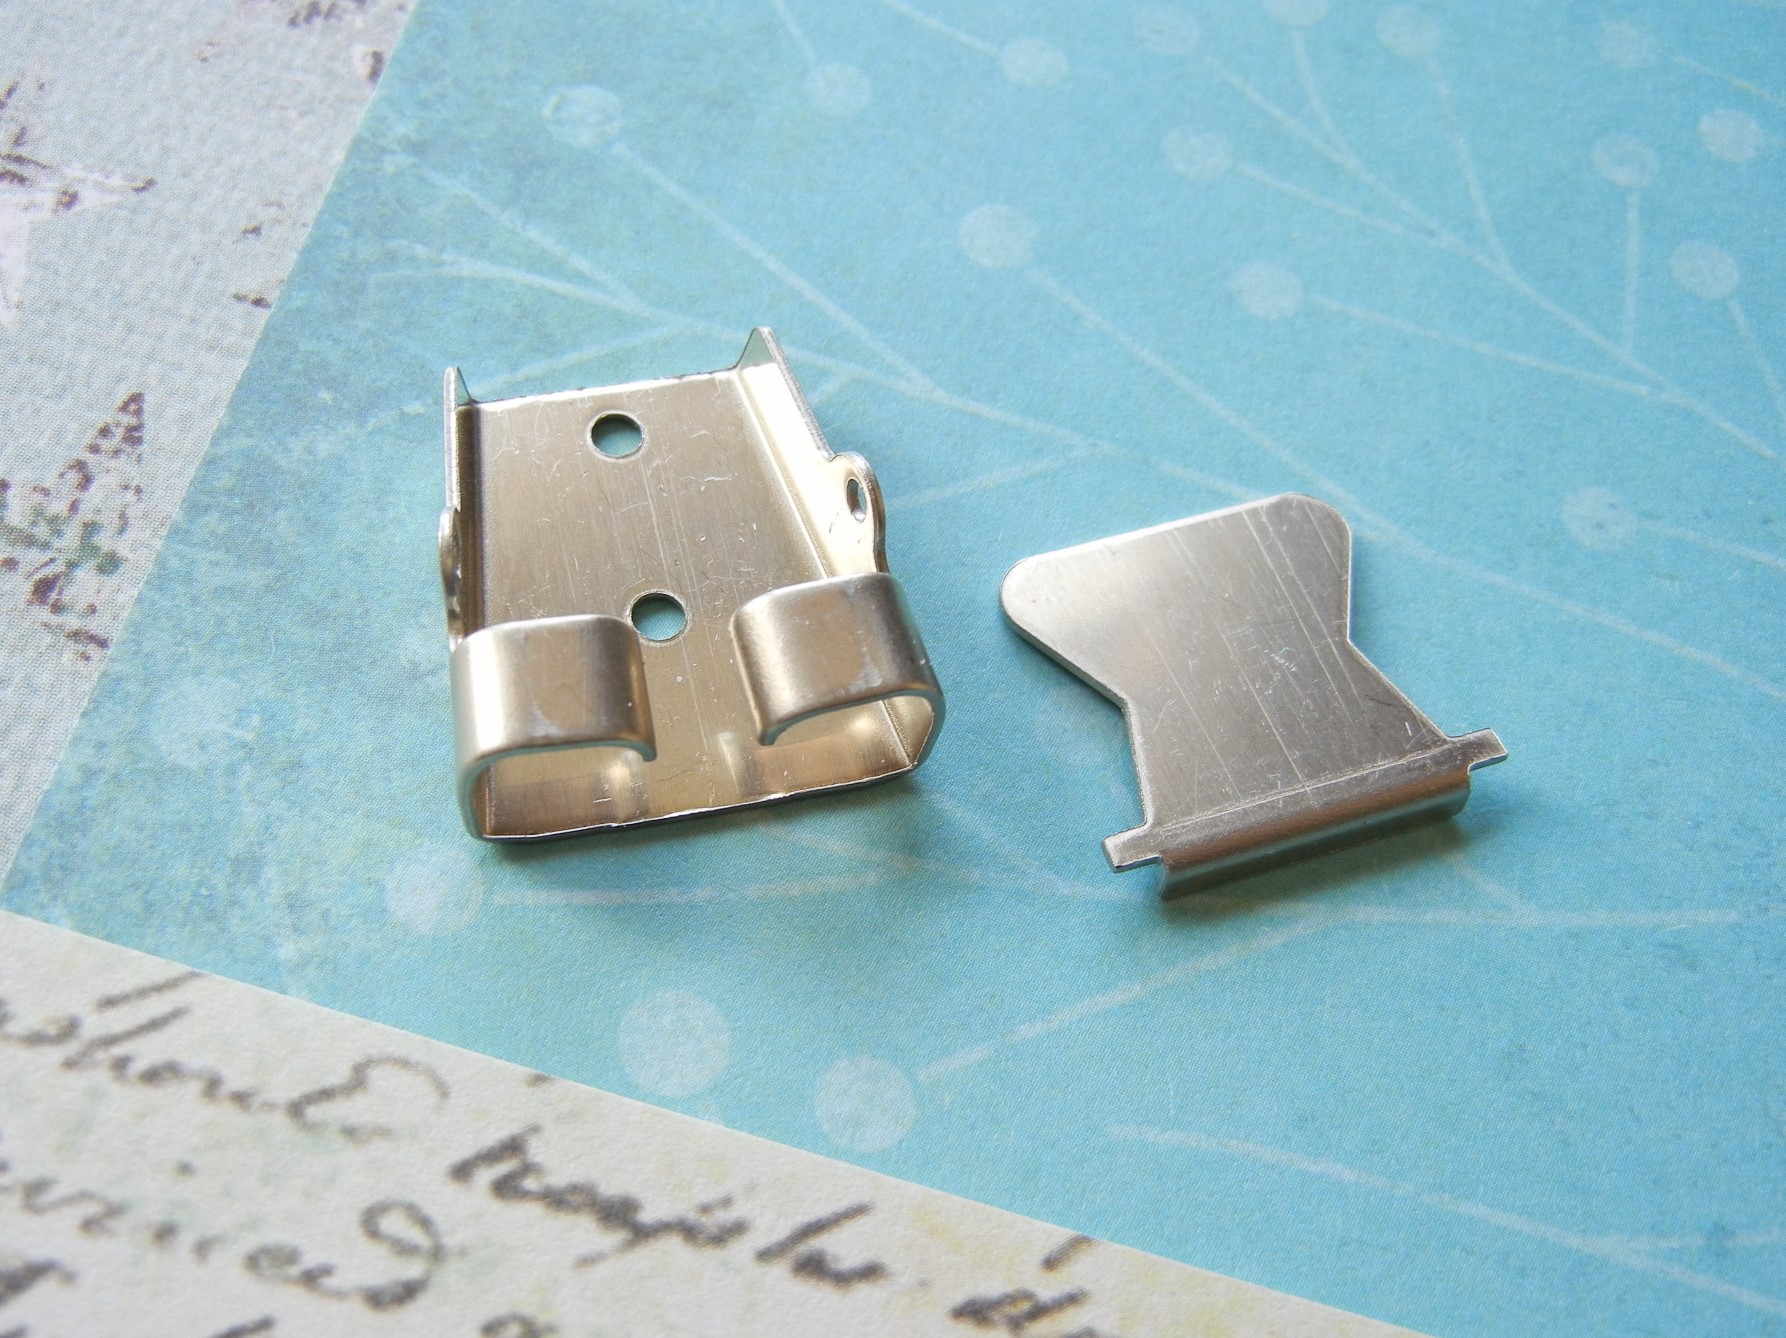
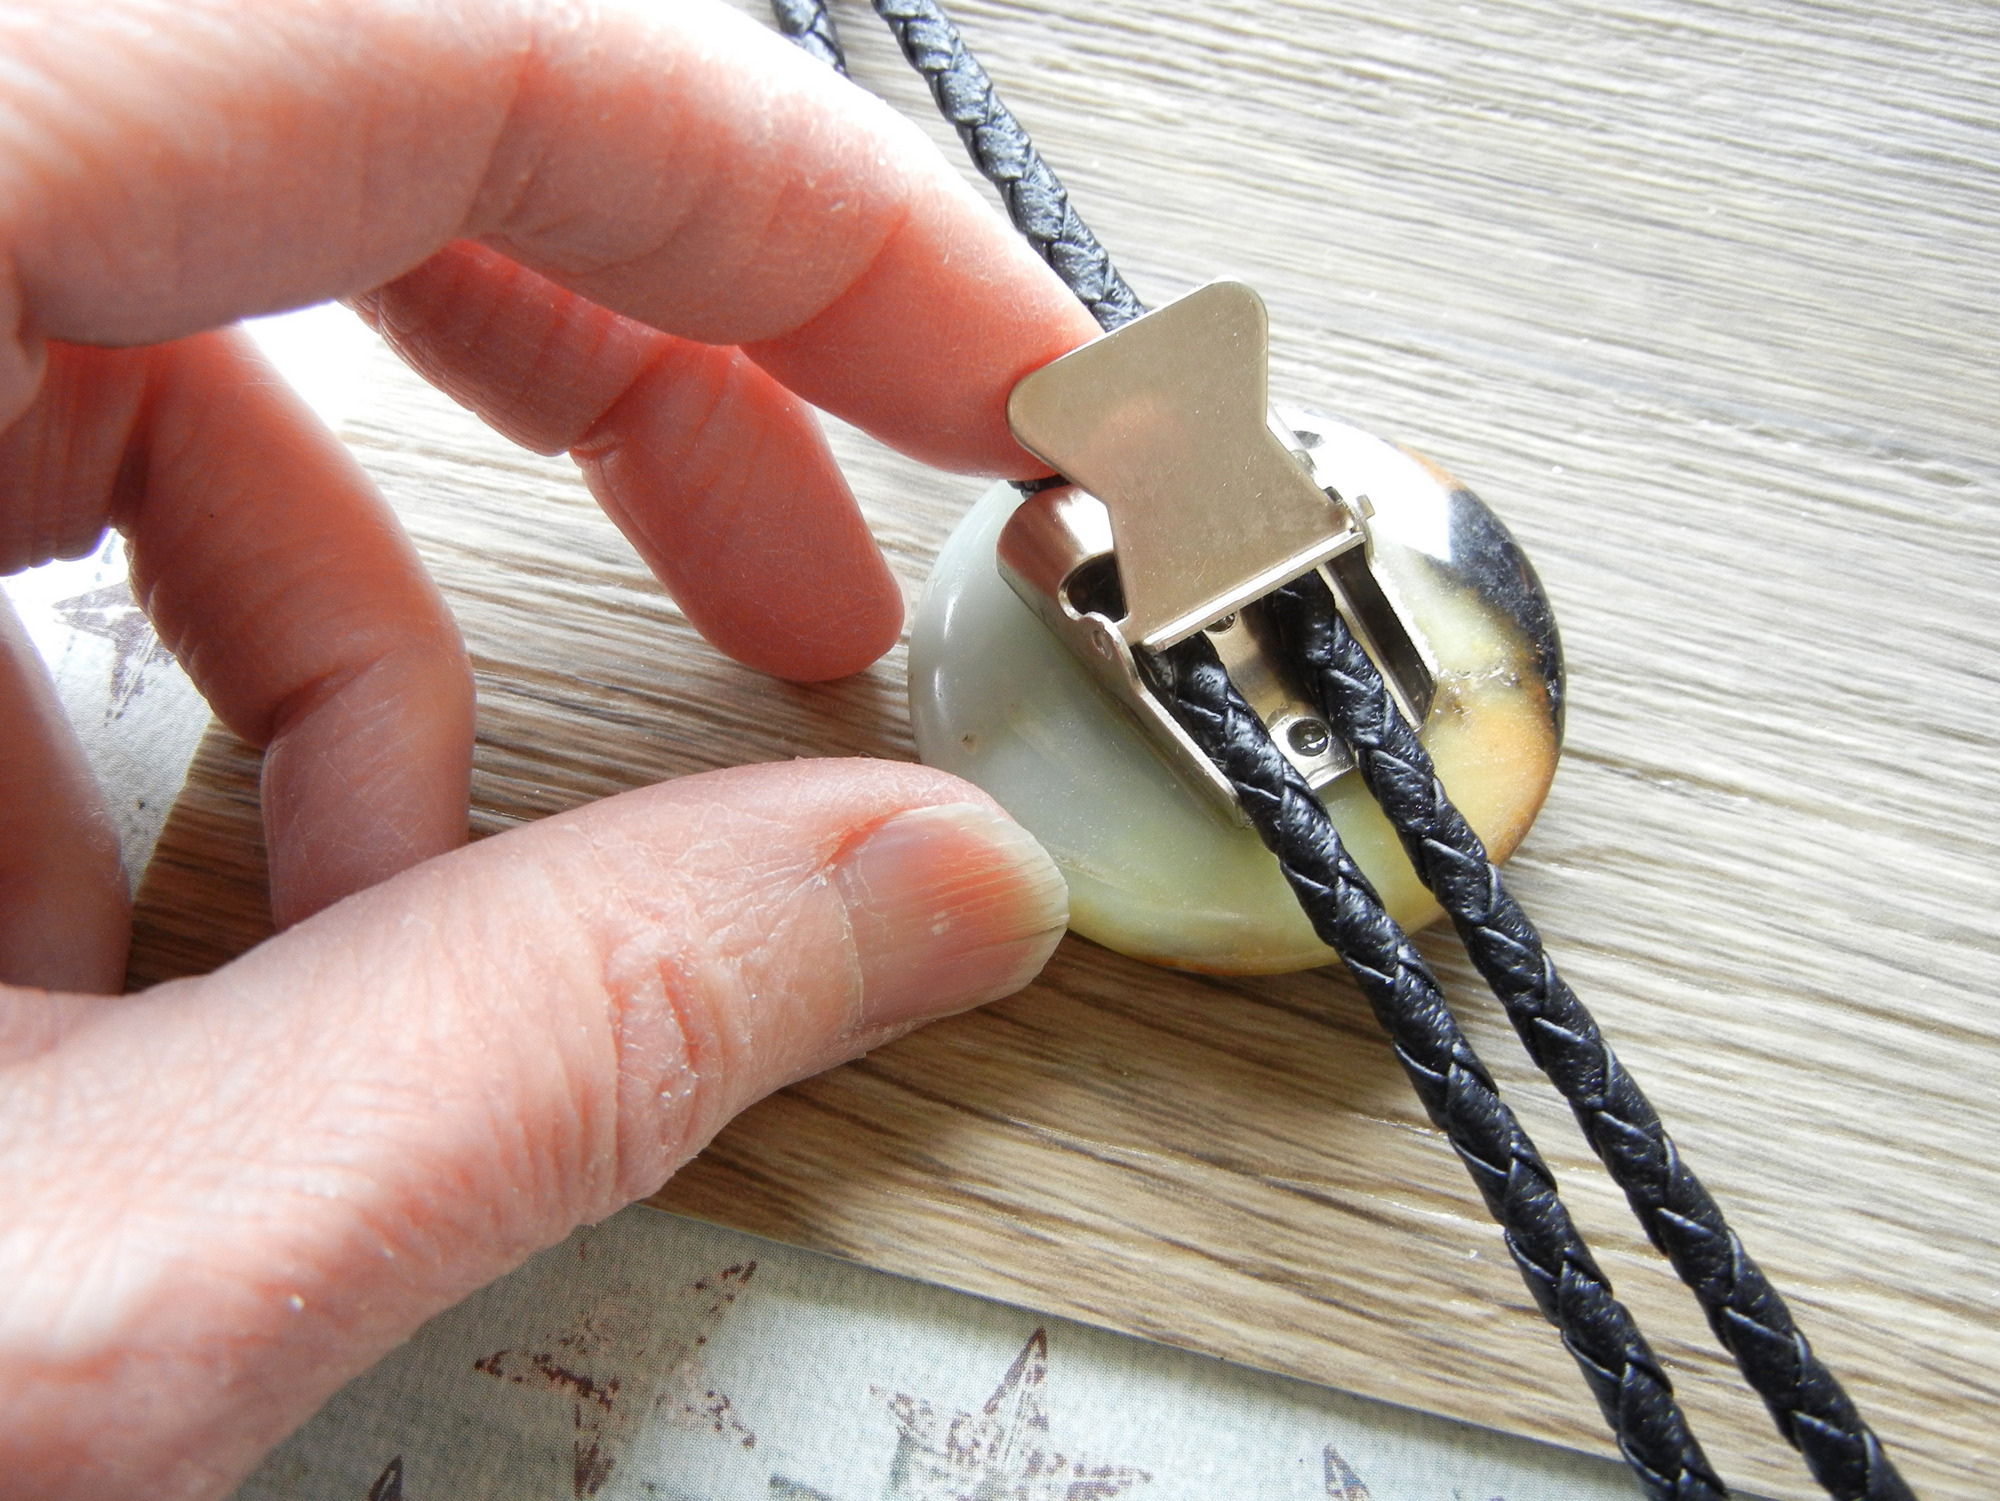
The Bennett-style bolo slide has two parts. First, the base, which has a flat back that attaches to your focal. Depending on your focal piece’s material, you can screw, rivet, solder, or glue on the bolo back. And second, the locking clasp, that has two tabs that fit into holes on the side of the base part. The lock flips up to slide and down to lock. This bolo slide works great with leather or vinyl bolo cord.
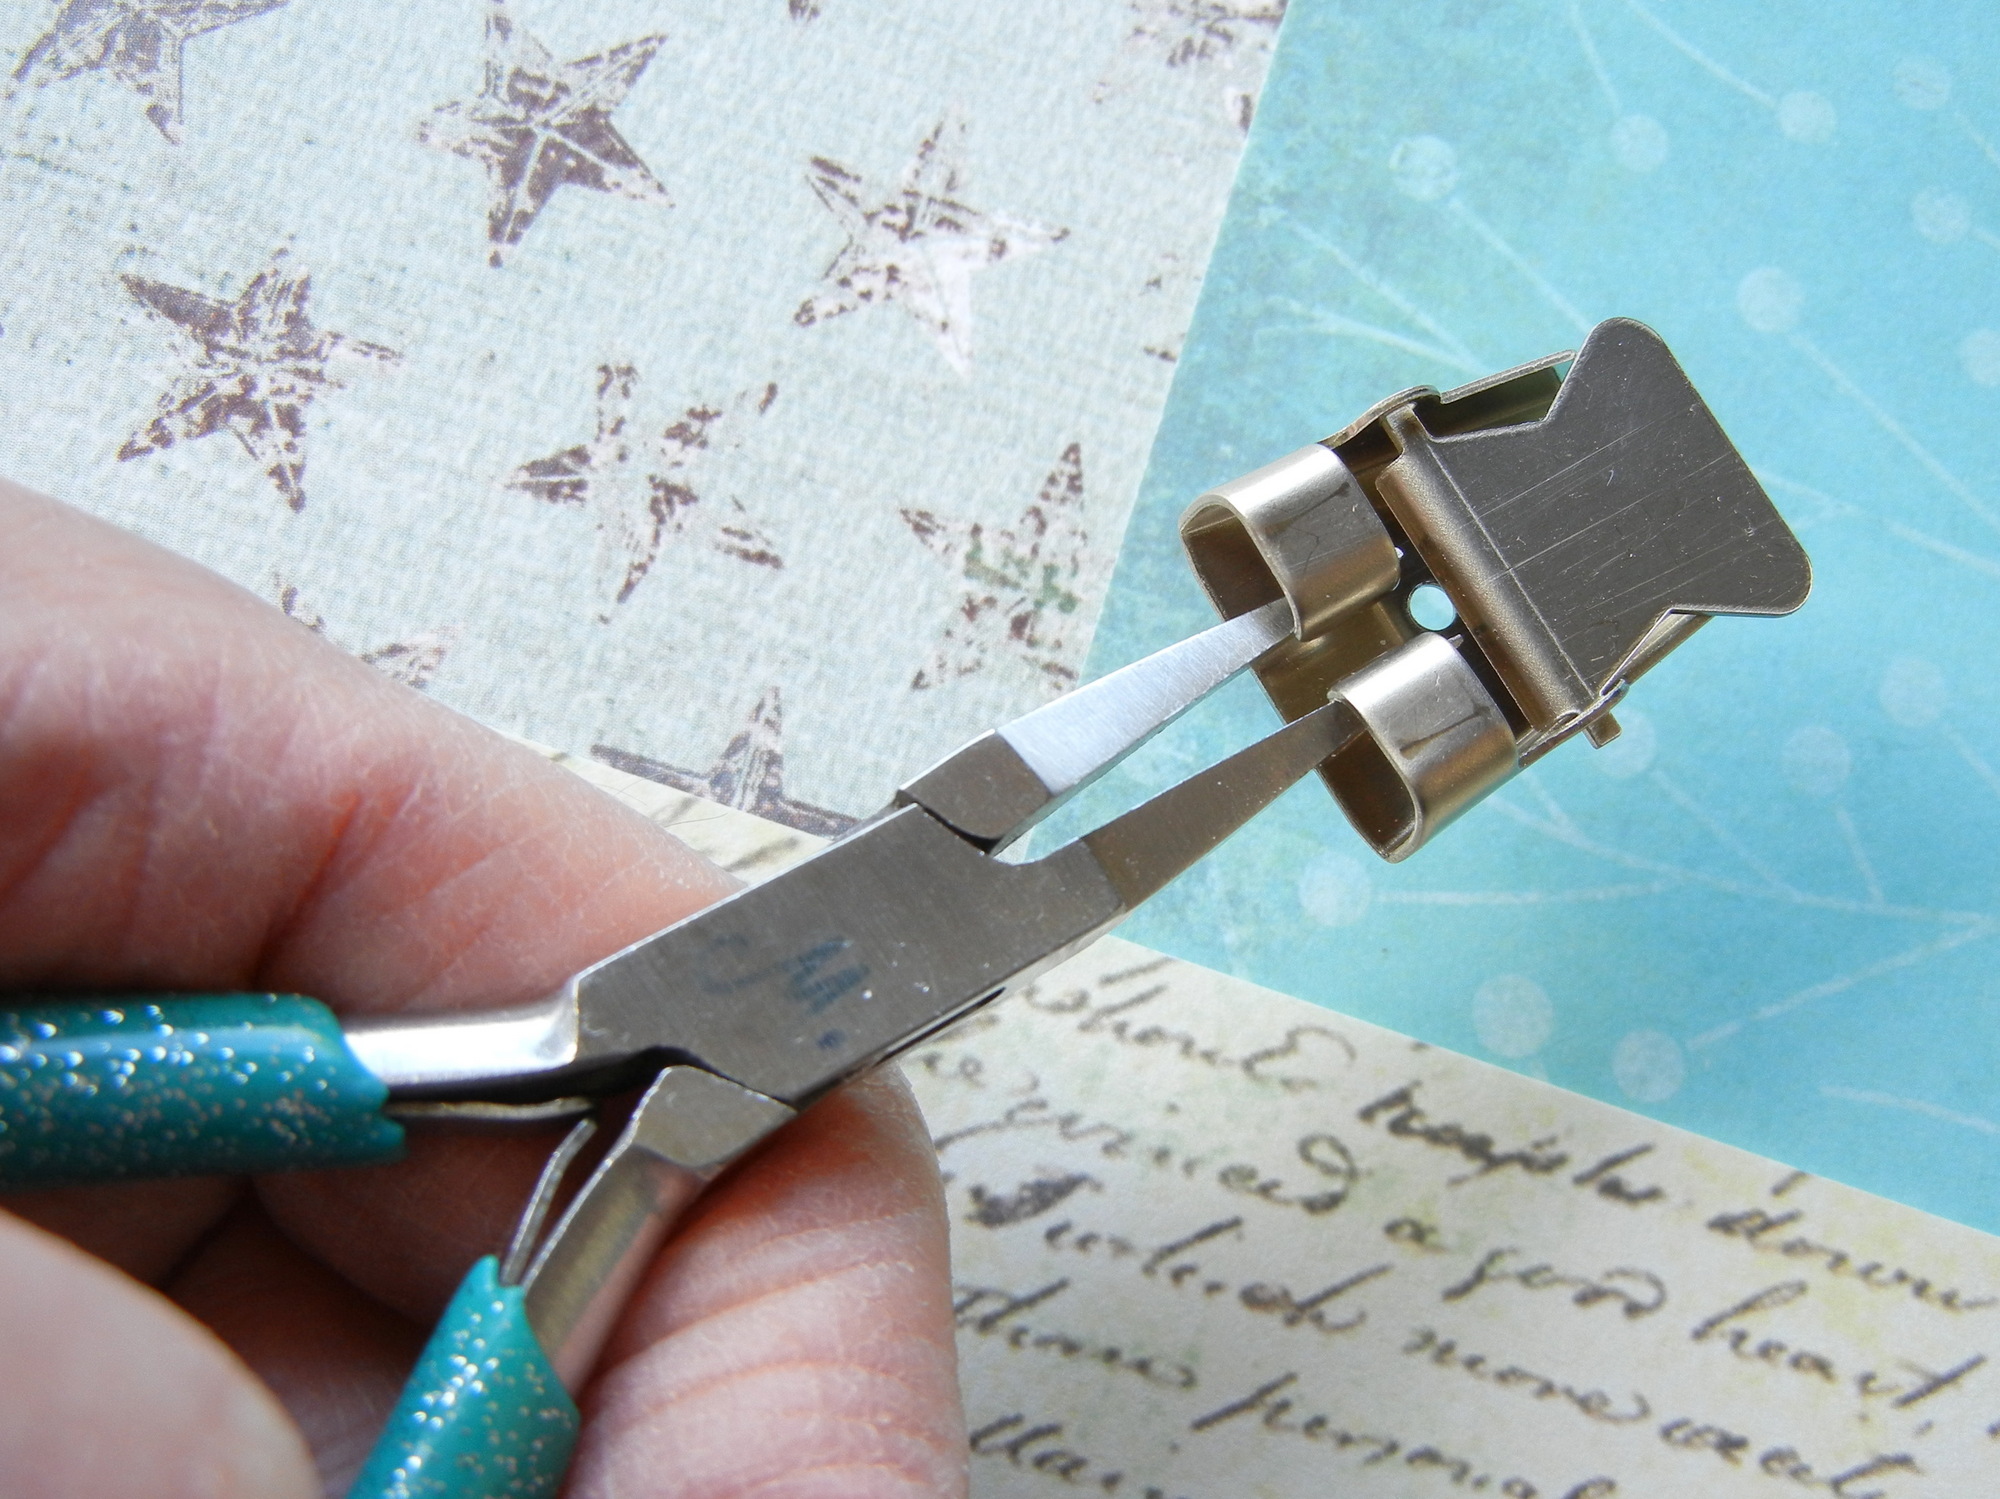
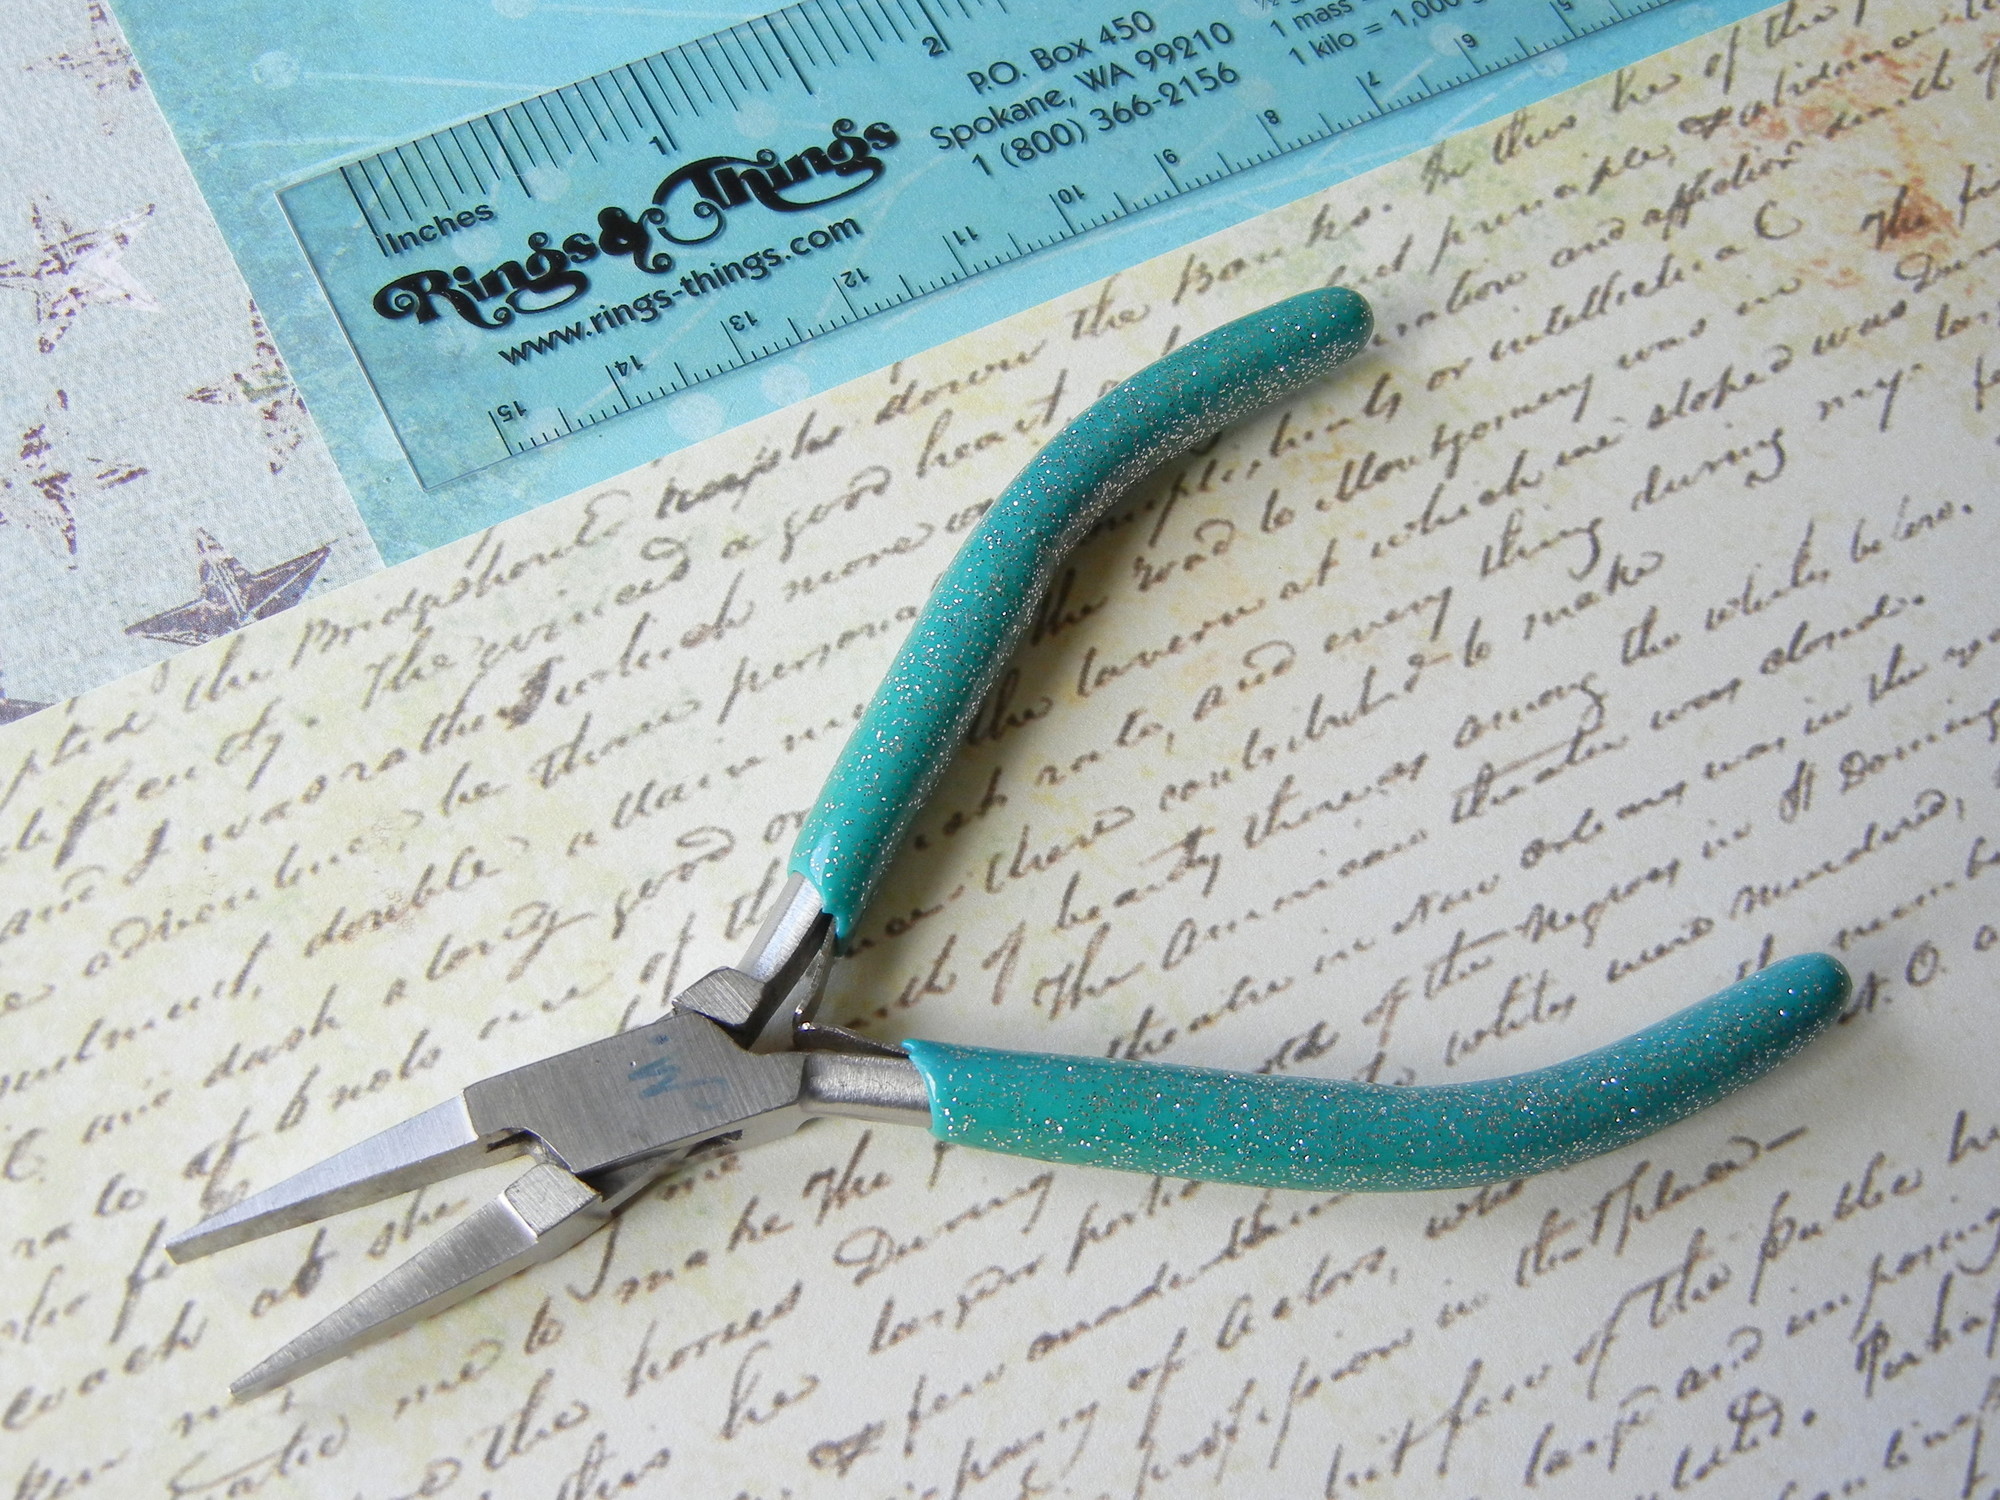
To assemble the bolo slide, insert the lock tabs into the receiving holes in the base. The fit will be a little loose, but you can tighten it. Use flat-nose pliers to gently draw the sides of the base together (see picture). Once it’s adjusted, the hinged lock should flip freely and not fall out. Make all adjustments before gluing the bolo slide to the gemstone focal.
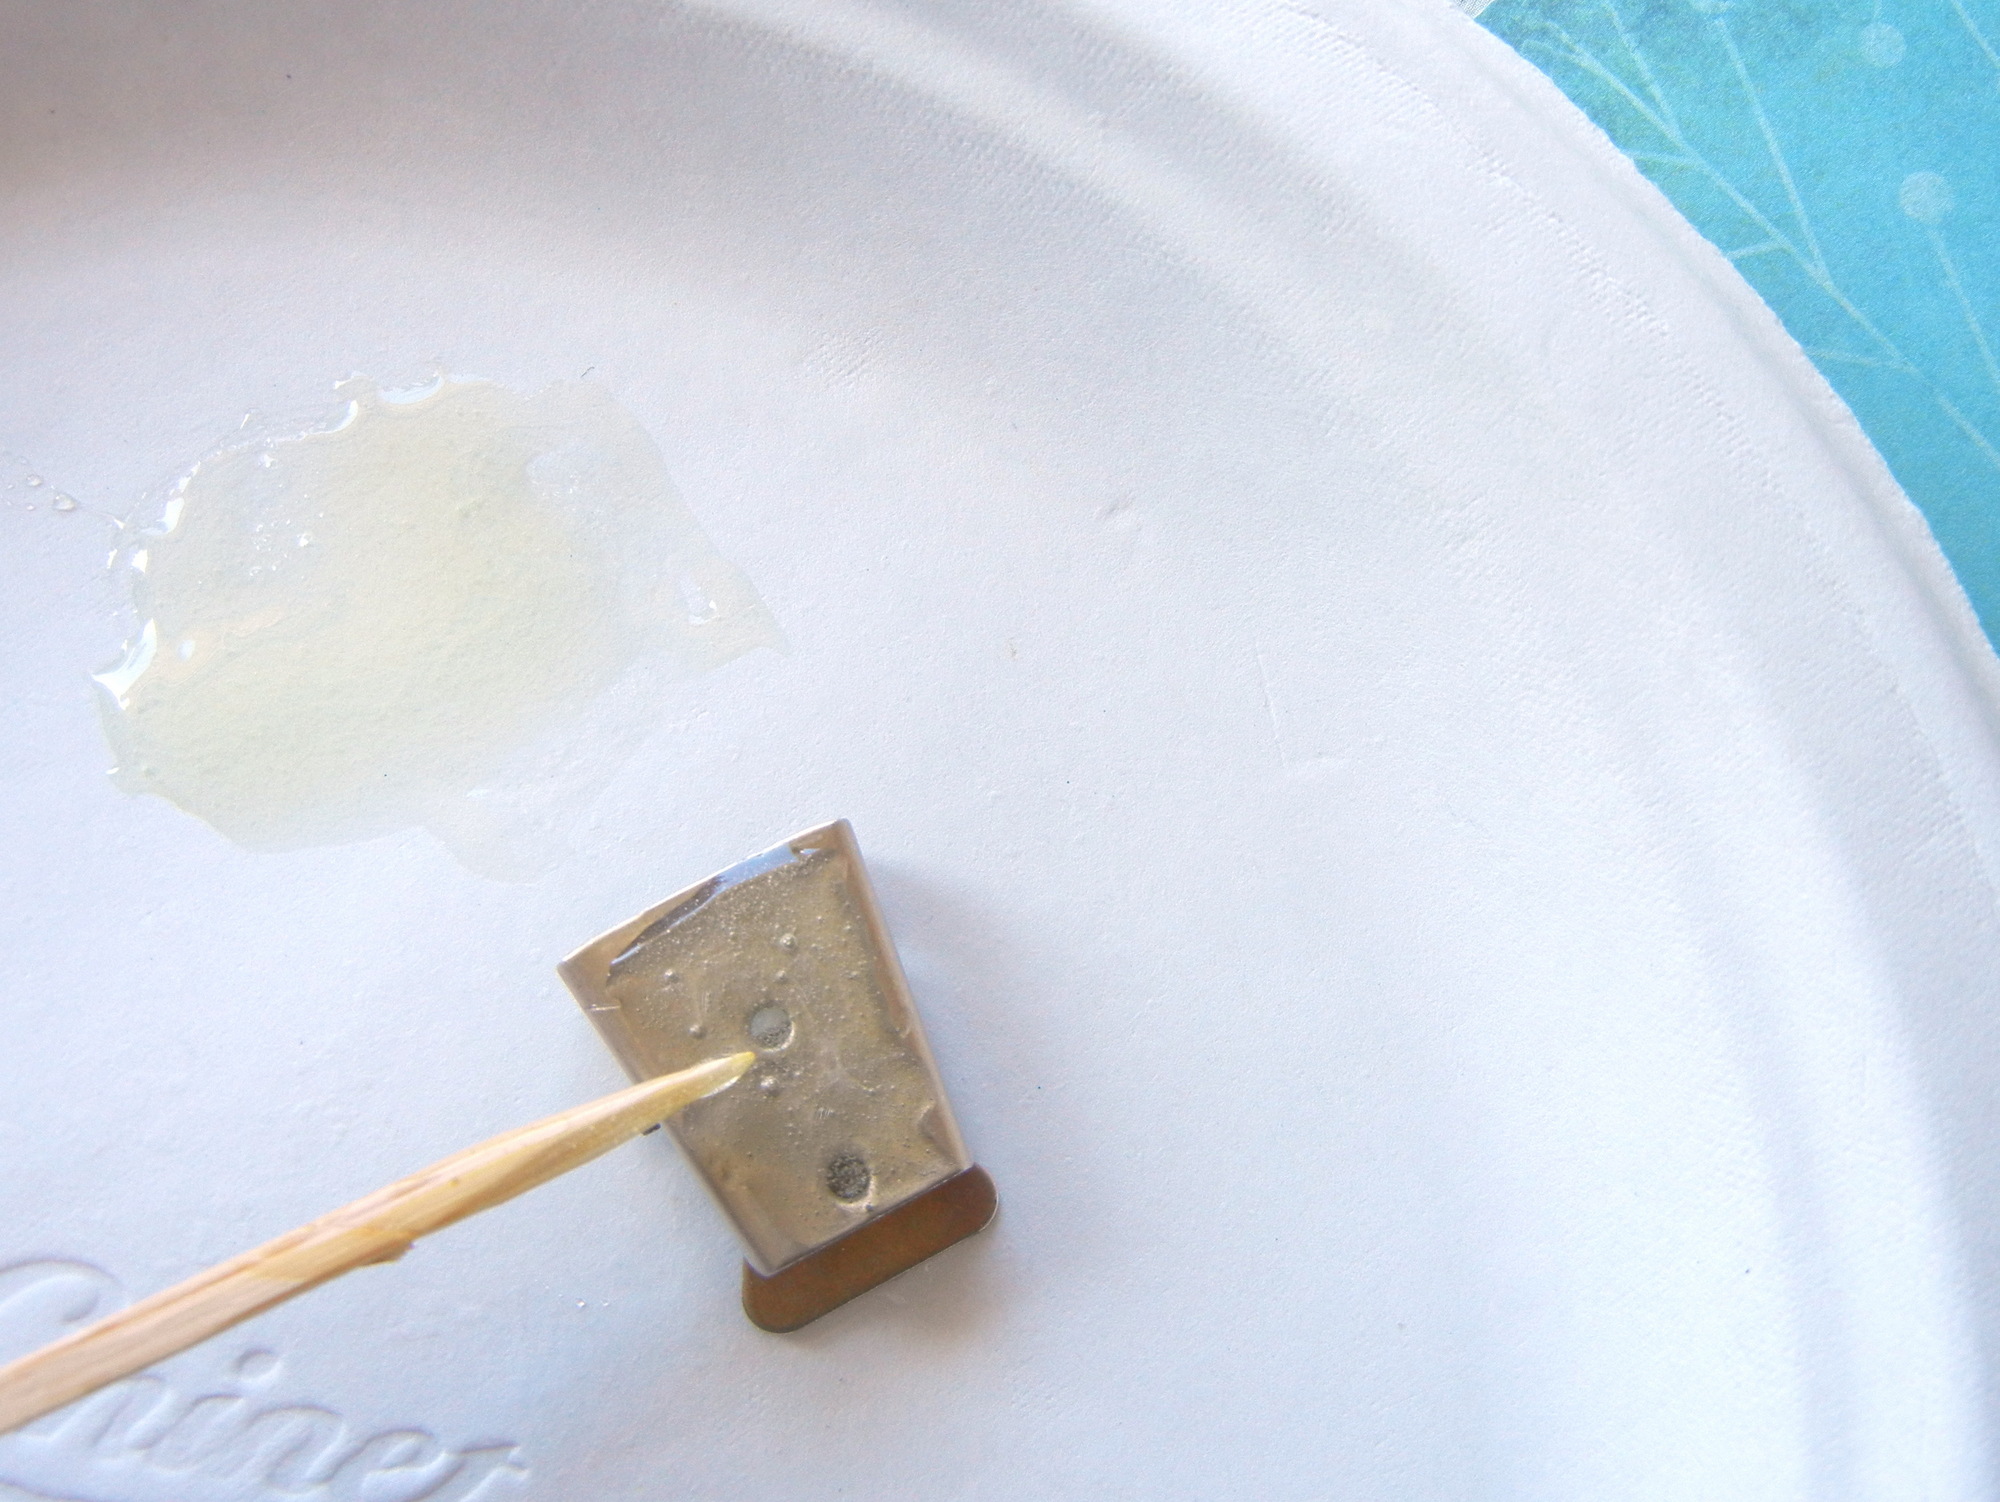
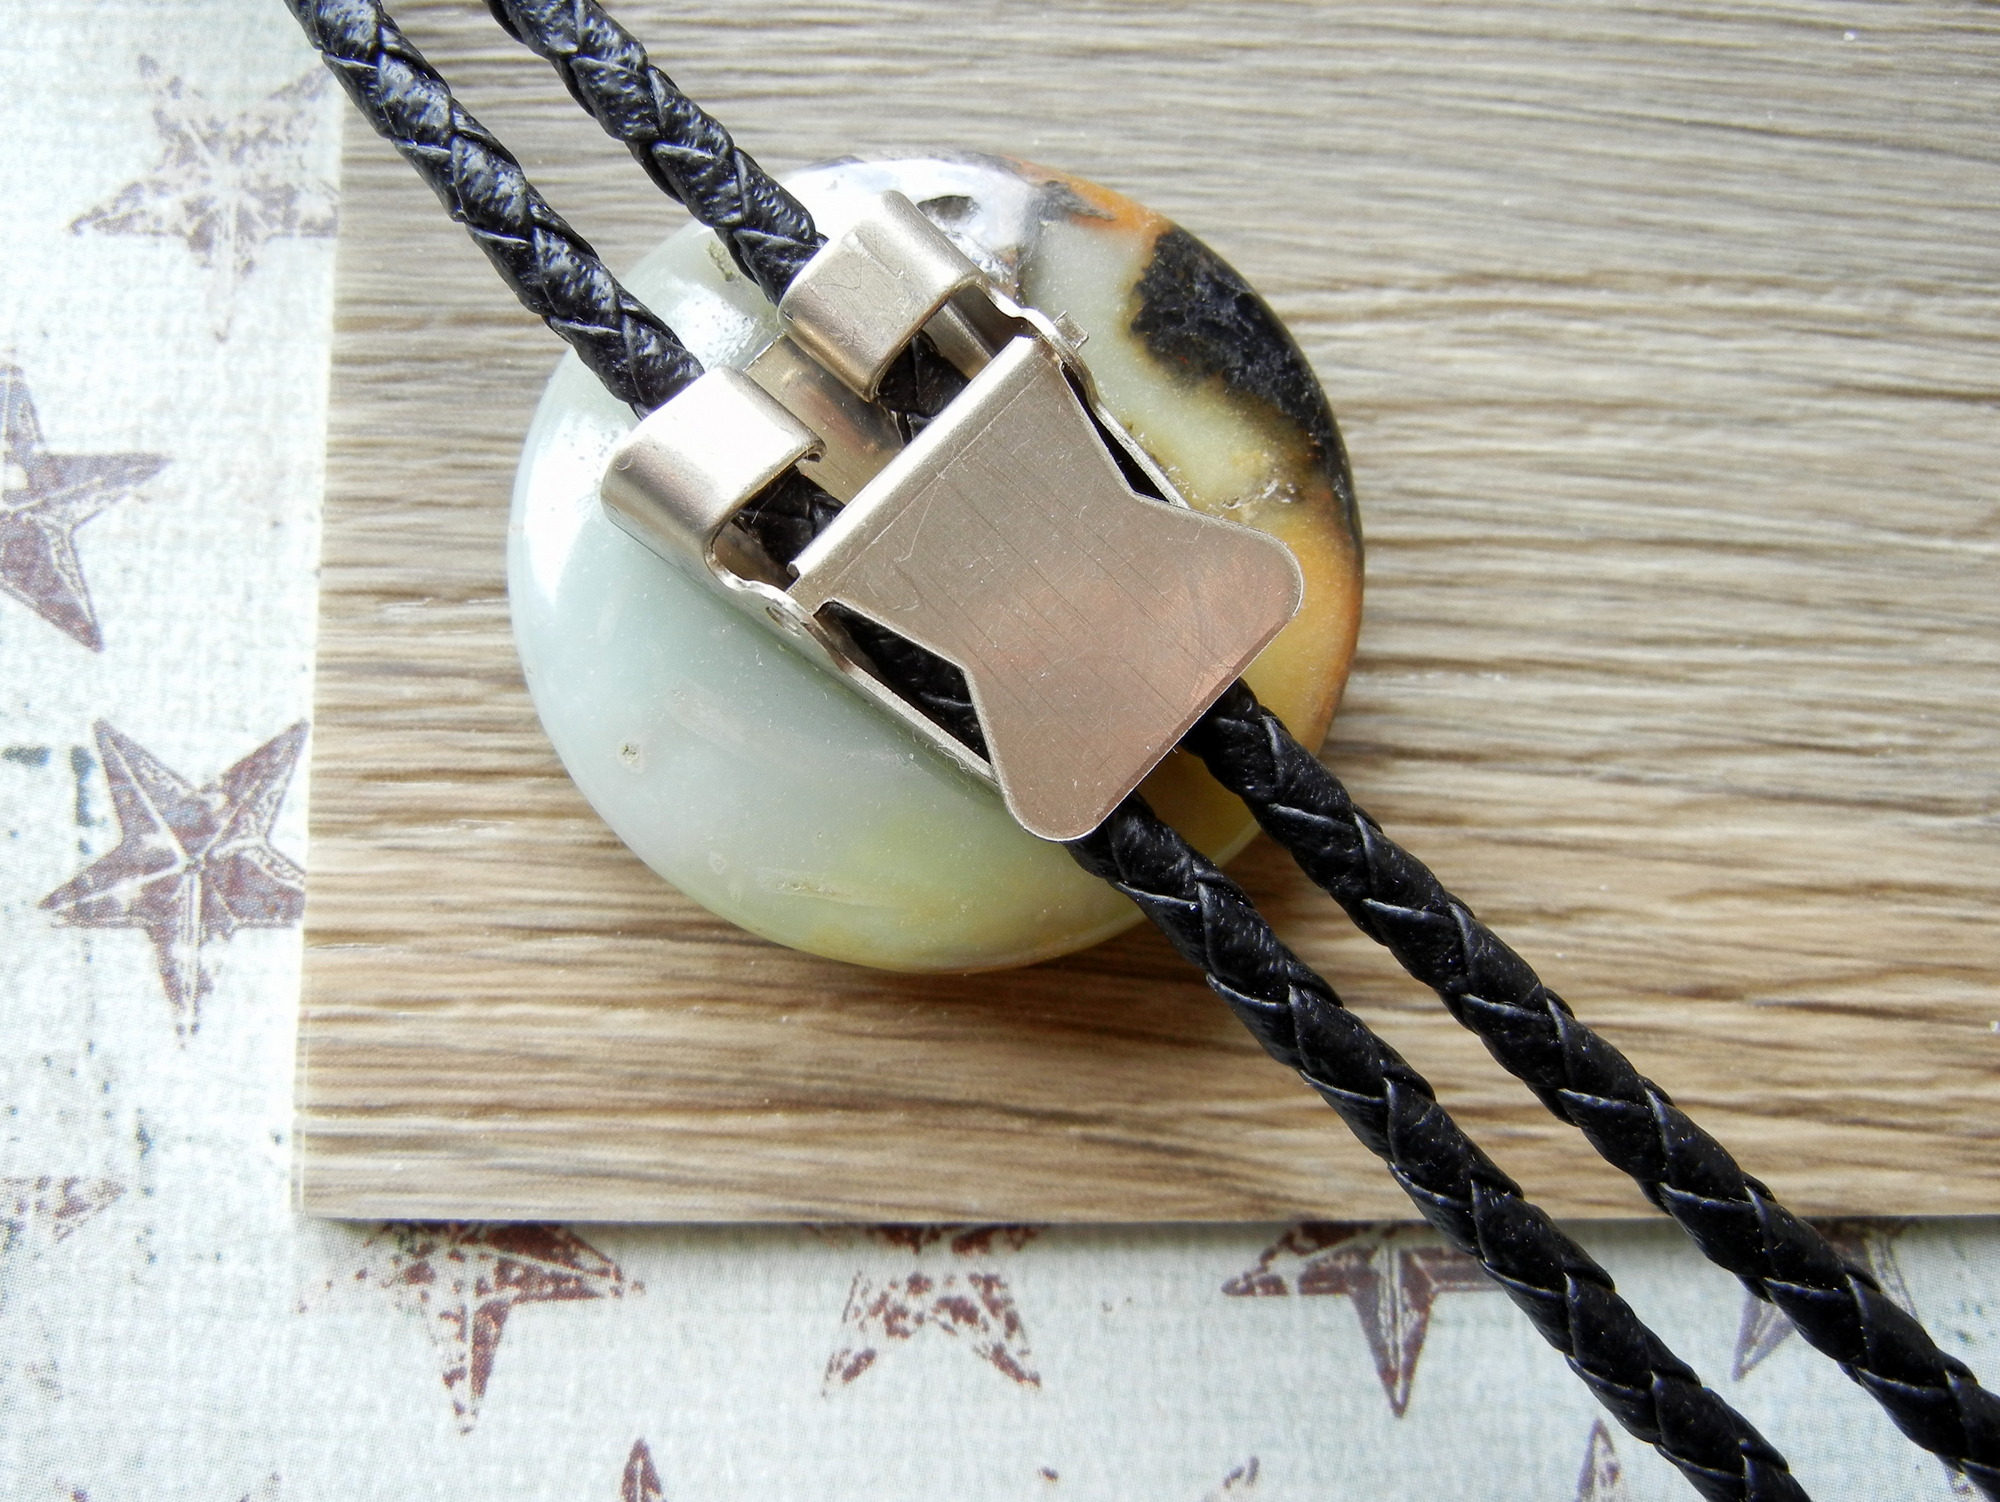
Clean the bolo slide with isopropyl alcohol. Mix a fresh batch of two-part epoxy and apply it to the backside of the bolo slide.
Turn the bolo slide over and position it on the gemstone donut. Press down gently to spread the glue and create a tight bond.
Make sure the bolo back is centered and lined up vertically with the front bolo design. Set the piece aside until fully cured (approximately 24 hours).
Finish with a Bolo Cord
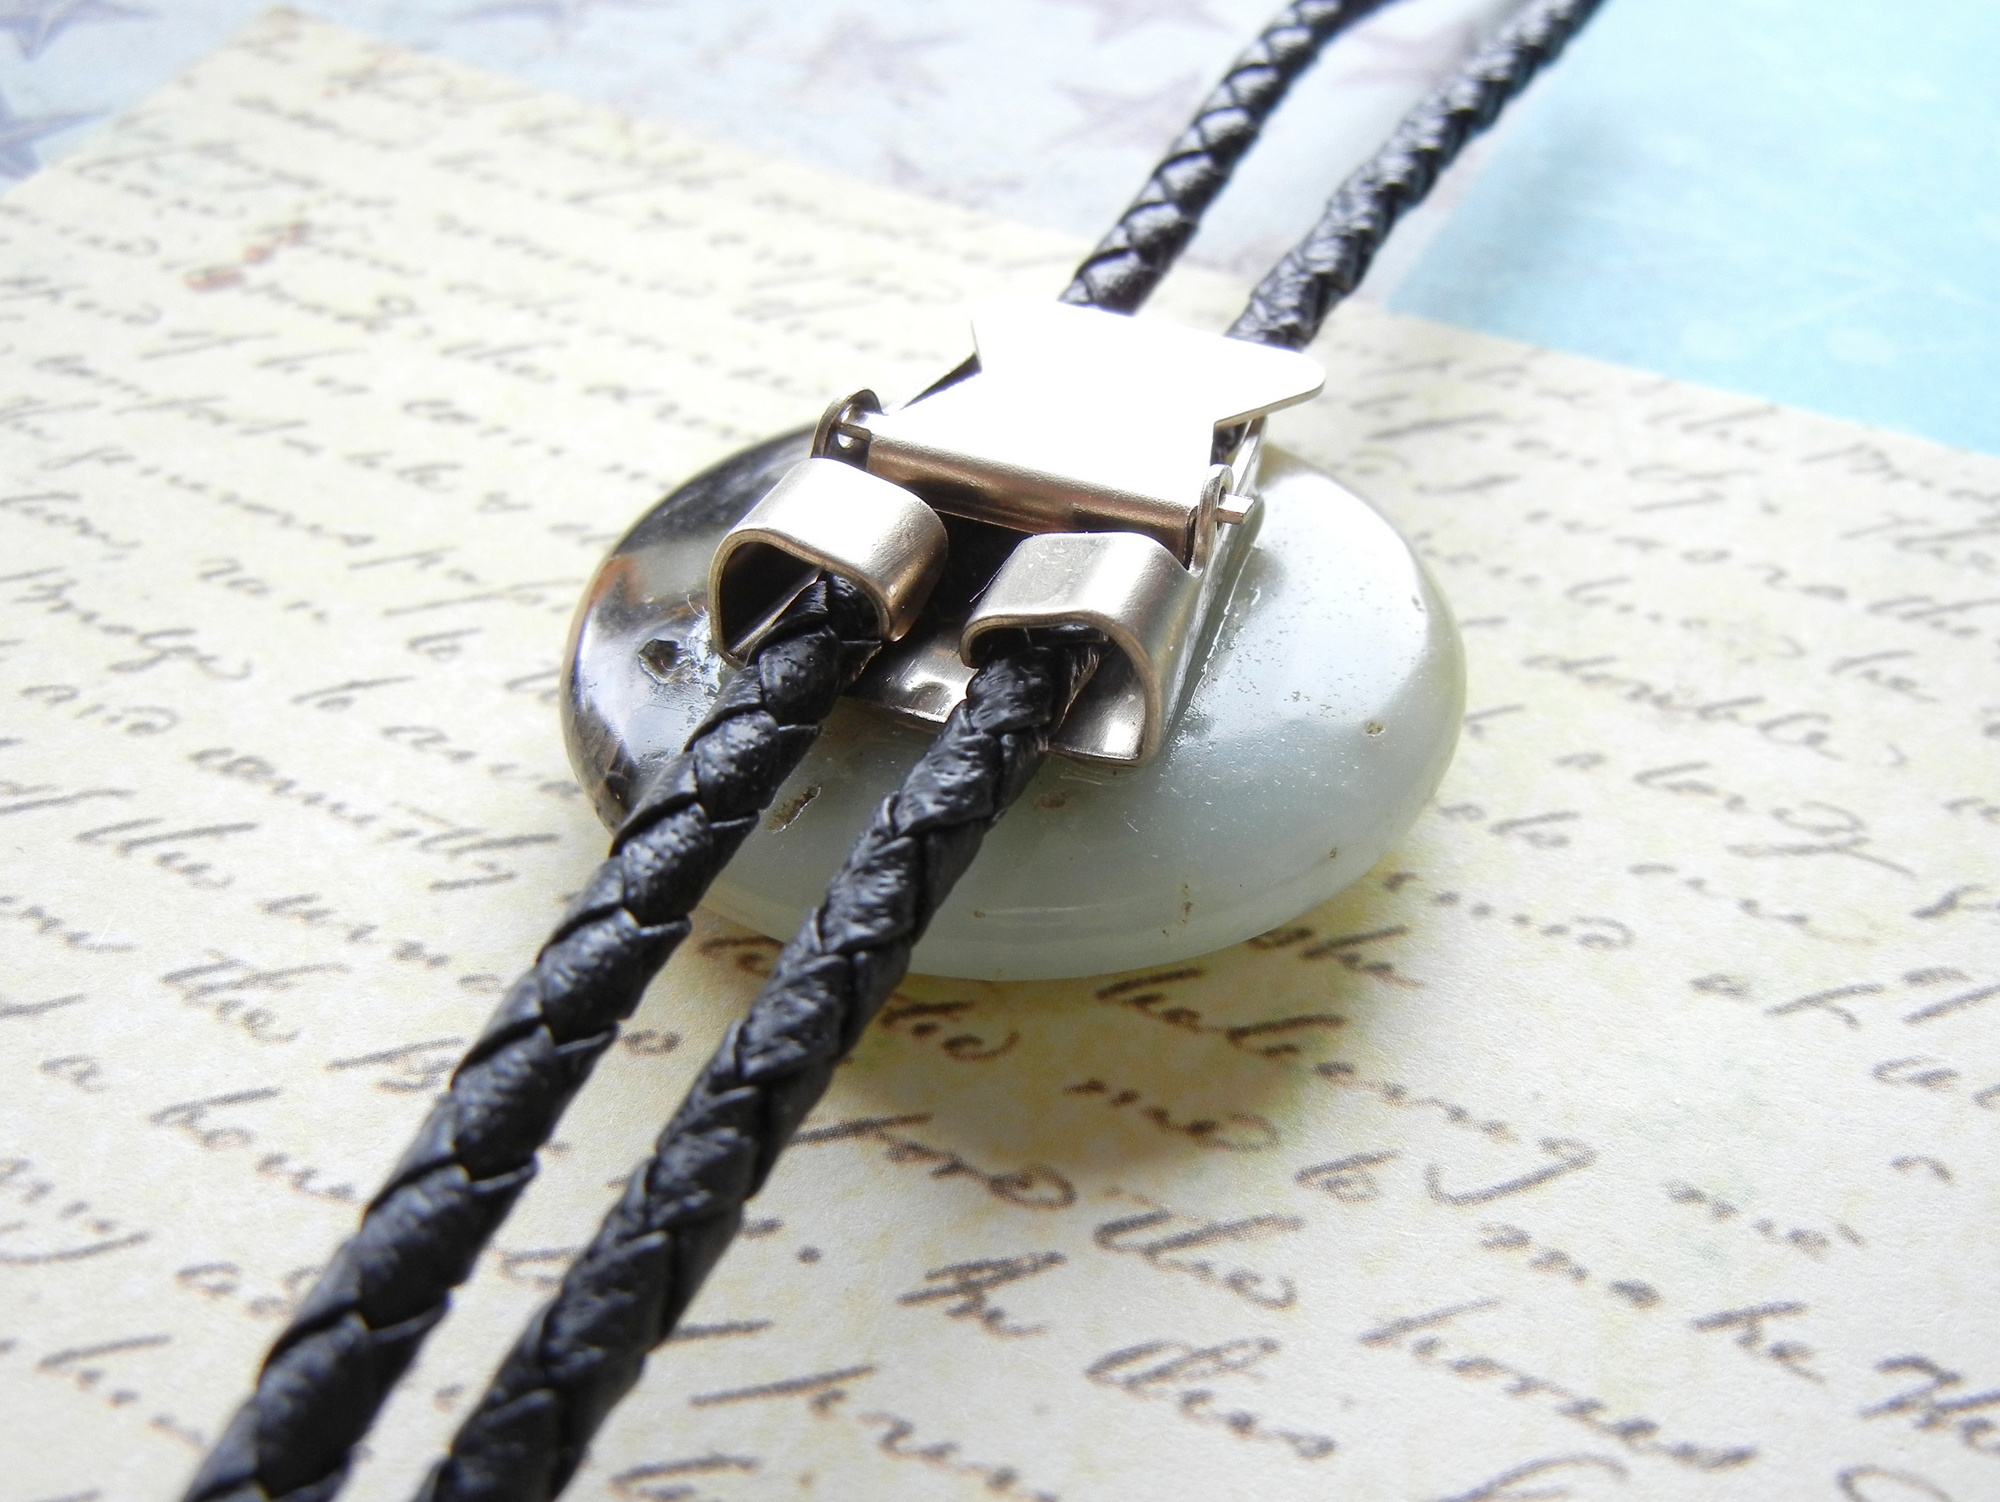
String the bolo cord through the bolo slide’s mechanism. The looped cord should be above the bolo slide and the tail ends below it.
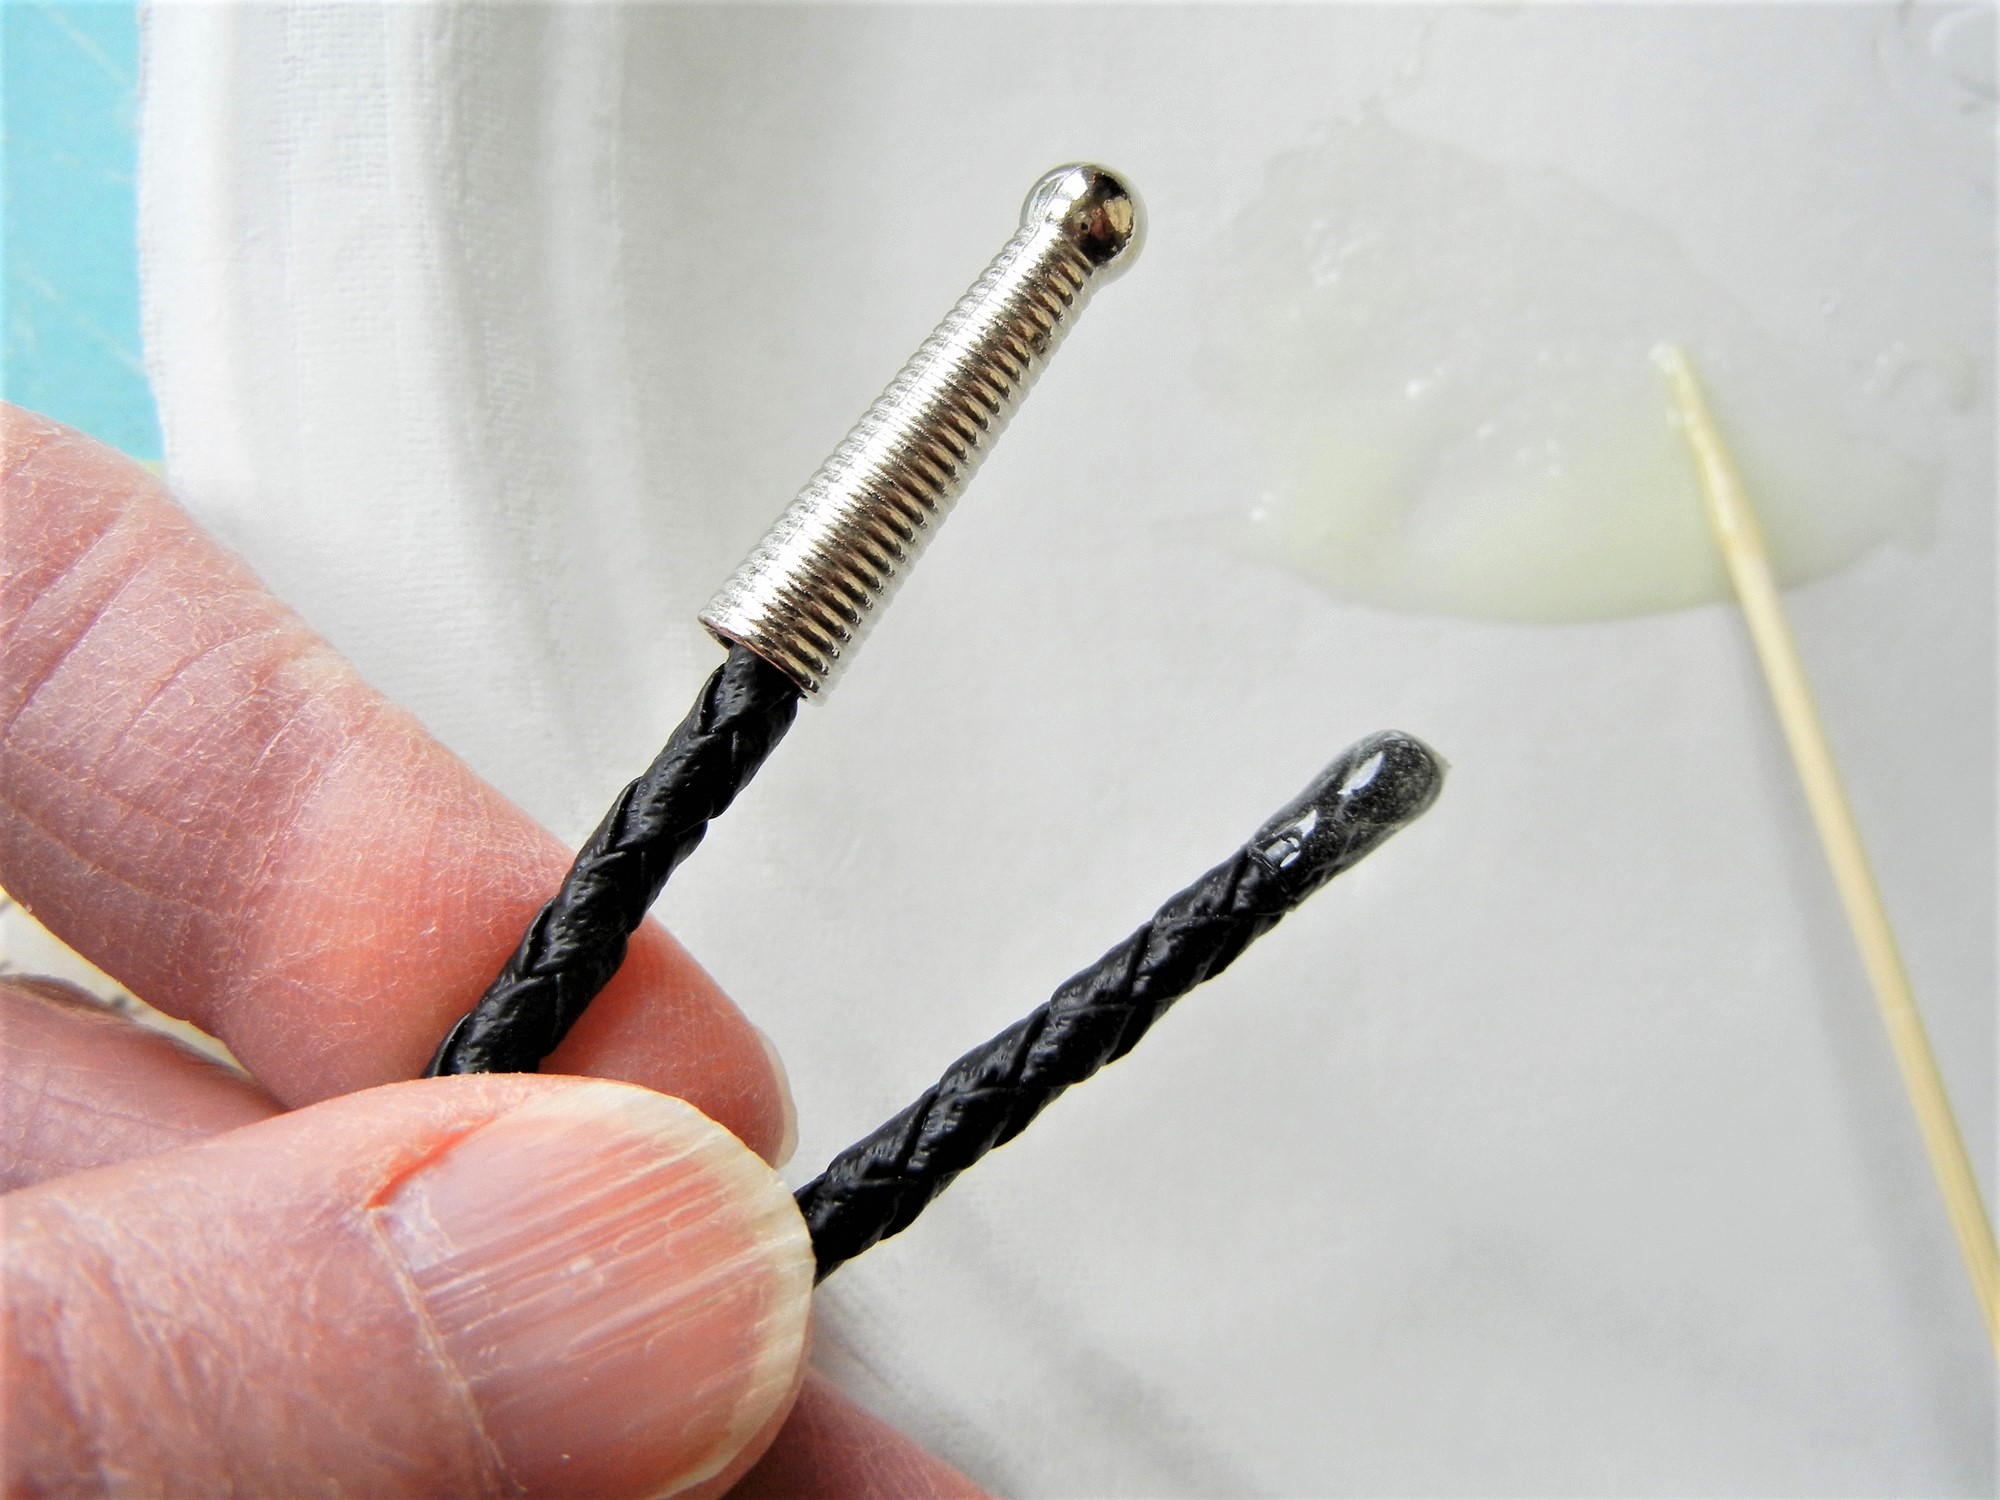
Mix another small batch of 2-part epoxy adhesive. This will be used to permanently attach the bolo tips to the bolo cord. The bolo cord ends are finished with plastic aglets. Coat the aglet with epoxy. Insert the epoxy-coated bolo-cord end into the bolo tip. Twist the bolo tip to spread the adhesive and lock the connection.
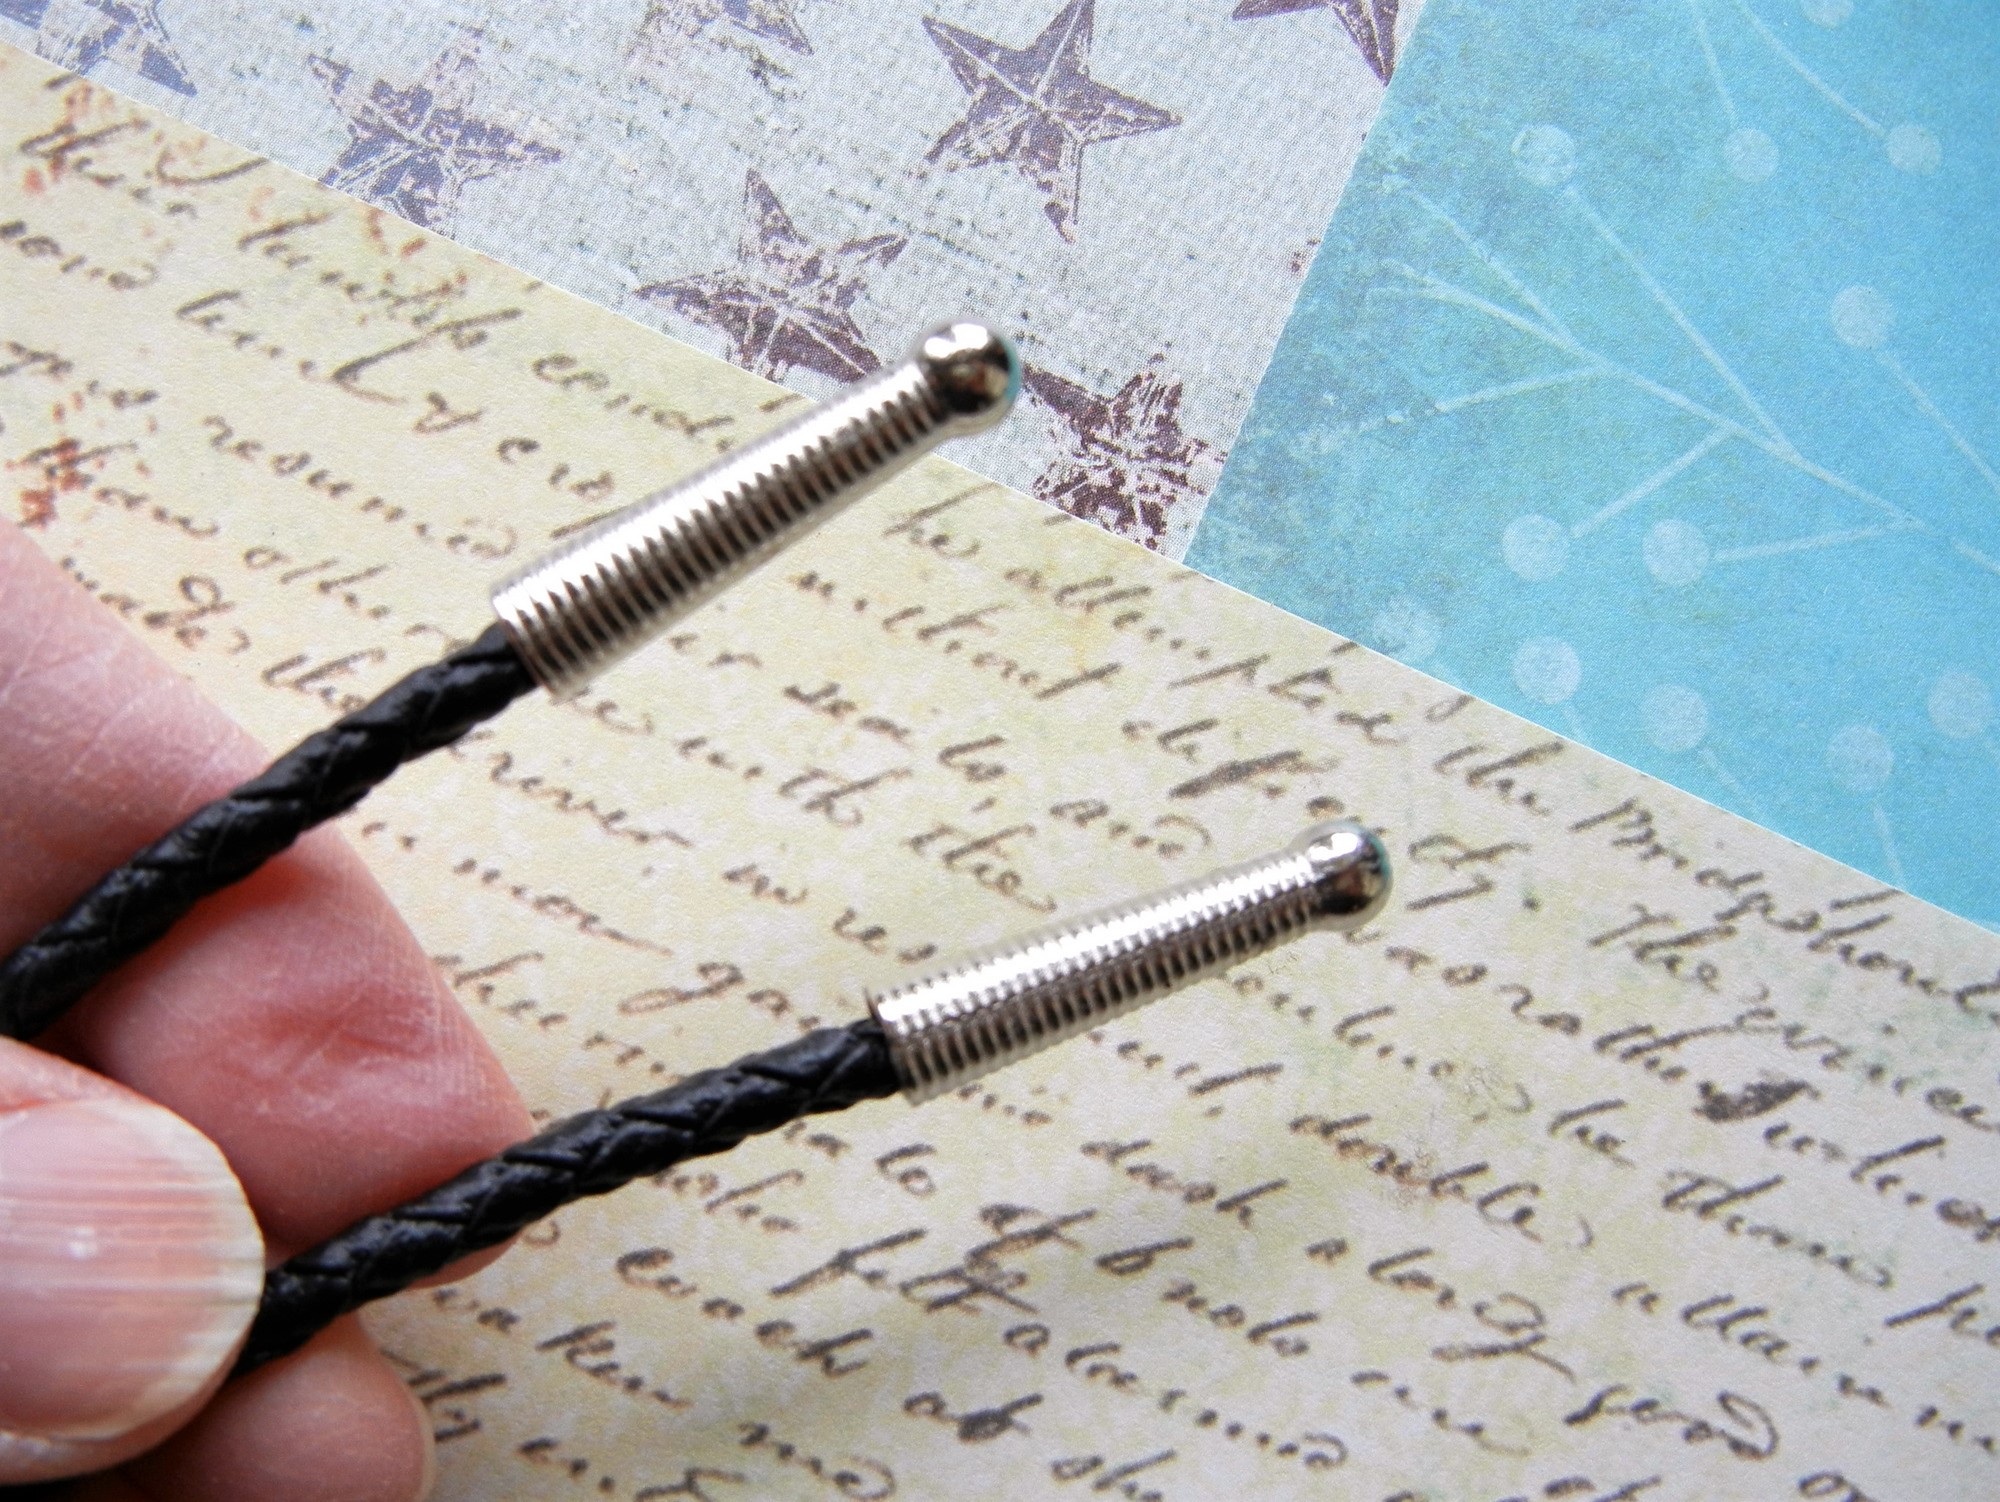
Set the bolo aside and allow the tips to dry before wearing the bolo tie.
In-use Bolo-Slide Instructions
Flip the bolo slide’s hinge clasp upwards to release the tension on the cord. The bolo’s focal piece will now slide freely on the cord.
Once the gemstone focal is positioned, flip the hinge clasp downward to lock the bolo’s focal piece in place.
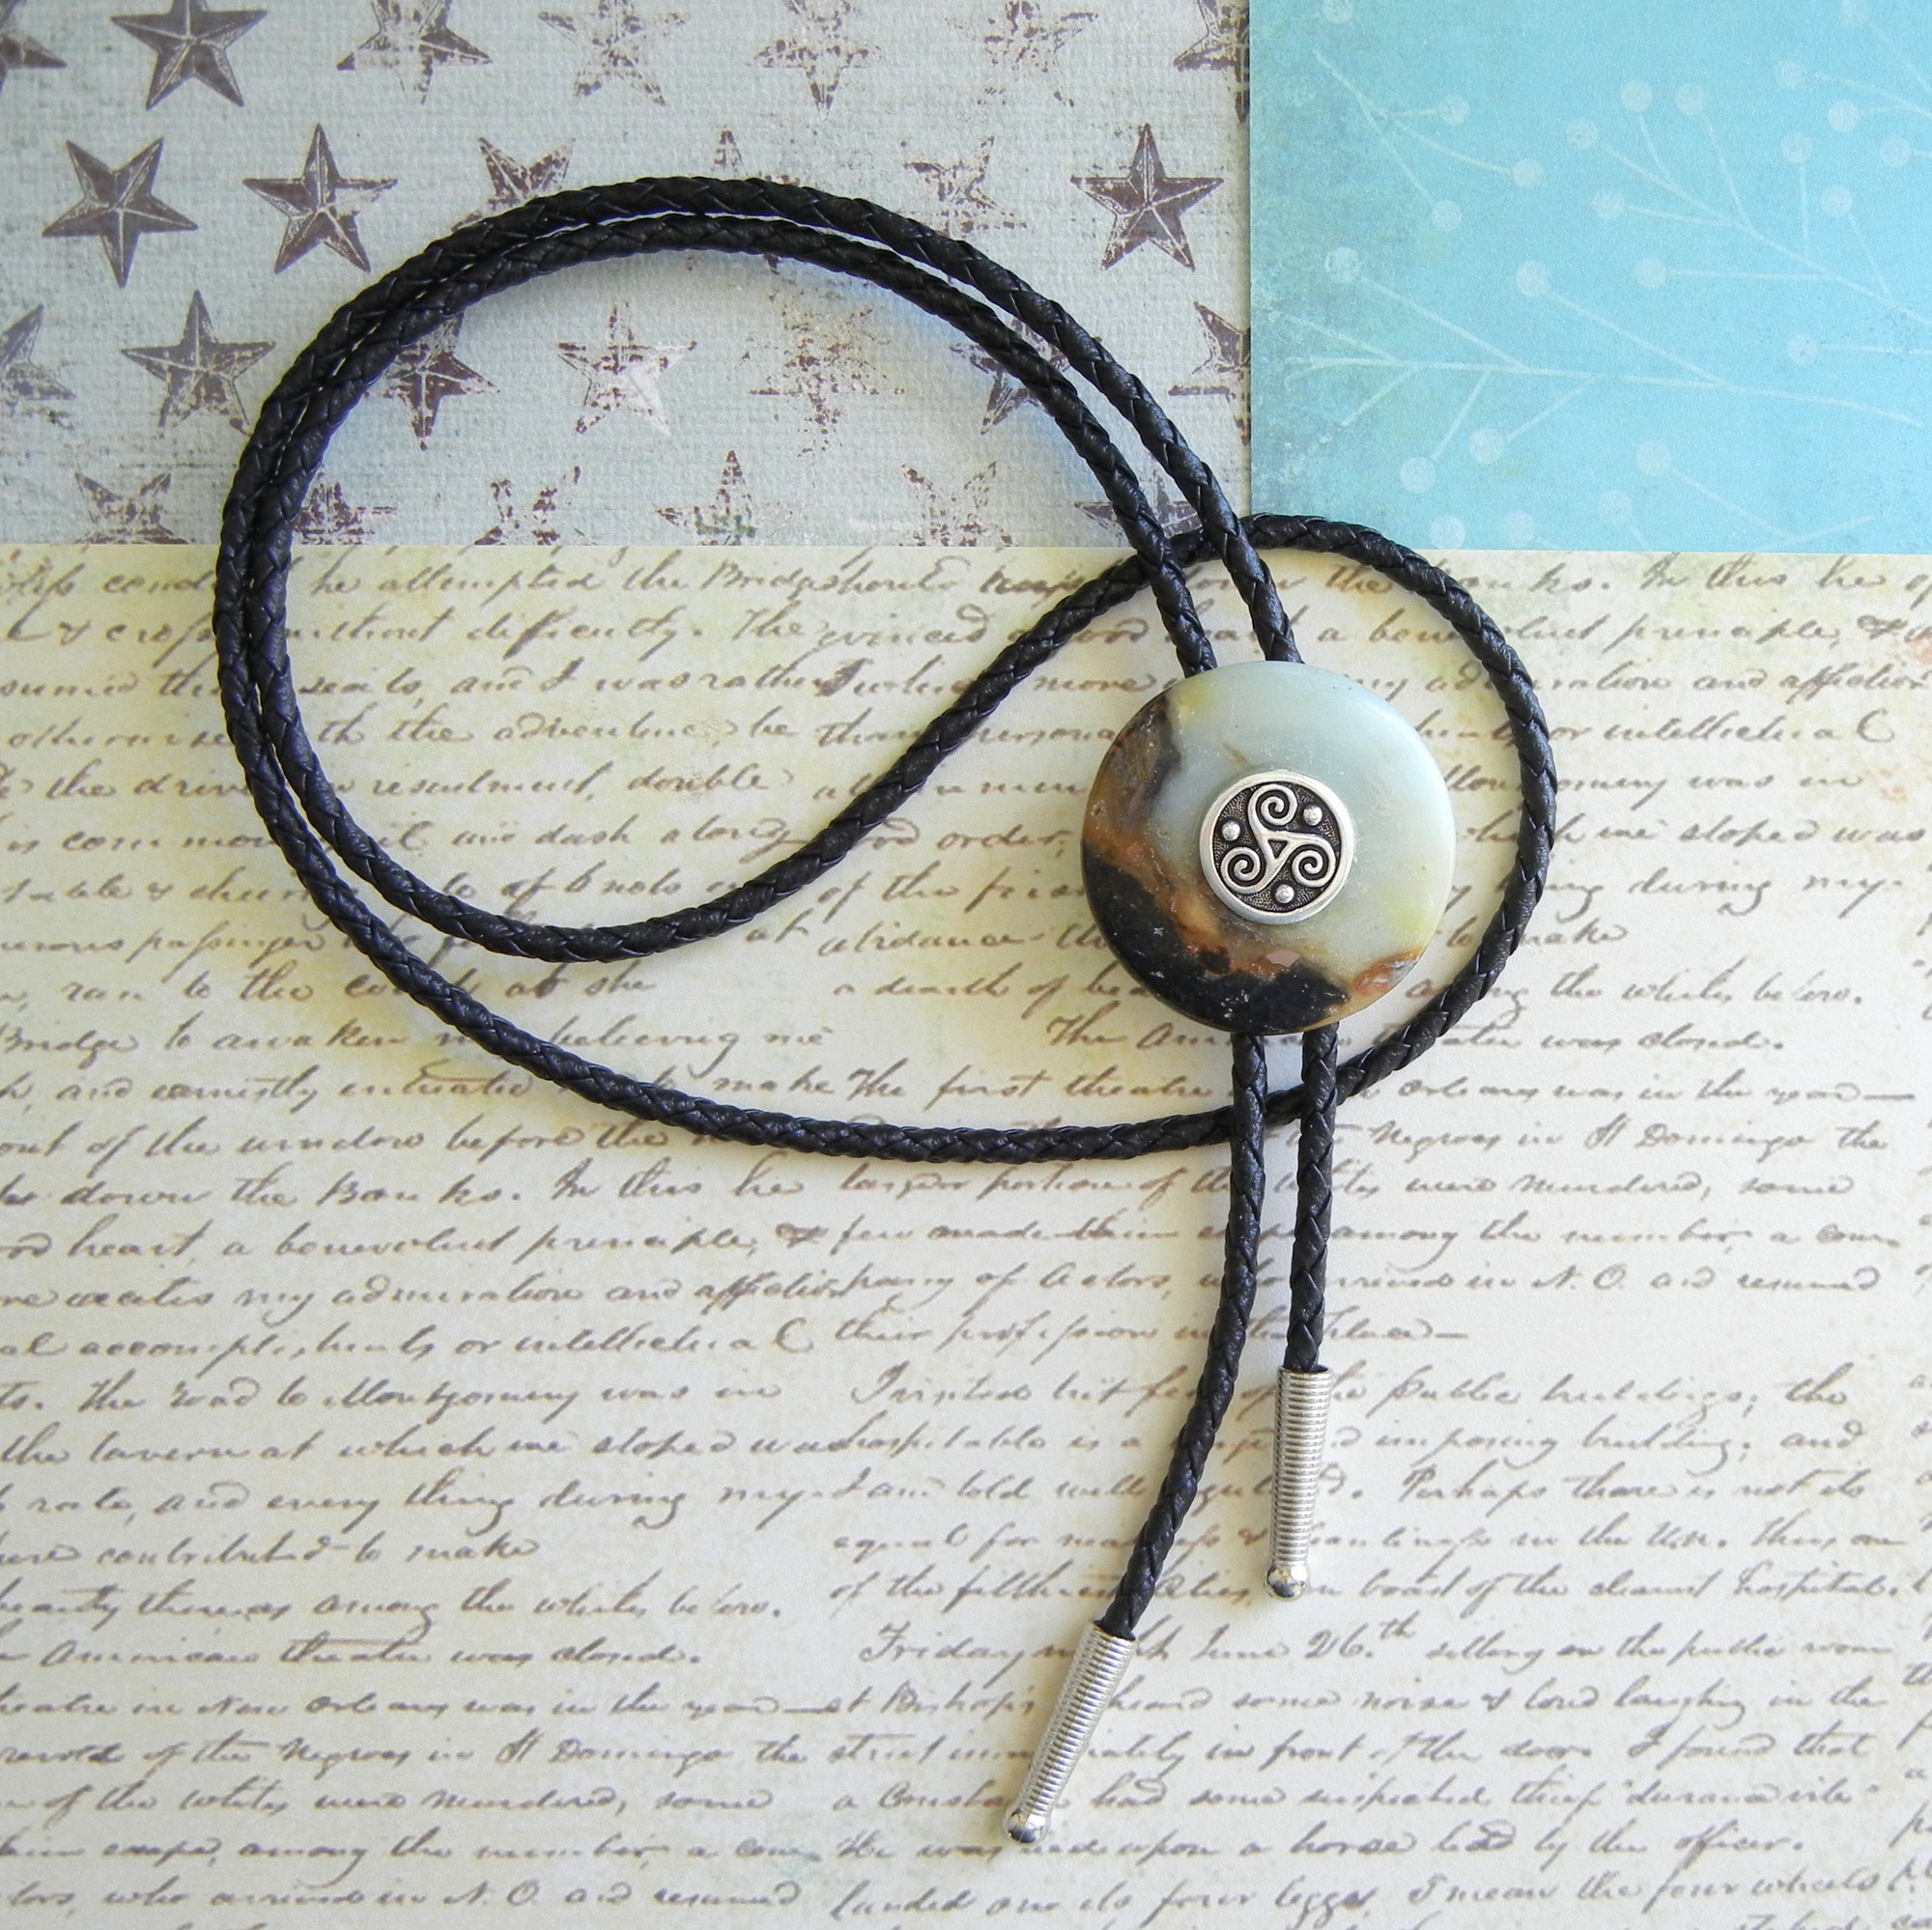
“Earth-Water-Sky” Bolo Tie by Rings & Things designer Mollie Valente.
Pick a DONUT and Pick a BUTTON
Grab some BOLO SUPPLIES
Begin crafting!
Make things!
Mollie
www.rings-things.com

No Comments