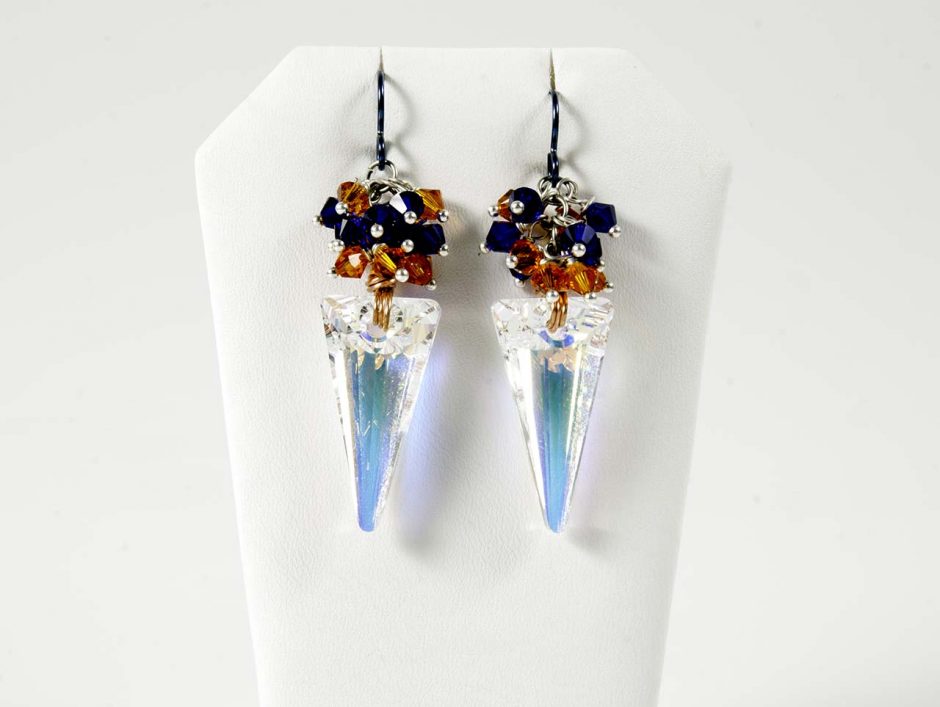
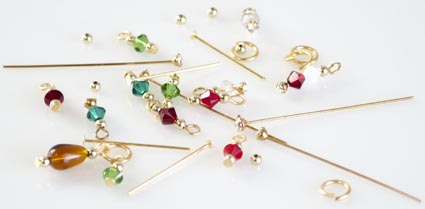
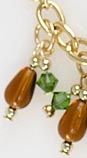
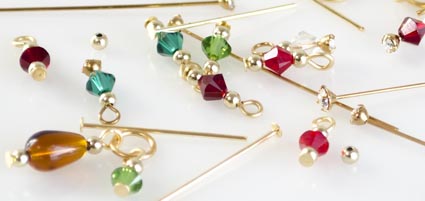
With football season fast approaching, it’s time to break out your team spirit! Colorful jewelry that shows off team colors will make it easy for everyone to know who you’re cheering for! Simply swap out the Swarovski crystal colors to make earrings that support your favorite team!
Continue Reading…
Living in the Pacific Northwest, I quickly became a fan of the show Portlandia. It is a comedy sketch show on IFC (the Independent Film Channel), and all the characters are representative of the eccentric people that live in Portland, Oregon. In the first season, there was a famous sketch called, “Put a Bird on It” where two characters go around putting birds on everything and selling it as art. It is one of my favorite sketches! So when I made this necklace, I used that episode as inspiration!
Continue Reading…
12 Days of Christmas DIY Charm Bracelet
October 20, 2014“On the first day of Christmas my true love sent to me a Partridge in a Pear Tree.”
Here’s a fun way to remember the rest of the gifts in the “12 Days of Christmas” song: Make yourself a bracelet with a charm representing each gift.
1. Gather Supplies and Tools:
- 1 Set of Charms: 12 Days of Christmas
- 12-25: Jump Rings, Assorted Sizes
- 1: Oval Cable Chain Bracelet
- 24: Mixed Christmas Colors, 4mm Swarovski Crystal Bicone Beads
- 24: 1.5″ Swarovski Crystal Head Pins or Standard 7/8″ Head Pins
- 1: Teardrop (Pear) Topaz Czech Glass Bead
- 48: 2mm Round Gold Plated Beads
- Round-Nose Pliers
(I love my classic German round-nose pliers.) - Smooth Flat-Nose Pliers
- Flush Wire Cutters or 1-Step Looper
- Chain Sta
2. Determine Bracelet Length
- Decide if the standard 7.5″ bracelet is the right length for the recipient.
Remove links to shorten; add links to lengthen. - The links on this chain are tough! Use 2 pairs of pliers and twist to open a link. If you want to be able to re-use the removed chain links, open and close them just like jump rings:
- If your pliers have scrapes or serrations on them, dip the tips in Tool Magic, or wrap the tips in masking tape to prevent scraping the jump rings and chain links.
Important notes about toggle clasps and bracelets:
Tip 1) Toggle clasps are great for bracelets because they are easy to put on and take off with one hand, but beware: If the bracelet is too loose, the toggle can work its way out and cause the bracelet to get lost! Whenever possible, adjust the length to fit the wearer’s wrist. (I removed 7 links to get it to fit me properly. )
Tip 2) Because you pull the bar (or “T”) portion of the clasp through the round loop, toggle clasps work best if you don’t dangle any charms from the last link or 2 of chain.
3. Determine Placement of Charms
There are approximately 40 links on the pictured bracelet. I removed 7 to make the bracelet fit more securely. This leaves 33 links.
The charms look best if you have a charm on every other link, and an empty link at each end. That takes up 25 links.
This leaves 8 links (4 open spaces to attach fun dangles for the full length of the bracelet, following the same every-other-link pattern as the charms). That brings us to…
4. Make Some Sparkly Dangles
Tutorials — How to make beaded head pins:
- How to make beaded head pins with a 1-step looper (blog)
or… - How to make traditional beaded head pins (PDF)
What to put on each dangle:
Make 4 or more beaded head pin dangles. (I made 21.)
- Your partridge needs a pear, so use a golden topaz teardrop bead for one or two of the dangles that you’ll place near the partridge.
I topped every dangle with a tiny 2mm round gold plated bead. Why? Even though I’ve been making beaded head pins for over 20 years, I still (too often) chip glass and crystal beads when I finish my loop. A simple metal bead on top fixes this issue.
I also put a tiny round bead at the bottom of (almost) every head pin. Why? I like the look of ball-end head pins, but they are more expensive than standard “nail head” pins. This tiny extra bead creates the look of a ball-end head pin.
5. Attach the Charms
Start placing your charms, then finish making the dangles. Straighten the bracelet chain and place it on the Chain Sta (“Chain Stay”), or pin/hang the bracelet on a convenient shelf, clipboard, etc.
Starting at approximately the 6th link from the Ring portion of the clasp, add the Partridge.
Use large, sturdy jump rings to attach the charms in the same order as the verses in the song. To make sure you get your jump rings securely closed, use 2 pairs of pliers, and twist, don’t “oval-ize” the links. (See above tip.)
Keep skipping a link before adding the other charms in the following order:
After placing the charms, fill empty end spots with colorful dangles:
- Use a single large jump ring to put a “pear” dangle and (optional) a green crystal dangle on the 4th link from the end (near the partridge).
- Repeat with the 2nd link from the end.
- Repeat with other colorful dangles to fill empty spots at the “T” end of the bracelet.
For a mostly-gold bracelet, you’re done!
Or … If you decide the bracelet needs more color, fill the links between the charms with additional colorful dangles in shades of siam red, emerald green, opalescent milky white and sparkling crystal.
Put the Christmas color dangles in any order you want, or use my “bird-brain” memory hint:
Some of these birds are easy to remember, especially once you have pictures (charms) for each. But I’ve never seen a French Hen or a Turtle Dove in real life, so I surrounded my turtle dove with “turtles are green” and “doves are white” sparkling hints.
Ready to get started?
Rings & Things has everything you need!
Lariat Round Up
January 21, 2014I have been more and more drawn to Lariat style necklaces lately, and seeing lots of them pinned on pinterest. This inspired me to create several lariat necklace tutorials for the Rings & Things jewelry design gallery and to look to our other designer’s past contributions to this jewelry style.
What is a lariat necklace? It is an open-ended necklace with no clasp. It is fastened by threading one end of the necklace through the other. Lariat necklaces frequently have beads or tassels at the end, and are typically worn with the ends in front.
The assymetrical Foliage necklace design is similar. Clusters of SWAROVSKI ELEMENTS xilion crystal bicones are spaced along the curb chain, and again the chain goes through one of the charms to lock the second charm in place, however, the spacing of the bead clusters limits the adjustment to the final length that can be done by the wearer.
The Tour de Belgium long lariat design is designed to be worn doubled. A large fluted bead locks the charm dangles in place. Some adjustment to the final length can be made by varying the length of the doubled section of drawn flattened cable chain.
The Giddyup lariat is made on suede lace with SWAROVSKI ELEMENTS. The ring is tied just off center of the length of leather, and the crystal briolette dangles slip through the ring. The metal components of this true lariat style necklace are plated, to economize.
The Ladylike lariat design is also made with suede lace. This luxe necklace pairs sterling findings with freshwater pearls and sparkly glass. While the components are minimal, the design has impact.
The Corralled Pearls necklace has no findings, and no metal. Thin leather cord, usually not strong enough for stringing, can transform into a bold design when many strands are gathered together. The use of a battery operated bead reamer allows the hole on these freshwater pearls to be made larger for stringing. Simple overhand knots create the loop (clasp) and also hold the pearls in place.
I hope you like this roundup of lariat designs. All of the components to make each of these designs are available right here at Rings & Things. Remember to check our design gallery for a variety of jewelry styles and jewelry design inspiration!
~ Rita