Browsing Category

DIY Jewelry Projects

Copper and brass bracelet design challenge results

August 8, 2011

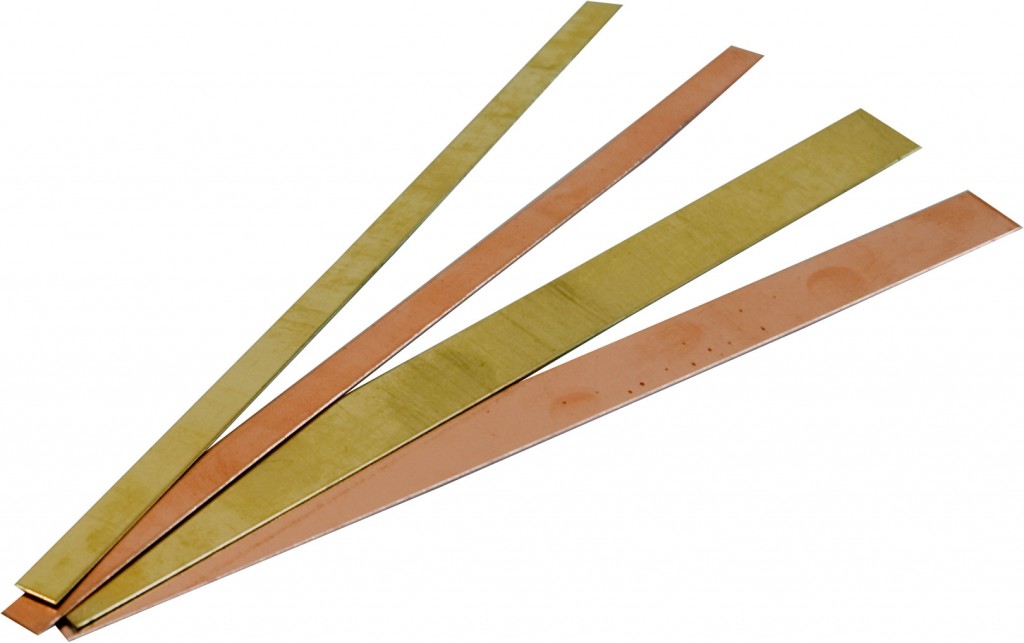
So simple, yet so fun! 6″ long, 1/4 and 1/2″ wide strips to make all kinds of jewelry with.

In July, we sent ten of our blog partners sample packs of our new 24-gauge metal bracelet strips. With summer in full swing, it isn’t surprising that not everyone completed projects (at least not yet) … but the WOW, those who did really brought their A-game!

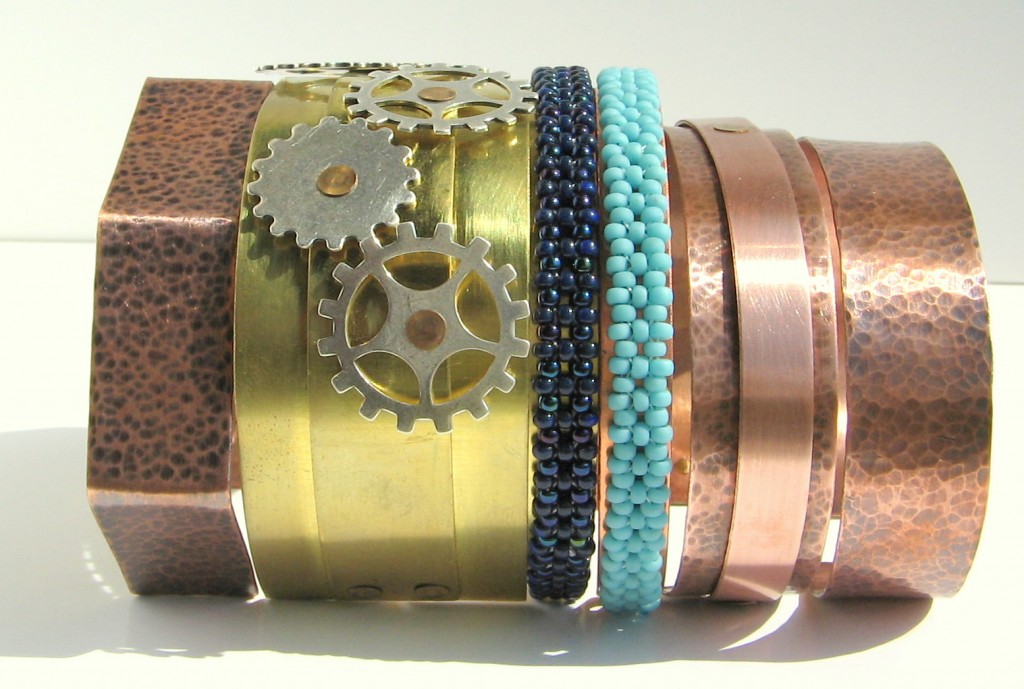
Textured, layered and beaded cuff bracelets by Helena.

Helena Fritz hammered, riveted and even bead-weaved her way to an armful of gorgeous bangle bracelets – her lovely blog has more photos. Helena specializes in beadwork, which makes her first attempt at metalwork even more impressive.

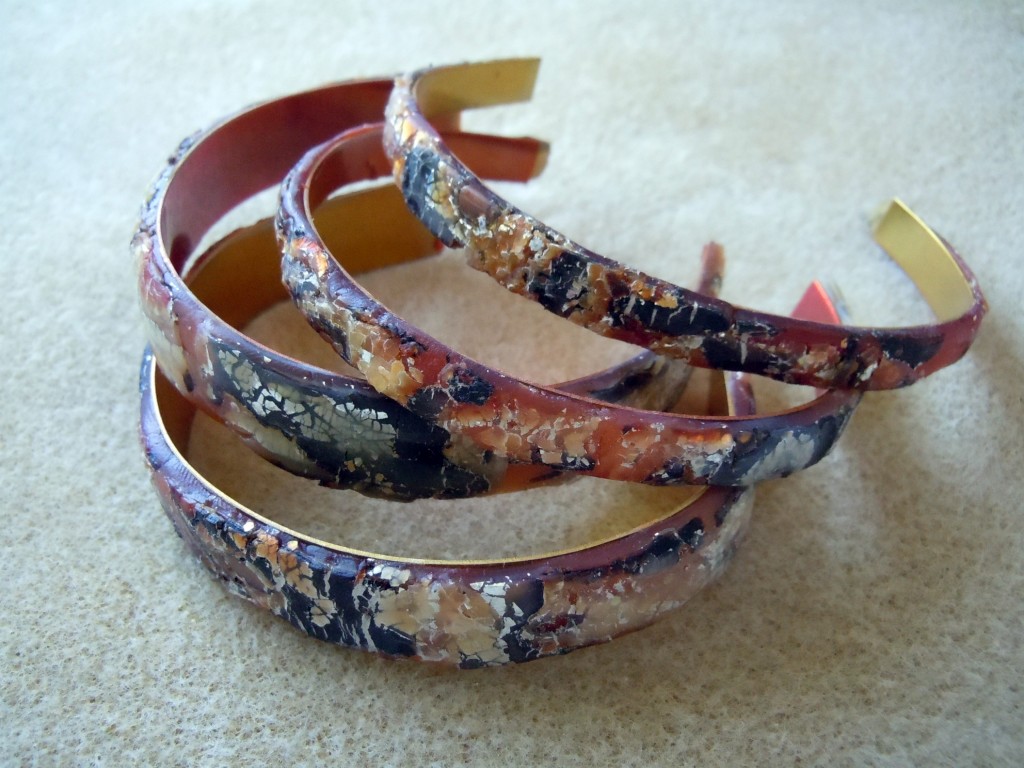
Carole shows her polymer prowess.

Carole Carlson stepped out of her comfort zone and into the world of polymer clay with these fun bracelets. She found that the copper was easier to work with than the brass, which makes sense since it is a softer metal. Check out her blog for more info.

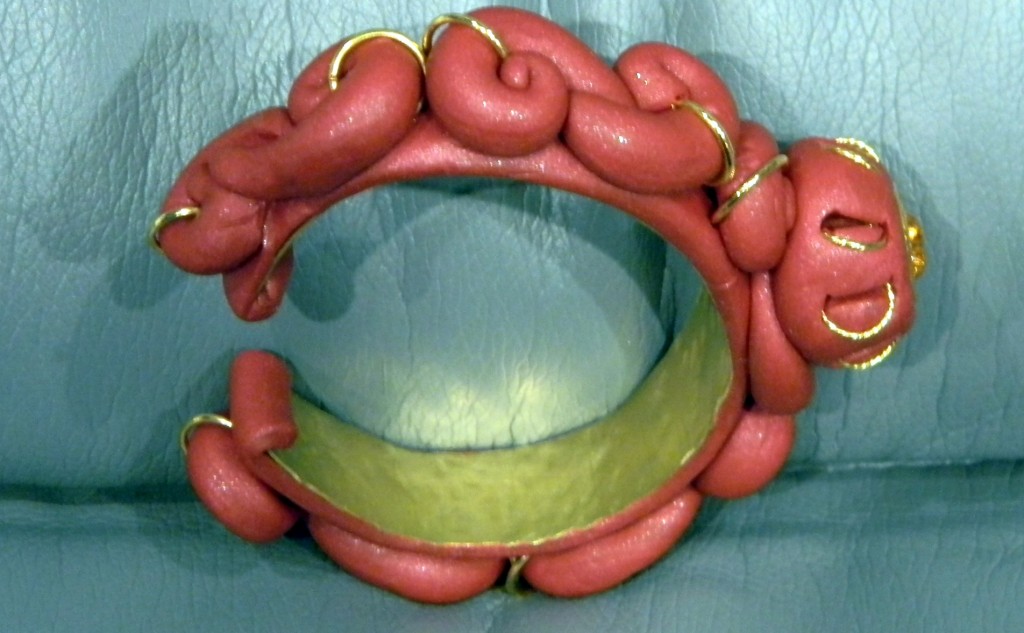
Just one of the bright and bold bracelets Carolyn created.

Carolyn Fiene also used polymer clay, but she preferred the brass as a base. Even though it is harder to form, she felt is held its shape better. Link to her blog showing other designs that combine chain and bezel cups with polymer coming soon.

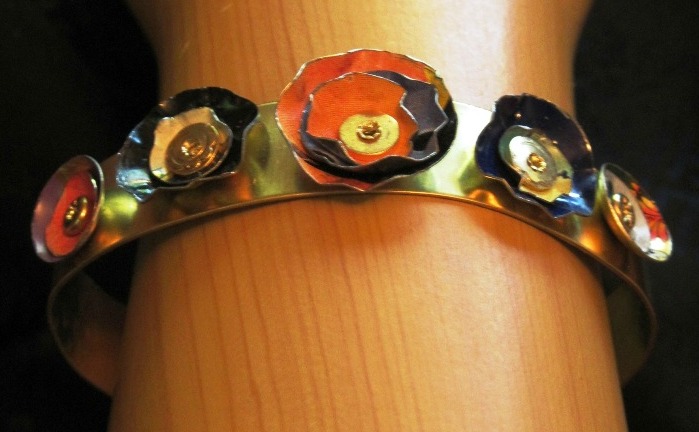
Layers of “ruffled” metal dress up Jan’s brass cuff.

Jan O’Banion made several great designs by layering different elements onto the bracelets. She used recycled tins to make flowers on the “Trashy Tinsel” bracelet above. Visit her blog to get a peek inside her creative world.

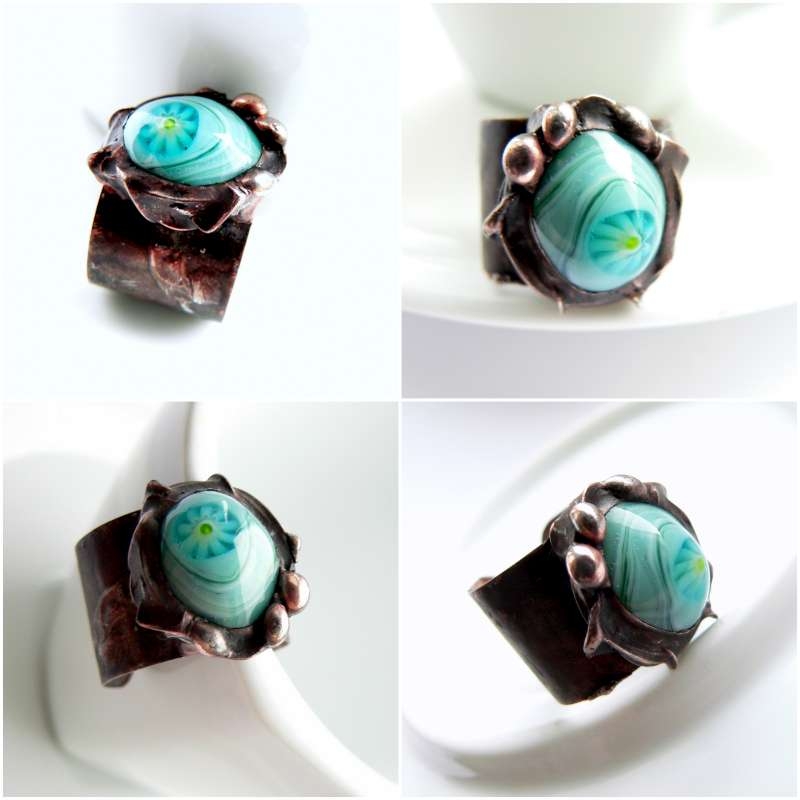
1/2″ wide copper forms the base of this lampwork glass ring by Lubica.

Lubica Vinicenko used the strips as the base of some truly elaborate rings. You can see more pictures at her blog.

As you can see, these metal “bracelet” strips are extremely versatile and fun to experiment with. Am I the only one surprised to see polymer clay and seed beads combined with sheet metal?
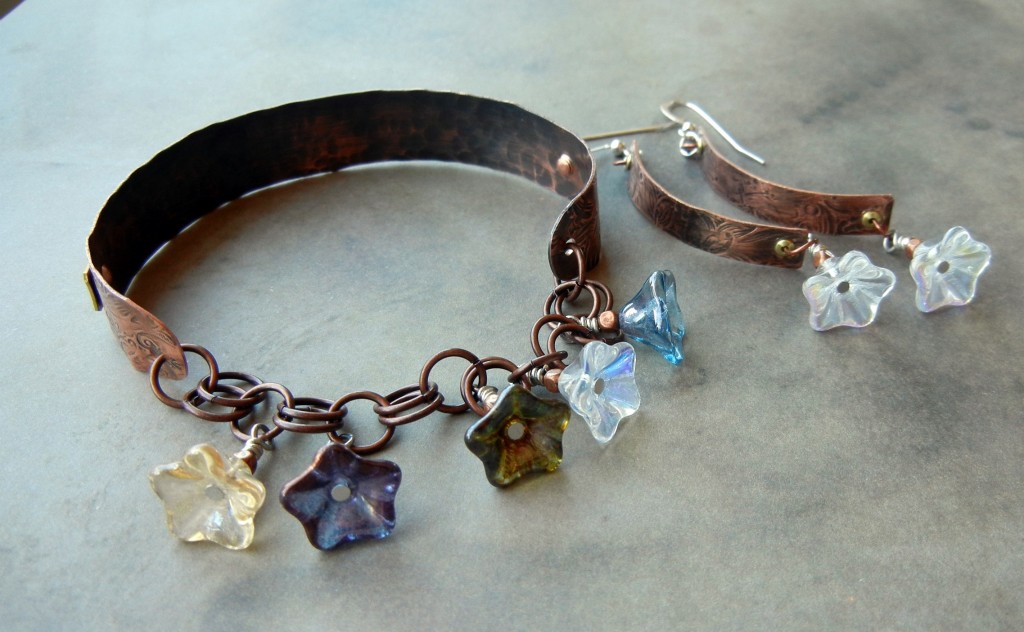
The back of my layered stamped bracelet. I curved short strips with my wood dapping set to make the matching earrings.

I’ve been having a blast stamping and texturing them. You can see the front of – and how I made – the “Earth Laughs in Flowers” bracelet in our design gallery. Texturing metal with
brass texture sheets is great stress relief, I must say!

Although July is already behind us, we’re always happy to see and share what you create. Be sure to send us some photos of what you make with these metal strips! ~ Cindy

PS – Molly Alexander posted her etching and mixed metal results to a photostream on Flickr – be sure to check them out!

Resin + scrapbook paper = fun

August 2, 2011

So, if you’ve been reading this blog you know we are very excited about SuperClear Resin for jewelry. As is usually the case, we had a bit leftover after filling some bezels, so we tried applying some to scrapbooking paper just to see what would happen. The results were great! With most epoxy resins, it is recommended that you coat your paper or images with Mod Podge, white glue or other sealer to prevent the resin from bleeding into the paper. However, we found that SuperClear resin worked just fine on uncoated paper. (We still recommend testing yours first! Each type of paper acts a little differently.)
SuperClear resin, when applied sparingly, has enough surface tension to stay domed on the paper.

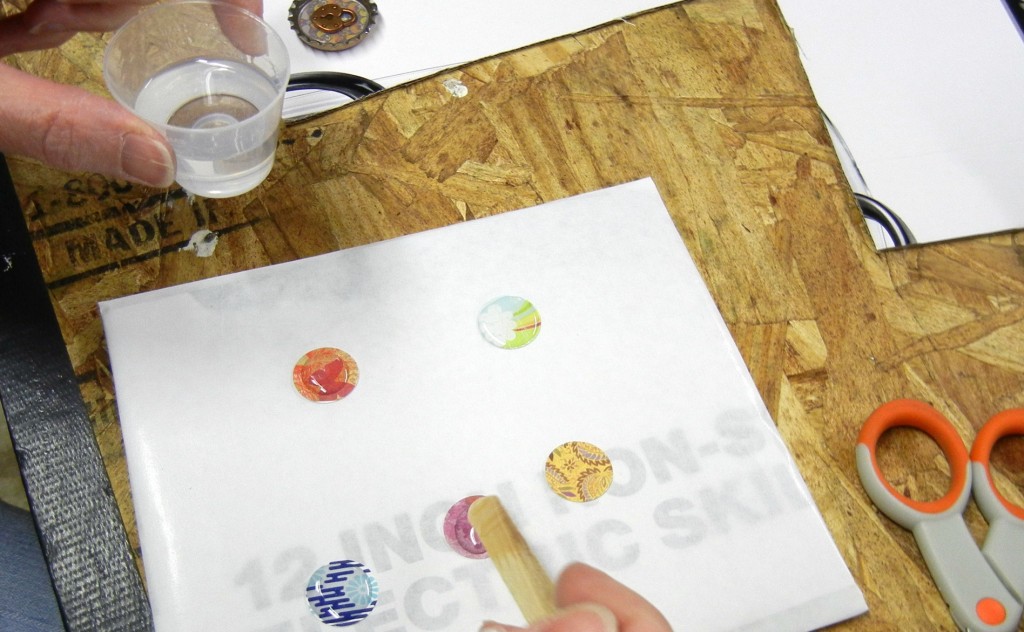
In the picture above, Mollie is using a wooden craft stick to stir and dab the resin. It works ok. However, it is possible for the moisture content of the wood to have an adverse affect on the resin. We’ve now switched to these
plastic paddles/spatulas, as recommended by Resin Obsession.

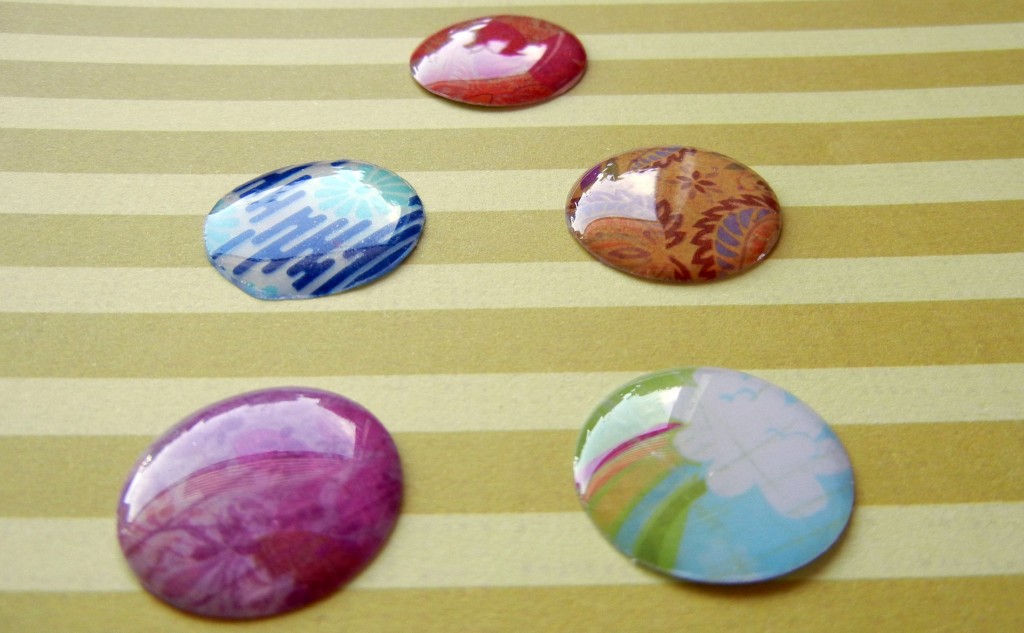
The dots were super shiny when they dried – and the colors didn’t bleed!

How do you turn resin-covered paper dots into wearable jewelry? Fortunately Mollie is a clever girl. Here are a couple of the options she came up with:

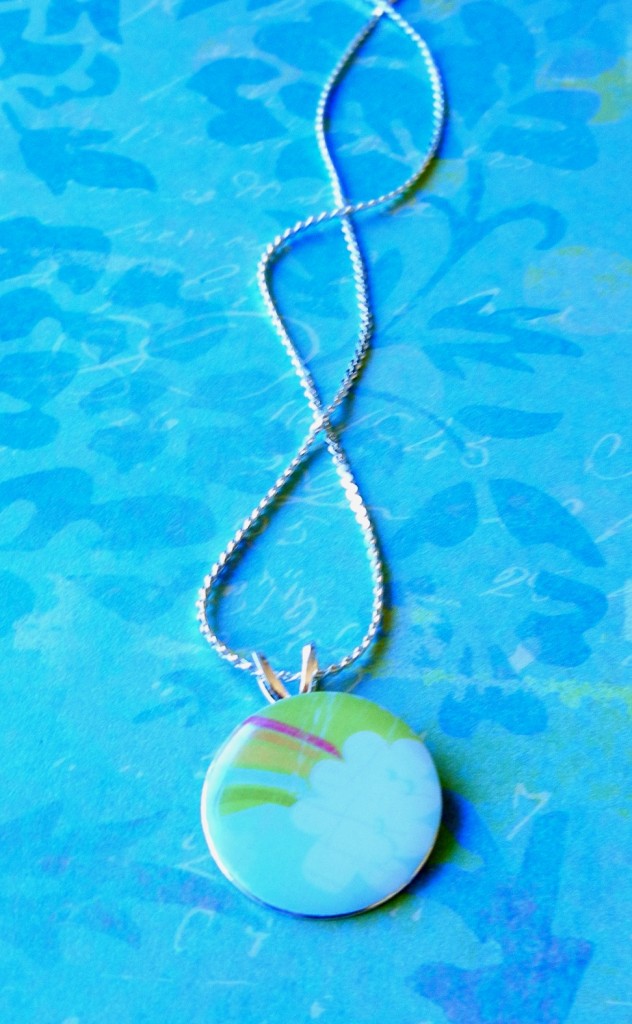
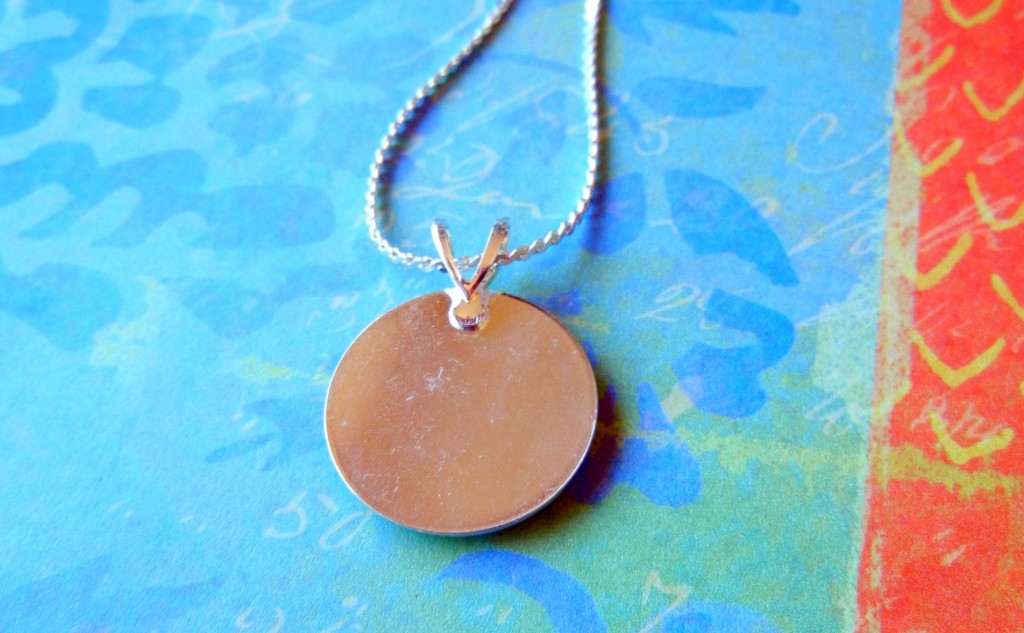
The dot fit perfectly on a round pendant finding with bail.

I especially like that the back of the piece is entirely covered with metal – it feels much more finished that way.

Since these gluable pendant findings already have bails attached, you can just slide them onto chains or ribbons and have complete necklaces for under $2 each!

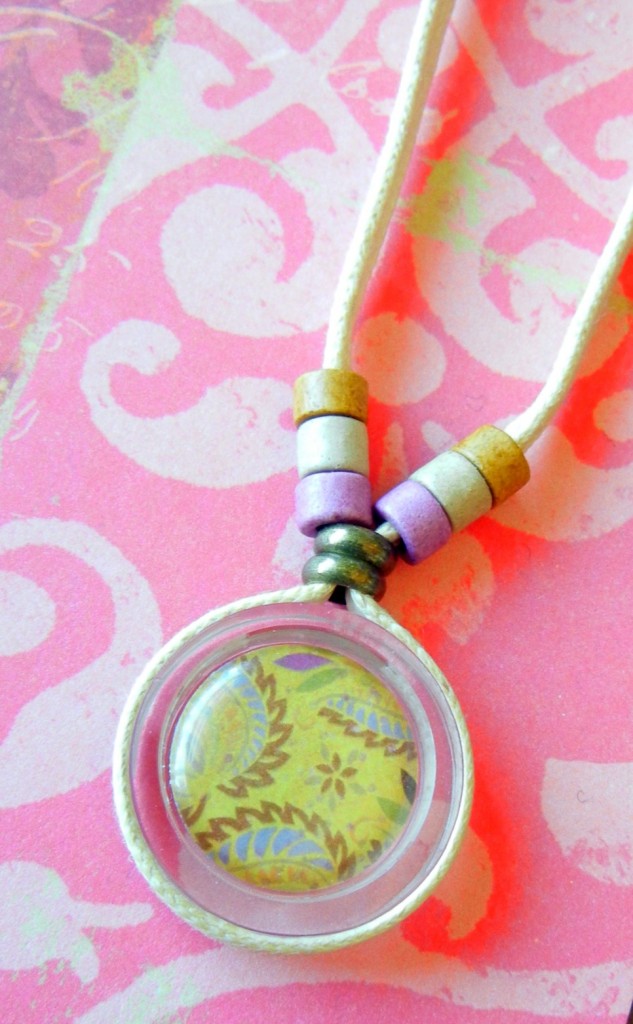
The resin dots also fit perfectly inside glass bezels.

Glass bezels are another unique option. If you plan ahead, you can make the pendant reversible! Since the bezels don’t have holes, Mollie wrapped hers with flat cotton cord and glued it in place.

Have you come up with interesting ways to combine resin with paper? We’d love to hear about it! ~Cindy

The easiest braided leather cuff bracelet ever

July 26, 2011

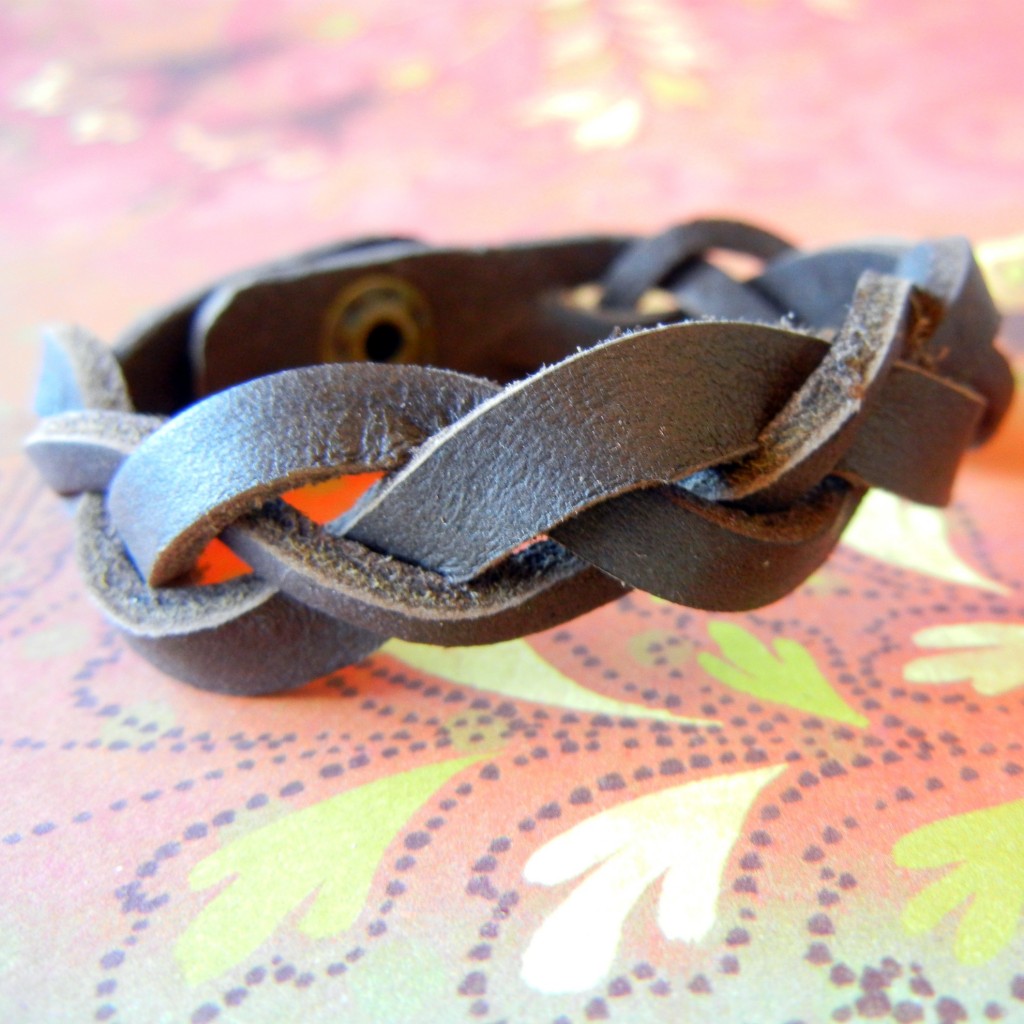
The magic braided cuff bracelet.

Hi bloglandia! I came across this great Magic Braided Leather tutorial today and immediately had to try it with our pre-made leather cuff bracelets. In less than 5 minutes I had a finished braided bracelet! Here’s how you can make your own:

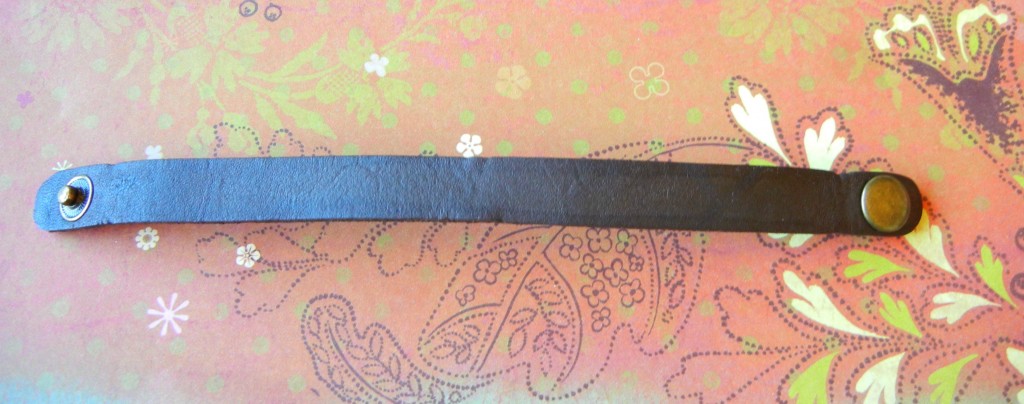
Plain bracelet: the “before” shot.

Supplies:

  1. Leather cuff bracelet (mine is 0.5″ wide, dark brown)
  2. Sharp hobby knife

How to:

  1. Cut two slits in the bracelet blank, so that there are three strips or “strands.” (My strands are woefully uneven…I thought holding a ruler down next to the blade would help me cut a straight line, but the opposite occurred. I had much better luck just free handing.)
  2. Braid the three strands together. The bottom will get all twisted and tangly. Just ignore that until you’ve braided halfway.
  3. Then, holding your braid securely, untangle the bottom section by feeding the bottom bracelet end up through the tangle: “reverse braiding” if you will. It only takes 2 or three “reverse” maneuvers to make the bracelet straighten out.
  4. Then…just continue braiding. Untwist the bottom as needed and like magic the whole piece is one continuous braid!

Ta da! The “magic” braid.

As it gets worn, the leather braid will flatten out and get smoother, but I’m pretty happy with it as it is! ~ Cindy

How to finish a multi-strand necklace with bullet ends

July 19, 2011

Hello, bloglandia! As promised, here are the instructions for finishing a multiple-strand piece of jewelry (like the braided hemp necklace I made with the Kumihimo disk last week) using glue-on bullet ends.

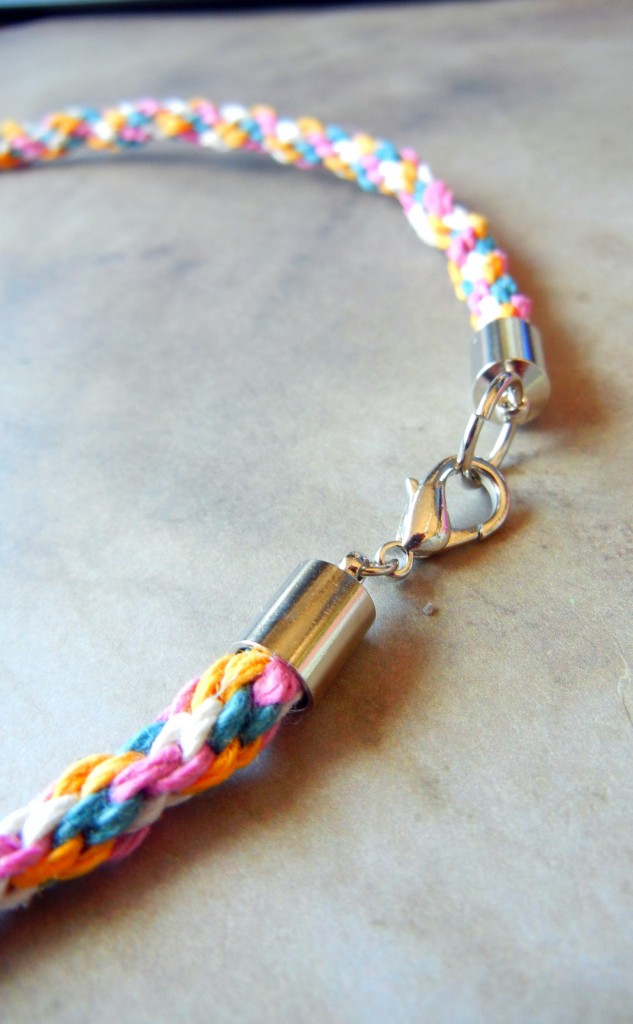
Cord End Caps are much less bulky than knots on multistrand designs.

A bullet end is a jewelry finding that hides cord ends and makes a clean transition to a clasp. Bullet ends are also called end caps, barrel caps, and a variety of other creative names. Just make sure the caps you are using have loops on the ends and that they are wide enough to accommodate your cording. (I used these.)

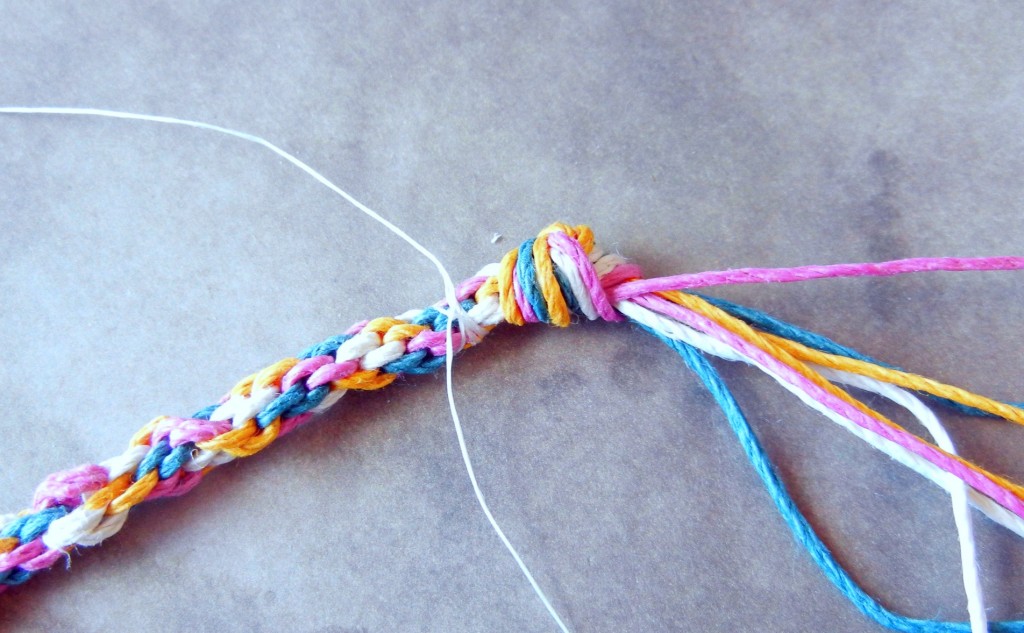
  1. Tie an overhand knot at the end of your piece.
  2. Take a piece of thread and wrap it tightly around the end several times (this is also called “whipping”). Tie a double knot to secure, and trim the thread ends.
  3. Cut the braid between the thread and the knotted end.
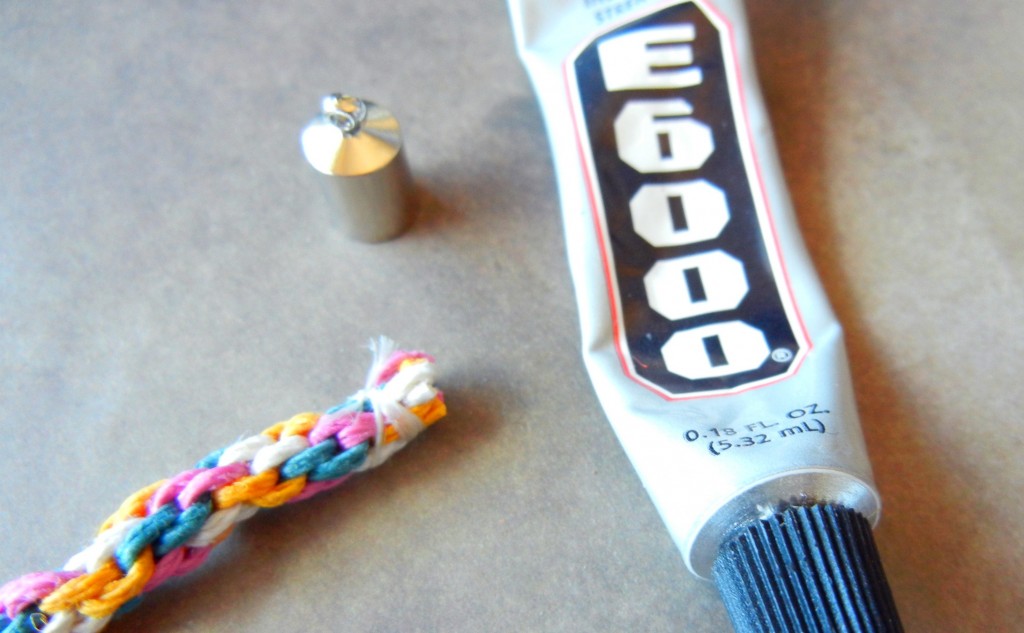
  4. Fill the bullet end about half way with glue and insert the cord. Make sure that it goes in as far as it can, and that the thread whipping is covered by the bullet end. Clean up any oozing glue immediately.
  5. Use jump rings to attach a clasp.

Make sure to let the glue cure fully before wearing. (For E-6000, this means 24 hours. ) The glue will be dry long before then, but to be safe, let it cure all the way.

E-6000 is one of my favorite glues because it holds up nearly as well as a 2-part epoxy, but you don’t have to measure and mix. Whatever glue you use, just make sure that is is compatible with both metal and fibers. Although instant gratification is tempting, super glue (cyanoacrylate glue) is a bad choice for this project because it can’t fill the gaps between the cord and the metal very well.

That is all there is to it! This technique works equally well with leather, ribbon, rattail and other types of cord. ~ Cindy

Make hemp friendship bracelets and more with a Kumihimo braiding disk

July 15, 2011

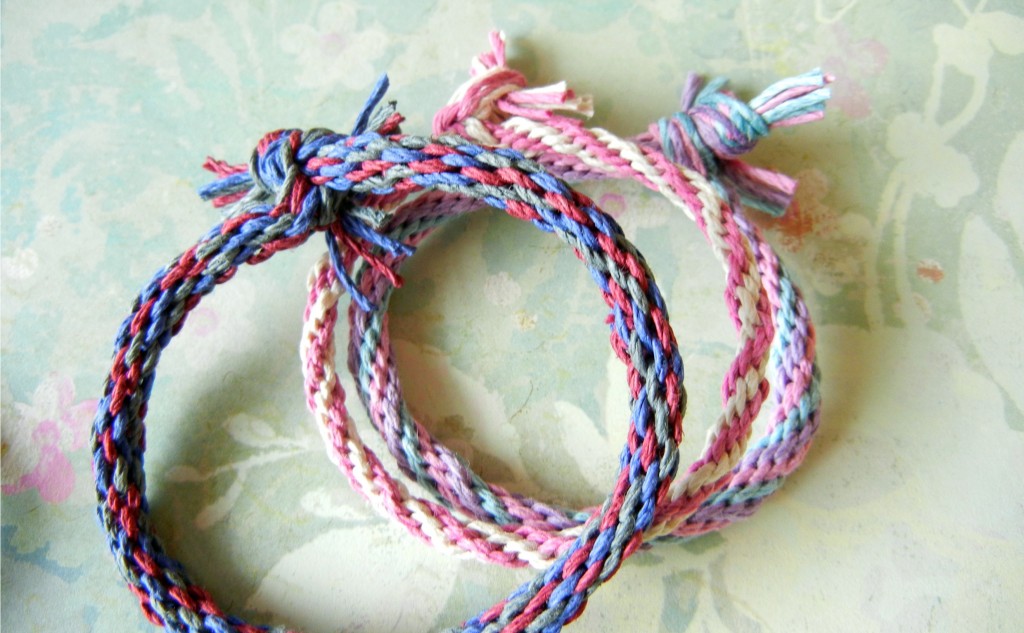
Colorful hemp bracelets are fun for kids of all ages to make … by “all ages” I mean 8 to oh, 80.

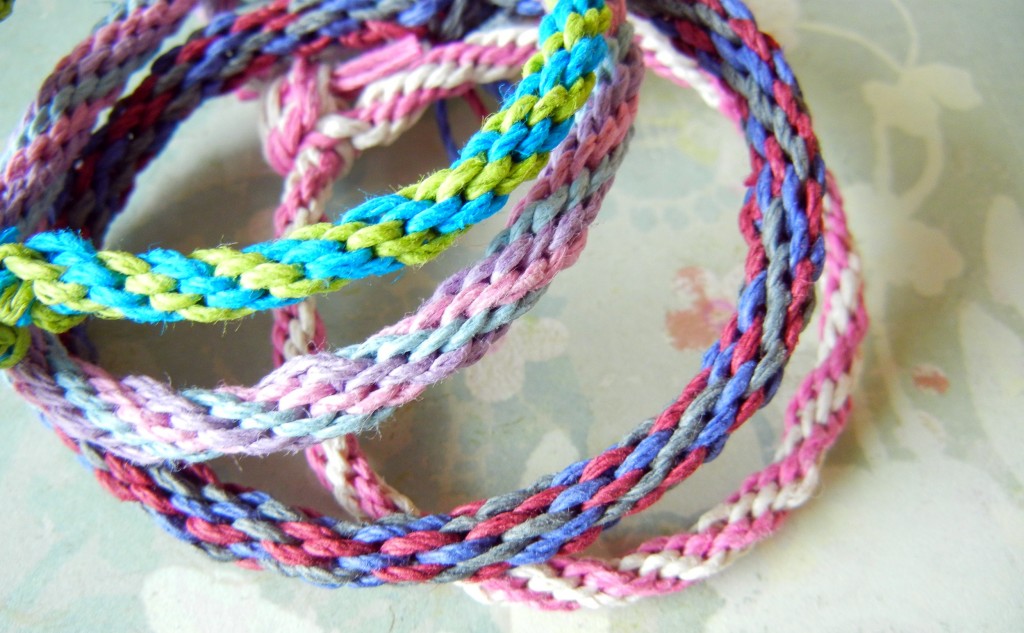
I’ve been intrigued by Kumihimo braiding disks for a while now. Kumihimo (a Japanese form of braid making) is an easy way to make intricate multiple strand braids. Braiding bracelets is the perfect summer-time activity, as anyone who has been to summer camp can attest.

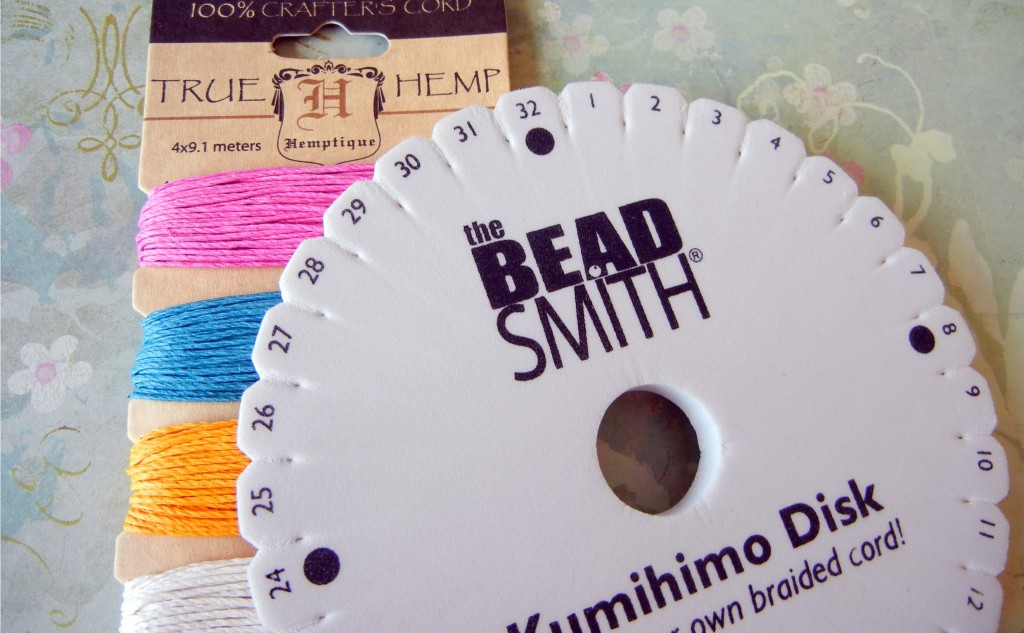
I used the “Spring” Hemptique assortment and round Kumihimo disk. Any type of thread or cord could be used. There is also a square disk available to make flat braids.

Most Kumihimo braids use 8 or 16 warps (each warp could be made up of multiple strands). I decided to try the 8-warp braid first. Since I was using 4 colors of hemp cord, I divided each color into two equal lengths and knotted them all together at one end (just a basic overhand knot). A basic rule of thumb is to have 3″ of each cord for each 1″ of braid length. If you are mixing different types of cord I would suggest estimating a bit higher.

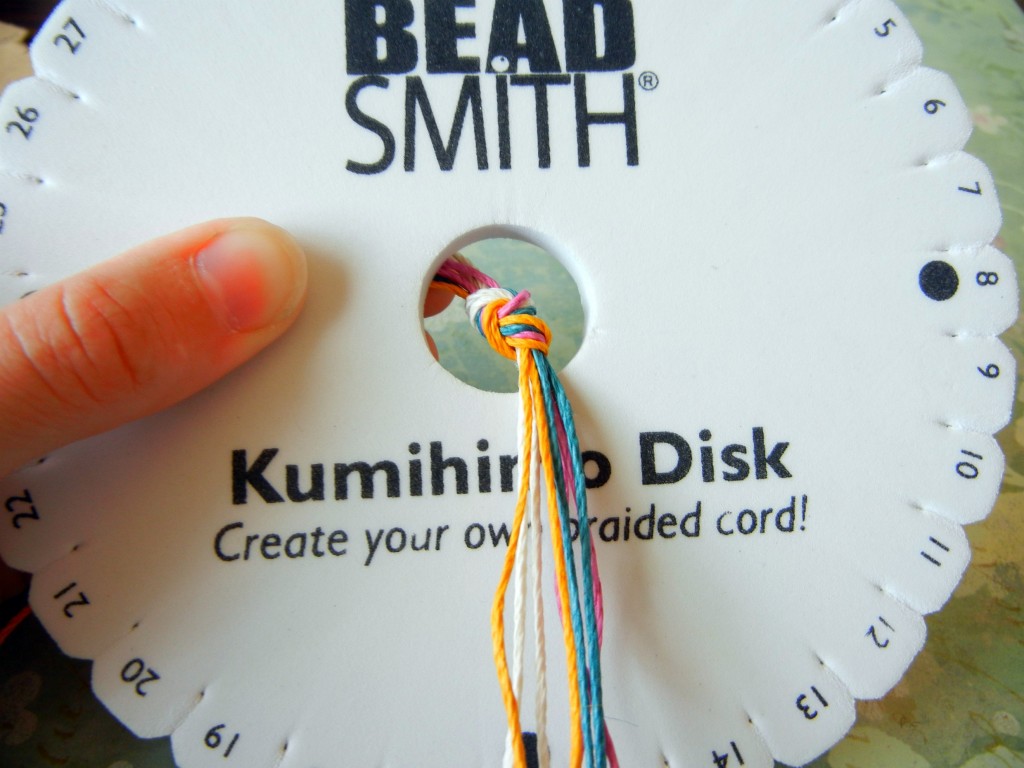
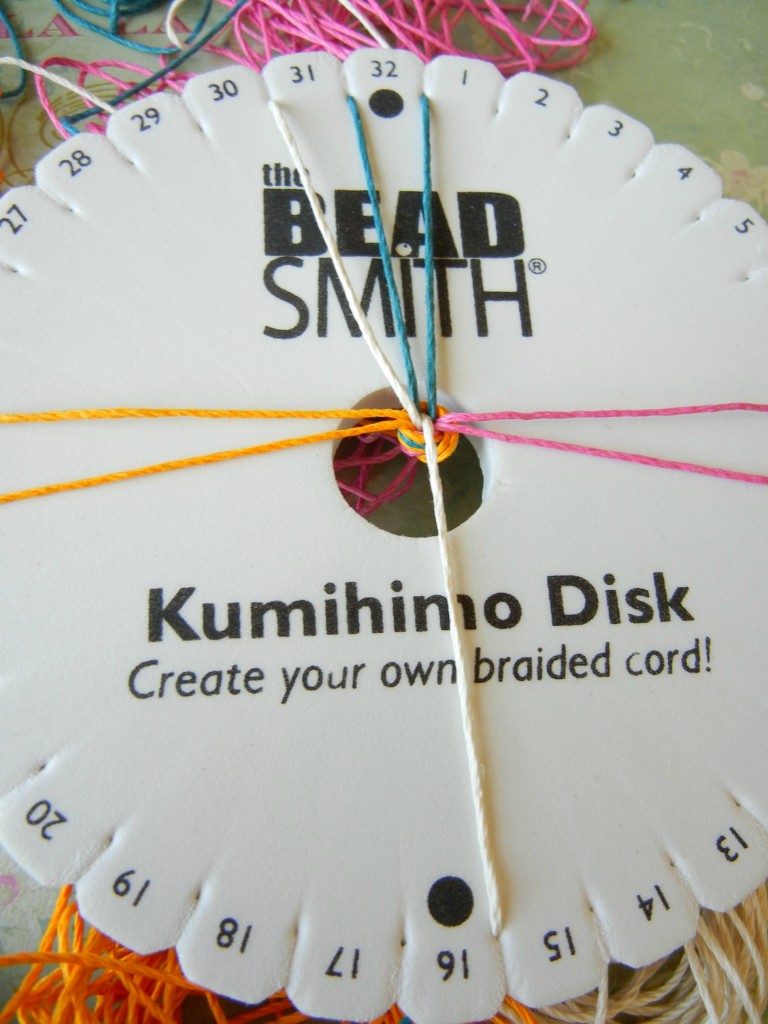
Feed the knotted end through the center of the disk to get started.

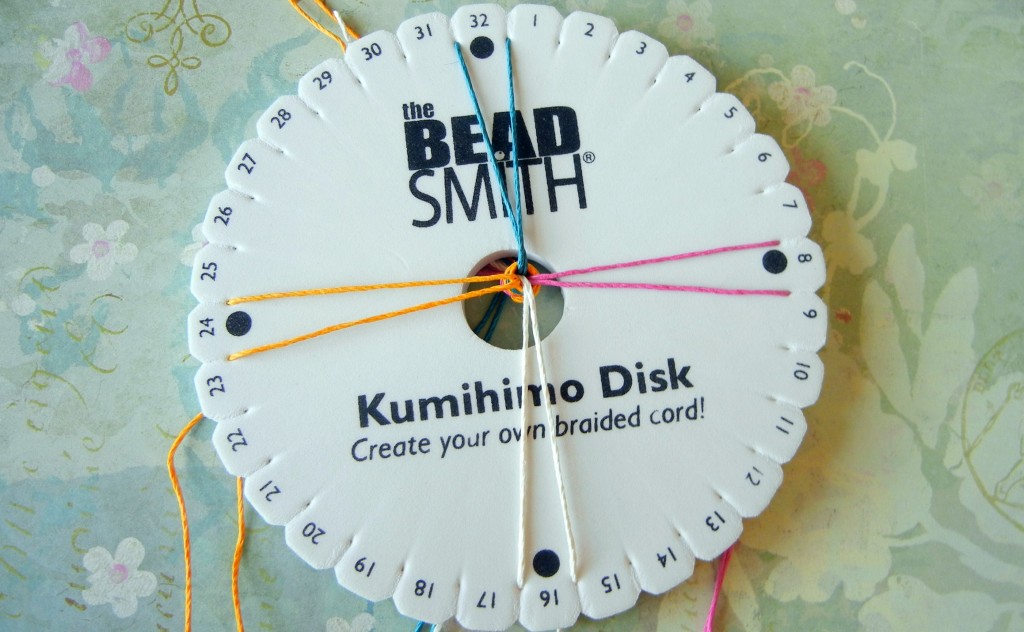
Place one cord (or “warp”) next to each of the four dots on the board.

And start braiding! Bottom left cord goes to top left. Then top right cord goes to bottom right.

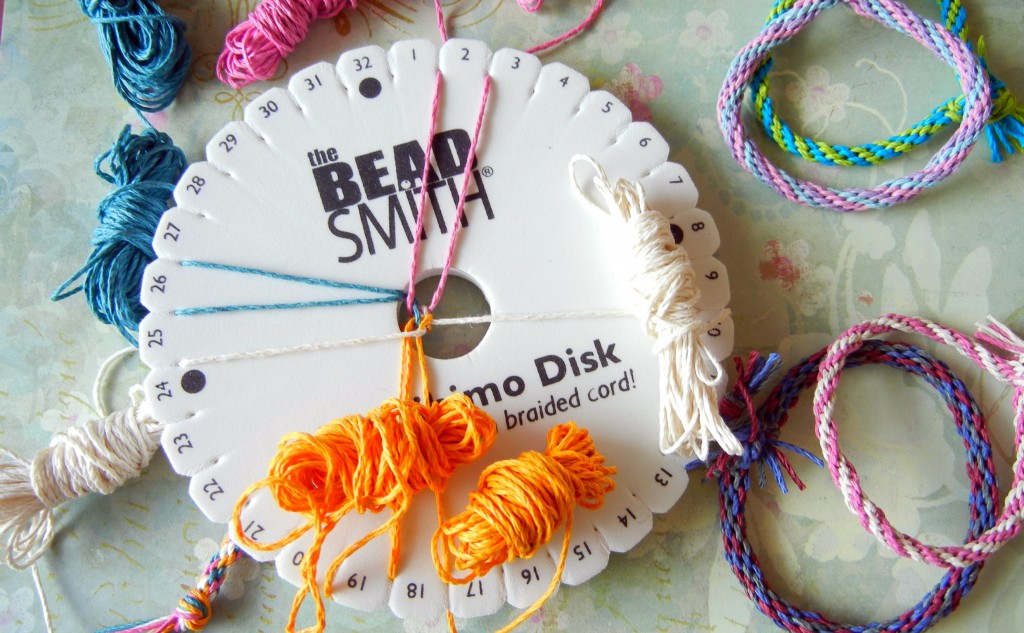
Now, the instructions told me to rotate the board 90 degrees so that I was always working from top to bottom, but I found it much easier to hold the board in one position and just apply the pattern. As long as you don’t cross the warps (ex. taking a left strand from the bottom and placing it on the upper right) it is really hard to mess this up. You’ll probably do it slightly differently than I did. What is really important is to keep your cords bundled into “no-tangle bobbins” – NOT all loose and tangly like in the photo above.

Keep the cord bundled up tightly to save yourself a headache.

The braid travels around the disk as you work, but you don’t need to pay attention to the numbers. And that’s all there is to it! For a project that requires no tools and no counting, the results are impressive! For a traditional friendship bracelet like the ones Jaci made, simply knot the ends together, preferably on your BFF’s wrist, so that it must be worn until it disintegrates.

Just tie a knot and trim the ends when you’ve braided a long enough piece.

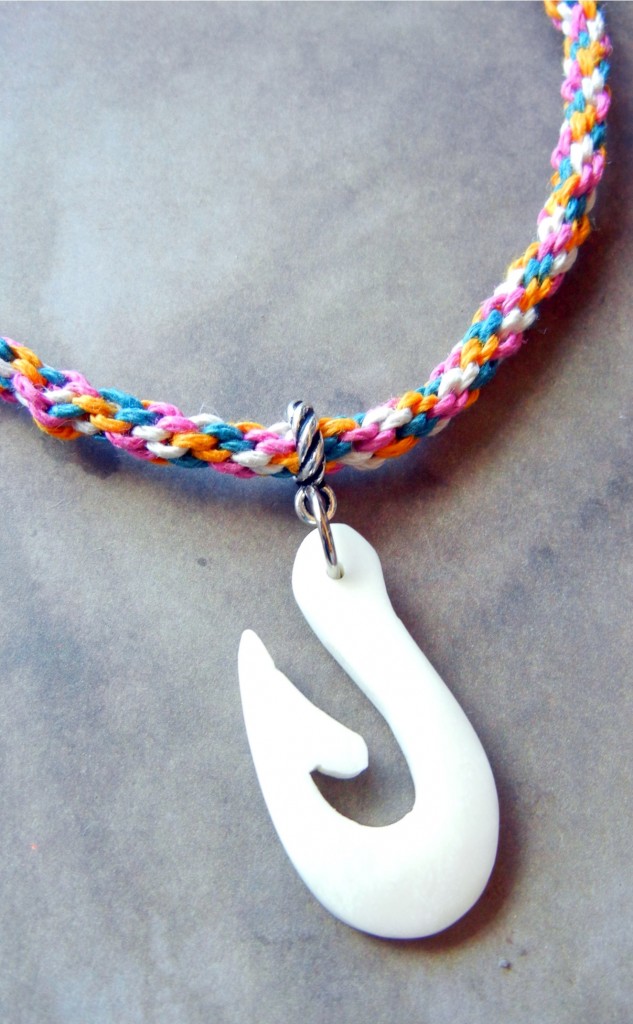
I got on a roll, so I kept going and made my braid into a necklace. In the next blog I will show you how to finish braids like these, or any type of cord, really, with glue-on bullet ends. Have a great weekend! ~ Cindy

www.rings-things.com

How to make copper bangle bracelets with large hole beads

July 1, 2011
stamped metal bracelet

One of Sondra’s bracelets from Bead & Button 2011.

Hello, bloglandia! Our sales manager, Sondra, was fortunate enough to attend Tracy Stanley’s “Bangles with a Message” class at Bead & Button last month. We’ve been oohing and ahhing over her wristful of chunky metal, so yesterday we got together and made some of our own bracelets.

For a sturdy yet slightly flexible bracelet base, we used 14 gauge copper wire. Start with about 10-11″ of wire. Simply form a large loop on one end with round nose pliers and hammer slightly. Slide on lots of large hole beads: 14 gauge wire is about 1.63mm, so your beads need to have holes that are at least 1.7mm big. Anything marketed as a Pandora or European-style bead will easily fit.

bangle bracelets made from copper wire

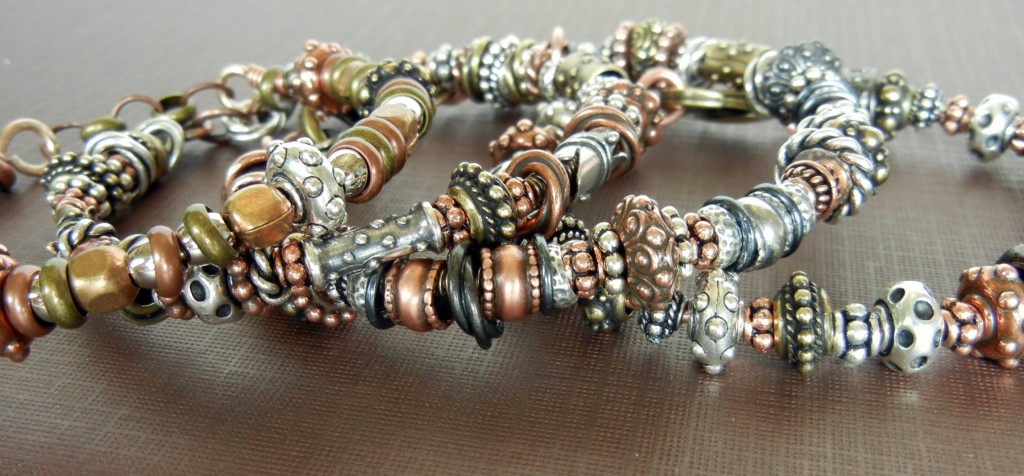
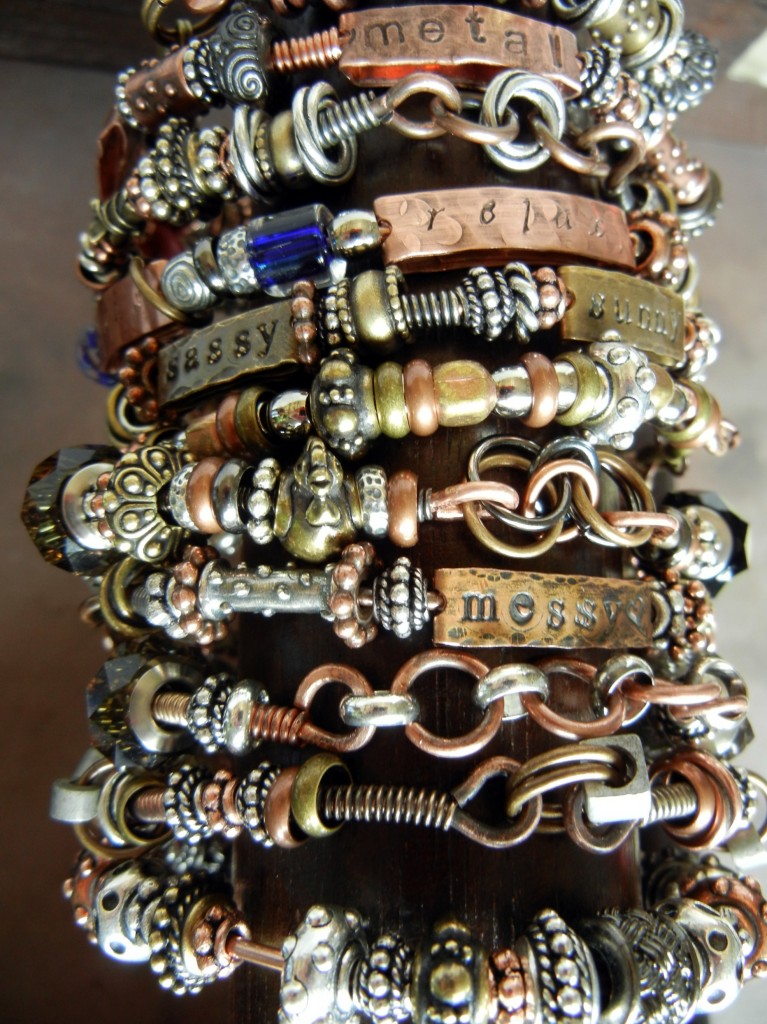
Mixed-metal mania bracelets are fun to wear en masse!

We mostly used metal, but trade beads and gemstones look great too. TierraCast has some especially nice large hole metal beads. You can also add coils of wire as decoration beneath floating beads, or as stoppers between beads. Shape the wire into a bracelet shape around your wrist and finish with another loop.

You can connect the two end loops together directly, connect them with jump rings or add a jewelry clasp. It is better to err on the small side, since a too-small bracelet can be extended with a jump ring or two, while a too-large bracelet will just go flying off your wrist!

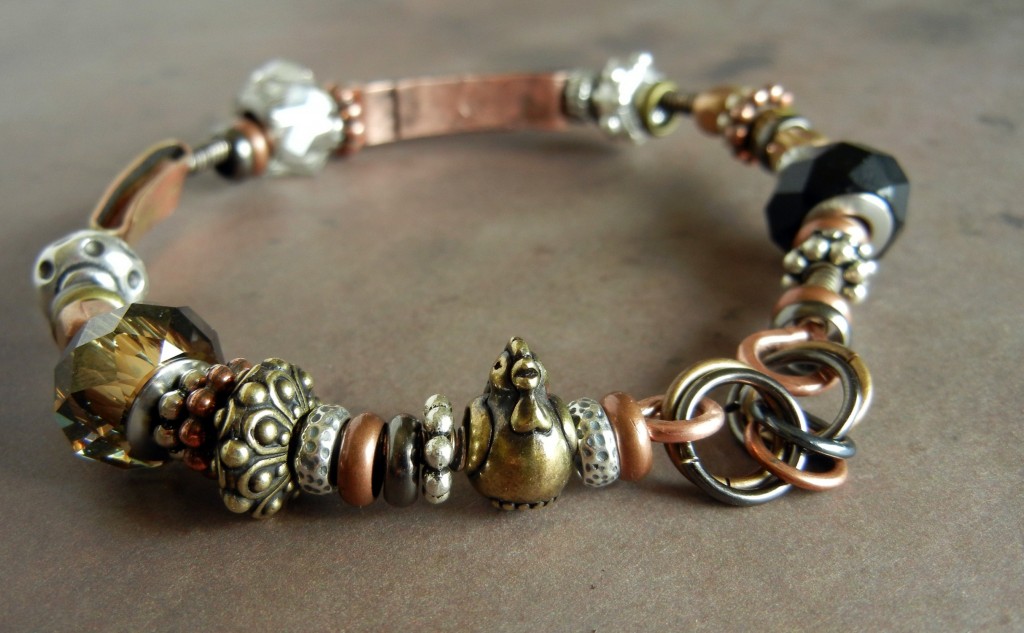
Lindsey used a few jump rings to make her bangle fit her wrist – and a rooster to make it fit her personality!

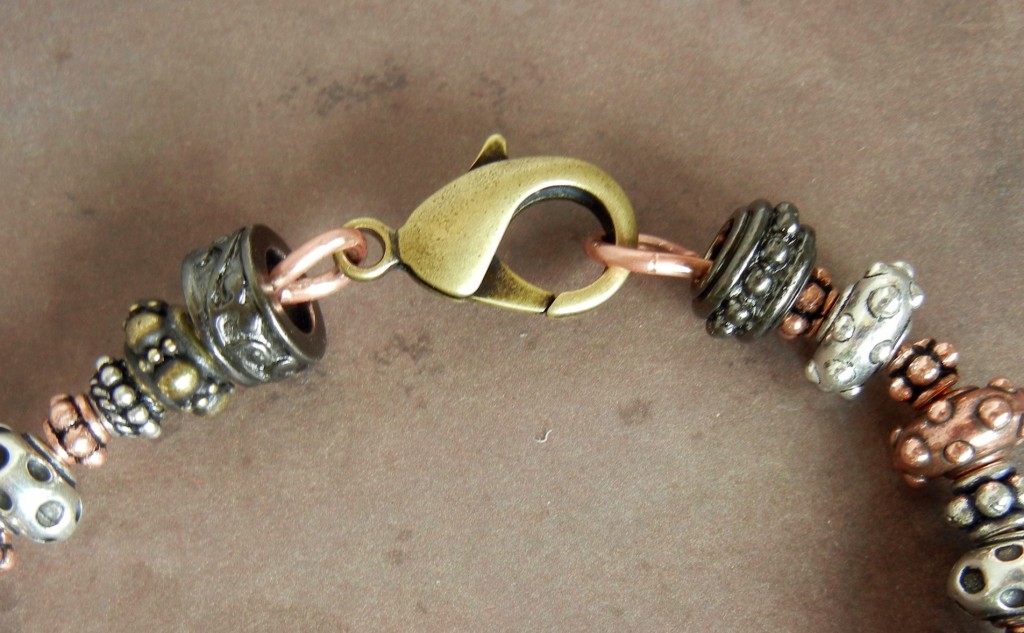
A giant lobster clasp is easy to open/close.

A couple of other bracelet-making tips:

  • Patina your wire, decorative coils and other components before assembling your bracelet.
  • Be sure to file down any sharp wire points or metal edges.
  • Have a whole bunch of beads ready, because once you start, you’ll want to make a bunch!

Metal, metal and more metal!

Check out Tracy’s teaching schedule if you’re interested in learning how she makes stamped word charms to fit on bangles. Our new brass and copper strips will save you a lot of sawing and cutting time!

~Cindy

Wire lashing: an easy way to cover your jewelry with beads or bling!

May 19, 2011
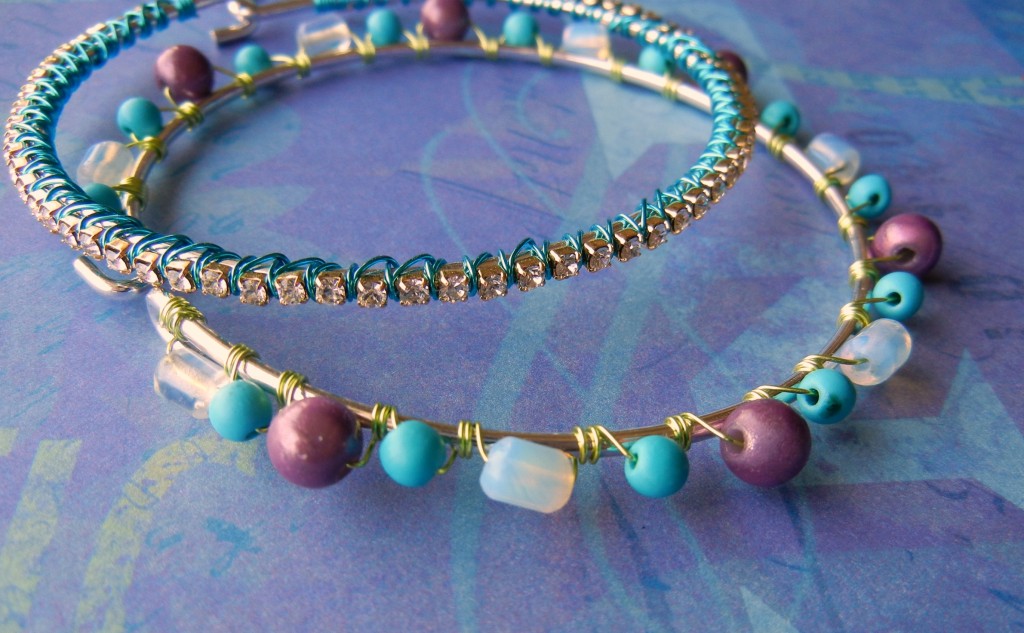
Two wire-lashed bracelets

Artistic Wire + bracelet forms = many many options!

I call this easy jewelry-making technique “wire lashing” to distinguish it from “wire wrapping” – but really, it is just wrapping thin wire around and around a component in order to cover it with beads (or chain!).

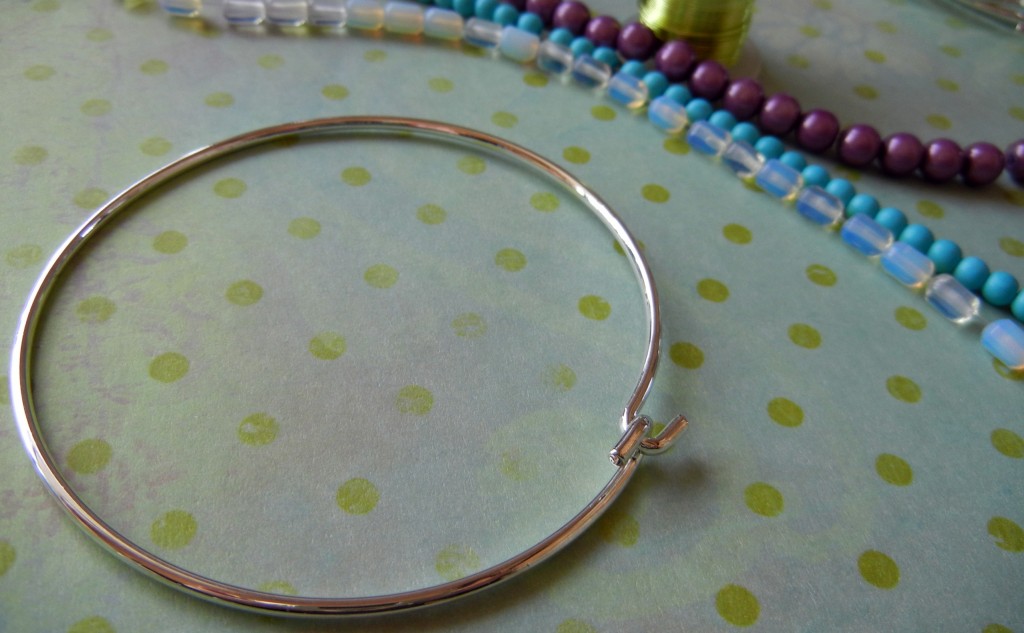
bracelet plain

A plain hook end bracelet is the perfect candidate for a good lashing!

The keys to wire lashing are simple, but oh so vital:

  1. Always begin with a few wire wraps around your base piece (in this case
    bangle bracelets) before adding beads or chain. Rather than trying to wrap the very end of the wire, leave about a 1″ tail so you have a bit of wiggle room.
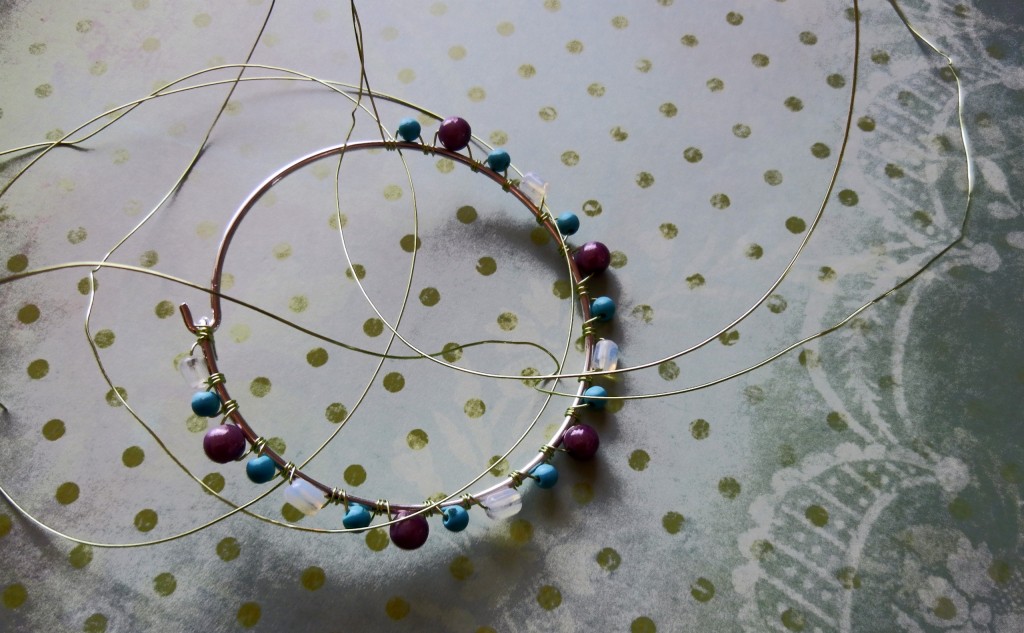
  2. Always keep your wire wraps tight around the item. Pull the entire wire all the way through and around before beginning another wrap. If using beads, lay the bead against the base in the position you want it to end up in before wrapping the wire tight.
  3. Always use two or more wraps between beads to keep everything securely in place.
  4. Always stay calm if (ha – when!) the wire gets kinked or tangled. When it starts getting cranky, take a second to smooth it back out or it will grow into a major mess.
  5. When you’re all done, you can adjust the wraps and beads with your fingers to make it more uniform. Likely there will some wraps that are tighter than others. This is perfectly normal and easy to fix.

I’ve used this technique before on small items (kidney ear wires, links, ear hoops and hair combs) so decided to step up to bracelets today. The only difference is working with longer wire (about 4-5 feet for a typical bangle). You have the option of working with smaller sections of wire and adding new pieces as you go, but I really wanted to use one continuous piece. I did of course kink the wire. Repeatedly.

Looks scary, but this nightmare actually only took a few seconds to correct.

But the nice thing about using one piece of wire is that as you go along, the lashing goes faster and faster until suddenly you realize you are having fun! At the end, you feel so victorious you immediately want to make another. So you do … and realize the wire is too darn long again … but wait, now it is fun again … victory is within reach … This is how addictions start.

I like to use 24 or 26-gauge wire when lashing because it is very easy to manipulate with your fingers. Today I used several colors of Artistic Wire. The beaded bracelet has 6mm purple Miracle beads, 4mm turquoise magnesite and opalite barrel beads held in place by chartreuse Artistic Wire. It was quick and easy to make. However, I started with waaaay too much wire, so it took a little longer to add each bead than was really necessary. Impatient as always, I decided to do away with stringing beads. My next attempt uses rhinestone chain.

Sparkle mania

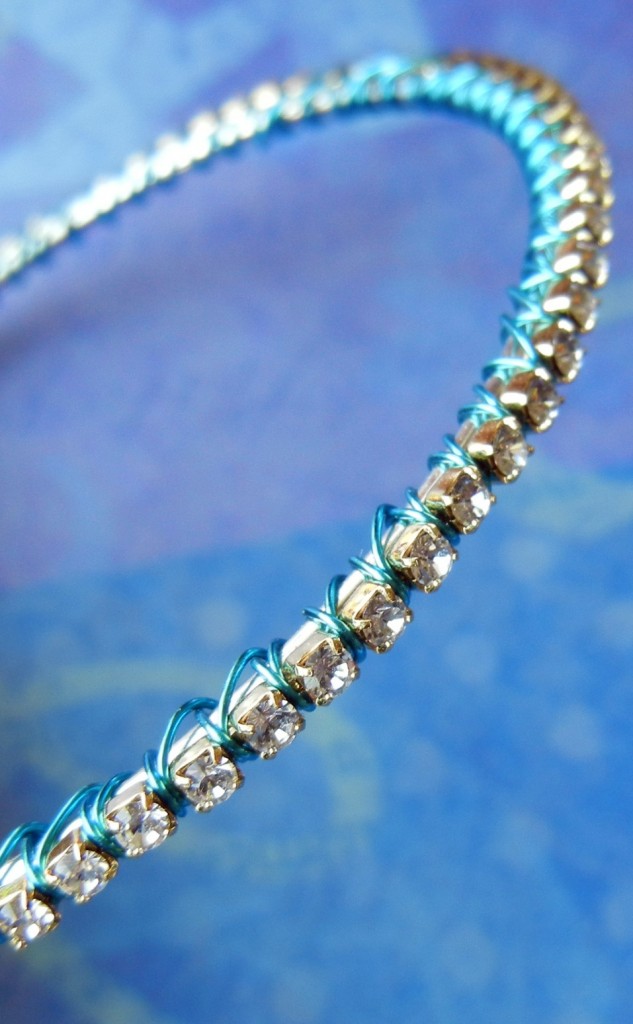
Sparkle mania has never been easier to achieve!

It turns out the 14pp size Swarovski Elements crystal rhinestone chain is almost exactly the same width as the bracelet form, so it stays in place nicely. I think this would be a great girl’s night jewelry project – simple, sparkly and easy to customize by adding some charms or changing up the wire color.

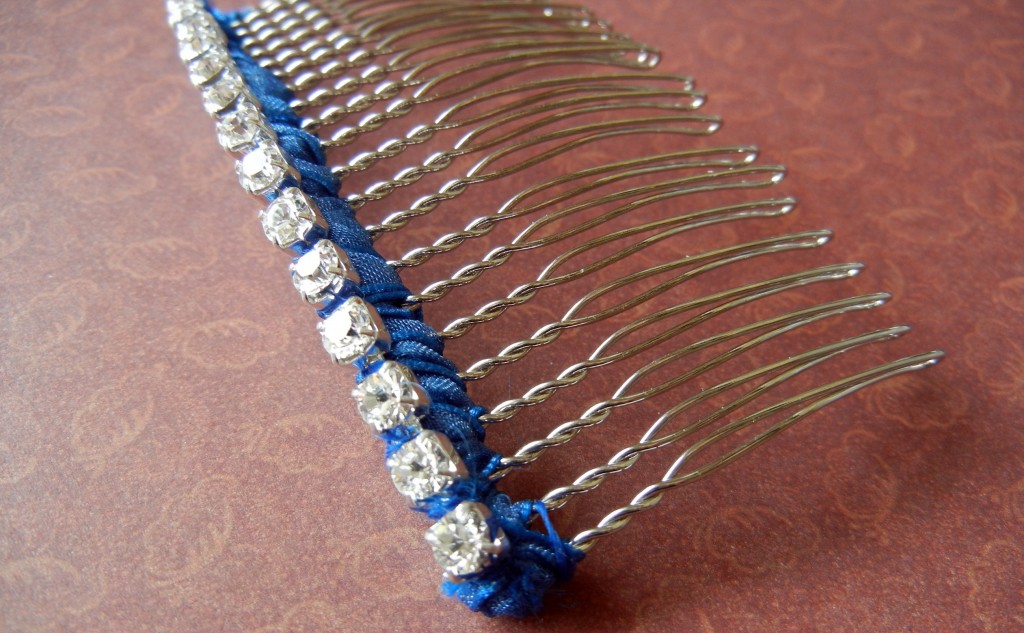
For those of you who prefer thread, check out Toni’s rhinestone hair comb – same technique, different materials.

rhinestone hair comb

Cover a comb with ribbon and rhinestones for easy elegance.

What else can we cover in rhinestone chain? Perhaps an easier question would be what can’t we cover! ~ Cindy

Two ways to color metal using Image Transfer Solution

April 22, 2011
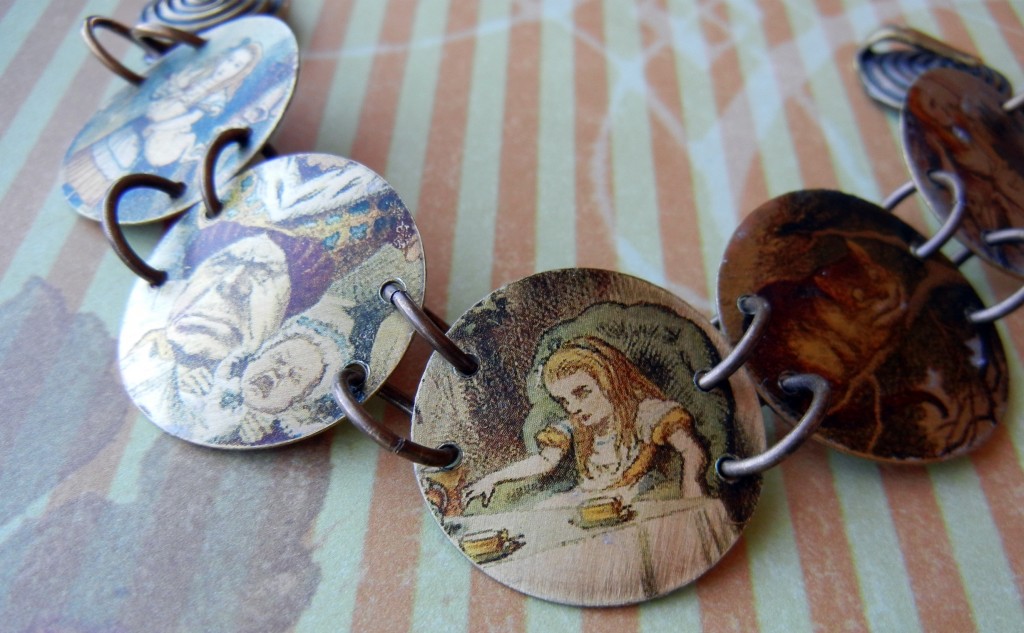
design by sondra barrington

Alice in Wonderland image transfer bracelet

Hi Bloglandia! Last weekend I did a demo in our Spokane showroom on how to use Sherri Haab’s Image Transfer Solution (ITS) and thought now would be a good time to share these techniques for colorizing metal with everyone.

Image transfer is just that – transferring an image from the paper it is printed on to a different surface (in this case, metal jewelry components). Image transfers have a vintage, ethereal feel, and I love how the different colors of metals shine through. Unlike many of the other solvents and processes used for image transfer, Image Transfer Solution (ITS) is non-toxic. Yay! Plus, it has another purpose not even mentioned on the bottle: it is an excellent way to seal colors onto metal (more on that in a bit).

Transferring Images – ITS Method #1

One caveat: The images you use must be printed on a laser (toner based) printer. Ink jet pictures will not work. The pictures can be black or white or color. Photos and text should be reversed before you print, since transfers will be mirror images.

To be honest, I did not like ITS the first couple of times I tried it. I kinda hated it. Following the directions on the bottle, I prepped my metal with steel wool and heat-set the images in a 325 degree oven – just like it said! – but things just kept going wrong. Either my images would wash right off the metal or the paper would be so very stuck to the metal that no amount of scrubbing would remove it. But I loved the concept, so I kept playing with it. Below is my own method for using ITS. Maybe the package directions will work like a charm for you. If not, I hope my tips and tricks help:

  1. Scuff up your metal (aluminum, brass, copper and silver all work great) with a medium grit sanding pad or sand paper. Steel wool leaves the surface too smooth, in my opinion.
  2. Wash metal with rubbing alcohol to remove dirt, dust and oil – even if it looks clean!
  3. Using a clean, dry paintbrush, evenly coat the prepped metal with just a couple of drops of ITS.

  1. Press image face-down onto metal and press firmly into place to remove any air bubbles. ITS is like glue – you will not be able to reposition your paper at all, so be careful to place it where you want it! Let dry. Use an iron (high heat, no steam) to heat the metal for 1 or 2 minutes. Don’t worry, the paper won’t burn. Let metal cool.
  2. Place the metal into water and using a gentle circular motion, begin rubbing the paper off, leaving the image behind. Don’t get to aggressive or you could lift off parts of the image. Patience pays off here.
  3. After most of the paper is removed, use a sheet of polishing paper and more water to remove the finer paper fibers.
  4. After all of the paper is removed, seal the image with a dab of Renaissance Wax and a soft cloth. It really improves the luster.
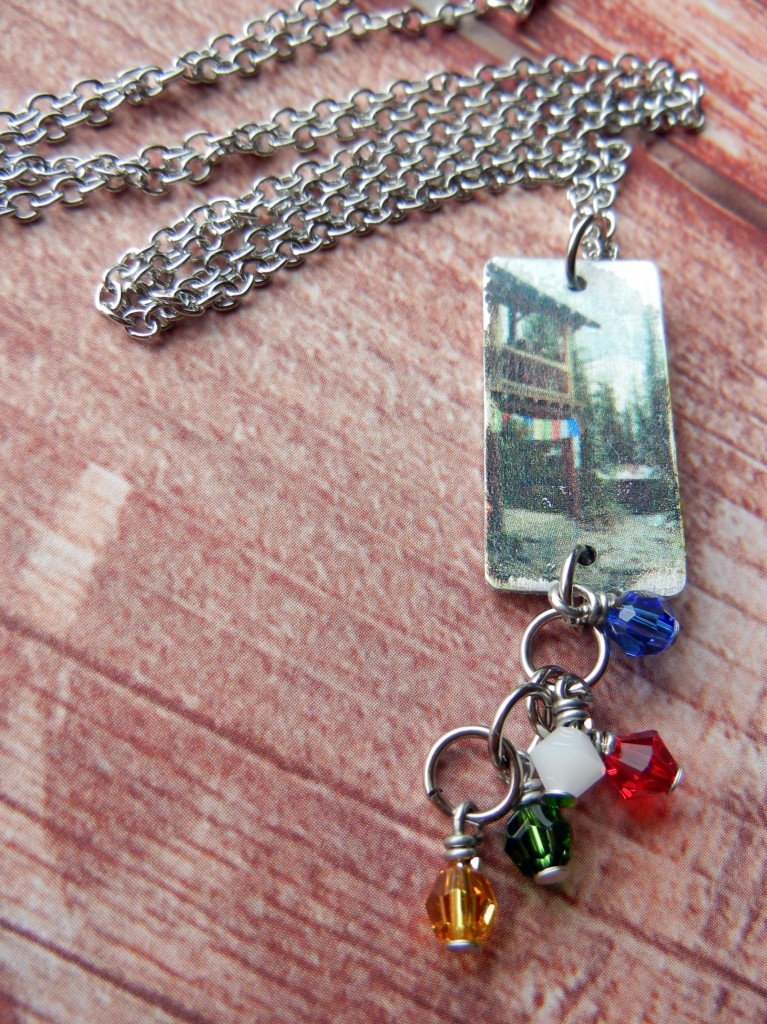
image transfer necklace

My photograph looks like a vintage postcard after being transferred onto aluminum. The Swarovski beads are the same colors as the prayer flags hanging on the mountain tea house.

Complete your jewelry piece! The image is permanently attached. You can even punch holes or dap the metal and it won’t come off!

Sealing Colors – ITS Method #2

Image Transfer Solution can also be used to permanently seal inks onto metal! Ranger Adirondack Alcohol Inks are tons of fun to mix and blend onto non-porous surfaces, like metal, but since they are ink, they can be rubbed or washed off. That is, unless you seal them with ITS. When you heat-set ITS, it binds the color to the metal. It will not wash off or bleed onto your customer’s skin.

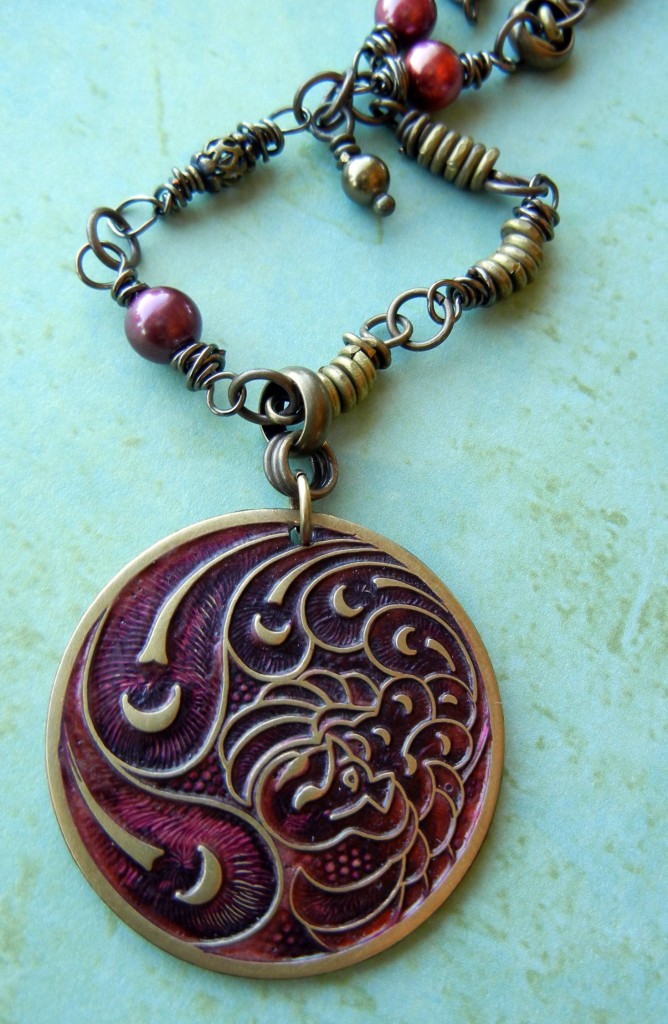
design by sondra barrington

Vintaj fussy peacock pendant colorized with alcohol inks for a faux enamel look.

You can color your metal with alcohol inks and then, after they’ve dried, paint a thin layer of ITS over the top. Another option is to mix the ITS directly with your inks (just a few drops of each) and paint that mix onto your metal. Either way, once the ITS has dried, you need to heat-set it to make the bond permanent. Just follow the directions on the Image Transfer Solution package for using an oven to heat-set (the iron won’t work for this application).

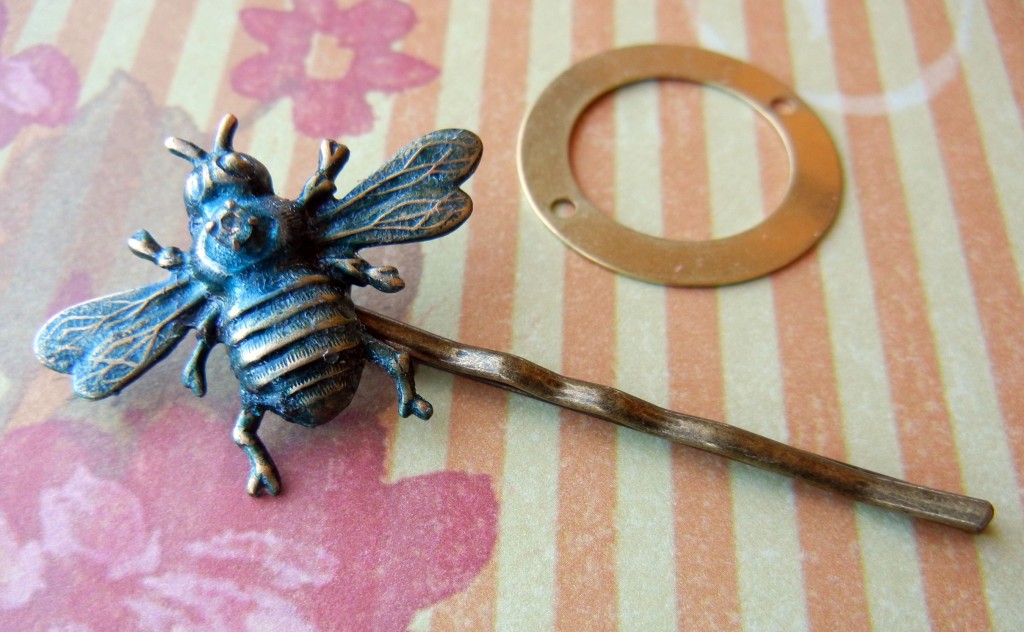
Looks like patina – but this blue bee was colored with alcohol inks.

There you have it! Two tried and true methods for permanently coloring your metal pieces for jewelry and other applications. Although this post focused on metal, Image Transfer Solution can be used on polymer clay, etched glass and other surfaces too! Since it really only takes a couple of drops per image, you’ll have plenty to experiment with! ~ Cindy


PS: here are some handy links to some other how-to‘s in the Rings & Things blog!