I recently got a chance to play with copper solder, and I LOVE it! This awesome copper solder is 7% phosporous (and 93% copper), which makes it self-fluxing. It flows and melts around the same temperature as hard-grade silver solder, so you can easily solder links, small bezels, and other basic joins with a butane micro torch.
Add color and shine with Gilders Paste
February 4, 2013Gilders Paste, trying various methods and materials, and deciding I like it!  Rings & Things has added an assortment of colors. Each tin is 1.5 oz of wax-based medium, and is enough to cover 30 square feet of metal, wood, resin, et cetera. You can apply Gilders Paste with a cloth, cotton swab, or fingertip. Thin with paint thinner, turpenoid (but not turpenoid natural) or mineral spirits to transform the highly concentrated Gilders Paste for brushing, sponging, staining, washing or spray painting. I suggest having the following tools handy when you plan to colorize with Gilders Paste:
- Soft Rag (an old cotton t-shirt worked well)
- Baby Wipes
- Small Mixing cup
- Disposable (cheap) small paint brushes
- Palette
- Stir Sticks
- Mineral Spirits – from the hardware or craft store.
- Non Stick Craft Sheet
- Apron
I don’t really mind getting my hands dirty. I didn’t have the foresight to use a craft sheet, so the table was gilded along with the objects. After I was done, the plastic table cleaned up good as new with some mineral spirits, and my hands cleaned up fine with soap and water. If you are more particular (and don’t want any gilding of your fingernails), you may want to wear latex or nitrile gloves. Drying time varies depending on substrate and surface preparation, approximately 60 minutes to the touch on dry debris-free surfaces and 12 hours for complete cure time. If polishing or burnishing is required, allow 12 hours drying time. Rubbing the base coat immediately after application with a dry cloth or slightly wet with thinner will remove Gilders Paste from the relief detail and highlight depressed details. Lightly brushing Gilders Paste over the top will highlight the relief details. This is patina color on a reproduction Ching dynasty coin. I scraped a little paste out of the tin, and then wet the paint brush with mineral spirits and mixed it together on the palette until I had a paintable consistency.  I put on a fairly thick coat.
  After an hour or so, I buffed off the excess paste, and this was the result (with a un-gilded example for contrast).
  This is a nice use of the Gilders Paste for faux aging. The color was a bit paler than I hoped for so I mixed some African bronze paste into my patina color.
  I painted a new layer of paste onto the opposite side of the coin, and the new color was more to my liking.
  This is a filigree cross in antiqued copper plating, which I colored with verdigris Gilders Paste. For this color, I still mixed in the mineral spirits, but I applied the color with a stir stick.
  After drying and buffing, the verdigris color is subtle, but it counters the reddishness of the copper metal.
  This color was nice, but I wanted a bit more shine, so I layered german silver Gilders Paste over the verdigris.
  Here is the filigree with the metallic layer lightly buffed off, and the original plating for contrast.
  Too much of the verdigris was covered now, so I went back in for a 3rd layer, verdigris paste on top of the previous two applications. After some more drying and buffing time, this was my final result:
  My next experiment involved resin flowers. I was curious about the results on a highly dimensional, non-metallic item. I thinned out violet Gilders Paste, and applied it to 3 colors of resin flower with a paintbrush.
  After drying, this was too tricky to just buff with a cloth, so I touched up the high points with my cloth, and then used a dry brush to remove excess paste from the crevices. The two lower flowers are un-colored. The flowers with the paste have an almost velvety look to them.
  This is another antiqued copper plated filigree. The piece on the right has iris blue Gilders Paste applied directly with a cloth. The piece on the left has been layered. White Gilders Paste on the filigree makes the iris blue top layer more visible. Both of these are dried and buffed.
  Next I tried colorizing some silver plated wavy disk beads. I thinned out the iris blue and damson pastes, and applied them to the beads with a brush. This is after buffing, with a shiny bead in the center for contrast. The lighter the metal color is to start with, the greater contrast the paste seems to make.
  I tried out the rusty red pinotage color Gilders Paste on both silver plated flower charms and antique brass filigree. This was my chance to paint the flowers red. For these items, I added a bit of mineral spirits to my brush, and conditioned some of the paste directly in the tin.
  Lastly, I wanted to mix colors, as opposed to layering them. I mixed the pinotage with the German silver Gilders Paste in the palette. Both of these colors happened to be creamier than some others, so I didn’t need to thin them down. I applied this mixture by brush to a raw brass filigree and got a lovely metallic pink finish.
  The manufacturer says Gilders Paste will be permanent in 24 hours. It will accept an over coat such as clear lacquer, varnish, urethane, or powder coating to achieve a uniform appearance where the paste was not used, or to provide further durability to areas where repeated handling is required, such as a door knob. Due to the anticipated increased wear for jewelry, I tested 4 different products for sealing Gilders Paste.
The first 3 sealers all worked great. The spray sealer was the easiest to use, but the fumes from it can be quite obnoxious.  I sealed one of the filigree crosses with the glaze, and the other with glossy accents. To me they look identical.
  The renaissance wax, however, provided unanticipated results. Due to the cleaning components of this product, it stripped most of the color from the item I applied it to. The disk on the left was the original gilded iris blue wavy disk. The disk on the right has had renaissance wax applied, which lightened the color. It is good to know that this may work to lighten a color without fully removing it if that is ever your desired effect.
  Be aware that the consistency of this product will vary from color to color and from tin to tin. If you have a tin with creamy consistency, enjoy it. If the product is crumbly, (whether it came that way, or you left the lid open) don’t ever consider it “bad”. You can re-constitute the paste with mineral spirits, a few drops at a time. So, having tried Gilders Paste, I’m hooked. Now I need to figure out what colors to buy to start my collection. ~ Rita
EnCapture Artisan Concrete
February 4, 2013We tested the new EnCapture Artisan Concrete Kit!
This “unique texture-rich medium for jewelry making” is designed for embedding treasures such as glass, gemstones, metal, buttons, wire and beads to create visual interest and contrast. Here are some tips for using it!
Mixing: We found the easiest way to mix the concrete was making a slurry (or thin paste) by putting a small amount of the base material in the mixing cup and adding the activator. To the slurry, mix in the base material and pigment incrementally until you have achieved the desired color and consistency.
Application: You can extend the life of your concrete while you are working by covering the mixing cup with a damp paper towel. We recommend you remove excess concrete from your embedded treasures as you work using a damp paper towel, cotton swab or toothpick. It is easier to remove when it is moist than after it starts to dry.
Hamsa Hand in Heart Mosaic Necklace – Tutorial
Finishing Touches: If you do not like large grains of sand from the concrete being visible in your design, you may be able to bury them by gently poking them down into the wet concrete with a toothpick.
- The kit
- Bezel Cups (for this concrete product, deeper bezels work better than shallow bezels)
- Resin & Jewelry Clay Tutorials
Modern Tassel Earrings Tutorial
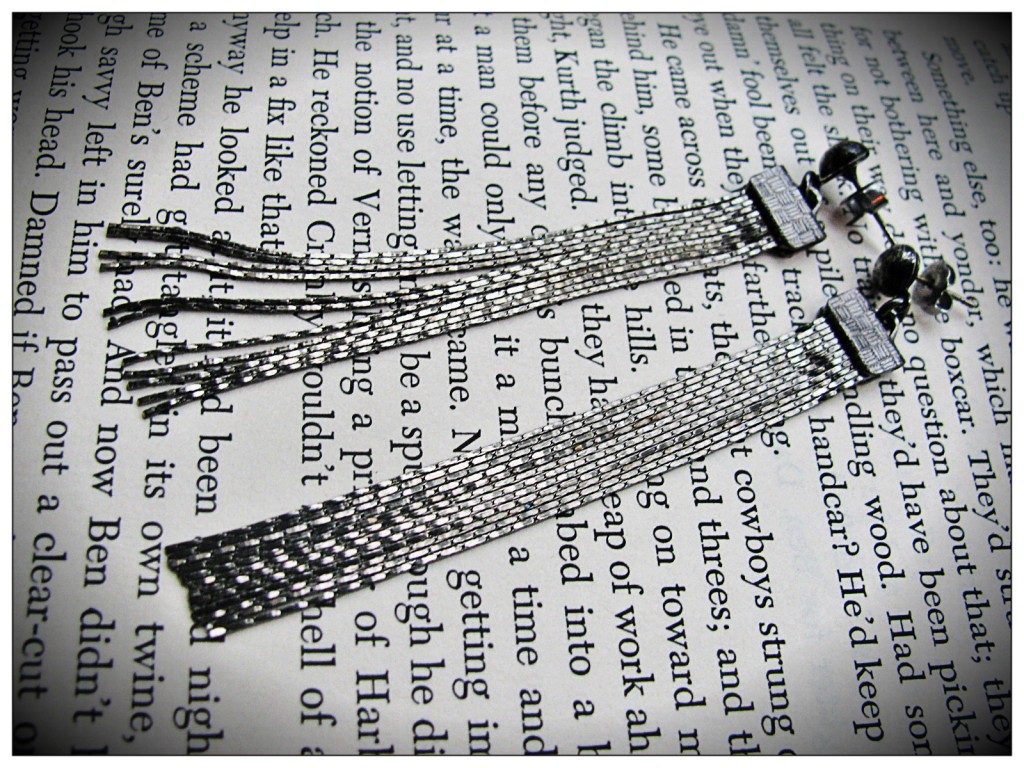
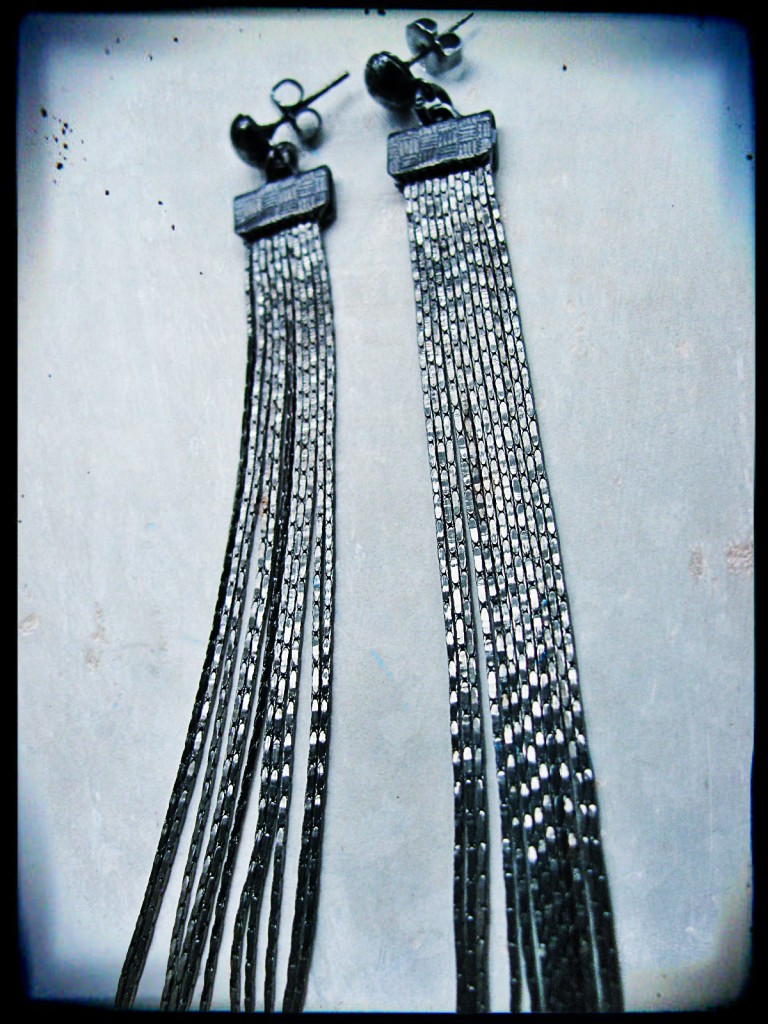
November 1, 2012Hello everyone! Tiffany here with a fun tutorial for you! With winter approaching, I find myself putting away my bright and airy spring and summer jewelry and replacing it with darker, fancier neutral pieces. I want jewelry that can easily go from the office to after work cocktails. Tassel earrings have always been a favorite of mine. I especially love the way tassel earrings move with you, catching the light. Recently, I have seen modern tassel earrings similar to these at high end department stores. Being a jewelry maker, I of course wanted to make my own version. Beading chain was the perfect material to make these earrings, because it really reflects the light. After a little trial and error, I have come up with a fairly easy way to re-create this designer look from home.
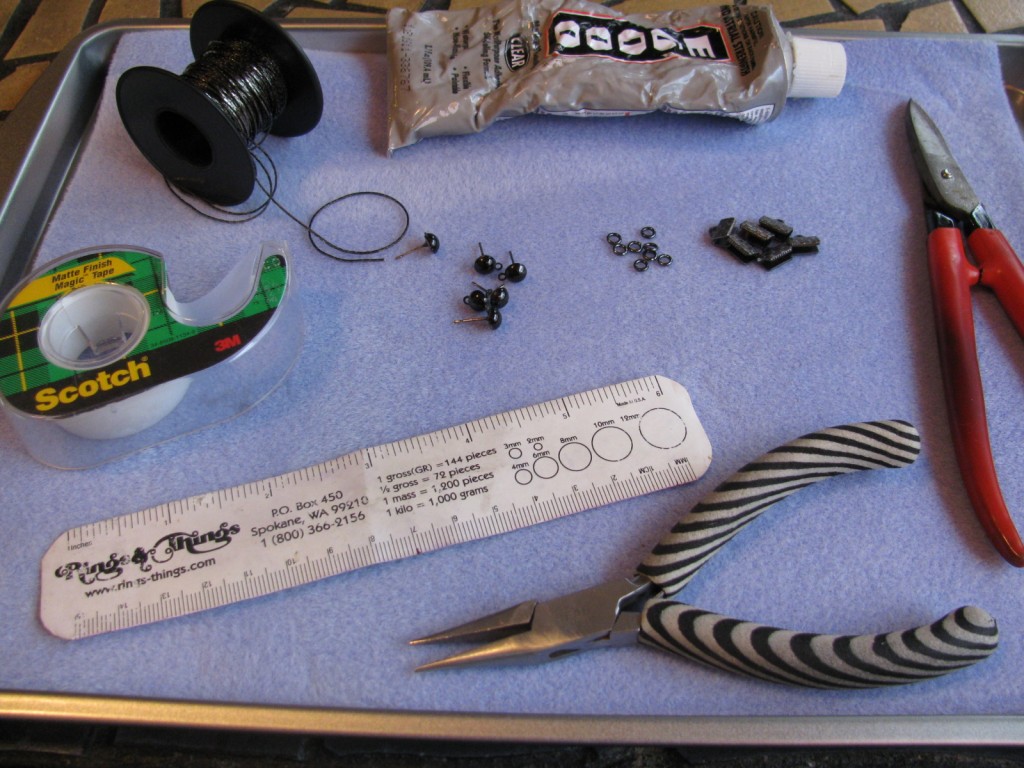
Everything needed to make these earrings. Look below for close-up photographs of all the items. Fun tip: I use dollar store sheet pans lined with bead mats to create all of my projects. They stack easily to neatly store all your on-going projects.
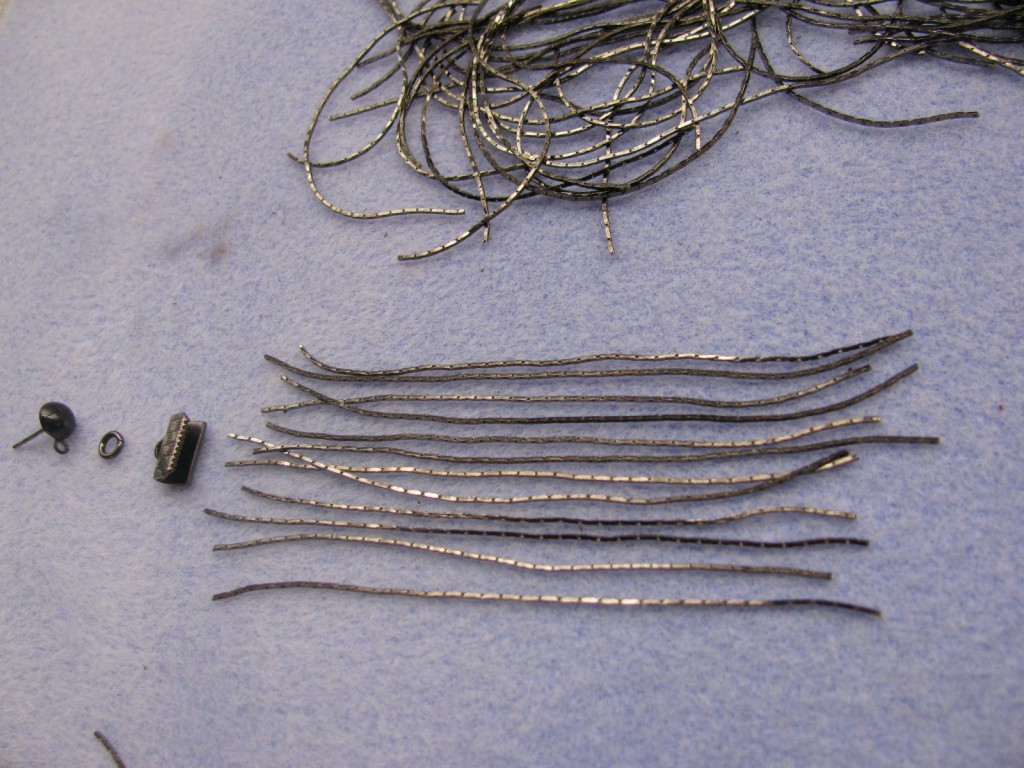
The supplies needed are the following:
- A ruler
- Gift wrapping (like Scotch) tape
- E-6000 adhesive
- Chain nose pliers
- Metal shears
- Post earring findings with loops
- Small jump rings (3-5mm range)
- Beading chain
- Ribbon ends, 10mm preferable
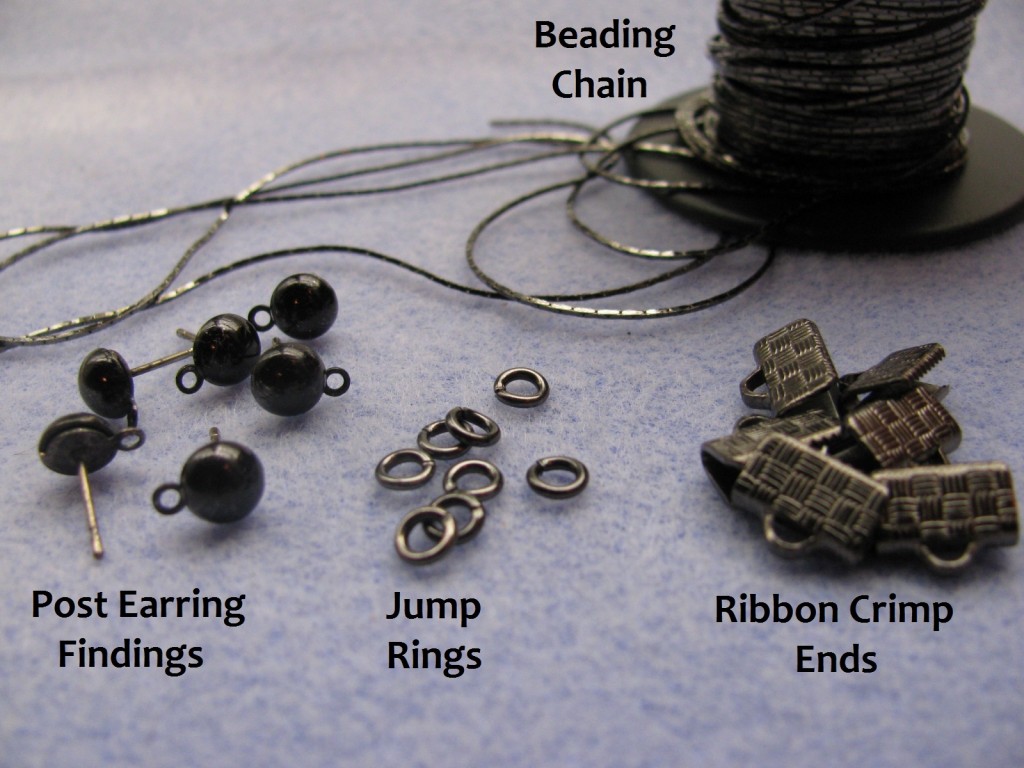
I used gunmetal beading chain, jump rings and ribbon ends. For the post, I used white finished ones that I gave a patina with Novacan Black patina solution, so they would match better.
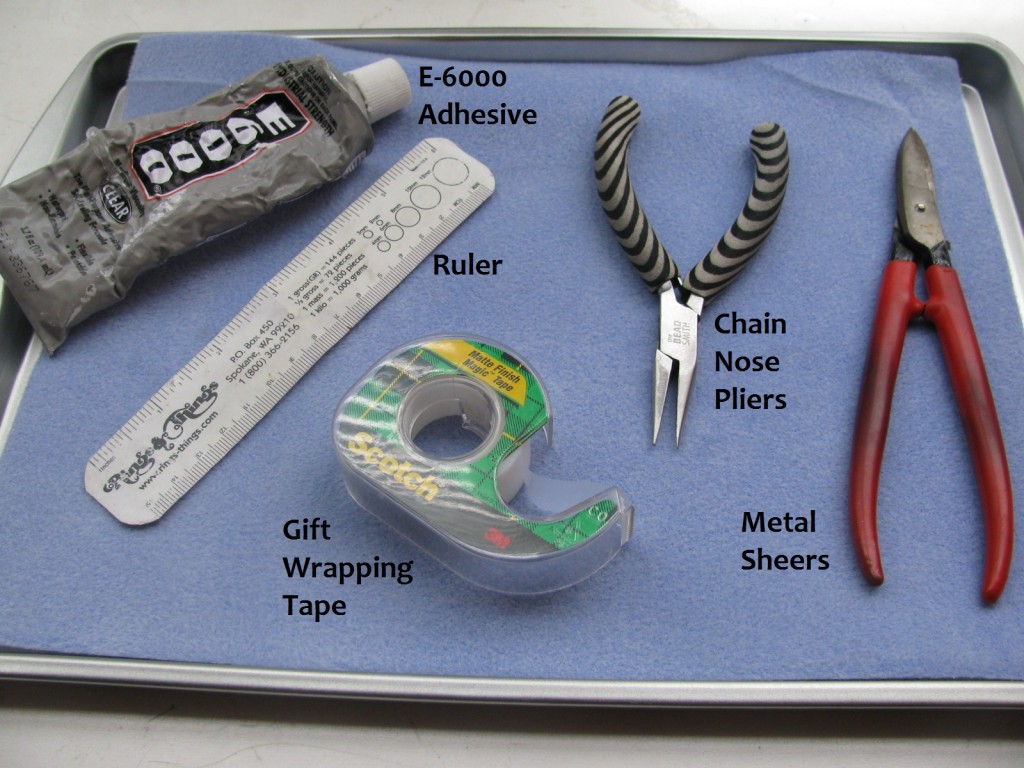
Tools and supplies needed to complete these. Pardon the condition of my E-6000, it has seen better days. Ruler, E-6000 adhesive, tape, chain nose pliers, and metal shears.
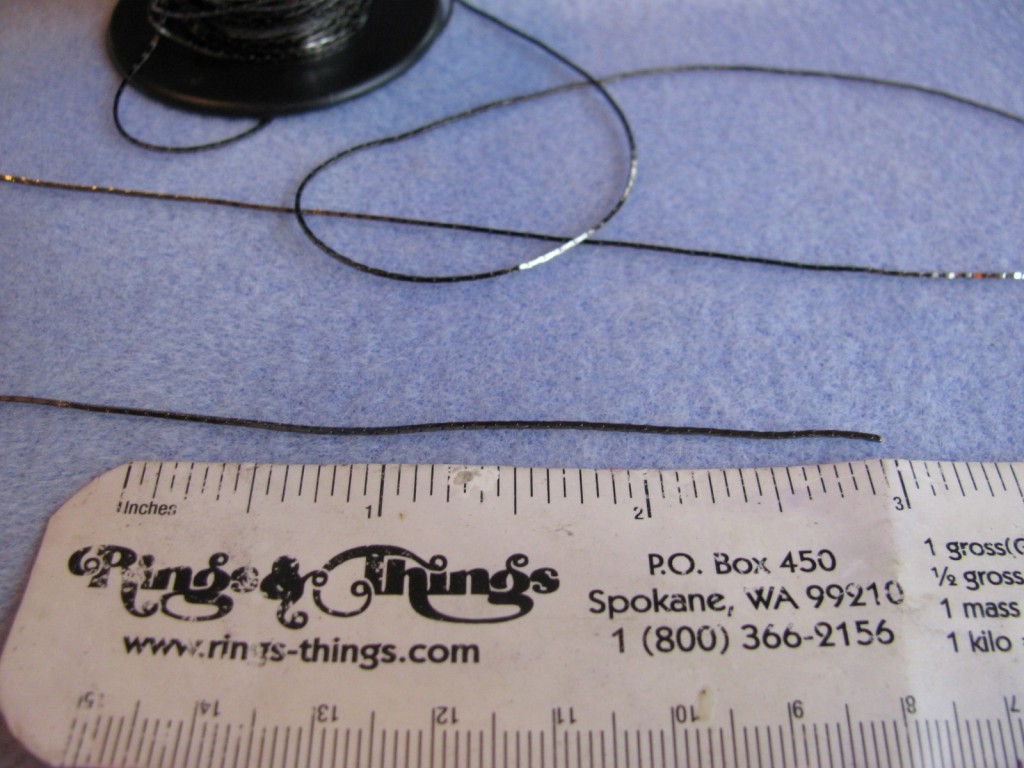
Use your ruler to decide how long you want the tassels to be on your earrings. Note, that you will lose about 1/2 inch when trimming the tassels. I found 3 inches was the perfect length for me.
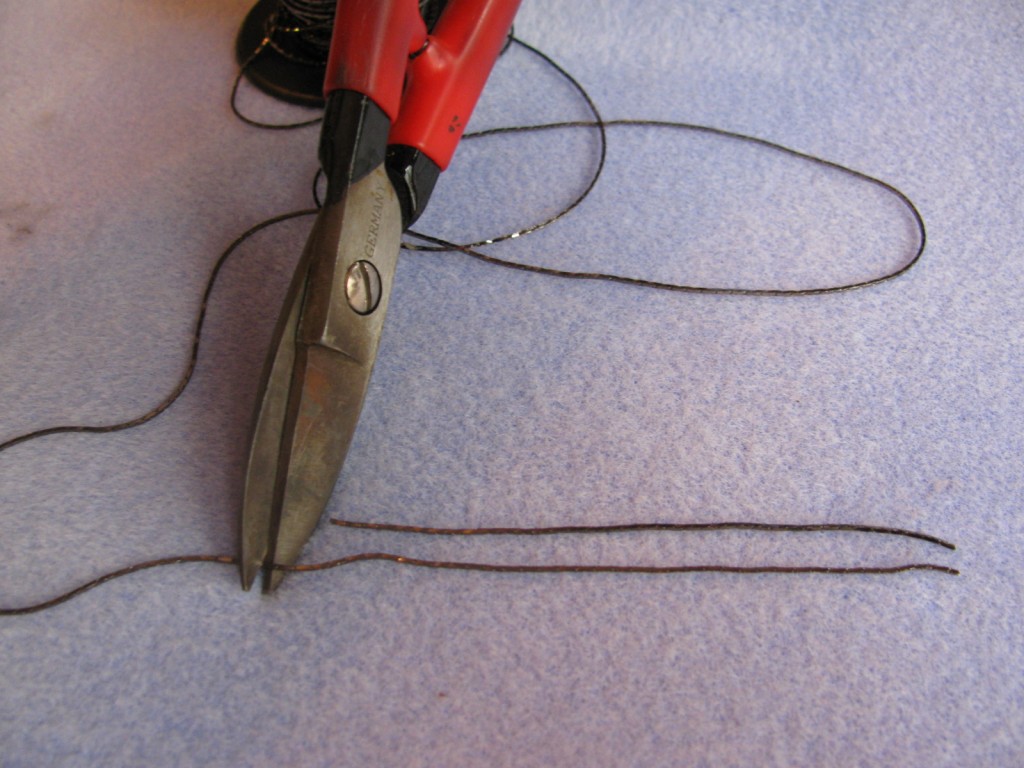
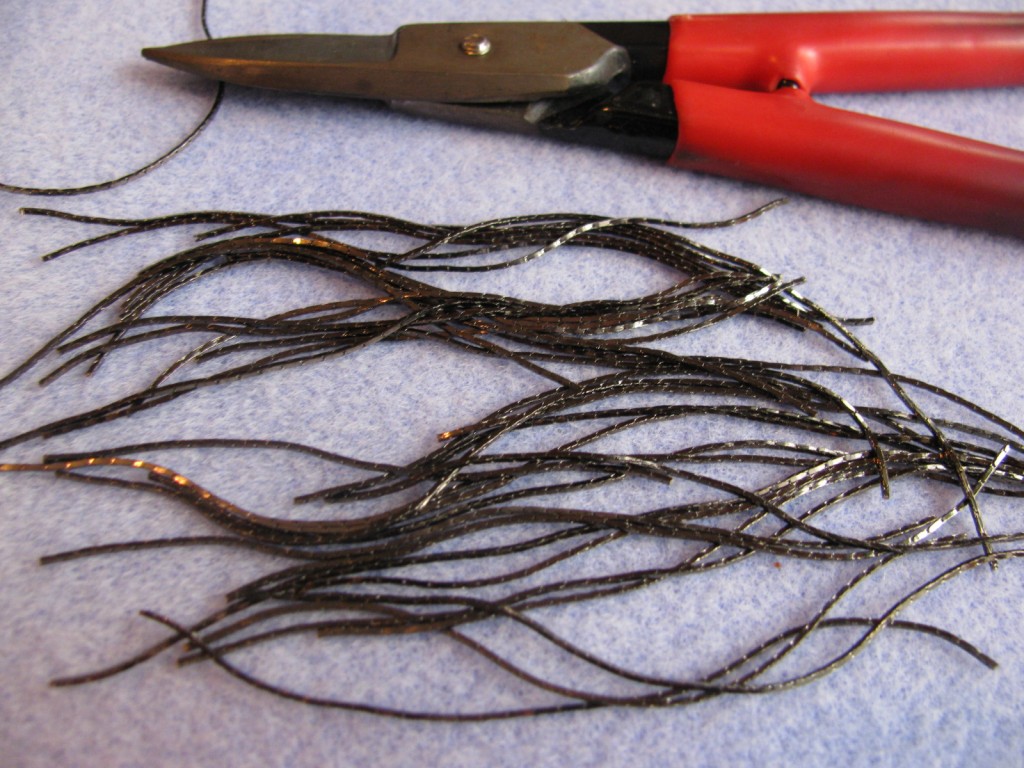
Use your metal shears to cut the beading chain. Once you cut one, you can ditch the ruler for now and just measure each additional piece by holding it next to the first piece.
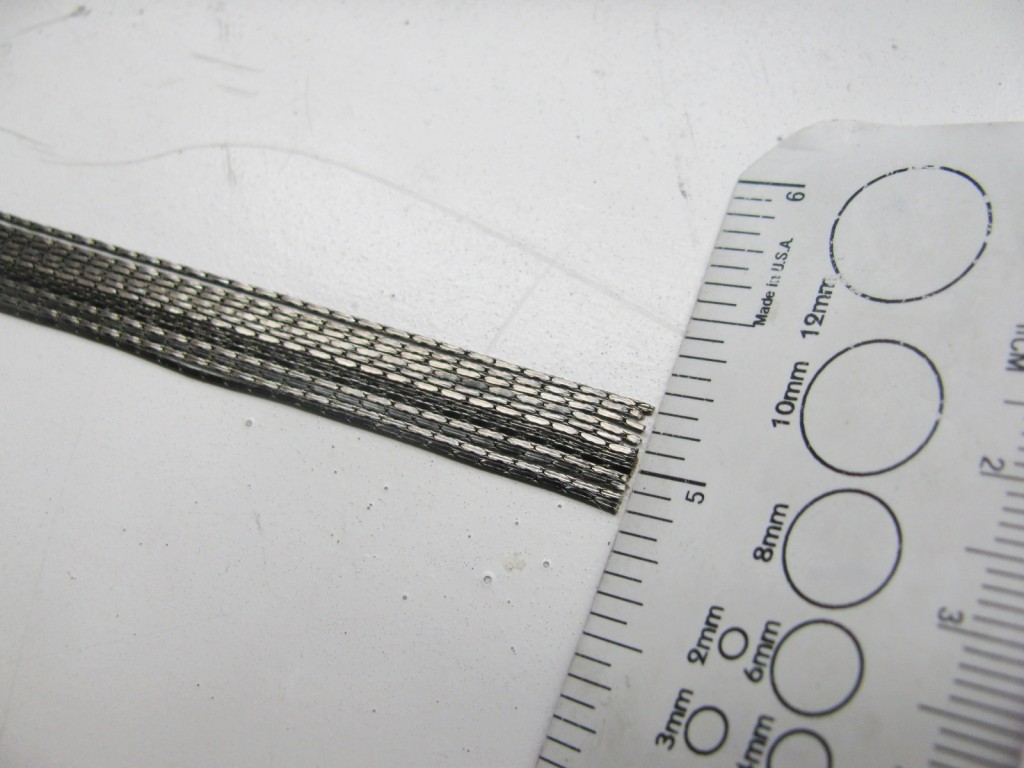
Use the edge of your ruler to tidy up the twelve pieces of beading chain. You want the pieces to be as flush as possible at the end, and snugly next to each other.
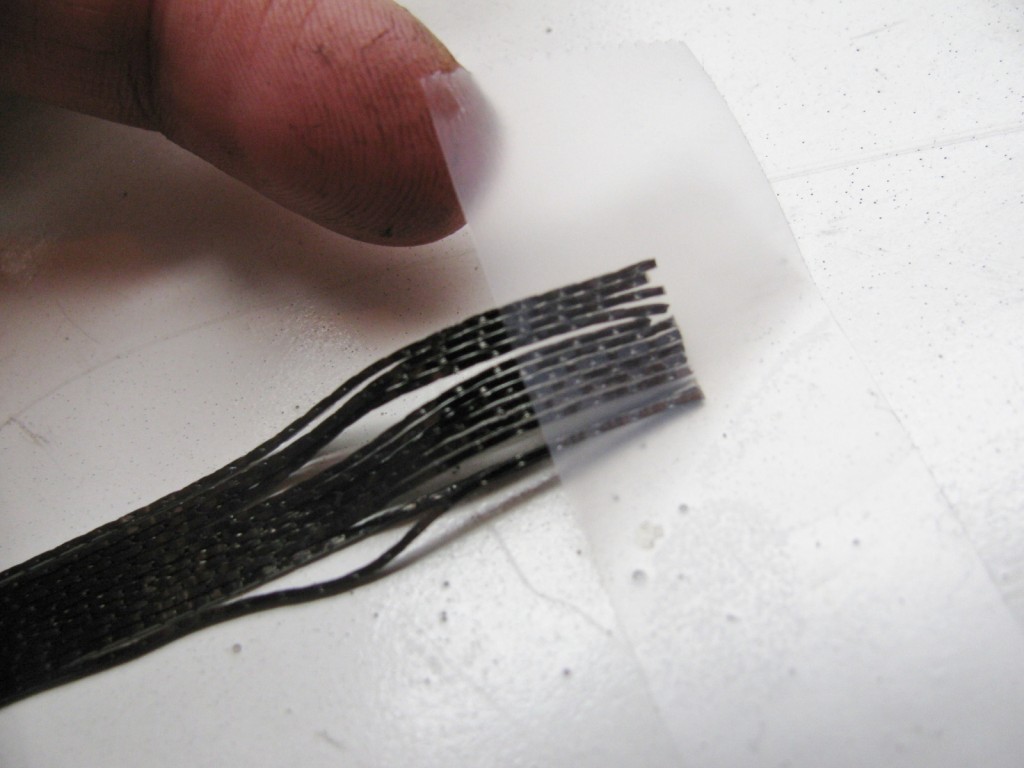
Take a small piece (about an inch) of gift wrapping tape and gently place it on top of the beading chain ends. The tape is not what will ultimately hold the chain, it is just to hold it together so you can use adhesive.
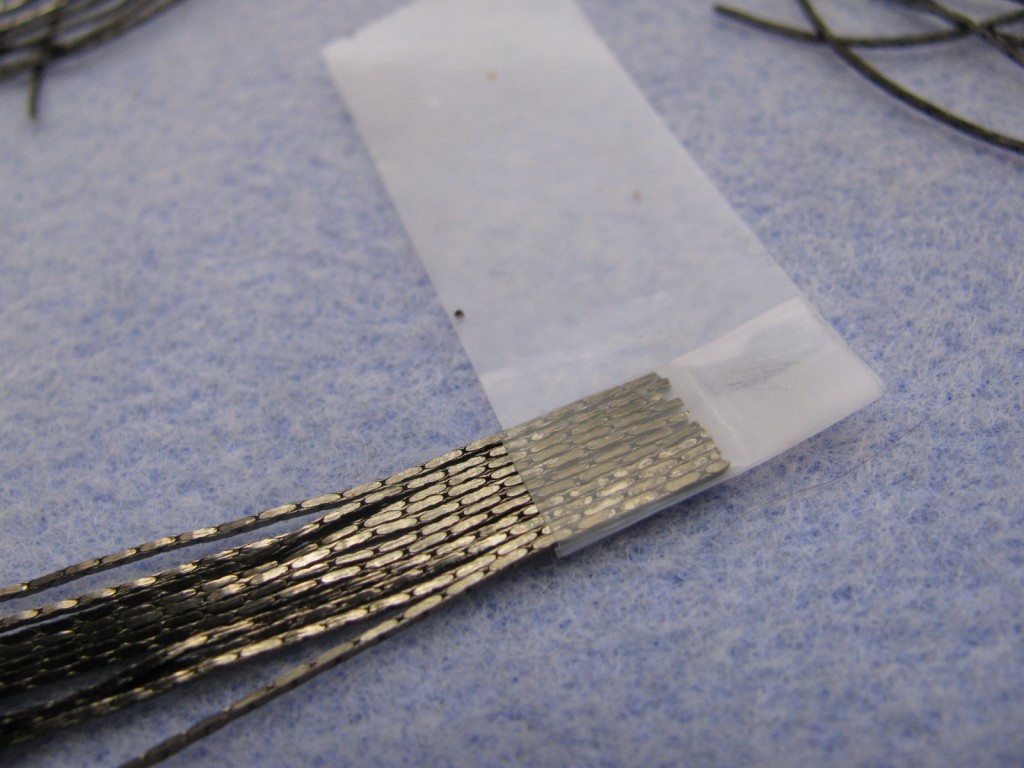
Wrap the tape around the ends, securing it by overlapping it once. Cut the excess tape and press closed.
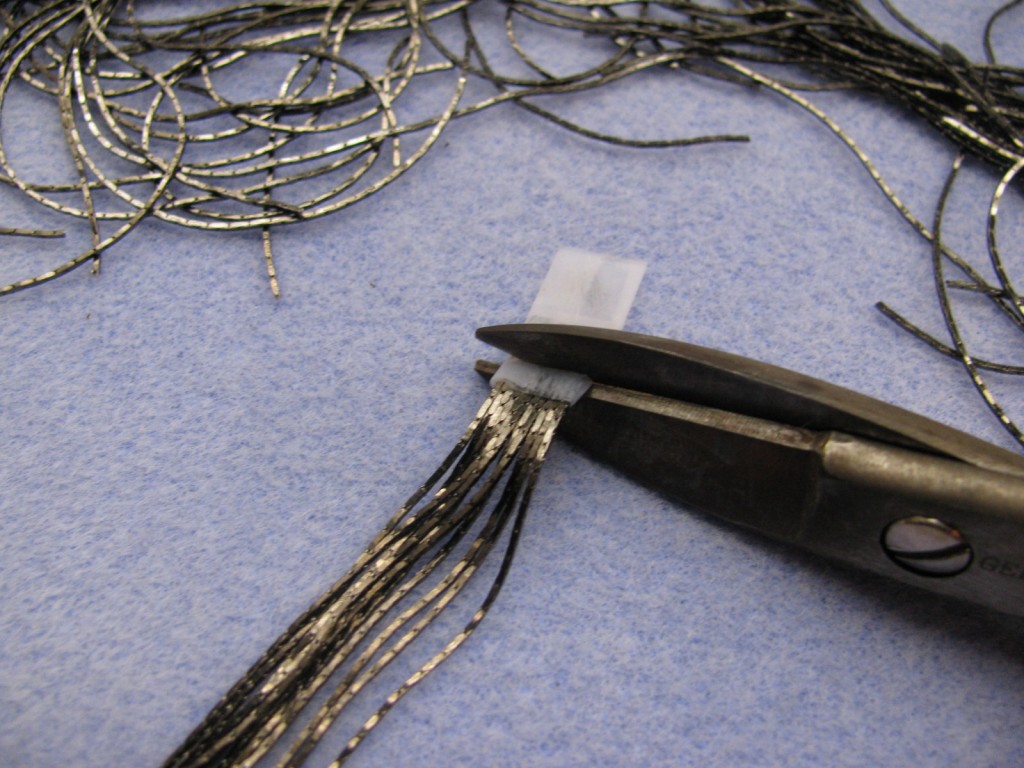
Use your metal shears to trim the ends of the tassel where the tape is. You want to leave only about 1-2mm of the taped section. Just enough to keep it held together. You don’t want any tape to show after you put the ribbon end on.
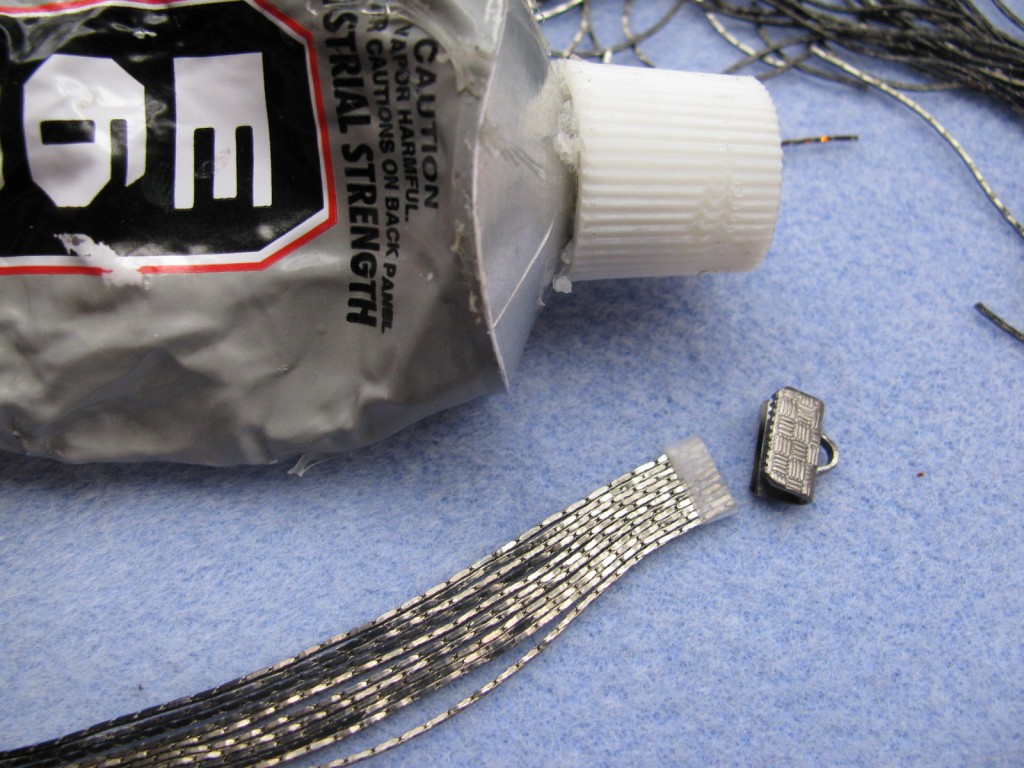
Place a thin line of E-6000 glue across the top of the tassel. Make sure that there is some of the glue touching all the pieces of beading chain.
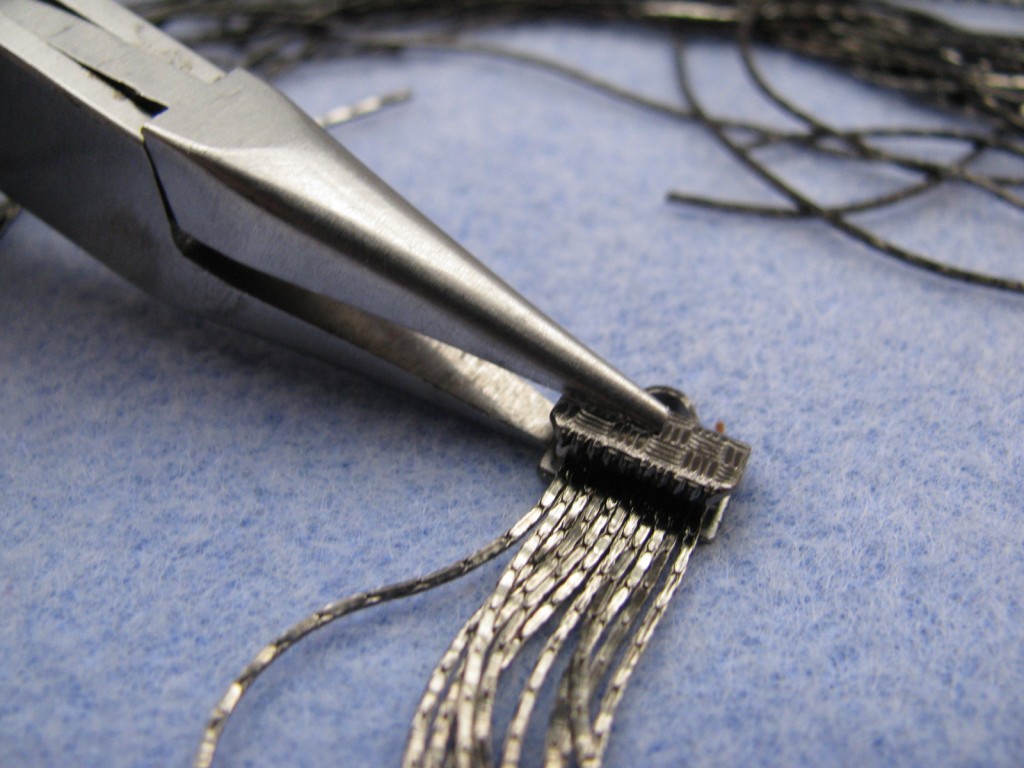
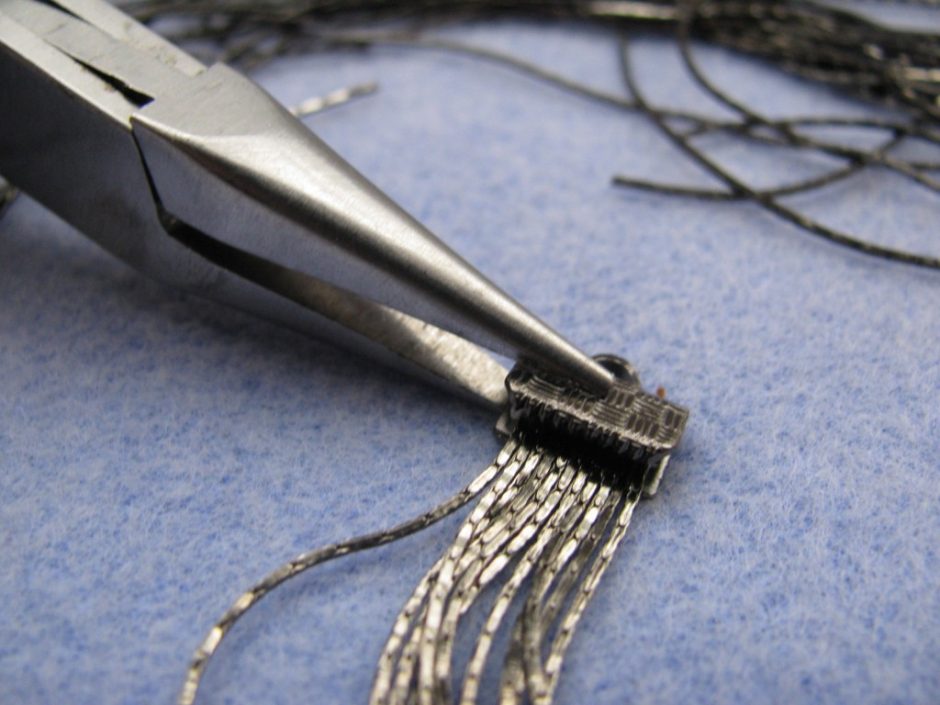
Place the ribbon end over the end of the tassel, where the glue has just been placed. Make sure the ribbon end is centered over the tassel, then pinch it closed with your chain nose pliers. Do this carefully because if you clamp down too hard it can spread the beading chain out of line.
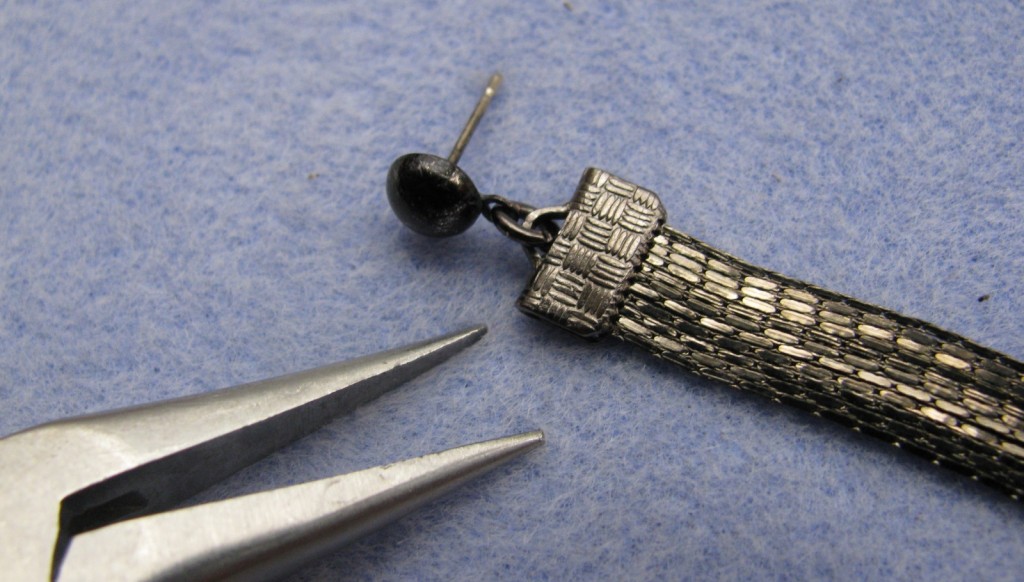
Use your chain nose pliers to attach the post findings with a jump ring. You could of course also simply add french wires to the end of your ribbon ends. Let the earrings dry overnight to be safe before wearing them out.
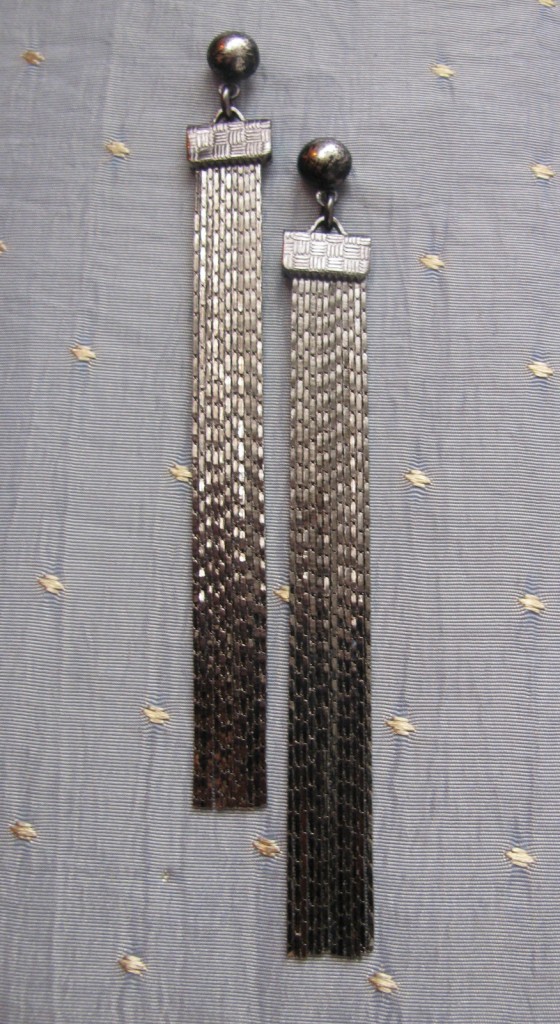
If needed, trim the bottom of the tassel earrings with your metal shears so all the ends make a straight line. Also hold the two earrings next to each other to make sure they are the same length and trim as necessary.
Well, I hope you all enjoyed this tutorial! Please feel free to ask me any questions about how I made these!
Thanks!
TIffany
Gemstone and Leather Cuff Bracelet Tutorial
September 24, 2012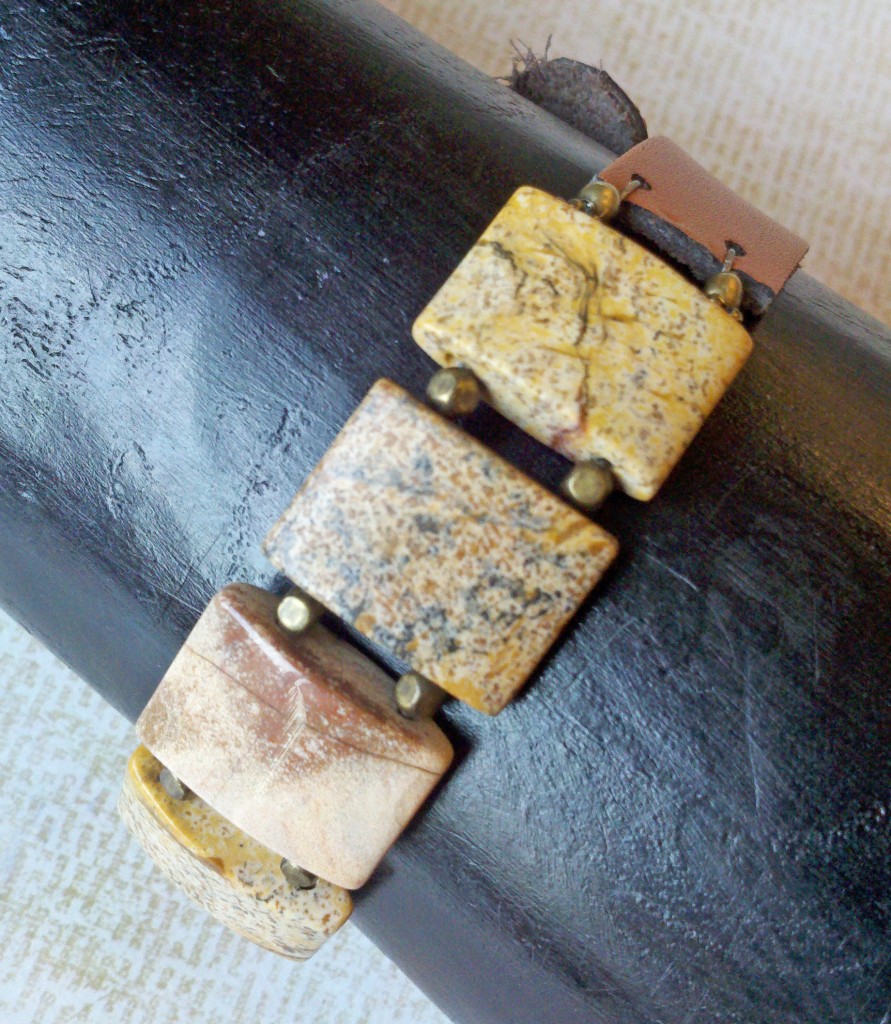
Gemstone & Leather Cuff Bracelet, simple & fun!
How many times do you open up a magazine and see photographs of adventurer type models wearing simple, but chic leather jewelry? I see it quite often when I’m thumbing through the usual magazines at check out while I’m shopping. It’s easy to see why these types of bracelets are oh, so trendy. They’re simple, stackable and easy to customize! Plus leather is pretty durable if you’re like me – a little too hard on your jewelry.
I’m going to show you just how easy it is to make this bracelet in a few photographs!
The Man Cuff: How to make a Manly Etched Metal and Leather Cuff
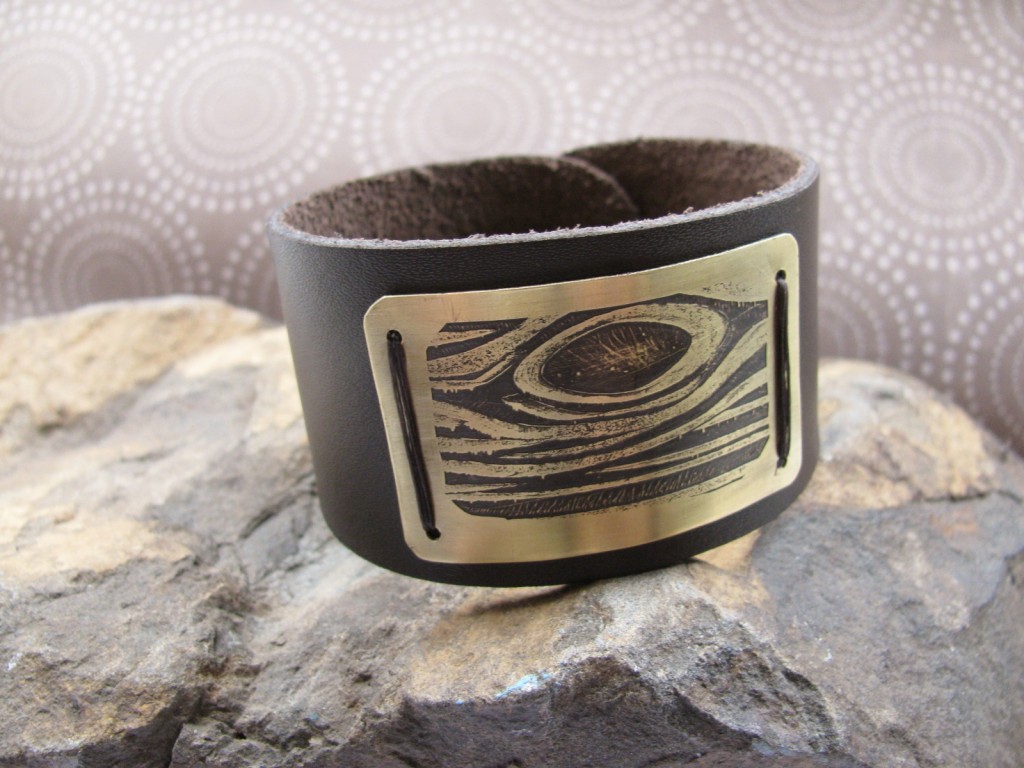
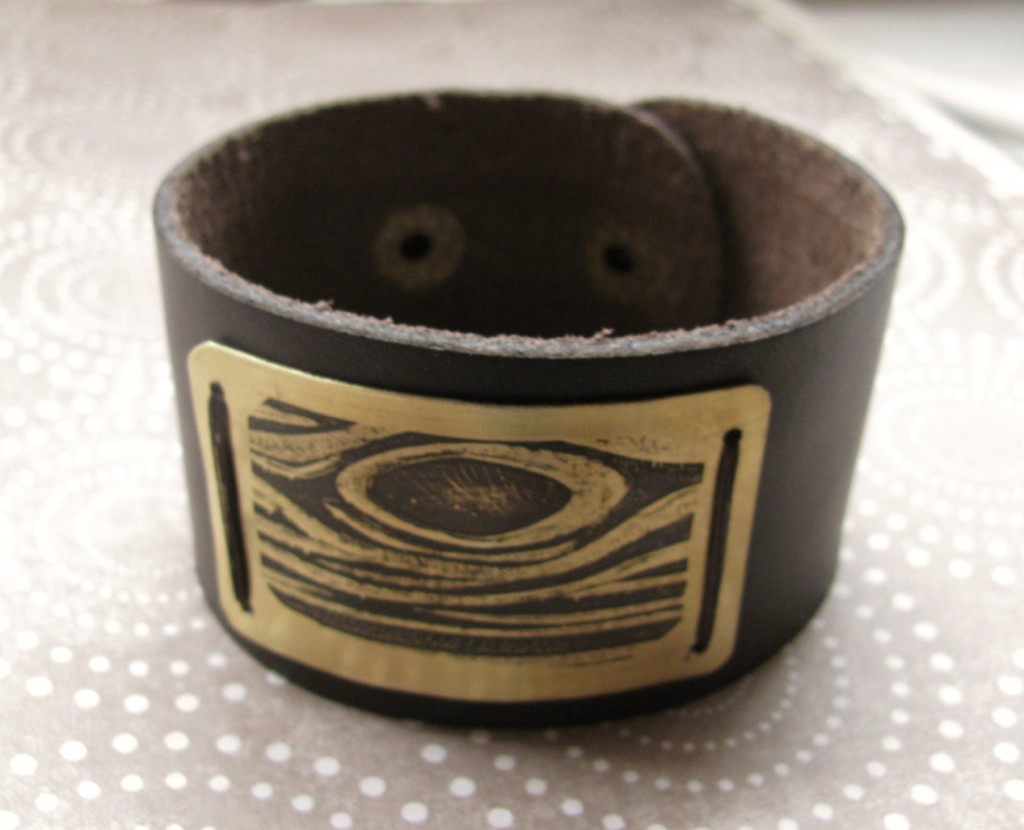
September 10, 2012As a jewelry maker, one of the most difficult things for me to do is make men’s jewelry. I think it is just my instinct to make things that are pretty and feminine. My husband has been begging me to make him a “cool” bracelet for years. I always kind of shrug off his request, but keep the idea simmering on the way back burner. Recently I began etching metal, and this seemed like the perfect opportunity to finally make something masculine. Etching metal gives you the freedom to incorporate any design into your work, even manly ones.
For this bracelet, I am going to briefly show how to etch metal using ferric chloride acid. If you plan on etching metal, I highly recommend that you read through our metal etching blog and all the safety guidelines associated with etching metal.
You can also do this project by using metal stamps to create phrases or designs, if you are not ready to dive head first into etching.
Items needed to make this bracelet:
- copper or brass sheet metal
- leather bracelet blanks, I like the 1 1/2 inch for men
- metal shears
- metal files
- steel wool or sanding sponges
- permanent black Sharpie marker
- permanent ink pad, like StazOn
- rubber stamps with manly designs
- packing tape
- ferric chloride
- baking soda
- rubber gloves and safety glasses
- two plastic containers, one for etching the metal, one for cleaning the etched metal
- patina solution, like Novacan Black
- metal hole punch
- thread and needle
- bracelet bending pliers (optional)
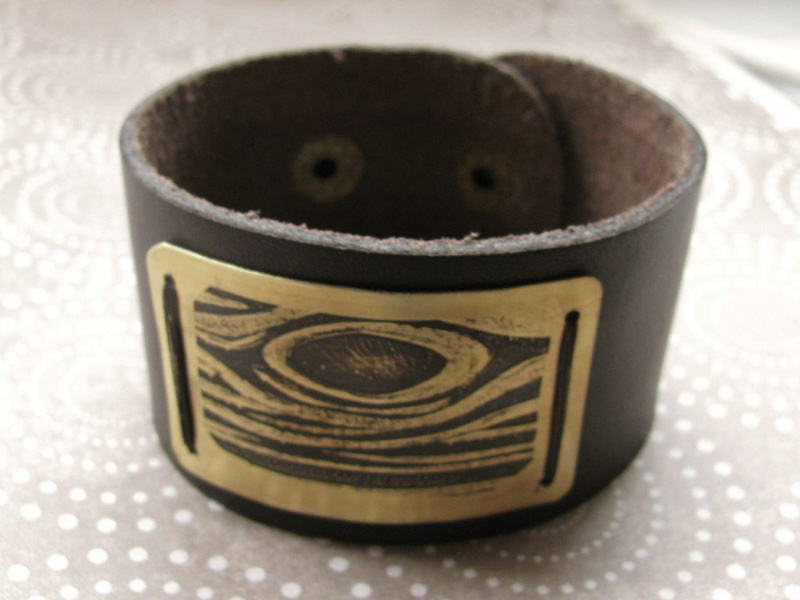
To start this project, first etch the metal piece that will be the center of the bracelet. The way that the etching process works, acid eats away at the metal where there is no ink. Therefore, you can stamp any image onto your brass or copper sheet metal, and any exposed metal will be etched. I have done a wood grain pattern for this bracelet, but any masculine image would work. It seems like images of fish, guns, tools, bicycles, or anything sports-related would work well, depending on the hobbies of the recipient.
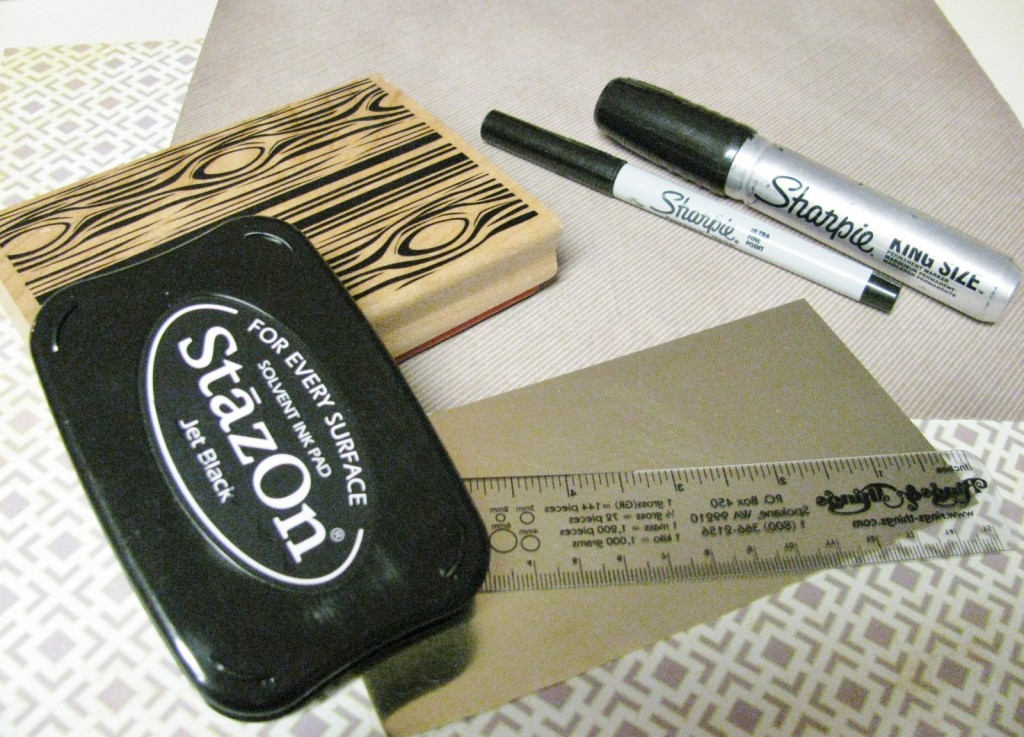
Use permanent ink to put your desired image on the metal. Make sure your metal is clean and free of any oils or dirt before stamping. I like to use a kitchen scrubbie to make sure it’s really clean first.
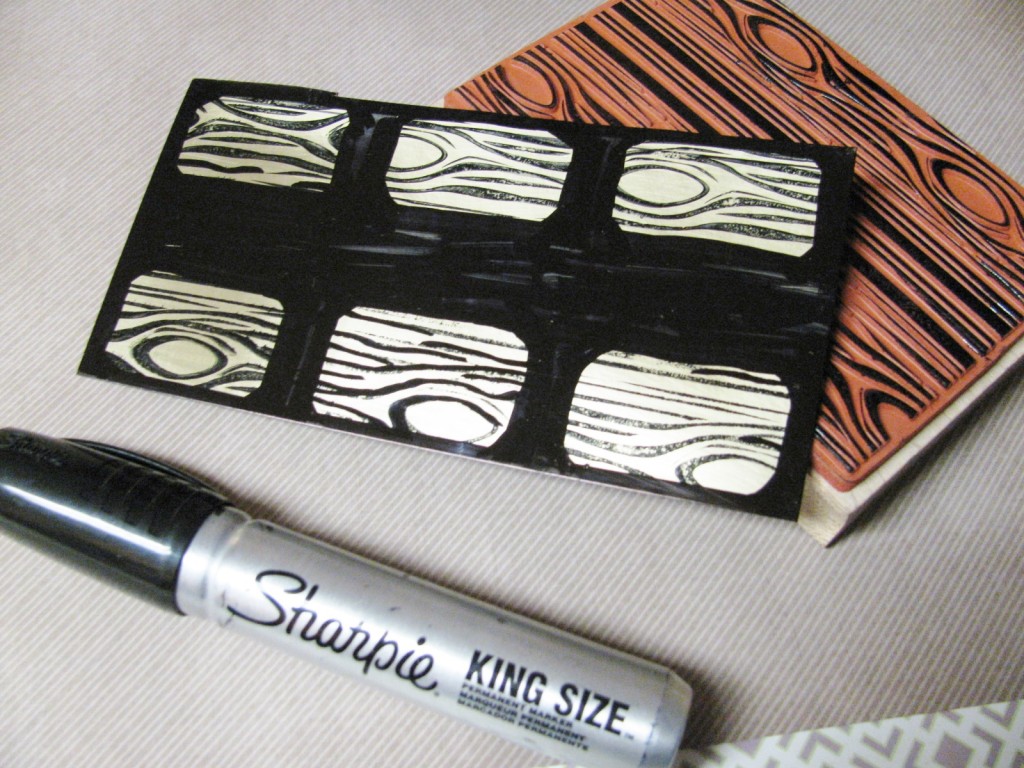
I made six pieces at once, by stamping first with the rubber stamp, then outlining the areas with a permanent black marker. If you want to make just one piece I would aim for dimensions around 1 by 2 inches. Also, make sure to cover the back of the metal with permanent ink.
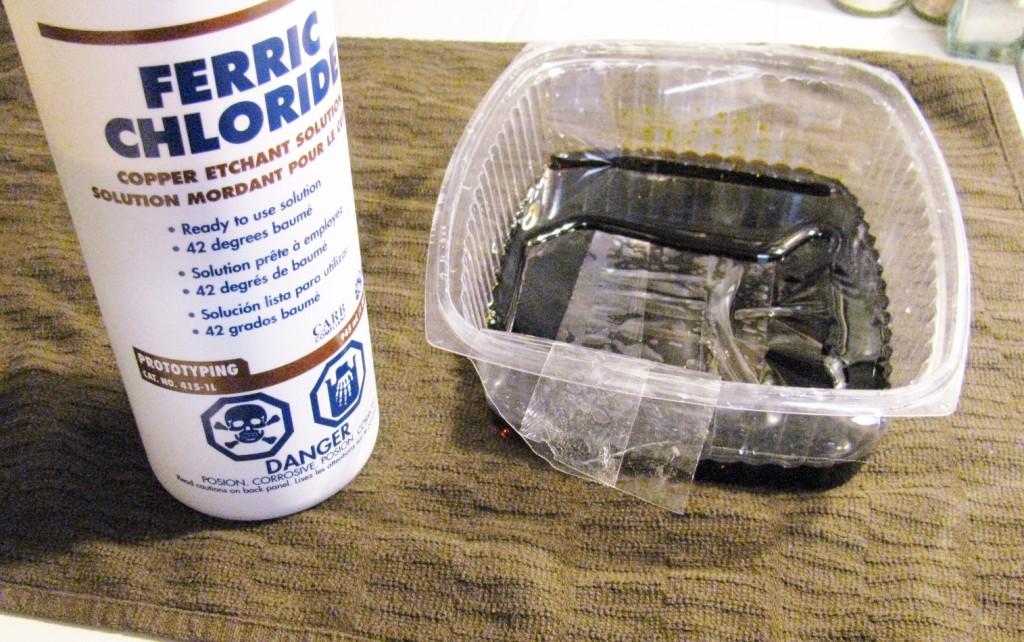
Place the metal on packing tape and float it in a bath of ferric chloride, just enough so all the metal is touching the liquid. Remember to use gloves, safety glasses and read through the safety guidelines first! For a detailed explanation of how to use this product please read our blog on etching and on safety considerations when etching.
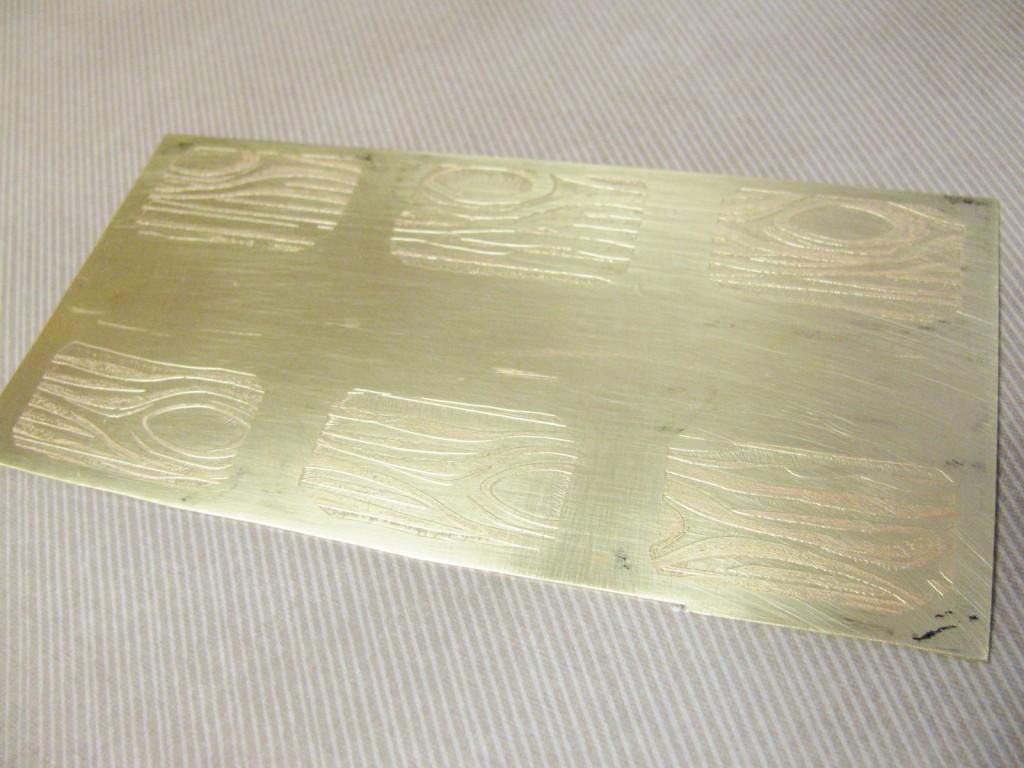
After about 30 minutes in the solution, your design will be etched nicely into the metal. Use baking soda, a scrubbie and warm water to clean your metal in a plastic container. Make sure to wear gloves. You can keep the remaining acid to etch more metal later; the acid will etch 3 or 4 times (or even more! but it takes a bit longer each time you use it). When it has lost all etching power, it must be brought to a waste disposal facility. Do not throw it away with the garbage or down the drain! Do you really want to find out what happens to your house when you etch the pipes?
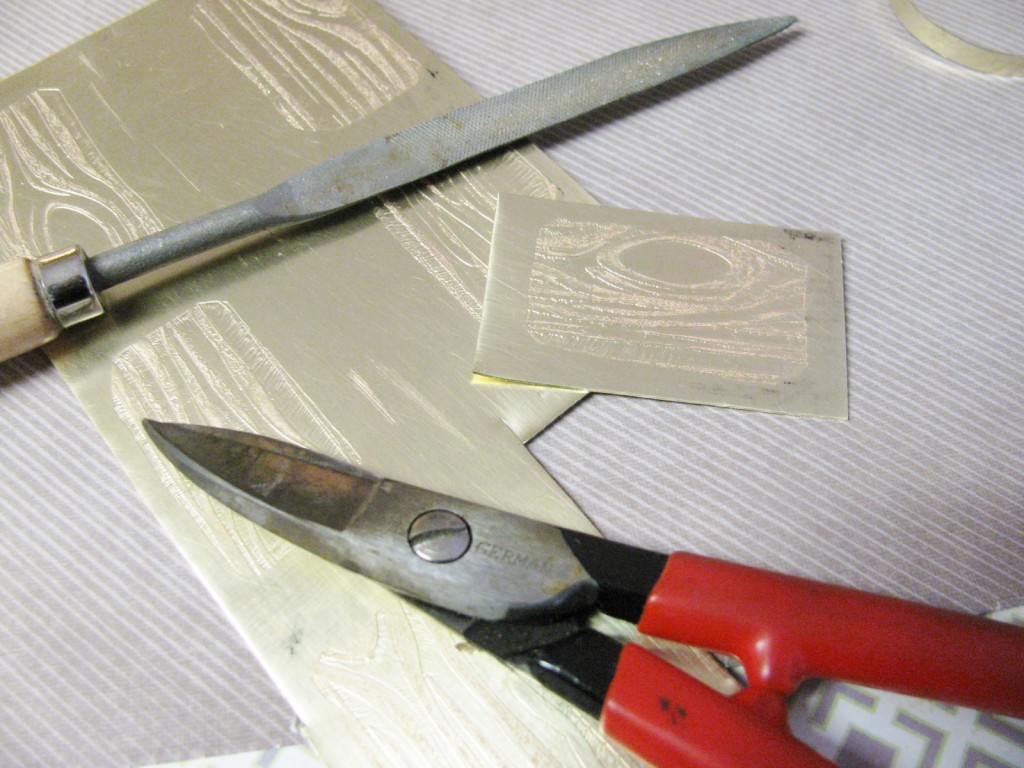
Cut your piece using metal shears (if you only made one piece, you could have done this step before etching) and file the edges smooth. The image won’t show up very well yet, but after it is darkened with patina it will be easy to see.
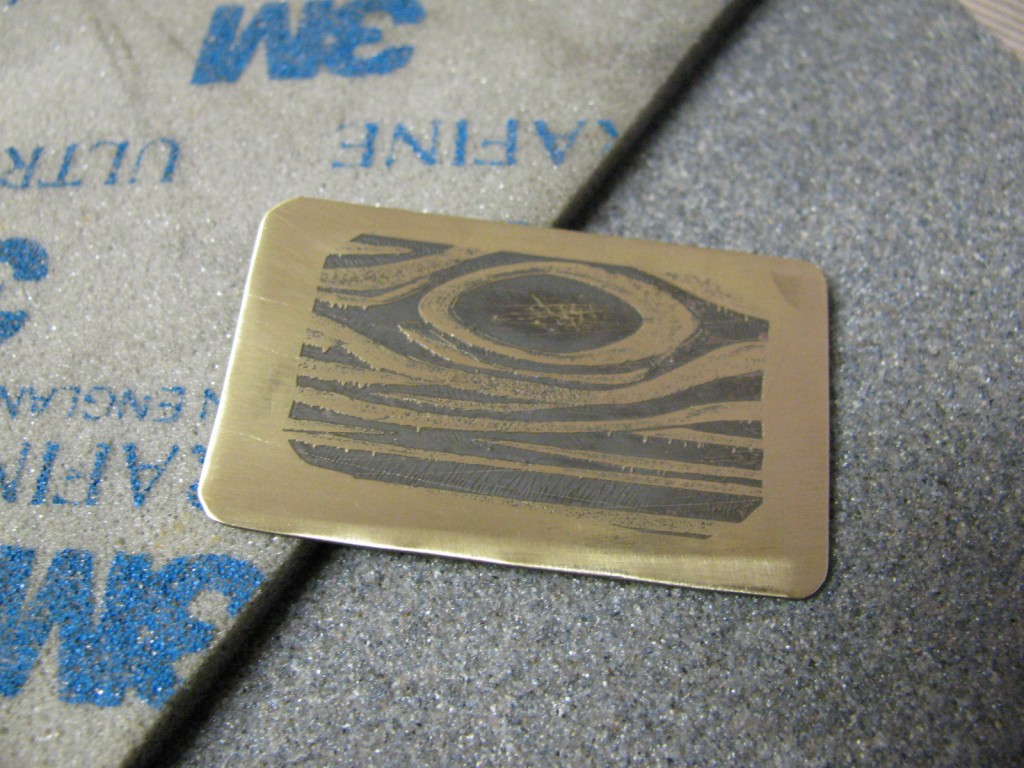
Blacken the metal by dabbing on a little Novacan Black patina solution. I usually just use a cotton ball or paper towel to apply it. Rinse the piece in water, and then use a fine sanding sponge or steel wool to remove the patina on the raised parts of the metal.
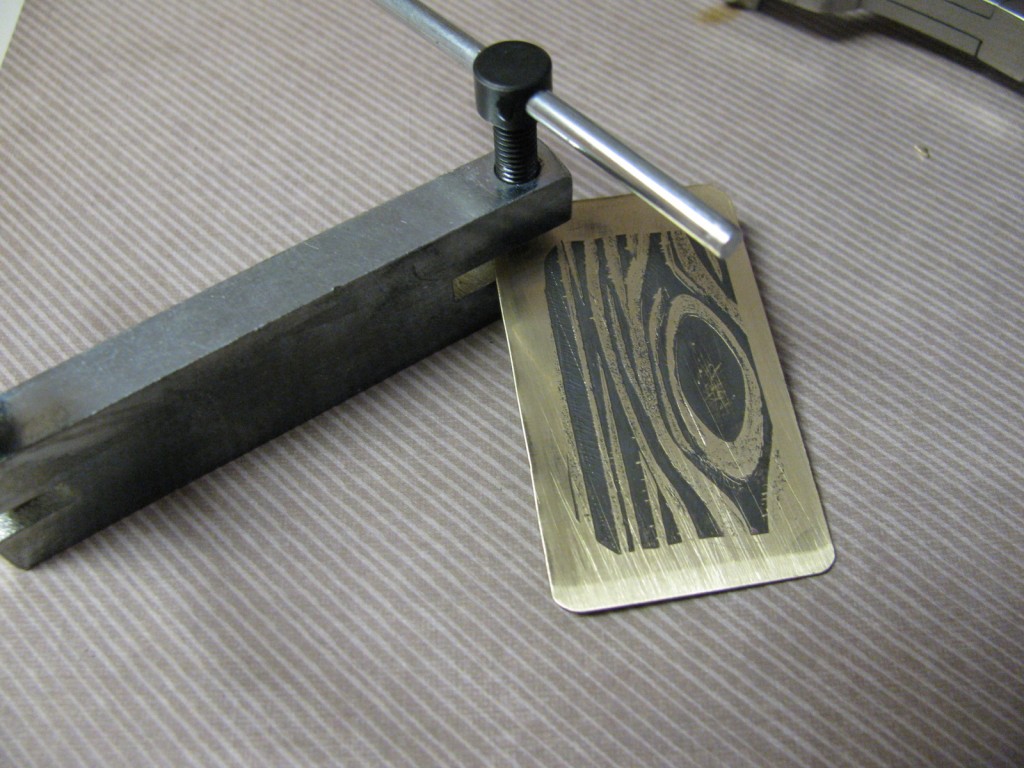
Use a metal hole punch to make four holes on the corners of the etched piece of metal.
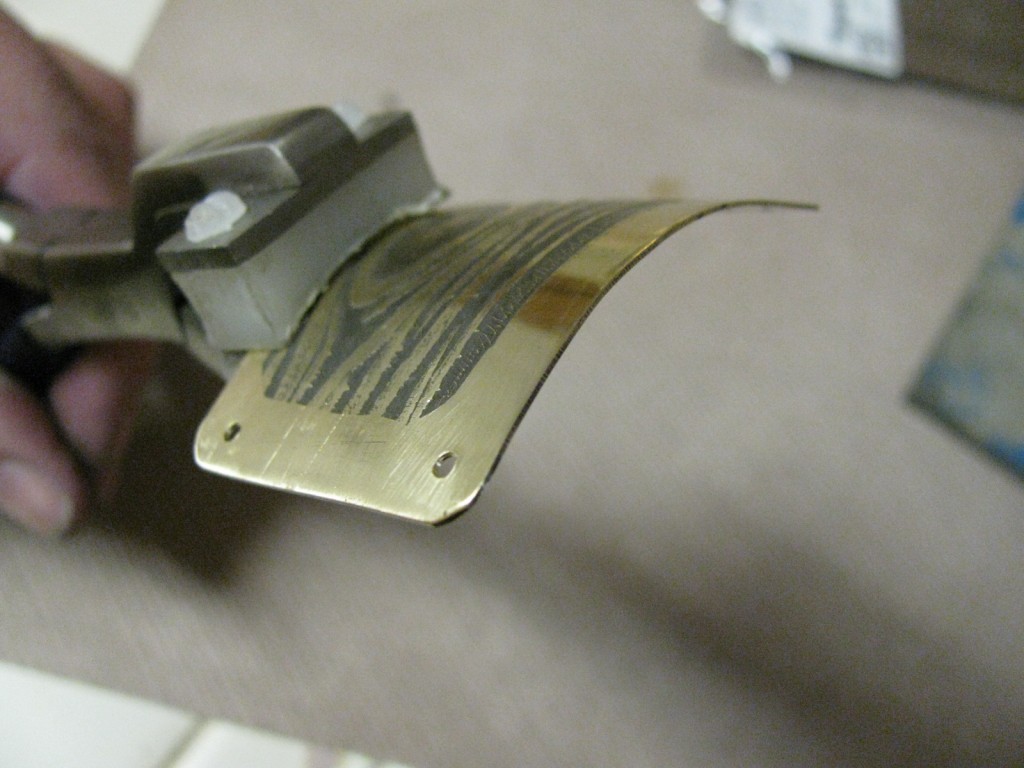
Bend the metal using H. If you don’t have these pliers, you can get a curve by bending the metal over a can of soup. It doesn’t work quite as well, but it will get the job done.
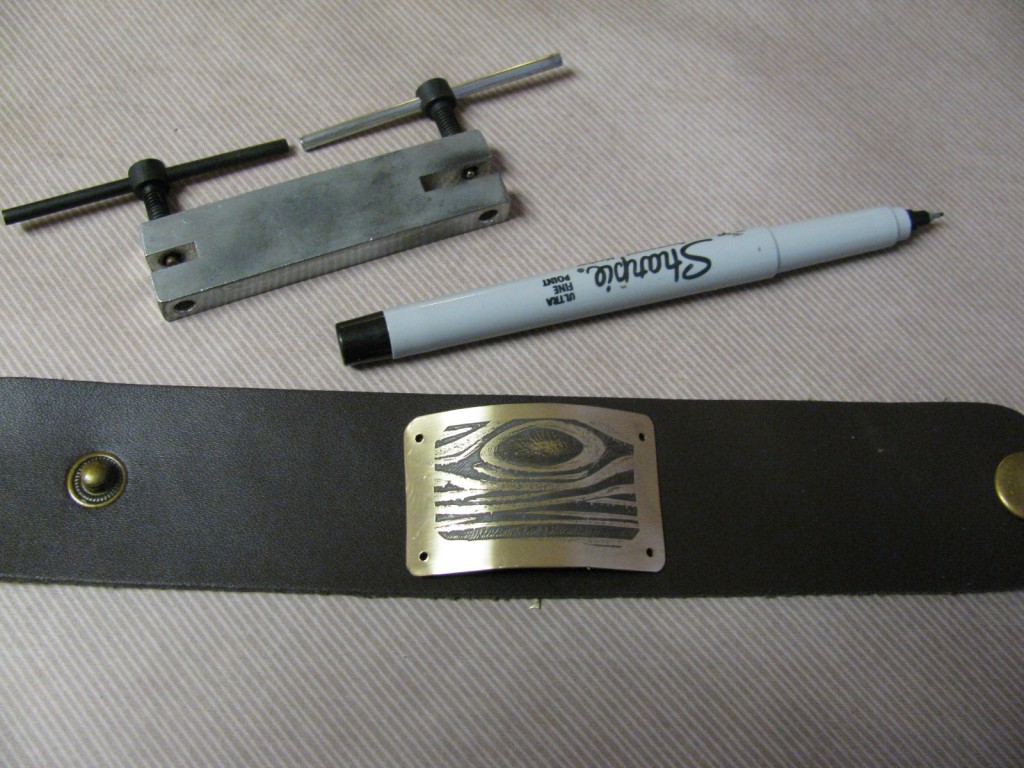
Place your piece of metal over the leather bracelet cuff. Use a small pen or marker to mark where the holes are onto the leather.
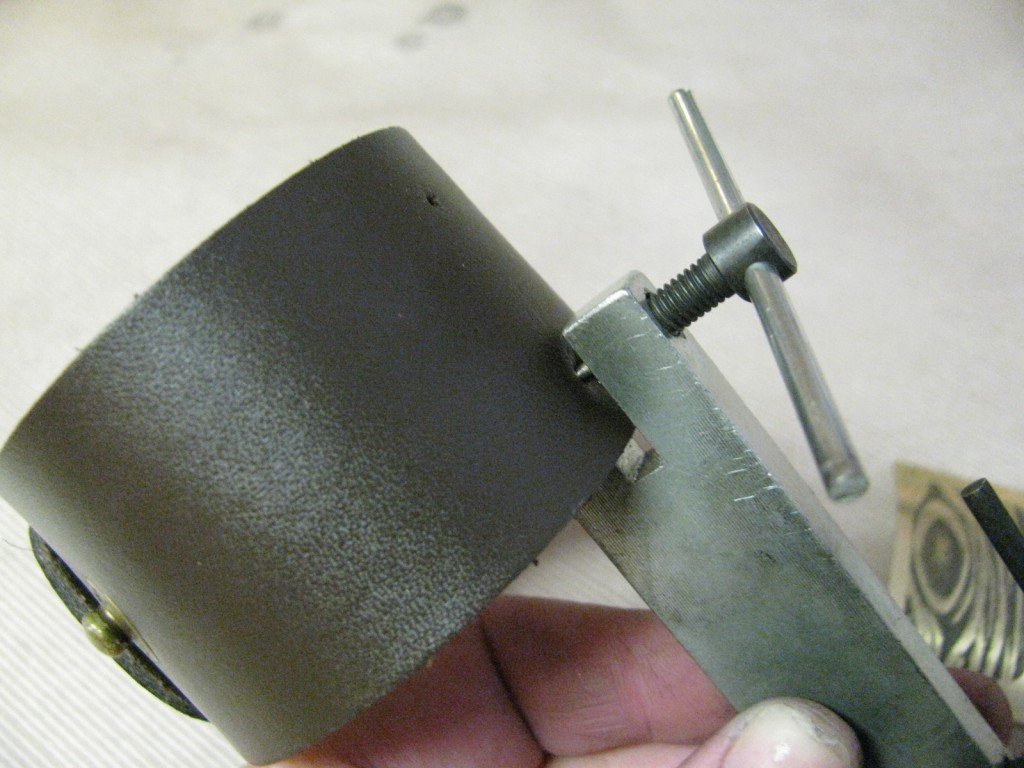
Using the metal hole punch, punch holes into the leather where you marked it.
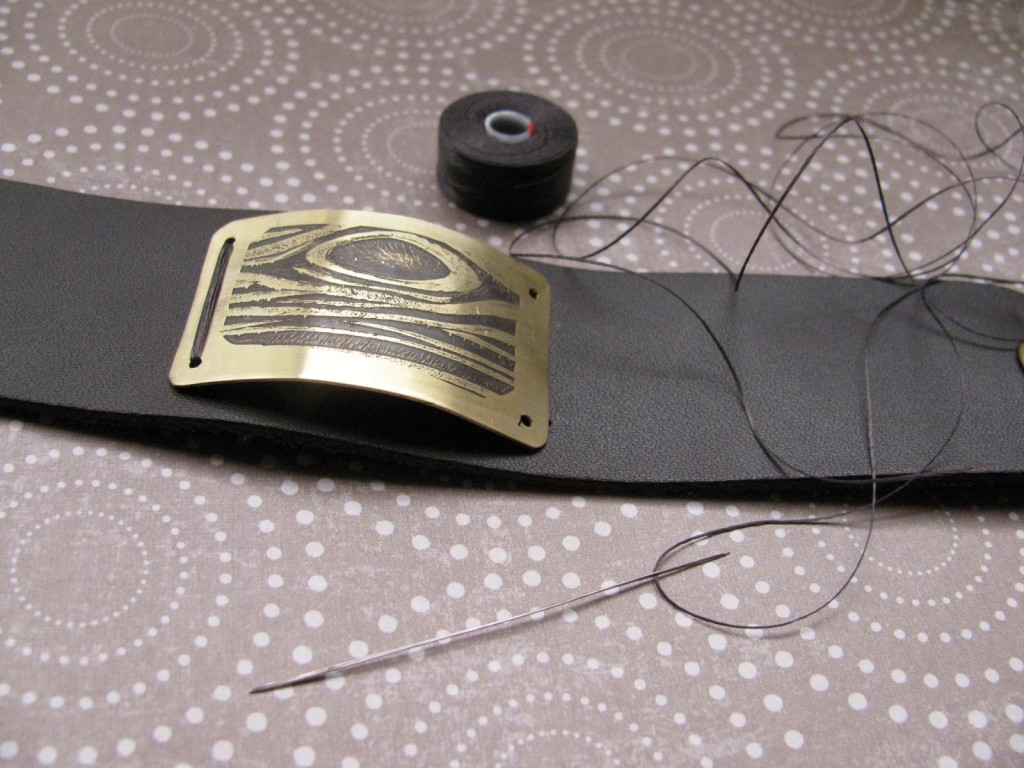
Use a
needle and thread to secure the metal to the leather. I like to use
Superlon thread and a Big Eye needle, since I can never thread a beading needle.
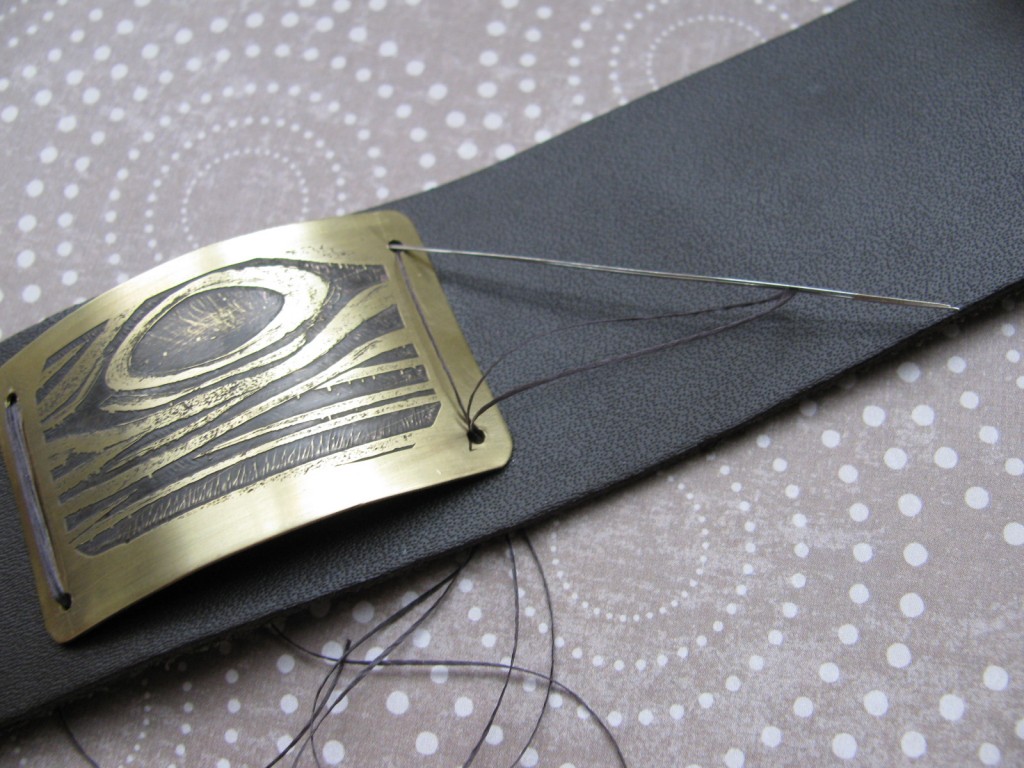
I secured the metal by going around 7 times and then tying the two threads together tight on the back of the bracelet. Cut the thread short and for extra security add a dab of glue onto the knot.

Completed Bracelet! These leather blanks are great because they have two size adjustments and come in a variety of colors.
Well I hope I have inspired you to make something masculine! But of course you can still make these girly if you want with flowers and unicorns. That is the beauty of etching! Feel free to ask me any questions you might have about what I have done here.
~~Tiffany
If you are loving this leather cuff, here are a few more free jewelry-making designs from the Rings & Things Design Gallery:
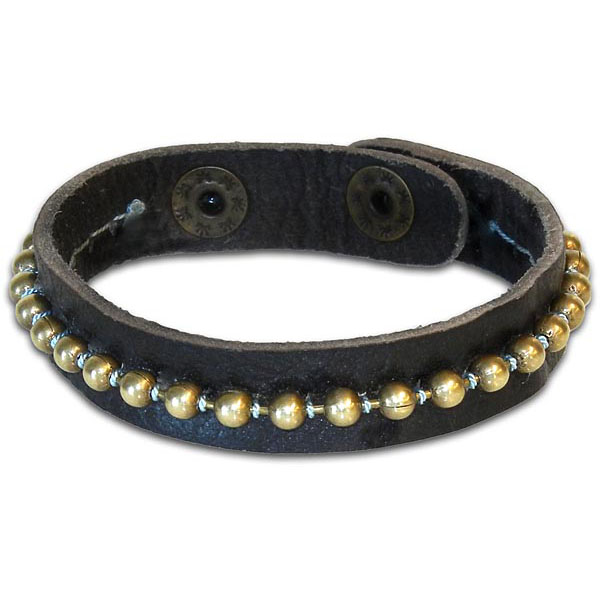
“Having a Ball Bracelet” created by Rings & Things designer Valorie Nygaard-Pouzar.
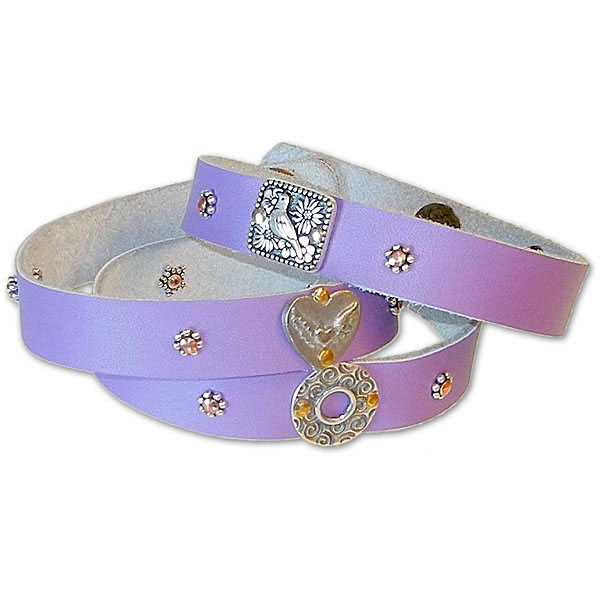
“Palomita Wrapped Leather Bracelet” created by Rings & Things designer Polly Nobbs-LaRue.
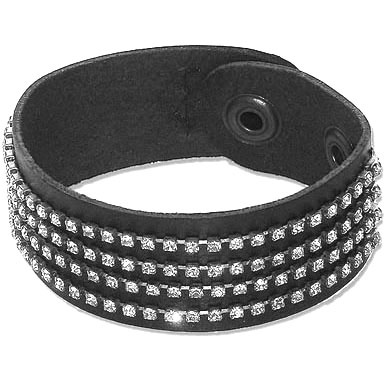
“Tough Girl Rhinestone Chain and Leather Bracelet” created by Rings & Things designer Rita Hutchinson.
DIY Project: Souvenir Penny Bracelet
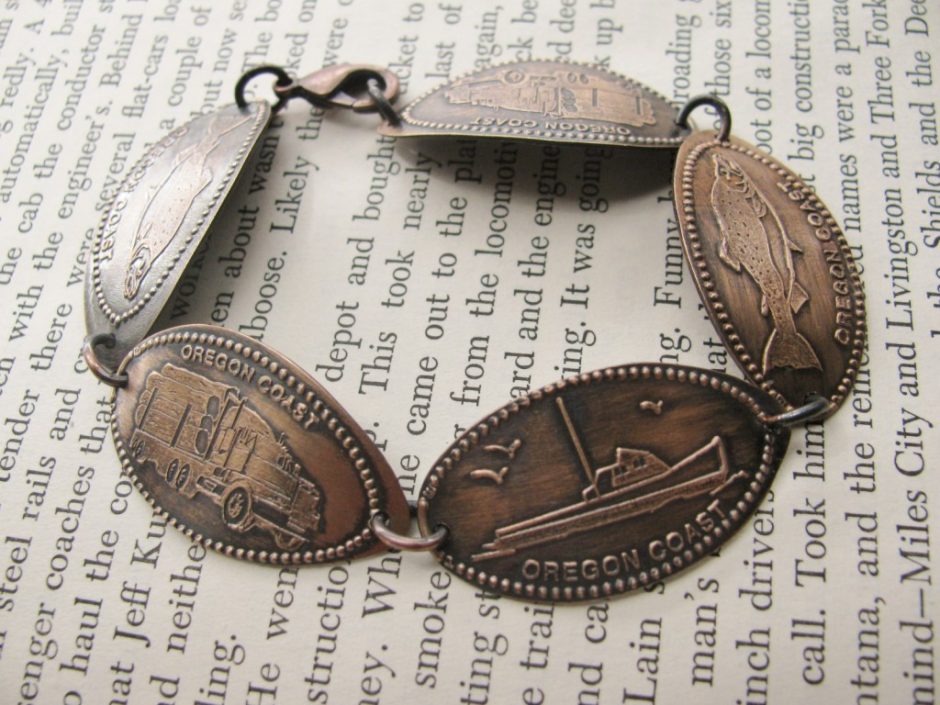
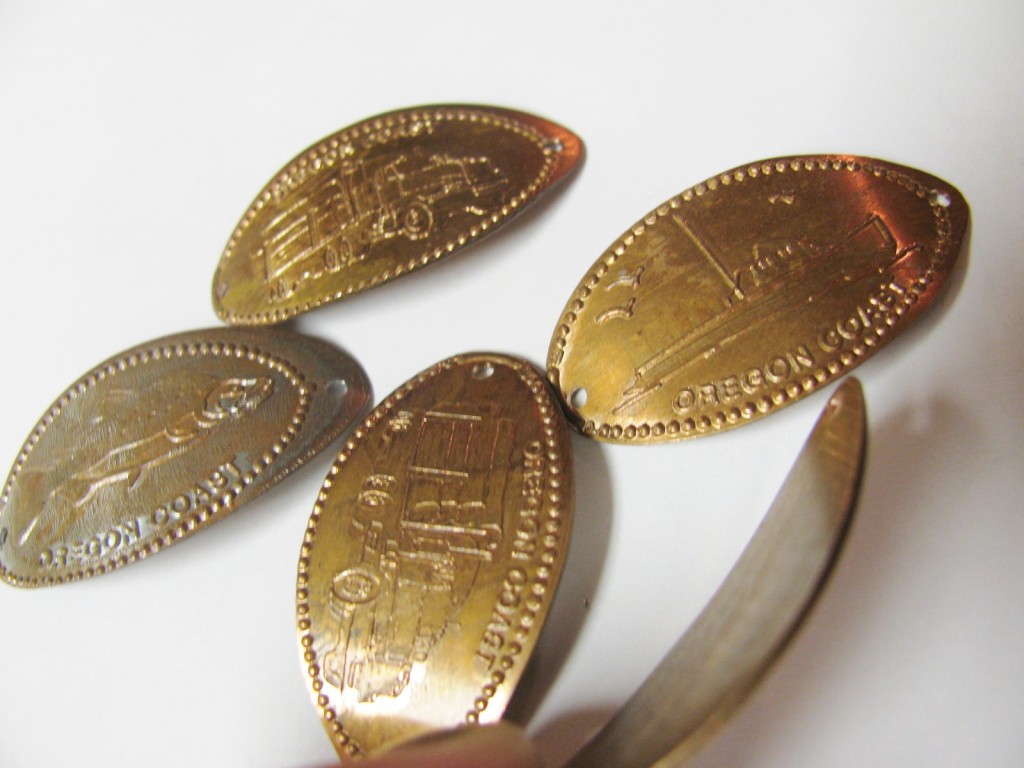
August 13, 2012Hello bloglandia! Tiffany here. I just recently returned from a fabulous week on the Oregon Coast with my family. While there, I succumbed to one of those touristy penny smashing machines. For some silly reason, I can never resist those machines! Perhaps they remind me of being a kid again and smashing pennies on the railroad tracks. Well anyway, upon my arrival home, I found myself with a pocketful of pennies stamped with fish and boat images. I was about to throw them into one of my many junk drawers to be lost forever when I had an epiphany! I thought to myself, aren’t you a jewelry maker? and couldn’t you possibly make something wearable with these souvenir pennies? Well, since the answer to both of these questions was yes, the Souvenir Penny Bracelet was born!
This bracelet is really easy to make. To get started you need the following items:
- five smashed souvenir pennies
- a lobster claw clasp, in either antique copper, copper plated or solid copper
- oval copper jump rings
- a metal hole punch
- liver of sulfur
- polishing pads
- Fine grit (“0000”) steel wool, available at any hardware store
- bracelet shaping pliers
- Renaissance wax
- Chain nose pliers
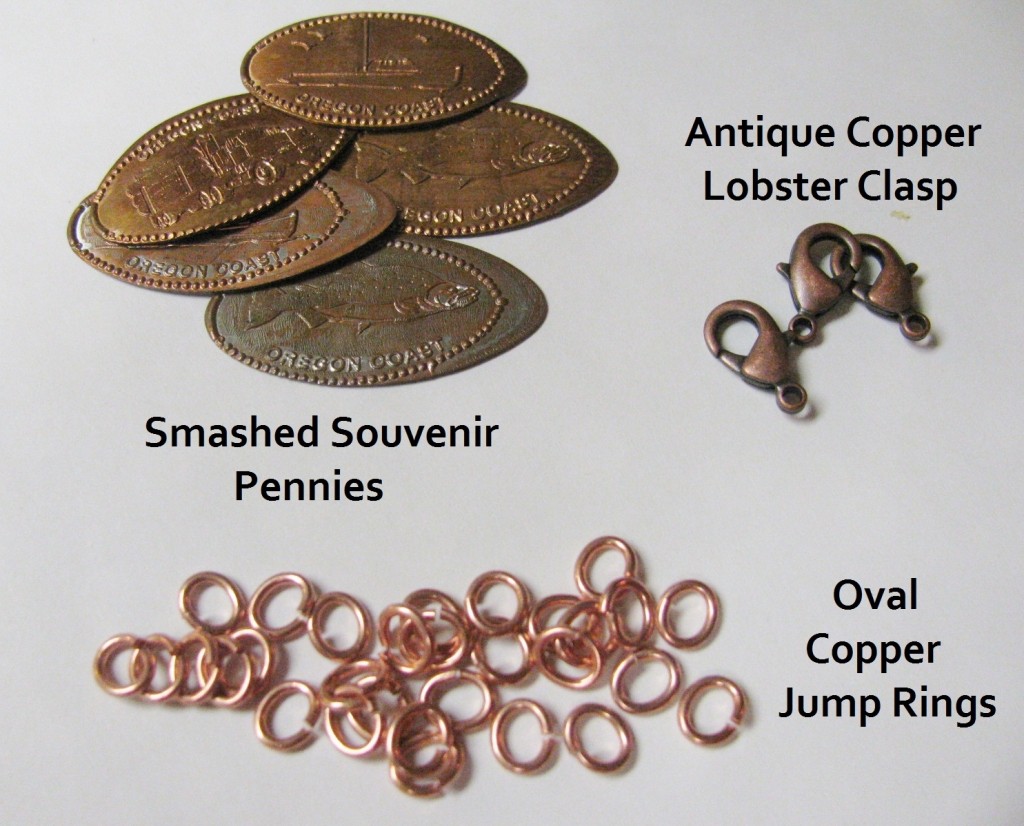
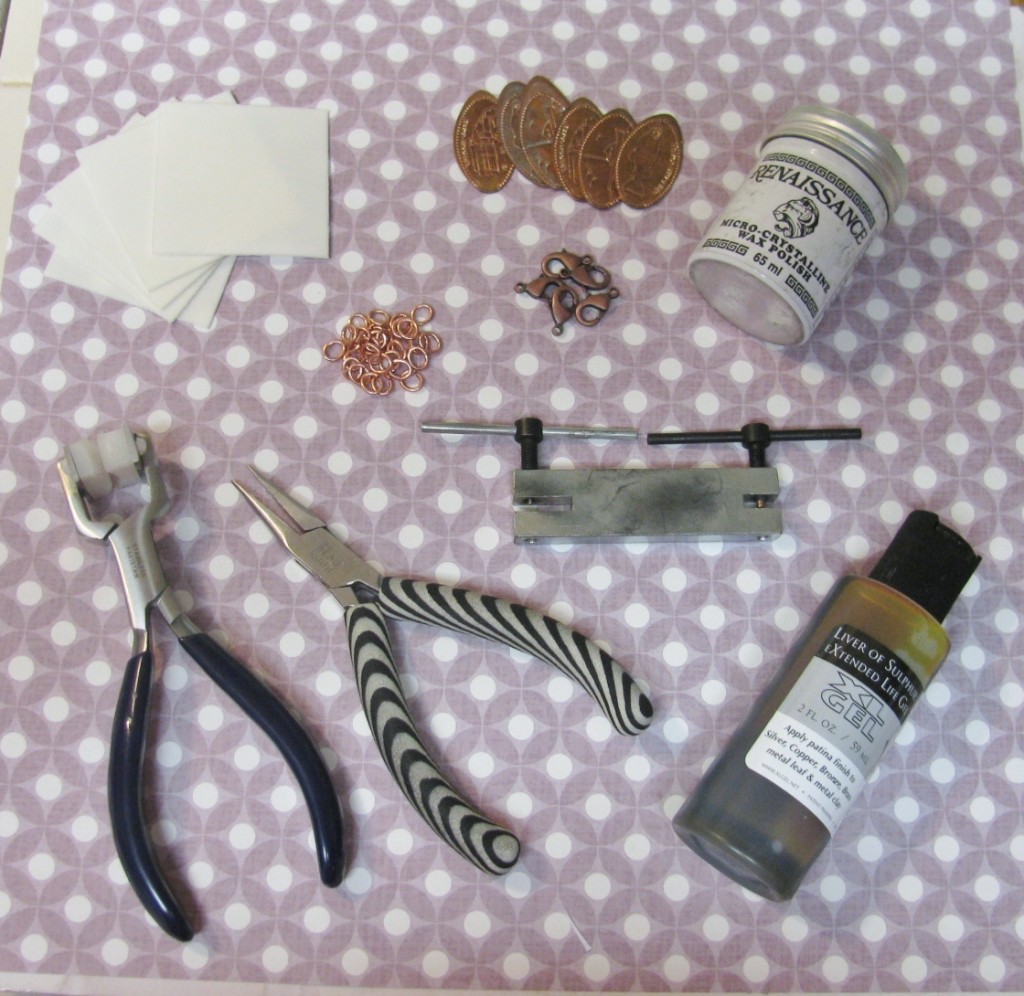
Smashed pennies, copper oval jump rings, and antique copper lobster clasp. When smashing the pennies, try to pick pennies that are older than 1981, because they are solid copper. The solid copper will take to the patina better.
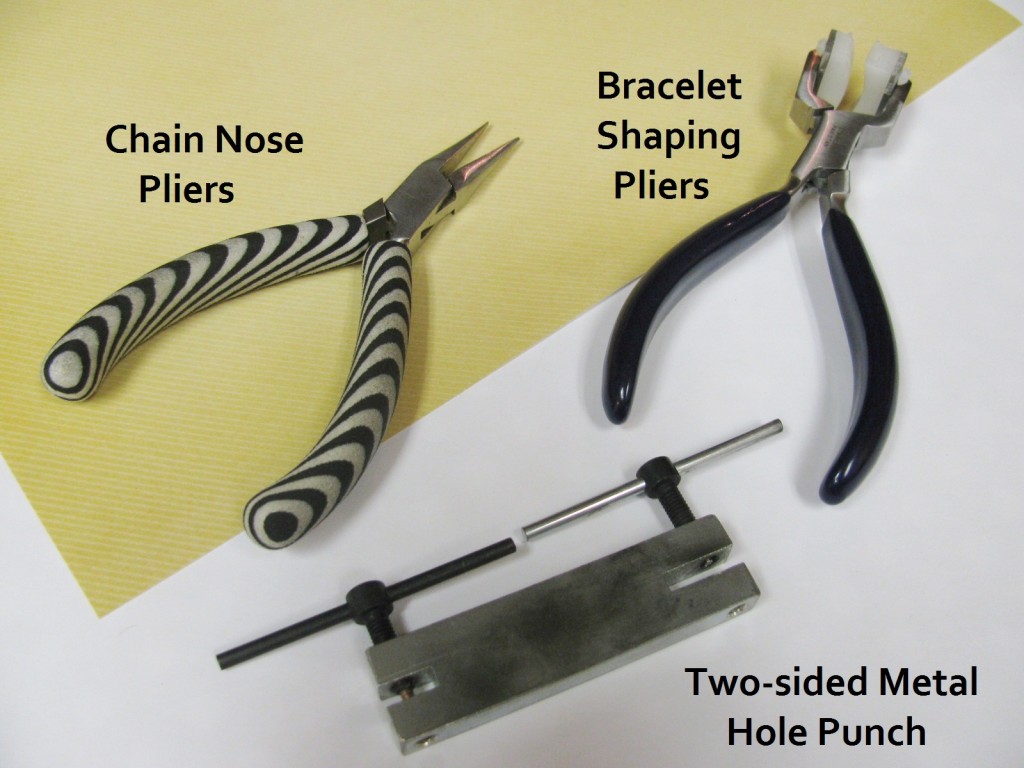
Tools for making the bracelets. Chain nose pliers, bracelet shaping pliers, two-hole metal punch. The bracelet shaping pliers are optional, but they really create a great shape.
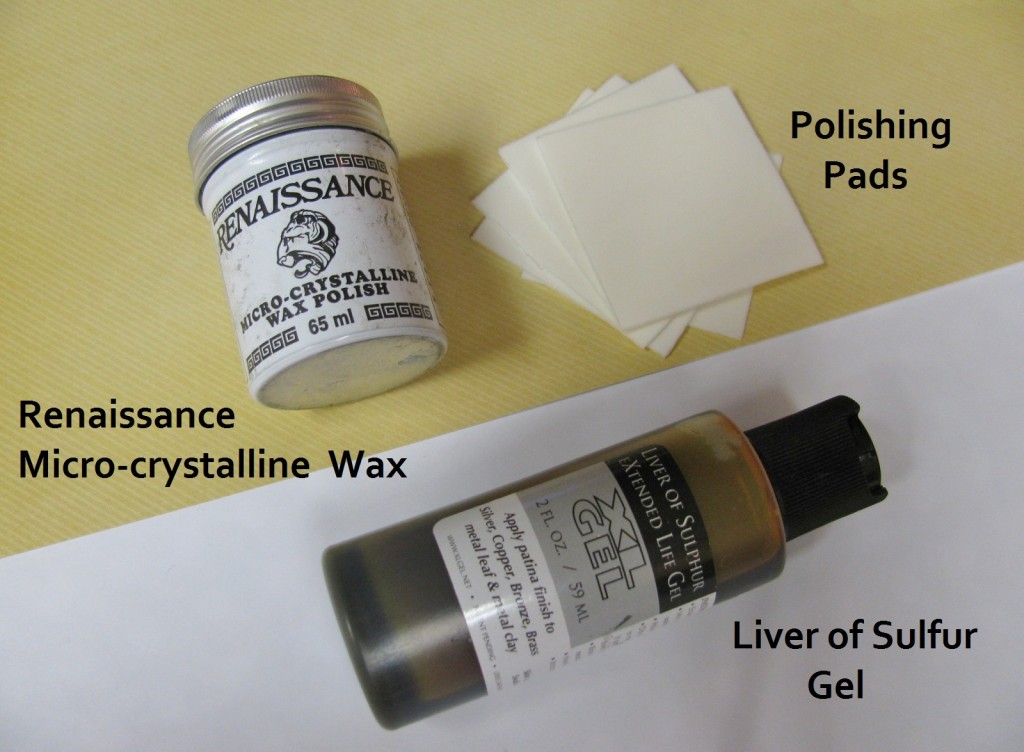
Renaissance Wax for sealing the copper. Polishing pads for buffing away patina. Liver of Sulfur for blackening the copper.
Now that you have all the tools and supplies, there are a few easy steps to follow.
1. Punch holes in the pennies.
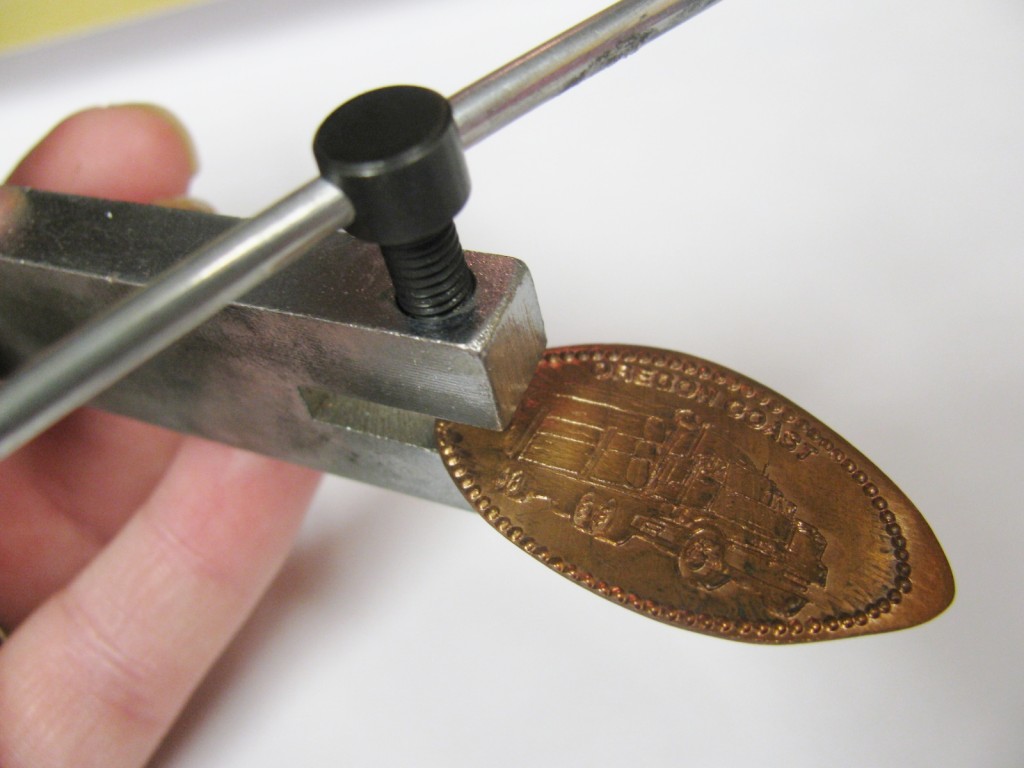
Just twist the handle on the top of the punch to make the holes. There are two sizes, I prefer the smaller size.
2. Use the bracelet shaping pliers to bend the pennies into a curved shaped. This will help the pennies shape to your wrist better and give the bracelet a polished, professional look.
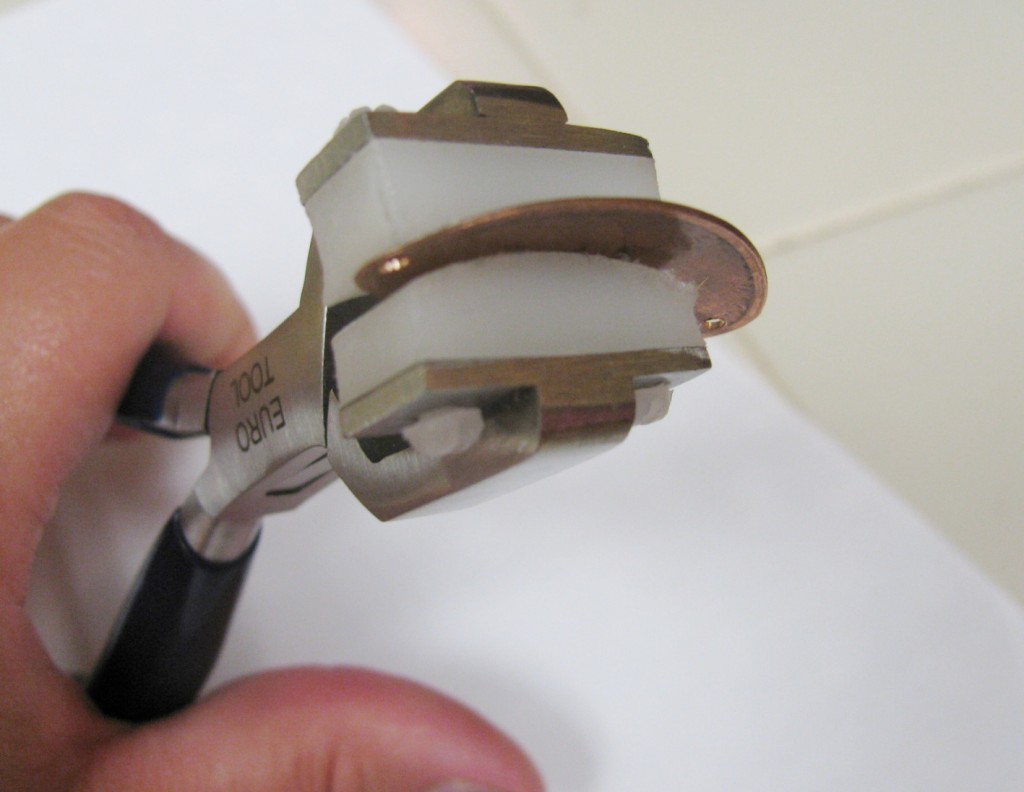
Simply place the pennies in the pliers and they will do the work for you! Sorry mine are kind of worn looking, I use them a lot!
3. Antique the pennies and jump rings. I like to use liver of sulfur, though there are several antiquing solutions that will work on copper.
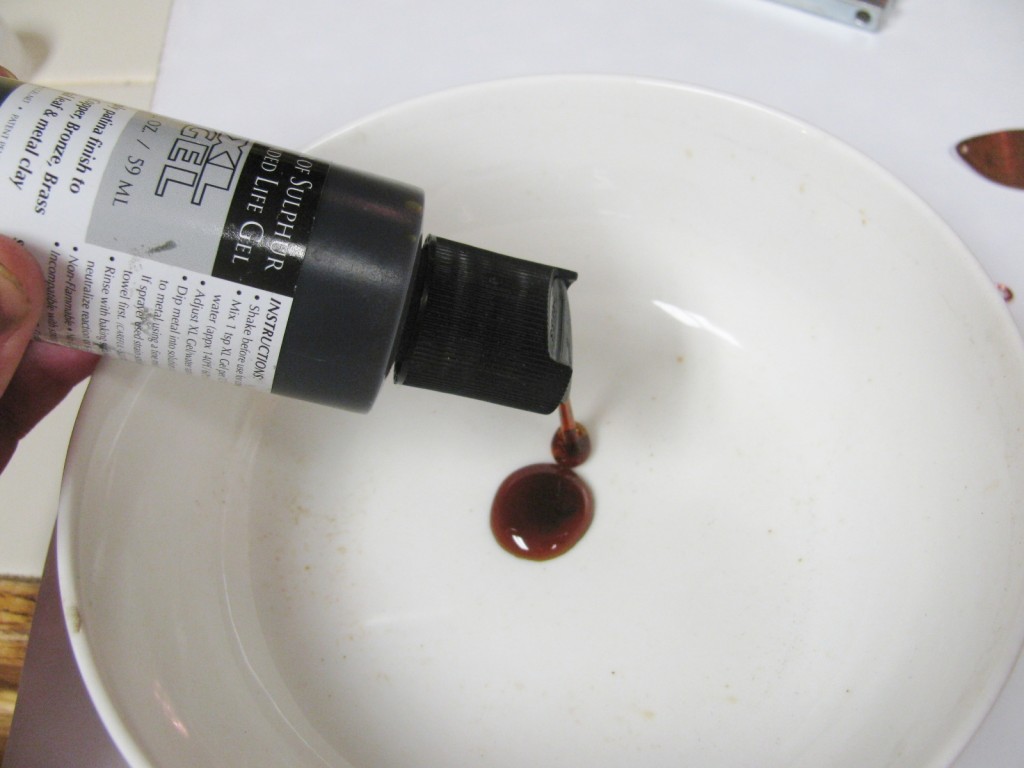
Squeeze a small amount of Liver or Sulfur gel into a small container. I use a small glass bowl as my designated antiquing container.
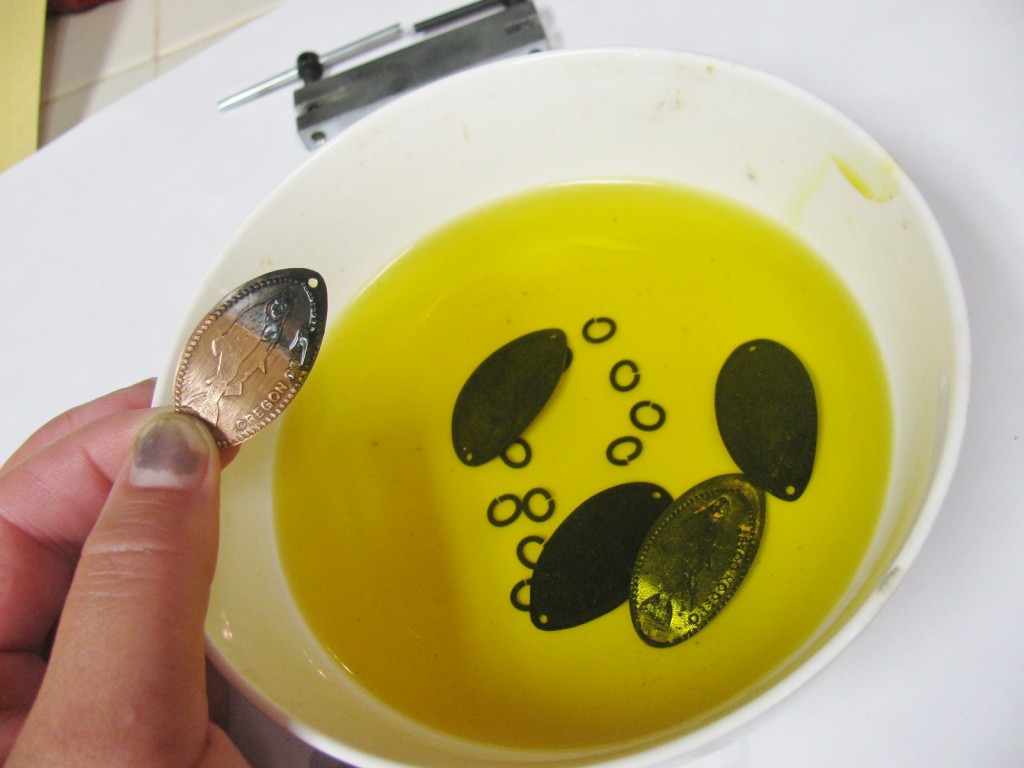
Add warm water to the liver of sulfur gel and stir the mixture. It will stink like rotten eggs. Place your smashed pennies and copper jump rings in the solution. You may need to clean the surface of the pennies and jump rings with some fine grit steel wool. This will take off any oils, dirt, or coatings that will keep the patina from penetrating the copper.

After a little bath in the liver of sulfur, the pennies will turn black. You can see on the last penny, the difference a patina makes.
4. Buff and polish the pennies.
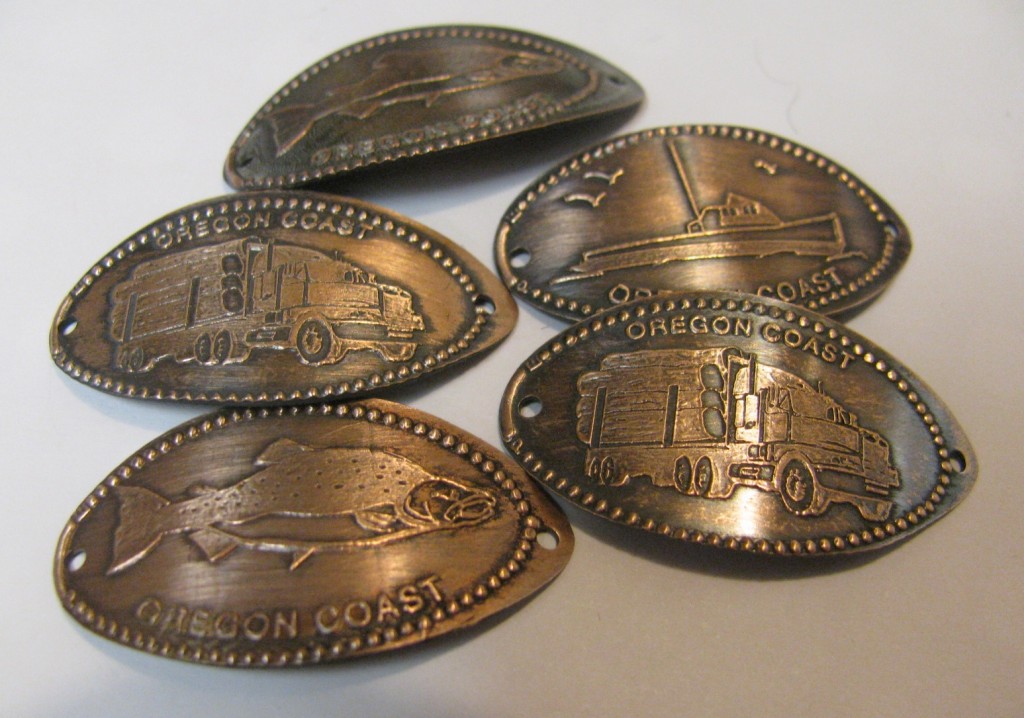
Use the steel wool first to remove the majority of the patina. Then use the polishing pads to make the copper shiny. The patina helps to make the images and lettering really stand out.
5. Seal the pennies with the Renaissance wax.
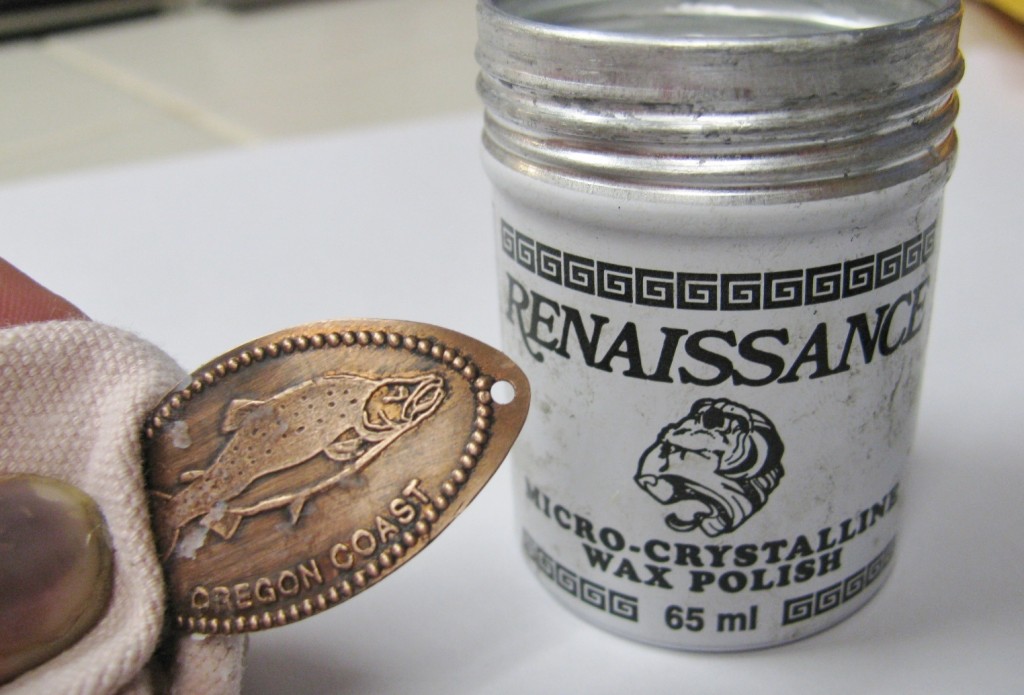
Rub a layer of wax on with either a paper towel or soft cloth. This will seal the patina, prevent further tarnishing and protect your skin from any possible reaction with the copper.
6. Assemble the bracelet.
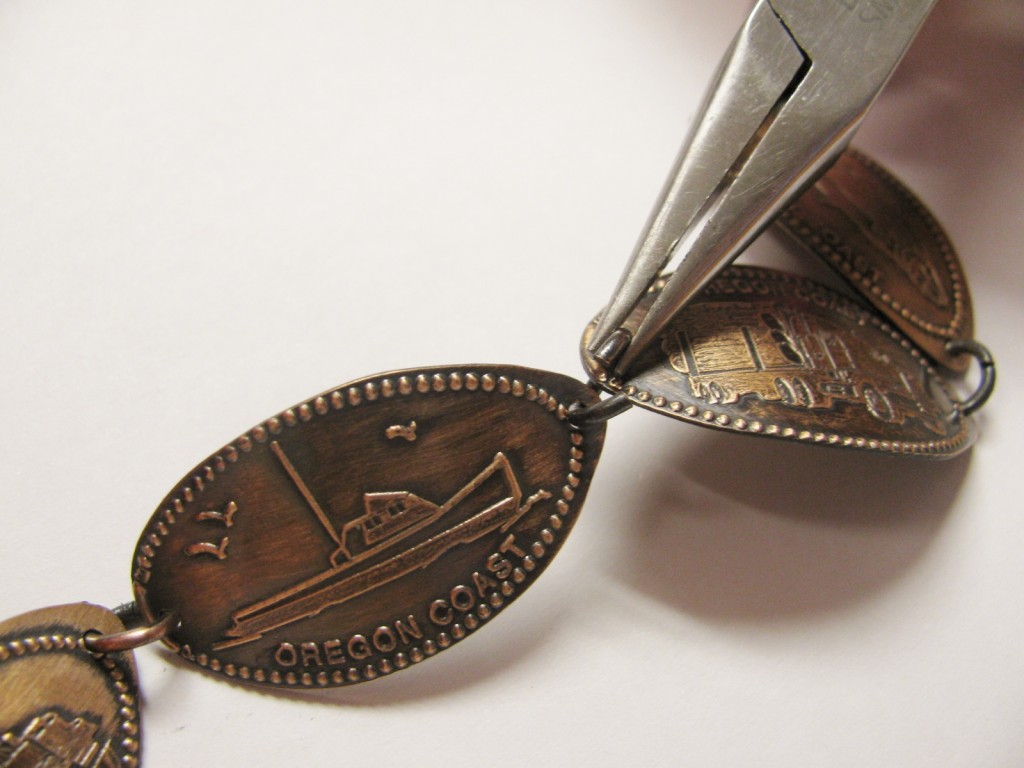
Use the chain nose pliers to attach the pennies together with oval jump rings. In between two of the pennies add a lobster claw clasp. Remember to always open your jump rings by pulling them apart sideways.
7. Enjoy your new bracelet!
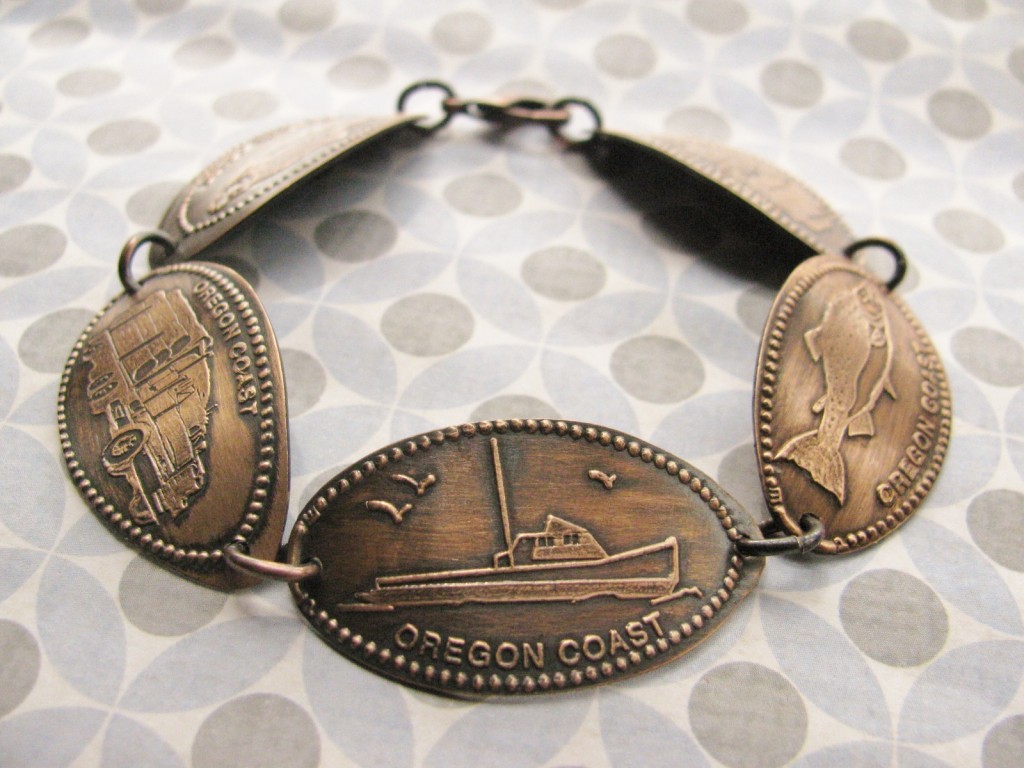
Now that your bracelet is all done, the only thing left to do is wear it and wait for the compliments!
Hopefully I have inspired you to make something fun with all your smashed souvenir pennies! Happy travels!
~~Tiffany
DIY Earring Cards that won't break the bank!
July 20, 2012Whether you make jewelry as a hobby, to sell at craft fairs or to just give as gifts to friends and family, presentation is always an issue. You wouldn’t hang up a beautiful print on the wall without a proper frame. Well, the same goes with your jewelry. It is after all wearable artwork that you have created, and it should be presented in a pretty way! I decided to try and find some DIY earring card ideas that are cute, quick and inexpensive. That way you can spend more time making the jewelry, and less time (and money) worrying about how to display it.
For this project, there are are few basic supplies needed to get started. A paper cutter makes this process much easier and faster. You can find small affordable ones at any craft store. Also, a glue stick is great for layering paper, to make thicker cards. I just use a pushpin to make my holes on the cards, though craft stores will sometimes have paper punches available specifically for creating earring cards. I have tried them, but I still prefer my pushpin. The last two items I recommend are nylon or rubber earring stoppers, to keep your earrings on the cards, and adhesive clip cards, so you can hang the earrings on display racks. The rest of the items I used I found for less than $3 at my local mega store.
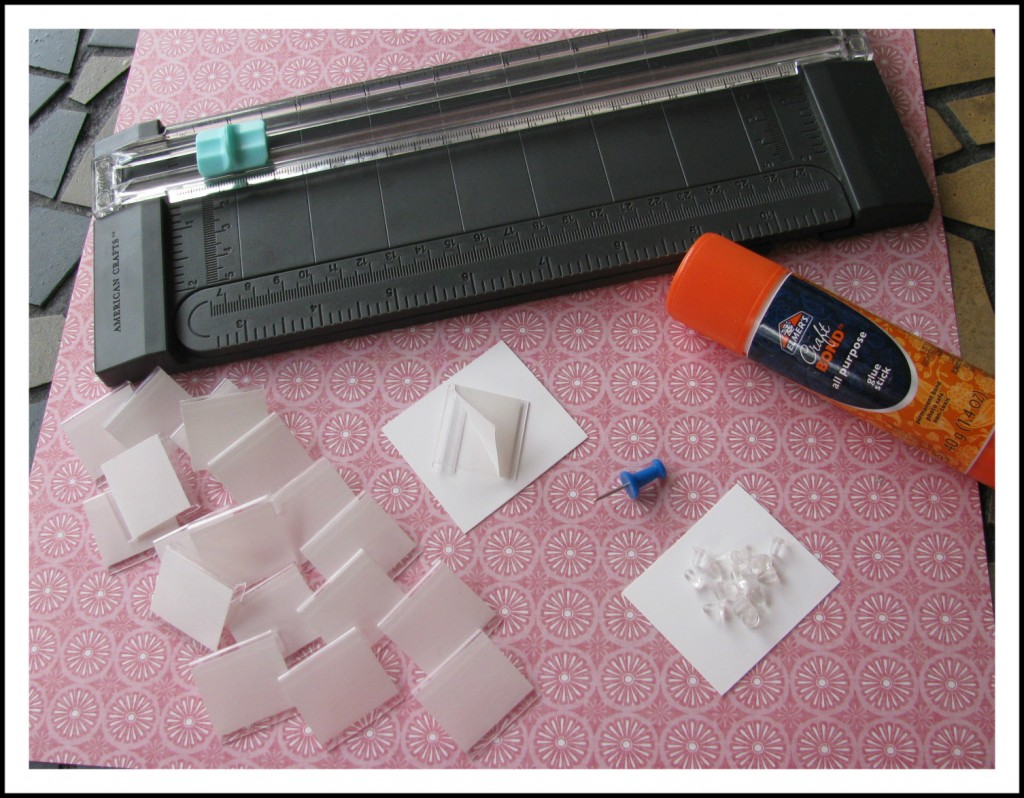
Basic supplies needed. Paper cutter, glue stick, pushpin, adhesive clip cards, and nylon earring backs

Close up of the earring clip cards. Sometimes,you may need to trim the bottom. This can be done easily: just trim them with scissors.
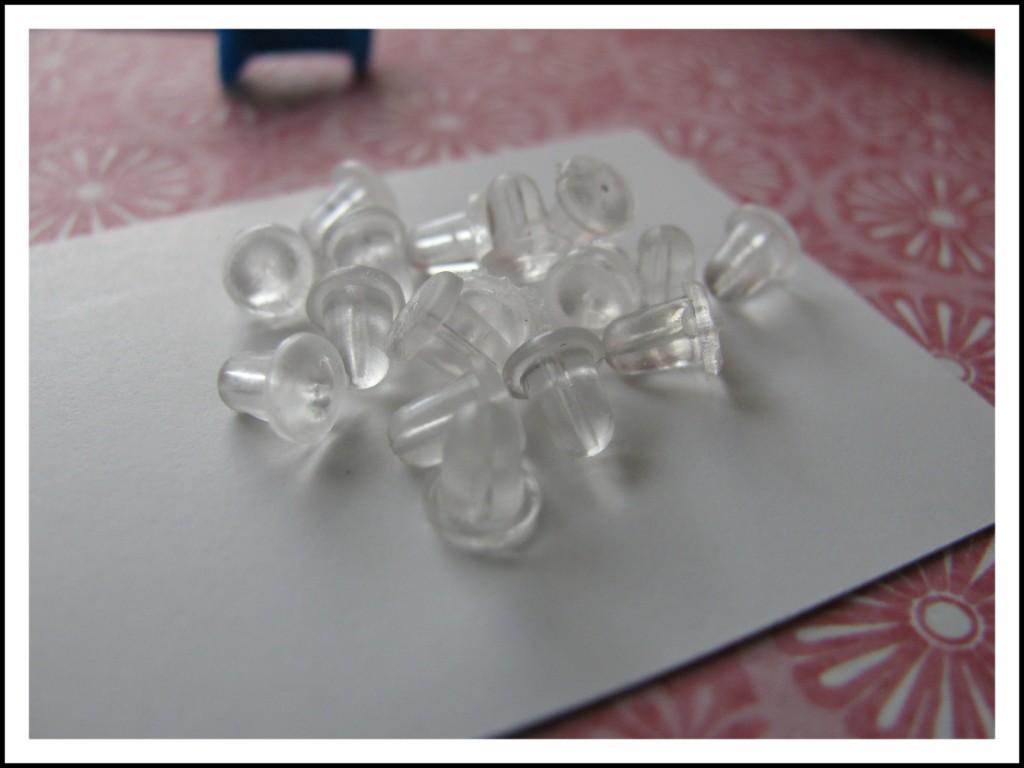
Close up of the nylon earring backs. There are a few different styles of these available, but I like the bell shape best.
NEW ~*~ NEW ~*~ NEW ~*~ NEW ~*~ NEW
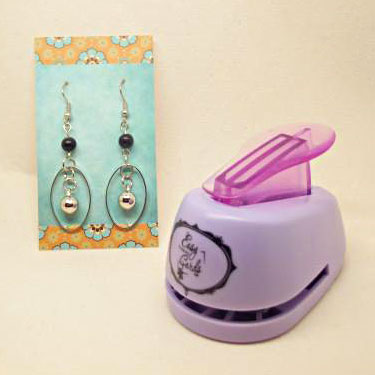
Since publishing this post in 2012, Rings & Things has introduces new earring-hole-punch tools. Appropriately named, both punches make the hole-punching task “easy”!
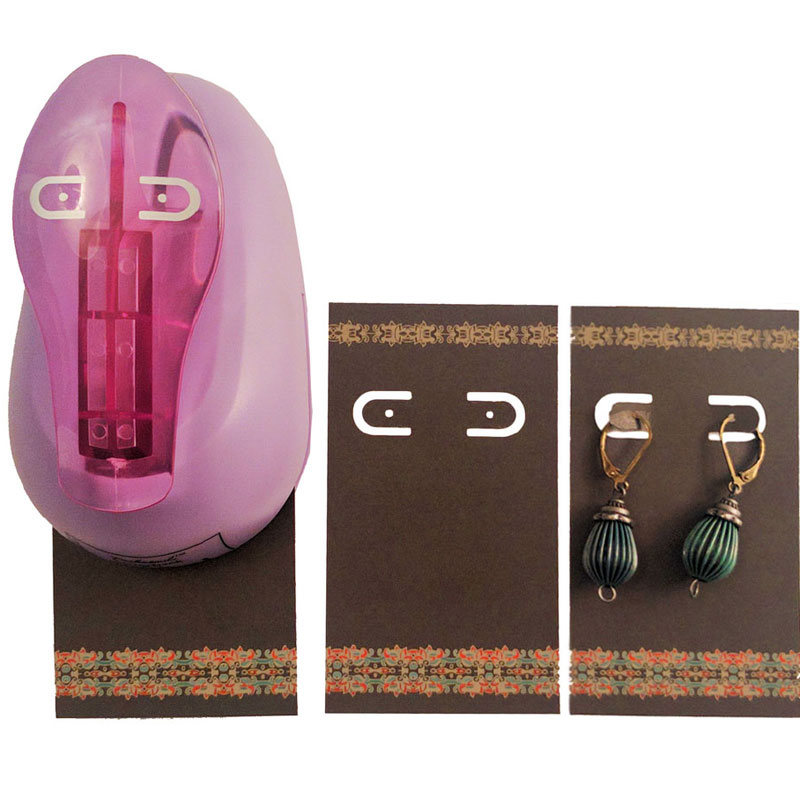 Easy Earring Card Leverback Punch
Easy Earring Card Double Post Punch
~*~*~*~*~*~*~*~
Okay, so now that the basics are covered, time to have fun! Check out all the affordable ideas I came up with below!
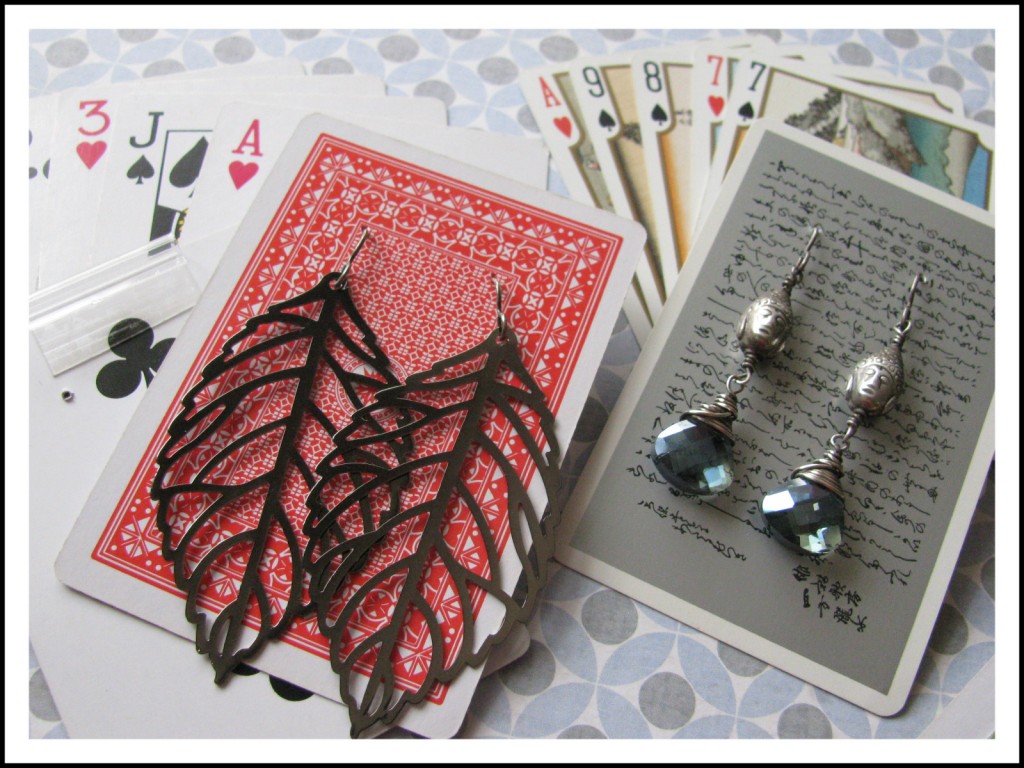
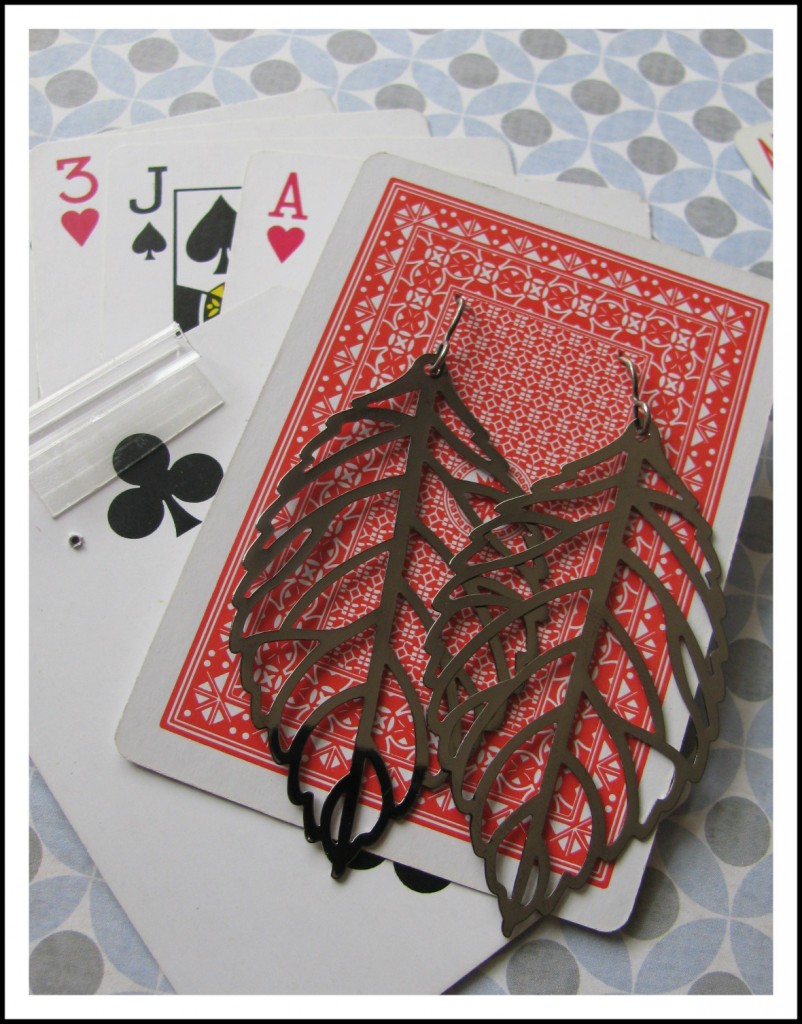
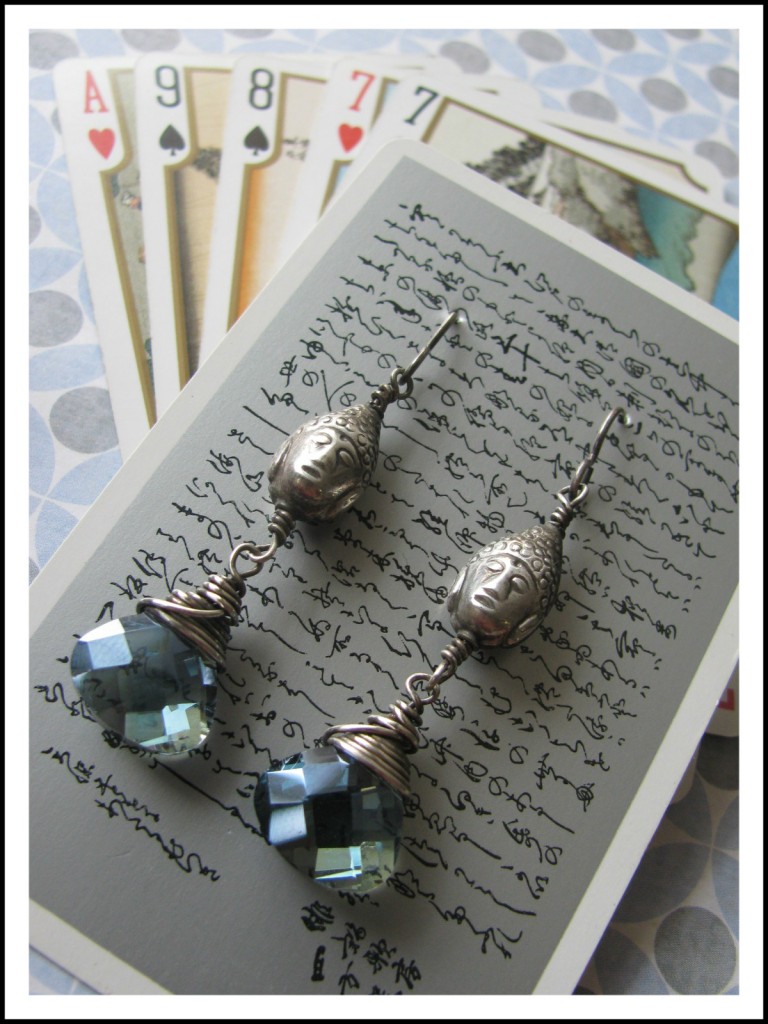
Playing Cards
Greeting Cards
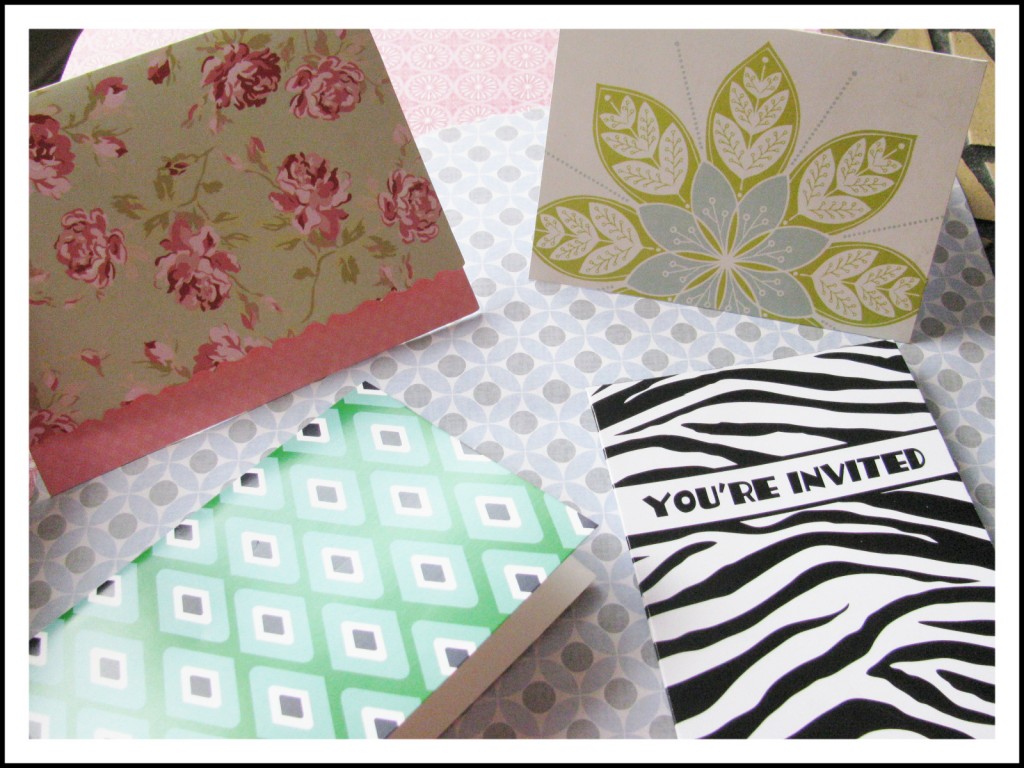
All of these cards came from packages of six or more and were less than $3. A paper cutter can transform them into functioning earring cards in no time!
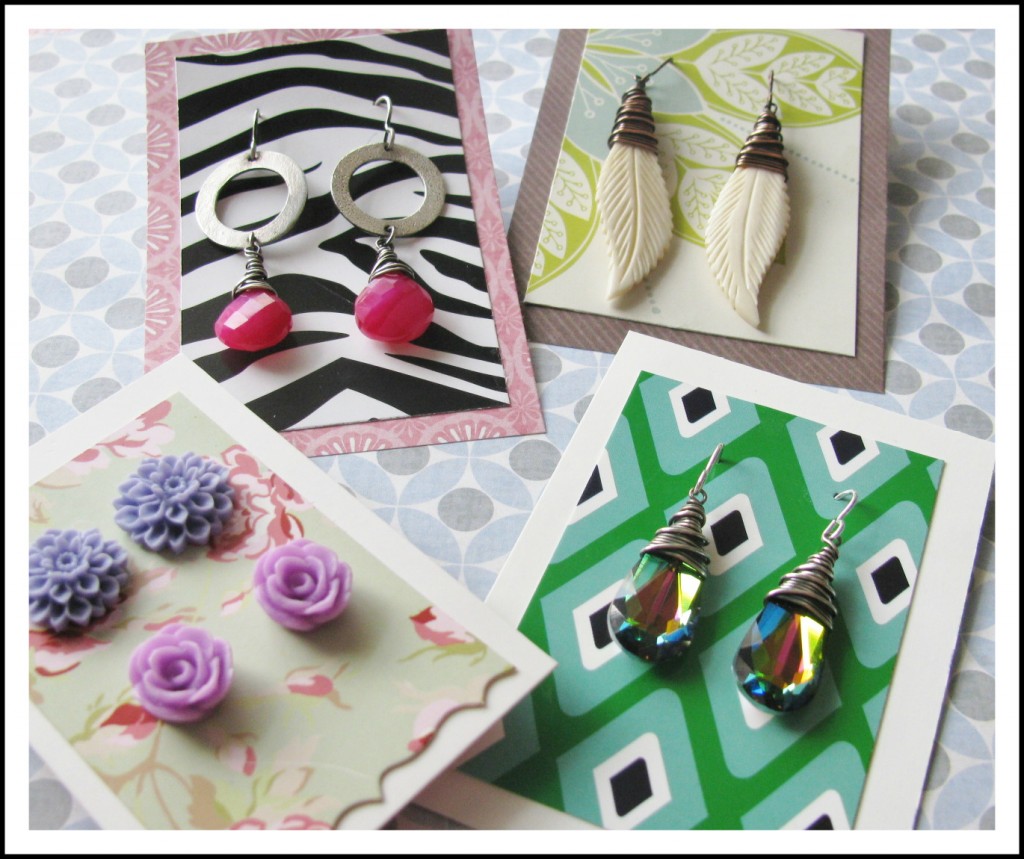
Use your glue stick to glue a second neutral piece of paper to the back, creating a border. The floral card was perfect for resin flower studs and I just love how the zebra print looks with the neon pink chalcedony!
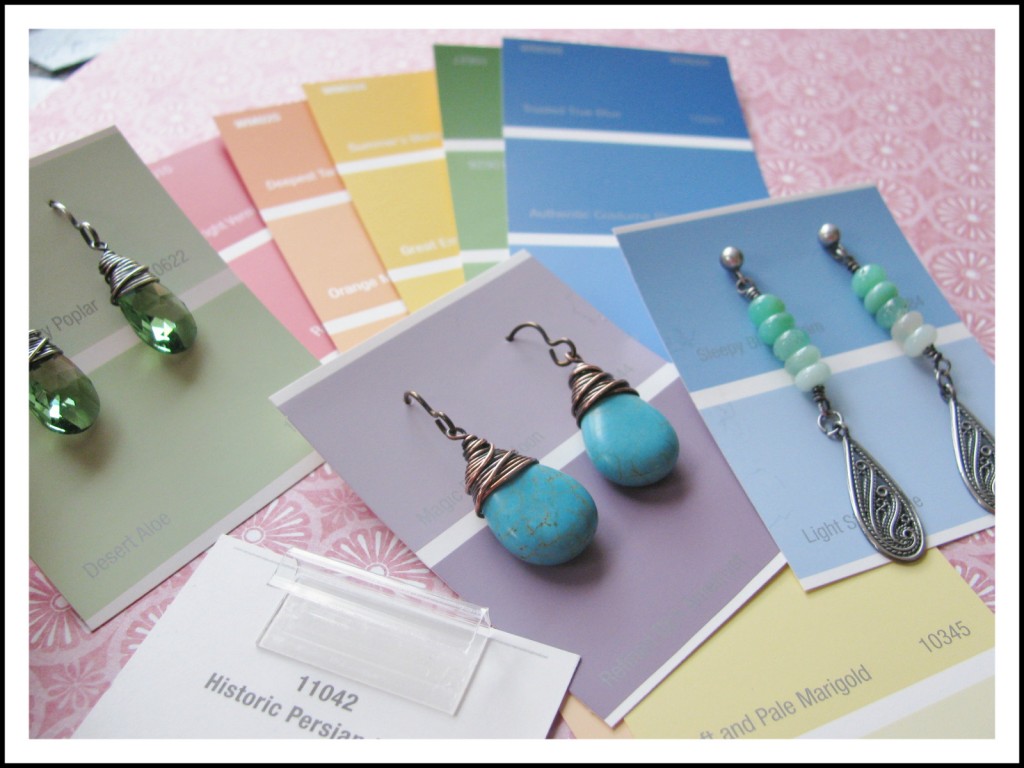
Paint Chip Samples
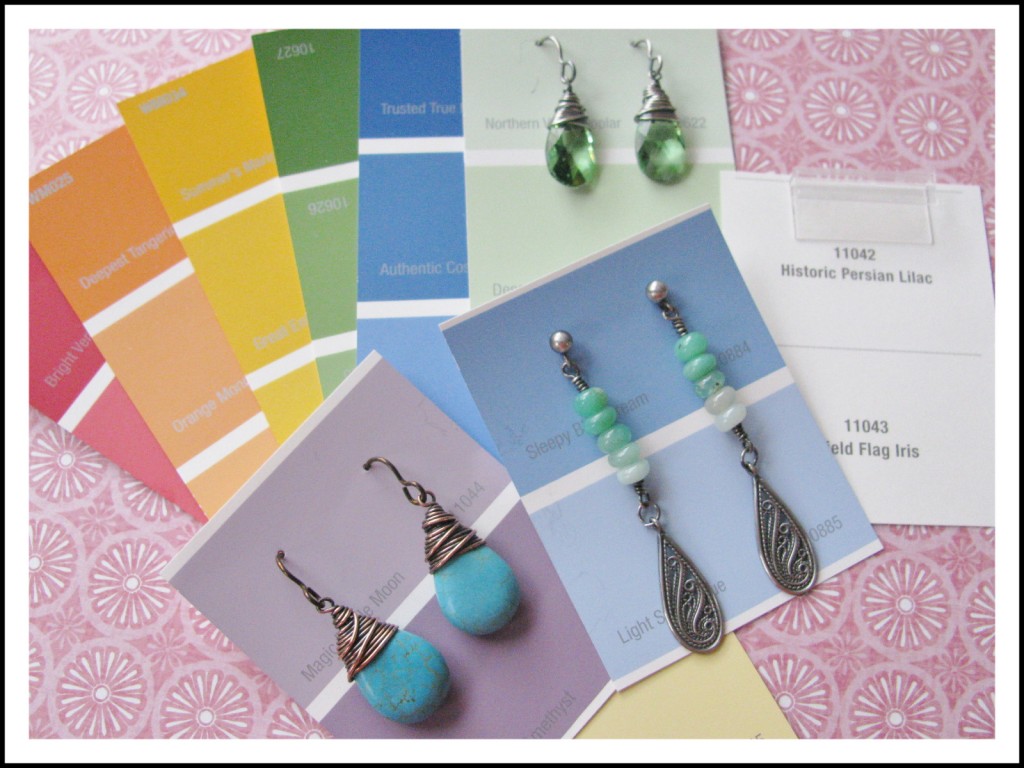
Total cost for paint chips, Free! At least for now, though I am sure due to Pinterest, they are disappearing more quickly from the shelves, so don’t be surprised if they start charging for them soon!
Gift Bag Tags

I found a 6-pack of these blank floral gift bag tags for $1! Check the dollar bins at your store, you never know what you might find!
Book pages
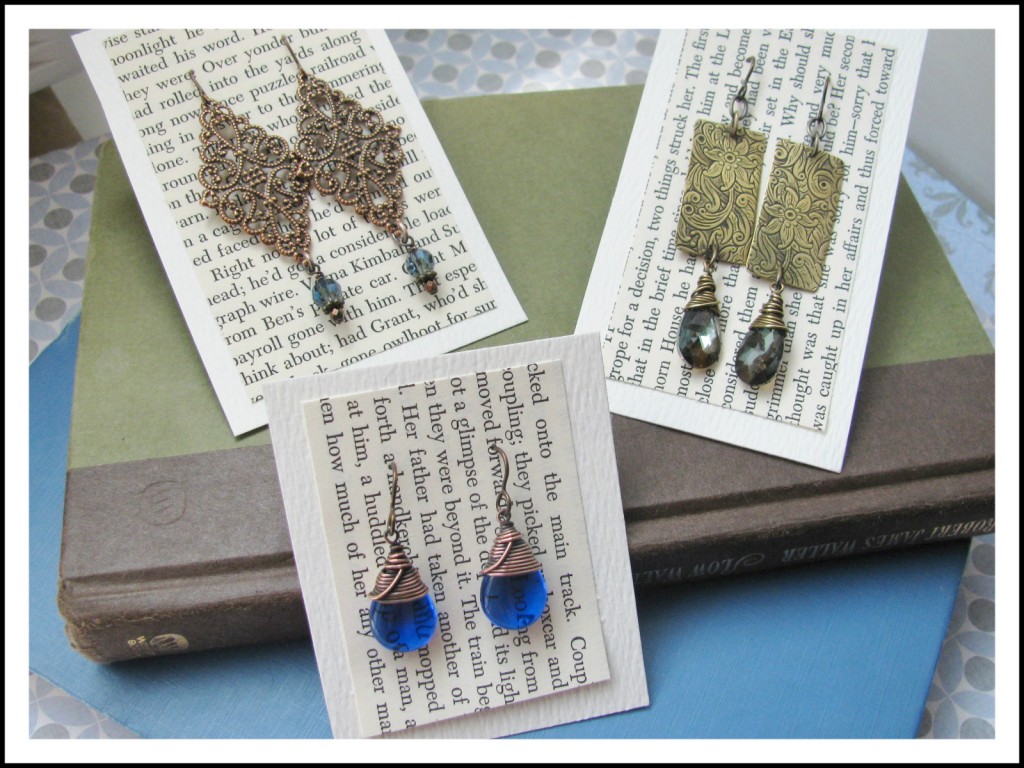
Love this look! Cut the pages vertical or horizontal and use the glue stick to adhere them to thick white construction or scrap book paper. Great for vintage looking earrings!
Maps
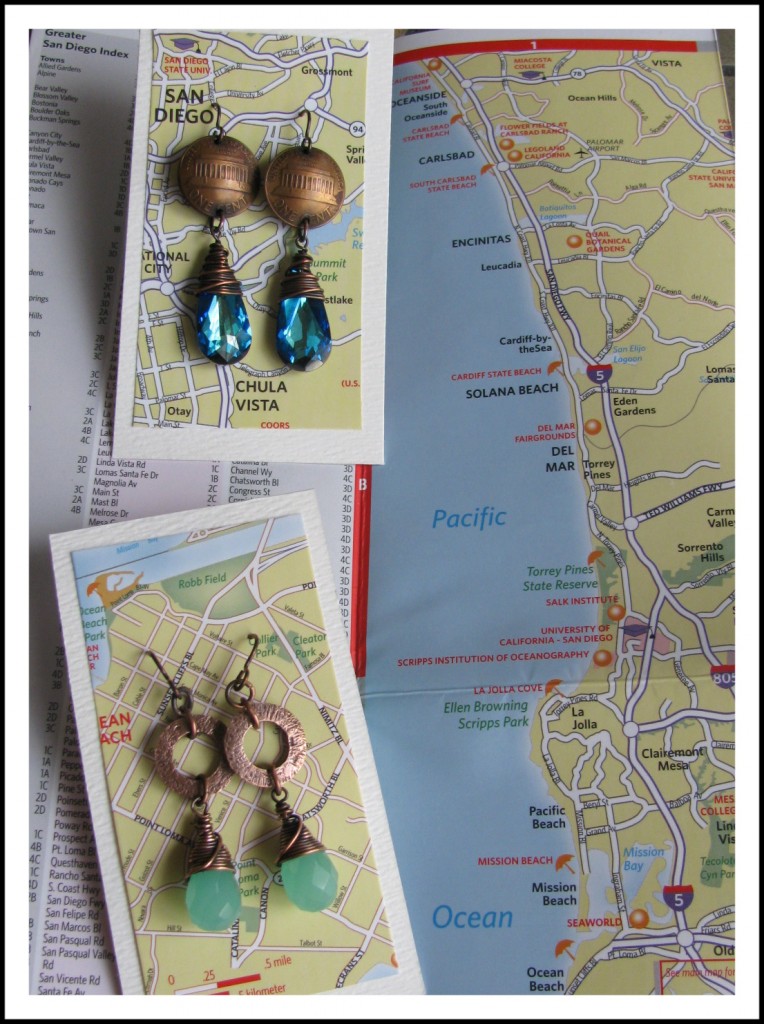
Buy inexpensive road maps, adhere to thick white scrapbook paper. I love this one, because you can pick out your favorite cities or coordinate your jewelry with the maps. Pair beachy earrings with maps of Hawaii of Celtic Earrings with maps of Ireland!
Well I hope I have inspired everyone to make some pretty earring cards! Please feel free to ask me any questions and add any ideas that you have for creating funky earring cards! Look forward to more blog post to help you with displaying and packaging your jewelry!
~~Tiffany
The Bead Bandit: make masculine beaded men's jewelry!
July 18, 2012Well, hello there, bloglandia. Do you ever feel like most jewelry findings are designed to look feminine? Even if they aren’t frilly or covered with hearts and flowers, there is often something innately delicate about most DIY jewelry findings. When you want to make beaded men’s jewelry, it can be a problem. Crimp beads and bullion just don’t look that tough! Luckily, jewelry designer Jeff Fulkerson invented a solution: the Bead Bandit.
Pretty in Pearls on Pinterest!
July 10, 2012Hi bloglandia! It seems every new breakthrough in technology divides people into 2 groups – those in the know and those who aren’t! The most influential new site is Pinterest.
Either you are busy pinning your favorite jewelry designs, wedding cake toppers, nail polish colors and mason jar DIY crafts – or you have no clue what all the fuss is about!
I think Pinterest is tons of fun for those of us who like pretty things (hi there, jewelry designers!!). Rings & Things has added new design boards for each of our Crystal Jams SWAROVSKI ELEMENTS bicone crystal bead assortments, and I must say, once you spend a bit of time searching for color-coordinated items, you start seeing the world in a whole new way!
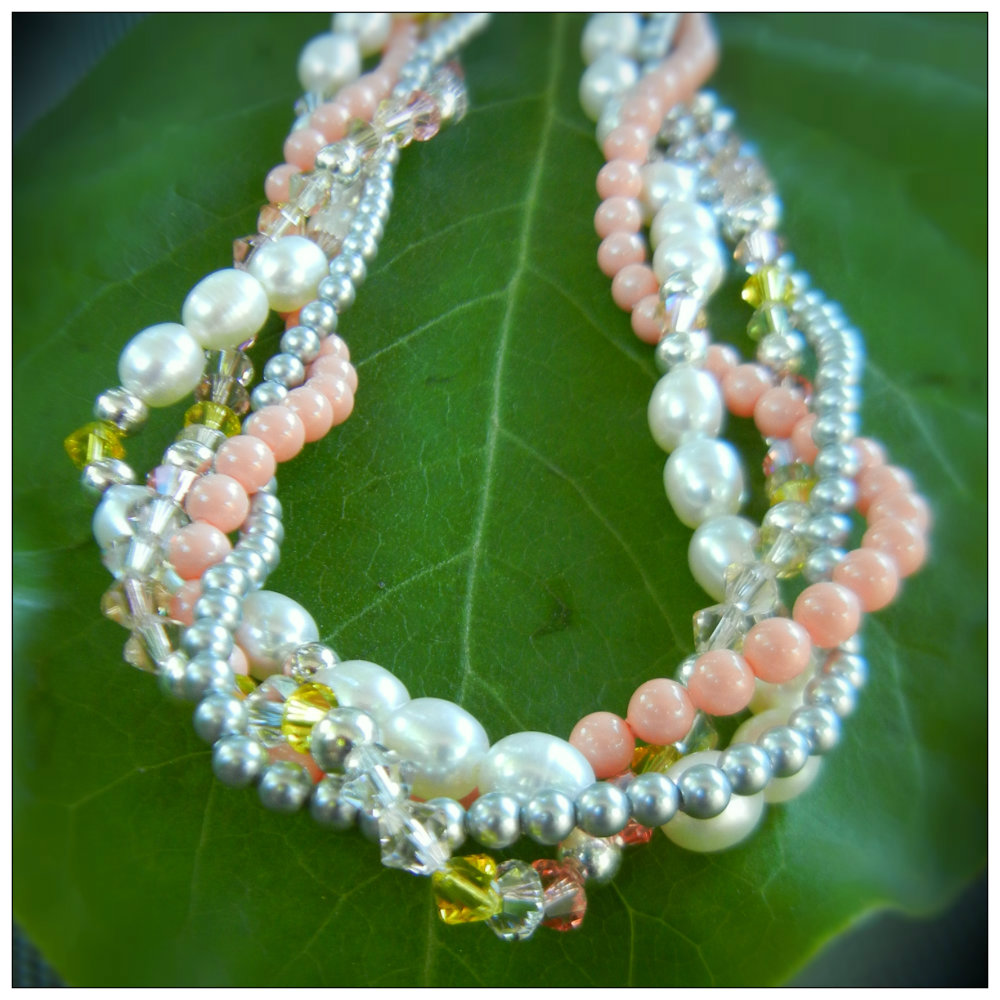
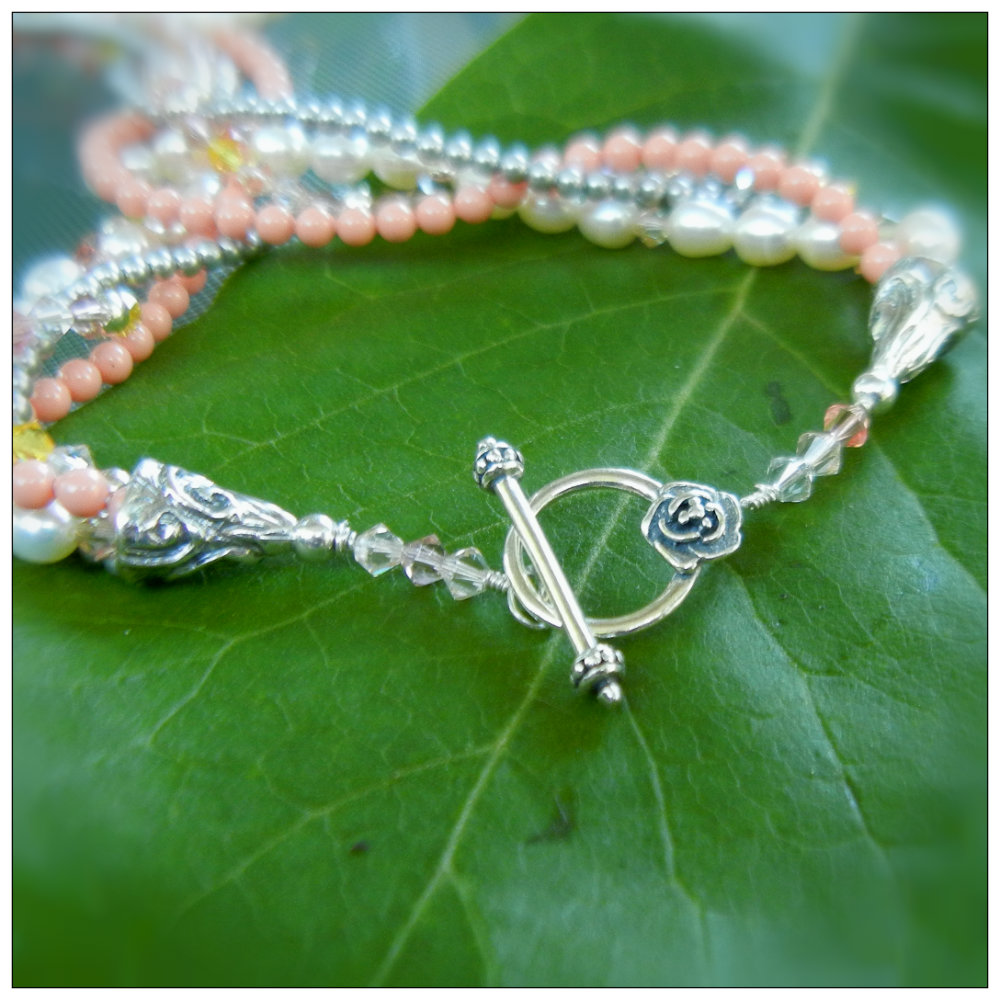
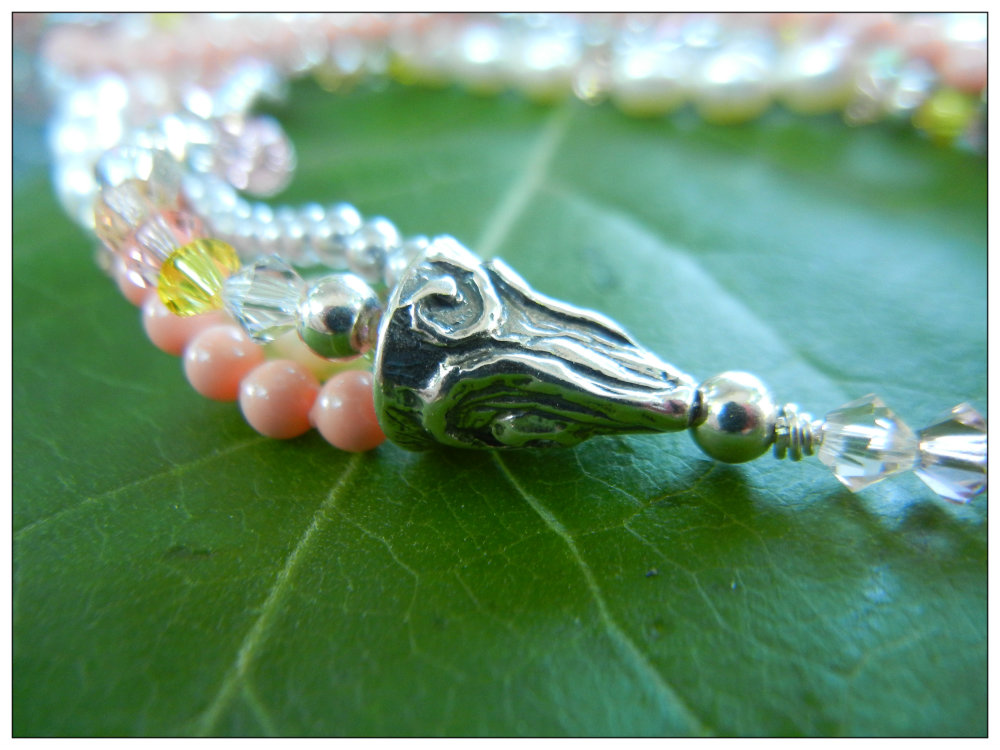
I braided four strands (4mm pink coral, 3mm light grey, 5-8mm rice pearls and 4mm bicones, with a few sterling silver rounds here and there) to make this statement necklace.
For example, I started pinning to our Kiss From A Rose board, and suddenly the world just looked peachier! The more I looked, the more I found (and loved) examples of peach with gray.
It led me to create this “Peachy Keen” necklace with pink coral and grey crystal pearls, freshwater pearls, and the Kiss From A Rose Crystal Jam. I finished it with a sterling silver floral toggle clasp and
Santa Me´ cone ends.
Follow Rings & Things Design Team on Pinterest to see all our color inspirations, plus boards devoted to new tools and techniques.
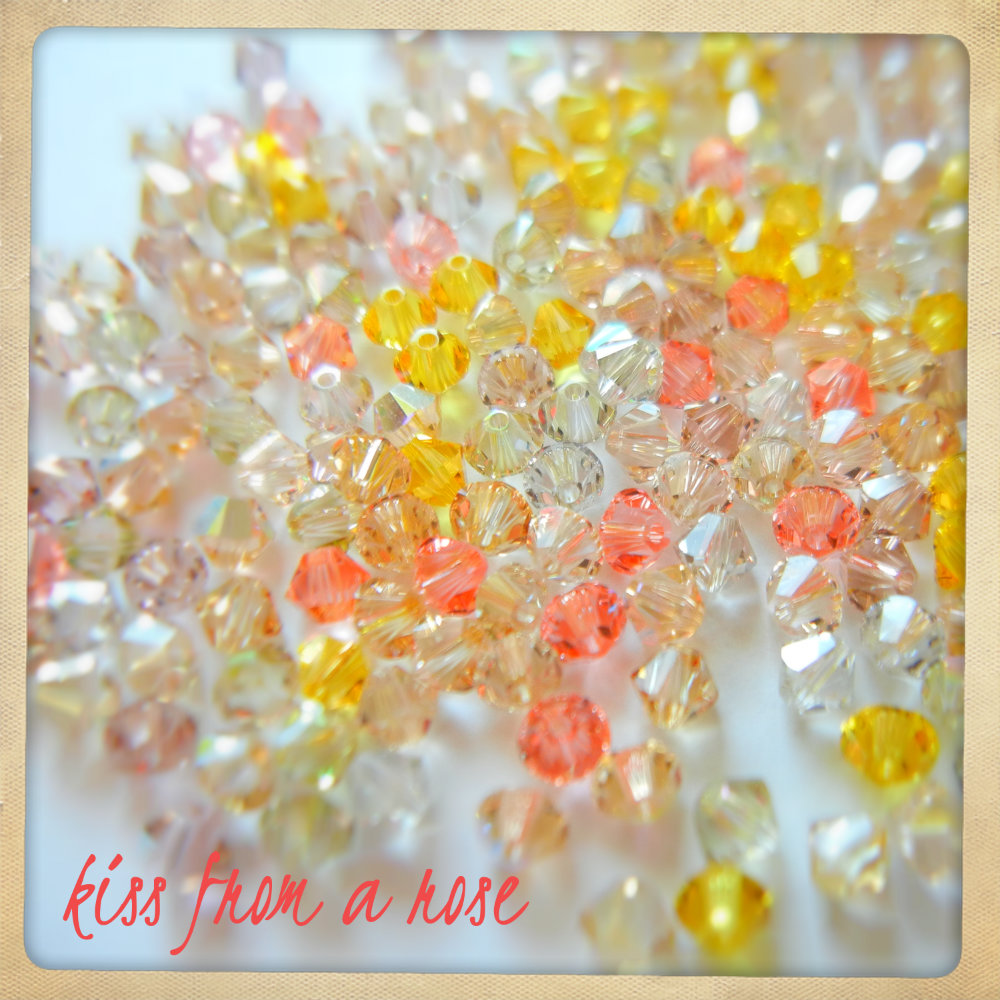 Then, Pick Your Palette and enter our design contest! The winners receive Rings & Things’ gift certificates and could be featured in our future catalogs! Happy pinning! ~ Cindy


