Browsing Category

Rings & Things Products

Twelve Days of Christmas Jewelry Designs: 4 – Beaded Snowflakes

November 17, 2011
beaded snowflakes

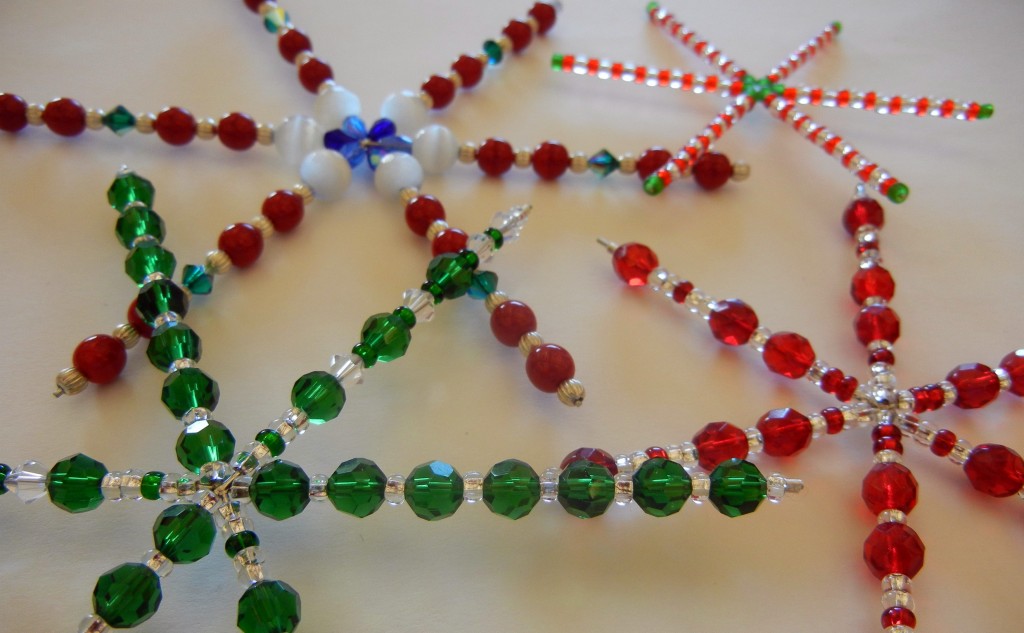
Making beaded snowflakes is a fun project for anyone old enough to not put beads in their mouth!

Day 4 is an ultra-simple, instant gratification project: beaded snowflakes. Simply take a wire snowflake form and add beads. This is an ideal project for using up leftover beads, especially sparkly glass beads!

snowflake wire formsThere are several options for keeping the beads in place:

  1. Use crimp beads. (Use a crimp with loop at the top to make it easy to hang).
  2. Glue the last bead in place.
  3. Use round-nose pliers to loop the end of the wire.
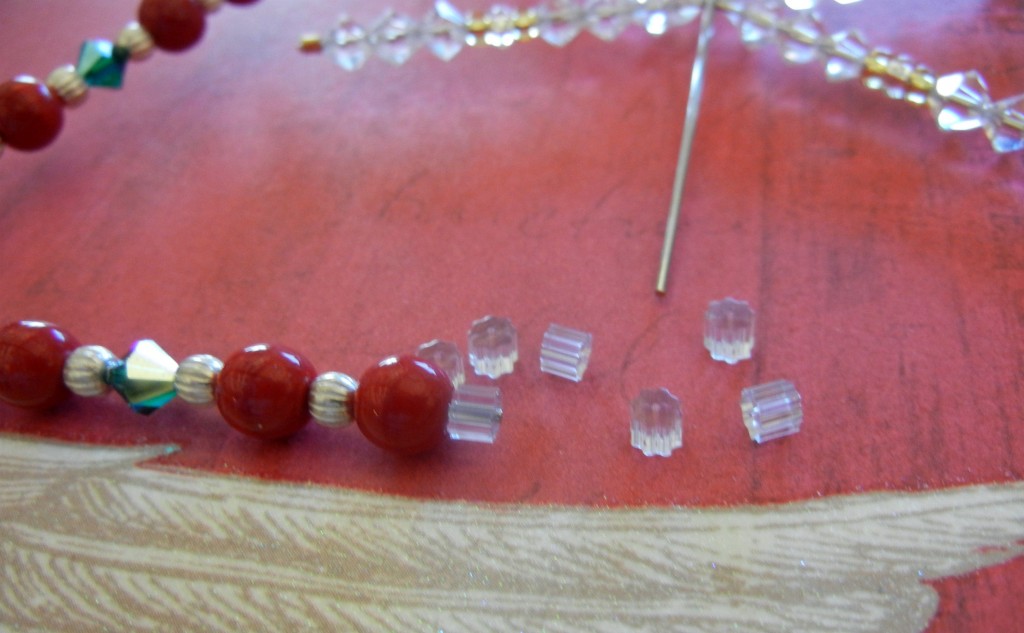
  4. french wire keeper on wireOr – the easiest and best in my opinion – use a French wire keeper. French wire keepers are little rubber stoppers that keep earrings in place – or beads on snowflake forms. French wire keepers also make great pin backs, or clutches/nuts for post earrings. A very versatile little jewelry finding indeed!
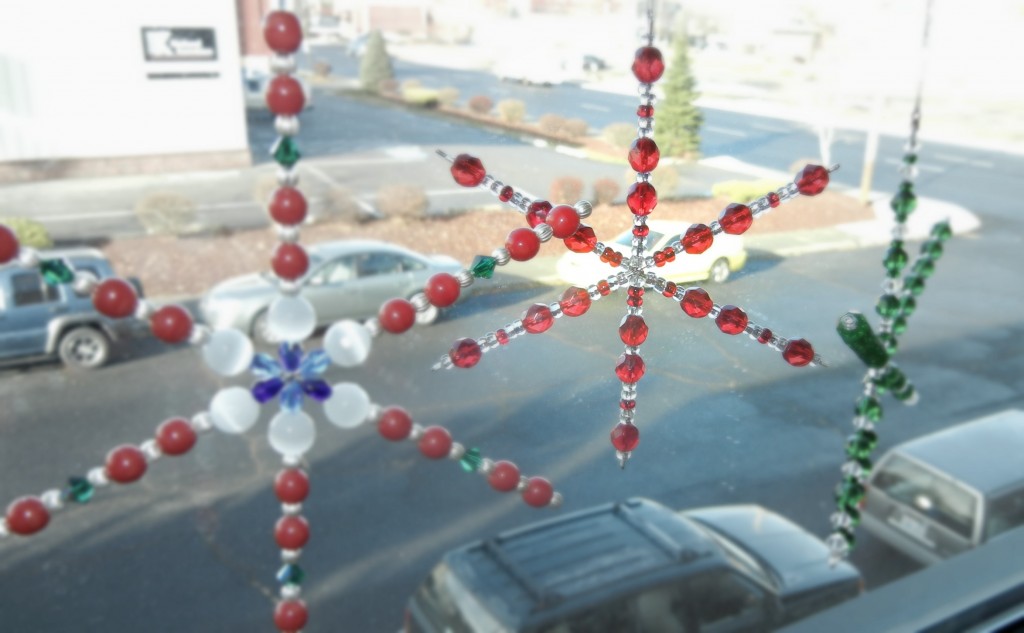
window-beaded-snowflakes

Dress up the view with sparkly snowflakes!

Winter – and the cold & flu season – is upon us. I didn’t post day 4 of the 12 Days of Christmas jewelry designs yesterday because I never made it out of bed. Silly head cold. So let that be a lesson to you all – it is never to early to start your holiday projects because you never know what interruptions you might face!

Happy beading! ~ Cindy

Twelve Days of Christmas Jewelry Designs: 3 – Lampwork Glass Bead Zipper Pulls

November 15, 2011
candy-glass-zipper-pulls

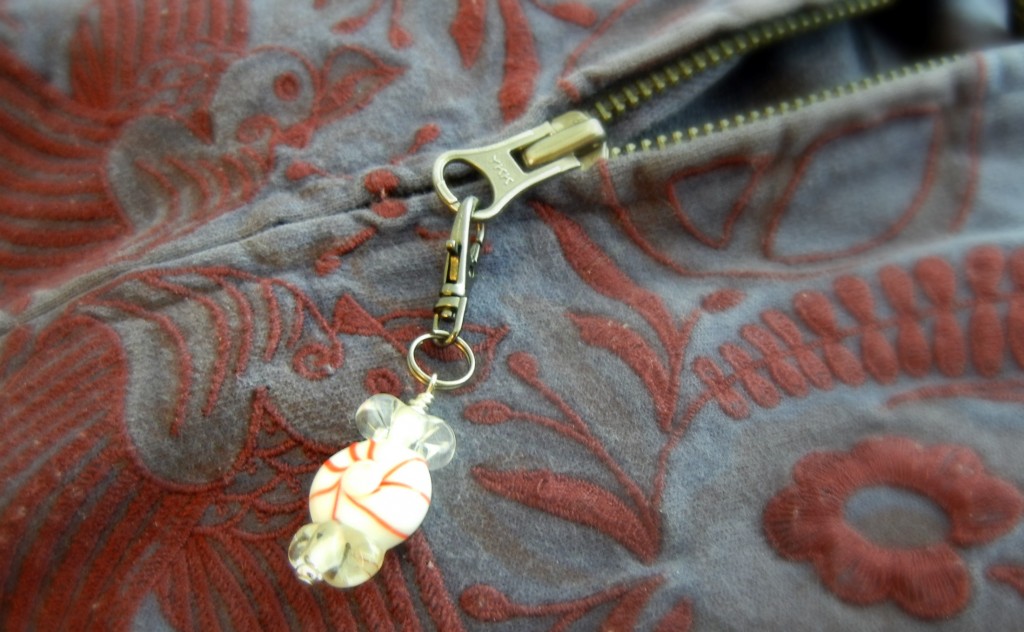
Candy bead zipper pulls make a great gift for someone sweet!

Quick, cute and affordable gift idea: zipper pulls! Zipper pulls are actually quite functional when you’re wearing gloves or mittens – why not make them pretty, too? Here are the three things you must do to make beady coat decorations strong enough to withstand a blustery winter.

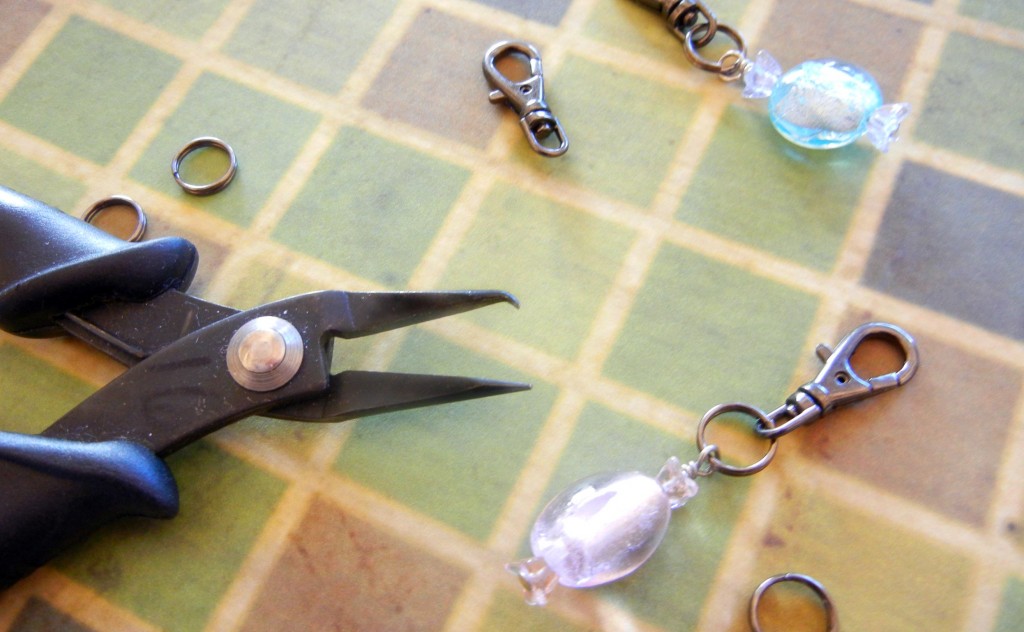
split ring pliers

That hooked jaw will save your manicure.

  1. Use beads that are large enough to grasp when you’re gloved up. If the bead holes are large, like on many of the holiday lampwork glass beads I used, add small beads on both ends. (Small Czech glass flower beads make convincing cellophane wrappers on silver-foil glass bead candy.)
  2. String beads on a headpin and make a wrapped loop. A basic loop won’t cut it here.
  3. Use split rings instead of jump rings to attach your baubles to a swivel clip or clasp.
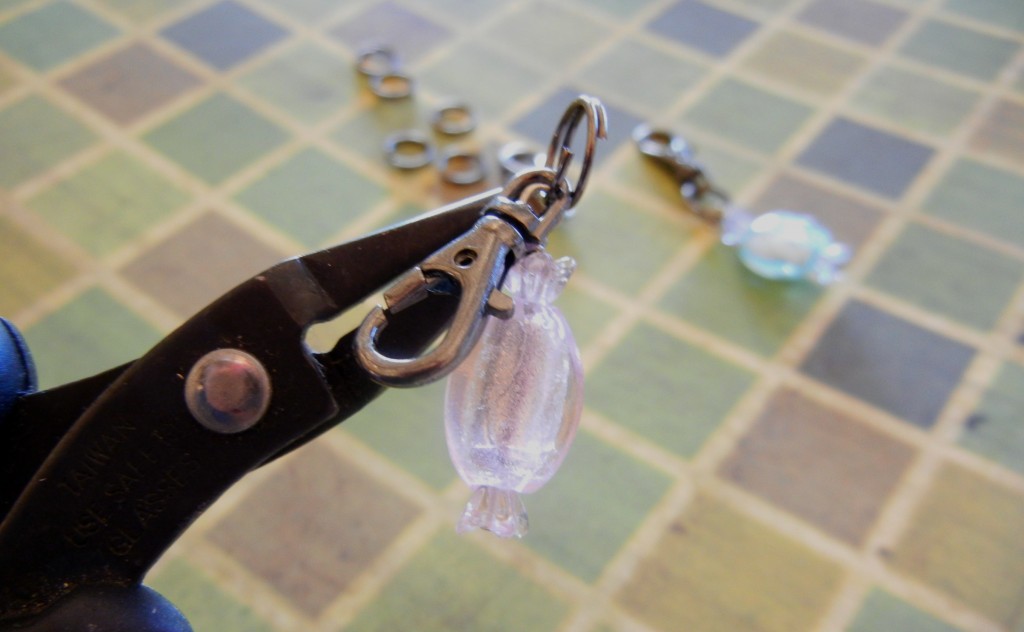
split ring pliers

Pliers make this so much easier!

You’ve heard the song “Save a Horse, Ride a Cowboy”? Well, save your nails – use split ring pliers! Just insert the hooked jaw into the split ring and squeeze. Now slide both the swivel clip and beaded pin onto the ring.

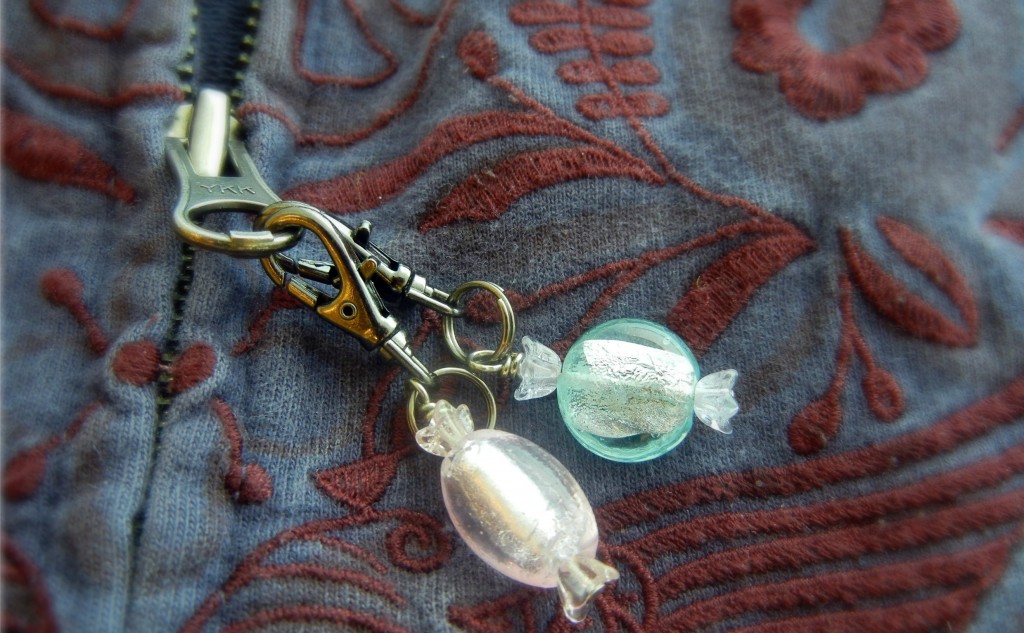
peppermint candy zipper

Mint candy freshens up any outfit.

Well done. You’ve just learned how to make great gifts for under $1 each! ~ Cindy

Twelve Days of Christmas Jewelry Designs: 1 – Swarovski Crystal Tree Earrings

November 11, 2011

Hi bloglandia! The holidays are sneaking up on us like stealthy ninjas. Whether you have been making jewelry for years or would like to make your very first pair of earrings, these super sparkly crystal Christmas tree earrings are a fast and fun way to whip up some holiday spirit. Over the rest of November, I’m going to share twelve holiday jewelry designs, most of which are simple and sweet. All of them make great DIY gifts or highly sellable products for your next craft show. Today’s detailed instructions for how to make beaded earrings should make it possible for you to make a variety of jewelry designs – the more you practice making wrapped loops on head pins, the easier it gets!

Supplies for one pair of Crystal Christmas Tree Earrings

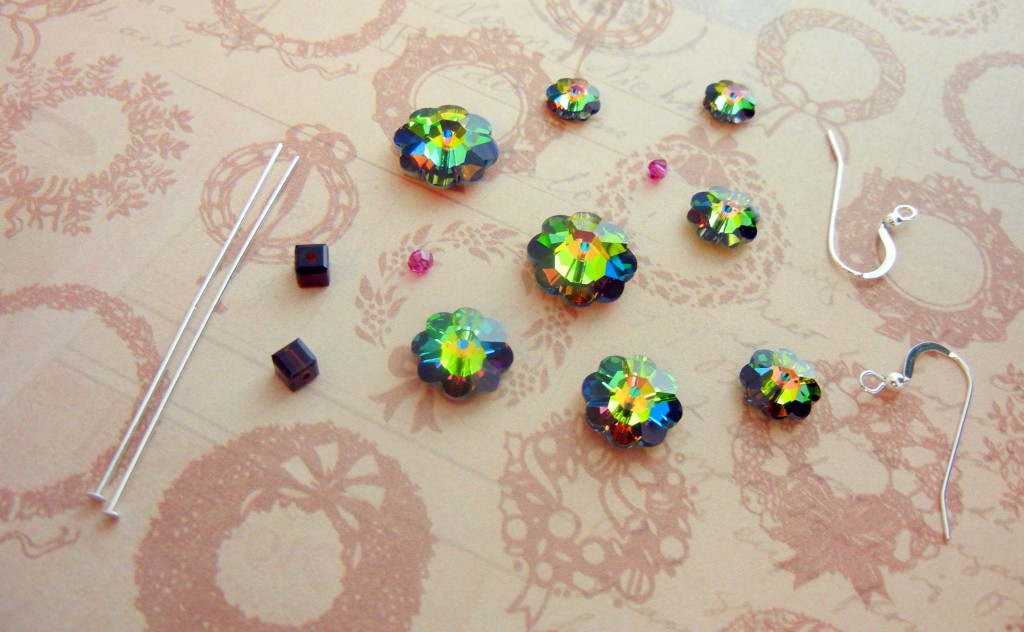
crystal-tree-earring-parts

Earring parts – you’ll also need a set of the basic jewelry pliers.

  • One pair of ear wires (I’m using sterling silver filled – less expensive than sterling, but the same look and quality for people who can’t wear base metal. Learn more.)
  • Two 2″ head pins (since the pin won’t touch the wearer, I think it is ok to use silver-plated pins if you like, instead of sterling silver. 1.5″ head pins will work too, but longer pins are easier for beginners to wrap.)
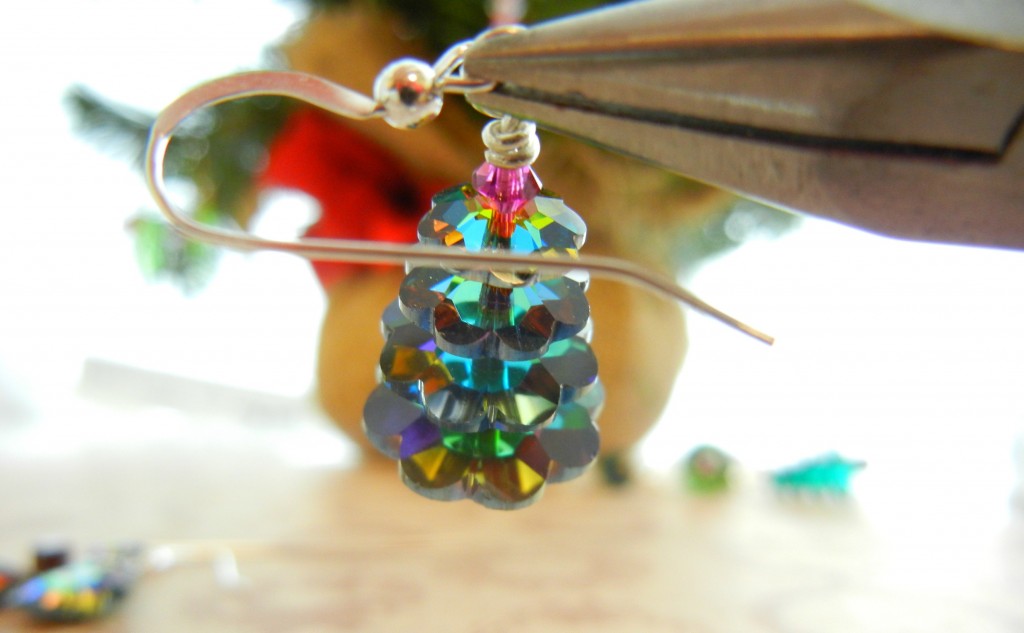
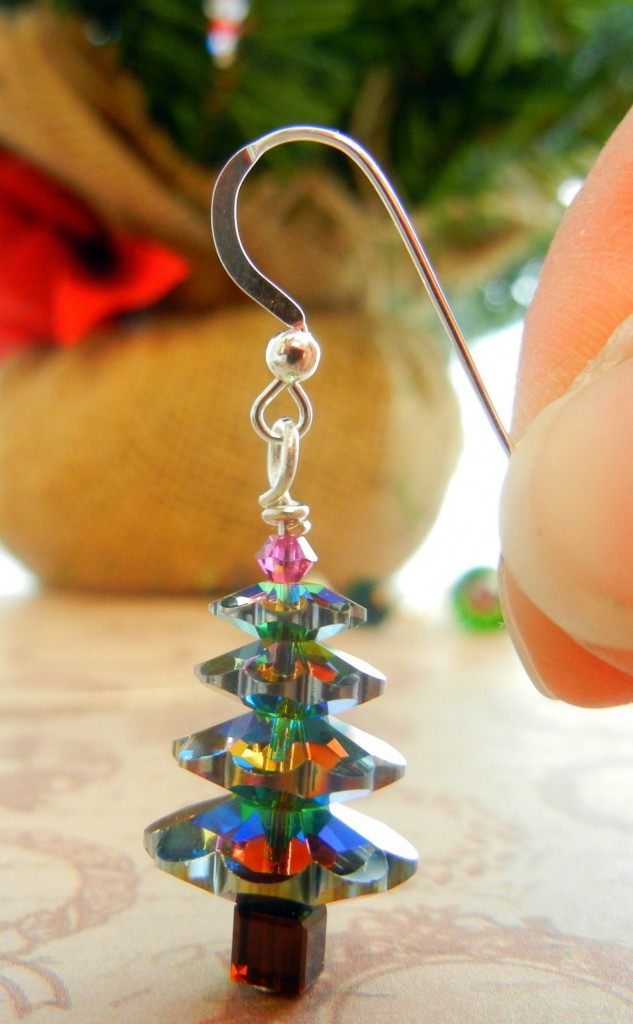
  • Three to five graduated sizes SWAROVSKI ELEMENTS crystal margaritas in one color (I used Crystal Vitrail Medium in 8mm, 10mm, 12mm and 14mm)
  • Two 4mm crystal cube beads
  • Two 3mm crystal bicones (I used Fuchsia)

Step by Step Photo Instructions for Making Crystal Tree Earrings

stack-a-bead-tree

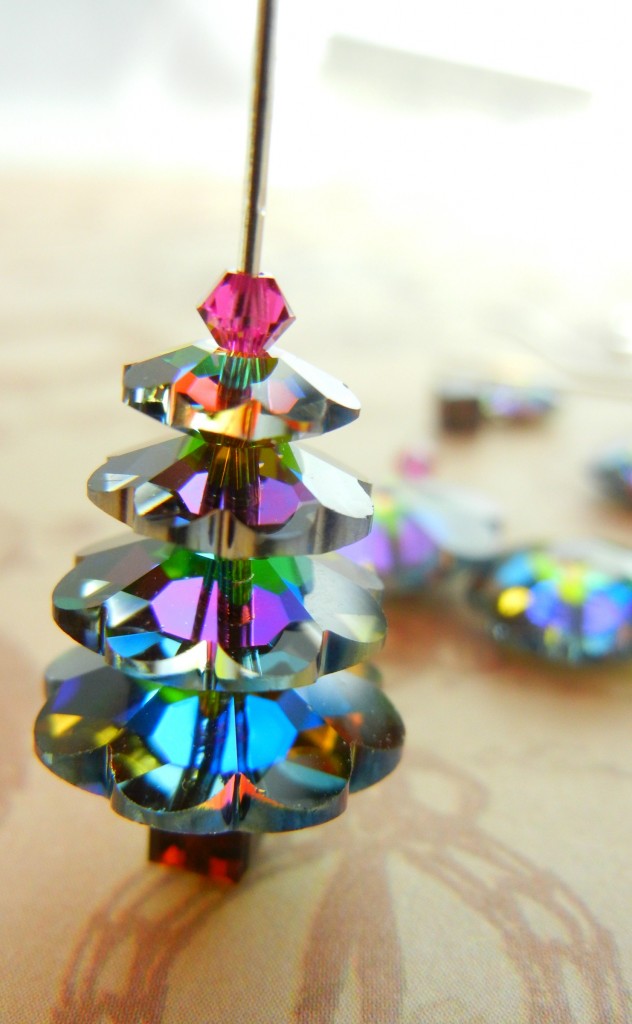
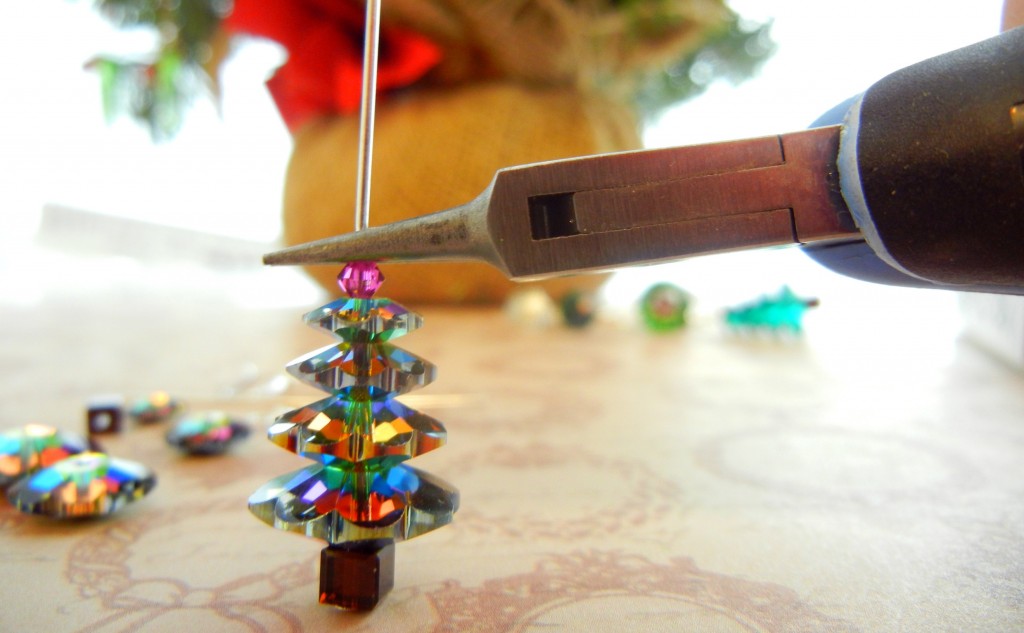
Stack the crystals on a head pin.

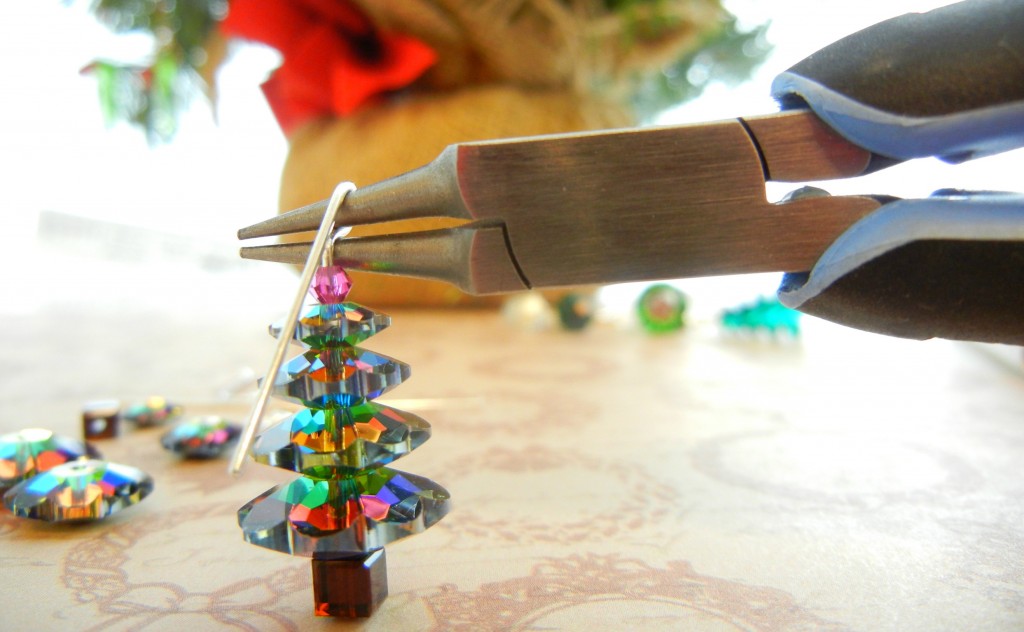
grip with round nose pliers

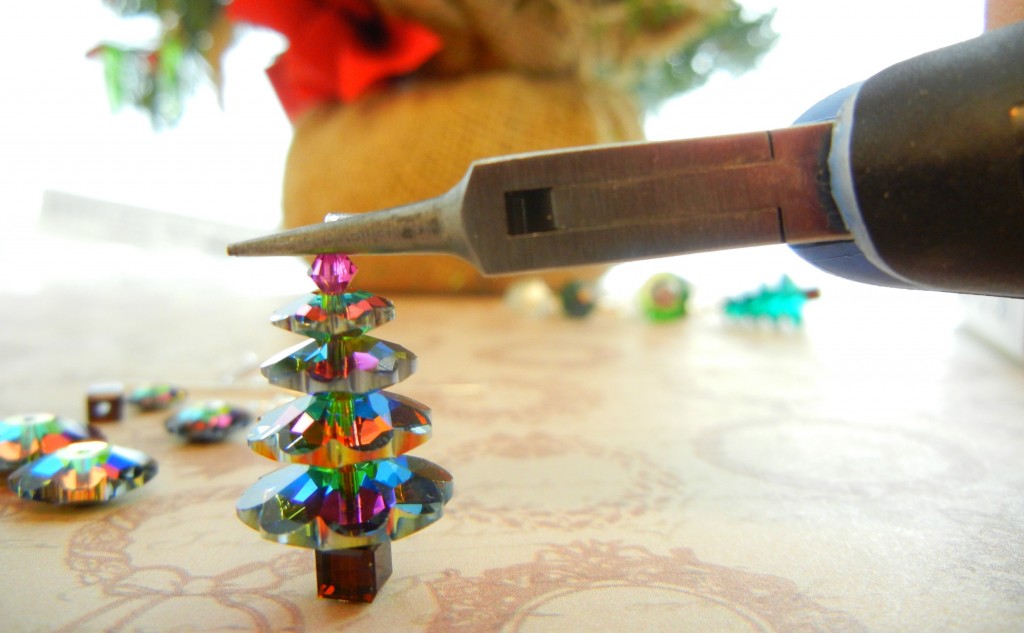
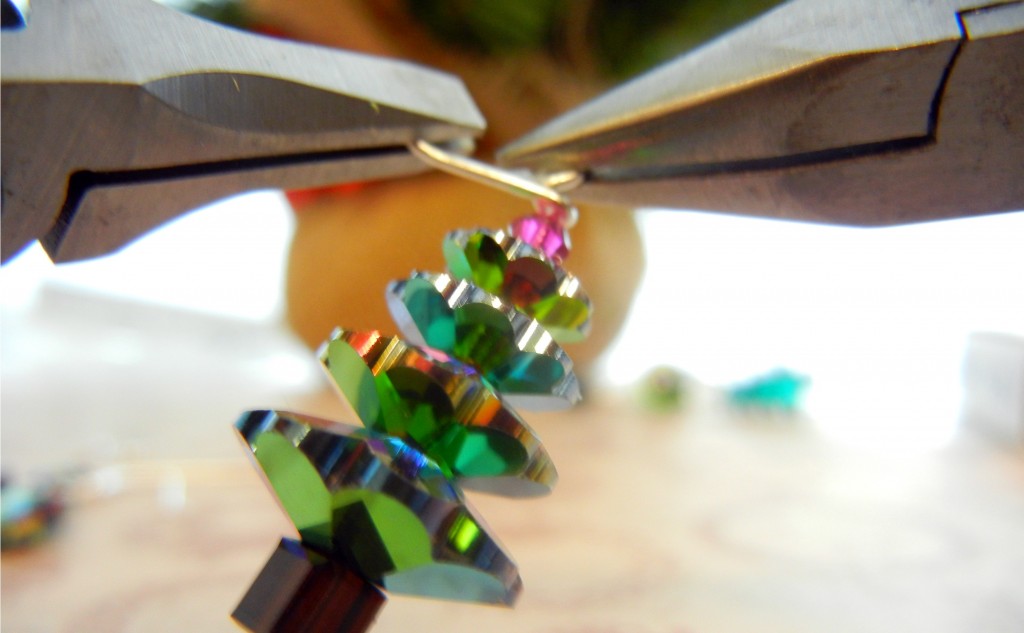
Grip the pin with round nose pliers.

Bend wire away from you.

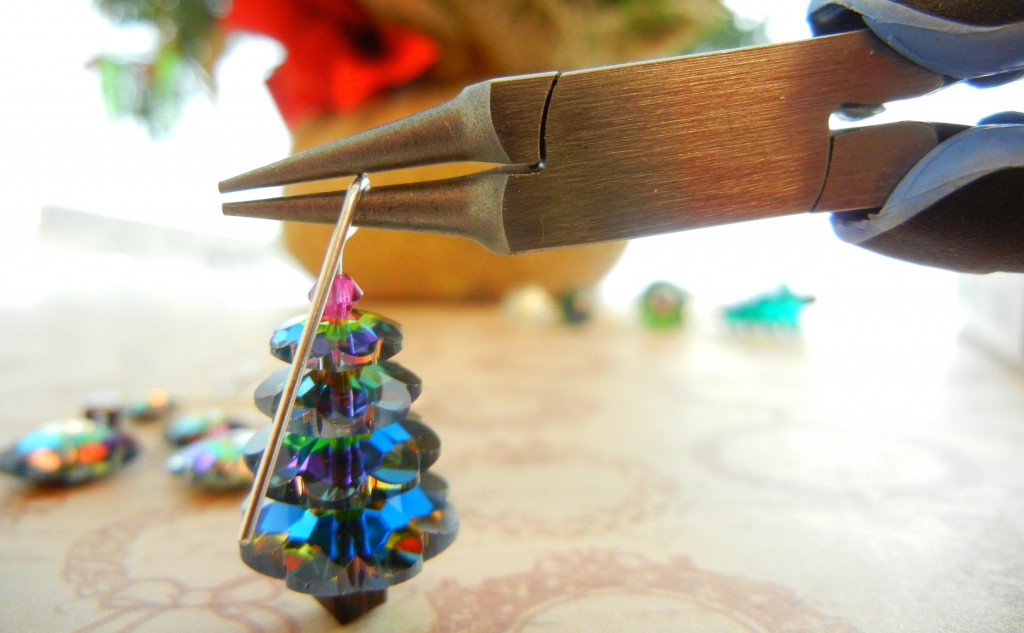
rotate pliers

Turn just your wrist to rotate the pliers a quarter turn away from your body, like so.

bend-wire-fwd

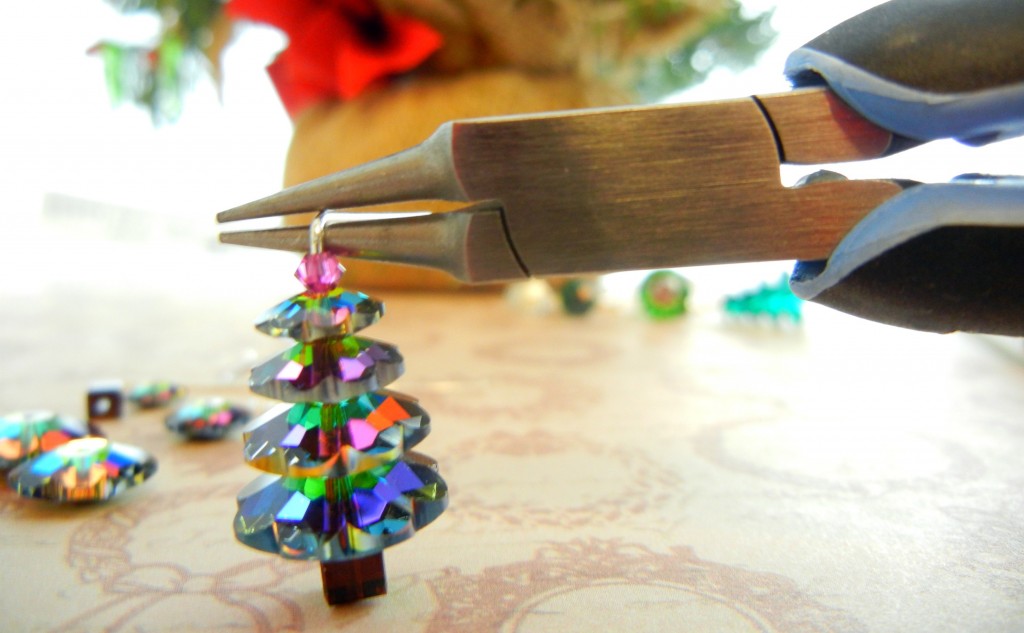
Pull the wire back towards your body, looping it over the top jaw of the pliers.

wire-facing-you

Now the wire is pointing back towards you.

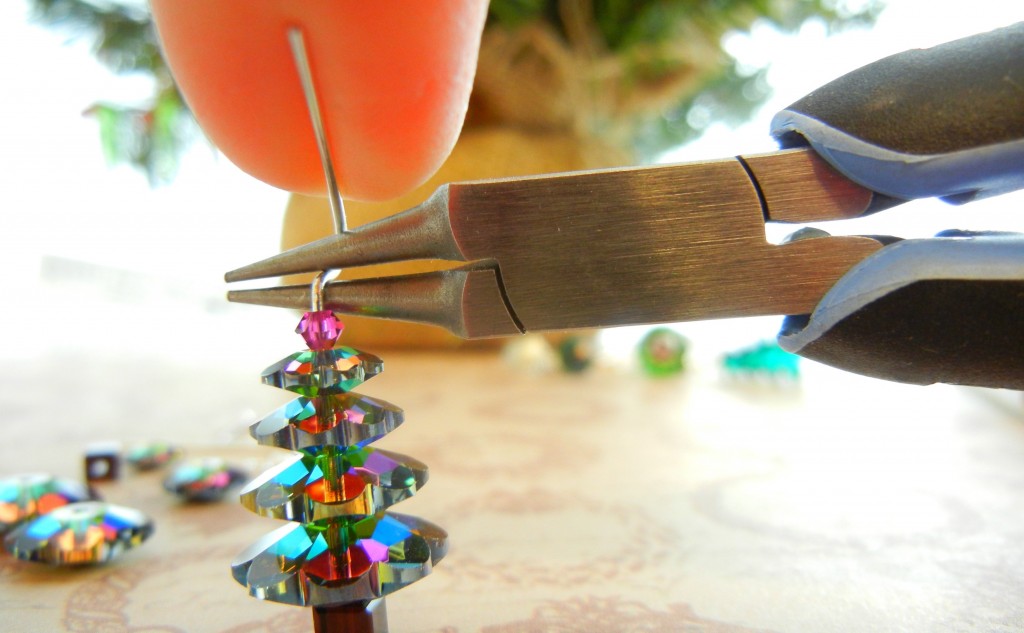
rotate-pliers-again

Rotate your wrist towards you again to move the pliers into this position.

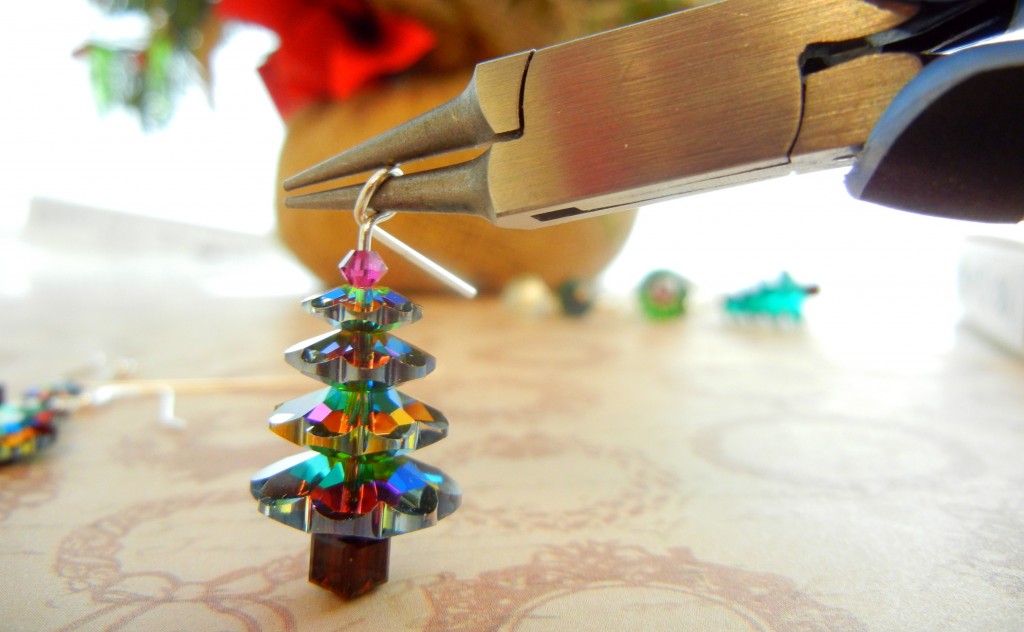
close the loop

Now there is room to close the loop (push the wire away from you).

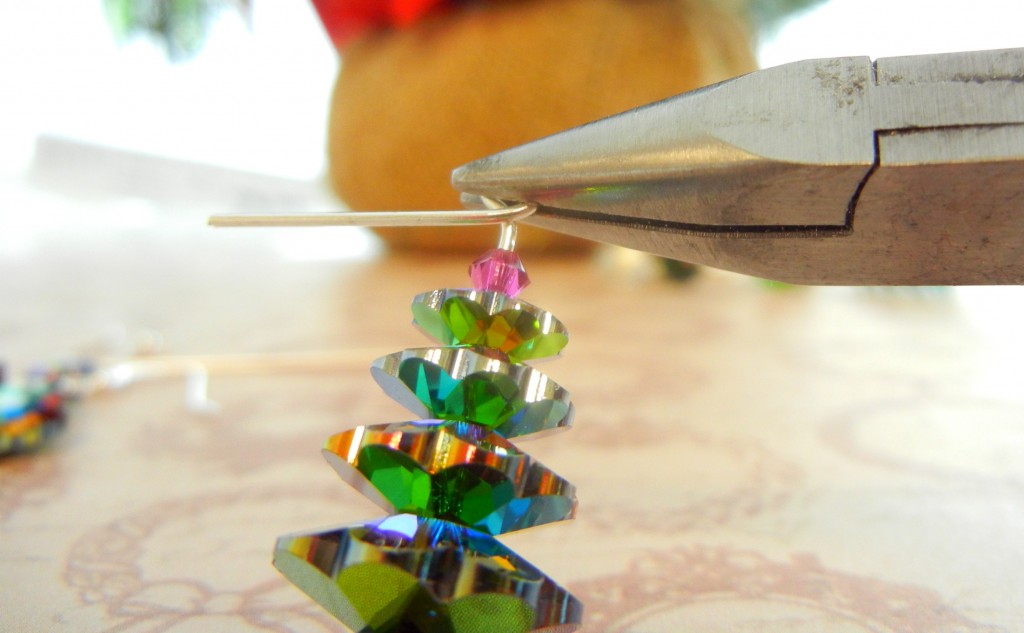
grip the loop

After you’ve closed the loop, switch to chain nose pliers to grip the loop.

wrap wire tail

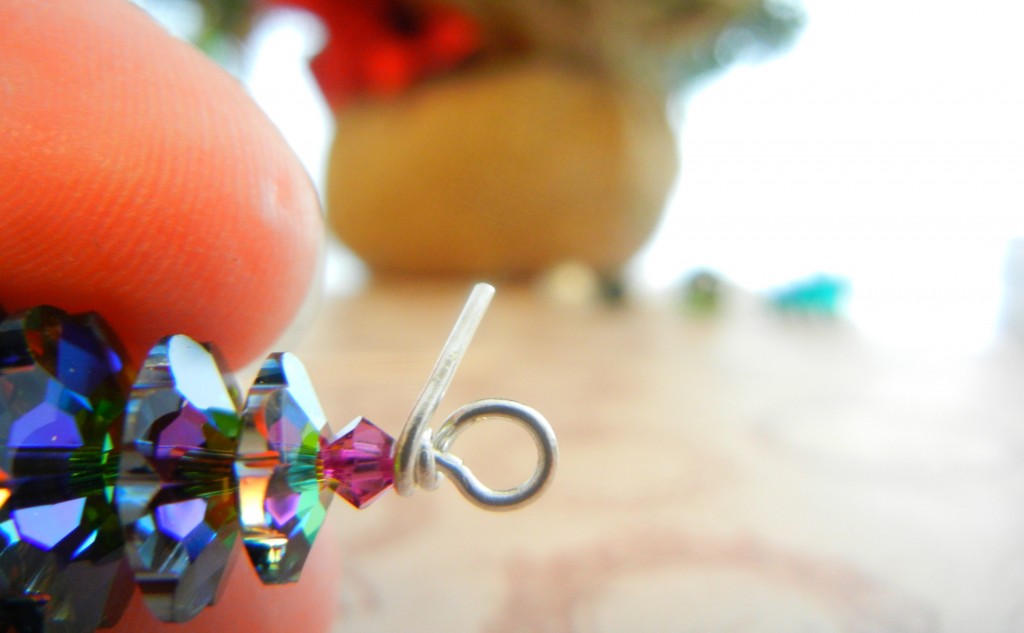
Grip the tail with flat nose pliers and wrap it around the wire.

wrapped wire loop

Stop wrapping when you reach the crystal.

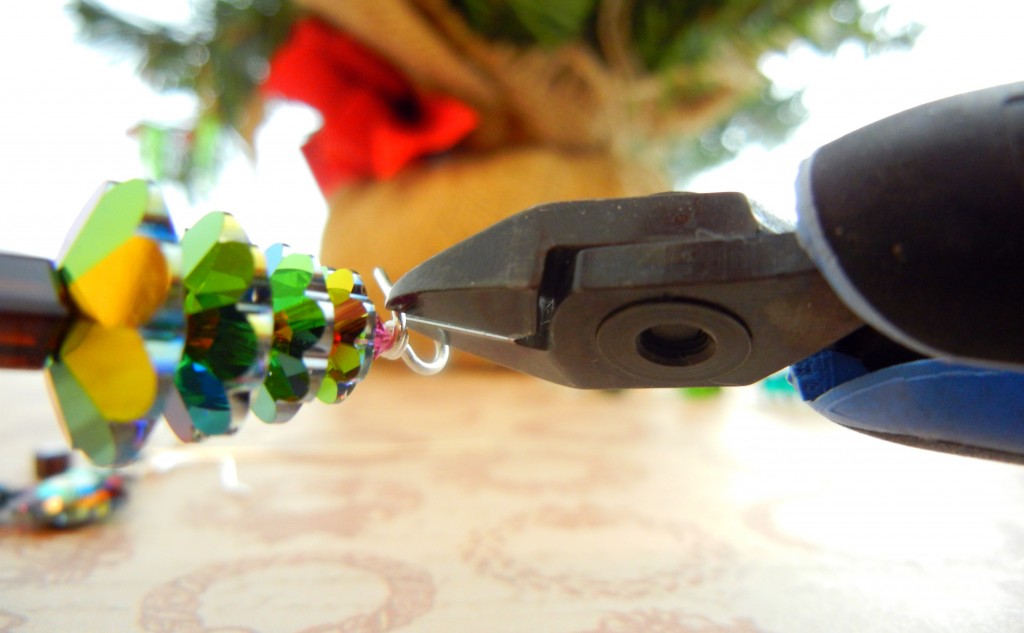
Trim the excess wire.

Trim the excess wire.

tuck the wire tail

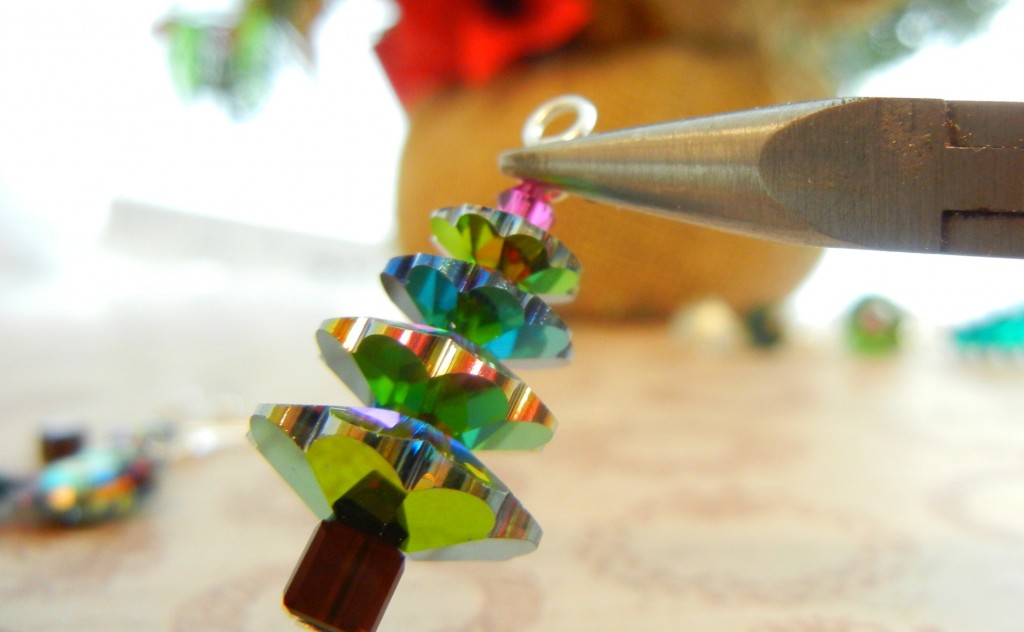
Squeeze gently with chain nose pliers to tuck the wire tail in tight with the wrap.

attach ear wire

Open the ear wire just like you’d open a jump ring. Add the crystal tree and close the ear wire.

complete crystal tree earring

Ta da! One sparkly tree earring. Now repeat all the steps to make its mate!

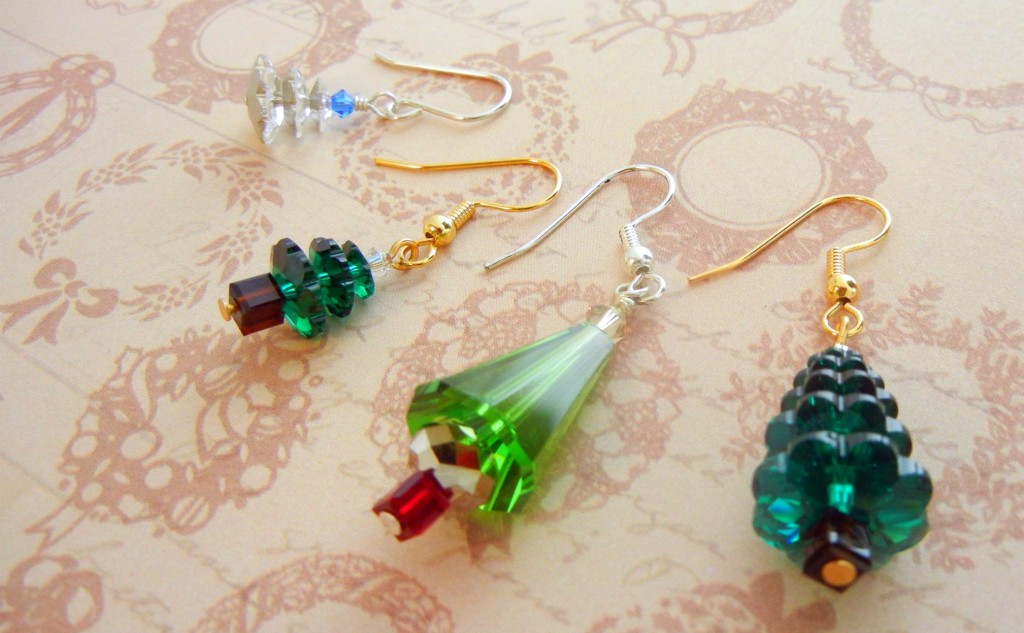
Green and red make the classic color combo, but there are plenty of other options. Foiled crystal margaritas look like icy trees, especially when paired with blue trunks and stars. Fern Green is an even “greener” green than Emerald, while the Crystal Vitrail Medium I used are mostly green with all kinds of reflected colors. I paired it with pink for a slightly less traditional look. I like to use the “Browse by Crystal Color” page on Rings & Things website to pick crystal color combos. Here are a few other crystal Christmas trees made with SWAROVSKI ELEMENTS:

crystal tree options

More sizes and colors of Christmas tree earrings – the smooth one is made with a Fern Green Artemis bead instead of margarita crystals.

Now that you know how to make these crystal tree charms, you can attach them to anything: use them as pendants, zipper pulls, cell phone charms, tree ornaments or wine glass markers if you like! ~ Cindy

Five designers: Five very different gemstone and chain jewelry pieces!

November 9, 2011

We’ve recently changed our jewelry design contest at Rings & Things. Instead of just one big contest, we’re now going to have a series of jewelry design challenges peppered throughout the year. The first of these is our Rock n’ Rollo Design Challenge. The rules are simple: just use any style of our rollo chain and either rainbow amazonite or larvikite gemstone beads in your design! And also – the design doesn’t even have to be jewelry! Any type of art or craft is eligible, so long as it incorporates the challenge supplies.

Oscar Wilde is quoted as saying “A work of art is the unique result of a unique temperament.” Design challenges like this one really highlight this truth. Given the same basic building blocks, it might seem like you’d end up with the same basic designs. Not true! Five of our designers created inspiration pieces that meet the contest guidelines, and all five use chain and gemstone in completely different ways:

etched-copper-bird-necklace“Wee Bird” riveted metals and rainbow amazonite necklace by Mollie Valente

A sweet etched copper bird pendant, riveted to brass. Mollie used a mesh choker for the back of the piece. Rollo chain is used as a stylish alternative to jump rings to link the gemstone connectors.

copper-clay-gemstone-necklace“Unfurled” copper and rainbow amazonite necklace by Cindy Morris

I created the leafy bead cap with copper clay and strung a river of copper and swirly gemstone oval beads flowing from it. I used chain in the back to keep the necklace from feeling and looking too heavy.

black-labradorite-ribbon-necklace“Reverse Stack Effect” larvikite necklace by Amy Mickelson

Amy combines a lavish and unexpected mix of materials (larvikite, dotted lampwork glass squares, wavy silver-plated disks, chunky rollo chain, hand-dyed silk ribbon) into a colorful statement piece. The full parts list is available in our newly reformatted design gallery. The gallery is now integrated with our online store, so it is much, much easier to find and buy the supplies that catch your eye!

larvikite-chain-bracelet“Slated for Chain” larvikite and silver-plated chain bracelet by Val Nygaard-Pouzar

Clean and classic: the shimmery larvikite (or black labradorite, as it is commonly known) gemstone bead anchors this symmetrical design.

ceramic-enamel-eye-necklace“Eyeball in My Martini” necklace by Polly Nobbs-LaRue

With a “raku” ceramic flying eyeball, C-Koop enameled gear and swirly TierraCast copper links, you might not even notice the rollo chain and single rainbow amazonite bead on this necklace!
No matter what type of jewelry you design, I hope you will stretch your imagination and enter the 2011 Rock n’ Rollo jewelry design contest! With hundreds of dollars in gift certificates (and the possibility of free advertising for your work!) as prizes, and nothing but a emailed photo required to enter, why wouldn’t you rock out a stunning rollo chain design? Be sure to check out the contest page for all the details! ~ Cindy

How to make a knotted pearl necklace

November 4, 2011

knotted-crystal-pearl-necklace
Tradition. While often we just mindlessly follow it, sometimes it is nice to understand the reasons why. For example, pearl necklaces are traditionally knotted on silk cord. Why is this?

  1. If the strand breaks, the pearls don’t go flying every which way.
  2. The knots provide space and cushion, which prevents the pearl’s delicate nacre coating from getting damaged.
  3. It just looks good!

Ok, so #3 isn’t an official reason, but it must be as true as the first two. People have been making pearl necklaces for hundreds of years, so I’m sure someone would have figured out a different method if this one wasn’t attractive. But knotted necklaces are attractive. What I only recently came to understand is how attractive they are to make. Knotting seems like a lot of work. Thread and I often do not get along, but I am a huge knotting fan now due to one simple tool:

cord knotting toolThe knotter. The cord knotter is described as “an awl and tweezers in one handy tool.” I initially found this marketing claim to be discouraging, as anything involving tweezers sounds extremely tedious. But the knotter tool really does make a process that might otherwise require extra hands, several tools and loads of patience into something anyone can do. Watch this little video and you’ll see what I mean.

How to pick the right thread or cord for your necklace:

Conventional wisdom says silk cord is for pearls, while gemstone, crystal and other beads should be strung on nylon cord. The reason given is that sharp bead holes may damage the silk. However, one of the features of SWAROVSKI ELEMENTS redesigned 5328 crystal bicone beads is a smoother bead hole, which makes it less likely to damage the thread. As long as the cord isn’t jammed into the hole too tightly, and the beads aren’t too heavy, I’ve had good results with a variety of beads on silk cord. I prefer using the silk cord that comes with a needle end – it makes stringing so much faster!

Freshwater pearls come in beautiful colors and have interesting variations in shape, but if you are looking for classic round pearls at an affordable price, crystal pearls are your best bet. They have consistent hole sizes and are much more durable than natural pearls (ie, a misplaced spritz of perfume or hairspray won’t ruin their finish). When you buy SWAROVSKI crystal pearls from Rings & Things, the pearls are already strung on a long, color-coordinated cord, which means you can completely eliminate the stringing step! Larger crystal pearls have larger holes, so sometimes the cord is doubled. I used 8mm pearls for this necklace, and found it wasn’t any harder to knot doubled cord.

How to add a clasp to a knotted necklace:

Most pearl necklace tutorials require that you ream (enlarge) the holes on the pearls closest to the clasp. This is so you can add French wire (bullion) over the cord end before tucking it back through a few beads and doubling a few knots. I chose to finish my necklace with bead tips instead. Bead tips are little clam-shell shaped findings that allow you to connect the thread to metal findings.

bead tip on silk cord necklaceThe best kind of bead tips are the “secure” type: adding a jump ring through the loops effectively seals the tip shut and allows you to attach a clasp or extender chain.

how to use a bead tip to finish a necklaceTying a seed bead inside the bead tip is the best method for ensuring that tip doesn’t slide off the end of the cord.

Amy, another of our designers, makes a lot of knotted necklaces. She likes to use French wire to finish the ends, but simply knots the end, secures it with a dab of Super Glue or Bead Fix, and hides the knot under a crimp cover. Her method avoids the reaming too!

More knotted necklace options:

  • Make it “endless” (long enough to fit over your head, or even long enough to wrap several times) – this way you don’t even need a clasp!

  • Instead of knotting the pearls or beads right next to each other, use gaps of cord as a design element. To make even spaces, wrap the cord around a piece of cardboard or other fairly sturdy material that you’ve cut notches into. (I recycled a plastic gift card). [2019 Editor’s Note: Beadalon now makes a “Tin Cup” knotter tool that you can adjust for evenly spaced knots, too! And yes, Wyatt has a great video for it, too.]

Thank you for putting up with the Oz-like transitions from color to black and white to color again in my photos – the light here has been gloomy and strange, making it hard to get good photographs! But when the weather is gray, it is a great time to play with a new jewelry tool like the knotter! 🙂 ~ Cindy

Copper Washers: A beautiful addition to your Jewelry Designs

October 31, 2011

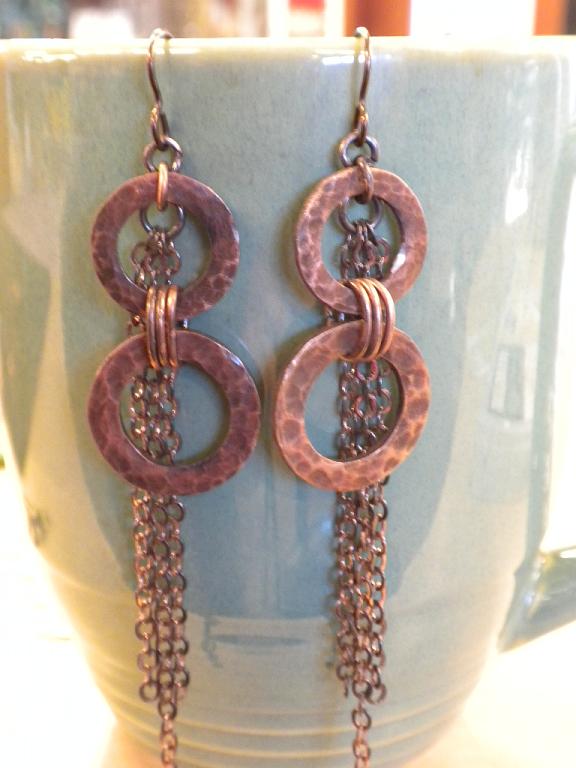
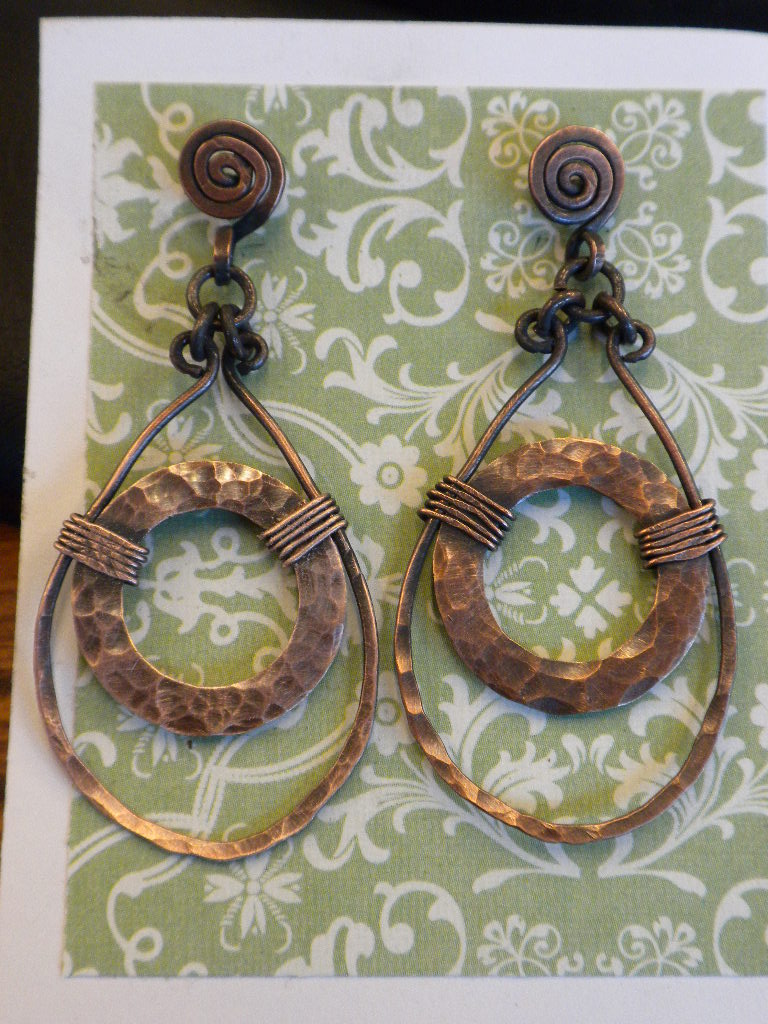
Earrings made with copper washers and copper wire

Copper washers may seem overly industrial for jewelry, but with a little manipulation, they work great. Ever since we started carrying them a couple of weeks ago, I have been experimenting and the results have been fabulous! And I have only scratched the surfaced. These washers would be great linked as bracelets, soldered together for fabulous bib necklaces or dapped into pretty dome shapes!

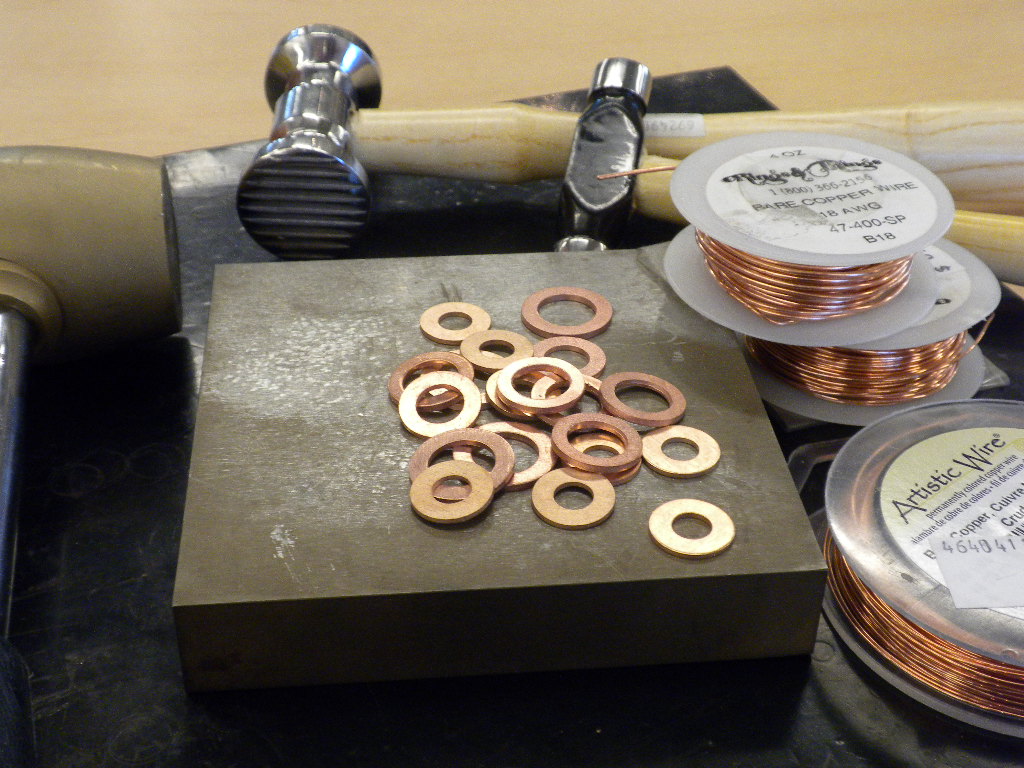
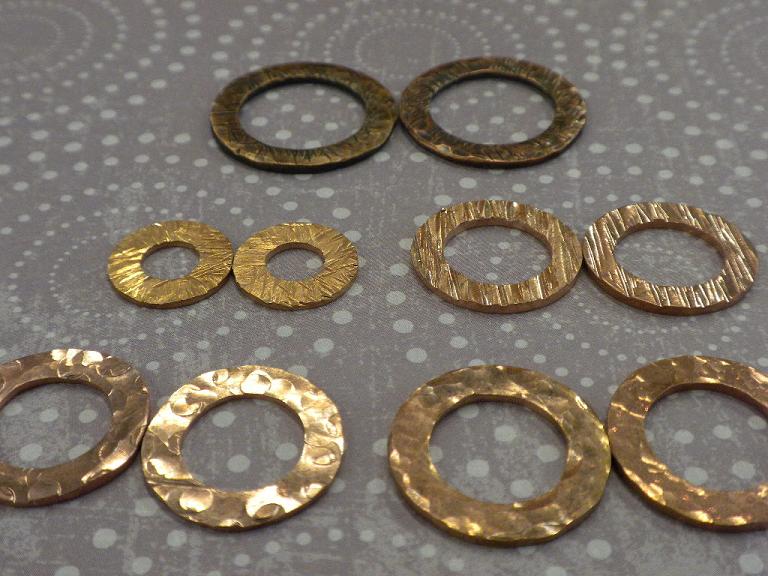
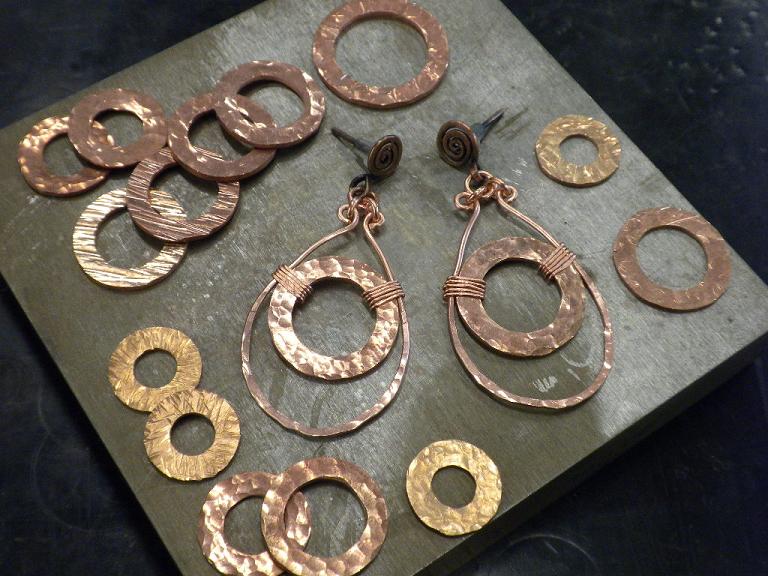
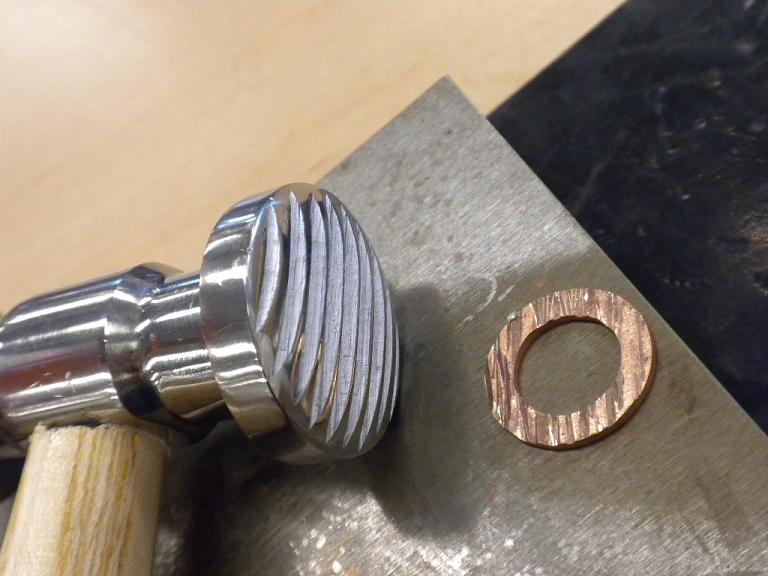
Everything you need to create hammered copper links: Washers, steel block, and hammers. Oh and some copper wire can add a nice touch!

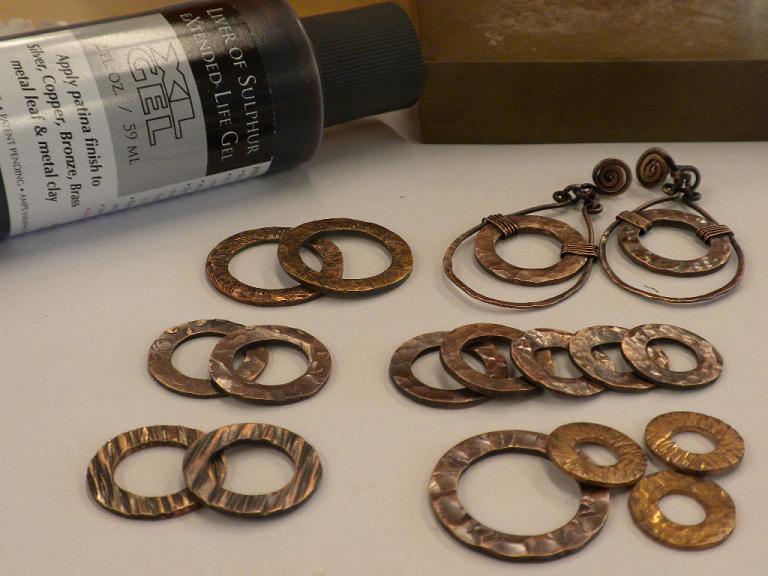
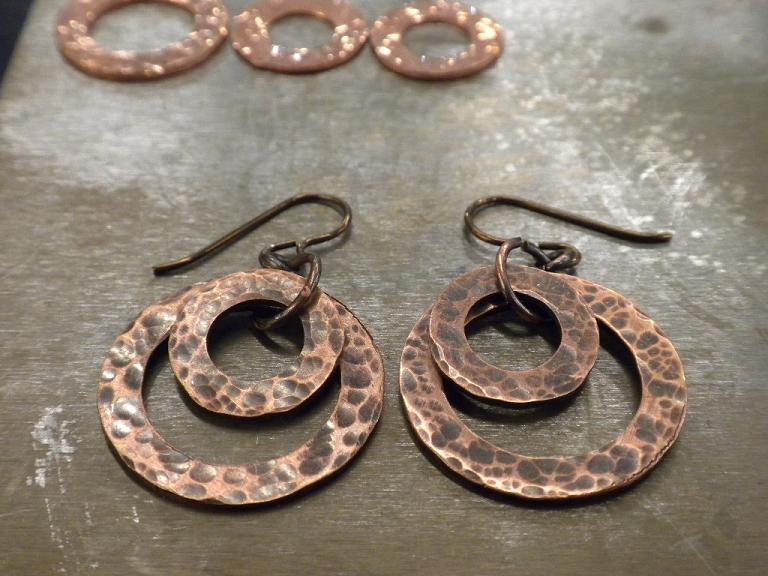
I chose to distress the washers using a steel block and multiple hammers. Then I used a little liver of sulfur to blacken the washers and some steel wool to buff them up. The result is the antiqued hammered links that can be used anywhere you would use any other link.

Cool lines created by a texturizing hammer!

Hammered look created using a ball pein or chasing hammer

Look at all the pretty washers! The assortment pack is great because there are several sizes.

In the center are the earrings seen above before being antiqued!

A little liver of sulfur will easily blacken your washers since they are solid copper. These are all the same washers as above!
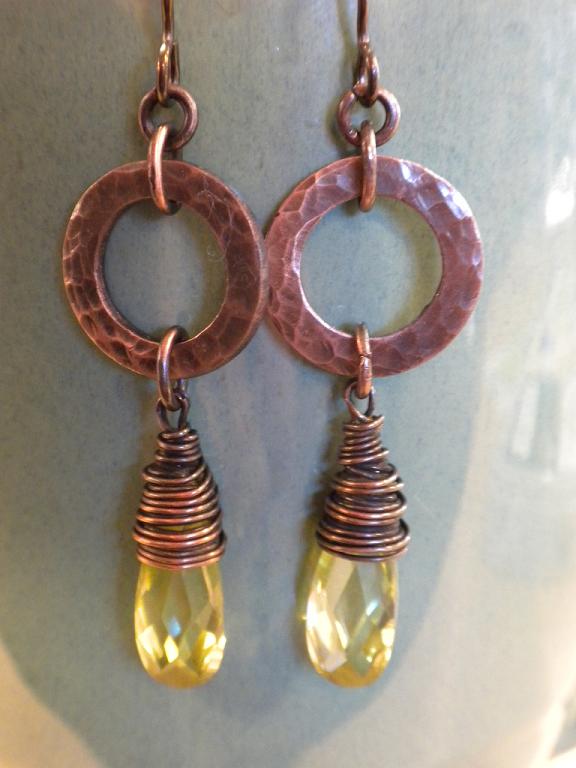
Earrings made with copper washers and cubic zirconia briolettes! I love the new cubic zirconia briolettes that we are carrying!
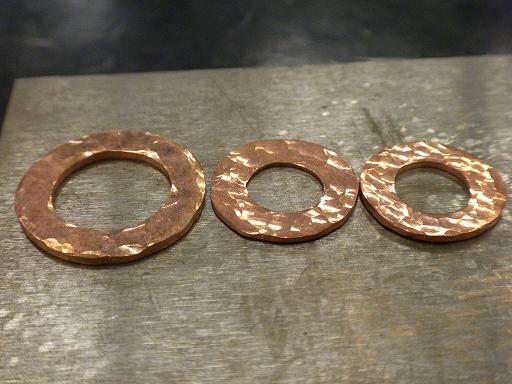
Hammered copper washers with a little chain 🙂

Two sizes of hammered washers, slightly sanded to show off the deep hammering

Well I hope you have enjoyed my washer blog! Please feel free to ask me any questions about the washers, tools or beads that I used. :0

~~Tiffany

Suggested supplies for the designs in this blog:

Solid copper jump rings are nice, because it’s great to say that nothing in your design is plated. But they are only available in a few sizes, so I love to have the assorted copper jump ring mix on hand too, because then I always have the right size.

Fall color trends: new crystal color combinations for jewelry designers

October 14, 2011

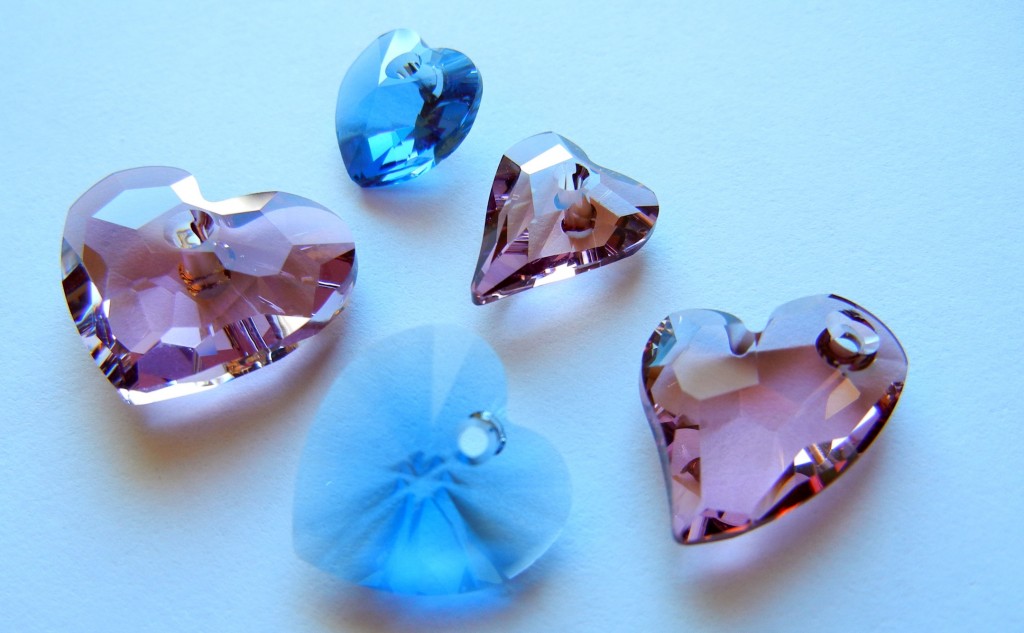
The fashion world is always on fast forward. While we are living in fall 2011 (at least last time I checked!), designers are already planning for fall 2012. Hence the debut of SWAROVSKI ELEMENTS fall/winter 2012/13 crystal colors – *antique pink and denim blue – in fall 2011!

love, love, love

I am actually pretty fond of the 2011 fall Pantone color scheme and its nature-driven hues. “Designers take a painterly approach to fall 2011 by artfully combining bright colors with staple neutrals, reminiscent of how an artist would construct a stunning work of art,” states Leatrice Eiseman, Executive Director of the Pantone Color Institute.

So, although *antique pink and denim blue were designed with next year’s trends in mind, I’m happy to see they coordinate beautifully with the current fashion color trends. Because, really, who can wait until next year to start making jewelry with pretty new crystal colors?

Both *antique pink (a clear crystal with colored coating) and denim blue have a pleasing depth and smokiness that allows them to either blend or pop with a huge variety of color palettes. They also work with both warm and cool hues. And, both look amazing with Vintaj natural brass and antiqued brass plate filigrees!

Behold the rainbow:

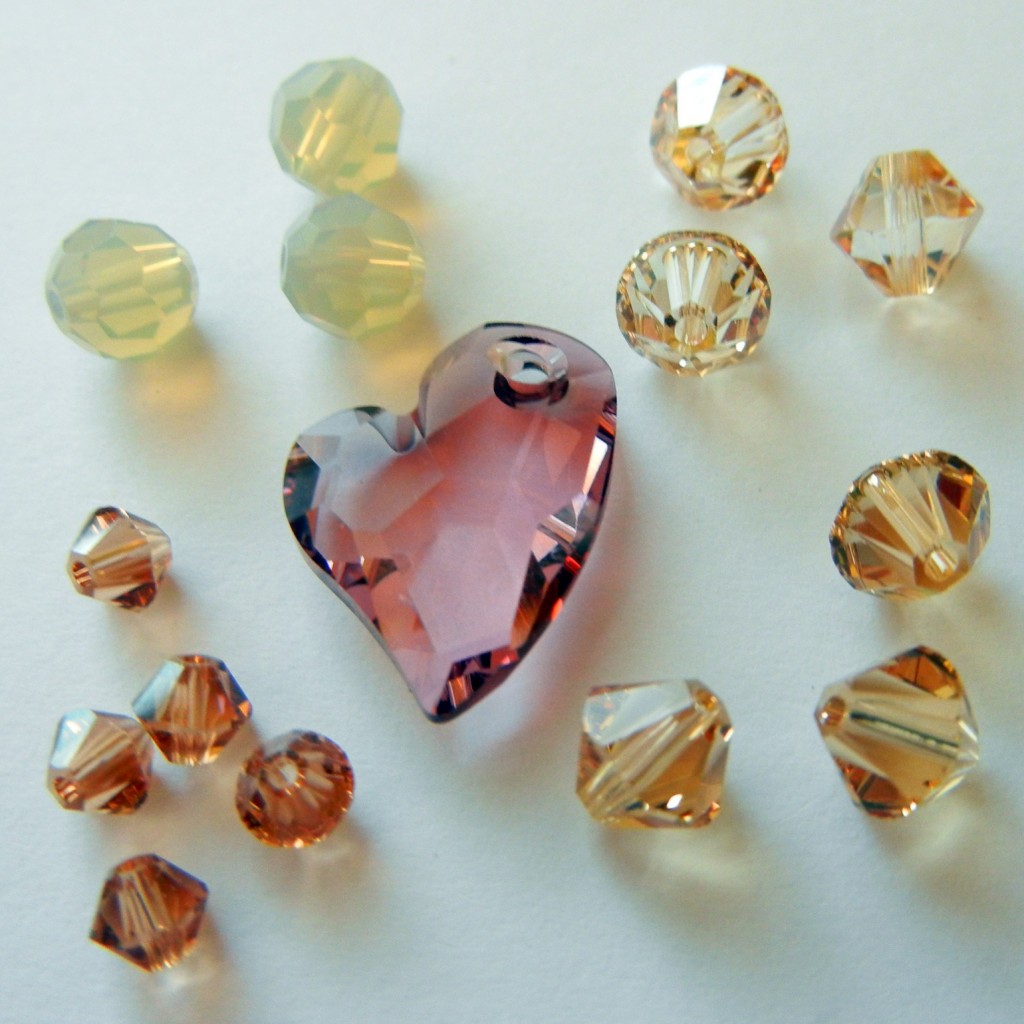
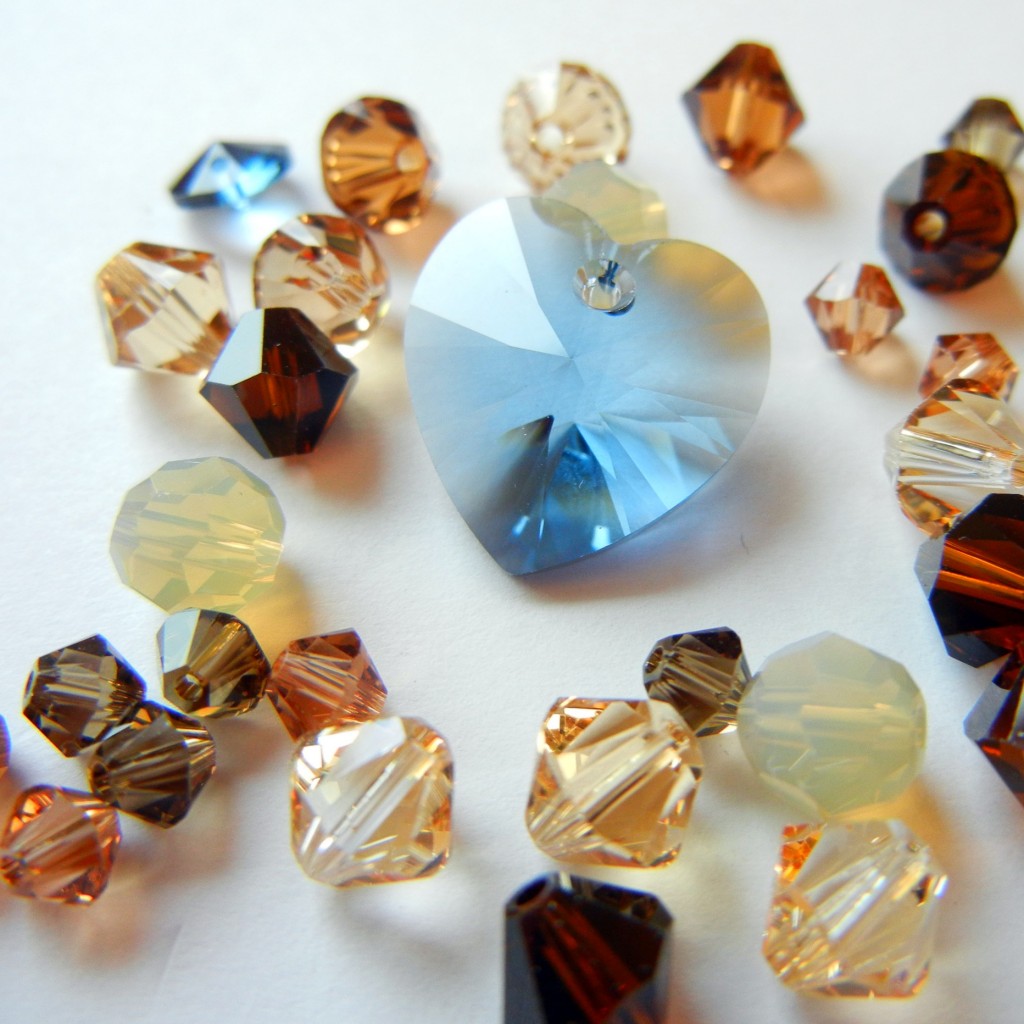
*Antique pink with warm browns

Denim blue with more warm browns

Yummy warm browns (Pantone calls them “Nougat” and “Coffee Liqeur”) are big this fall. Both of the above pictures include crystal/golden shadow, light colorado topaz, light topaz and sand opal. The denim blue crystal mix also has light smoked topaz, mocca and smokey quartz.

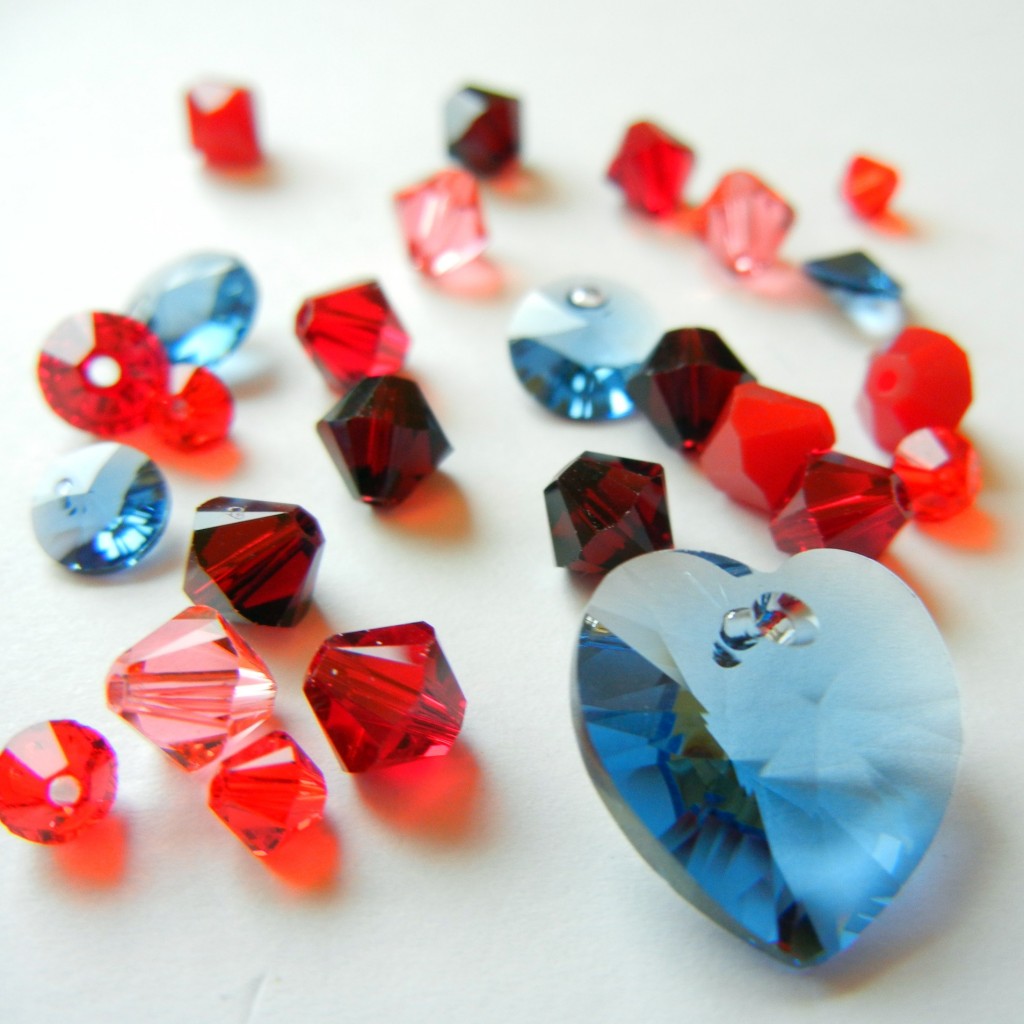
Red, red and denim blue

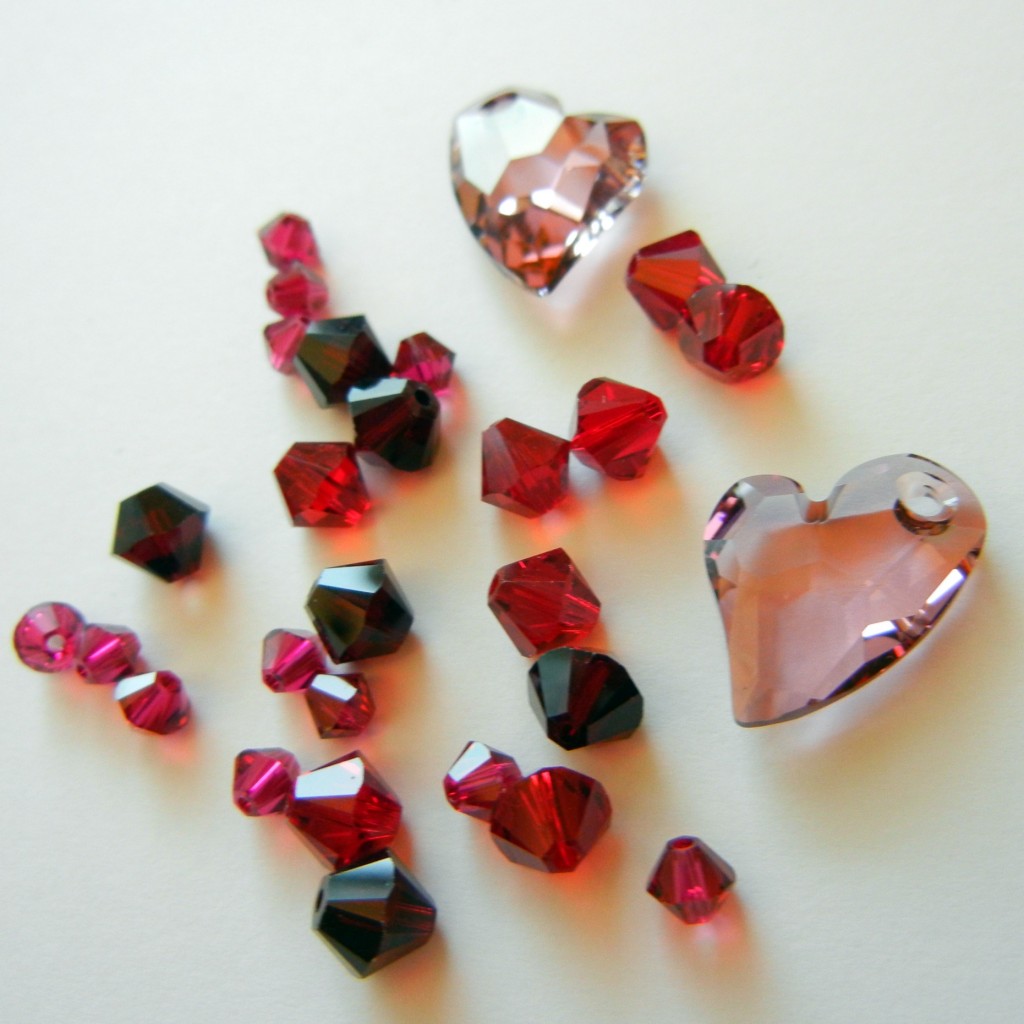
Berry-licious antique pink and with reds

Garnet and siam crystals are featured in both pictures. The denim mix also features dark red coral, light siam and padparadscha (aka Pantone’s “Honeysuckle”). The berry mix uses burgundy and ruby crystals with dusky *antique pink.

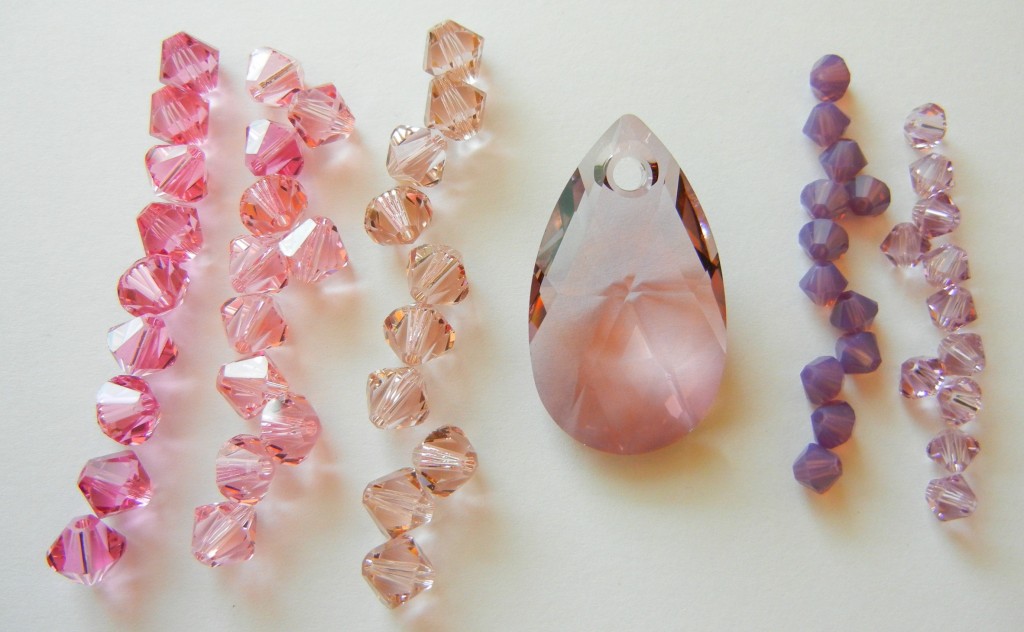
A spectrum of pinks and purples

I lined up the “tone on tone” color blend option from SWAROVSKI ELEMENTS to help show where *antique pink falls in their color palette. From left to right, we’ve got rose, light rose, vintage rose, *antique pink, cyclamen opal and light amethyst crystal beads. As you can see, *antique pink has a hint of purple and a smidge of grey to tone down its rosiness.

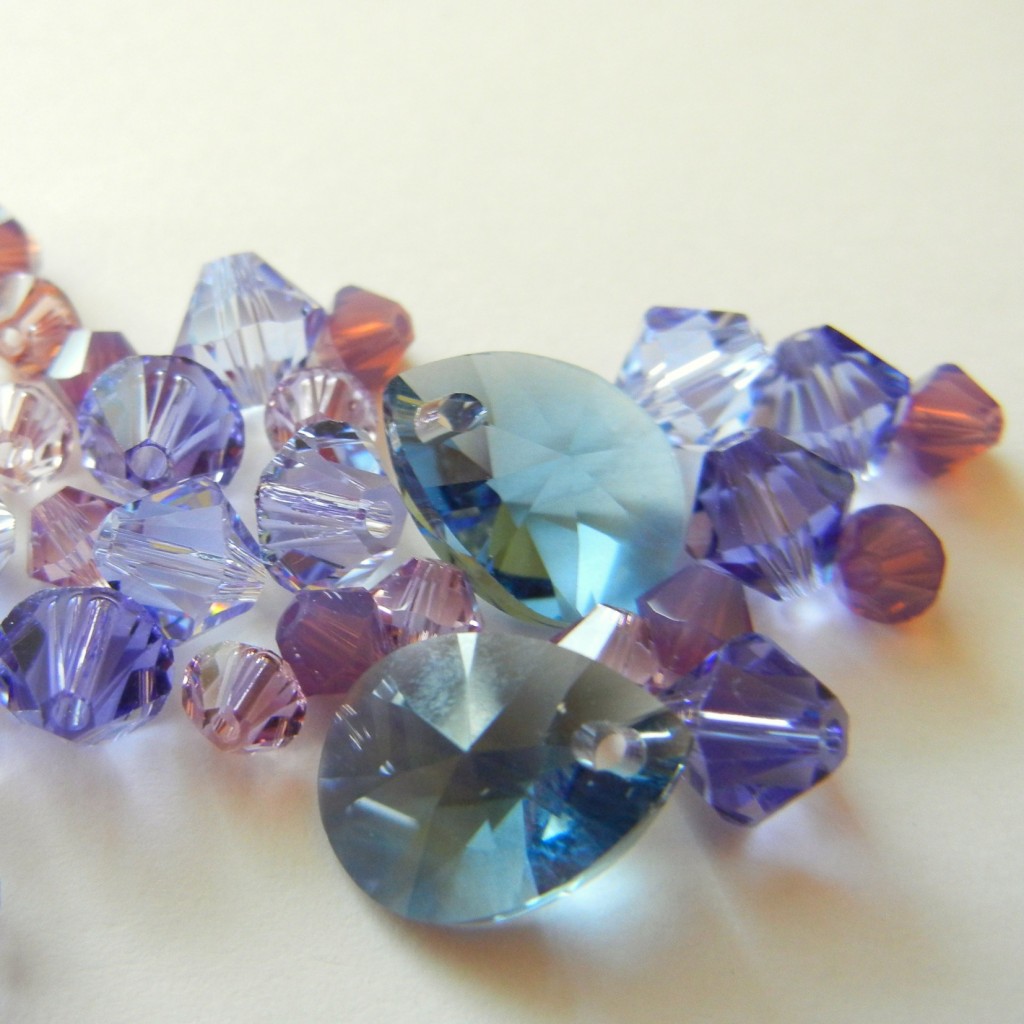
Denim blue with purple crystals

Denim blue with purple crystals

Denim blue looks great with purple crystals, such as violet, light violet, cyclamen opal, Provence lavender and tanzanite. It’s more vivid, but still pairs nicely with Pantone’s “Quarry” blue and purple-y gray “Orchid Hush.”

Pink pops next to denim blue crystals

Pink pops next to denim blue crystals

Or, go for more contrast by pairing denim blue with light rose, rose, vintage rose, light amethyst, Indian pink and fuchsia.

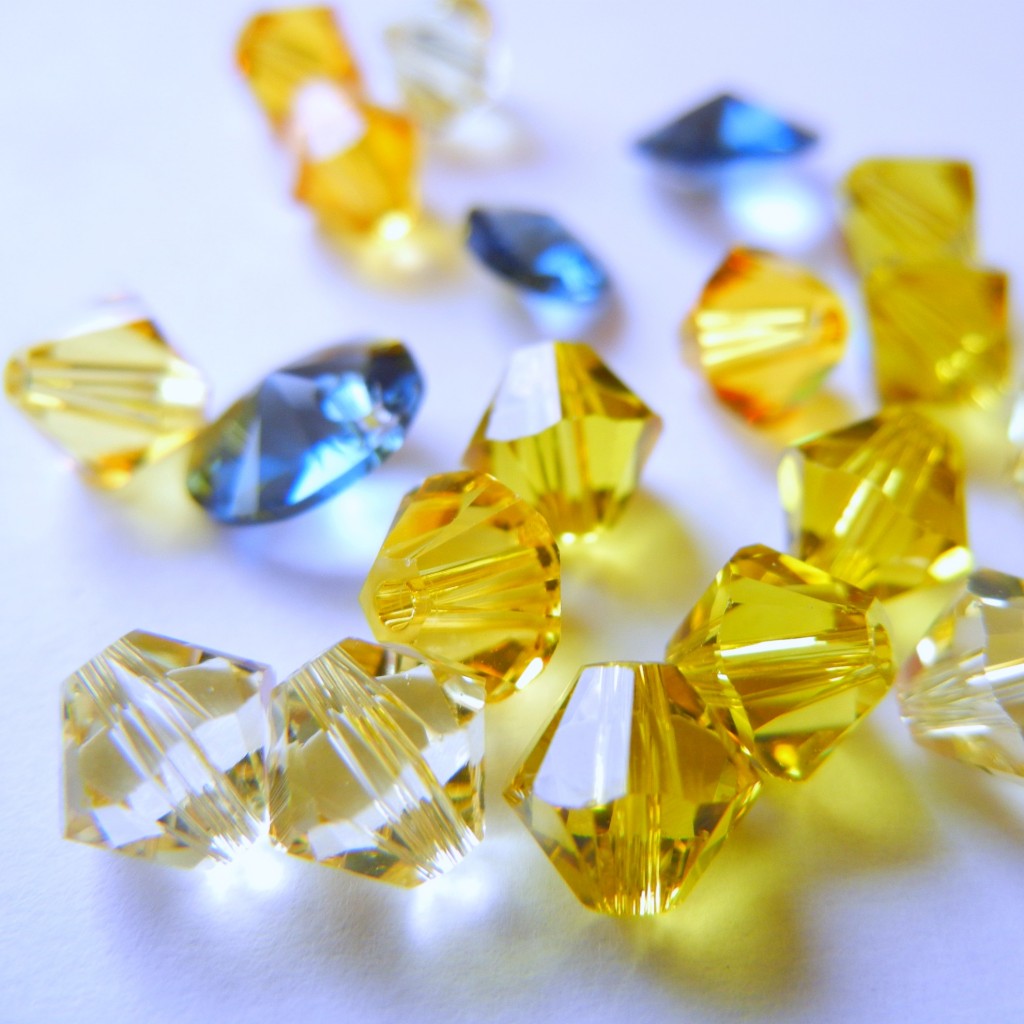
Sunshine-y bright mix of crystals

Sunshine-y bright mix of crystals

Denim blue with jonquil, light topaz, lime and sunflower (or in Pantone terms, “Bamboo”) crystals is like a burst of sunshine – especially in comparison with the dreary gray sky outside my window!

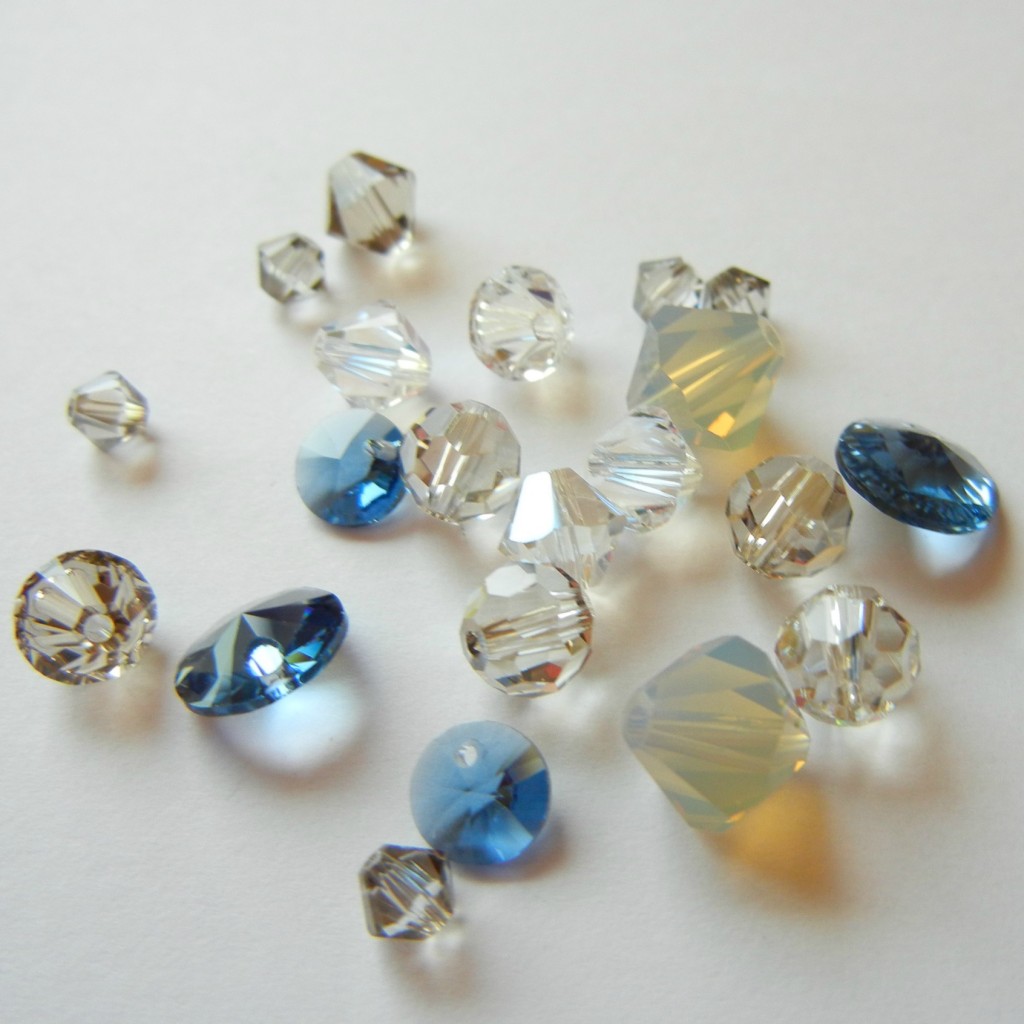
cool grey and denim blue crystal beads

Cool grays with denim blue

Yet even gray looks less dreary with a shot of blue. Above is a neutral mix of *moonlight, *silver shade, light grey opal, greige and *satin beads.

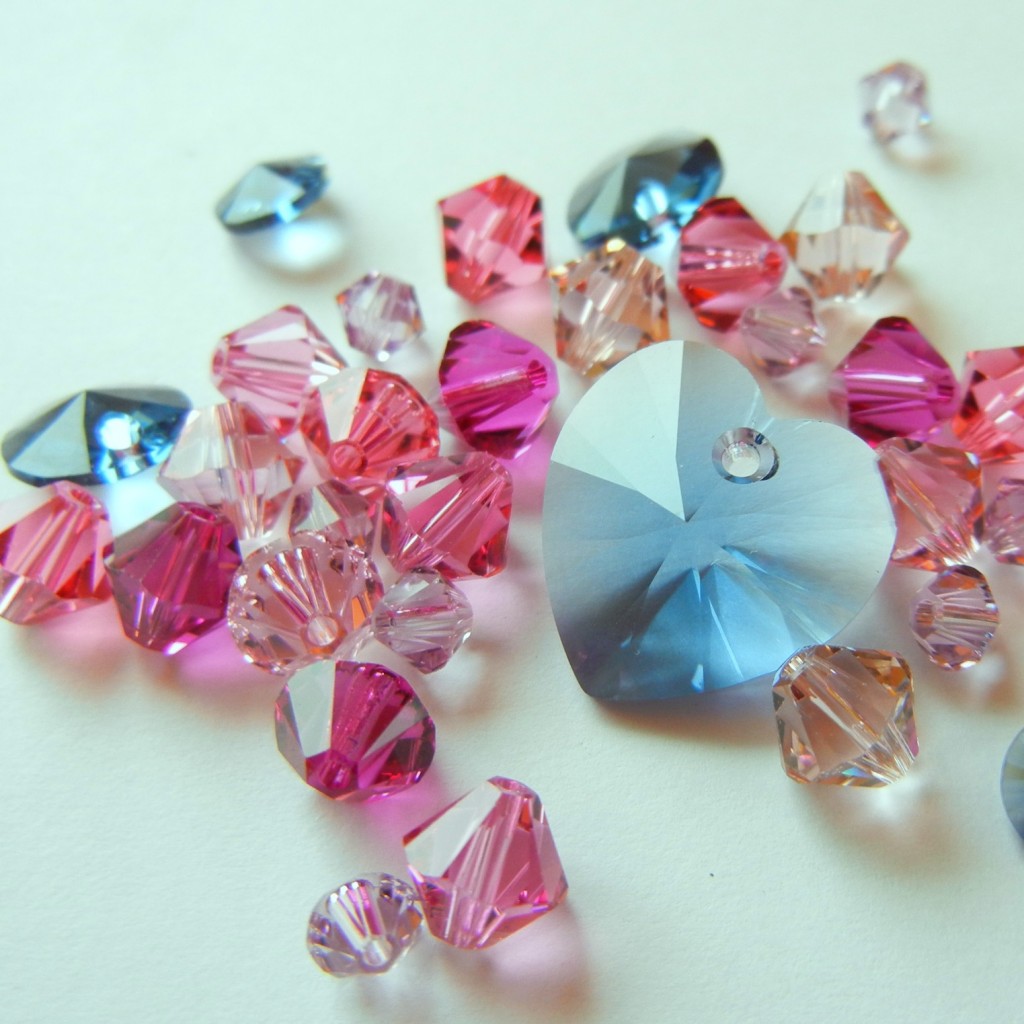
antique pink crystal beads with gray

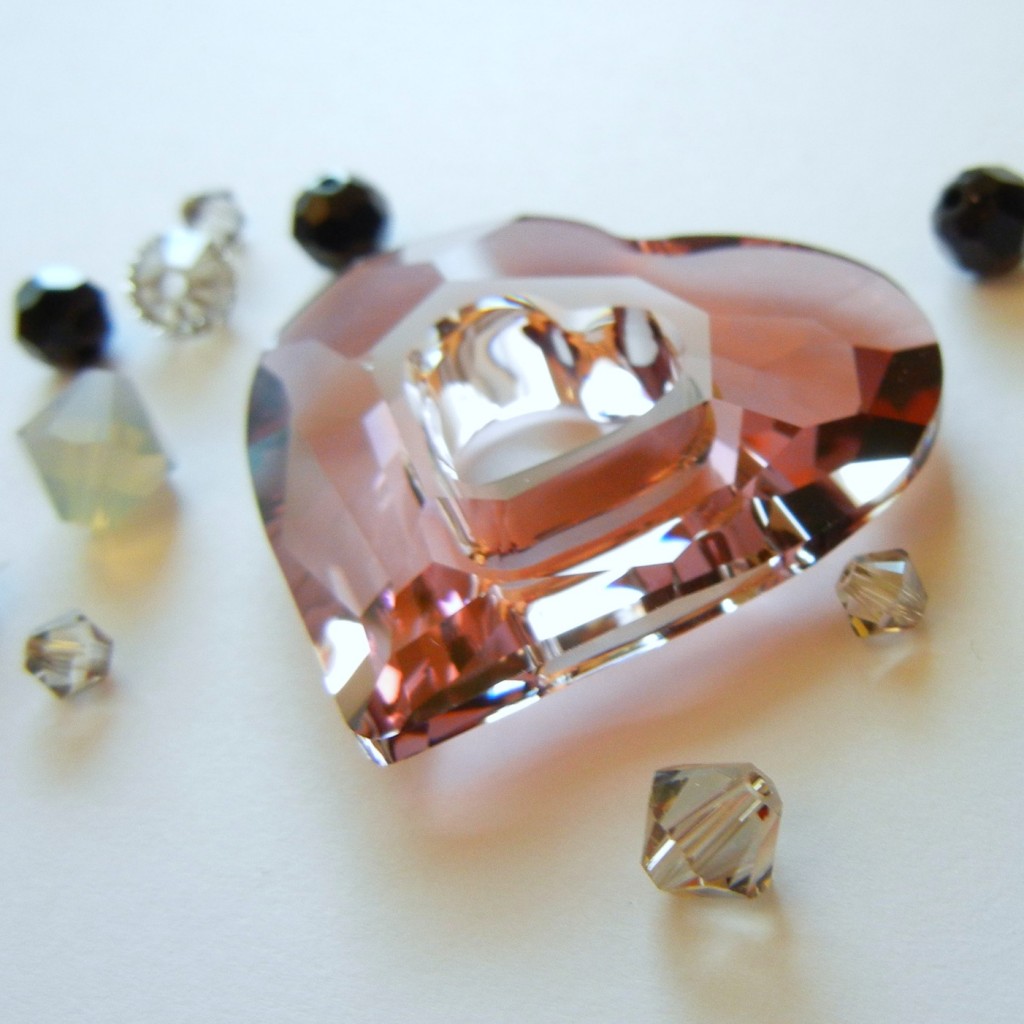
Antique pink crystal heart with cool grays

Meanwhile, *antique pink with those same grays and pure jet black makes a decidedly romantic and elegant statement. When the greige crystal color debuted a few seasons ago, I honestly thought Swarovski made up the word by combining “grey” and beige” (hey, they have a lot of power!). I’ve since learned greige is an actual word that describes raw, undyed fabric. I was perhaps a bit underwhelmed by greige (and sand opal and light grey opal, to be honest) when they were unveiled, but I’ve since come to appreciate how well they compliment other more vibrant colors.

Whether you are a slave to fashion or completely oblivious to its fickle ways, it is always nice to have more color options to choose from. These are just a few of the many, many color options using SWAROVSKI ELEMENTS. Hope you’ve enjoyed the crystal eye candy – next week I’ll share some color combos featuring the new petrol crystal pearls on our Facebook page! ~ Cindy

Beads for a Cause!

October 10, 2011
cause ribbon beaded bracelet

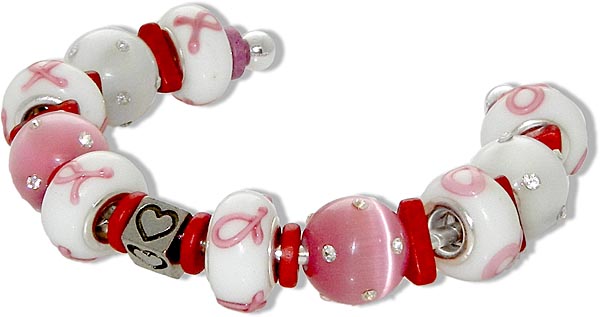
Breast Cancer Awareness bracelet by Laurae

It seems like world turns pink during October in honor of National Breast Cancer Awareness month: pink lids on yogurt, special cupcakes at bakeries, even pink-ribbon windshield wiper blades! Awareness jewelry has become popular with many causes (autism and diabetes for example) but, probably because it is pink, breast cancer awareness jewelry is by far the most prevalent. Since big-hole Pandora-style beads continue to be extremely popular, Laurae suggested we create a pink-ribbon version and here it is!

During the month of October, Rings & Things is donating $1 from the sale of each pink ribbon Calypso bead to Susan G. Komen for the Cure because awareness is great – but what we really want is a cure for cancer!

Upcycle cans and tins into jewelry!

October 7, 2011

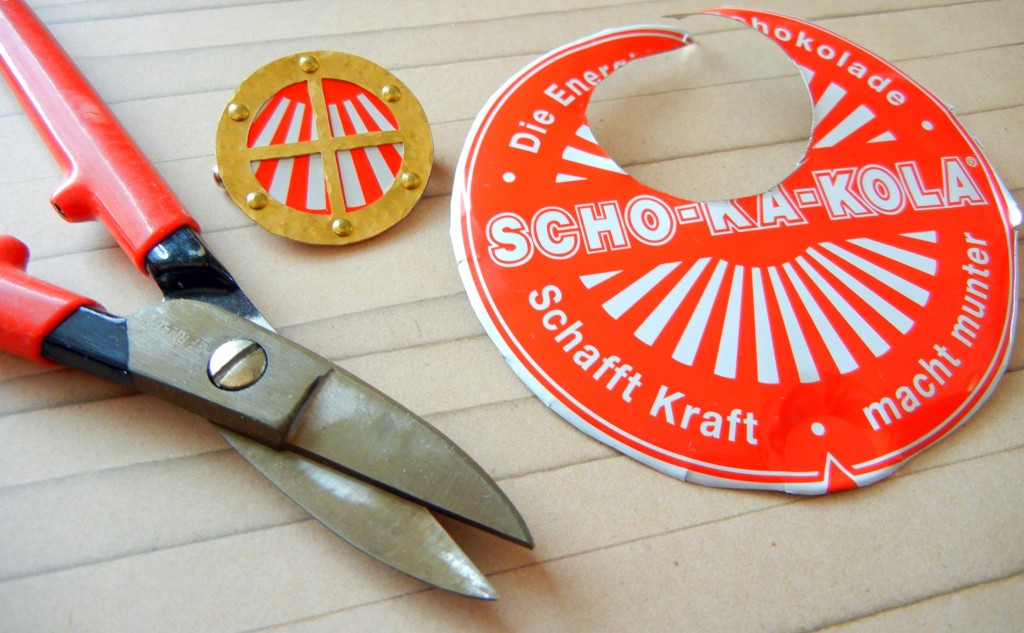
Metal shears, a metal tin and the completed metal pin!

We all know recycling is a good thing, but upcycling is even better! Aluminum and tin cans can easily be turned into jewelry, but there are a couple of things to keep in mind:

  1. Metal edges can be wicked sharp. Make clean cuts and file off any jagged points. Quality jewelry metal shears make this much easier! Most tin snips and other shears from hardware stores are difficult to grip.
  2. Aluminum cans and most tins are too thin to be durable enough for jewelry by themselves. We suggest layering the metal you cut from recycled items. Three ways of doing this are riveting, gluing and/or coating the metal pieces.

Here are a few examples of how to turn packaging into lovely adornments:

pollys-tin-pins

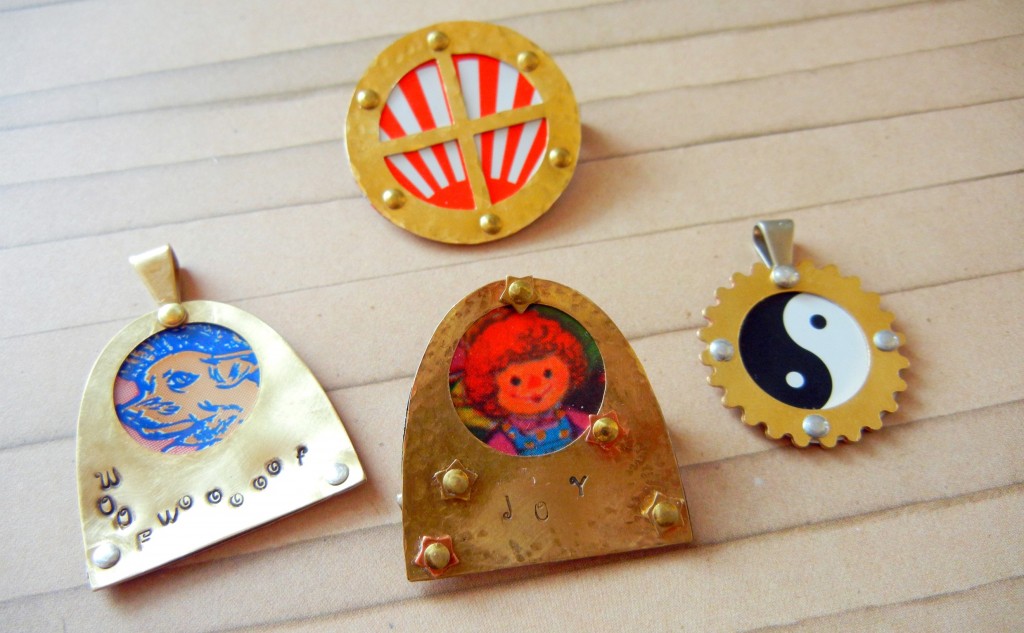
Polly’s tin pins and pendants

Polly sandwiched her recycled metal elements between brass fairy doors, disks and gears. She riveted the pieces together using Crafted Findings’ riveting tool. Learn more about the riveting tool system here.

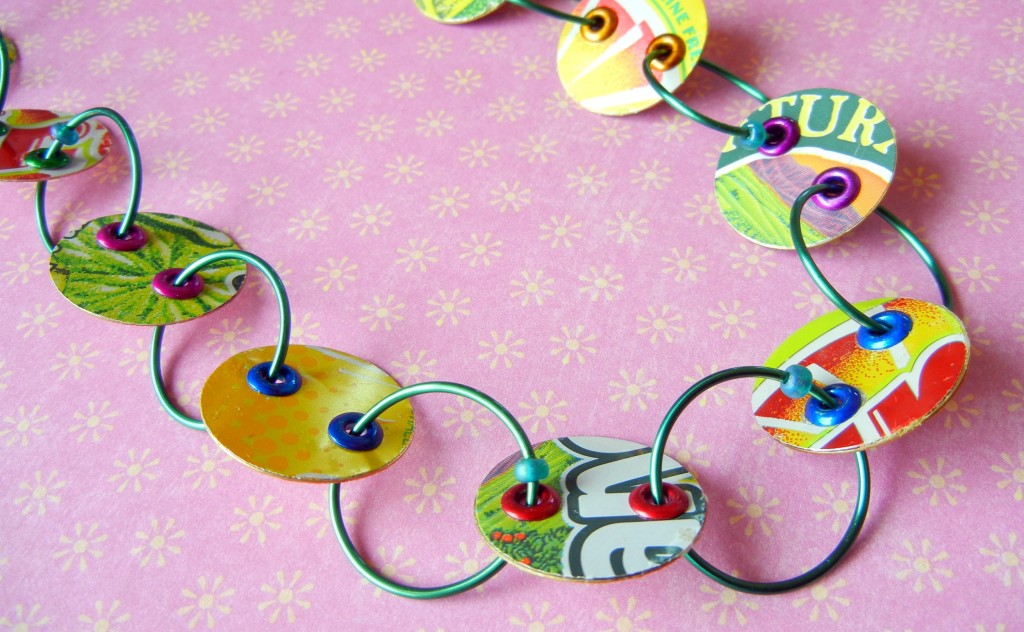
soda pop can necklace

The holes are lined with large eyelets from a scrapbooking supplier.

For this Soda Pop necklace, we cut disks out of cans and then glued them to brass disks to make them thicker. A circle template (commonly found in Art Supply stores and sometimes Craft Store) makes this task easier. Get more info in our design gallery.

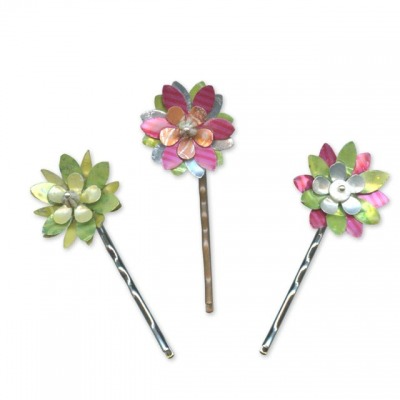
soda can bobby pins

Layers of flowers punched from soda cans form these fun bobby pins.

Instructions for how Toni coated these pins with liquid polymer clay to make them safe to wear are in our design gallery.

Start looking at soda cans and other product packaging in a different way! I for one always check the bottle cap design when deciding on a beverage.

How I wish every city had an Upcycle Exchange Market (yikes! Link removed in 2019 … that link goes to something COMPLETELY different and unsavory now). It is a brilliant idea for reusing and redistributing crafty supplies and recyclables! Until then, ask your friends and family to help collect interesting materials for you. You might just upcycle something wonderful!