Browsing Category

Trendspotting

Torch fired enamel jewelry ideas

January 4, 2012

[editor’s note: links updated March 2018]

Torch fired enameled metal is really (really!) quite beautiful! You can create your own on copper (or a few other metals) using Thompson vitreous enamels, or purchase artisan copper components from C-Koop Beads. C-Koop components’ colors are deep and lustrous due to the layers of glass fused to the surface of the metal, and since they are handmade, each one is slightly different. Here are a few of the mixed-media jewelry pieces our designers have recently created with enameled copper:

enameled-leaves-handpainted-wood

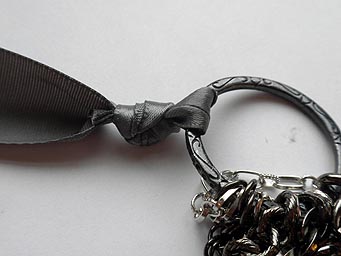
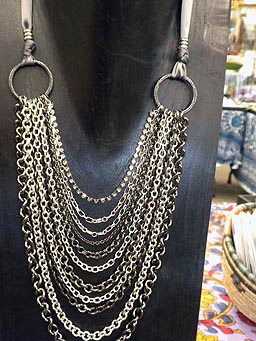
Nory painted wood pendants and beads with a rose motif, and had Tiffany construct his design using silk ribbon and brightly dyed wood beads. The enameled copper leaves, rings, bead caps and toggle clasp are all by C-Koop.

cindy-morris-gogoshebogo-design

I used copper clay powder to create the bird pendant, which coordinated well with C-Koop enameled pink rings and Swarovski antique pink crystals. I love how you can see bits of copper underneath the enamel.

bottle-cap-necklace-enameled-heart

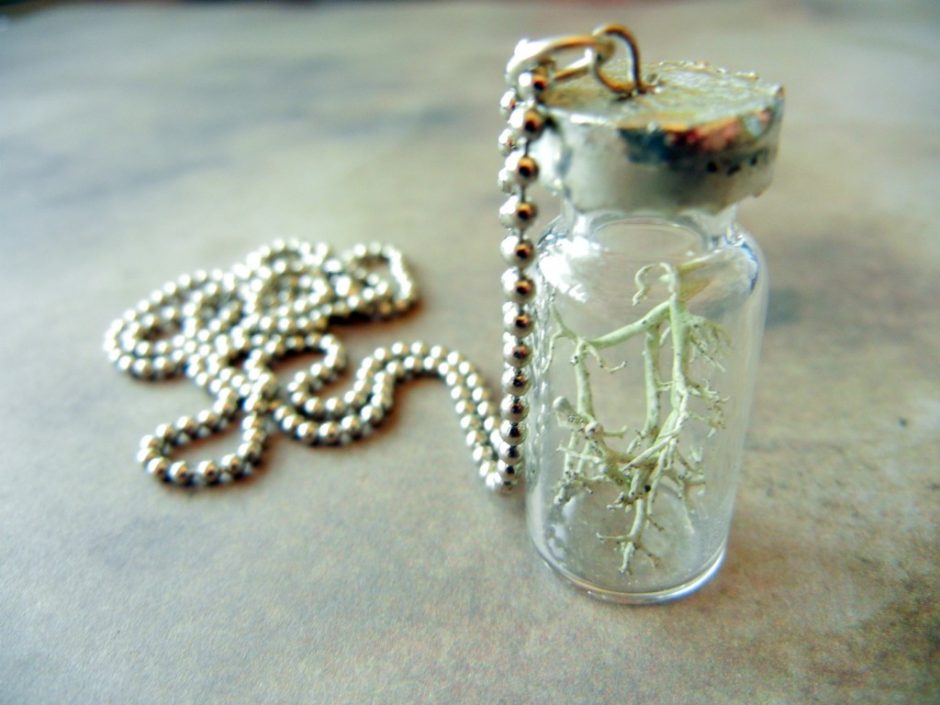
The elongated heart shape is practically Sondra’s signature, so of course it was the finishing touch on her bottle cap necklace.

enameled-etched-copper-bracelet

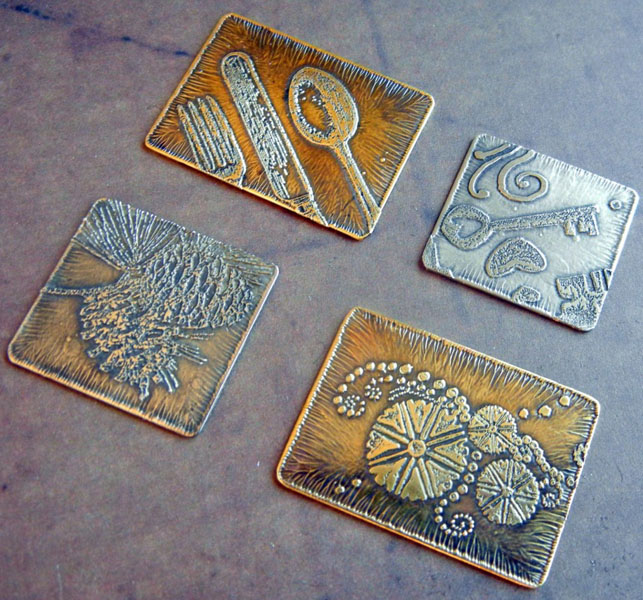
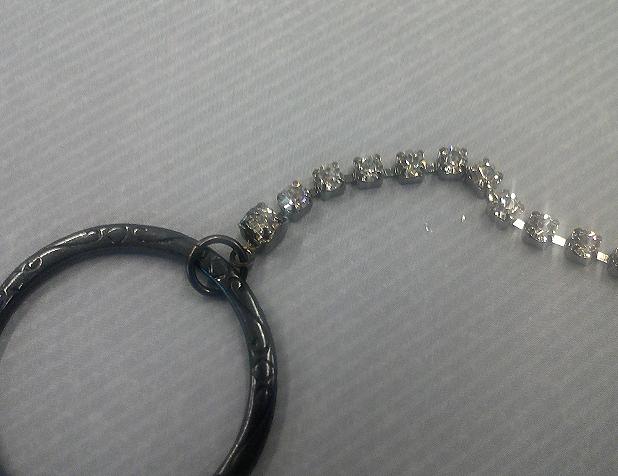
Rita etched a copper washer to create the center link on this bracelet, and used a clasp and beads from C-Koop to add more color.

~Cindy

DIY copper etching tutorial

December 28, 2011

It is easy to etch your own designs into metal for jewelry. This tutorial will teach you how! (Check out our etching kit too!)

etched-stamped-metal
Rubber stamp designs etched into brass sheet metal.

Before you begin, please read the safety considerations for etching metal with chemicals blog post.

You’ll also probably want to read the design considerations for etching metal blog post too!

Now, here are the steps for etching metal with ferric chloride:

1. Choose your metal(s). Ferric chloride works on copper, brass and nickel silver. It will not work on actual silver (fine or sterling). Do NOT use ferric chloride on aluminum. Metal as thin as 24-gauge can be etched – just leave it in for less time than you would for thicker metal. If you want to etch both sides or etch really deeply, use at least 20-gauge metal.

2. Clean metal with Penny Brite (our favorite) or an abrasive cleaner and scrubbie. The metal must be very clean. Water will sheet off (not bead up) on the surface when it is truly clean.

3. Apply resist. Stazon ink, Sharpies, toner transfers – there are many options! (Read the design considerations.)

Continue Reading…

Twelve Days of Christmas Jewelry Designs: 12 – Fairy Doors

December 12, 2011

A super easy way to create some holiday magic is with our exclusive brass fairy doors. These precut metal shapes with cutouts can be stamped, hammered, riveted, painted, patinaed, layered…so, so many options! Mollie used one to make her sister a sweet keepsake necklace (Day 6). Sondra added a stamped tag to one of her designs on Day 11. Earlier this year, Polly made several sweet pins and pendants by sandwiching pieces of recycled tins between the riveted layers. Basically, the designers here are in love with them – and it isn’t just us! Sondra’s Victorian Christmas fairy door design just won Vintaj’s blog contest!

sondra barrington christmas vintaj winning design

Also, jewelry designer extraordinaire Molly Alexander shared with us the design below that she created with our heart fairy doors for Art Bead Scene’s November Challenge. It is just too lovely not to share. Merry Christmas! ~ Cindy

Molly Alexander design

Make Your Own Designer Jewelry: Multi-Chain Necklace!

October 24, 2011

As a jewelry maker, I am constantly checking out the jewelry at department stores and boutiques for inspiration and current trends. When winter and fall comes, so does big statement jewelry. The kind of pieces that you wear to Christmas parties with your favorite black cocktail dress. This year, I have noticed that there are a lot of multiple chain necklaces and necklaces that end with ribbons and I just couldn’t resist the urge to create one myself. If you have a lot of leftover chain pieces this is a great way to use them up.

Items needed for this project:

  • Chain, lots of chain. You can use all the same color and style or mix and match. I have seen ones that are in all antique brass, but with several different styles. I have also seen ones with all one style, but all different platings. For my necklace I used a variety of gunmetal and silver-plated chains, plus one strand of rhinestone chain for a little extra “wow” factor. Get creative with it!
  • Large connector rings. I used 32mm gunmetal rings.
  • Satin Ribbon. Get this at the craft store. I like the nicer ribbon that you buy by the yard.
  • Hypo Fabric Cement or fabric glue, to keep the ends of the ribbon from fraying.
  • Jump rings, for the chain that has links which too small to open and close around the connector ring.
  • Chain nose pliers, flat nose pliers, semi-flush cutter and scissors.

How to create it:

Step 1: Select your chain

Step 2: Pick out coordinating connector rings and ribbon

Step 3: Attach your first piece of chain to one of the connector rings. This will be the shortest length of chain. I found that 6 inches, give or take a little, was a good starting length.

If using rhinestone chain, pinch on an end piece to the rhinestone using your chain nose pliers.

Use a jump ring if using rhinestone chain.

Step 4: Add each additional chain and attach, one at a time to the first connector link. Cut each additional chain between 1/2 inch and an inch longer than the previous chain.

This is how the necklace will look after the chain is attached on both sides.

Step 6: Tie a peice of ribbon onto each connector link. Use about 16 inches on each side. Trim the short ends of the ribbon close with scissors.

Step 7: All you have to do to finish the necklace is finish the edges of the ribbon with a little anti-fray fabric glue or hypo fabric cement. I also added a few large hole metal beads for some extra pizzazze!

Showing off my new necklace in the Rings & Things Showroom 🙂

Well there you have it! If I had to rate this project on a scales of difficulty I would give it intermediate. It was a little tricky to keep my chains straight. If you do re-create a necklace like this with lots o’ chain, remember to be careful when storing it. I recommend hanging it so as to not get all the chain tangled.

~~ Tiffany

Check out these other great tutorials on our blog:

Fall color trends: new crystal color combinations for jewelry designers

October 14, 2011

The fashion world is always on fast forward. While we are living in fall 2011 (at least last time I checked!), designers are already planning for fall 2012. Hence the debut of SWAROVSKI ELEMENTS fall/winter 2012/13 crystal colors – *antique pink and denim blue – in fall 2011!

love, love, love

I am actually pretty fond of the 2011 fall Pantone color scheme and its nature-driven hues. “Designers take a painterly approach to fall 2011 by artfully combining bright colors with staple neutrals, reminiscent of how an artist would construct a stunning work of art,” states Leatrice Eiseman, Executive Director of the Pantone Color Institute.

So, although *antique pink and denim blue were designed with next year’s trends in mind, I’m happy to see they coordinate beautifully with the current fashion color trends. Because, really, who can wait until next year to start making jewelry with pretty new crystal colors?

Both *antique pink (a clear crystal with colored coating) and denim blue have a pleasing depth and smokiness that allows them to either blend or pop with a huge variety of color palettes. They also work with both warm and cool hues. And, both look amazing with Vintaj natural brass and antiqued brass plate filigrees!

Behold the rainbow:

*Antique pink with warm browns

Denim blue with more warm browns

Yummy warm browns (Pantone calls them “Nougat” and “Coffee Liqeur”) are big this fall. Both of the above pictures include crystal/golden shadow, light colorado topaz, light topaz and sand opal. The denim blue crystal mix also has light smoked topaz, mocca and smokey quartz.

Red, red and denim blue

Berry-licious antique pink and with reds

Garnet and siam crystals are featured in both pictures. The denim mix also features dark red coral, light siam and padparadscha (aka Pantone’s “Honeysuckle”). The berry mix uses burgundy and ruby crystals with dusky *antique pink.

A spectrum of pinks and purples

I lined up the “tone on tone” color blend option from SWAROVSKI ELEMENTS to help show where *antique pink falls in their color palette. From left to right, we’ve got rose, light rose, vintage rose, *antique pink, cyclamen opal and light amethyst crystal beads. As you can see, *antique pink has a hint of purple and a smidge of grey to tone down its rosiness.

Denim blue with purple crystals

Denim blue with purple crystals

Denim blue looks great with purple crystals, such as violet, light violet, cyclamen opal, Provence lavender and tanzanite. It’s more vivid, but still pairs nicely with Pantone’s “Quarry” blue and purple-y gray “Orchid Hush.”

Pink pops next to denim blue crystals

Pink pops next to denim blue crystals

Or, go for more contrast by pairing denim blue with light rose, rose, vintage rose, light amethyst, Indian pink and fuchsia.

Sunshine-y bright mix of crystals

Sunshine-y bright mix of crystals

Denim blue with jonquil, light topaz, lime and sunflower (or in Pantone terms, “Bamboo”) crystals is like a burst of sunshine – especially in comparison with the dreary gray sky outside my window!

cool grey and denim blue crystal beads

Cool grays with denim blue

Yet even gray looks less dreary with a shot of blue. Above is a neutral mix of *moonlight, *silver shade, light grey opal, greige and *satin beads.

antique pink crystal beads with gray

Antique pink crystal heart with cool grays

Meanwhile, *antique pink with those same grays and pure jet black makes a decidedly romantic and elegant statement. When the greige crystal color debuted a few seasons ago, I honestly thought Swarovski made up the word by combining “grey” and beige” (hey, they have a lot of power!). I’ve since learned greige is an actual word that describes raw, undyed fabric. I was perhaps a bit underwhelmed by greige (and sand opal and light grey opal, to be honest) when they were unveiled, but I’ve since come to appreciate how well they compliment other more vibrant colors.

Whether you are a slave to fashion or completely oblivious to its fickle ways, it is always nice to have more color options to choose from. These are just a few of the many, many color options using SWAROVSKI ELEMENTS. Hope you’ve enjoyed the crystal eye candy – next week I’ll share some color combos featuring the new petrol crystal pearls on our Facebook page! ~ Cindy

Upcycle cans and tins into jewelry!

October 7, 2011

Metal shears, a metal tin and the completed metal pin!

We all know recycling is a good thing, but upcycling is even better! Aluminum and tin cans can easily be turned into jewelry, but there are a couple of things to keep in mind:

  1. Metal edges can be wicked sharp. Make clean cuts and file off any jagged points. Quality jewelry metal shears make this much easier! Most tin snips and other shears from hardware stores are difficult to grip.
  2. Aluminum cans and most tins are too thin to be durable enough for jewelry by themselves. We suggest layering the metal you cut from recycled items. Three ways of doing this are riveting, gluing and/or coating the metal pieces.

Here are a few examples of how to turn packaging into lovely adornments:

pollys-tin-pins

Polly’s tin pins and pendants

Polly sandwiched her recycled metal elements between brass fairy doors, disks and gears. She riveted the pieces together using Crafted Findings’ riveting tool. Learn more about the riveting tool system here.

soda pop can necklace

The holes are lined with large eyelets from a scrapbooking supplier.

For this Soda Pop necklace, we cut disks out of cans and then glued them to brass disks to make them thicker. A circle template (commonly found in Art Supply stores and sometimes Craft Store) makes this task easier. Get more info in our design gallery.

soda can bobby pins

Layers of flowers punched from soda cans form these fun bobby pins.

Instructions for how Toni coated these pins with liquid polymer clay to make them safe to wear are in our design gallery.

Start looking at soda cans and other product packaging in a different way! I for one always check the bottle cap design when deciding on a beverage.

How I wish every city had an Upcycle Exchange Market (yikes! Link removed in 2019 … that link goes to something COMPLETELY different and unsavory now). It is a brilliant idea for reusing and redistributing crafty supplies and recyclables! Until then, ask your friends and family to help collect interesting materials for you. You might just upcycle something wonderful!

Torch-enameled components from C-Koop Beads!

August 16, 2011

Stackable enameled copper flowers from C-Koop Beads.

Fun, colorful enameled jewelry components are popping everywhere! I attribute the trend to talented artists whose business smarts have led them to develop enticing product lines of individual beads, gears and charms for designers to turn into finished jewelry. Just one or two enameled elements easily take a piece from ‘pretty’ to ‘pretty amazing.’

One such enamel artist is C-Koop Beads, aka Sara Lukkonen. Sara began making and selling enameled beads back in the 70’s. When she picked up the torch again in the 90’s (in her chicken coop of a studio!) her business expanded by leaps and bounds. Here are just a few of the components she creates:

So many colors of adorable little rings.

Three sizes of flat and domed disks.

Clasps, connectors, pendants and big-hole beads too!

If you are interested in doing your own enamel work, check out this how-to video from Enamel and Tiffany. It shows the entire torch-enameling process, plus does a great job of making it clear what types of tools and work space you will need. While the video focuses on beads, the process is similar for making other components. Check out our new selection of 18-gauge copper shapes – they are perfect for both torch enameling and etching!

While I know I would love enameling, I don’t have time or space for yet another addiction right now, so I opted to layer a couple of C-Koop flowers on a bracelet instead – yay for instant gratification! ~ Cindy

Black leather bolo cord made this triple-wrap bracelet super quick and easy to make! A 6mm SWAROVSKI ELEMENTS rondelle fit perfectly inside the purple enamel bead cap for a tiny bit of sparkle.

Make hemp friendship bracelets and more with a Kumihimo braiding disk

July 15, 2011

Colorful hemp bracelets are fun for kids of all ages to make … by “all ages” I mean 8 to oh, 80.

I’ve been intrigued by Kumihimo braiding disks for a while now. Kumihimo (a Japanese form of braid making) is an easy way to make intricate multiple strand braids. Braiding bracelets is the perfect summer-time activity, as anyone who has been to summer camp can attest.

I used the “Spring” Hemptique assortment and round Kumihimo disk. Any type of thread or cord could be used. There is also a square disk available to make flat braids.

Most Kumihimo braids use 8 or 16 warps (each warp could be made up of multiple strands). I decided to try the 8-warp braid first. Since I was using 4 colors of hemp cord, I divided each color into two equal lengths and knotted them all together at one end (just a basic overhand knot). A basic rule of thumb is to have 3″ of each cord for each 1″ of braid length. If you are mixing different types of cord I would suggest estimating a bit higher.

Feed the knotted end through the center of the disk to get started.

Place one cord (or “warp”) next to each of the four dots on the board.

And start braiding! Bottom left cord goes to top left. Then top right cord goes to bottom right.

Now, the instructions told me to rotate the board 90 degrees so that I was always working from top to bottom, but I found it much easier to hold the board in one position and just apply the pattern. As long as you don’t cross the warps (ex. taking a left strand from the bottom and placing it on the upper right) it is really hard to mess this up. You’ll probably do it slightly differently than I did. What is really important is to keep your cords bundled into “no-tangle bobbins” – NOT all loose and tangly like in the photo above.

Keep the cord bundled up tightly to save yourself a headache.

The braid travels around the disk as you work, but you don’t need to pay attention to the numbers. And that’s all there is to it! For a project that requires no tools and no counting, the results are impressive! For a traditional friendship bracelet like the ones Jaci made, simply knot the ends together, preferably on your BFF’s wrist, so that it must be worn until it disintegrates.

Just tie a knot and trim the ends when you’ve braided a long enough piece.

I got on a roll, so I kept going and made my braid into a necklace. In the next blog I will show you how to finish braids like these, or any type of cord, really, with glue-on bullet ends. Have a great weekend! ~ Cindy

www.rings-things.com