Browsing Tag

glass bezels

EnCapture Artisan Concrete

February 4, 2013

We tested the new EnCapture Artisan Concrete Kit!

This free jewelry project by Rings & Things uses bezel cups, jewelry grade concrete (EnCapture Artisan Concrete), Gilders Paste, rhinestone chain, vintage inspired filigree, black gunmetal chain and has a delicate flower bead as the center of the mini mosaic.

Flor Sepultiado Mosaic Necklace

This “unique texture-rich medium for jewelry making is designed for embedding treasures such as glass, gemstones, metal, buttons, wire and beads to create visual interest and contrast.  Here are some tips for using it!

This free jewelry project by Rings & Things features a stitched devil head lampwork bead as the centerpiece of a mini mosaic. Small beads surround the black white and red focal, which is set into Encapture Artisan Concrete (jewelry grade concrete). The small mosaic is held inside an inexpensive 1" round bezel cup.

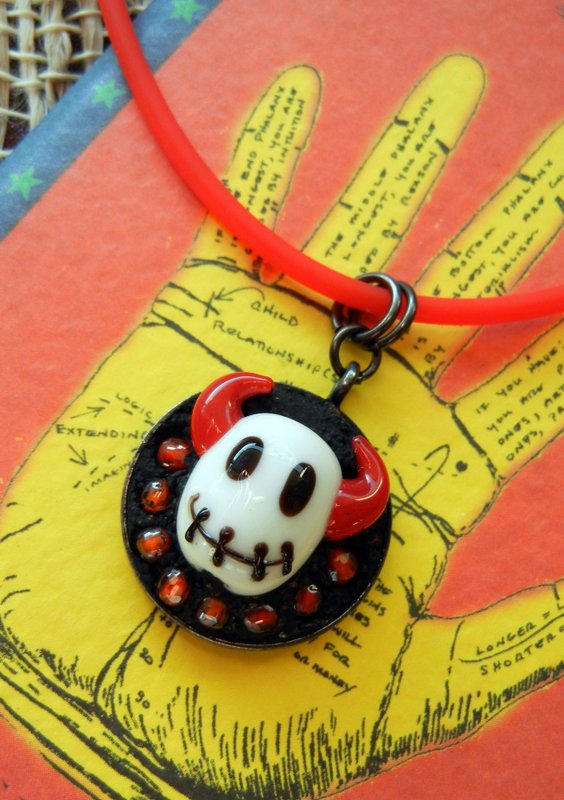
Stitched Devil Mosaic Necklace

Mixing: We found the easiest way to mix the concrete was making a slurry (or thin paste) by putting a small amount of the base material in the mixing cup and adding the activator. To the slurry, mix in the base material and pigment incrementally until you have achieved the desired color and consistency.

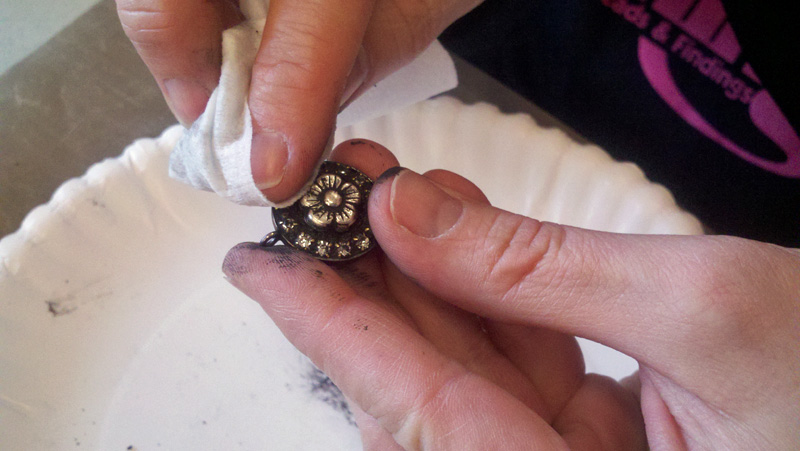
Application:  You can extend the life of your concrete while you are working by covering the mixing cup with a damp paper towel. We recommend you remove excess concrete from your embedded treasures as you work using a damp paper towel, cotton swab or toothpick. It is easier to remove when it is moist than after it starts to dry.

Initial cleaning of the mini mosaic involves wiping away the excess jewelry grade concrete (Encapture Artisan Concrete) from the silver flower and rhinestone chain. Remove any excess concrete from the back of the gunmetal bezel cup. All parts available at rings-things.com

Work Time:  As the concrete starts setting within 5 minutes, you must work quickly!  Pre-arranging your design is very helpful.  We found it easiest to trace the bezel, and to mock-up the arrangement on paper.  This allows you to quickly and precisely place each item when it is time.   
Encapture Artisan Concrete (jewelry grade concrete) sets quickly. The lampwork cat head bead and smaller gemstone round beads were positioned into place before the concrete was placed, making it easier to create a small mosaic. All parts available at www.rings-things.com
Green Cat Mosaic Necklace
Design:  Including small beads in your design is easiest if you string them first (this way they can’t roll and move as easily). For a more elaborate or mosaic-style design, setting your treasures with a dab of two-part epoxy glue is recommended. Glue your items in place and allow the glue to fully dry before applying concrete.  
Trade beads, a Tierra Cast hamsa hand, an Amate primitive heart or art heart (arte heart) silver bezel were carefully glued into place for this small mosaic. The designer bezel will be filled with jewelry grade concrete (EnCapture Artisan Concrete) once the glue has dried. Free DIY jewelry project by designer Sondra Barrington of www.rings-things.com.

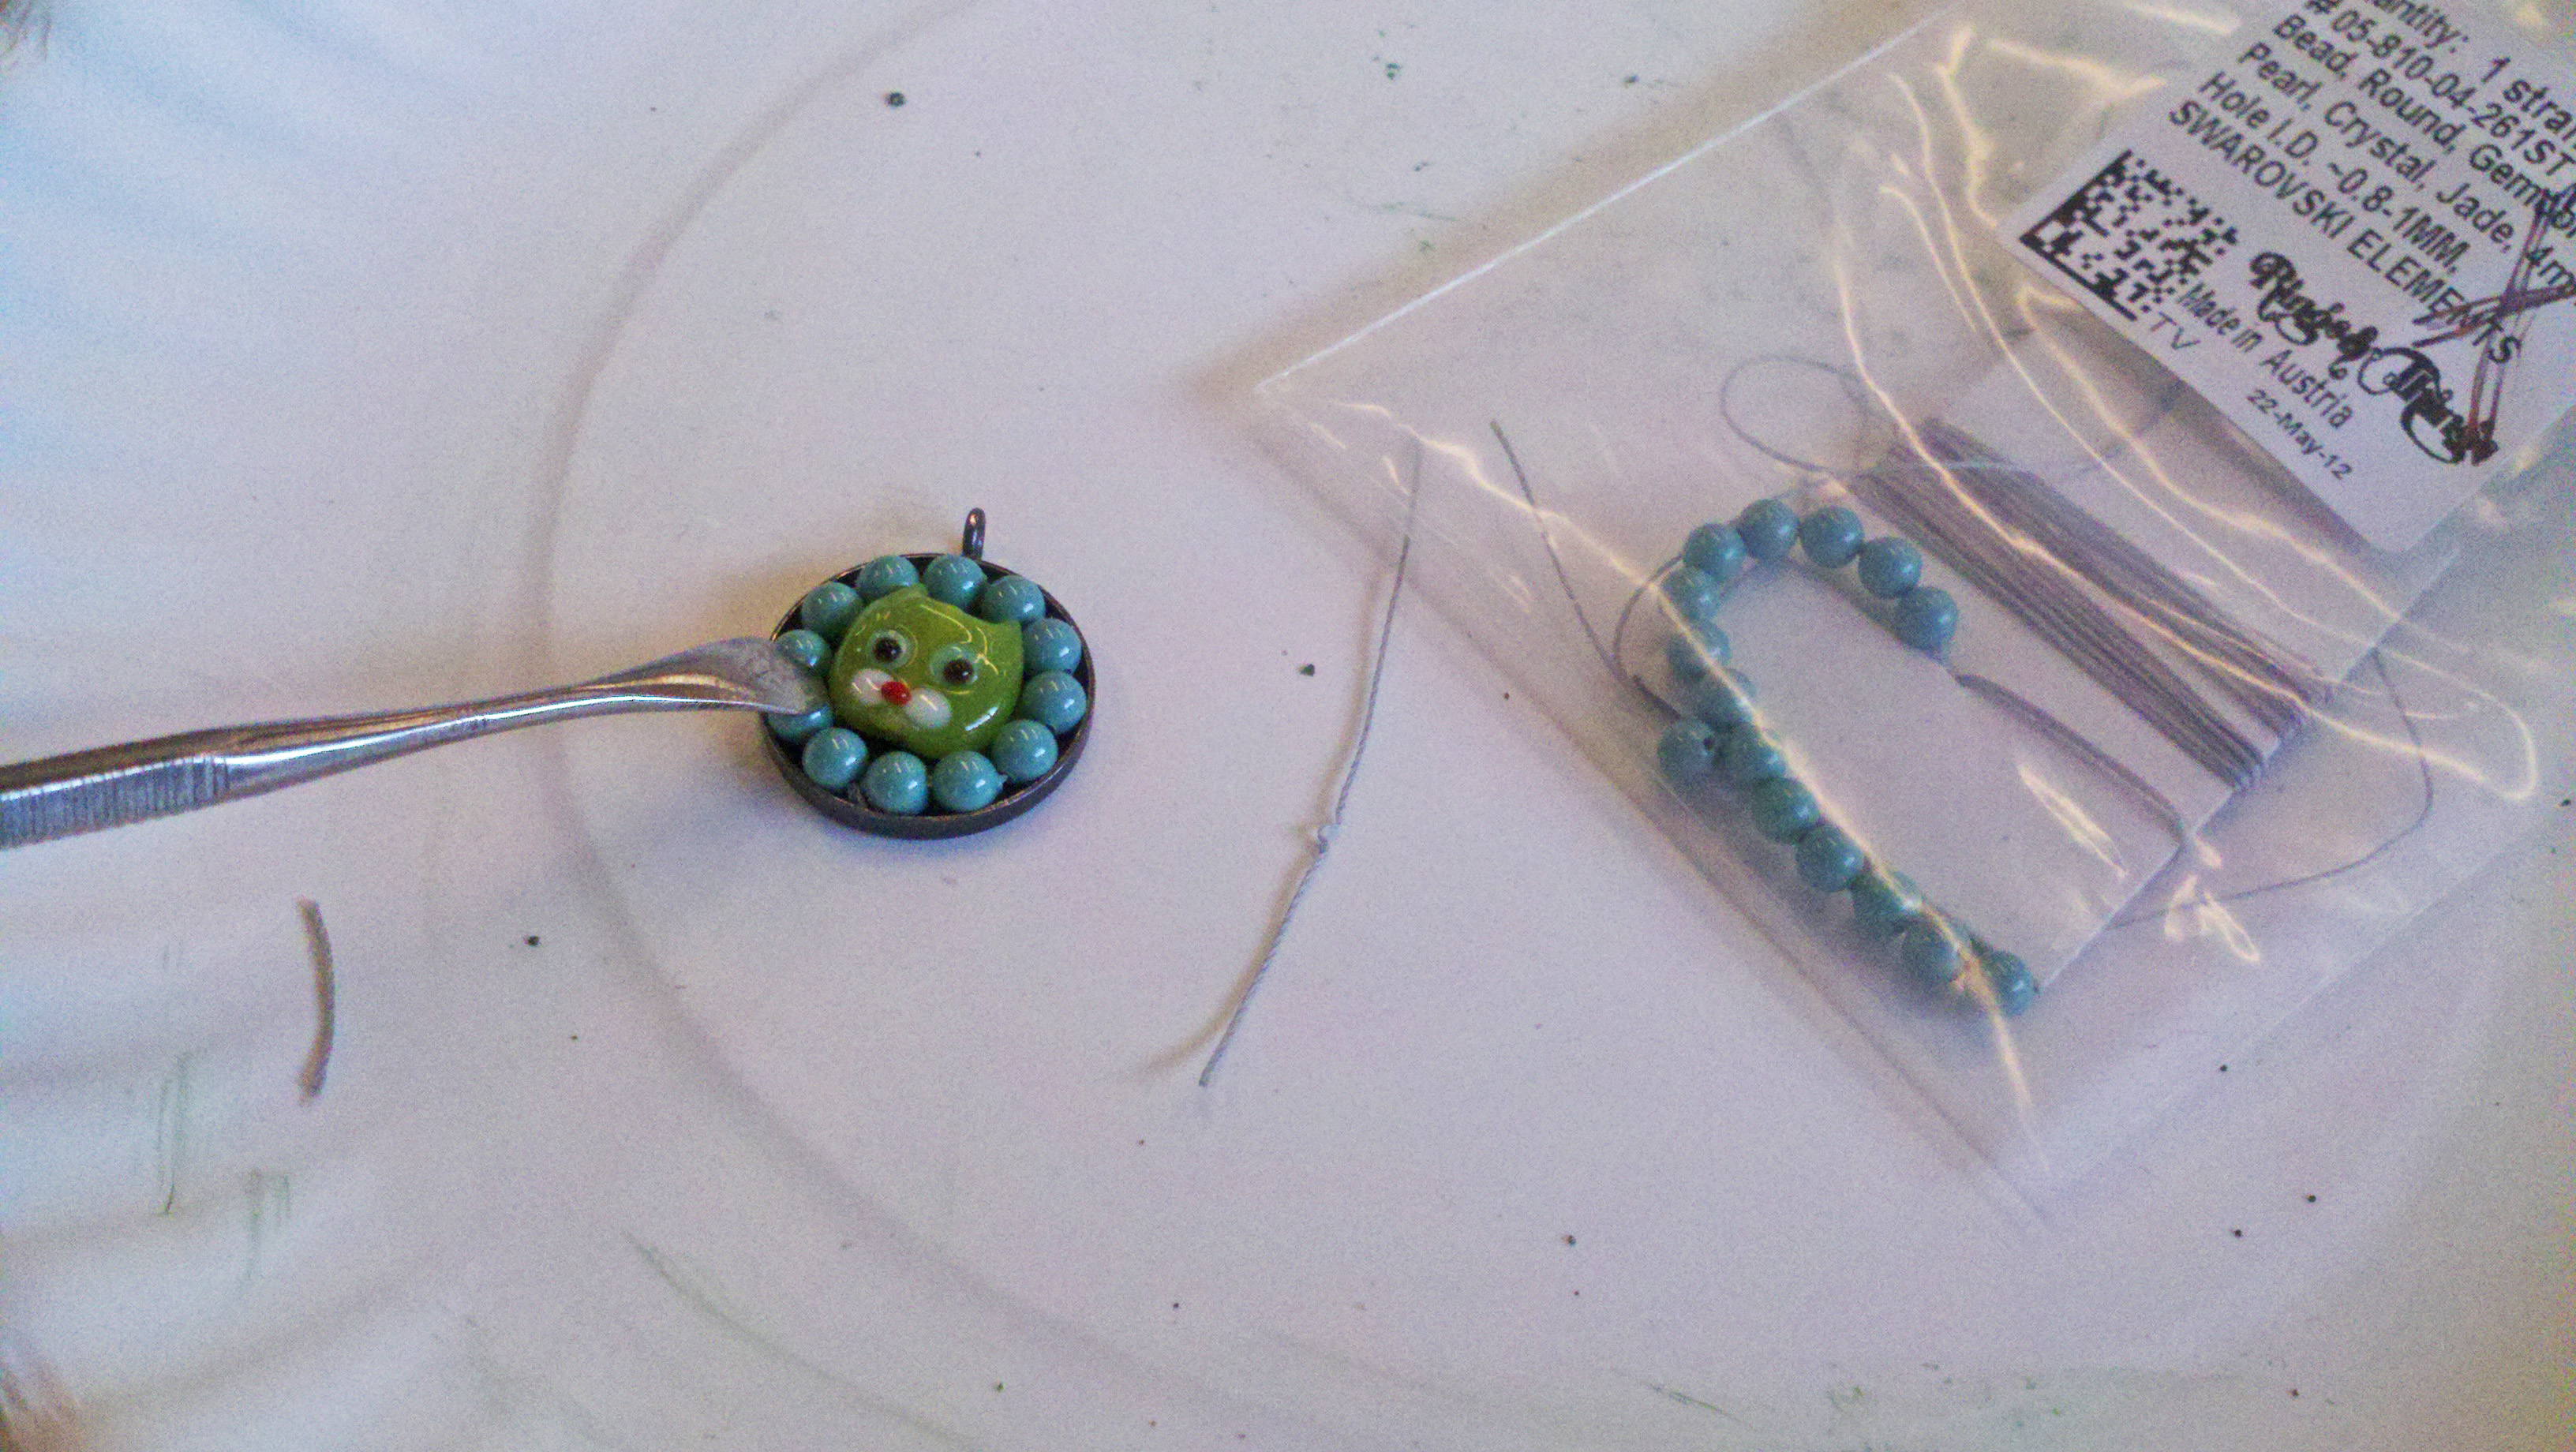
Hamsa Hand in Heart Mosaic Necklace – Tutorial

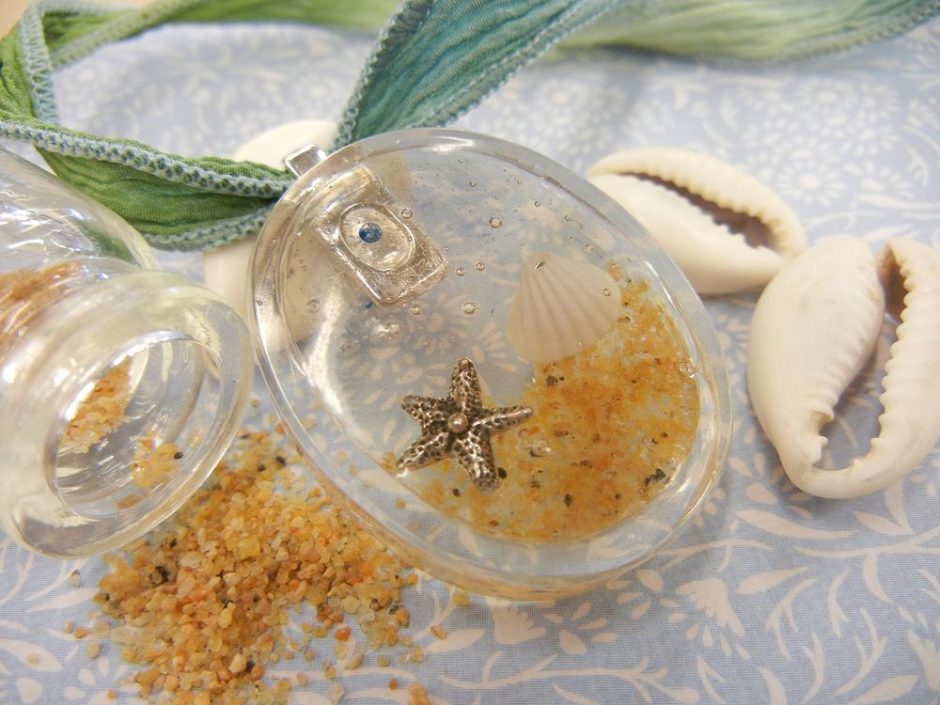
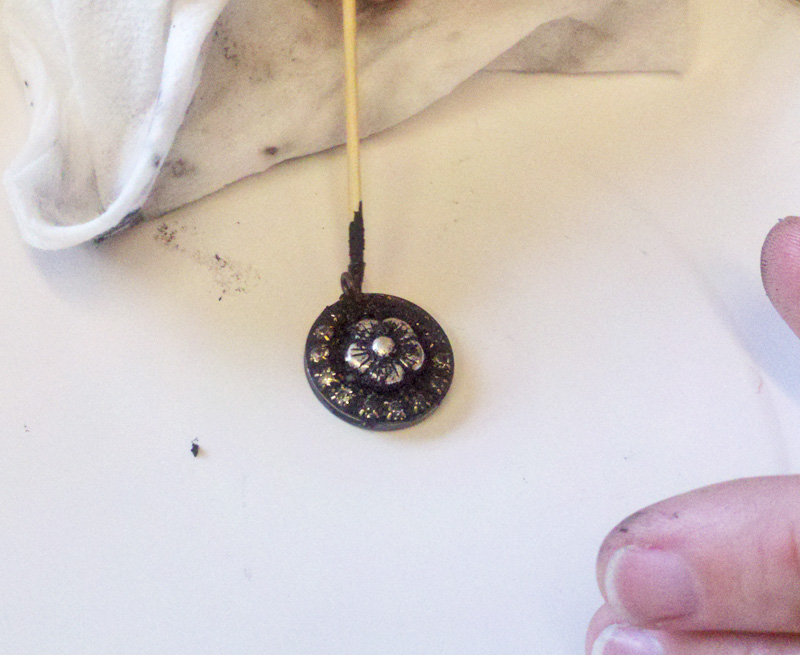
Finishing Touches:  If you do not like large grains of sand from the concrete being visible in your design, you may be able to bury them by gently poking them down into the wet concrete with a toothpick.

Once the product has cured, for a beautiful golden sheen, the brass brush works wonders!  If you do not want to alter the color of your finished piece, gently clean around embedded treasures with the straight carver.

Using a toothpick to place jewelry grade concrete (Encapture Artisan Concrete) into the small mosaic, around the silver flower and rhinestone chain. Carefully place the concrete to avoid getting it on the gunmetal bezel cup. All parts available at rings-things.com

In addition to the tools and supplies provided in the kit, we found the following tools and supplies very helpful:
* Damp paper towels/moist towelettes
* Extra wood mixing sticks
* Cotton swabs
* Tablet & pencil
* Extra disposable plastic mixing cups
* Extra dust masks
* Extra disposable gloves
This free jewelry project by Sondra Barrington of www.rings-things.com features a silver Amate primitive heart bezel. This deep dish art heart bezel has been filled with jewelry grade concrete (Encapture Artisan Concrete) and an assortment of trade beads, small silver beads and a Tierra Cast hamsa hand charm. The mini mosiac is hung from an inexpensive choker.
Links:

Glass Bezels: Clearly show off your treasures!

April 27, 2012

I filled this glass bezel with sand,  starfish and  seashell charms. It’s a little ocean microcosm.

Glass bezels are great! You can make your own by using a bottle cutting tool from Delphi. This tool is also pretty handy to convert old wine bottles and beer bottles into drinking glasses and votive holders. Check out this video from Six in the Suburbs Blog to see how easy it is to cut glass bottles. However, if you aren’t quite ready to go down the path of cutting glass, we have a solution for you here at Rings & Things: Glass Bezels already made and ready to fill with all of your wonders!

Continue Reading…

Resin + scrapbook paper = fun

August 2, 2011

So, if you’ve been reading this blog you know we are very excited about SuperClear Resin for jewelry. As is usually the case, we had a bit leftover after filling some bezels, so we tried applying some to scrapbooking paper just to see what would happen. The results were great! With most epoxy resins, it is recommended that you coat your paper or images with Mod Podge, white glue or other sealer to prevent the resin from bleeding into the paper. However, we found that SuperClear resin worked just fine on uncoated paper. (We still recommend testing yours first! Each type of paper acts a little differently.)

SuperClear resin, when applied sparingly, has enough surface tension to stay domed on the paper.

In the picture above, Mollie is using a wooden craft stick to stir and dab the resin. It works ok. However, it is possible for the moisture content of the wood to have an adverse affect on the resin. We’ve now switched to these
plastic paddles/spatulas, as recommended by Resin Obsession.

The dots were super shiny when they dried – and the colors didn’t bleed!

How do you turn resin-covered paper dots into wearable jewelry? Fortunately Mollie is a clever girl. Here are a couple of the options she came up with:

The dot fit perfectly on a round pendant finding with bail.

I especially like that the back of the piece is entirely covered with metal – it feels much more finished that way.

Since these gluable pendant findings already have bails attached, you can just slide them onto chains or ribbons and have complete necklaces for under $2 each!

The resin dots also fit perfectly inside glass bezels.

Glass bezels are another unique option. If you plan ahead, you can make the pendant reversible! Since the bezels don’t have holes, Mollie wrapped hers with flat cotton cord and glued it in place.

Have you come up with interesting ways to combine resin with paper? We’d love to hear about it! ~Cindy