I love leather cuff bracelets! Whether I wear one alone, or layer them with other metal and leather bracelets, I think they are always in style. They are bohemian, and can be in funky bright colors or subdued earth tones. With the large selection of pre-made cuffs we sell, the possibilities are endless! I made a few examples using the TierraCast eyelet setting tool and eyelets to show you! Check out how to make them below!
Leather bracelets featuring TierraCast eyelets, Swarovski crystals, and TierraCast links.
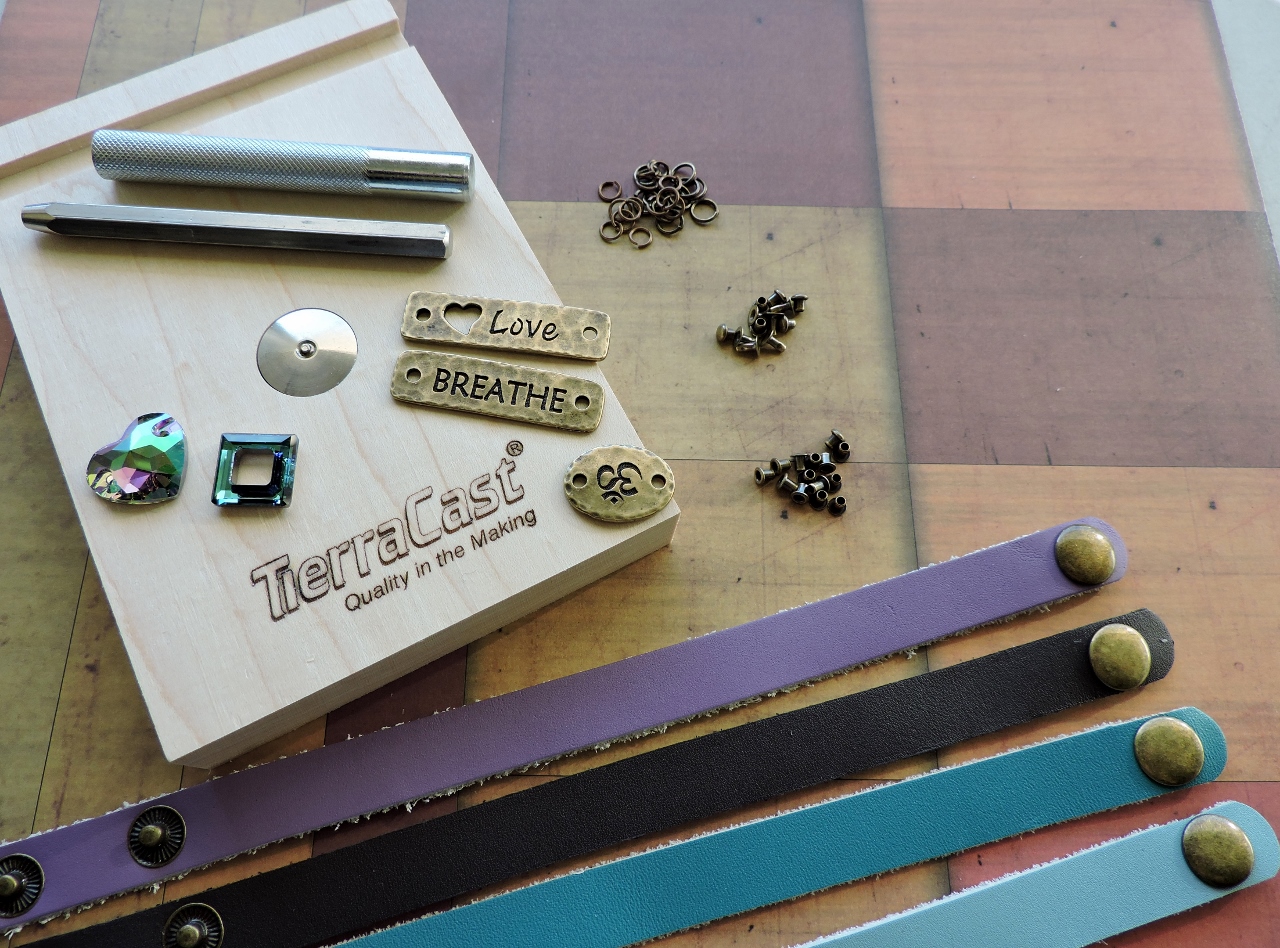
♦Supplies Needed ♦
TierraCast Rivets, I used #69-981-05-6 (Antiqued Brass)
Swarovski Crystal Sew-on Hearts, I used #03-259-16-445
Swarovski Crystal Square Links, I used #04-439-14-03
Antique Brass Jump Rings, I used 8mm and 10mm
Scissors
Mix and Match different leather, Swarovski and TierraCast components
The first bracelets I made were with the Swarovski Crystal pendants. I wanted to add the crystal components to the center of the leather bands.
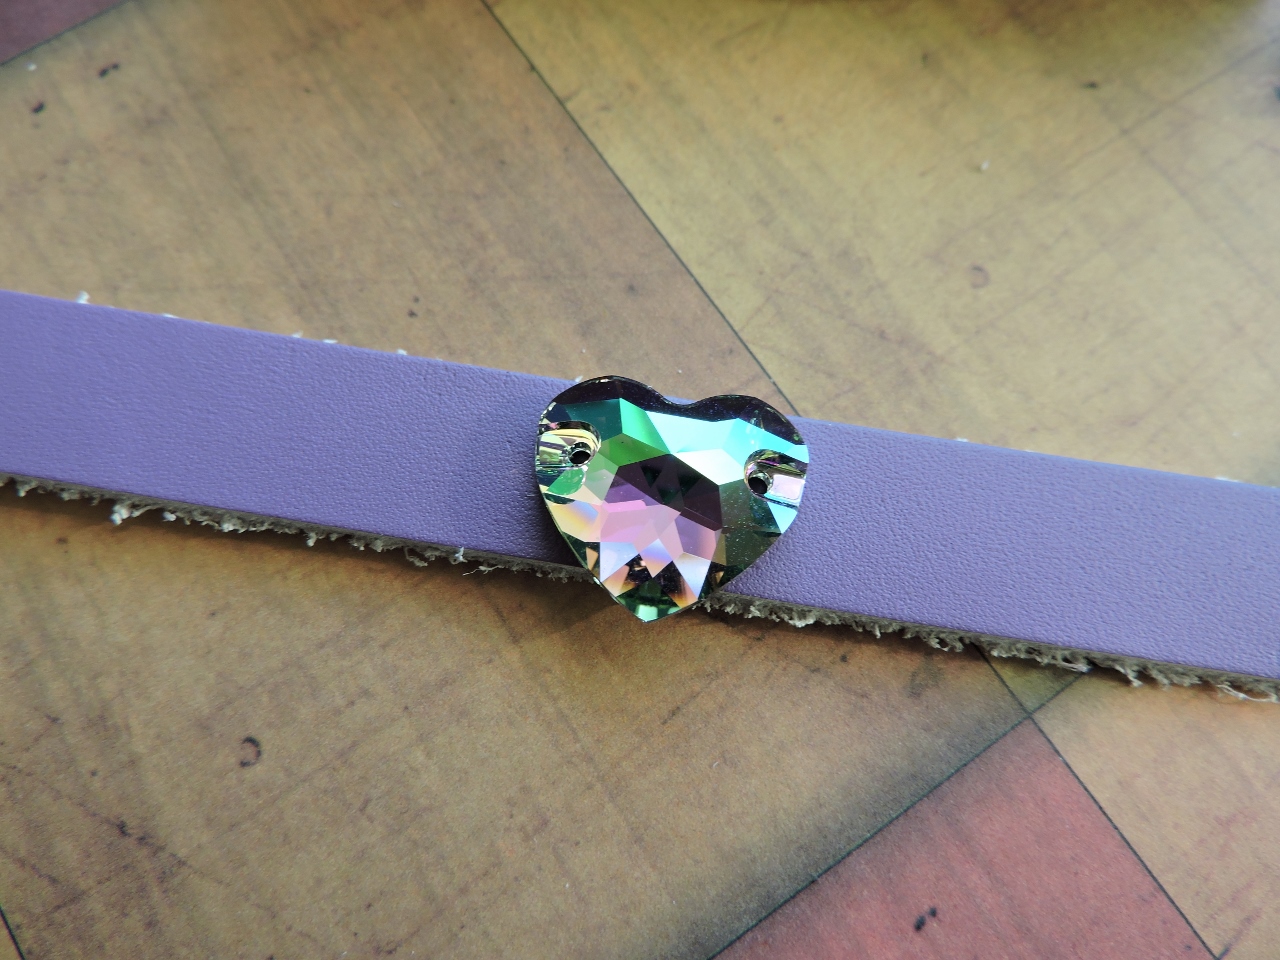
Place the crystals on the leather band where you want them to be on the bracelet. Place a permanent marker dot on the leather a couple millimeters out from the holes on the crystals.
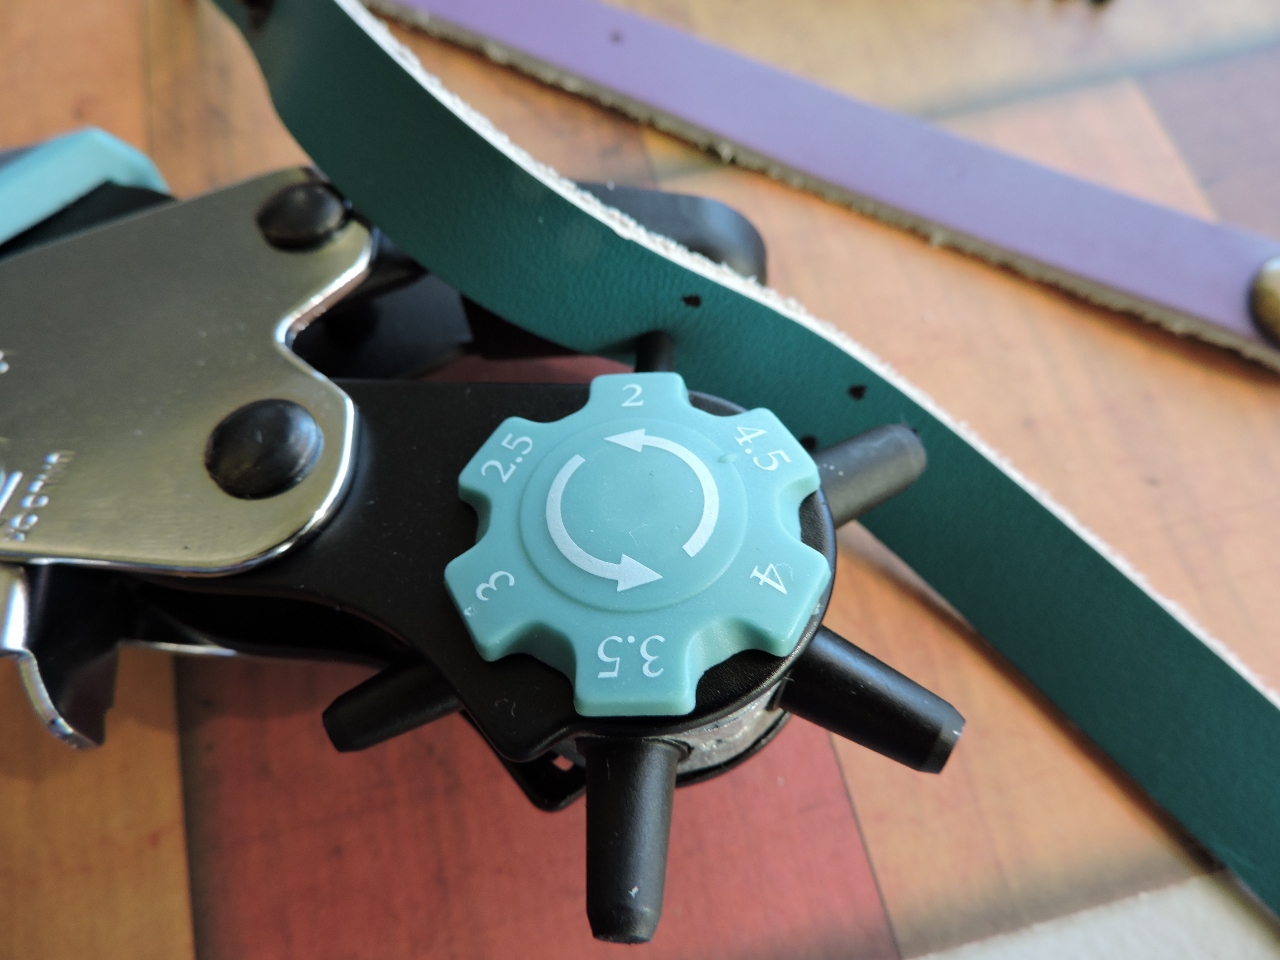
Punch holes in the leather where you want to place the eyelets.

Here is what the leather looks like after you have made all your holes.
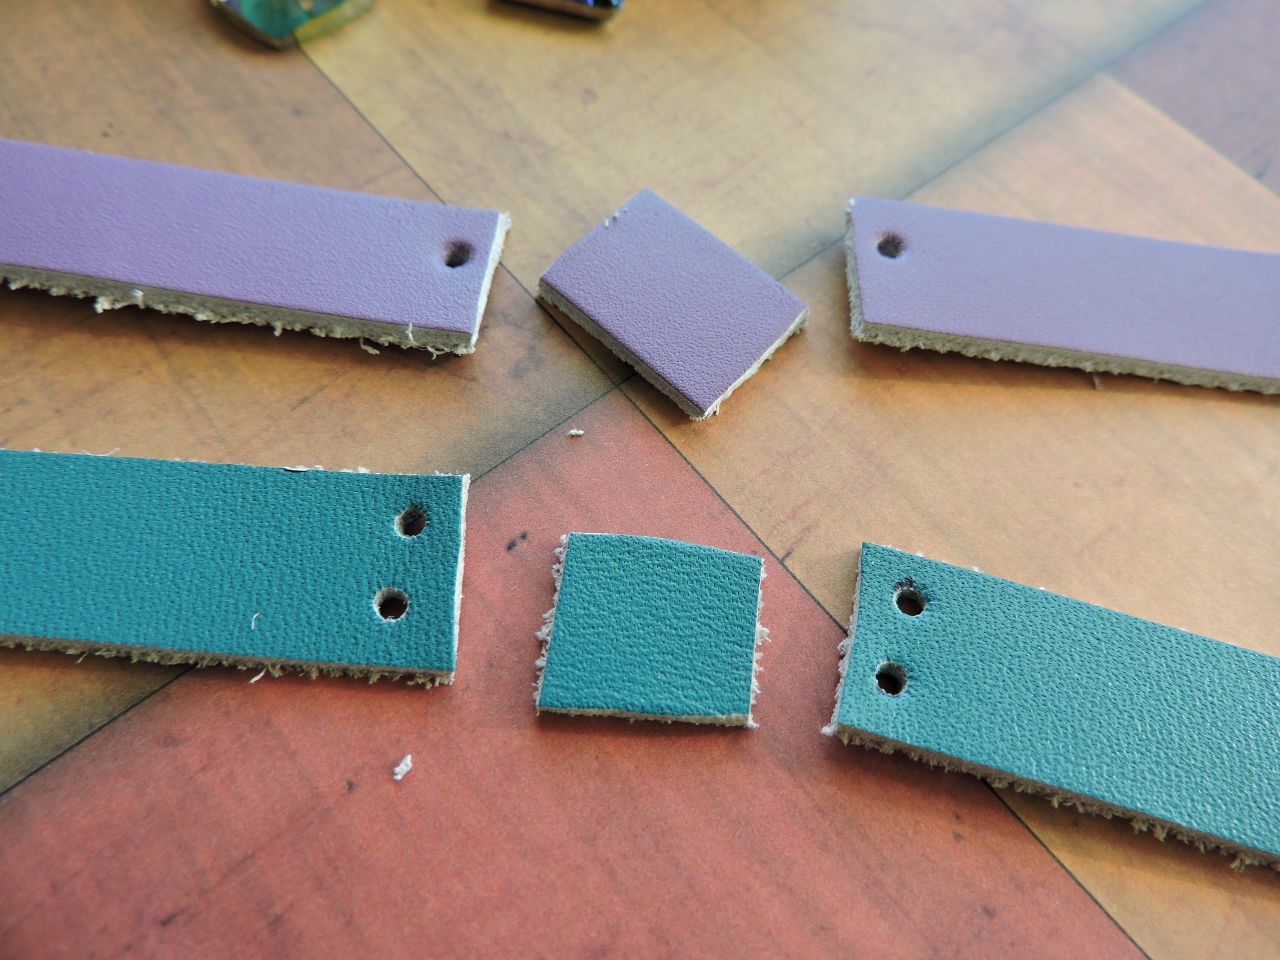
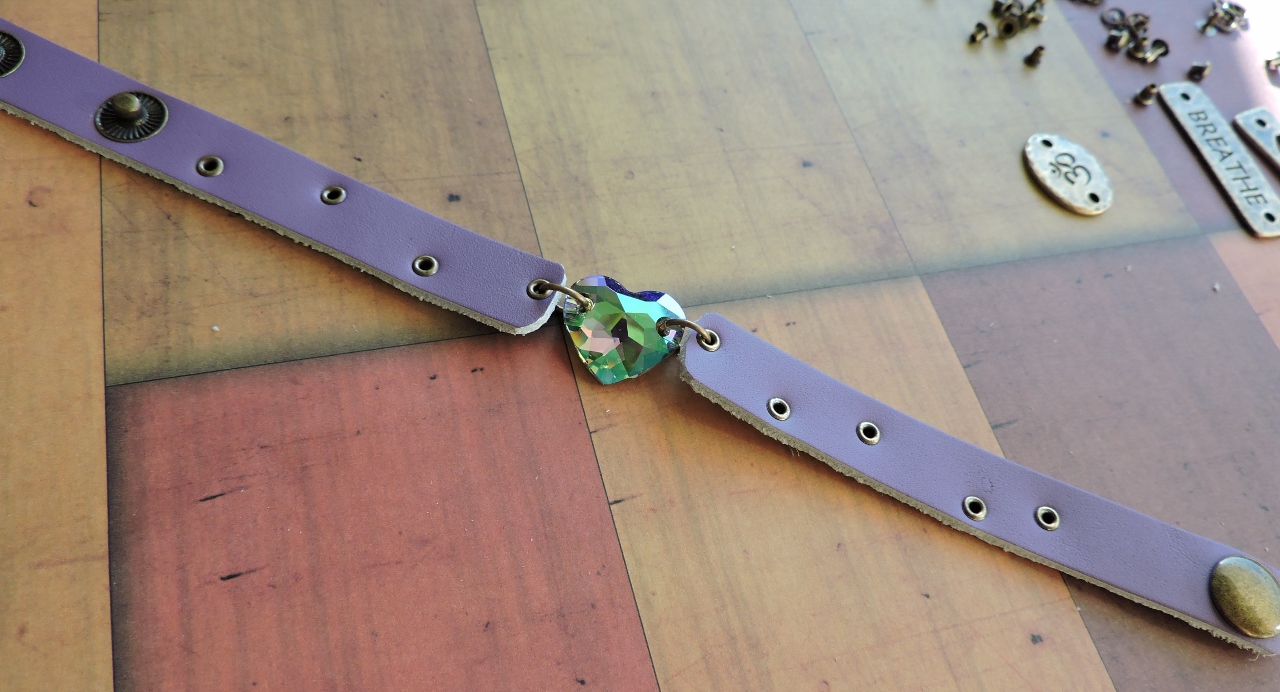
Using sharp scissors, cut out the center of the leather bracelets where you are going to place your crystal pendants.
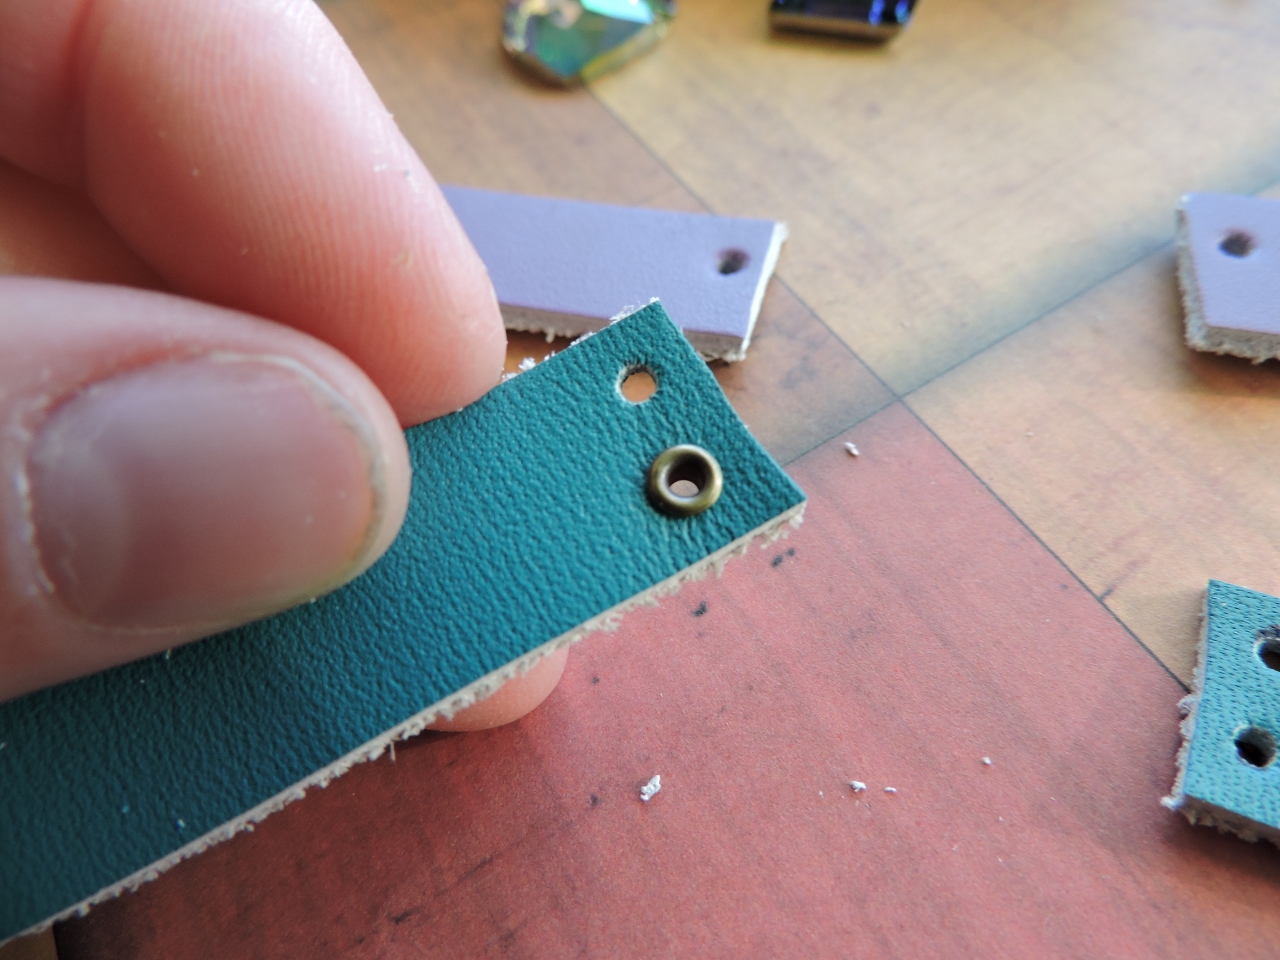
Add eyelets to all the holes that you have punched in the leather.
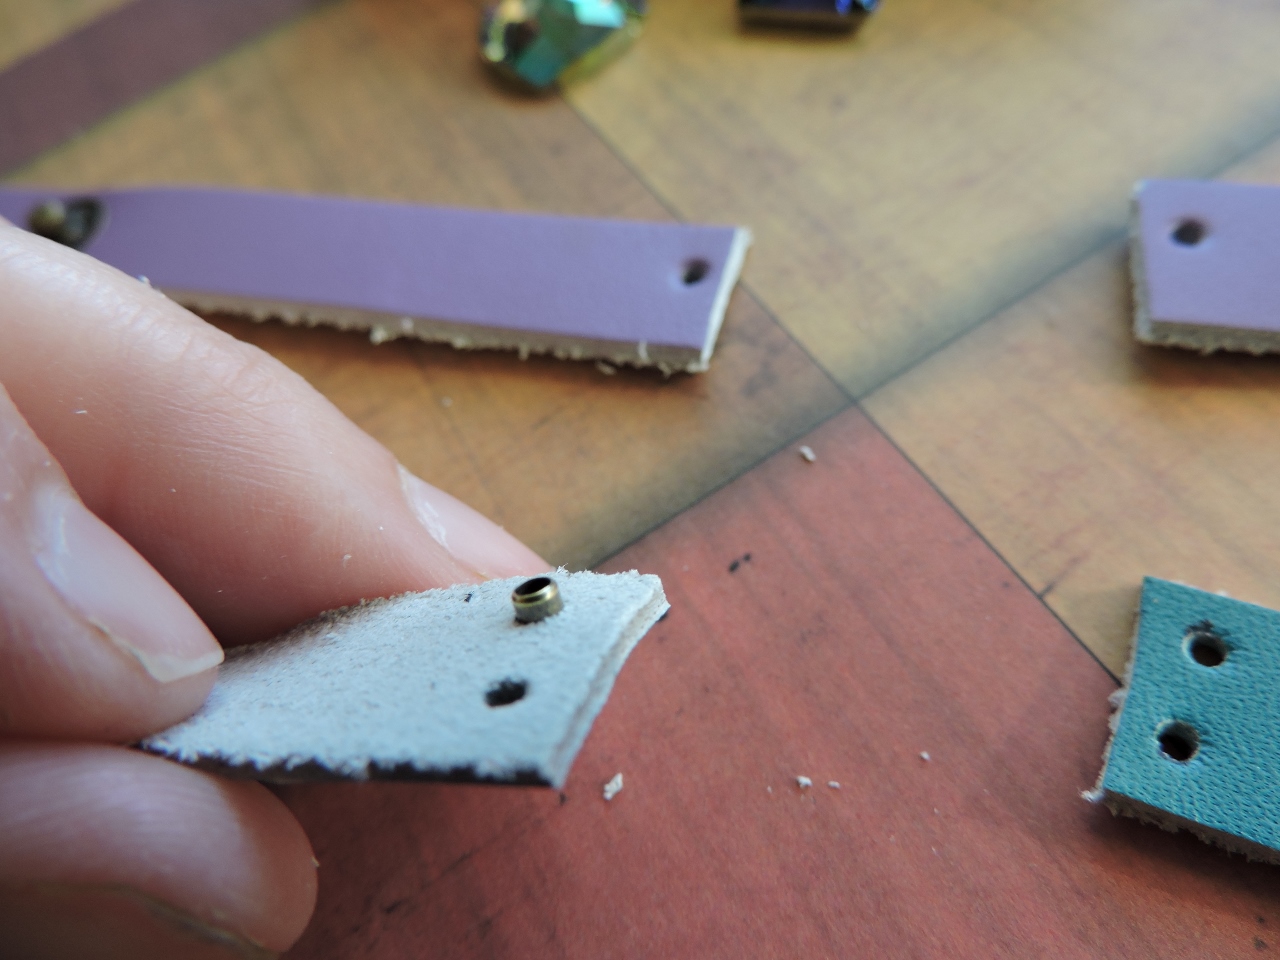
This is what the eyelet looks like on the backside of the leather.
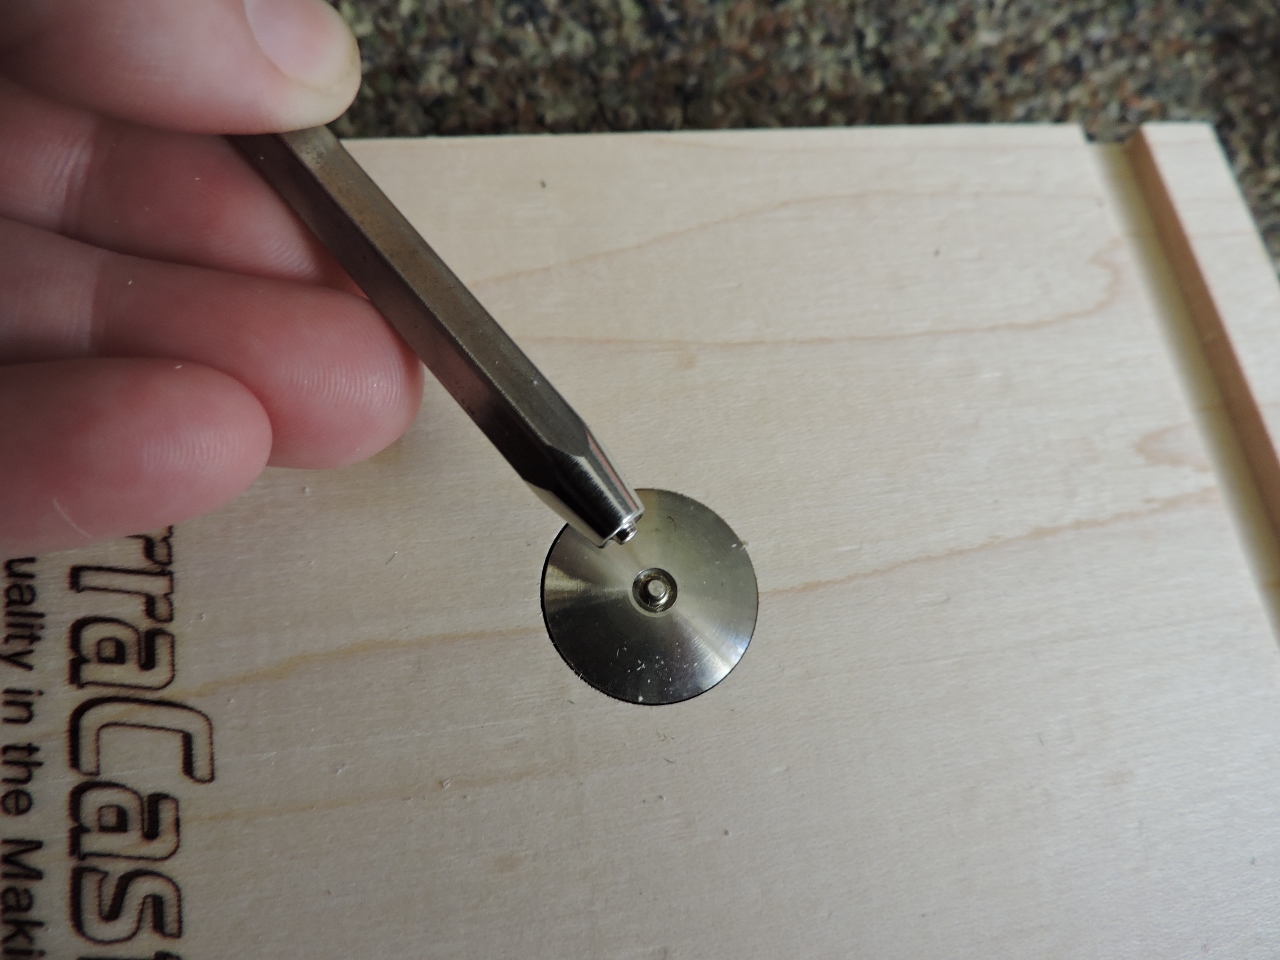
This is what the tool looks like up close. The eyelet will sit right into the grooves on the metal disc. The handheld portion of the tool has a small peg that will fit into the back side of the eyelet. When you hammer the tool, it will flare the metal out, creating the eyelet.
This is how you want it to look before you hammer the eyelet.
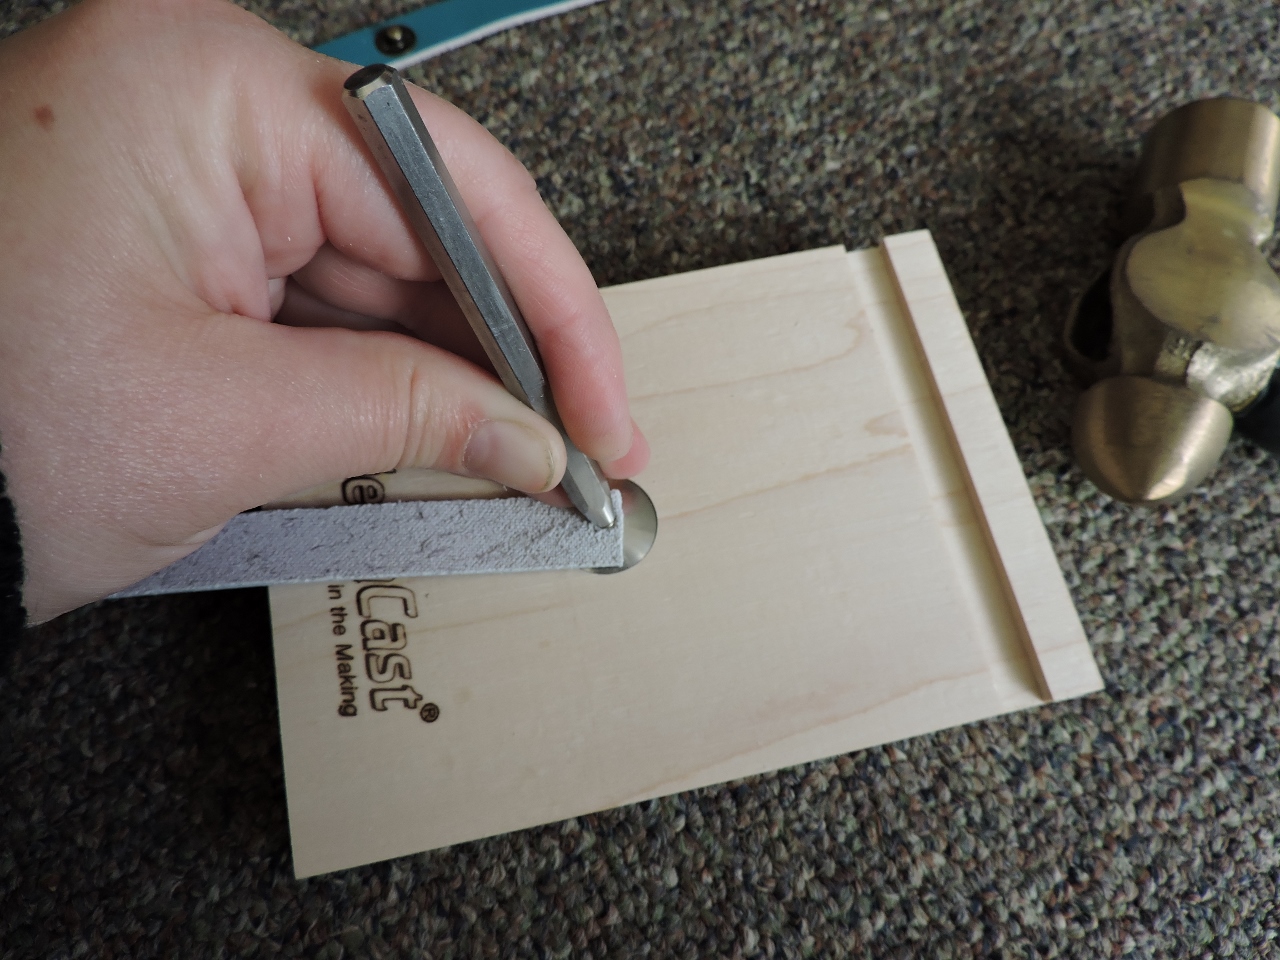
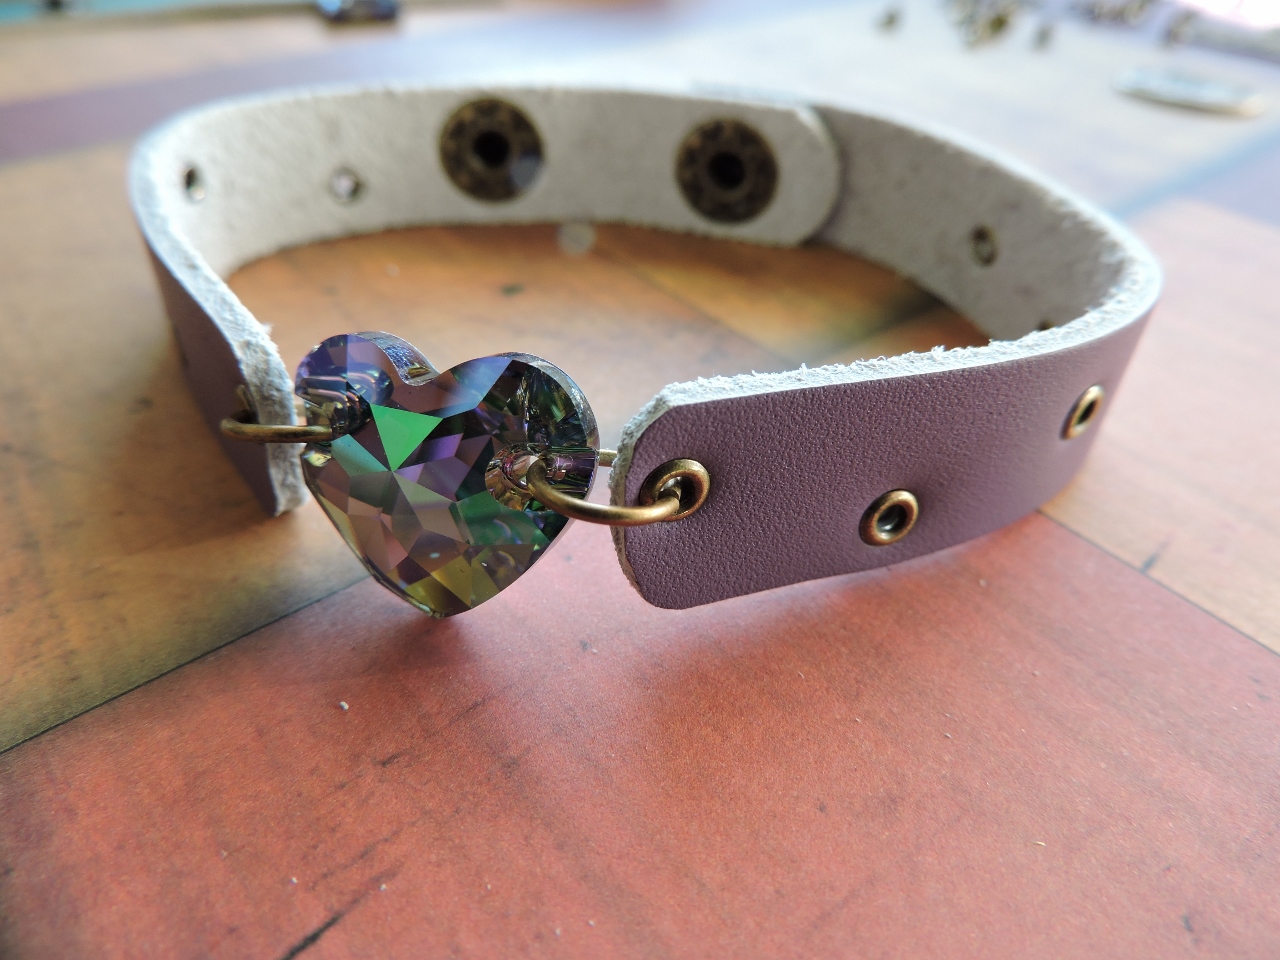
After I finished the two eyelets on the purple bracelet and added the crystal heart, I decided that it would look nicer if I rounded out the leather edges.
Much better! I used my scissors to clean up the fuzzy edges, and round off the leather.
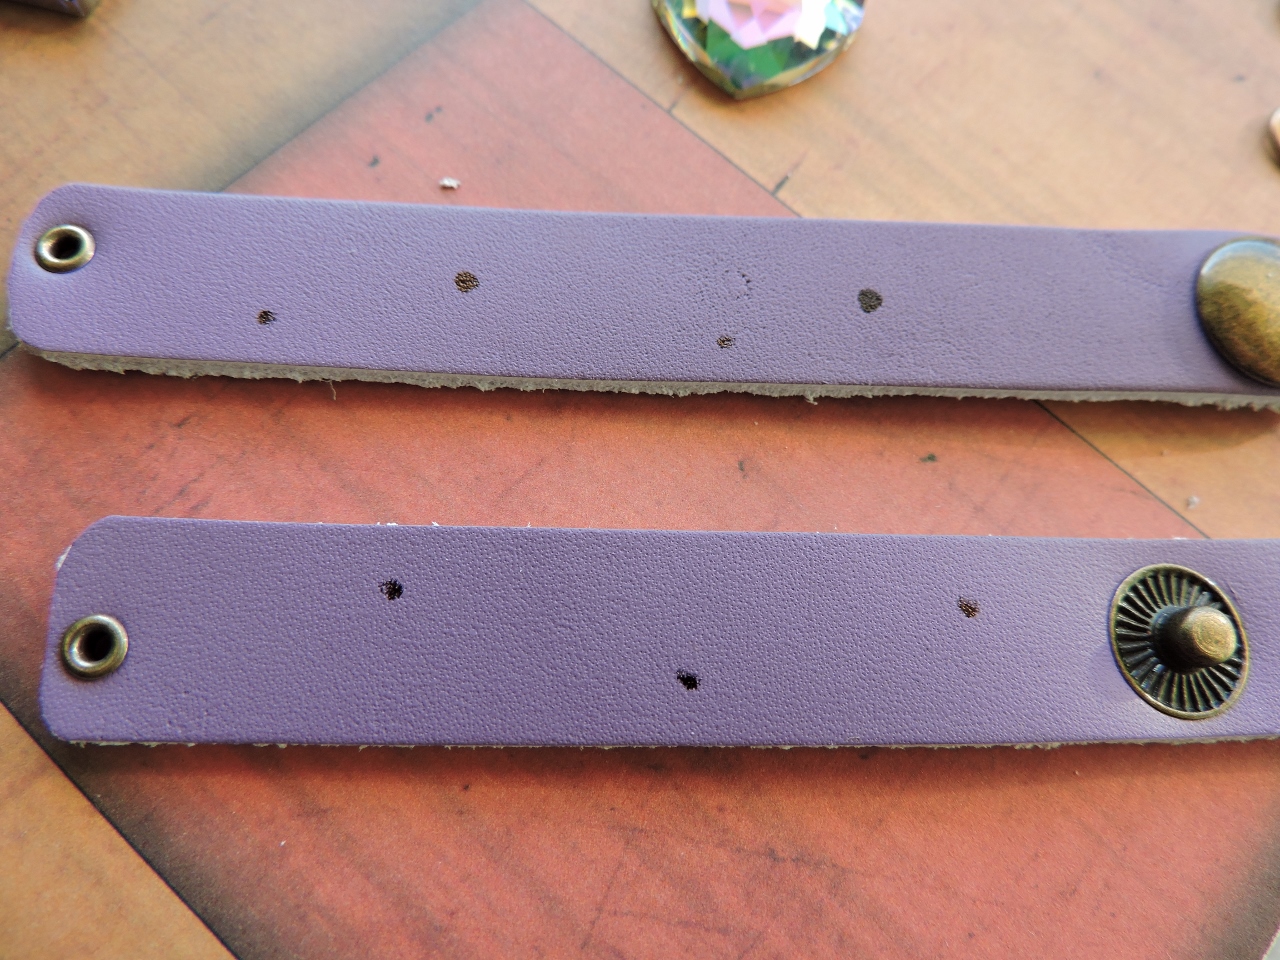
I decided to add some more decorative eyelets to the leather randomly. I placed permanent marker dots where I wanted to put the eyelets
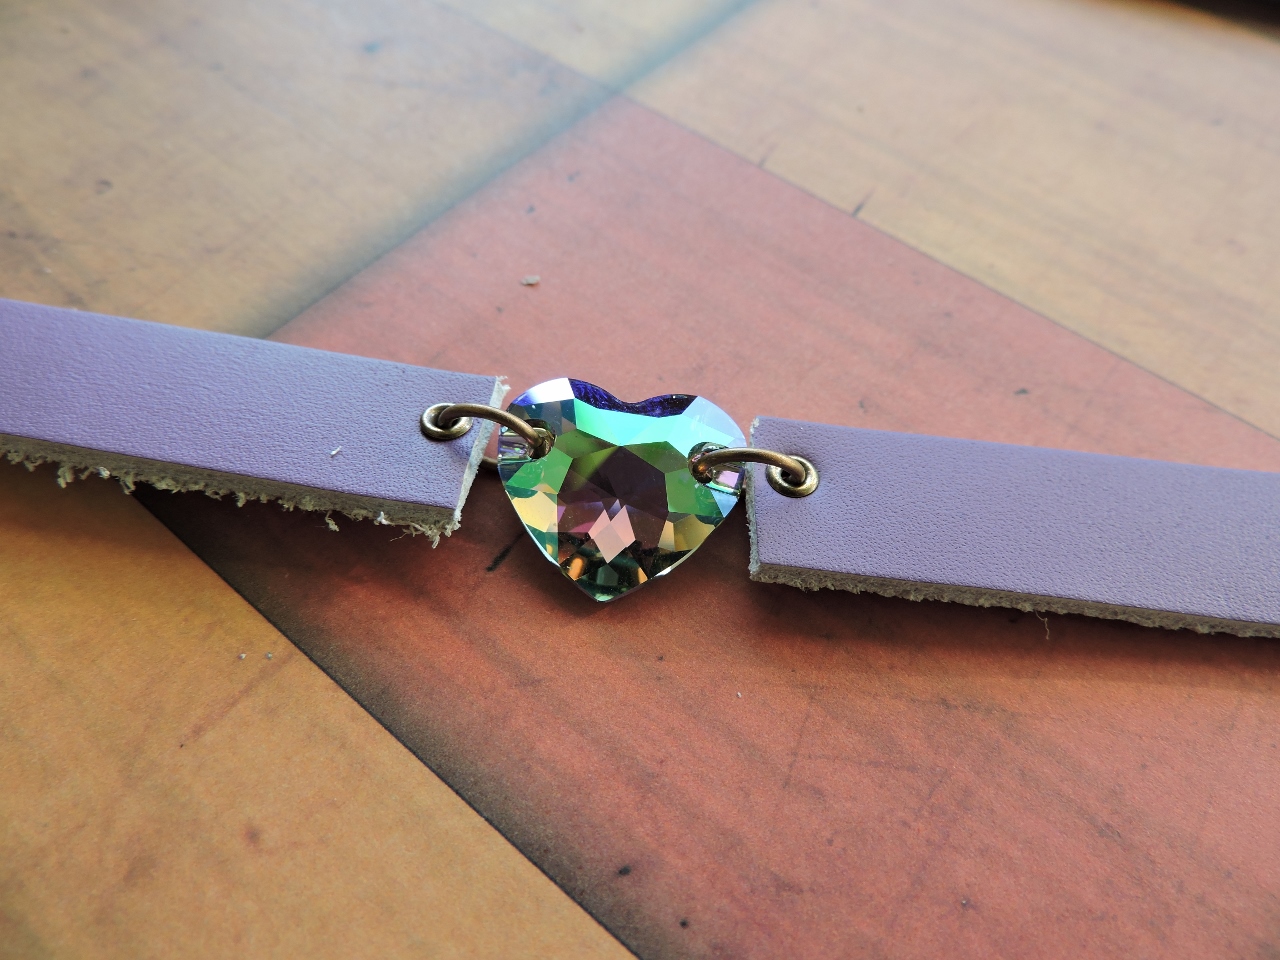
Completed bracelet! Swarovski Crystal Paradise Shine Heart and Bellflower Purple Leather Cuff.
I seriously love this crystal so much! It is so colorful and the faceting is so pretty! Get one here!
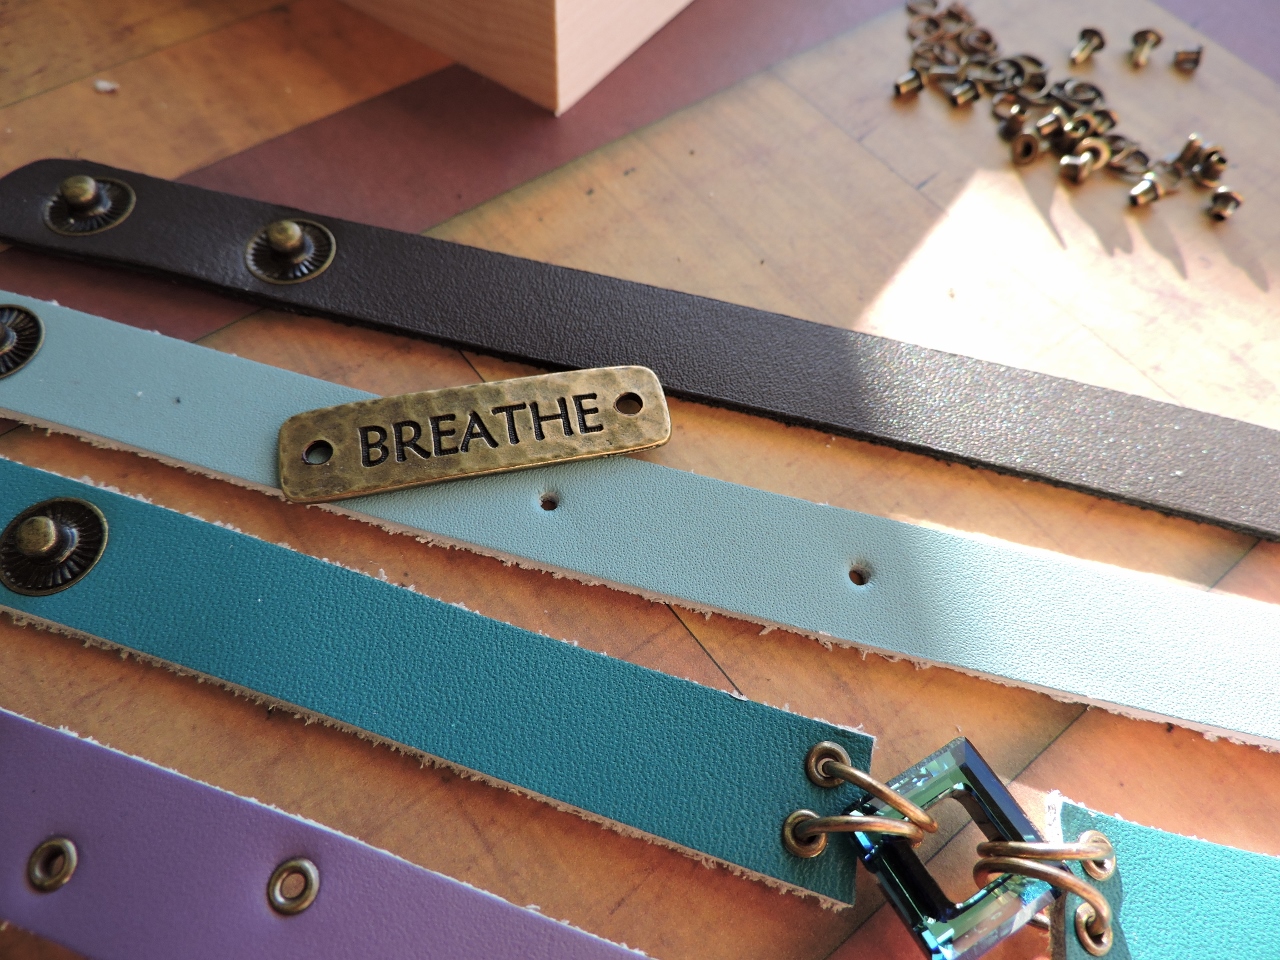
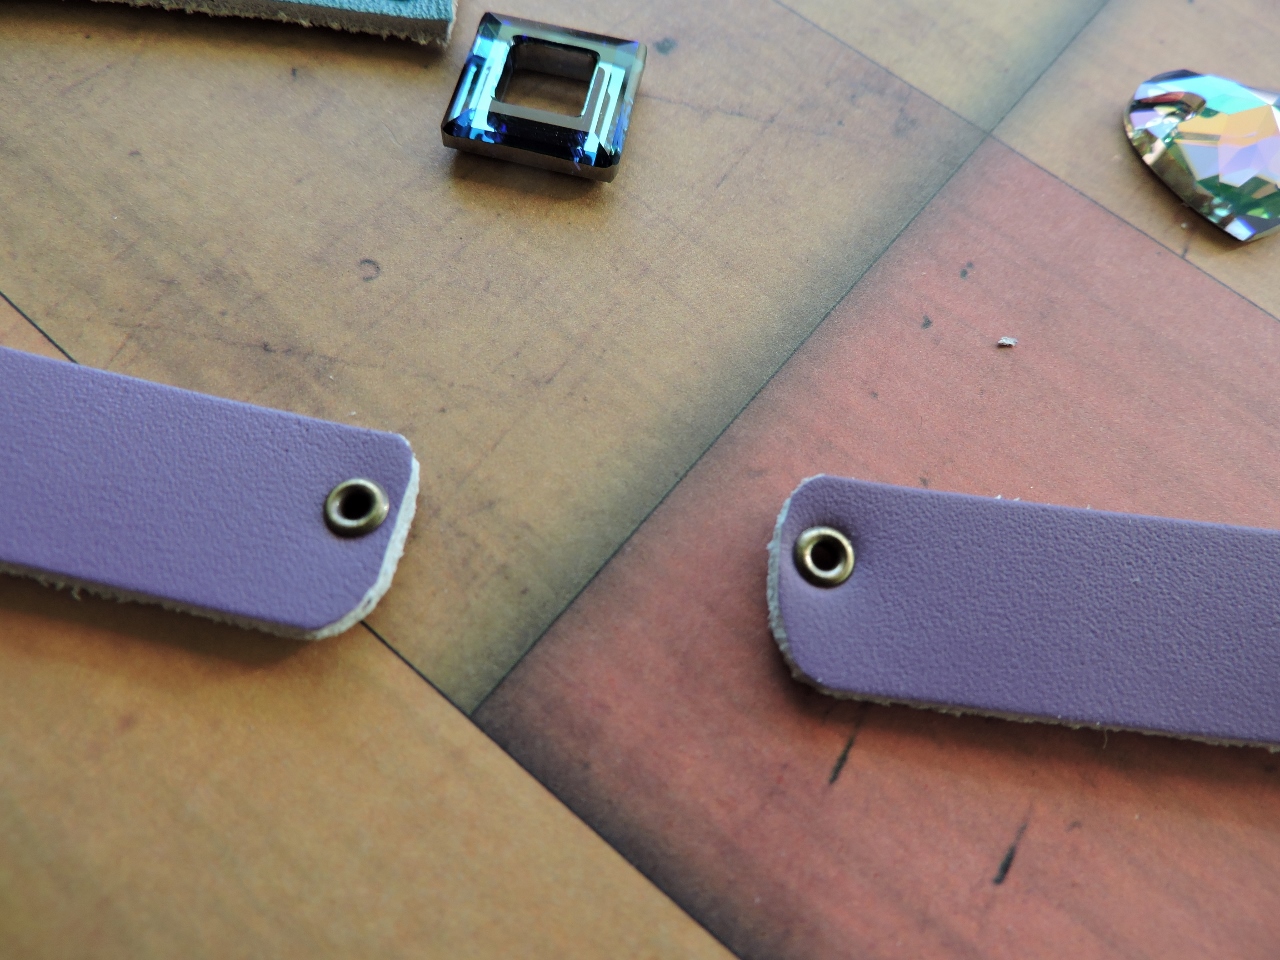
The other crystal one I did is just as easy. I just put 4 eyelets on the teal leather bracelet blank and then added the 14mm Bermuda Blue Swarovski square link with large (10mm) antique brass jump rings.
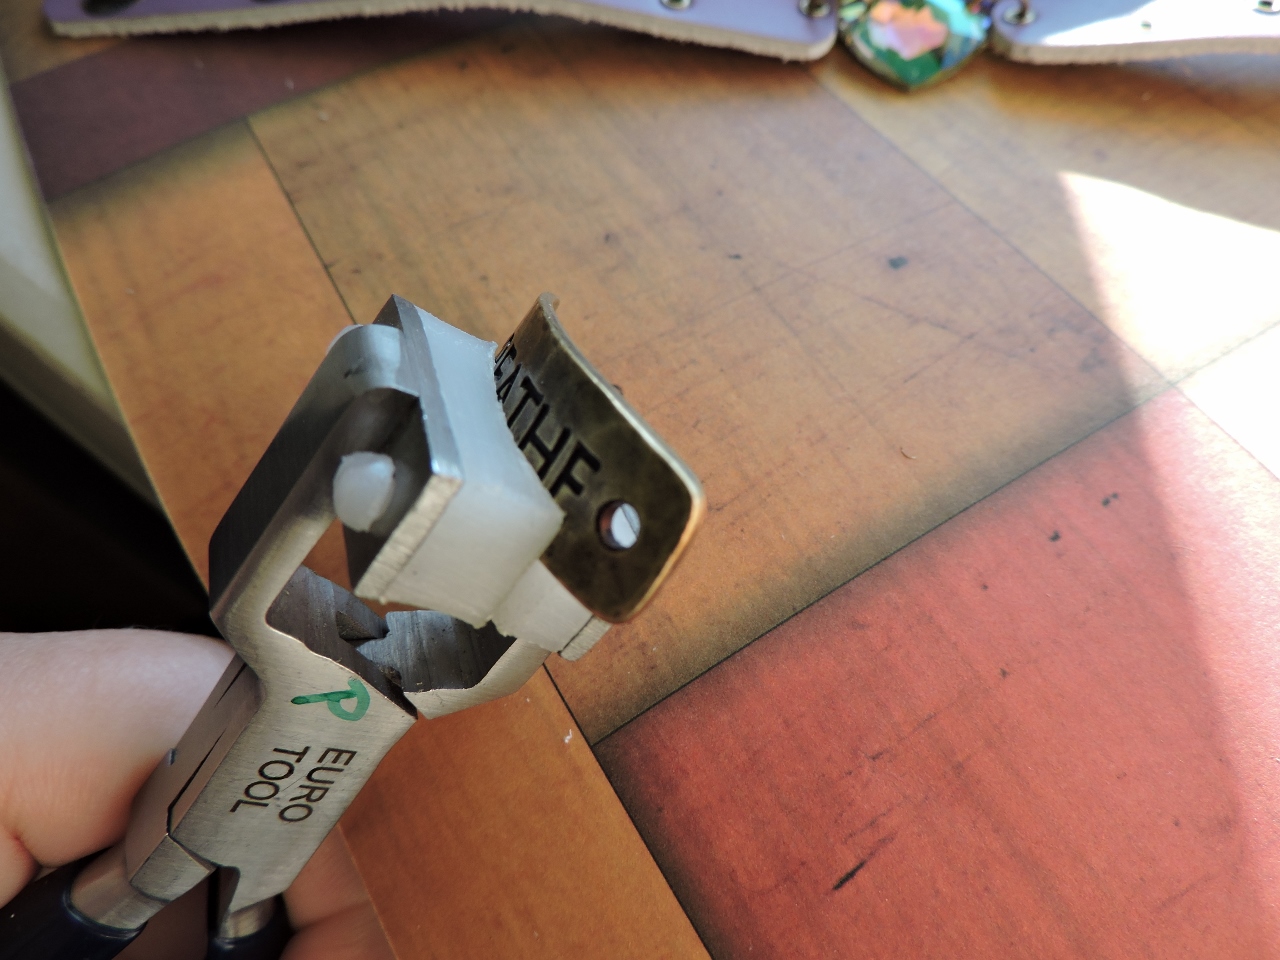
To add the TierraCast “Breathe” plate to the bracelet, I gave it a nice curve with bracelet bending pliers. The metal is soft enough to bend with your hands alone, but the pliers create a neater look. After bending the metal link, I placed it where I wanted it on the bracelet, then made permanent marker dots where I want to make the holes. Punch your holes with the leather punch, and use the eyelets to attach the piece with the eyelet setter.
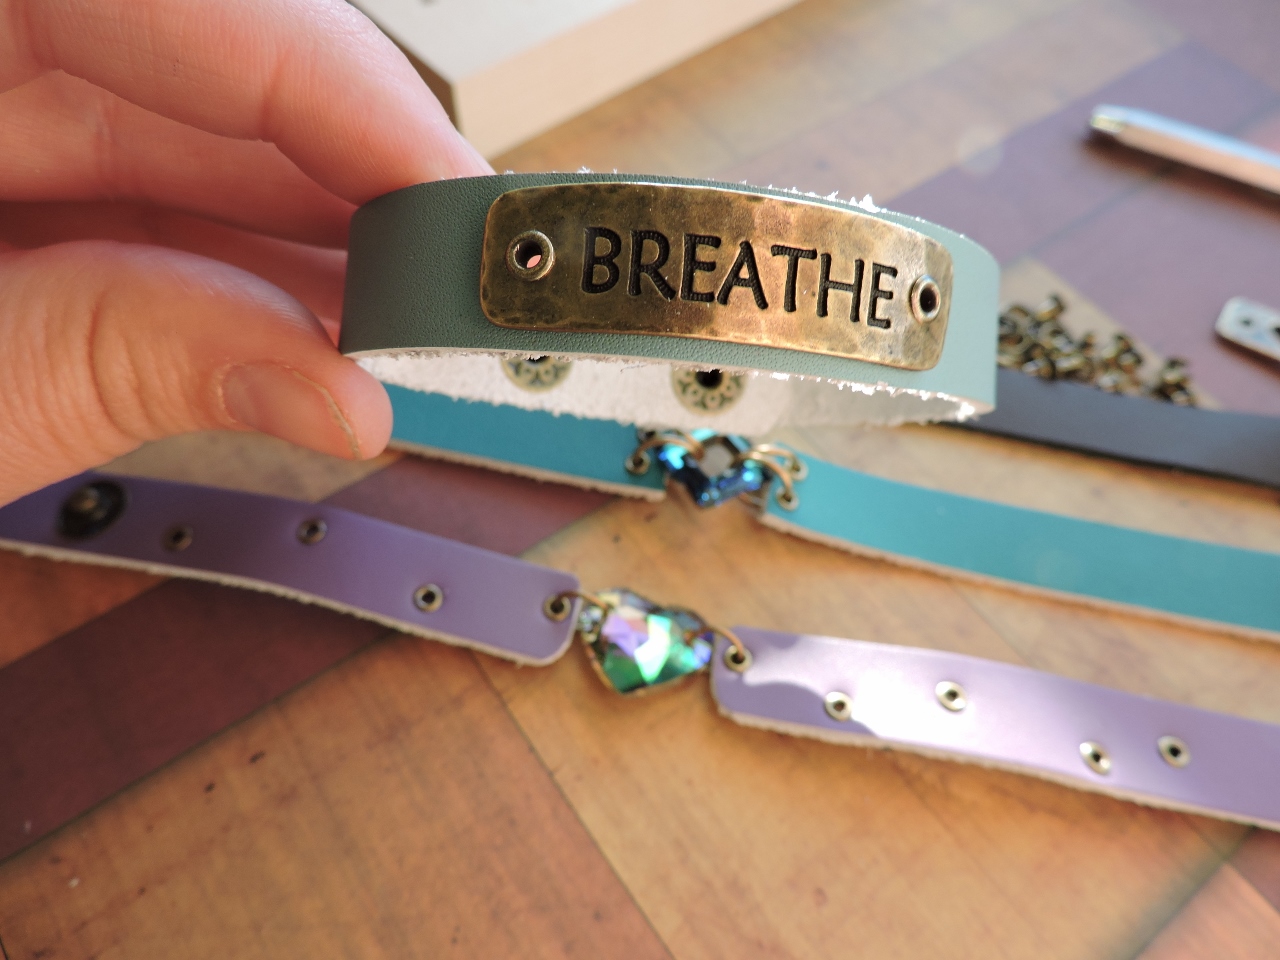
The metal plate “Breathe” looks great on this cuff!
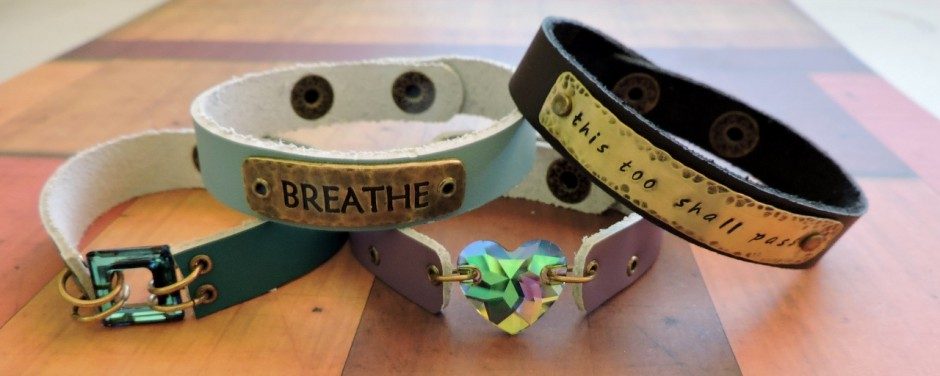
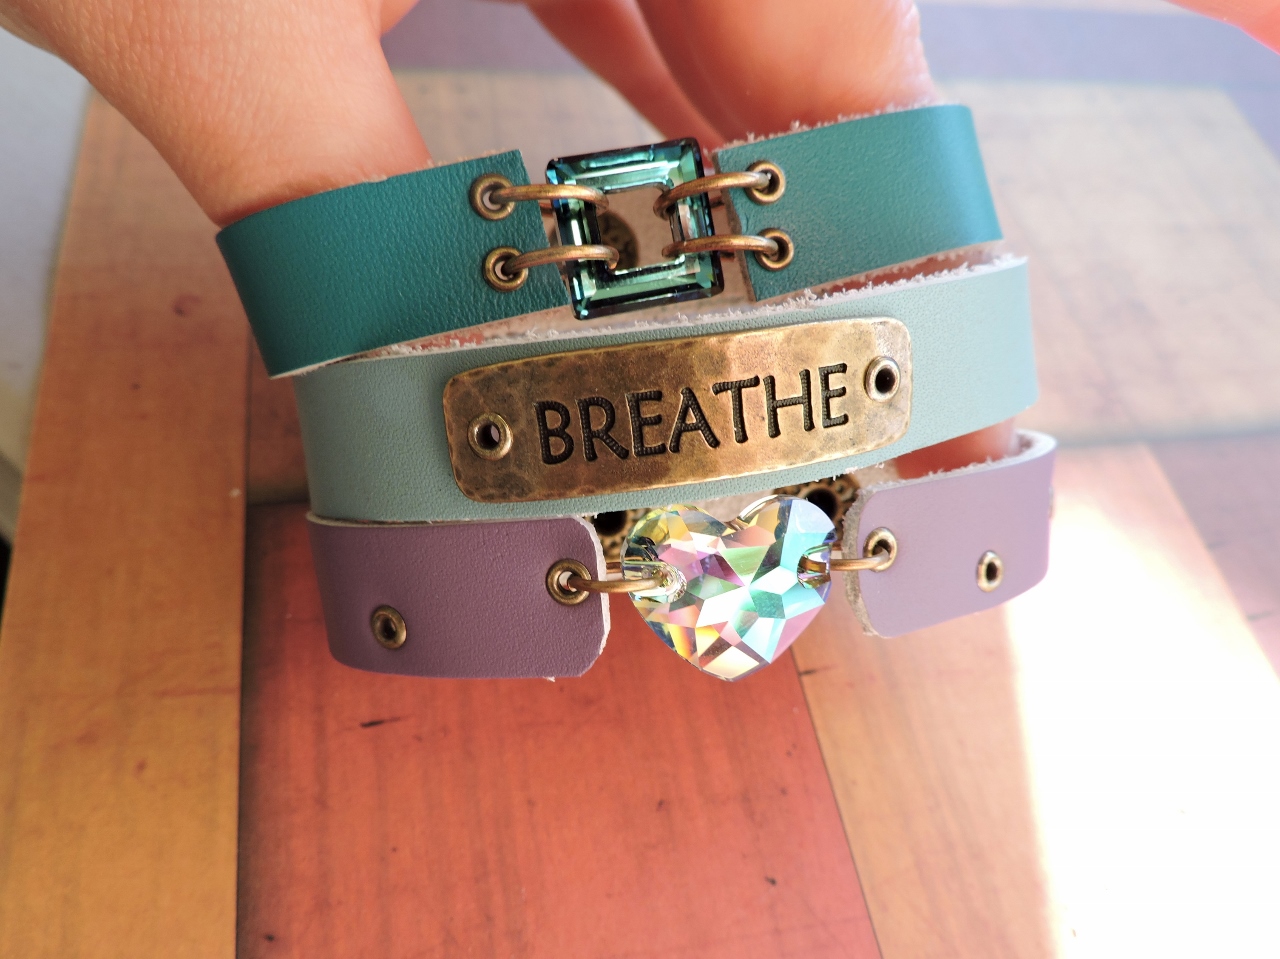
All three leather cuffs using eyelets. Wear alone, or layer all three together!
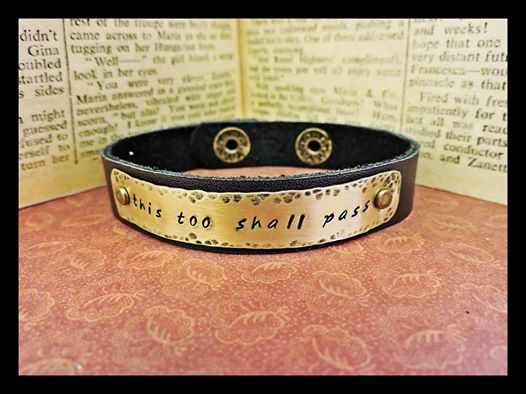
I decided to make a custom riveted leather and metal bracelet with my favorite quotation. To make this you will need a few additional supplies. I stamped the quote onto a brass sheet metal strip that I trimmed with metal shears. I then hammered the edges with a chasing hammer. I punched the holes using the larger side (3/32″) of the two-hole metal punch. I then antiqued the brass with Novacan black and polished it with a Superfine sanding sponge. To attach to the leather, make the holes in the leather like above. Instead of using the eyelet setting tool, use the rivet setting tool. And instead of using eyelets, use rivets. I love how it turned out!
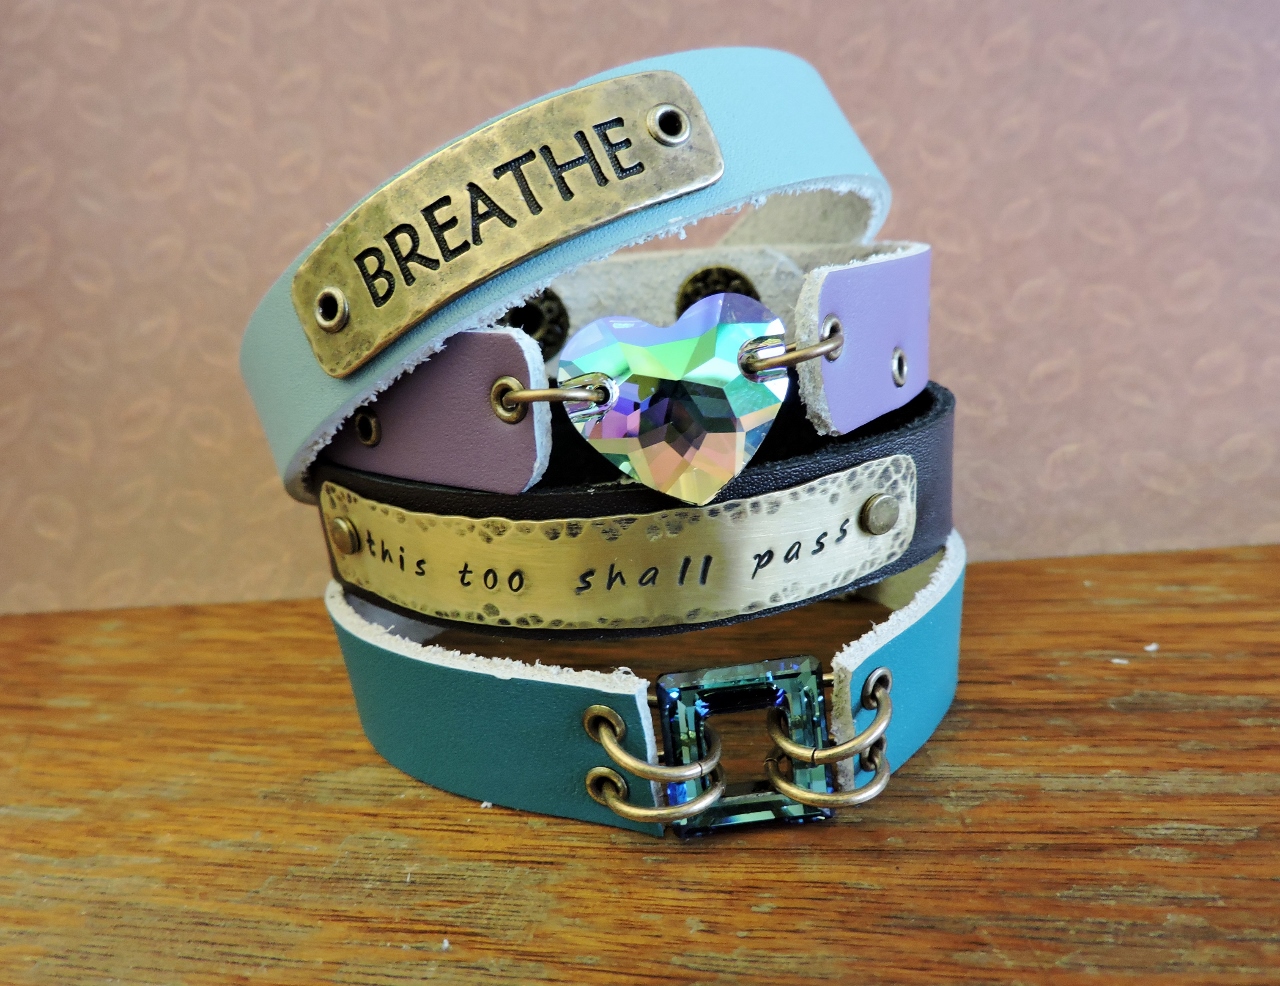
All four leather cuff bracelets!
For a video tutorial on how to set eyelets click here!
I hope you enjoyed this tutorial on creating custom leather bracelets with eyelets and rivets. The possibilities are really endless when it comes to these! Please feel free to ask me any questions on how to make these! Happy jewelry making! ~Tiffany

No Comments