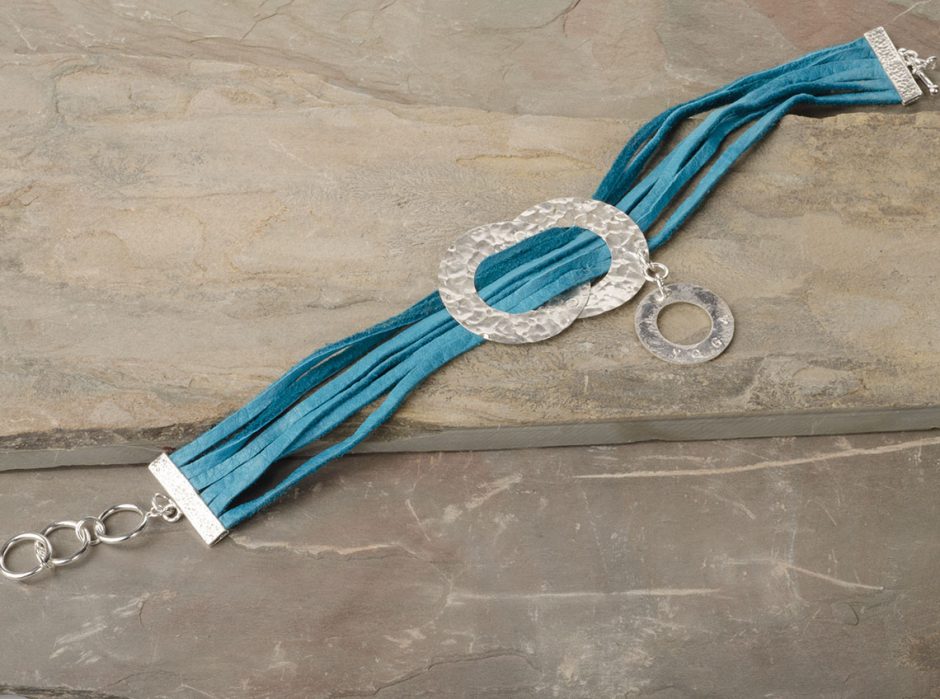
One of my favorite combinations when making bracelets is leather and charms! When deciding what color of leather to use, I chose turquoise because it’s a color that always calms me – plus it seems to work for all seasons. It reminds me of the beach where I would love to be! I decided to make this a multi strand bracelet because the stacked bracelet look is such a huge trend right now. To make your own version of this multi strand leather charm bracelet, read on. It’s easier than you think!
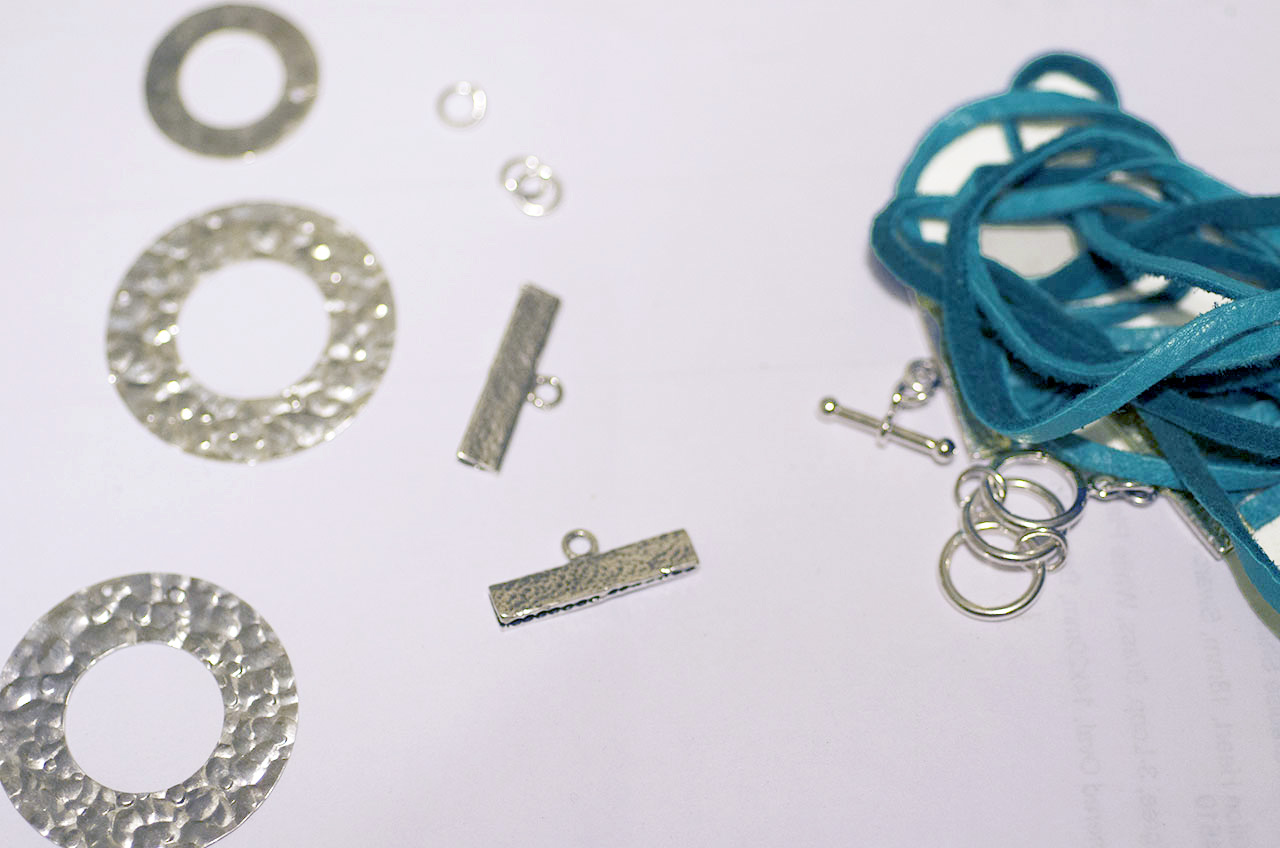
Supplies needed to get started.
First, gather the following supplies and tools:
- 2 each Sterling Silver Textured Donut Pendants (Rings)
- 2 each Ribbon Clamps (I used 25mm Sterling Silver Ribbon Clamps)
- 1 each Sterling Silver Toggle Clasp (I used an Adjustable 3-Ring Toggle Clasp)
- 5 each Sterling Silver Jump Rings (I used 5mm 22-Gauge Silver Jump Rings)
- 1 each Sterling Silver Charm OR make a custom charm with the Metal Stamping Supplies listed below
- 36 inches of 3mm wide Flat Deer Hide Leather Cord (I used 3mm Flat Turquoise Leather Cord)
- 2 each 1/16″ Wide, 1/16″ Long Sterling Silver Rivets
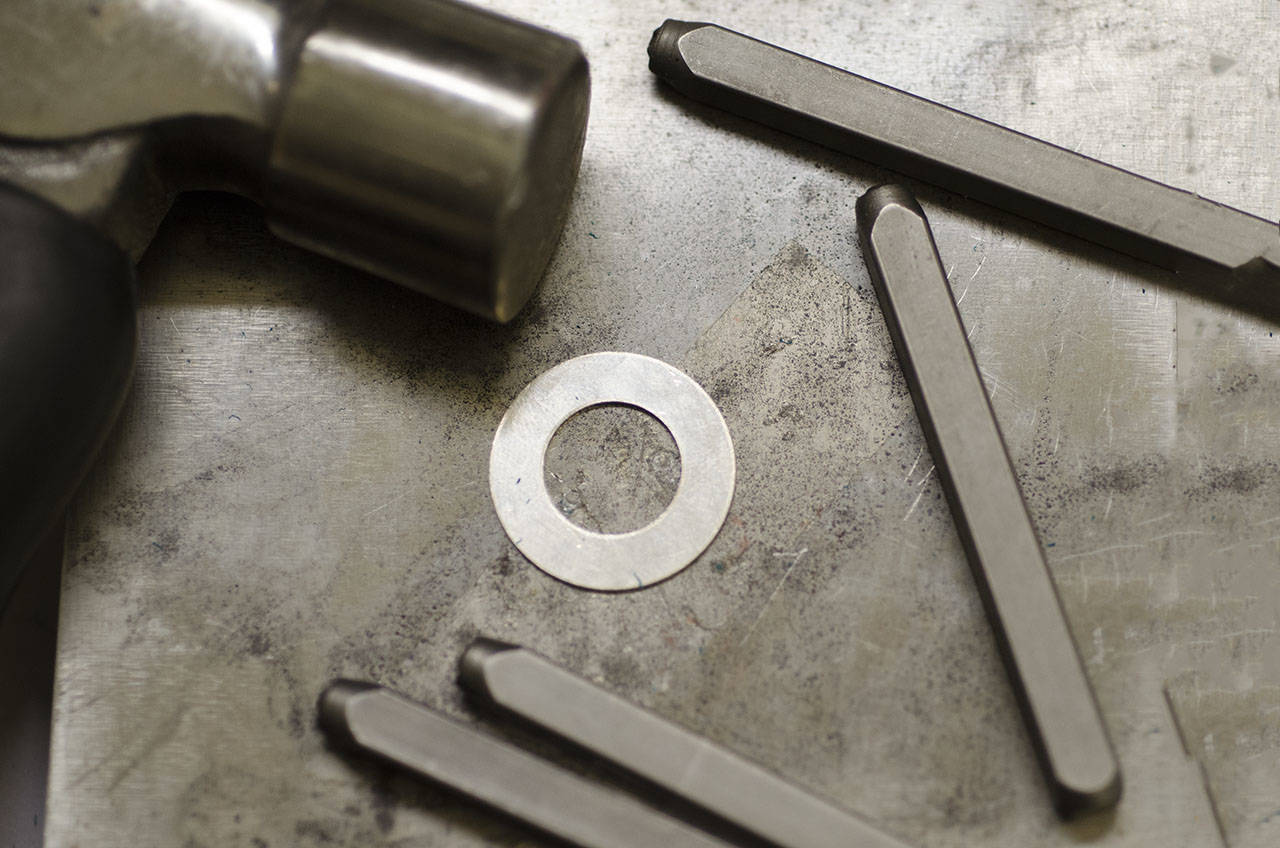
- 1 Stubby Brass Hammer
- 1 pair Chain-Nose Pliers
- 1 Metal Hole Punch (I used 1.8mm Metal Hole Punch Pliers)
If you want to stamp your own custom charm, you’ll need these too:
- 1 each Sterling Silver Metal Stamping Blanks (I used a 22mm 22-Gauge Silver Washer)
- 1 Metal Stamps Letter Set (I used 1/8″ Uppercase Siena Letter Stamps)
- 1 Steel Block
Now follow these steps to make this stylish bracelet:
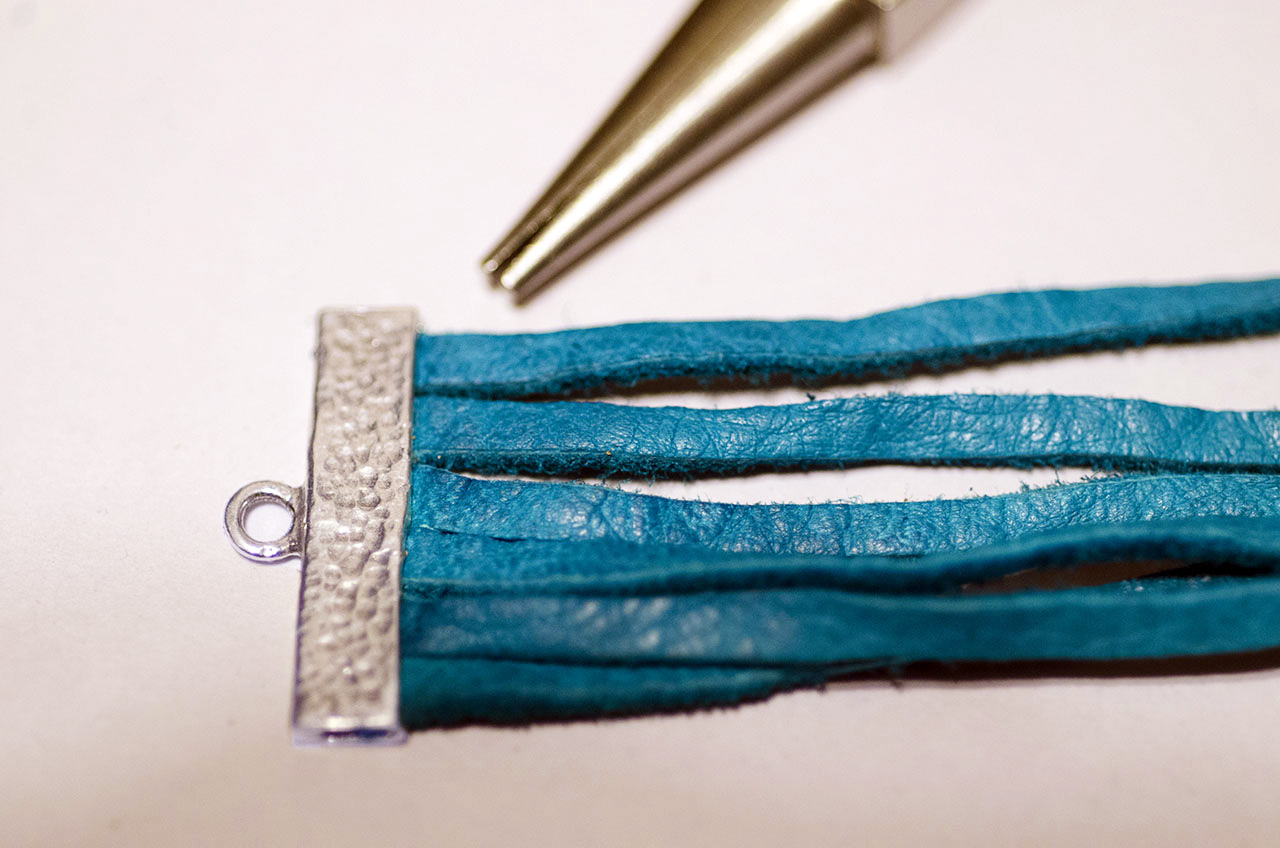
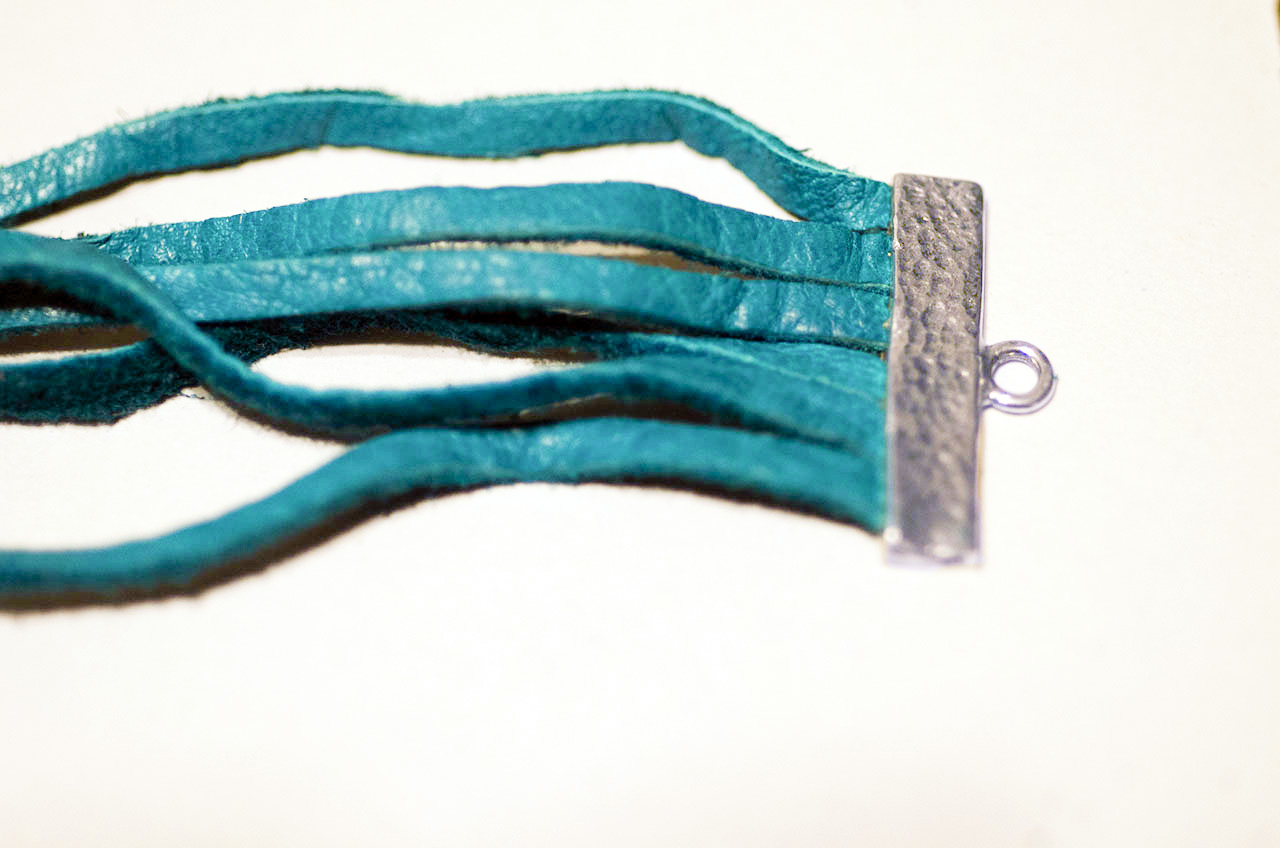
1. Cut 6 pieces of leather, each approximately 6 inches in length. Line up the ends and carefully insert them into one of your ribbon clamps. Use your chain-nose pliers to gently squeeze shut the clamp ends, making sure your leather doesn’t stick out on either edge.
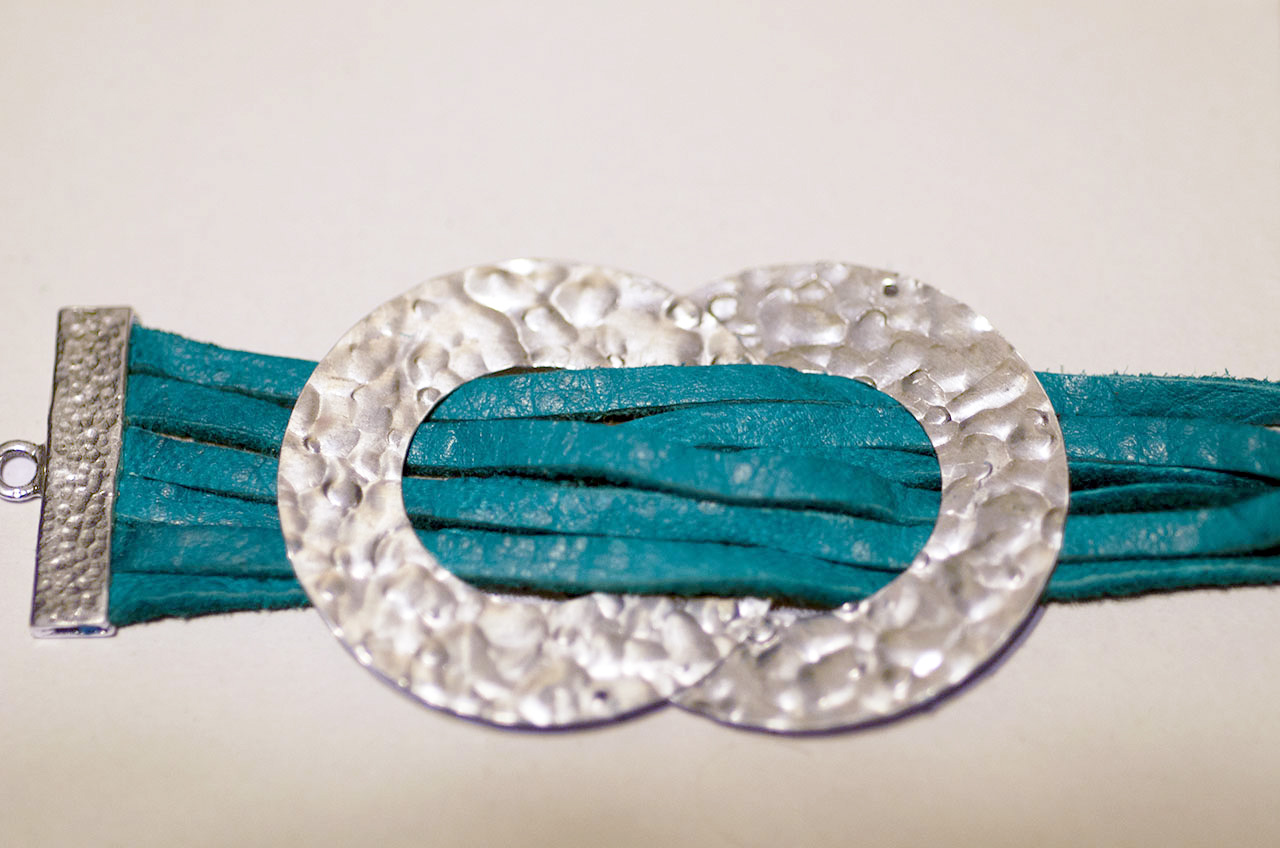
2. Slide your two textured donuts / rings onto all six strands of leather cord, as pictured. NOTE: Alternately, you can rivet your rings together before stringing them onto the leather. To do that, complete steps 3. and 4. before completing this step.
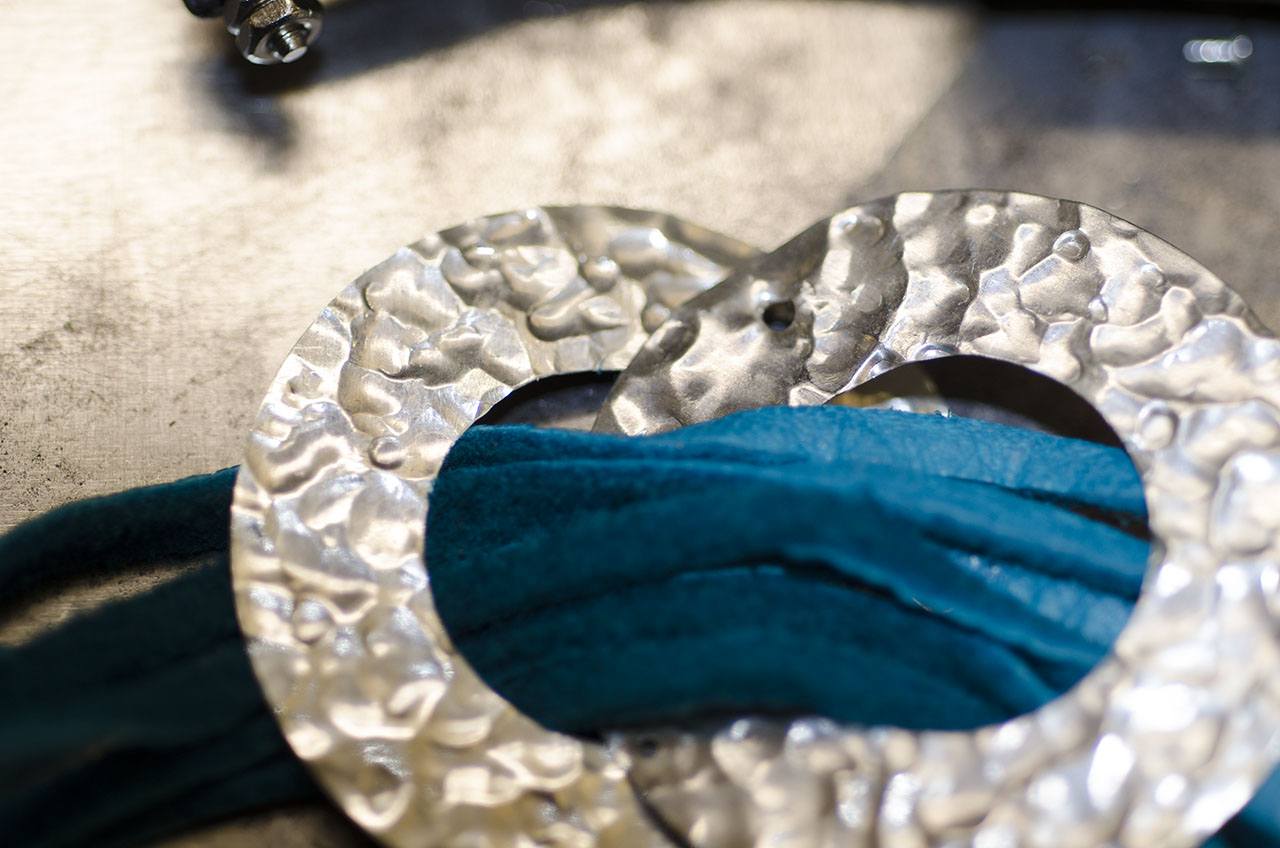
3. Now you’re going to prepare the two textured pendant rings for riveting. Don’t worry! It’s easier than it sounds. First, enlarge the small hole that’s already on each ring by punching right over each hole with your 1.8mm hole punch. Now line up your two enlarged holes and overlap the two rings to form the shape pictured. Make a mark on each pendant ring where to line up one more pair of holes for your second rivet. Now punch these holes (one on each ring).
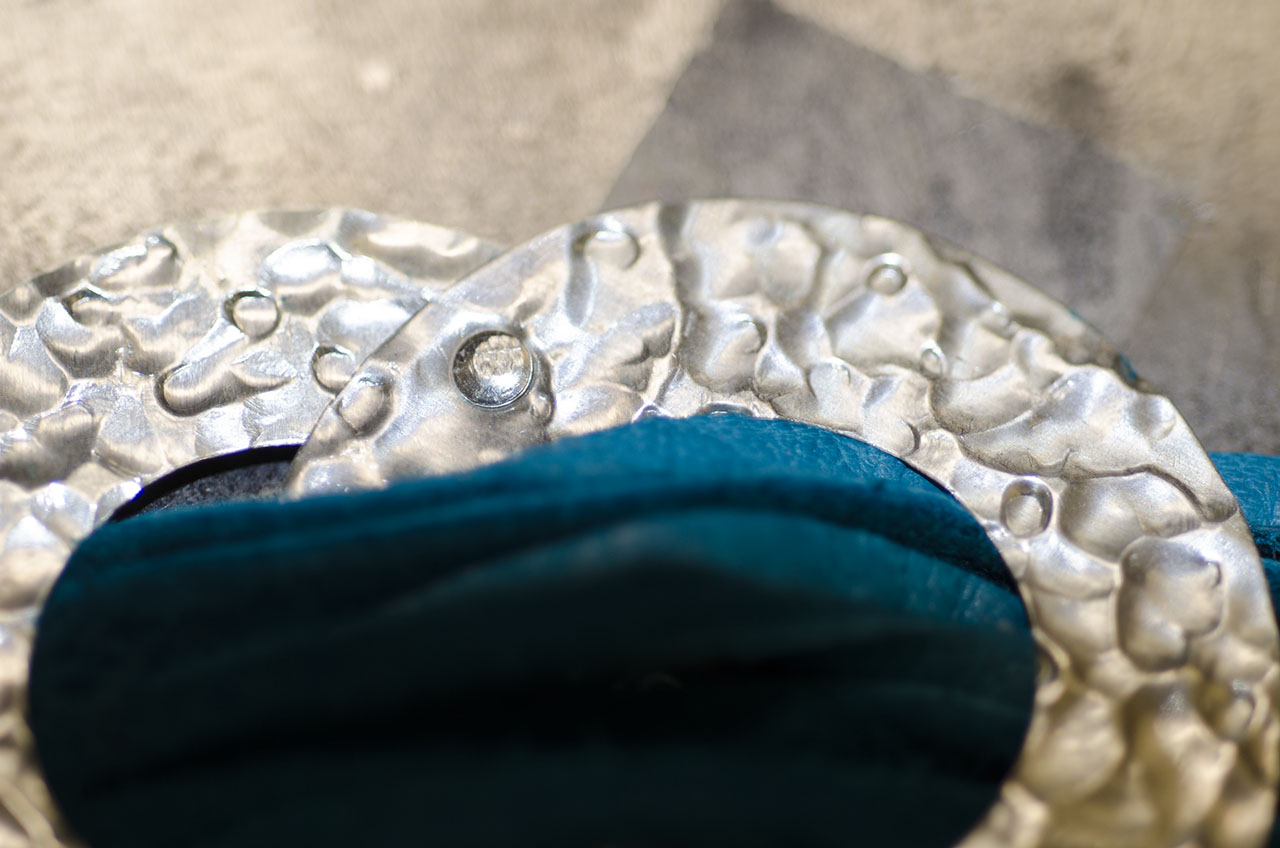
4. Time to rivet! With all holes lined up, place a rivet in one of the two lined-up pair of holes. Make sure to place the finished side of the rivet on the front of your ring and the unfinished end of the rivet on what will be the back. That way, if your hammering isn’t perfect, no one will know! Lightly start tapping around the edges of the unfinished end of your rivet with the brass hammer. Strike with an outward motion as you hammer the rivet down. Continue until the rivet is secure. Repeat with your other lined-up hole and your second rivet. Now you’ve successfully turned the two pendant rings into an attractive buckle!
5. Once your completed buckle is strung onto all six strands of leather, add your other cord end onto the other side of the leather.
6. If you’re making a custom stamped charm, it’s time to do some stamping! For a handout with step-by-step metal stamping instructions, add the FREE Metal Stamping 101 Technique Sheet to a Rings & Things order when you get your supplies!

I stamped “Yoga” on my custom charm, but you can stamp any word you like to say something about yourself! After I stamped in the word I used an old scratched up hammer to give my charm a well worn look.

7. Choose where you’d like your charm to dangle from your buckle, and punch one last hole into your buckle. Attach your charm using a “chain” of 3 jump rings so that it dangles from the buckle easily and has some motion to it.
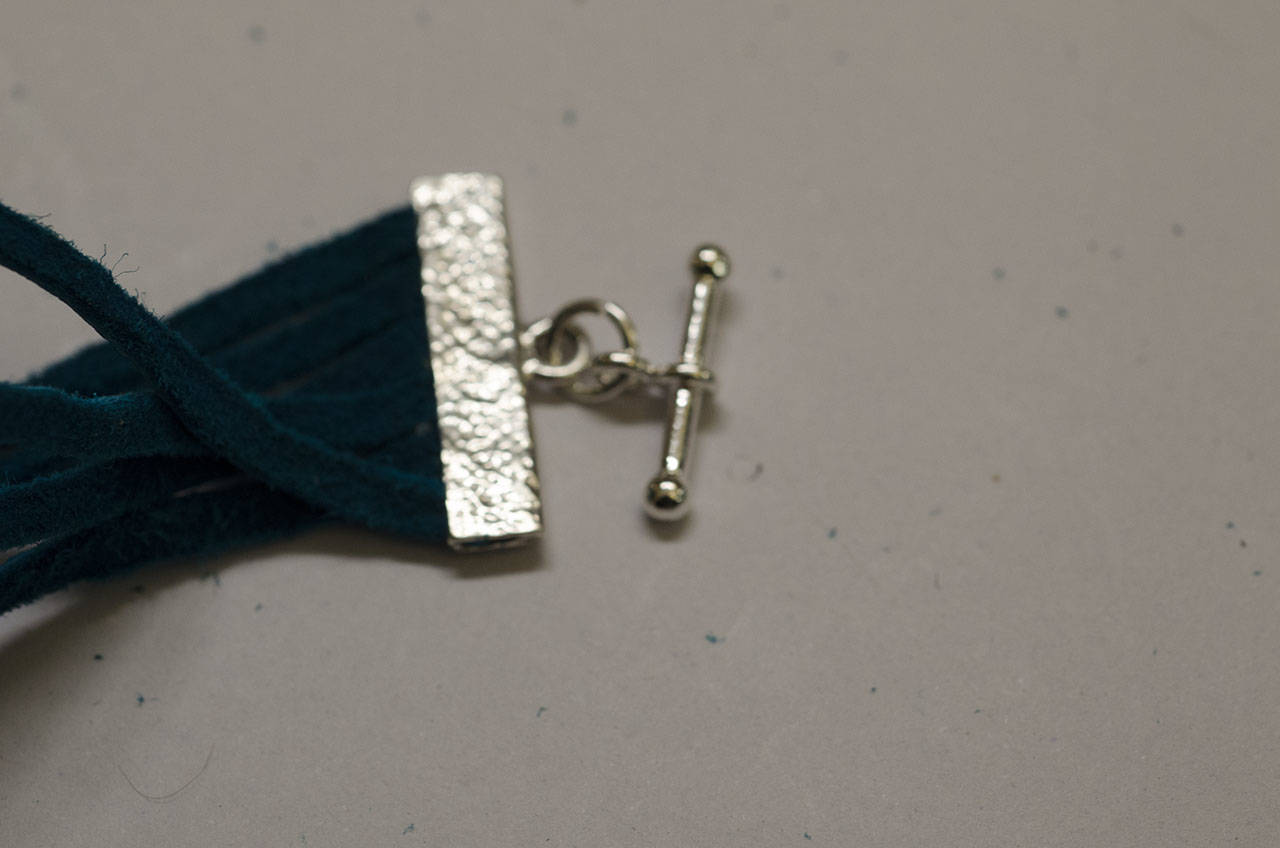
8. Attach the bar end of your toggle clasp to one ribbon clamp using another jump ring.
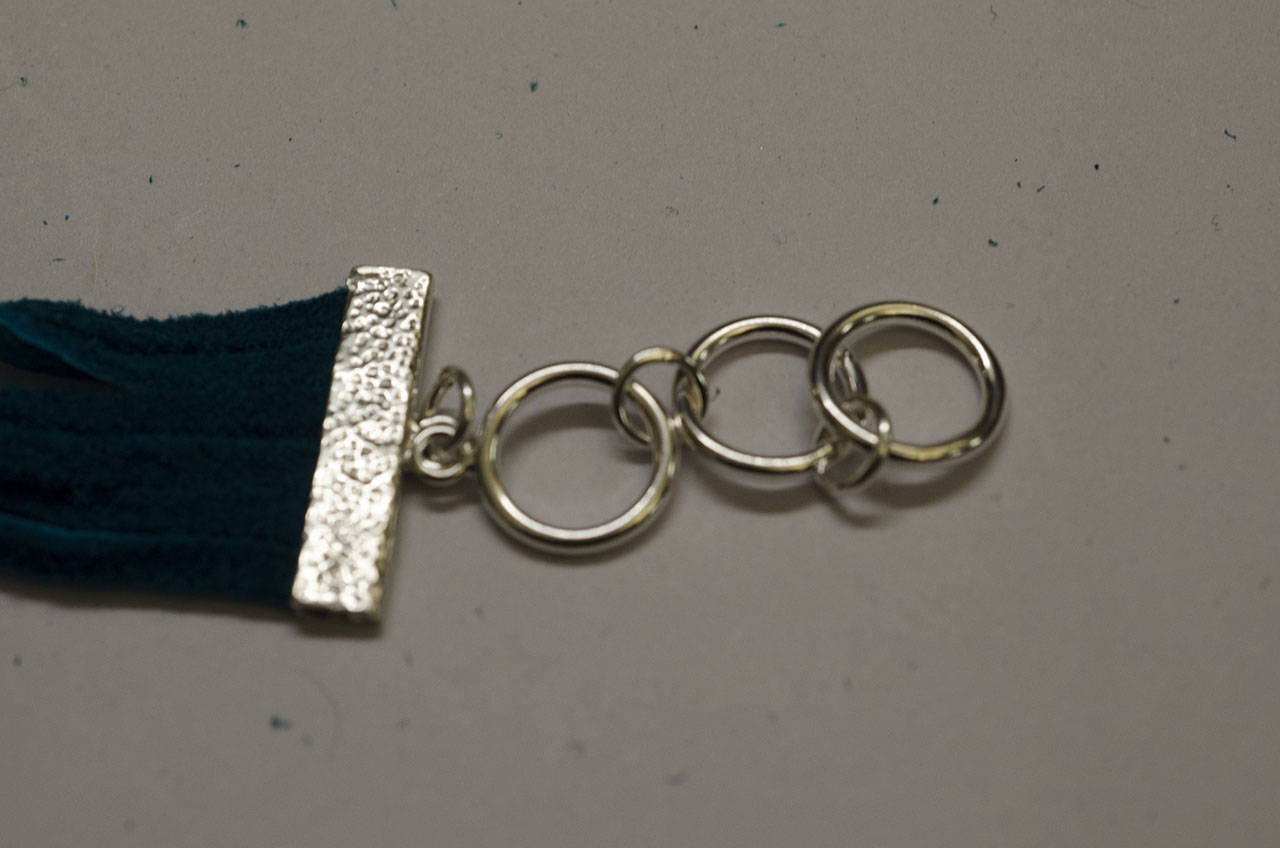
9. Attach the rings of your toggle to the other ribbon clamp and you’re done.
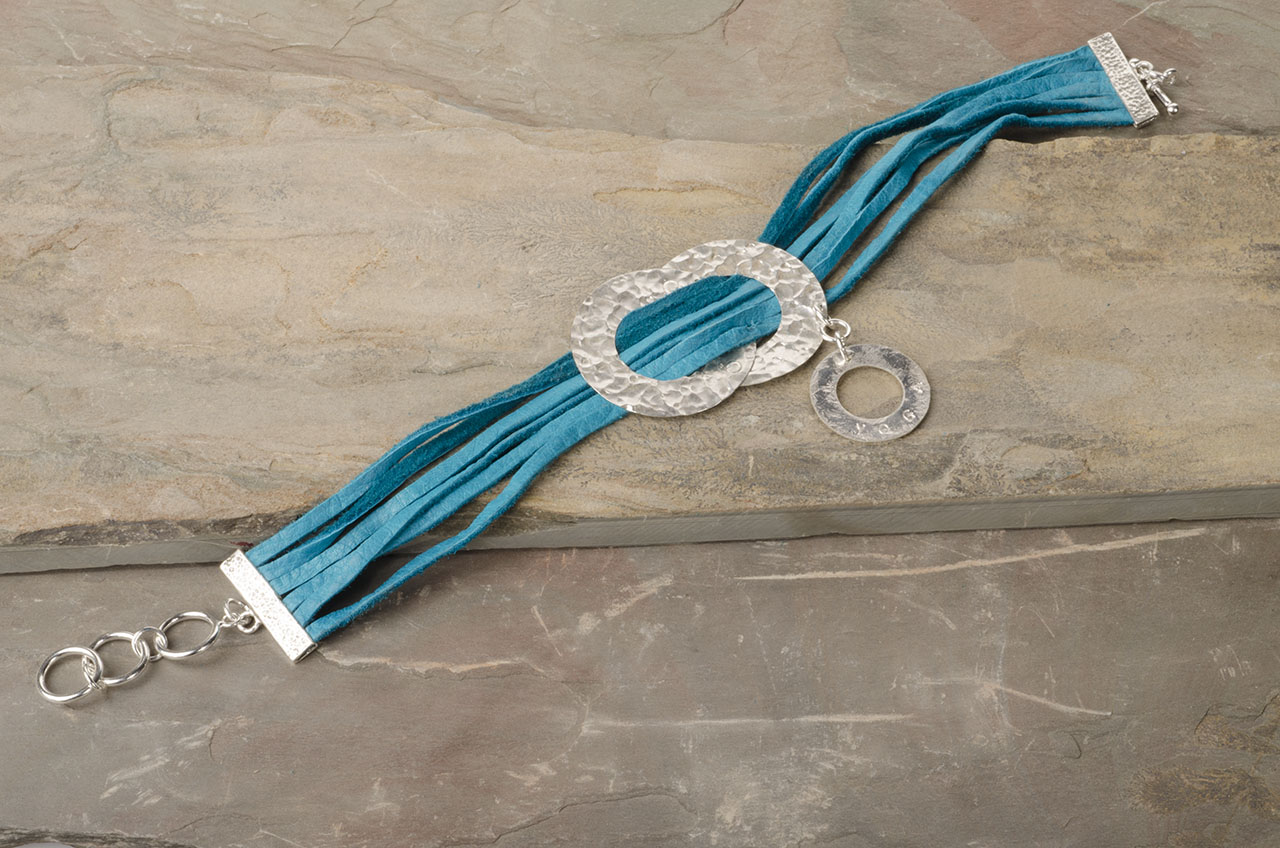
Your finished multi-strand leather charm bracelet is ready to wear!
Enjoy!
Always,
Kayla

1 Comment
Thank you for the clever tutorial using flat leather instead of round leather. I check this website every day. The rustic copper heart bracelet is wonderful also.