Browsing Category

Free Jewelry Tutorial

How to Create a Reliquary Pendant

May 20, 2013
Create a personal keepsake with this free DIY reliquary pendant tutorial.

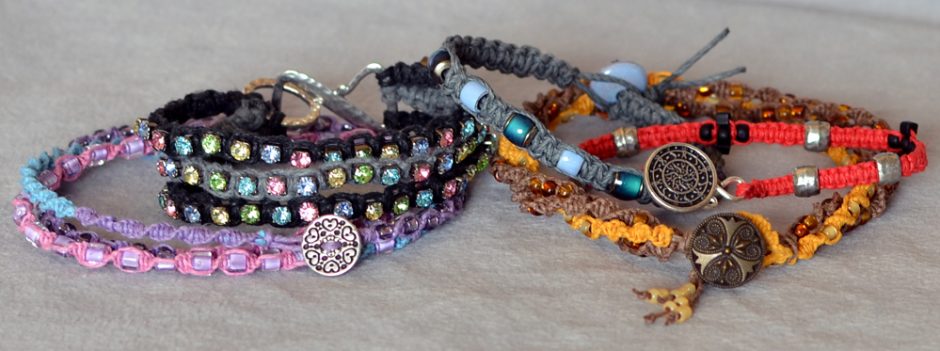
Create a personal keepsake with this free DIY shrine pendant tutorial.

I love keepsake jewelry, and this reliquary necklace is perfect for capturing mementos. You can adapt this pendant design to make your own personalized jewelry; encase a family photo, dried flower petals from a special event, or perhaps a lock of baby hair.

The following is a DIY tutorial for making a glass bezel shrine necklace.

Continue Reading…

How to Macramé a Hemp Bracelet

May 7, 2013
Square knot macrame bracelet.
Simple square-knot macrame bracelet.

Growing up in the 1970’s, I predictably spent part of my childhood making macramé. In fact, I spent hours tied to the ends of masses of cording creating the ubiquitous plant hangers that have become an icon of the era. Call me sentimental, but I got a warm and fuzzy feeling when asked to dust off my knotting fingers and make a hemp macramé bracelet for Rings & Things’ Blog.

Continue Reading…

Turn it upside down!

December 22, 2011

What happens when you take the oh-so-popular Swarovski crystal tree charm pattern and turn it upside down? Beautiful, festive crystal earrings that can be worn year-round!

melissa-earrings

The French clips are another nice touch. Melissa made these classic clear crystal margarita earrings while on vacation with her mom and I snatched them off her ears as soon as I saw them. I think they look like frosty pine cones or icicles, but in a subtle way. Unlike the “real” crystal trees, they’ll still look appropriate in June. Something to keep in mind if you’re making last-minute gifts! ~ Cindy

DIY Earring Project: Swarovski Crystal Tassel Earrings

December 19, 2011

Tassel Earrings made using WireLace, Swarovski Crystals and Vintaj charms and bead caps

Tassel Earrings made using WireLace, Swarovski Crystals, and Vintaj birds and bead caps

I have always been a sucker for anything sparkly. So when I started working here at Rings and Things, I soon became addicted to everything Swarovski! I know all the colors and all the shapes. Bronze Shade, Golden Shadow, Silver Night, Red Magma and of course the coveted Bermuda Blue! I dream of crystals. Seriously. I rarely leave work without buying a few new crystals. (Basically I get paid in crystals!) So here is my new fun crystal project!

Crystal Bead Mixes: Swarovski Crystal Jams

Some of the different Swarovski Crystal Jams bicone bead mixes.

One thing we do here at Rings & Things are make these magical little baggies full of mixed Swarovski Crystals called crystal jams. I love crystal jams because they are carefully selected assortments that contain several colors that coordinate. I have been wanting to make something with one of the crystal jams for a while so when a co-worker suggested these tassel earrings, I couldn’t resist.

Supplies for Swarovski Crystal Tassel Earrings

Supplies needed to make these lovely earrings.

The crystal jam I decided to use for this project is called Brown Sugar. It blends golden shades of topaz, beige and browns. I paired the crystals with chocolate WireLace, shell pearls, Vintaj bead caps, Vintaj bird charms, and niobium earring wires. I also use Hypo Cement to seal the edges of the WireLace.

Supplies needed:

Step 1 - How to make Swarovski Crystal and WireLace Tassels

First make several templates from card stock. Start with a 3×3 inch square. Cut a triangle out of one corner of the square, leaving about an inch on each side. Create a stair pattern up the diagonal, making a new step at each 1/4 inch.

Step 2 - How to make Swarovski Crystal and WireLace Tassels

Start threading the crystals onto the wire lace. Make a slit on the top left to string the lace through after each new loop is made.

Step 3 - How to make Swarovski Crystal and WireLace Tassels

Place anywhere from 5 to 10 crystals per step on the template.

Step 4 - How to make Swarovski Crystal and WireLace Tassels

Keep going until you have the desired amount of loops for your tassle.

Step 5 - How to make Swarovski Crystal and WireLace Tassels

For this one, I used 8 bicones on each loop, and made 8 loops, so a total of 64 bicones per earring.

Step 6 - How to make a Wire Lace and Swarovski crystal tassel.

Tie the two ends together. Then wrap one end under all the loops and tie another secure square knot. This way all the loops are connected.

Step 7 - How to make a Wire Lace and Swarovski crystal tassel.

Remove tassel from the template. I found that the best way to do this is to cut away the template from the tassel. This is why you need to make several templates.

Step 8 - How to make a Wire Lace and Swarovski crystal tassel for earrings.

Trim excess Wire Lace and add a dab of Hypo Fabric Cement to secure the loose ends. Attach your fold-over crimp before the glue sets. Fold the crimp over using your chain nose pliers.

Finished Tassel Earrings, made with shell pearls, wire lace, large Vintaj bead caps, Vintaj bird charms and niobium earring wires.

Finished Tassel Earrings! I used some beautiful shell pearls, large Vintaj bead caps, cute little Vintaj bird charms and niobium earring wires.

Well I hope you liked my tassel earrings! I think that this technique could really be applied to all different beads and cording so go nuts with it! Now I just need to figure out what to name these earrings…..

~~Tiffany in the Showroom

How to do a Herringbone Wire Wrap

September 30, 2011

Earrings made using a Herringbone Wire-wrapping Technique

Earrings made using a Herringbone Wire-wrapping Technique

Wire-wrapping has become my newest jewelry making addiction! I am always browsing the internet and looking for new inspiration and techniques that I have yet to master. My latest accomplishment was learning how to create the oh so complicated looking herring bone wrap. I have admired this style of wire wrapping for years but was always too intimidated to attempt it. A couple of weeks ago, I decided it was time to learn it. And guess what? It was really pretty easy! Now I will pass my knowledge on to you, fellow bloggers and bead addicts, so you too can feel that sweet satisfaction that comes from creating something new and beautiful! (not to mention the compliments you are sure to receive by your coworkers!)
Continue Reading…

Wire lashing: an easy way to cover your jewelry with beads or bling!

May 19, 2011

Two wire-lashed bracelets

Artistic Wire + bracelet forms = many many options!

I call this easy jewelry-making technique “wire lashing” to distinguish it from “wire wrapping” – but really, it is just wrapping thin wire around and around a component in order to cover it with beads (or chain!).

bracelet plain

A plain hook end bracelet is the perfect candidate for a good lashing!

The keys to wire lashing are simple, but oh so vital:

  1. Always begin with a few wire wraps around your base piece (in this case
    bangle bracelets) before adding beads or chain. Rather than trying to wrap the very end of the wire, leave about a 1″ tail so you have a bit of wiggle room.
  2. Always keep your wire wraps tight around the item. Pull the entire wire all the way through and around before beginning another wrap. If using beads, lay the bead against the base in the position you want it to end up in before wrapping the wire tight.
  3. Always use two or more wraps between beads to keep everything securely in place.
  4. Always stay calm if (ha – when!) the wire gets kinked or tangled. When it starts getting cranky, take a second to smooth it back out or it will grow into a major mess.
  5. When you’re all done, you can adjust the wraps and beads with your fingers to make it more uniform. Likely there will some wraps that are tighter than others. This is perfectly normal and easy to fix.

I’ve used this technique before on small items (kidney ear wires, links, ear hoops and hair combs) so decided to step up to bracelets today. The only difference is working with longer wire (about 4-5 feet for a typical bangle). You have the option of working with smaller sections of wire and adding new pieces as you go, but I really wanted to use one continuous piece. I did of course kink the wire. Repeatedly.

Looks scary, but this nightmare actually only took a few seconds to correct.

But the nice thing about using one piece of wire is that as you go along, the lashing goes faster and faster until suddenly you realize you are having fun! At the end, you feel so victorious you immediately want to make another. So you do … and realize the wire is too darn long again … but wait, now it is fun again … victory is within reach … This is how addictions start.

I like to use 24 or 26-gauge wire when lashing because it is very easy to manipulate with your fingers. Today I used several colors of Artistic Wire. The beaded bracelet has 6mm purple Miracle beads, 4mm turquoise magnesite and opalite barrel beads held in place by chartreuse Artistic Wire. It was quick and easy to make. However, I started with waaaay too much wire, so it took a little longer to add each bead than was really necessary. Impatient as always, I decided to do away with stringing beads. My next attempt uses rhinestone chain.

Sparkle mania

Sparkle mania has never been easier to achieve!

It turns out the 14pp size Swarovski Elements crystal rhinestone chain is almost exactly the same width as the bracelet form, so it stays in place nicely. I think this would be a great girl’s night jewelry project – simple, sparkly and easy to customize by adding some charms or changing up the wire color.

For those of you who prefer thread, check out Toni’s rhinestone hair comb – same technique, different materials.

rhinestone hair comb

Cover a comb with ribbon and rhinestones for easy elegance.

What else can we cover in rhinestone chain? Perhaps an easier question would be what can’t we cover! ~ Cindy

Make your own no-solder resin bezels!

June 18, 2010

The no-solder bezel-making workshop in the Rings & Things showroom a few days ago was a huge success. Thanks to our customers who joined in the experiments down in the lab!

This “Pink Portal” necklace used technique #3 below…

Continue Reading…

Cowgirl Moon & Dry Harvest – Resin Belt Buckles

September 16, 2009

These are one of the neatest new design ideas that our free-ranging design team has roped lately. Git along with it!

Top: "Cowgirl Moon". Bottom: "Dry Harvest".

Top: “Cowgirl Moon”. Bottom: “Dry Harvest”.

Created by: Laurae Sather

Cowgirl Moon Belt Buckle
1 #21-340-03-030 35x50mm rectangle gemstone donut, sodalite
1 #30-193 Belt-buckle back, nickel silver
1 #82-500-08 8oz kit EasyCast epoxy
1 Artisan drawn or copyright-free image

Dry Harvest Belt Buckle
1 #21-340-03-031 35x50mm rectangle gemstone donut, tigereye
1 #30-193 Belt-buckle back, nickel silver
1 #82-500-08 8oz kit EasyCast epoxy
1 Artisan drawn or copyright-free image

Tools and supplies: resin mixing supplies (#82-599), Crafter’s Pick™ The Ultimate adhesive (#60-280), Mod Podge®

TIPS:
Cut image to fit buckle blank, coat both sides with Mod Podge and let dry. Glue your image to the buckle blank. Once dry, glue the rectangular gemstone donut to the buckle blank and let it dry overnight.

Follow the directions for mixing the EasyCast epoxy and fill the ‘donut hole’ over the image with resin. Let it dry overnight, attach a belt and you’re ready to saddle up!

See our Epoxy Resin Technique Sheet for resin tips.

To view (PDF files), you will need Adobe Acrobat Reader. You can download it free here.

View more Resin design ideas, or post questions on the Rings & Things Discussion Forum. Don’t be shy! If you’re wondering, so is someone else!

Thanks, Laurae, for (excuse me) adding a new notch to our design repertoire!