When you hear the word “margarita,” you probably don’t think of Christmas trees … unless you’re a fan of Swarovski crystal margarita beads! Christmas tree earrings made from these sparkling beauties are one of the most popular Christmas jewelry projects around. Plus, these crystal charm designs are super easy to make! So, grab a tasty beverage and a friend or two and have a good time making margarita trees all evening. Continue Reading…
Make Margarita Christmas Tree Earrings to Make Merry
November 19, 2013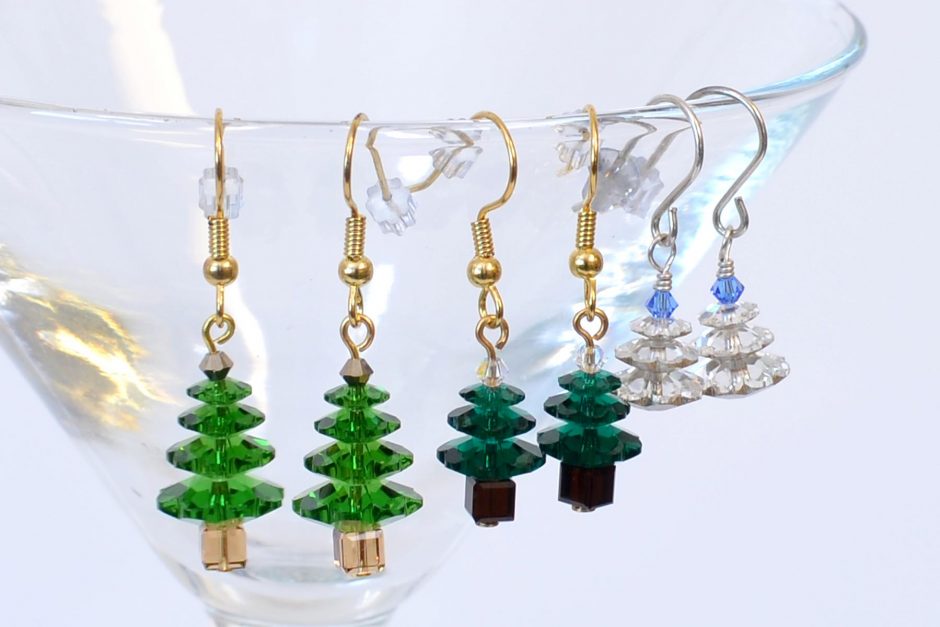


 to 1 part of hardener (part B).")