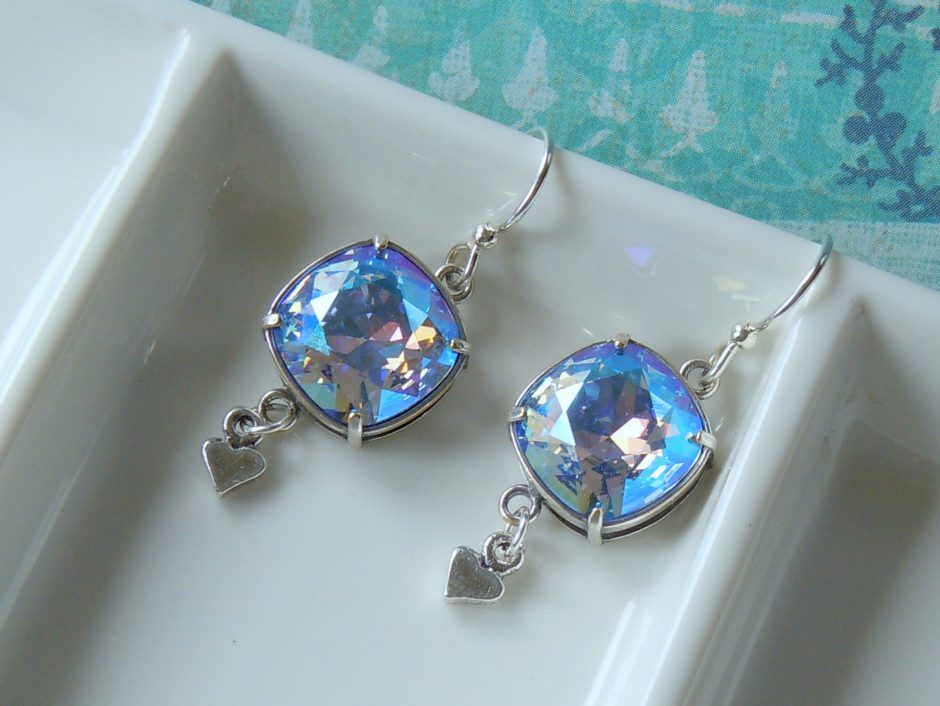
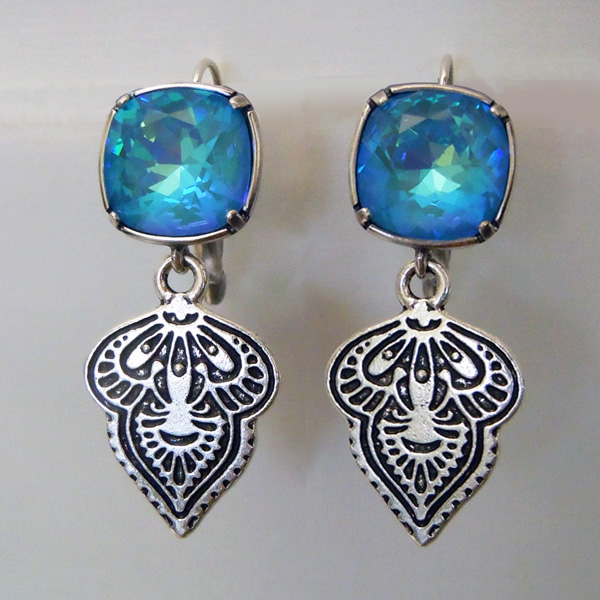
Are you new to making jewelry? If so, here is a beginning earring-making project that will make you look like a seasoned professional. The prong-style bezel settings are quick and easy to use. From setting the stone to assembling the components takes about 20 minutes.
And don’t be limited by the color choices I made, the prong-style bezel settings for the cushion stones are available in 4 different platings (silver plate, antiqued-silver plate, antiqued-brass plate, and antiqued-copper plate); plus the Swarovski cushion stones come in a variety of colors. This makes for seemingly endless possibilities.

You will need these supplies:
- 2 each Swarovski 4470 Cushion Square Stones, 12mm (I used item #04-470-12-678)
- 2 each Pendant Bezel Setting for 12mm Cushion Stones, 2 Loops – Antiqued Silver Plated (I used item #41-878-56-12-5)
- 1 pair Sterling Silver Earring Hooks (I used item #34-569-04)
- 2 each Sterling Silver Round Jump Rings (I used item #37-295-240)
- 2 each Sterling Silver Charms (I used item #44-046-28)

You will need the following tools:
- EURO TOOL 2″ Curved Steel Burnisher
- EURO TOOL Glitter, Flat-Nose Jewelry Pliers
- EURO TOOL Glitter, Chain-Nose Jewelry Pliers

Tool Spotlight
If you are new to jewelry making and have not invested in basic tools yet, consider purchasing them by the set. The Glitter Line™ tool set from EURO TOOL® has the four most commonly used tools stored neatly in a handy carrying case.

Place a Swarovski square cushion stone in the bezel setting. Hold the bezel setting firmly (or work on a rubber block). Use the burnisher to carefully push the first bezel prong until it is set against the stone. Rotate the bezel setting so the second prong you set is opposite the first one. Then set the final two prongs in the same manner. Repeat these steps with the second stone and setting.

Lay out the jewelry components in the order of their assembly.
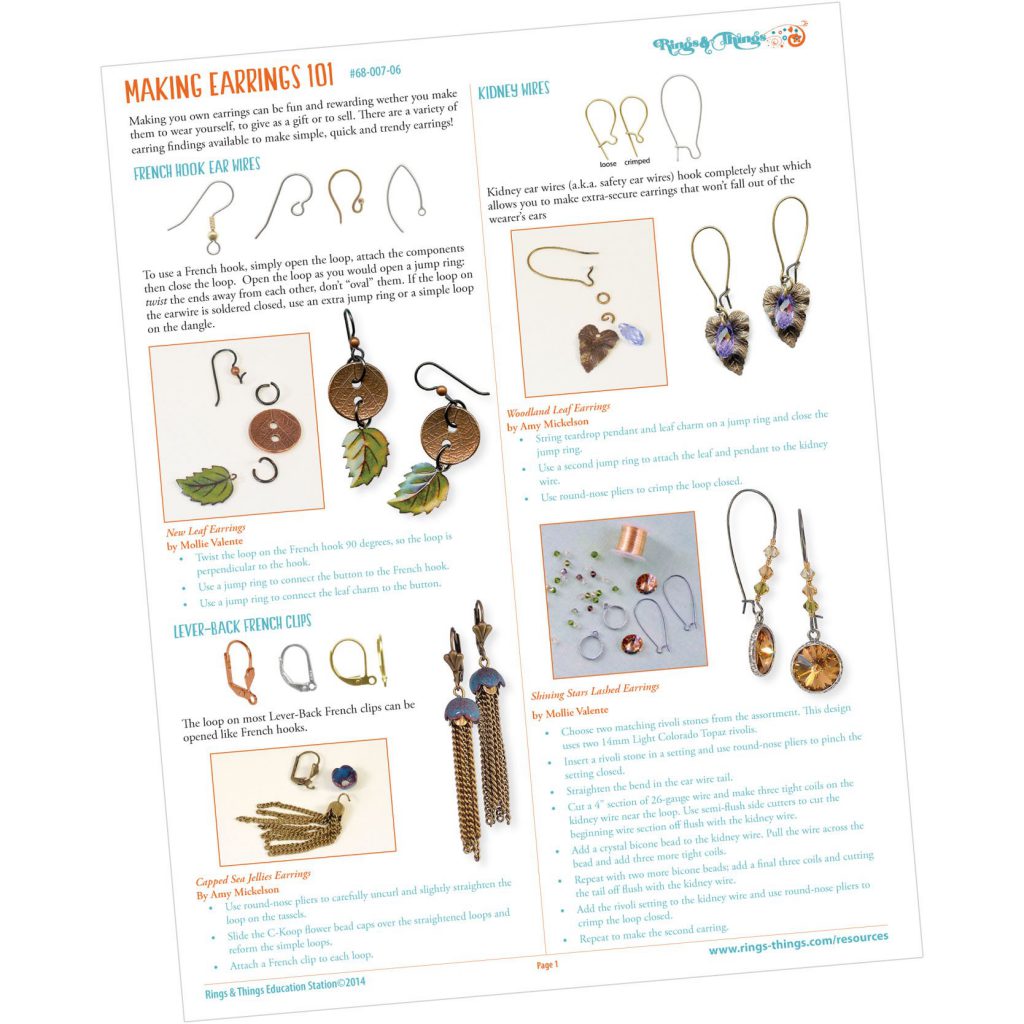
Free printable PDF on basic earring-making techniques from Rings & Things.

The jump ring serves as a connector between the heart charm an the bezel setting loop. Twist the jump ring open and add the heart charm. Connect the jump ring to the lower loop of the bezel setting then twist the jump ring closed. Repeat this step with the second bezel setting.

Twist the loop on the French earring hook open and attach it to the top loop of the bezel setting. Then twist the earring loop closed. Your earring is done. Repeat to finish the second earring.

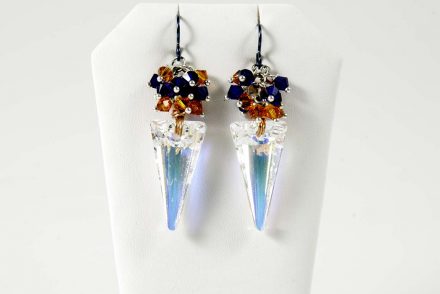
The finished earrings are ready to wear.

♥ ♥ ♥ ♥ ♥ ♥ ♥ ♥ ♥ ♥ ♥ ♥ ♥ ♥ ♥ ♥ ♥ ♥ ♥
If you love the look of these sparkly earrings, and how easy they are to make, here are a few more Rings & Thing projects to inspire you:
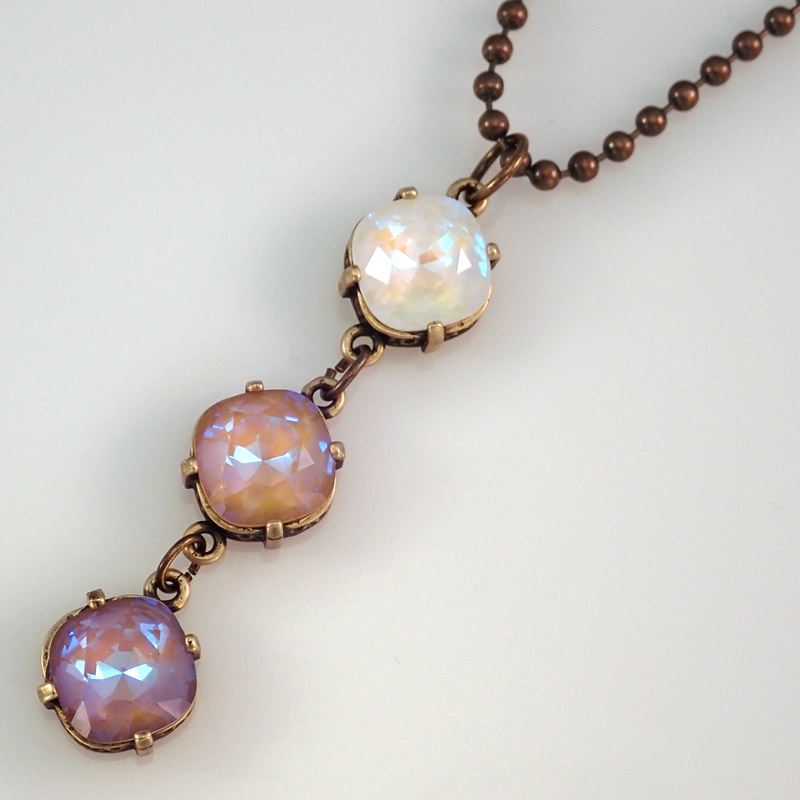
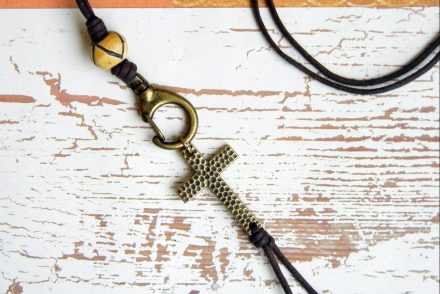
Free Necklace Making Tutorial
“Ombre Delight Necklace” created by Rings & Things designer Bridget Austin
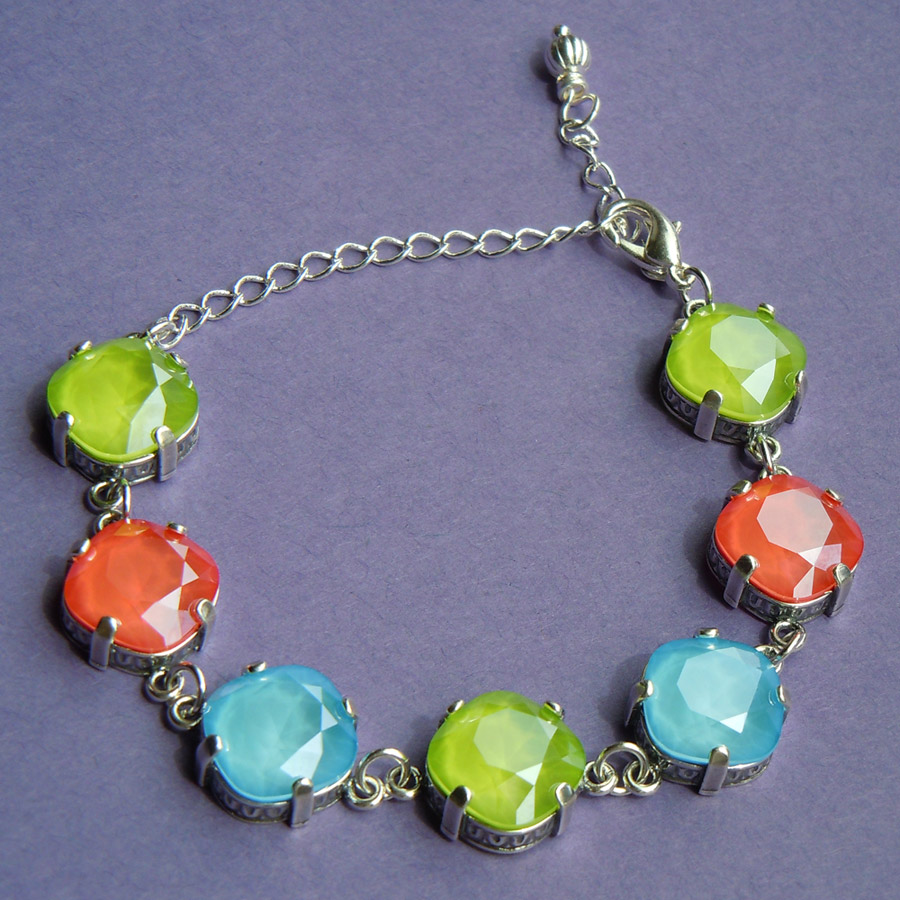
Free Bracelet Making Tutorial
“Sour Patch Bracelet” created by Rings & Things designer Rita Hutchinson
Free Bangle Bracelet Making Tutorial
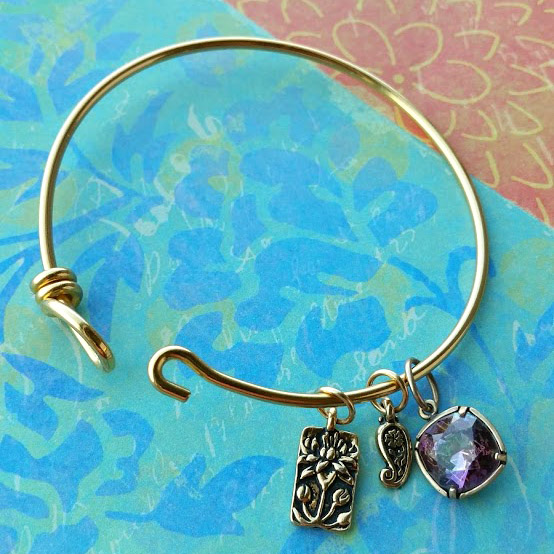
“Lotus Paisley Bracelet” created by Rings & Things designer Sondra Barrington
Free Earrings Making Tutorial
“Ultra Blue Mehndi Earrings” created by Rings & Things designer Polly Nobbs-LaRue
Make Things!
Mollie

2 Comments
Hi,
I’m starting a new jewelry design line as a hobby with the potential for entrepreneurship part-time. I’m specifically, working with glass fish tank rock rounds (many colors of clear glass pebbles to choose from). I specifically want to improvise creatively with applications in sterling silver inlays and gold. As expected, I’m thinking about seamless, visually impressive craftsmanship accomplished in the least amount of time per unit. I have never worked with soldering silver or gold and could use a quick take on streamlining practices during creation that might be a flattering substitution rather than hot metal on glass. Can you share a couple of tried and true alternatives with me at this time? Is there a clear rubber-based product you might suggest instead of metals? My imagination runs into ‘how-too’ daily, in anticipation of seeing my first try a masterpiece.
Thank you,
Lorna K
Hi Lorna,
Glass pebbles can be used with “soft” aka tin-based solders, but aren’t safe to use with higher-temperature solders like those used for karat gold and sterling silver.
So here’s a tutorial on making glass pendants with soft solder. You would use the same general process with glass pebbles, you just wouldn’t be sandwiching 2 of them together.
https://blog.rings-things.com/2013/04/how-to-solder-glass-pendants
Our Soldering 101 article has a good summary of the differences between “soft” and “hard” solders: https://www.rings-things.com/blog/soldering-101 and links to the basic supplies for each.
Jewelry resins are another option, that will work with everything you mentioned. You can use them with glass, mica, glitter, fine silver, karat gold… just about anything!
https://www.rings-things.com/blog/resin-101
You can use pre-made bezels, or make your own.