Browsing Category

Free Jewelry Tutorial

12 Days of Christmas DIY Charm Bracelet

October 20, 2014

On the first day of Christmas my true love sent to me a Partridge in a Pear Tree.”

Here’s a fun way to remember the rest of the gifts in the “12 Days of Christmas” song: Make yourself a bracelet with a charm representing each gift.

12 days of Christmas Bracelet

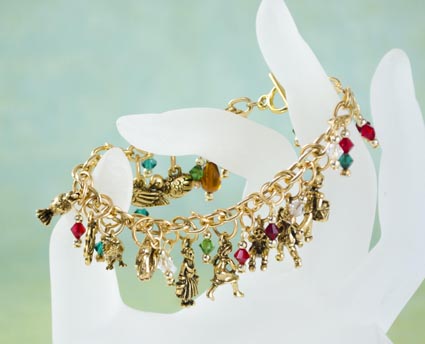
“12 days of Christmas” DIY Charm Bracelet

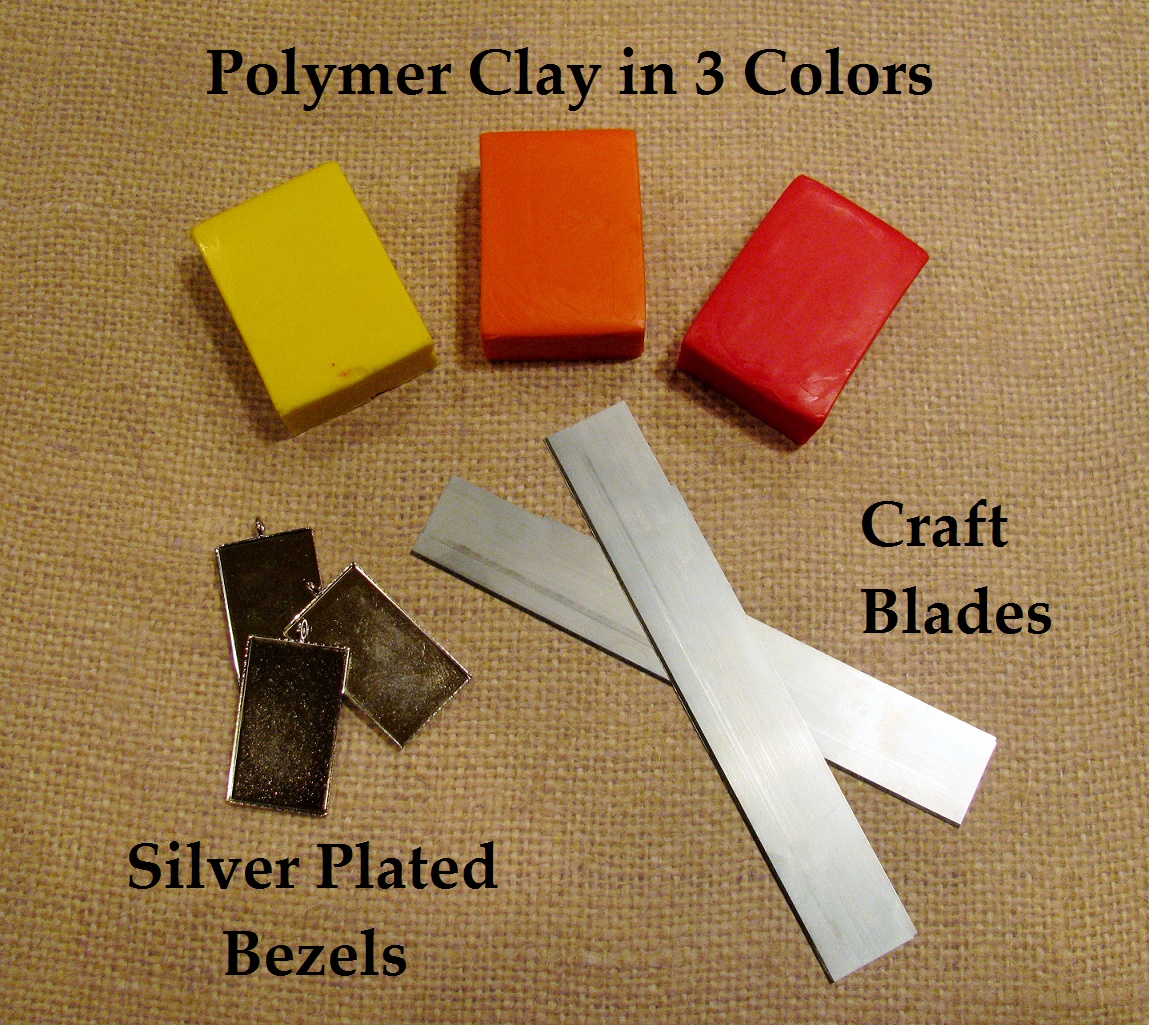
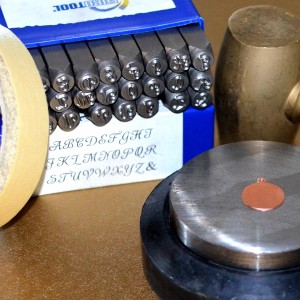
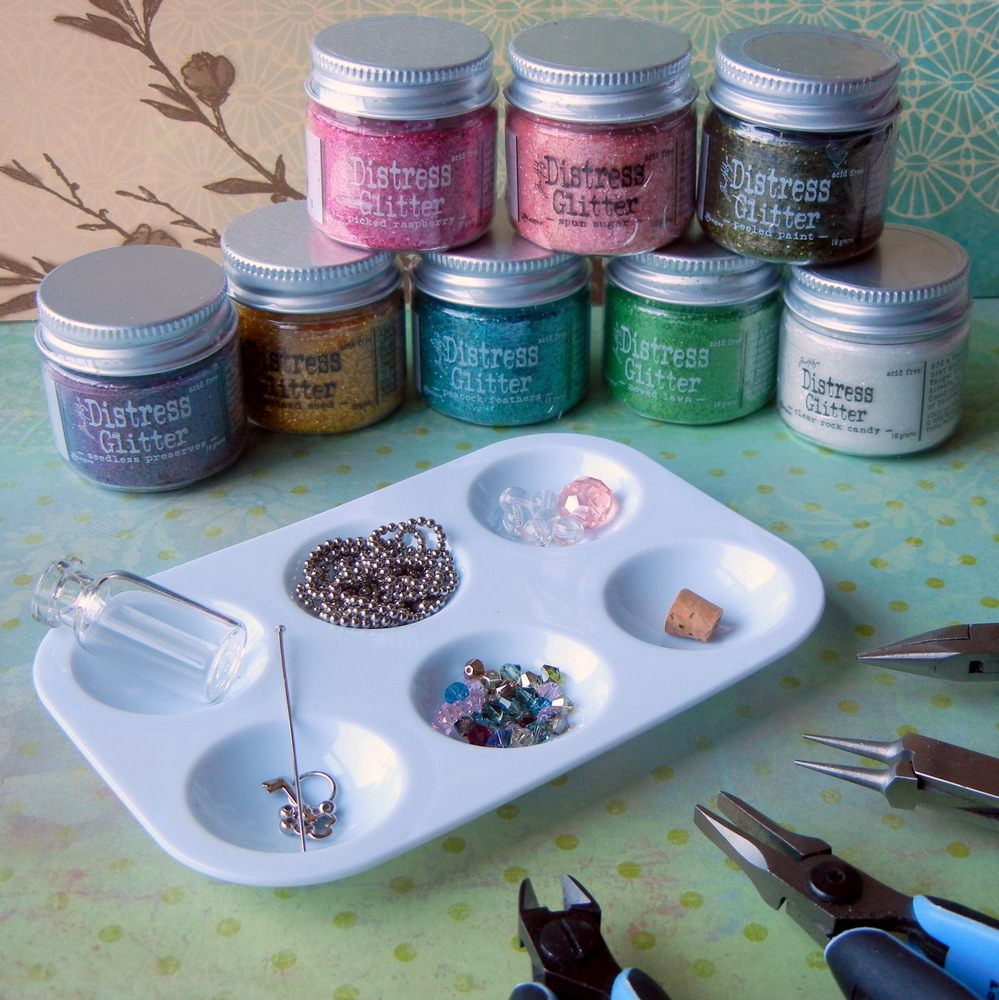
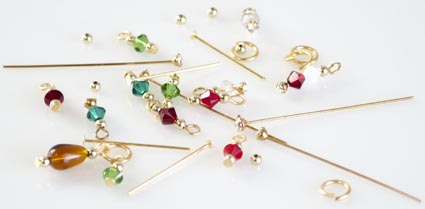
1. Gather Supplies and Tools:

2. Determine Bracelet Length

  • Decide if the standard 7.5″ bracelet is the right length for the recipient.
    Remove links to shorten; add links to lengthen.
  • The links on this chain are tough! Use 2 pairs of pliers and twist to open a link. If you want to be able to re-use the removed chain links, open and close them just like jump rings:
Jump Ring Tip - How to open and close jump rings

Jump Ring (and Chain Link) Security Tip

  • If your pliers have scrapes or serrations on them, dip the tips in Tool Magic, or wrap the tips in masking tape to prevent scraping the jump rings and chain links.

Important notes about toggle clasps and bracelets:

Tip 1) Toggle clasps are great for bracelets because they are easy to put on and take off with one hand, but beware: If the bracelet is too loose, the toggle can work its way out and cause the bracelet to get lost! Whenever possible, adjust the length to fit the wearer’s wrist.  (I removed 7 links to get it to fit me properly. )

Tip 2) Because you pull the bar (or “T”) portion of the clasp through the round loop, toggle clasps work best if you don’t dangle any charms from the last link or 2 of chain.

3. Determine Placement of Charms

gold chain bracelet with oval links, perfect for charm bracelets

There are approximately 40 links on this bracelet.

There are approximately 40 links on the pictured bracelet. I removed 7 to make the bracelet fit more securely. This leaves 33 links.

The charms look best if you have a charm on every other link, and an empty link at each end. That takes up 25 links.

This leaves 8 links (4 open spaces to attach fun dangles for the full length of the bracelet, following the same every-other-link pattern as the charms). That brings us to…

4. Make Some Sparkly Dangles

Tutorials — How to make beaded head pins:

  1. How to make beaded head pins with a 1-step looper (blog)
    or…
  2. How to make traditional beaded head pins (PDF)
Festive beaded head pins for 12 Days of Christmas Charm Bracelet

Festive beaded head pins for “12 Days of Christmas” Charm Bracelet

What to put on each dangle:

Make 4 or more beaded head pin dangles. (I made 21.)

  • Your partridge needs a pear, so use a golden topaz teardrop bead for one or two of the dangles that you’ll place near the partridge.
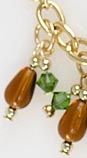
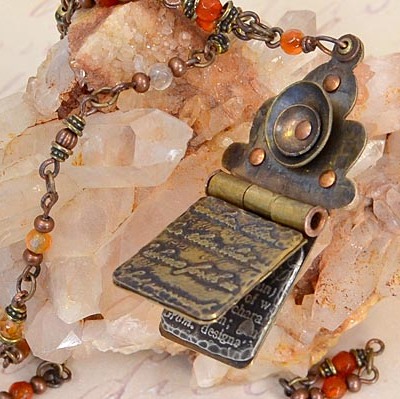
12 Days of Christmas Bracelet Tutorial - Closeup of Pear "Tree"

“Pear Tree”

I topped every dangle with a tiny 2mm round gold plated bead. Why? Even though I’ve been making beaded head pins for over 20 years, I still (too often) chip glass and crystal beads when I finish my loop. A simple metal bead on top fixes this issue.

I also put a tiny round bead at the bottom of (almost) every head pin.  Why? I like the look of ball-end head pins, but they are more expensive than standard “nail head” pins. This tiny extra bead creates the look of a ball-end head pin.

Close-up of beaded Christmas head pins

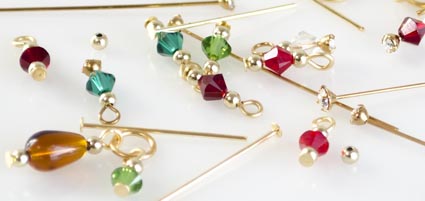
Close-up of beaded Christmas head pins.  Use either Swarovski crystal head pins or standard head pins — or a mix of both.

5. Attach the Charms

Start placing your charms, then finish making the dangles. Straighten the bracelet chain and place it on the Chain Sta (“Chain Stay”), or pin/hang the bracelet on a convenient shelf, clipboard, etc.

Chain Sta (Chain Stay) chain holder

The “Chain Stay” chain holder makes it easy to keep your chain straight and add dangles at consistent intervals without worrying about losing count.

Starting at approximately the 6th link from the Ring portion of the clasp, add the Partridge.

12 days of Christmas Charm 1 Partridge In a Pear Tree

Partridge

Use large, sturdy jump rings to attach the charms in the same order as the verses in the song. To make sure you get your jump rings securely closed, use 2 pairs of pliers, and twist, don’t “oval-ize” the links. (See above tip.)

12 days of Christmas Charm 2 Turtle Dove

Skip a link, add #2) Turtle Doves

12 days of Christmas Charm 3 French Hen

Skip a link, add #3) French Hens

Keep skipping a link before adding the other charms in the following order:

4 Calling Birds

#4) Calling Birds

12 days of Christmas Charm 5 Gold Rings

#5) Gold Rings

12 days of Christmas Charm 6 Geese-A-Laying

#6) Geese-A-Laying

12 days of Christmas Charm 7 Swans-a-Swimming

#7) Swans-a-Swimming

12 days of Christmas Charm 8 Maids-a-Milking

#8) Maids-a-Milking

12 days of Christmas Charm 9 Ladies Dancing

#9) Ladies Dancing

12 days of Christmas Charm 10 Lords-a-Leaping

#10) Lords-a-Leaping

12 days of Christmas Charm 11 Pipers Piping

#11) Pipers Piping

12 days of Christmas Charm 12 Drummers Drumming

#12) Drummers Drumming

After placing the charms, fill empty end spots with colorful dangles:

  • Use a single large jump ring to put a “pear” dangle and (optional) a green crystal dangle on the 4th link from the end (near the partridge).
  • Repeat with the 2nd link from the end.
  • Repeat with other colorful dangles to fill empty spots at the “T” end of the bracelet.

For a mostly-gold bracelet, you’re done!

Or … If you decide the bracelet needs more color, fill the links between the charms with additional colorful dangles in shades of siam red, emerald green, opalescent milky white and sparkling crystal.

12 days of Christmas bracelet Finished

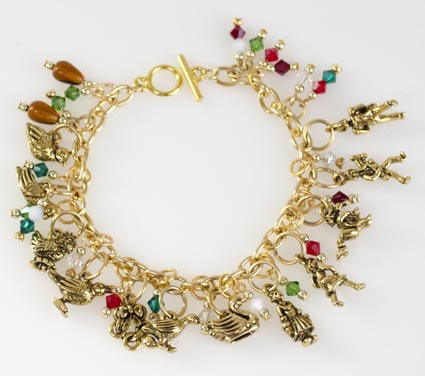
12 days of Christmas bracelet … finished!

Put the Christmas color dangles in any order you want, or use my “bird-brain” memory hint:
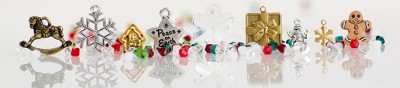
Some of these birds are easy to remember, especially once you have pictures (charms) for each. But I’ve never seen a French Hen or a Turtle Dove in real life, so I surrounded my turtle dove with “turtles are green” and “doves are white” sparkling hints.

Close-up of green and white crystal beads surrounding the Turtle Dove

Left to right: Partridge with pears, Turtle Dove with sparkling green and white hints, French Hen, open-mouthed Calling Bird

Ready to get started?

Rings & Things has everything you need!

Christmas and winter holiday jewelry supplies for sale

Purchase Christmas Components Here

How to Use Center Crimp Cord Ends

October 14, 2014

When you’re making jewelry, center crimp cord ends are an easy way to cleanly finish the ends of a wide variety of jewelry cord including but not limited to leather, silk ribbon, and chain.

Center crimp cord ends are an easy way to cleanly finish the ends of a wide variety of jewelry cord.

Center crimp cord ends are an easy way to cleanly finish the ends of a wide variety of jewelry cord.

You can finish your necklace or bracelet with a loop and a hook:

Use loop and hook center crimps together.

Use loop and hook center crimps together.

Or, use two loops and the clasp of your choice (shown here is an “S” hook clasp):

Using two loop crimp ends and a clasp.

Using two loop crimp ends and a clasp.

Here is how to apply the crimp ends:

1. Gather your supplies. All you really need are the crimp ends, some round nose pliers (or non serrated chain nose pliers) and of course your cording material. Super glue is optional, but adds extra security.

Supplies for applying center crimp ends

Supplies for applying center crimp ends: Crimp ends, pliers, cording & Glue.

2. For added security, put a dab of super glue inside the crimp end. Slide the cording end(s) into the crimp end. Do this quickly before that dab of glue dries.

Insert the cording into the center crimp end. A dab of glue will offer added security to your clasp.

Insert the cording into the center crimp end. A dab of glue will offer added security to your clasp.

3. Holding the crimp in place over the cording, use your pliers to firmly squeeze the center portion of the crimp and clamp it down on the cording.

Firmly squeeze the center of the crimp end.

Firmly squeeze the center of the crimp end.

4. Once crimped, the center of the end piece will be flattened down on the cording. Crimping the metal on top of the glue will ensure a secure connection for jewelry designs.

A crimped end piece.

A crimped end piece.

Center crimp ends with loops combined with an "S" Clasp.

Center crimp ends with loops combined with an “S” clasp and leather cording make a simple yet stylish bracelet.

Crimp ends shown using a variety of cording and clasp options.

Crimp ends shown using a variety of cording and clasp options.

Here are some jewelry inpirations that incorporate the use of center crimp ends. These designs and more can be found in our Jewelry Design Gallery where you will find the complete supplies list as well as tips from the designer. Click on the images to take you there.

Go West Necklace by Mollie Valente

Go West Necklace Tutorial by Mollie Valente

Now that you know what to do with center crimp cord ends, don’t be shy! Use them to make bracelets, necklaces, earrings and more.

Did you know? You can Shop for center crimp cord ends here.

Happy creating! ~ Val

Polymer Clay Sunset Ombre Pendants

October 6, 2014

I must admit, polymer clay is a material I rarely think of using when creating jewelry designs. But lately, I have seen some jewelry on etsy and pinterest that have made me second guess this almost forgotten medium. I mean it is very versatile. It allows you to create simple, yet modern and edgy designs.  So when I was faced with the daunting task of making something with polymer clay my mind went straight to an ombre design.   When something is ombre it means it is graduated tones of colors, like a sunset.  Perfect, I thought! I will make sunset ombre pendants! And I must admit, I love how they turned out!

Ombre Sunset Pendants, made with polymer clay

To get started with this project you need to only invest in a few supplies.

  • Choose three colors of polymer clay. I used Kato Polyclay, because it is easier and more consistent to work with than other brands I have tried.
  • You will need a sharp craft blade. The blades I used are designed for working with polymer clay, so there is no handle at the top that can squish your design.
  • Lastly, you need some jewelry bezels to inlay your pretty ombre design. I like the modern sleek look of these rectangle silver plated bezels.

All you need to make a Ombre Sunset Pendant!


To make these Ombre Pendants, simply follow these steps!

Using your craft blade, cut up all the polymer clay into small pieces.

Continue cutting up the clay, until you have three small piles of colorful cubes.

Sort the colors into the categories above. They do not need to be exact. This is art after all!

Once you have sorted all the colors of polymer clay you can begin to mix your colors. Warm hands are necessary for this step!

Roll the two colors between your hands until you can form a snake.

Fold the “snake” in half and continue to roll the clay out into another snake.

Repeat this process, over and over again, until you see the colors blend completely into one.

After you have mixed all the colors, roll them into about 1 inch cylinders. Place them in order like a rainbow.

Flatten each piece by rolling it with a rolling pin or jumbo magic marker. Roll them about 1/4 inch thick.

After you have flattened all the colors, stack them like a rainbow.

I decided that I wanted to have the ombre pattern work out from the center of the pendants, so I sliced the cane in half and layered it together, so that the yellow sides matched up.

Make sure the two halves are combined by rolling them together a bit with either a small rolling pin or jumbo magic marker.

Cut a thin slice of the cane and lay the bezel on top of the slice. Using your knife, trim the clay to the shape of the bezel.

Press the polymer clay into the bezel, making sure that it fills the whole bezel.

Using your craft blade, trim all the excess polymer clay. There will only remain a very thin slice of the clay in the bezel.

Bake the polymer clay pendants on a sheet pan for 10-15 minutes at 275 degrees.


After you bake the bezel cups, you now have completed pendants! They will have a matte finish, which is nice, or if you want you can make them shiny, like I did, by adding a thin coat of resin spray. After the resin spray dries, you can either hang them from chain to make a necklace, or from jump rings and earring wires to make some bright, vibrant earrings!

These earrings are just the pendants I made, connected to silver filled earring wires with large 10mm jump rings.
Click here to buy supplies to make these earrings!

One of the pendants I made, simply hanging from silver plated cable chain.
Click here to buy supplies to make this necklace!

Well, I hope you like how these turned out as much as me! My mind is racing now with design ideas. Being that Rings & Things is based out of Washington state, I think I will make some green and blue ombre pendants to support my Seahawks! Plus, I really want to make some with the bezel cup rings that we carry!  Happy polymer claying!

~Tiffany White

Geisha Creations


CzechMates Memory Wire Bracelet Tutorial

September 25, 2014

I love the Picasso finishes and and unusual colors of CzechMate 2-hole tile beads and other CzechMate 2-hole beads. But it’s hard to find a project with them that doesn’t involve needles and intricate beadweaving.

So … here it is! When I discovered pliers designed for looping ends of memory wire, I decided on an ombre chevron cuff bracelet. This 4- to 6-row ombre chevron design takes advantage of the CzechMate color combinations, and is easy to “string” on memory wire. The outside row uses a few seed beads (or bugle beads) near the edges, because their sizes are so compatible with these 2-hole beads.

Memory Wire bracelet made with 2-hole CzechMate tile beads

My first 2 ombre CzechMate bracelets. Rather than wrapping the memory wire around your wrist three times like most memory wire bracelets, these are cuff bracelets.

For a petite wrist, use standard stainless steel memory wire. For larger wrists or a looser fit, use stainless steel anklet memory wire. (Don’t be swayed by the word “anklet” — it’s actually an excellent bracelet size.)

Cutting Memory Wire:

When cutting any type of wire, wear eye protection, or at least make sure your bits of wire will end up someplace safe, not in anyone’s eye. Cup your free hand over the end, and aim the wire downward at a soft surface like a flocked bead mat.

Tools and Memory Wire:

Memory wire is strong, springy steel — much tougher than most jewelry wire. It requires strong, durable tools, both for cutting and bending. I tried cutting steel wire with my cheap cutters and one blade SNAPPED, shooting across the room in 3 pieces. I also dented high quality cutters that were not designed to cut steel. I strongly suggest a pair of heavy-duty flush cutters and a pair of memory wire looping pliers. They aren’t too expensive, and they work great for lighter-duty projects as well.

Step 1. Practice Making Loops:

Although Memory Wire Pliers make it easy to make consistent-sized loops, steel wire is tougher to bend than other jewelry wire. I recommend practicing memory wire loops before you begin adding beads. This helps you make all your loops at the same angle, and avoid chipping your end beads.

CzechMate Memory Wire Bracelet - Practice

Cut four 2″ pieces (each about 1/4 of a circle). Practice making a loop at each end, with both loops on the same plane (or angle).

Memory Wire - How to Make Nice Loops

How to Make Nice Loops with Memory Wire

1. Grip one end of the wire firmly in the pliers and use your fingers to smoothly wrap the wire around the small side of the pliers. Don’t let it twist upward or downward.
2. About halfway around the pliers, release the plier grip on the wire, and get a new grip so you can finish making your circle.
3. Close the loop ALL the way — don’t leave a spot for beads to slide down inside a gap in the loop.

Repeat at other end. Grip the wire’s tip, push around, release, re-grip, and finish pushing. Take a look at your circles — are they the same size and angle, or are they twisting ickily in random directions? Make a few more until it’s easy to make nice consistent loops on the same plane. Also note that these loops are all to the OUTside of the circle, not the inside:

Memory Wire Loop - Do and Don't

For bracelet comfort, make all loops curve to the outside, not the inside of the arc.

Step 2. Assemble your beads:

Appletini TOHO Seed & Bugle Bead Mix

Appletini TOHO Seed & Bugle Bead Mix

TOHO seed bead mixes work excellently with CzechMate 2-hole tile beads. There are great color mixes to choose from, and you can use 3 large seed beads, 4 small seed beads, or a single bugle bead as perfect-size spacers.

A few beads from each assortment are too tiny to fit on memory wire, or too big to fit next to a Czechmate, so save those for future projects.

Step 3. Make the bracelet:

Cut 4 pieces of wire, each about 1-1/8 coils long (Like going all the way around the clock face from midnight to 2pm.).

3a. Cut 4 pieces of wire, each 1 to 1-1/8 coil long. Make sure they are all the same length.
Carefully round 1 end of each wire.

CzechMate Memory Wire Bracelet Step 3b

3b. For a 2-color bracelet, count out 21 tile beads of each color, in sets of 3.

For a 1-color bracelet, use approximately 42 beads. For a 3-color bracelet, count out 15 tile beads of each color in sets of 3. Lay them out in the order that you’ll use them. You might not use all the beads you laid out, but it’s easier to keep your pattern going correctly if you lay out the beads in advance.

String 1 bead.

3c. String 1 tile bead.

Pick up a 2nd wire, and string 1 bead. String a 3rd bead onto both wires.

3d. Pick up a 2nd wire, and string 1 tile bead.
String a 3rd tile bead onto both wires.

String 2nd color using same pattern.

3e. String 2nd color using same pattern.

Don't worry that the beads and strands flip and flop around at this point.

Don’t worry that the beads and strands flip and flop around at this point.

End with 2 tile beads. Make sure you have at least 1/2" (12mm) of wire left.

3f. End with 2 tile beads. Make sure you have at least 1/2″ (12mm) of wire left.

3g. After your last 2 beads, push beads snug (but not super tight), and trim wire to approx. 1/2″ if necessary. Next, very carefully round the end wires for both strands (one wire at a time). Abrupt / harsh movements may chip the end bead.

Take another of your prepared wires, and string 4 seed beads, or a single bugle bead. Place these next to your strung CzechMates … do they look good? If not, pick a different color or size and test it before you begin the next step.

Back at the beginning, feed a new piece of prepared wire through the other hole in one of your first beads.

3h. Back at the beginning, feed a new piece of prepared wire through the other hole in one of your first beads.

3i. Where the wire comes out, add 3-5 seed beads (or a bugle bead) so they are the same total length as a Czechmate tile bead or slightly shorter.

Feed through next CzechMate, add bugle or seed beads, repeat to end of bracelet.

3j. Feed through next CzechMate, add bugle or seed beads, repeat to end of bracelet.

Repeat for 4th row, trim excess if necessary, and carefully round the ends.

3k. Repeat for 4th row, trim excess if necessary, and carefully round the ends. (Click image for close-up.)

Tips & Errata:

Do your best to make the loops all face the same direction, but don’t be hard on yourself if they don’t. Here is my first bracelet, with wonky ends and a chipped bead. When I taught a class on how to make this bracelet, I introduced the “practice making loops” step, and not a single person chipped a bead!

Example of bad loops on my first memory wire bracelet.

Close-up of bad loops on my first bracelet. The tips listed above should help you make better loops and avoid chipped beads.

By my 3rd bracelet, I realized it’s much easier to finish the ends if the strands (after looping) are tiny bit shorter than one full coil, so now I design these more like cuffs than bangles.

Czechmate and Memory Wire - Finished Cuff-Style bracelets

It’s much easier to finish the ends, if each strand, after looping, is slightly shorter than one full coil, more like a cuff than the bangles I originally envisioned.

You’ll soon perfect your ability to make all your loops at the same angle. After that, these are quick and easy to make, so make a bunch for gifts or to sell!

Czechmate Memory Wire Bracelets

Variations on a theme.

Depending on the size of your spacer beads, some bracelets spike up a bit in the middle, and others curve up at the outside edges. This is part of the fun with these designs. Used in this pattern, I think the CzechMates™ Two Hole Triangle Beads look like tiny Stegosaurus / dragon spikes.

Parts & Supplies:

Any questions? Please ask! (Click on “Comments” or “Leave a Reply” below.)

Easy to Make Leather and Trade Bead Wrap Bracelet

September 17, 2014

Making a wrapped-leather bracelet doesn’t have to be difficult or take a lot of time – this colorful African bead bracelet is proof of that. In fact, if you can string beads and tie a simple overhand knot, you can make the “Volta River” Wrap Bracelet.  It’s an easy afternoon project!

Continue Reading…

Say it Your Way with Easy Metal Stamped Jewelry

September 10, 2014

You don’t have to be Frank Sinatra to do things your own way! That’s the beauty of metal stamping as a jewelry technique. Not only do you get to assemble components, you get to make your own components – and they can say whatever you want them to say!

Young Love Bracelet Tutorial

This Young Love bracelet is a perfect example of how you can easily customize jewelry with metal stamps!

Letter stamps are the perfect way to create monogram jewelry, plus jewelry with names or inspirational sayings. Design metal stamps are the perfect way to add cuteness and panache.

Hootie and the Sodalite Earrings

Learn to make these simple metal stamped earrings – just click the image above for the complete parts, ready to buy.

Designer Amy Mickelson’s “Hootie and the Sodalite Earrings” feature custom owl charms she made using an ImpressArt Metal Stamp and a JBB Antiqued Copper Plated Square Tag Charm. These JBB tags are plated especially for stampers – pretty amazing! For more on these components, see the full parts list and tutorial here.

Supplies for metal stamping a charm.

First, gather your supplies.

The basics of jewelry stamping are easy and only require a few tools. The tools are a small investment, but will last for years and thousands of impressions!

Supplies you’ll want:

The basic steps to jewelry stamping:

Getting ready to make a metal stamp impression.

Once you’ve planned your design, secure your metal tag or blank onto your steel block with tape. Stamp Straight Tape by ImpressArt is more expensive than masking tape, but it offers a sturdier edge and does not leave sticky residue.

How to get a good metal stamped impression.

Strike the perfectly vertical stamp with one firm blow. This is important for achieving a clear impression.

A successfully stamped metal blank charm.

Now you’ve got a custom made charm that’s uniquely made by you!

That’s all there is to it! It really is that simple. Then, you can use your completed stamped charms to make earrings, necklaces, bracelets, gift tags, and more!

Ava's Ladies in Waiting Necklace Tutorial

Click this picture for all the parts and instructions you need to make these pretty necklaces.

For a great monogram jewelry tutorial, see “Ava’s Ladies in Waiting” Necklace Tutorial in our Design Gallery.

Hootie and the Sodalite Earrings

Click this picture for all the parts and instructions you need to make adorable metal stamped owl earrings.

To make fun owl earrings, see the “Hootie and the Sodalite” Earrings Tutorial.

Young Love Bracelet Tutorial

Click this picture for all the parts and instructions you need to make a simple metal stamped bracelet.

For the full how-to on making a metal stamped chain bracelet, see our “Young Love” Bracelet Tutorial.

Rings & Things offers a huge variety of metal stamping blanks, plus jewelry stamping tools and supplies with fast shipping and free returns.

So what are you waiting for? Isn’t it time to say things your way! ~ Melissa

Make a Simple, Dainty Sterling Silver Necklace

September 5, 2014

Sometimes when it comes to jewelry, less is more. That’s the case when it comes to these adorable river rock and sterling silver charm necklaces designed by Rings & Things’ Amy Mickelson. This project is easy, yet really pretty! Plus there are a ton of different sterling silver charms to pick from!

These necklaces only require one tool and a few simple components to make! The sterling silver chain necklaces are already finished with a clasp, making them a breeze to use. Plus, I just adore the contrast between the natural river rock and the dainty sterling silver charms.

Supplies and Tools Needed:

Simply layer the items on the sterling silver jump ring. Chain first, then river rock pendant, then sterling charm.

Simply layer the items on the sterling silver jump ring. Chain first, then river rock pendant, then sterling charm.

Creating this necklace couldn’t be easier! Using your chain-nose pliers, pry open the jump ring a little. You only need to open it enough so that you can layer the three elements together. When opening jump rings, remember to always twist the ends in opposite directions to separate them. Do not “oval” the ring by pulling the ends apart.

Place the chain first, then the rock pendant, then your sterling silver charm onto the jump ring. Close the jump ring carefully, so that the ends line up flush.

These dainty pendants are so cute! And smaller than a penny!

These dainty pendants are so cute! And smaller than a penny!

Each finished dangle is smaller than a penny!

So cute in the palm of my hand!

So cute in the palm of my hand!

If you like this look, buy the parts to make these necklaces now!

These lovely necklaces by Amy Mickelson combine rustic river rock and dainty sterling silver charms!

All the parts are ready to buy in our Gallery – just click this image to go there.

You can check out additional possibilities by browsing our huge selection of sterling silver charms and sterling silver chain necklaces! My personal favorite chain is the sterling faceted ball chain, because it sparkles!

~ Tiffany

How to Make a Glass Vial Necklace

August 28, 2014

There is no denying that little glass bottle necklaces are adorable, and as keepsake jewelry they are easily adaptable for a multitude of themes. Whether you want to make the featured “Beachcomber” Vial Necklace, or a variation–this style of jewelry is easy to make. You might also consider filling your little bottle with dried flower petals, dandelion wishes, a lock of baby hair, a printed parchment scroll, tiny photos, sea shells, moss, feathers, ashes, or the other seemingly endless possibilities.

Necessary supplies for making a glitter and crystal filled vial necklace from www.rings-things.com

Step 1: Gather your supplies needed to make the Beachcomber Vial Necklace.

You will need the following supplies:

1 each 8mm round jump ring (I used item #37-167-1: 8mm round, white-plated jump ring)

3 each 3.2mm rondelle spacer beads (I used item #26-155-32-1: 3.2mm white-plated rondelle spacer bead)

1 each 2″standard head pin (I used item #37-422-1: 2″ white-plated standard head pin)

1 each clear glass bottle (I used item #30-187-3515: 32x15mm clear glass bottle)

1 each 12mm faceted rondelle crystal bead

1 each ball chain clasp (I used item #40-801-1: 2.4mm white-plated ball chain clasp)

24 inches ball chain (I used item #40-889-1: 1.8mm white-plated ball chain)

And Treasures to fill your vial:

20 each 4mm Swarovski crystal bicone beads (I used #05-328-04-116, #05-328-04-124, #05-328-04-407, #05-328-04-90, and #05-328-06-138.)

1 each 17x7mm white-plated key charm

Glitter (I used Tim Holtz Distressed Glitter “Clear Rock Candy“)

You will need the following tools:

awl

rubber block

4 piece tool kit

mini spoon / tiny glitter scoop

Use an awl to make a centered hole running top to botton through the cork stopper on www.rings-things.com

Step 2: Remove the cork stopper from the vial; use the awl to make a centered hole running from the top of the cork through to the bottom.

How to make a decorative beaded cork and vial necklace from www.rings-things.com

Step 3: To make the beaded cork stopper, string the following parts onto a 2″ head pin: a white-plated rondelle spacer bead, the cork, a faceted glass bead, and a bicone crystal bead.

Finish the beaded cork stopper with a wire-wrapped loop; how to make a vial necklace from www.rings-things.com

Step 4: Finish the beaded cork stopper with a wire-wrapped loop. Follow the instructions for making wire-wrapped loops in Rings & Things “Jewelry Basics 101″.

Add an adorned jump ring to hang your vial necklace. Tutorial from www.rings-things.com

Step 5: Add a jump ring to the top loop of the beaded cork stopper. Adorn the jump ring by adding two white-plated rondelle spacer beads prior to closing it. Follow the instructions for opening and closing jump rings in Rings & Things “Jewelry Basics 101″.

Fill your vial necklace with beads, crystals, and charms. DIY instructions to make a vial necklace at www.rings-things.com

Step 6: Fill the vial with your combination of beads, crystals, and charms (or other tiny treasures). When selecting items to go in the vial, keep in mind the neck of the vial has a diameter of approximately 7mm.

DIY Vial necklace tutorial from www.rings-things.com Add Tim Holtz Distressed Glitter to your vial necklace.

Step 7: Add glitter to the vial. Rings & Things’ tiny spoon charm #44-639-0 makes a perfect scoop! Once your vial is filled, add the beaded cork stopper to the vial.

Finish your beaded vial necklace with ball chain. Easy jewelry-making instructions from Rings & Things.

Step 8: Finish your necklace with chain. Measure and cut the ball chain to your desired length. Add the ball chain clasp to one end of the chain and string on the vial pendant. Connect the open end of the ball chain to the clasp. Enjoy!

♥Get Inspired! If you loved making the “Beachcomber” Vial Necklace, visit the Rings & Things Design Gallery and get inspired! You will find instructions for making the following necklaces (just click the image for details):

www.rings-things.com, terrarium jewelry, plant jewelry, mini terrarium, wearable plants, DIY, tutoriall, supplies

Fairy garden terrarium tutorial by Sondra Barrington & the Rings & Things Showroom crew

Tiny Living Terrarium Tutorial by Summer Melaas of Rings & Things Showroom

Free DIY riveted jewelry tutorial from www.rings-things.com Sondra Barrington

Healing Shrine Necklace Tutorial by Rings & Things Designer Sondra Barrington

Make things!

Mollie

Create a Journal Necklace with Piddix Images

July 24, 2014
Flora & Fauna Journal Style Necklace made with Rings & Things brass "fairy door" blanks and Piddix Collage Sheets.

Flora & Fauna Journal Style Necklace made with Rings & Things brass “fairy door” blanks and Piddix Collage Sheets.

Creating a journal necklace is fun and easy using Rings & Things precut brass “fairy door” blanks and Piddix collage sheets or your own personal images. Just follow these steps:

A list of supplies for making a metalworked journal style necklace.

Step 1: Gather the tools and supplies necessary to make a journal necklace. Select your favorites from the many styles of “fairy-door” blanks and Piddix collage sheets

You will need the following supplies:

1 set Brass Sandwich Blanks (Fairy Doors) (I used #44-721-11: square-with-circle window brass blank)

1 each Metal-mesh choker (I used #52-293-16-6: antiqued-brass-plated metal-mesh choker)

5-10 images Piddix collage sheet (I used #83-231-01-006: square flora & fauna)

6 each Crystal Jams™ Assortment (I used #05-328-04-916: Somebody’s Heartbreak)

6 each ball-end head pin (I used #37-091-15-6: 1.5″antiqued-brass-plated ball-end head pin)

2 each 5mm round jump rings (I used #37-136-6: 5mm round antiqued brass jump rings)

2 each 8mm round jump rings (I used #37-167-6: 8mm round antiqued brass jump rings)

Oxidizer & Antiquing Solution ( I used Novacan black patina)

And the following tools:

800-1000 grit sanding sponges or polishing paper

polishing cloth

Extra Fine Point Sharpie®

1.25mm round hole punch pliers

Four-piece glitter tool set

Two-hole metal punch

Fine-tip craft scissors

cotton swab

How to punch holes in metal with a metal hole punch.

Step 2: Measure and mark the hole position on the brass blanks. The apex of the hole should be positioned 1/8″ from the sides on the top two corners. Punch holes at the marked positions with the two-hole metal punch. Make sure the hole placement on the front and back blanks line up.

How to patina a brass jewelry blank with Novacan Black Patina.

Step 3: Prepare the brass blanks for patina by gently sanding with a 3M ultra-fine polishing sponge. Use a cotton swab to apply Novacan black patina to the front and back side of both blanks. Polish the brass blanks to attain the desired shade of patina.

How to make a journal necklace with Piddix image sheets.

Step 4: Use fine-point craft scissors to cut out image “pages”. The pages should measure slightly smaller than the size of the brass cover blanks. Five to ten pages per journal works best.

How to make a journal necklace with Piddix image sheets, punching holes.

Step 5: Mark and punch holes in the paper image pages. Use the metal blanks as a guide to mark hole position on the upper two corners of each page. Punch holes with a 1.25mm hole punch.

How to wire wrap the loop of a Swarovski crystal bicone dangle charm.

Step 6. Make six crystal dangle charms, follow the instructions for making wire-wrapped loops in the Rings & Things Jewelry Basics 101.

How to assemble a journal necklace.

Step 7: Assemble the journal pendant by stringing the brass blank back, image pages, and brass blank front onto jump rings. Add three crystal dangle charms on each jump ring and then close the jump rings. String the pendant onto a metal mesh choker. Your necklace is ready to wear.

If you enjoy making the “Flora & Fauna” journal-style necklace, try these variations:

Make Things!

Mollie