Spring 2013 Pantone Color Trends Giveaway

April 29, 2013

Pantone Spring 2013 Giveaway

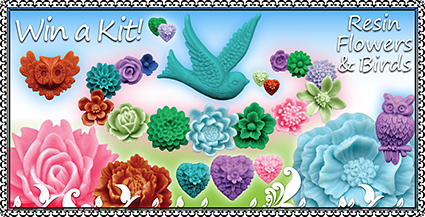
Enter to win our Resin Flower Gluing Kit. Just comment at the end of this post  — by May 6, 2013 — with your favorite Pantone Spring 2013 Color Trend to be entered into our drawing.

win a resin flower gluing kit

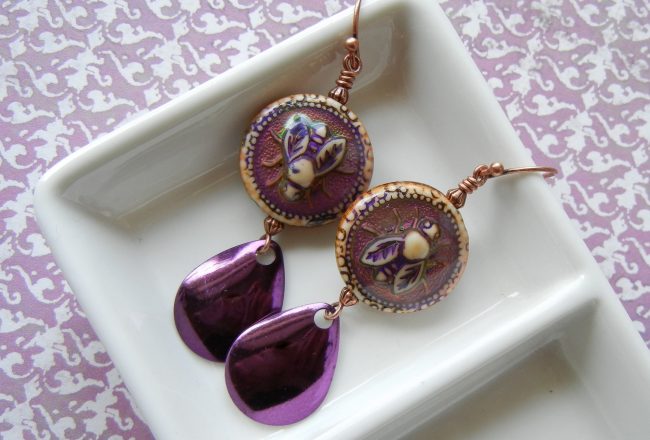
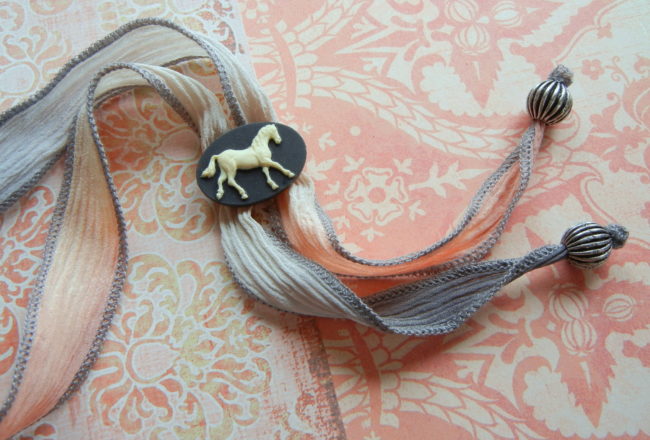
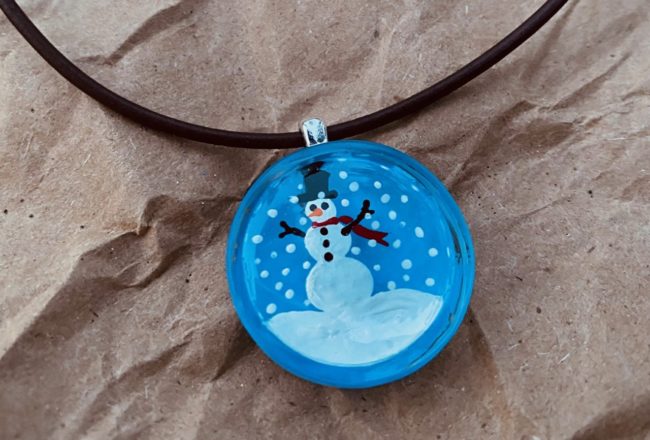
In celebration of Spring, here are the Spring 2013 Pantone Color Trends. Just click on any of the color swatches below and find the treasures available in our online store. Also visit our Design Gallery  for all the designs you see here and many more. All designs are FREE – no login required!

banner-spring13_emerald banner-spring13_grayedjade

banner-spring13_tendershoots  banner-spring13_lemonzest

banner-spring13_nectarine banner-spring13_poppyred

banner-spring13_linen banner-spring13_africanviolet

banner-spring13_duskblue banner-spring13_monacoblue

Comment now with your favorite Pantone Spring 2013 Color Trend to win. Contest ends May 6, 2013.

~Jan

Conversions and Useful Jewelry Charts

April 29, 2013

Wire Gauge Chart

Gauge is often abbreviated “ga” or simply “g”. If you can’t find what you’re looking for when searching a website, you may need to try the following variations: 28-gauge, 24ga, 22g, 20 gauge, and/or 18 ga to find what you want.


The most important thing to know about wire gauge is:
LARGER wire gauge NUMBERS = SMALLER/THINNER wire.


  • 30 gauge wire is very thin, excellent for wire stitching and fine wire weaving.
  • 21 gauge is a a popular size for ear wires in the United States (some other countries have thicker ear wires). To make nice ear wires that don’t bend out of shape, many people buy 18 gauge or 20 gauge dead-soft sterling silver wire and pull it through a draw plate to size it down, while the draw plate both work-hardens the wire, and makes it springy.
  • 10 gauge is very heavy. It is likely to break inexpensive jewelry pliers, and dent or break most wire cutters. (Use a jeweler’s saw to cut heavy gauges of wire.)
Wire Gauge Chart for Jewelry Wire

Wire Gauge Conversion Chart (AWG)

Picking the right size hole punch or drill bit for your wire gauge:

When punching a hole for a jump ring, you normally want a hole at least twice the diameter of your wire. This allows for good freedom of movement.

When riveting, either measure and drill a hole the exact right size, or punch a hole slightly too small, and then enlarge it to the perfect size with a bead reamer (or round file). Riveting with a hole that is too large, can cause your rivet to bend or slip, both of which can cause additional problems. More info @ Riveting 101 (for jewelry and small mixed media artworks).

  • 1/16″ hole punch = .0625 inches or 1.59mm (a tiny bit smaller than 14 gauge) – so a 1/16″ hole, plus a few turns of a bead reamer, is perfect for riveting 14ga wire.
  • 3/32″ hole punch =  .0938 inches, or 2.38mm (roughly 11 gauge)
  • 1/8″ hole punch = .125 inches, 3.18mm
  • The new 3-hole punch by Eugenia Chan punches 1/8″, 3/32″ and 1/16″ that correspond with standard tube rivets (aka eyelets): 1.6mm, 2.4mm, and 3.2mm.
  • The new 4-hole punch by Eugenia Chan punches holes that are the exact correct size for 18-gauge, 16-gauge, 14-gauge and 12-gauge wire rivet holes.

OH GOSH DARN IT! I accidentally made this live before I finished it…
Still to Add:

  • bracelet sizes from old catalog page 777?
  • typical # of round beads per strand

More helpful links:

How to Use Fancy Wire Rivets

April 5, 2013

Bees ~ Fleur-de-Lis ~ Leaves ~ Simple Domed ~ Shells ~ Hearts ~ Stars

If you already know how to make and set traditional wire rivets, then you only need to know one new thing about setting these fun decorative rivets:

  • To prevent marring the decorative rivet head, don’t hammer with your rivet head directly on the usual steel block. Instead, set the rivet head on a piece of wood (a scrap of 2×4″ works great), or use a piece of heavy leather between the rivet head and steel block.

Continue Reading…

Square Peg – DIY Greek Leather Bracelet

April 1, 2013

I love this simple, sleek Greek leather bracelet by designer Mollie Valente. And I’m not the only one who appreciates this combination of simplicity and Greek leather — it is the most popular project on our site for the first 3 months of this year!

Greek leather bracelet tutorial

Greek leather bracelet – DIY

10mm SWAROVSKI ELEMENTS crystal heart - Crystal Bronze Shade

crystal heart

Swarovski’s Crystal Bronze Shade (see all 79 shapes!) picks up and reflects the hues nearby, and even changes color depending on the intensity and type of light coming into it — it can look bronze, olive, or even a shimmering gray-blue.

This bracelet features four 7.5″ strands of supple olive-green Greek leather:

Olive green Greek leather

Olive green Greek leather

antiqued silver center-crimp tube with hook

with hook

antiqued silver center-crimp tube with loop

center-crimp tube with loop

Hold the 4 strands of Greek leather together with classic center-crimp tubes. To use center-crimp tubes, select a size slightly larger than your cord — for this bracelet, the 4.5mm inner diameter perfectly holds 4 pieces of round 2mm cord. Add a dab of flexible glue to the ends, and firmly crimp the center section of the tube with round-nose or narrow flat-nose pliers.

Use a hook on one end, and an eye (or loop) on the other end of the bracelet.

Hammered square drum bead

Hammered square drum bead

The square drum beads have a 5mm hole – great for heavy cord and multistrand designs. They are available in 4 plating colors, and a slightly smaller triangular shape too. A large 8mm round jump ring fits nicely around the bead, so you can hang charms, small pendants or beaded dangles.

Square Peg Greek Leather Bracelet Tutorial

Click image for full tutorial and parts list

Browse our Design Gallery for 100’s more jewelry design ideas and techniques (it’s always free — no login required!).

Questions about this or any other design in our Gallery or catalog?
Comment below, or ask us on Facebook! ~Polly

Bead Fest Santa Fe

March 25, 2013


The Museum of Contemporary Native Arts


If you have considered traveling to Bead Fest to take beading, metal working or jewelry making classes, I recommend the show traditionally held each Spring in Santa Fe, New Mexico. Downtown Santa Fe is the perfect setting!


Traditional Turquoise & Sterling Silver Jewelry

Nearly everything you need is within easy walking distance and you have access to many quintessential New Mexico experiences:

Art galleries, museums, artifacts, history, culture, excellent food, and shopping.  Schedule extra time for day trips and activities.


I had a great time taking metal working classes, and learned many new tips and techniques (which I will share on the blog soon!).  A tip if you are traveling to take classes that require heavy tools:  Securely pack them in a box and check it as luggage.  The cost for a checked bag is now often less than the cost for shipping a box through the mail.


Teri Greeves NDN Grrrl!  A version of the infamous Frito Pie from the Atomic Grill   Cathedral Basilica of St. Francis of Assisi 

 Gib Singleton... I'm not decorating somebody's living room. I'm not decorating somebody's garden. I'm decorating somebody's heart.   Marcus Amerman Cui Bono  Medina Gallery


Beyond traditional sterling silver and turquoise jewelry designs, you can find design inspiration nearly everywhere you look.


A beautiful stained glass window in the Cathedral Basilica of St. Francis of Assisi    Tau Mas ceramic sculpture by Woodrow Nash

Upcycled Necklace


A few words of caution: Santa Fe is expensive, so plan accordingly. Spring is the windy season, so expect strong winds. Juniper trees produce huge amounts of pollen, so if you suffer from seasonal allergies, Spring can be miserable. The high altitude of Santa Fe is very dry, so staying hydrated is important.

More images from my recent Santa Fe excursion can be found on Pinterest.  Enjoy your travels, wherever they take you!

Sondra

Copper Soldering Tutorial – Part 2

March 7, 2013

Today’s DIY: How to solder copper links with beads

If you like bead-embellished wire links, but wire wrapping is not your forte, then this is an excellent project for you!

See previous blog post for basic soldering instructions, including links to torches, soldering surfaces, basic tools and setup.

  1. When cutting or soldering, wear eye protection to protect your eyes from flying bits of wire or solder.
  2. Make a few coils: as many as you can comfortably fit on your ring-bending pliers, a suitable size of Wubbers bail-making pliers, or the fun new shapes of Wubbers mandrel pliers. For round links, I prefer ring-bending pliers for 20-22mm loops (3/4″ – 7/8″), and the X-Large bail-making pliers for 12mm and 15mm links.

Continue Reading…

Add color and shine with Gilders Paste

February 4, 2013

Gilders Paste, trying various methods and materials, and deciding I like it! 86-381-gilderspaste2 Rings & Things has added an assortment of colors. Each tin is 1.5 oz of wax-based medium, and is enough to cover 30 square feet of metal, wood, resin, et cetera. You can apply Gilders Paste with a cloth, cotton swab, or fingertip. Thin with paint thinner, turpenoid (but not turpenoid natural) or mineral spirits to transform the highly concentrated Gilders Paste for brushing, sponging, staining, washing or spray painting. I suggest having the following tools handy when you plan to colorize with Gilders Paste:

  • Soft Rag (an old cotton t-shirt worked well)
  • Baby Wipes
  • Small Mixing cup
  • Disposable (cheap) small paint brushes
  • Palette
  • Stir Sticks
  • Mineral Spirits – from the hardware or craft store.
  • Non Stick Craft Sheet
  • Apron

I don’t really mind getting my hands dirty. I didn’t have the foresight to use a craft sheet, so the table was gilded along with the objects. After I was done, the plastic table cleaned up good as new with some mineral spirits, and my hands cleaned up fine with soap and water. If you are more particular (and don’t want any gilding of your fingernails), you may want to wear latex or nitrile gloves. Drying time varies depending on substrate and surface preparation, approximately 60 minutes to the touch on dry debris-free surfaces and 12 hours for complete cure time. If polishing or burnishing is required, allow 12 hours drying time. Rubbing the base coat immediately after application with a dry cloth or slightly wet with thinner will remove Gilders Paste from the relief detail and highlight depressed details. Lightly brushing Gilders Paste over the top will highlight the relief details. This is patina color on a reproduction Ching dynasty coin. I scraped a little paste out of the tin, and then wet the paint brush with mineral spirits and mixed it together on the palette until I had a paintable consistency. mineral spirits I put on a fairly thick coat. 44-062 with patinaAfter an hour or so, I buffed off the excess paste, and this was the result (with a un-gilded example for contrast). 44-062 patina buffedThis is a nice use of the Gilders Paste for faux aging. The color was a bit paler than I hoped for so I mixed some African bronze paste into my patina color. patina and african bronzeI painted a new layer of paste onto the opposite side of the coin, and the new color was more to my liking. 44-062 dark patinaThis is a filigree cross in antiqued copper plating, which I colored with verdigris Gilders Paste. For this color, I still mixed in the mineral spirits, but I applied the color with a stir stick. verdigris cross After drying and buffing, the verdigris color is subtle, but it counters the reddishness of the copper metal. verdigris cross compare This color was nice, but I wanted a bit more shine, so I layered german silver Gilders Paste over the verdigris. german silver filigree crossHere is the filigree with the metallic layer lightly buffed off, and the original plating for contrast. german silver filigree cross buffedToo much of the verdigris was covered now, so I went back in for a 3rd layer, verdigris paste on top of the previous two applications. After some more drying and buffing time, this was my final result: filigree cross final My next experiment involved resin flowers. I was curious about the results on a highly dimensional, non-metallic item. I thinned out violet Gilders Paste, and applied it to 3 colors of resin flower with a paintbrush. violet paste on resin flowersAfter drying, this was too tricky to just buff with a cloth, so I touched up the high points with my cloth, and then used a dry brush to remove excess paste from the crevices. The two lower flowers are un-colored. The flowers with the paste have an almost velvety look to them. colored resin flowers This is another antiqued copper plated filigree. The piece on the right has iris blue Gilders Paste applied directly with a cloth. The piece on the left has been layered. White Gilders Paste on the filigree makes the iris blue top layer more visible. Both of these are dried and buffed. blue iris filigreeNext I tried colorizing some silver plated wavy disk beads. I thinned out the iris blue and damson pastes, and applied them to the beads with a brush. This is after buffing, with a shiny bead in the center for contrast. The lighter the metal color is to start with, the greater contrast the paste seems to make. wavy disksI tried out the rusty red pinotage color Gilders Paste on both silver plated flower charms and antique brass filigree. This was my chance to paint the flowers red. For these items, I added a bit of mineral spirits to my brush, and conditioned some of the paste directly in the tin. pinotageLastly, I wanted to mix colors, as opposed to layering them. I mixed the pinotage with the German silver Gilders Paste in the palette. Both of these colors happened to be creamier than some others, so I didn’t need to thin them down. I applied this mixture by brush to a raw brass filigree and got a lovely metallic pink finish. metallic pink The manufacturer says Gilders Paste will be permanent in 24 hours. It will accept an over coat such as clear lacquer, varnish, urethane, or powder coating to achieve a uniform appearance where the paste was not used, or to provide further durability to areas where repeated handling is required, such as a door knob. Due to the anticipated increased wear for jewelry, I tested 4 different products for sealing Gilders Paste.

The first 3 sealers all worked great. The spray sealer was the easiest to use, but the fumes from it can be quite obnoxious. spray sealed filigree I sealed one of the filigree crosses with the glaze, and the other with glossy accents. To me they look identical. sealed crossesThe renaissance wax, however, provided unanticipated results. Due to the cleaning components of this product, it stripped most of the color from the item I applied it to. The disk on the left was the original gilded iris blue wavy disk. The disk on the right has had renaissance wax applied, which lightened the color. It is good to know that this may work to lighten a color without fully removing it if that is ever your desired effect. waxed disk Be aware that the consistency of this product will vary from color to color and from tin to tin. If you have a tin with creamy consistency, enjoy it. If the product is crumbly, (whether it came that way, or you left the lid open) don’t ever consider it “bad”. You can re-constitute the paste with mineral spirits, a few drops at a time. So, having tried Gilders Paste, I’m hooked. Now I need to figure out what colors to buy to start my collection. ~ Rita