How to make a sliding adjustable necklace
June 23, 2011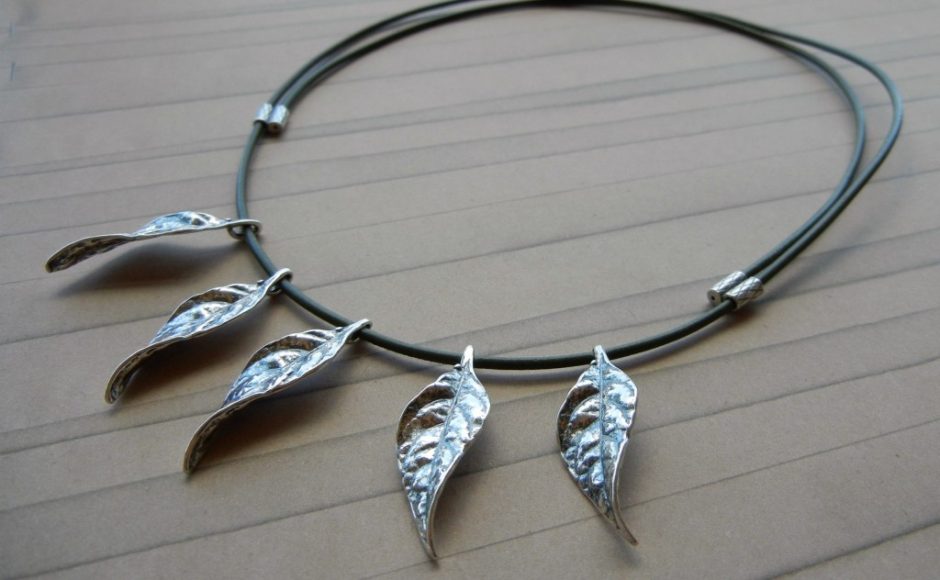
 Hello bloglandia! There was a “hit” product at last week’s Bead & Button show in Milwaukee: the new wire-looping pliers from Wubbers. Our booth sold out – then our website sold out! Wow. It was “wub – twue wub.” We just got more in stock, but they could be gone soon!
[stextbox id=”info” caption=”This one put a song in my head: “…Ride a painted pony, let the spinnin’ wheel spin!” “]
How to coordinate colors…automatically: “Ride a painted pony, let the spinnin’ wheel spin!”
[/stextbox]
Don’t be seen on that painted pony without coordinating the colors!
Swarovski’s “Create Your Style” program introduces a brilliant–and fun–color tool:

(Cue the calliope music, as you head off to play Color Carousel at Rings & Things’ website) 🙂

designed by sondra barrington
Jan (Marketing Manager) and I have spent the last week in Milwaukee for the Bead and Button Show. It was a busy week!
We met with vendors and talked about new product ideas; took classes and learned new jewelry making techniques; chatted with customers and helped at the Rings & Things booth; met with jewelry designers and the editors of several magazines and found some time to enjoy the city. (Who knew that “Beer Capital of the World” was home to a lifesize statue of Arthur Fonzarelli ~ AKA the Fonz!)
Thanks to our many customers who attended the show! Share your photos of your Bead & Button experience. Check out our photos on Facebook!
Happy Beading!
Sondra (Sales Manager)
Ever wanted to turn a pretty ribbon into a necklace, but weren’t sure how to make it wearable? Here are a few of our favorite methods for finishing the ends of silk ribbons.
1. Add a clasp – any clasp!
 Simply string large-hole spacer beads or soldered jump rings, then one half of your clasp, onto one ribbon tail. Thread the tail back through the spacers/jump rings and tie a knot on the end. Slide the spacers/rings to adjust the necklace length. Mollie used a button and oval link to form the clasp on this sweet pea pod design, but you could use any kind of clasp. You could also omit the spacers/rings and just tie the clasp to the ribbon for a non-adjustable design.
 With the jumbo lobster clasp, I just tied a loop on the opposite end instead of adding a ring.
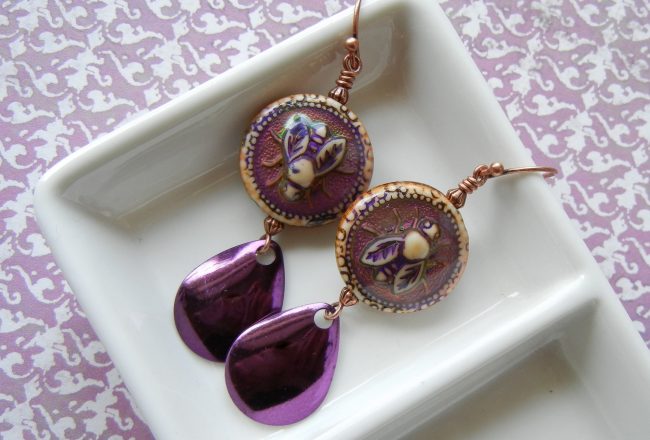
2. Glue on necklace adjusters (2020 update: sorry, these are no longer available)
 Since the silk ribbon has tapered ends, Rita folded the ends over two times to make them fit securely into the adjusters. She used G-S Hypo Cement for a secure fabric-to-metal bond with no mess.
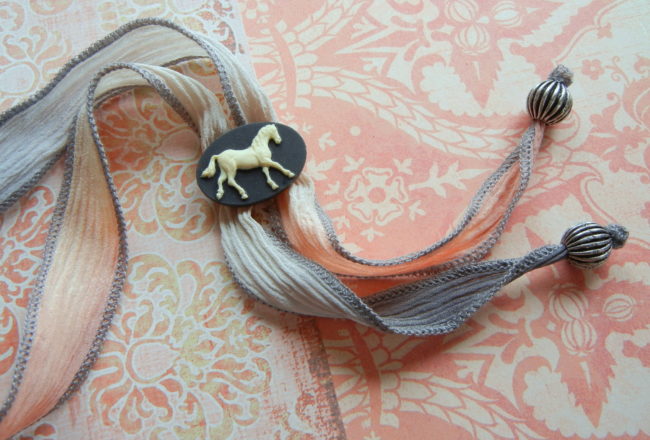
3. Bolo!
 To create a bolo necklace, just connect a bolo slide to the back of a pendant and slide it onto the ribbon. While Jaci titled her piece Sweet Lolita, I can’t help thinking of it as Bolo Betty. She designed it, so she wins of course.
4. Tube bead slider (not pictured)
Run both ends of the ribbon through a large-hole tube bead, running opposite directions or in the same direction: either way works. Tie knots on the ends, and add some embellishments if you like.
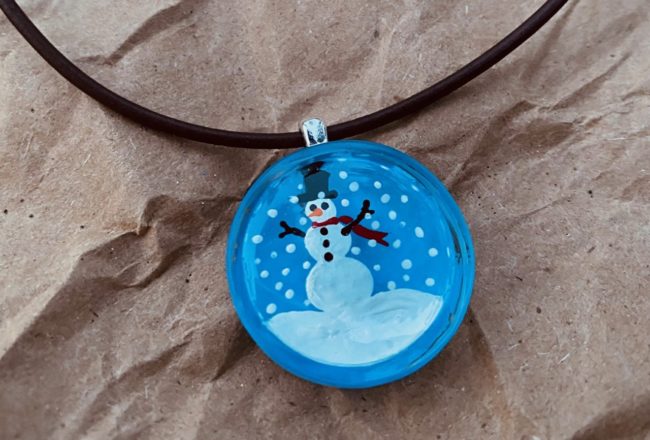
5. Just tie a bow!
 Seems too obvious, right? Although it might feel “unfinished,” this method is comfortable, adjustable and it allows you to remove the pendant.
We’ll cover how to finish flat ribbon, like velvet, and round cording, like leather, in future blog posts. Let me know if you’d like tips for any other materials! ~ Cindy
While not everyone believes in the metaphysical healing powers of gemstones, it is hard to argue with the emotional benefits of creating something pretty to wear with friends while dealing with the decidedly un-pretty reality of cancer.

A few of the designs created at the cancer patient retreat.
We just received a lovely thank-you note from Margaret Nowak, an Art Therapist with the University of Michigan Comprehensive Cancer Center. Margaret recently hosted a retreat for women with gynecological or breast cancers. One of the activities was making jewelry, and Rings & Things was happy to donate some of the supplies. Due to the Susan G. Komen Fund and other fantastic organizations, everyone knows pink is the official color of breast cancer awareness, but I hadn’t realized that turquoise is the official color for gynecological cancers.
Margaret wrote: “The women loved making bracelets and necklaces. They all chose a theme for their jewelry that often centered on healing. I do have some beads left which I will use with patients who are here receiving chemotherapy treatments or are in the hospital. A small bracelet made during a treatment or hospital stay can leave a huge impression on someone dealing with cancer. Know that Rings & Things is appreciated for bringing a little bit of pleasure to what might be an unpleasant day for someone dealing with cancer!”
bazillion new metal beads in our online store! Most of them have large holes, too – perfect for all the leather and Pandora-style jewelry that is so popular these days.

Toni’s bracelet design allows the cube bead to make a statement.
Whether you prefer antiqued silver, antiqued brass or antiqued copper in your jewelry designs, there are tons of new bead options with strong geometric shapes, fancy details and great textures. A few of my favorites include:

New summery flower beads in antiqued brass and silver.

Hollow metal barrel beads that remind me of Donkey Kong!

Tube beads and other unique shapes with hammered texture.
I don’t know exactly what this will end up being, but these chunky tube beads told me they wanted to be strung on leather with our new larger-hole shell pearls. We shall see!

The future of this piece is a mystery at this point!
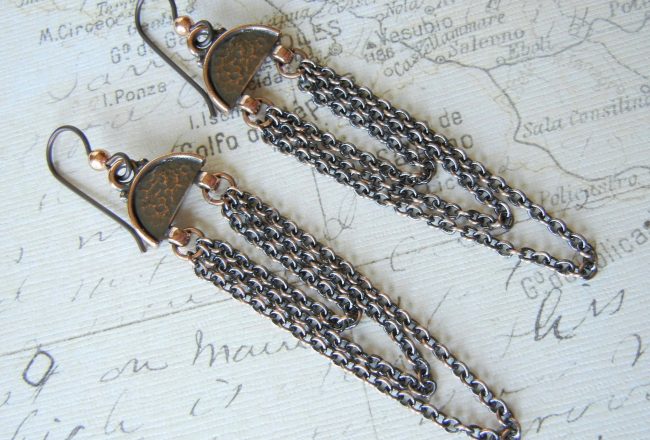
Finally, here are a pair of earrings Toni made. What a great go-with-everything design! For variety, it would be easy to add a splash of color or sparkle by capping the dotty tube beads with small gemstones or crystals.

West Yin earrings.
Do metal beads inspire you to add bright colors or to keep in neutral? I would love to hear what kind of combinations you come up with! ~ Cindy
]]>

Hold up the pin and it is easy to see where to cut! Gravity is our friend.
I hate counting. But when it comes to cutting chain for your jewelry designs, sometimes you have to count links. After I’ve exhausted my attention span by counting out a section (look, sparkly crystal hearts!!!), I string it onto a head pin and snip a bunch more. This is the easiest way I’ve found to speed up the task. Do you have a better way? I’d love to hear it! ~ Cindy

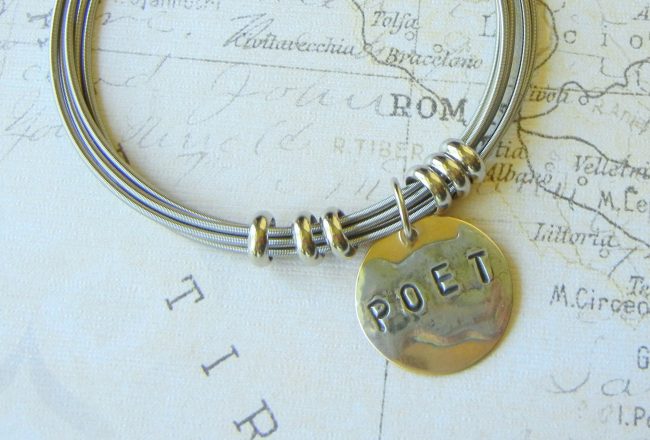
Artistic Wire + bracelet forms = many many options!
I call this easy jewelry-making technique “wire lashing” to distinguish it from “wire wrapping” – but really, it is just wrapping thin wire around and around a component in order to cover it with beads (or chain!).

A plain hook end bracelet is the perfect candidate for a good lashing!
The keys to wire lashing are simple, but oh so vital:
I’ve used this technique before on small items (kidney ear wires, links, ear hoops and hair combs) so decided to step up to bracelets today. The only difference is working with longer wire (about 4-5 feet for a typical bangle). You have the option of working with smaller sections of wire and adding new pieces as you go, but I really wanted to use one continuous piece. I did of course kink the wire. Repeatedly.

Looks scary, but this nightmare actually only took a few seconds to correct.
But the nice thing about using one piece of wire is that as you go along, the lashing goes faster and faster until suddenly you realize you are having fun! At the end, you feel so victorious you immediately want to make another. So you do … and realize the wire is too darn long again … but wait, now it is fun again … victory is within reach … This is how addictions start.
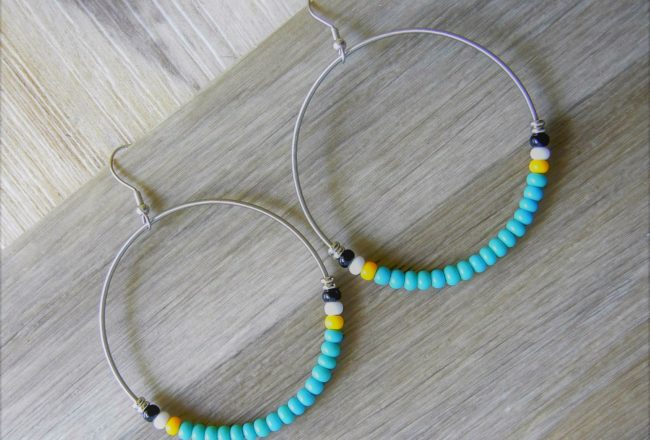
I like to use 24 or 26-gauge wire when lashing because it is very easy to manipulate with your fingers. Today I used several colors of Artistic Wire. The beaded bracelet has 6mm purple Miracle beads, 4mm turquoise magnesite and opalite barrel beads held in place by chartreuse Artistic Wire. It was quick and easy to make. However, I started with waaaay too much wire, so it took a little longer to add each bead than was really necessary. Impatient as always, I decided to do away with stringing beads. My next attempt uses rhinestone chain.

Sparkle mania has never been easier to achieve!
It turns out the 14pp size Swarovski Elements crystal rhinestone chain is almost exactly the same width as the bracelet form, so it stays in place nicely. I think this would be a great girl’s night jewelry project – simple, sparkly and easy to customize by adding some charms or changing up the wire color.
For those of you who prefer thread, check out Toni’s rhinestone hair comb – same technique, different materials.

Cover a comb with ribbon and rhinestones for easy elegance.
What else can we cover in rhinestone chain? Perhaps an easier question would be what can’t we cover! ~ Cindy
![]() The slogan for the 2011 Great Spokane Art Party “Eat, Drink and Be Artsy” was very fitting! Saturday, May 7 was a fun-filled evening of delicious food, tasty wine and hands-on art. This inspiring fundraiser benefits Blueprints for Learning, a non-profit organization working to increase the quality of early child care and education in our community and the Community Building Children’s Center.
The slogan for the 2011 Great Spokane Art Party “Eat, Drink and Be Artsy” was very fitting! Saturday, May 7 was a fun-filled evening of delicious food, tasty wine and hands-on art. This inspiring fundraiser benefits Blueprints for Learning, a non-profit organization working to increase the quality of early child care and education in our community and the Community Building Children’s Center.
At the event, several talented local artists mentor participants in creating collage magnets, handmade clay tiles, watercolor paintings, printed silk scarves, mono-prints, handmade paper, stick puppets, felt beads, jewelry and more. Rings & Things has participated in the event since its inception.
Russ and Dee donated the findings for the project, and various Rings & Things staffers and their friends worked the event. If you are interested in participating in this event next year, or in other community projects in the Spokane area, let us know!
Next on the calendar is the ‘Make It Art’ booth for kids at ArtFest. Also, please contact Russ if you’d like to help with recycling at ArtFest (June 3-5, 2011). Every year he coordinates the recycling efforts at this and many other community events!

Local art perched on mountains of recycling!