Browsing Category

Bracelets and Cuffs

Make-it-yourself Adjustable Bangle Bracelet Project

March 6, 2015

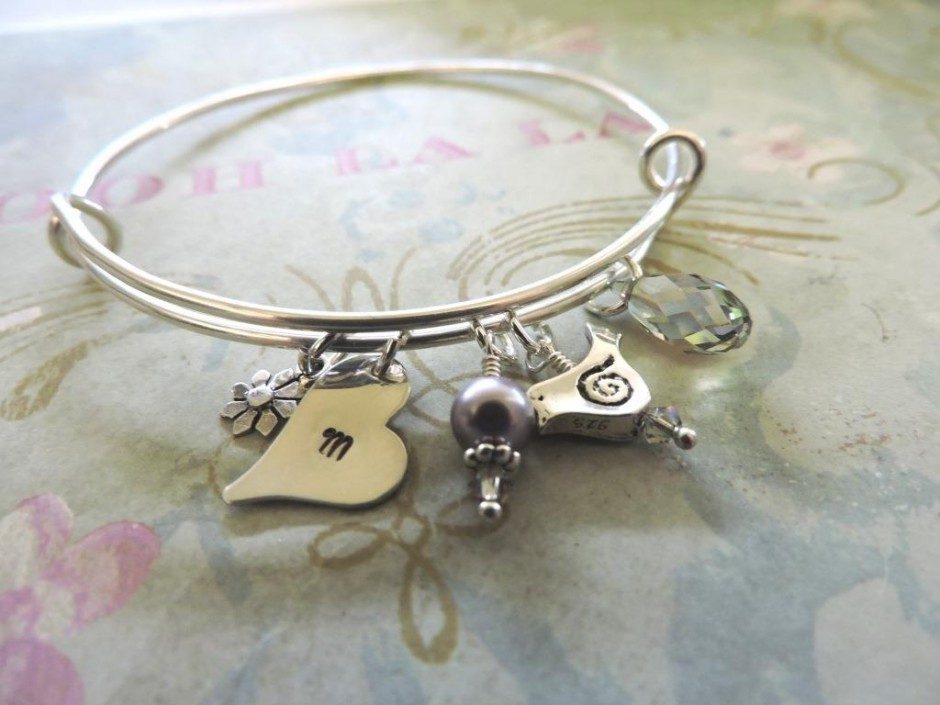
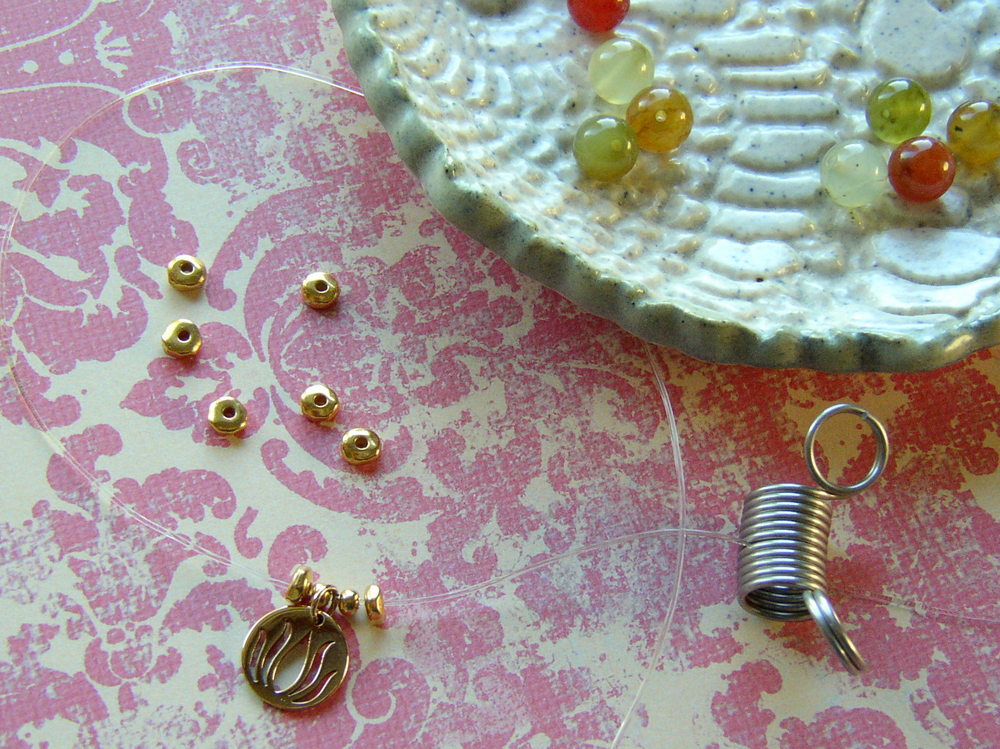
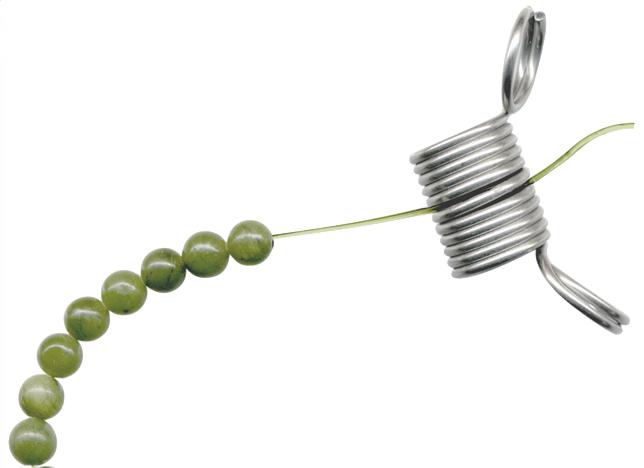
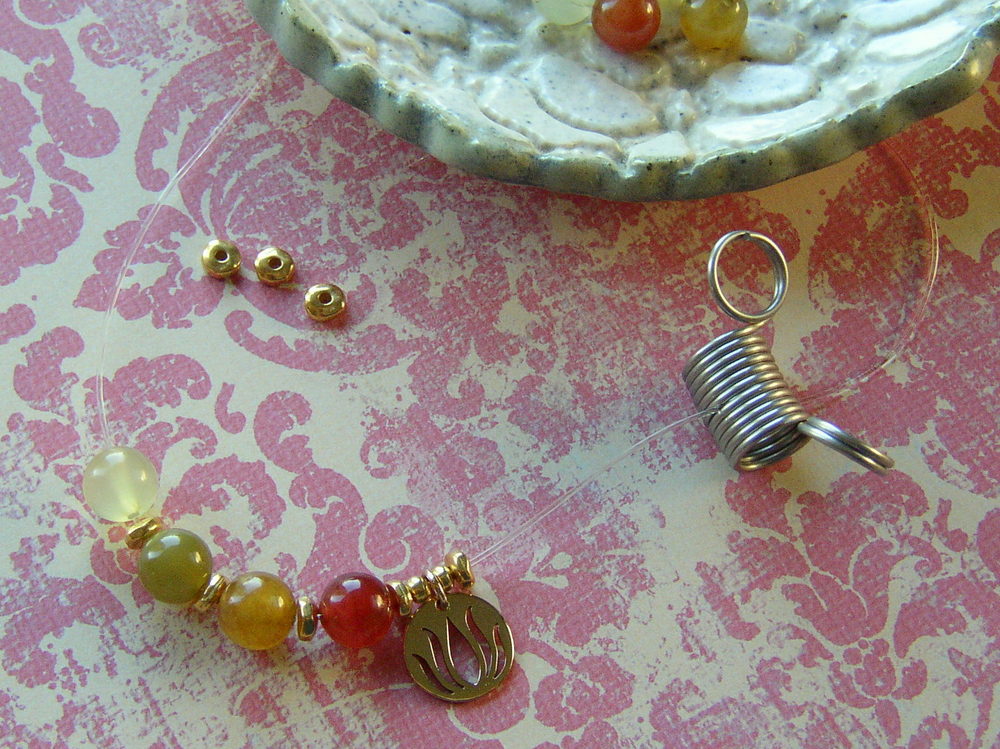
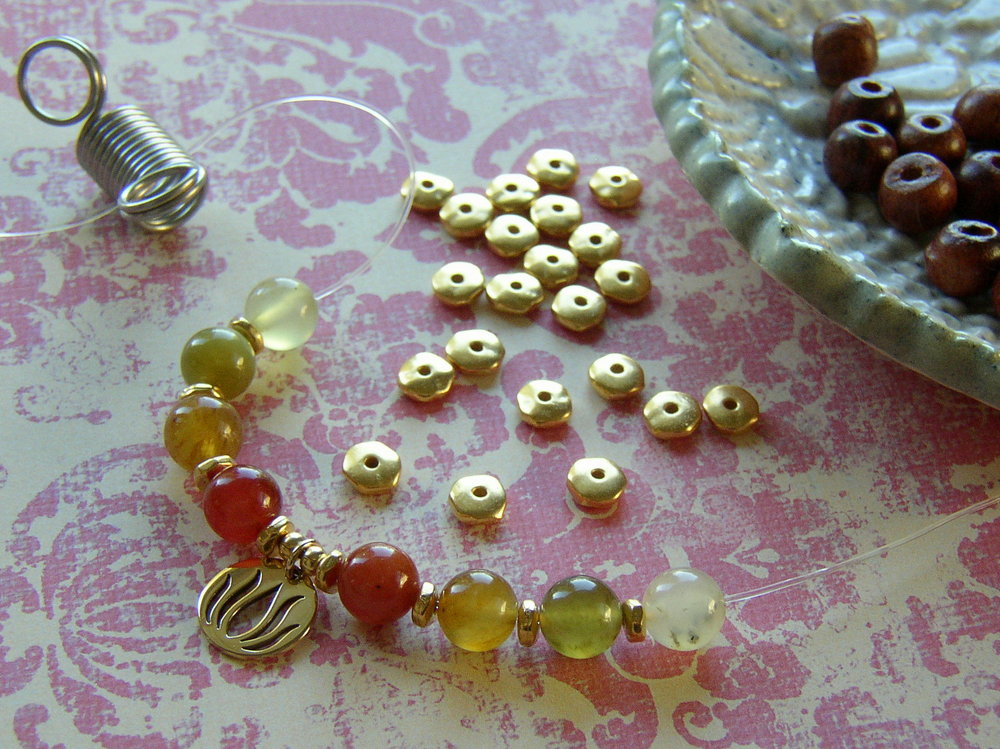
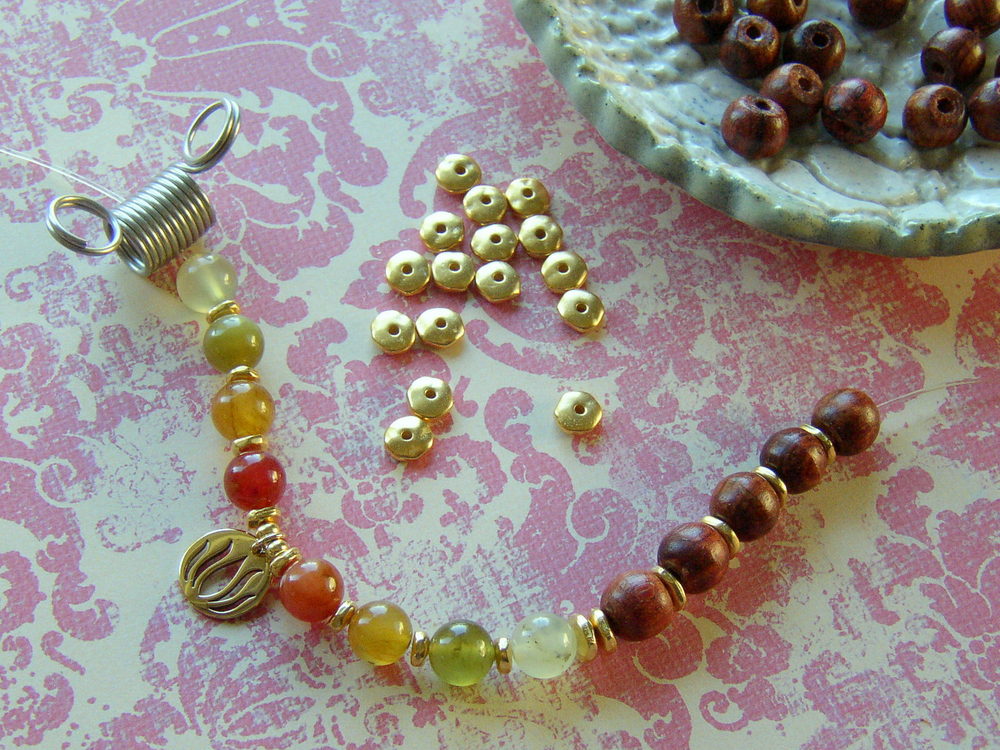
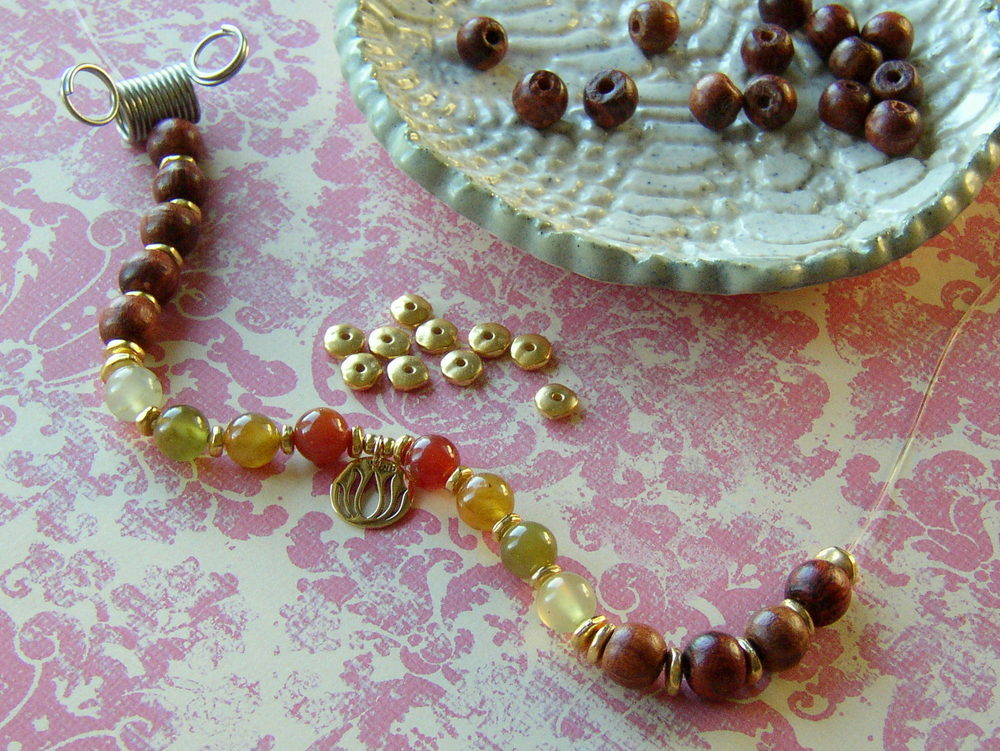
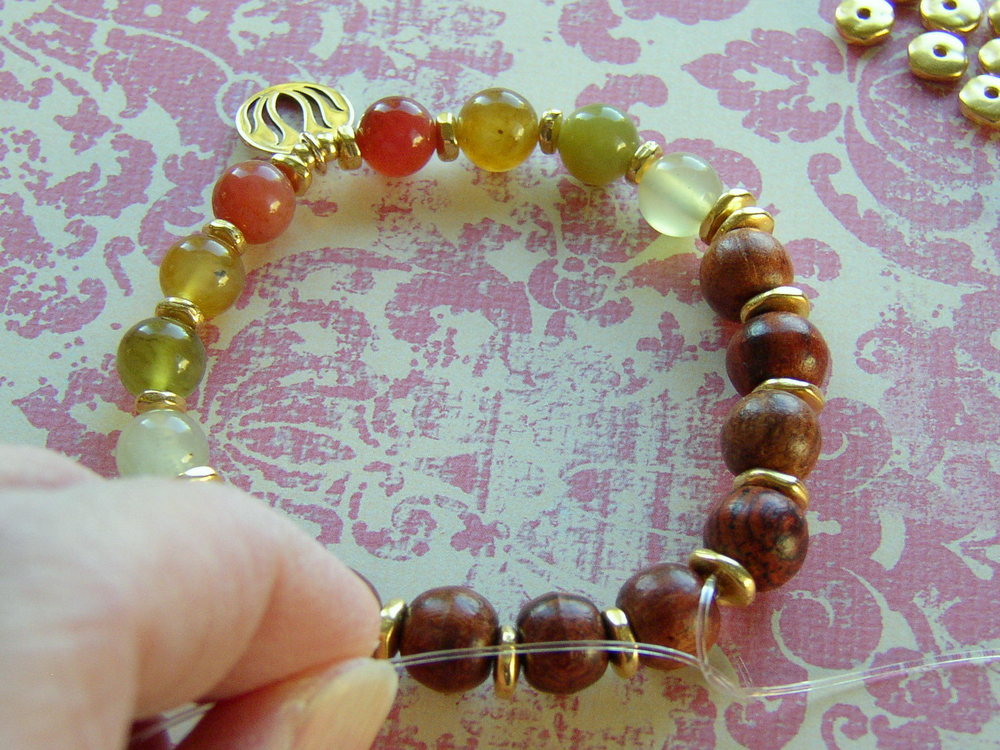
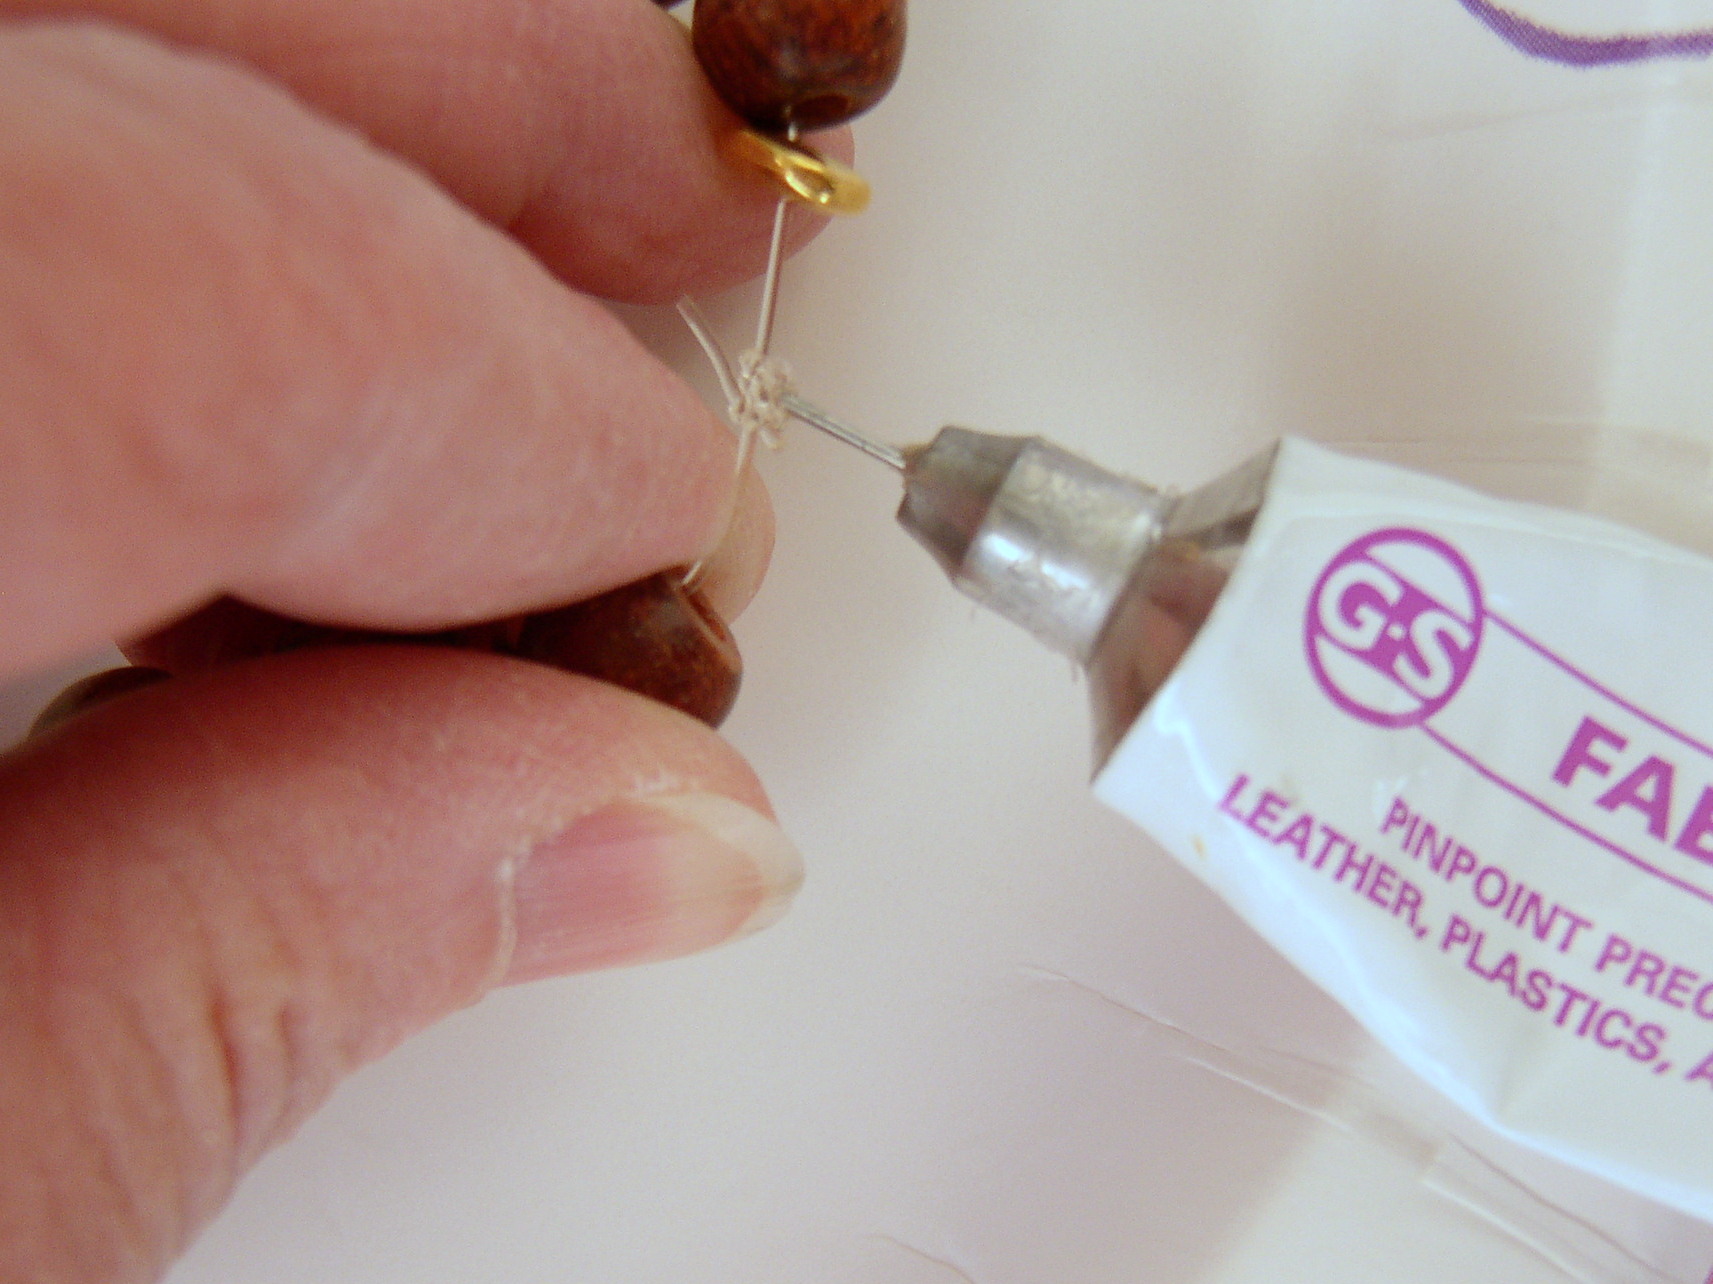
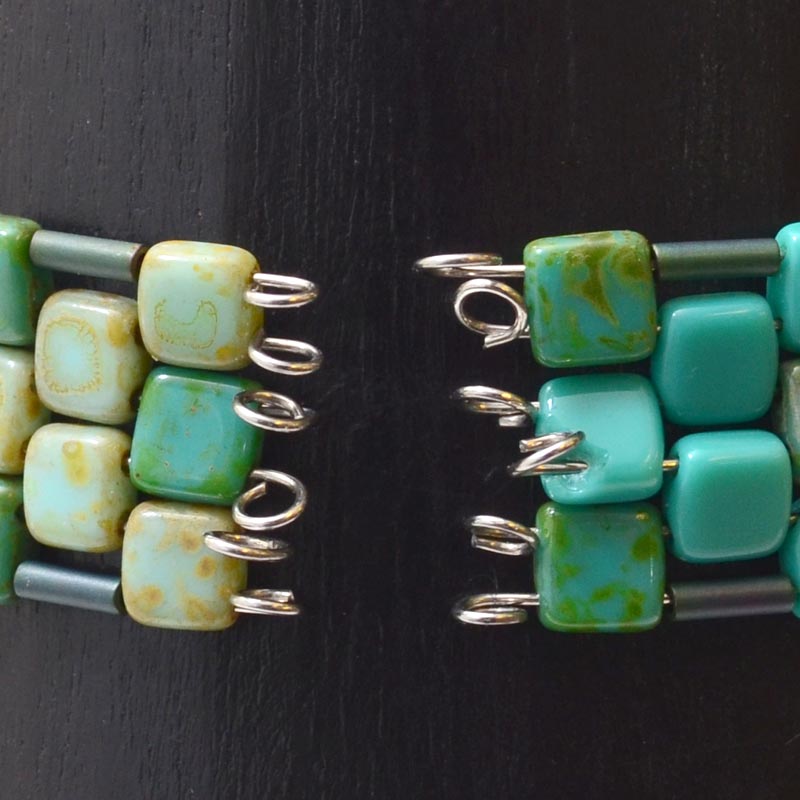
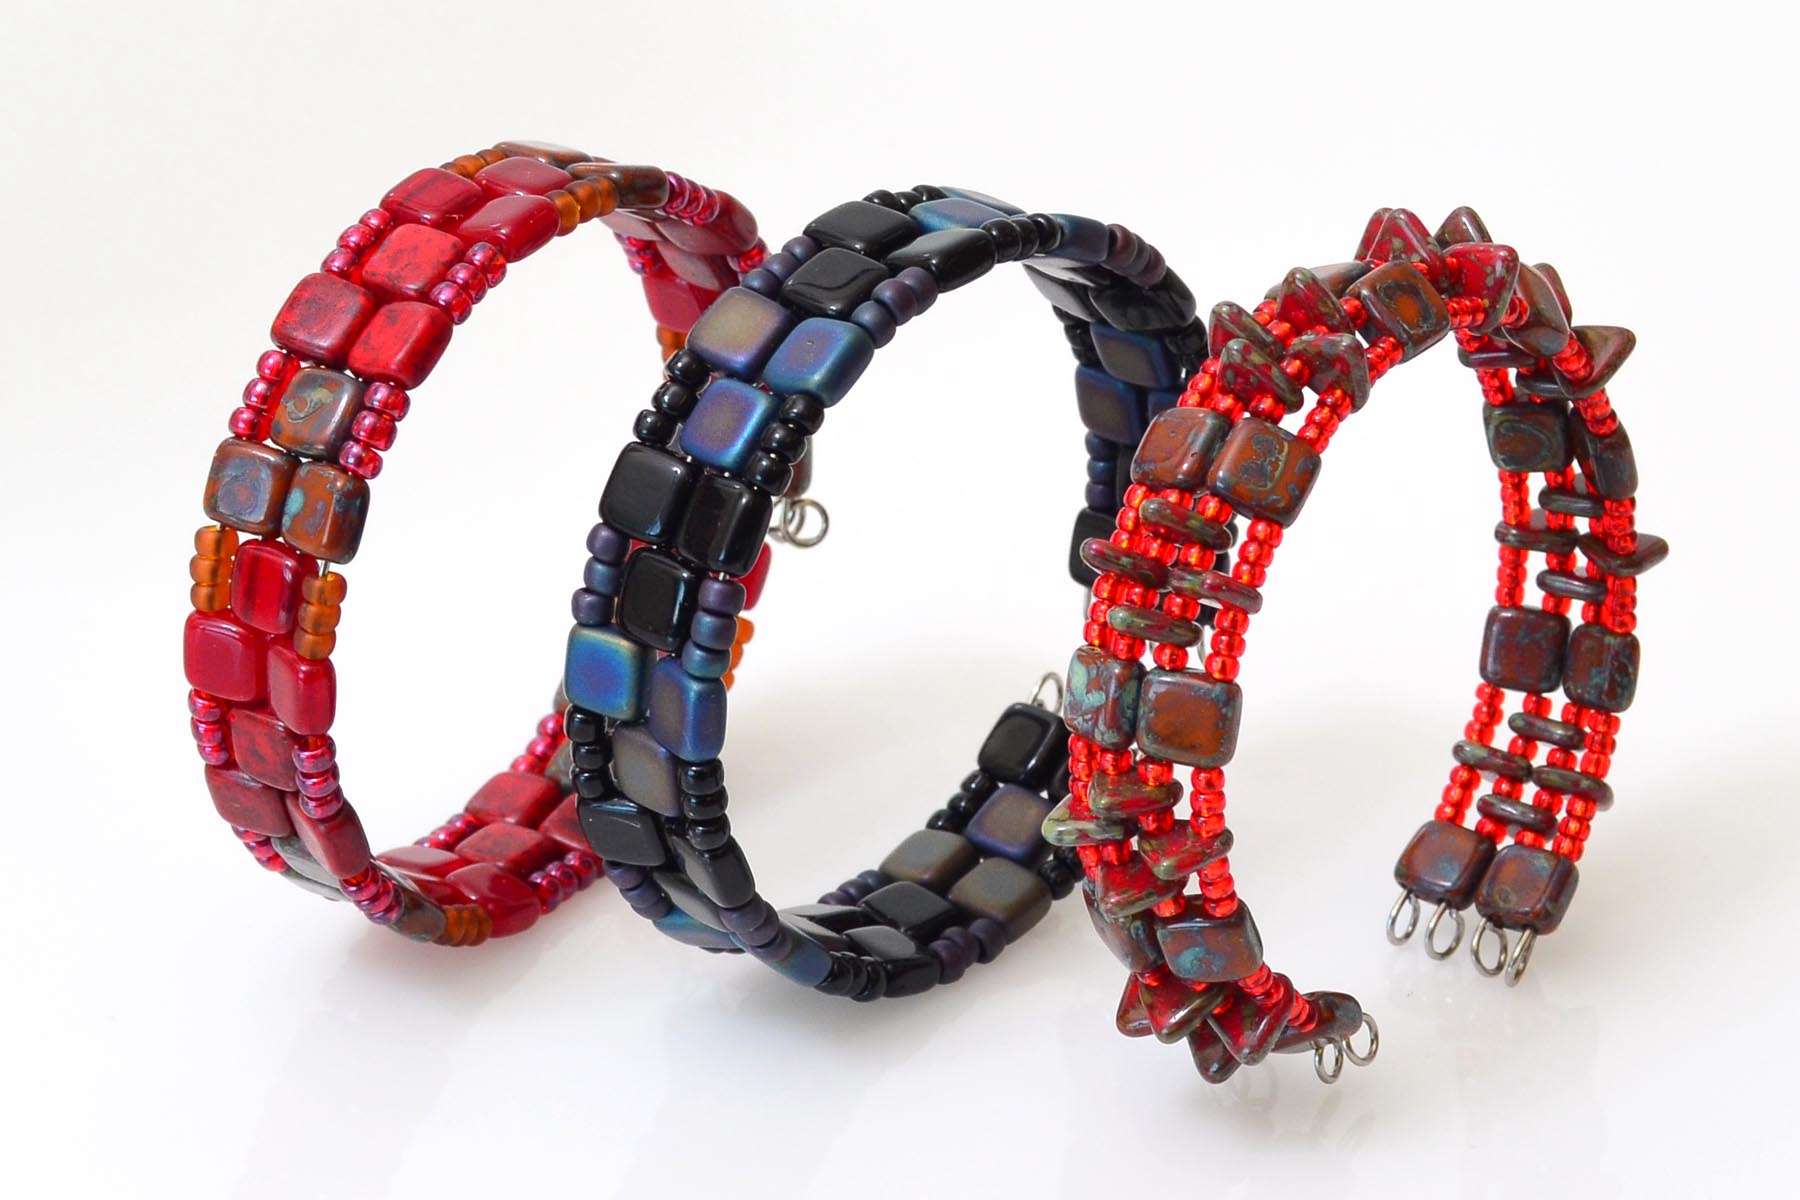
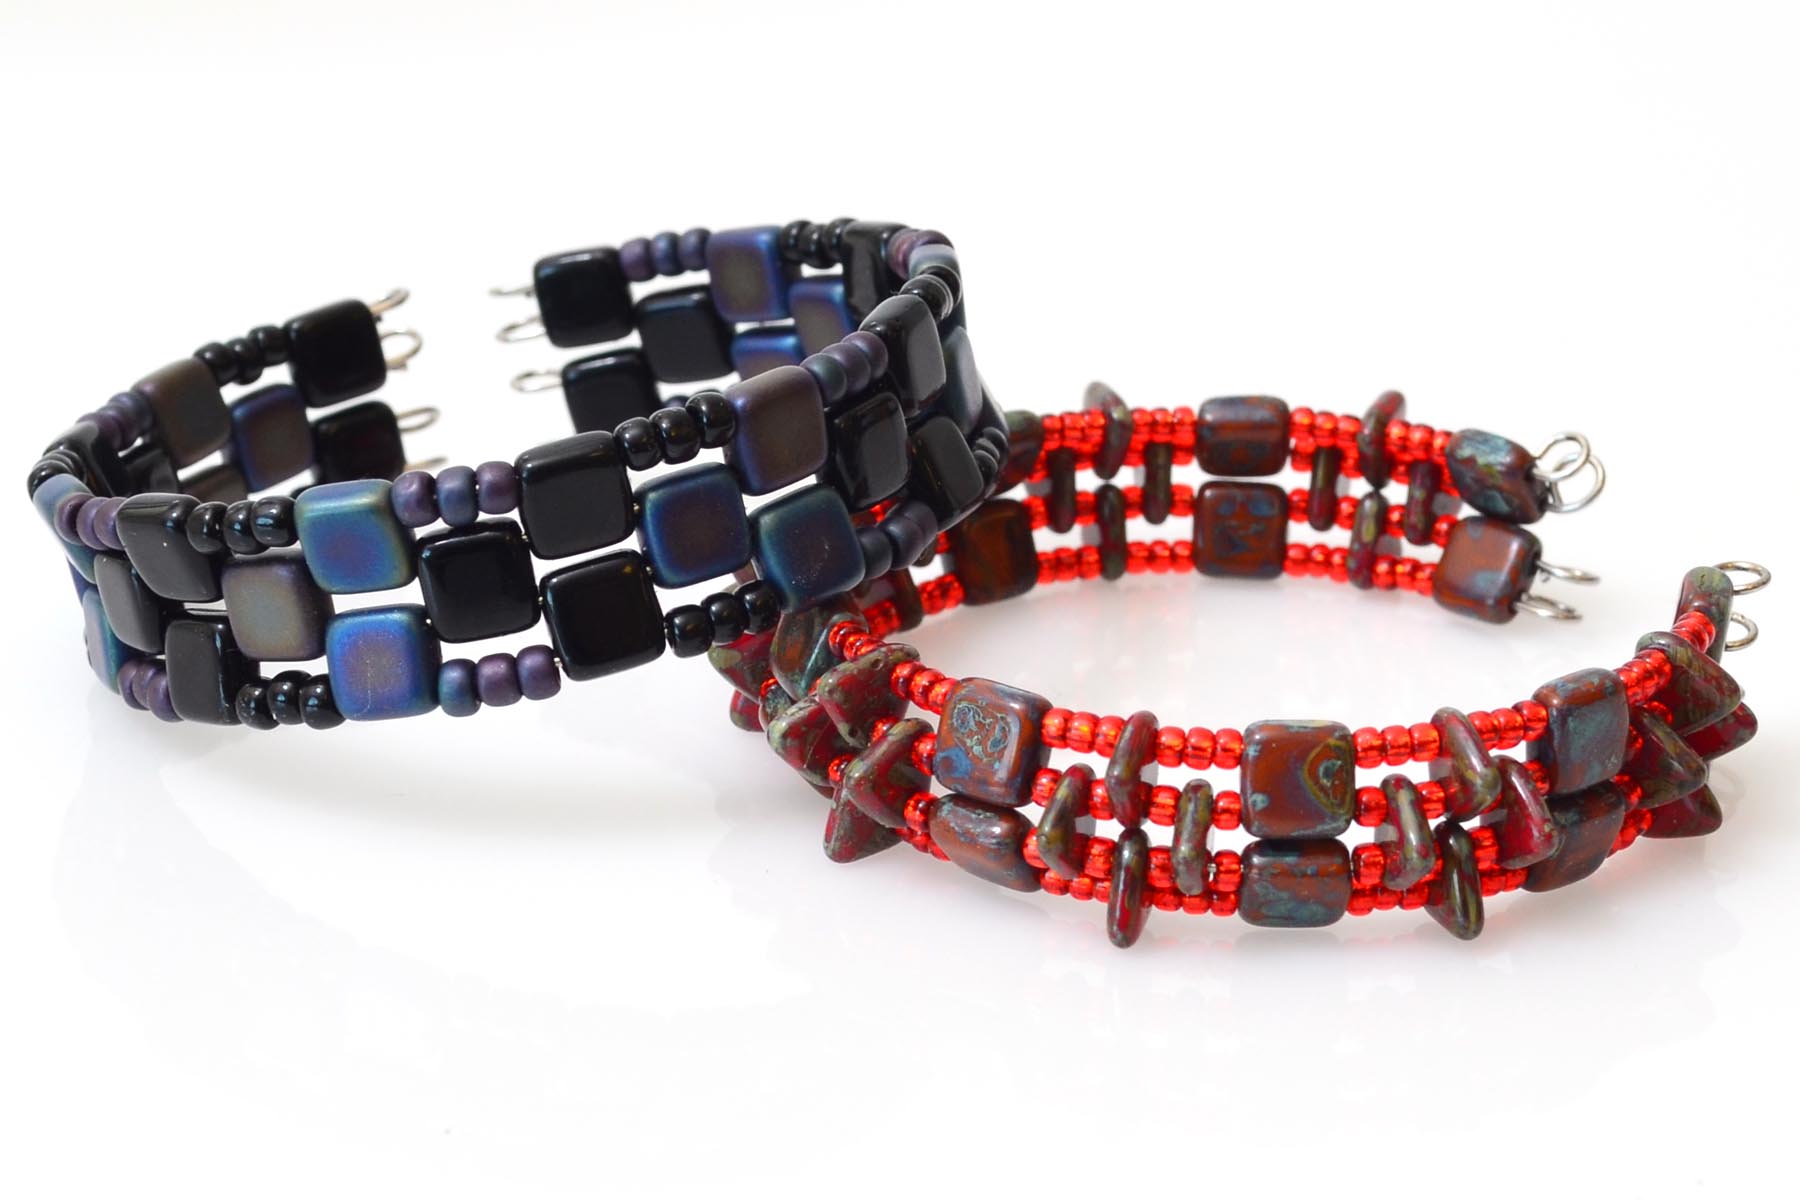
Adjustable bangle bracelets are everywhere these days! They are the hottest new trend, so I just had to figure out how to make them. They are very easy to make! You can make them with brass for a gold look or silver filled wire like I did below.

DIY Leather Bracelets: Setting Rivets and Eyelets

February 19, 2015

I love leather cuff bracelets! Whether I wear one alone, or layer them with other metal and leather bracelets, I think they are always in style. They are bohemian, and can be in funky bright colors or subdued earth tones. With the large selection of pre-made cuffs we sell, the possibilities are endless! I made a few examples using the TierraCast eyelet setting tool and eyelets to show you! Check out how to make them below!
Continue Reading…

DIY Braided Triple Wrapped Curb Chain Bracelet

January 2, 2015

Braided Triple Wrapped Turquoise and Antique Copper Curb Chain Bracelet

I love wrapped bracelets! I like to wear multiple bracelets of all different colors and textures layered. After the popularity of the wrapped leather bracelet the last few years, I decided I wanted to make another colorful wrapped bracelet. Something I could layer with my other bracelets for a super bohemian look! Continue Reading…

Do-it-yourself custom bracelets

December 22, 2014

They are also a great way to showcase cool found objects such as vintage buttons or foreign coins. Even the most novice crafter will be able to create one of these fun, mixed media pieces!
Continue Reading…

How to Make a Beaded Yoga Bracelet

October 31, 2014

If you’re looking for a tranquil jewelry-making project, the stretchy yoga bracelet is perfect. It’s easy to make and takes very few tools (this also makes it perfect for beginning jewelry makers!). Our design incorporates Mala prayer beads and 8mm round gemstone beads. Plus, we’ve personalized the bracelet with a Nina Designs charm.  Whether you make one or a whole armful, you will love this project!

Easy to make Yoga Charm Bracelet made of wooden mala beads, gemstone beads, and a lotus charm from www.rings-things.com

“Lotus Flower” Yoga Bracelet by Rings & Things designer Mollie Valente.

First, gather your supplies:
Shop www.rings-things for supplies to make this trendy Yoga charm bracelet.

The “Lotus Flower” yoga bracelet combines rosewood Mala beads, gemstone beads, gold-plated beads, and a bronze Nina Designs lotus charm — all strung on Stretch Magic® cord.

You will also need just a couple of tools:
Then follow these easy steps:

To make a yoga bracelet, add a charm and gold plated beads to the center of the Stretch Magic cord.
Step 1: Measure and cut the Stretch Magic cord. Make the cord length wrist size plus 4 inches). String on the charm and position it in the middle of the cord. On each side of the charm, string one rondelle bead and one 5mm nugget heishi bead. Add the Bead Stopper to one side of the cord.

Bead Stoppers In-Use Image
Tool Spotlight: Bead Stoppers are a helpful tool for any stringing project! Simply attach the spring to your beading cord to prevent accidental bead spills. You can purchase the Bead Stoppers in both regular and mini size. This tool is a “Rings & Things Staff Choice”.

Free DIY stretchy gemstone Yoga bracelet instructions, how to string beads.
Step 2: The color of rainbow new jade beads varies from bead to bead on each strand. Take a moment and plan your bead design before stringing. String on one 8mm gemstone bead followed by one 5mm nugget bead; string this pattern three times, then end with an additional 8mm gemstone bead.

How to make a stretchy Yoga bracelet with round gemstone and wood bead.  Free DIY jewelry-making tutorial.
Step 3: Secure the cord with a Bead Stopper on the beaded side of the bracelet. String beads on the opposite side of the bracelet, matching the pattern in Step 2.

Yoga Charm Bracelet Step 4
Step 4: Continue beading. String on two 7mm nugget heishi beads. Then string on an alternating pattern of one 8mm Mala bead, followed by one 7mm nugget bead; repeat this pattern five times. Secure the beads with a Bead Stopper.

Yoga Charm Bracelet Step 5
Step 5: Secure the cord with a Bead Stopper on the beaded side of the bracelet. String beads on the opposite side of the bracelet, matching the pattern in Step 4. Vary the number of wooden Mala beads and 7mm nugget heishi beads to achieve your desired bracelet length.

Free jewelry-making instructions.  Learn to make a Yoga bracelet.  Secure the Stretch Magic cord with a knot.
Step 6: With the Bead Stopper removed, hold the ends of the Stretch Magic cord securely and form a circular bracelet. Secure the cord with a knot (square knot, surgeon’s knot, or a few over-hand knots). To tighten the knot, pull the cord tails and stretch the bracelet. Clip the cording about 1/8″ from the knot.

How to tie knots for jewelry making:  overhand knot, square knot, and surgeon's knot.
The overhand knot, square knot, and surgeon’s knot are commonly used in jewelry making.

Jewelry making tutorial, make a Yoga bracelet: how to securely finish Stretch Magic cord.
Step 7: Secure the connection by applying GS Hypo Cement to the knot. Use the super-fine applicator to generously coat the knot, and then slide the knot into the center of a wooden Mala bead and allow it to dry. Now the knot is secure, protected, and hidden.

Yoga Charm Bracelet Step Concluding Image
The Lotus Flower Yoga Bracelet is ready to wear!

Buy the Supplies to Make this Bracelet Now

Get Inspired! Enjoy 100’s more free jewelry projects at Rings & Things too!

Make Things!
Mollie

12 Days of Christmas DIY Charm Bracelet

October 20, 2014

On the first day of Christmas my true love sent to me a Partridge in a Pear Tree.”

Here’s a fun way to remember the rest of the gifts in the “12 Days of Christmas” song: Make yourself a bracelet with a charm representing each gift.

12 days of Christmas Bracelet

“12 days of Christmas” DIY Charm Bracelet

1. Gather Supplies and Tools:

2. Determine Bracelet Length

  • Decide if the standard 7.5″ bracelet is the right length for the recipient.
    Remove links to shorten; add links to lengthen.
  • The links on this chain are tough! Use 2 pairs of pliers and twist to open a link. If you want to be able to re-use the removed chain links, open and close them just like jump rings:
Jump Ring Tip - How to open and close jump rings

Jump Ring (and Chain Link) Security Tip

  • If your pliers have scrapes or serrations on them, dip the tips in Tool Magic, or wrap the tips in masking tape to prevent scraping the jump rings and chain links.

Important notes about toggle clasps and bracelets:

Tip 1) Toggle clasps are great for bracelets because they are easy to put on and take off with one hand, but beware: If the bracelet is too loose, the toggle can work its way out and cause the bracelet to get lost! Whenever possible, adjust the length to fit the wearer’s wrist.  (I removed 7 links to get it to fit me properly. )

Tip 2) Because you pull the bar (or “T”) portion of the clasp through the round loop, toggle clasps work best if you don’t dangle any charms from the last link or 2 of chain.

3. Determine Placement of Charms

gold chain bracelet with oval links, perfect for charm bracelets

There are approximately 40 links on this bracelet.

There are approximately 40 links on the pictured bracelet. I removed 7 to make the bracelet fit more securely. This leaves 33 links.

The charms look best if you have a charm on every other link, and an empty link at each end. That takes up 25 links.

This leaves 8 links (4 open spaces to attach fun dangles for the full length of the bracelet, following the same every-other-link pattern as the charms). That brings us to…

4. Make Some Sparkly Dangles

Tutorials — How to make beaded head pins:

  1. How to make beaded head pins with a 1-step looper (blog)
    or…
  2. How to make traditional beaded head pins (PDF)
Festive beaded head pins for 12 Days of Christmas Charm Bracelet

Festive beaded head pins for “12 Days of Christmas” Charm Bracelet

What to put on each dangle:

Make 4 or more beaded head pin dangles. (I made 21.)

  • Your partridge needs a pear, so use a golden topaz teardrop bead for one or two of the dangles that you’ll place near the partridge.
12 Days of Christmas Bracelet Tutorial - Closeup of Pear "Tree"

“Pear Tree”

I topped every dangle with a tiny 2mm round gold plated bead. Why? Even though I’ve been making beaded head pins for over 20 years, I still (too often) chip glass and crystal beads when I finish my loop. A simple metal bead on top fixes this issue.

I also put a tiny round bead at the bottom of (almost) every head pin.  Why? I like the look of ball-end head pins, but they are more expensive than standard “nail head” pins. This tiny extra bead creates the look of a ball-end head pin.

Close-up of beaded Christmas head pins

Close-up of beaded Christmas head pins.  Use either Swarovski crystal head pins or standard head pins — or a mix of both.

5. Attach the Charms

Start placing your charms, then finish making the dangles. Straighten the bracelet chain and place it on the Chain Sta (“Chain Stay”), or pin/hang the bracelet on a convenient shelf, clipboard, etc.

Chain Sta (Chain Stay) chain holder

The “Chain Stay” chain holder makes it easy to keep your chain straight and add dangles at consistent intervals without worrying about losing count.

Starting at approximately the 6th link from the Ring portion of the clasp, add the Partridge.

12 days of Christmas Charm 1 Partridge In a Pear Tree

Partridge

Use large, sturdy jump rings to attach the charms in the same order as the verses in the song. To make sure you get your jump rings securely closed, use 2 pairs of pliers, and twist, don’t “oval-ize” the links. (See above tip.)

12 days of Christmas Charm 2 Turtle Dove

Skip a link, add #2) Turtle Doves

12 days of Christmas Charm 3 French Hen

Skip a link, add #3) French Hens

Keep skipping a link before adding the other charms in the following order:

4 Calling Birds

#4) Calling Birds

12 days of Christmas Charm 5 Gold Rings

#5) Gold Rings

12 days of Christmas Charm 6 Geese-A-Laying

#6) Geese-A-Laying

12 days of Christmas Charm 7 Swans-a-Swimming

#7) Swans-a-Swimming

12 days of Christmas Charm 8 Maids-a-Milking

#8) Maids-a-Milking

12 days of Christmas Charm 9 Ladies Dancing

#9) Ladies Dancing

12 days of Christmas Charm 10 Lords-a-Leaping

#10) Lords-a-Leaping

12 days of Christmas Charm 11 Pipers Piping

#11) Pipers Piping

12 days of Christmas Charm 12 Drummers Drumming

#12) Drummers Drumming

After placing the charms, fill empty end spots with colorful dangles:

  • Use a single large jump ring to put a “pear” dangle and (optional) a green crystal dangle on the 4th link from the end (near the partridge).
  • Repeat with the 2nd link from the end.
  • Repeat with other colorful dangles to fill empty spots at the “T” end of the bracelet.

For a mostly-gold bracelet, you’re done!

Or … If you decide the bracelet needs more color, fill the links between the charms with additional colorful dangles in shades of siam red, emerald green, opalescent milky white and sparkling crystal.

12 days of Christmas bracelet Finished

12 days of Christmas bracelet … finished!

Put the Christmas color dangles in any order you want, or use my “bird-brain” memory hint:
Some of these birds are easy to remember, especially once you have pictures (charms) for each. But I’ve never seen a French Hen or a Turtle Dove in real life, so I surrounded my turtle dove with “turtles are green” and “doves are white” sparkling hints.

Close-up of green and white crystal beads surrounding the Turtle Dove

Left to right: Partridge with pears, Turtle Dove with sparkling green and white hints, French Hen, open-mouthed Calling Bird

Ready to get started?

Rings & Things has everything you need!

Christmas and winter holiday jewelry supplies for sale

Purchase Christmas Components Here

CzechMates Memory Wire Bracelet Tutorial

September 25, 2014

I love the Picasso finishes and and unusual colors of CzechMate 2-hole tile beads and other CzechMate 2-hole beads. But it’s hard to find a project with them that doesn’t involve needles and intricate beadweaving.

So … here it is! When I discovered pliers designed for looping ends of memory wire, I decided on an ombre chevron cuff bracelet. This 4- to 6-row ombre chevron design takes advantage of the CzechMate color combinations, and is easy to “string” on memory wire. The outside row uses a few seed beads (or bugle beads) near the edges, because their sizes are so compatible with these 2-hole beads.

Memory Wire bracelet made with 2-hole CzechMate tile beads

My first 2 ombre CzechMate bracelets. Rather than wrapping the memory wire around your wrist three times like most memory wire bracelets, these are cuff bracelets.

For a petite wrist, use standard stainless steel memory wire. For larger wrists or a looser fit, use stainless steel anklet memory wire. (Don’t be swayed by the word “anklet” — it’s actually an excellent bracelet size.)

Cutting Memory Wire:

When cutting any type of wire, wear eye protection, or at least make sure your bits of wire will end up someplace safe, not in anyone’s eye. Cup your free hand over the end, and aim the wire downward at a soft surface like a flocked bead mat.

Tools and Memory Wire:

Memory wire is strong, springy steel — much tougher than most jewelry wire. It requires strong, durable tools, both for cutting and bending. I tried cutting steel wire with my cheap cutters and one blade SNAPPED, shooting across the room in 3 pieces. I also dented high quality cutters that were not designed to cut steel. I strongly suggest a pair of heavy-duty flush cutters and a pair of memory wire looping pliers. They aren’t too expensive, and they work great for lighter-duty projects as well.

Step 1. Practice Making Loops:

Although Memory Wire Pliers make it easy to make consistent-sized loops, steel wire is tougher to bend than other jewelry wire. I recommend practicing memory wire loops before you begin adding beads. This helps you make all your loops at the same angle, and avoid chipping your end beads.

CzechMate Memory Wire Bracelet - Practice

Cut four 2″ pieces (each about 1/4 of a circle). Practice making a loop at each end, with both loops on the same plane (or angle).

Memory Wire - How to Make Nice Loops

How to Make Nice Loops with Memory Wire

1. Grip one end of the wire firmly in the pliers and use your fingers to smoothly wrap the wire around the small side of the pliers. Don’t let it twist upward or downward.
2. About halfway around the pliers, release the plier grip on the wire, and get a new grip so you can finish making your circle.
3. Close the loop ALL the way — don’t leave a spot for beads to slide down inside a gap in the loop.

Repeat at other end. Grip the wire’s tip, push around, release, re-grip, and finish pushing. Take a look at your circles — are they the same size and angle, or are they twisting ickily in random directions? Make a few more until it’s easy to make nice consistent loops on the same plane. Also note that these loops are all to the OUTside of the circle, not the inside:

Memory Wire Loop - Do and Don't

For bracelet comfort, make all loops curve to the outside, not the inside of the arc.

Step 2. Assemble your beads:

Appletini TOHO Seed & Bugle Bead Mix

Appletini TOHO Seed & Bugle Bead Mix

TOHO seed bead mixes work excellently with CzechMate 2-hole tile beads. There are great color mixes to choose from, and you can use 3 large seed beads, 4 small seed beads, or a single bugle bead as perfect-size spacers.

A few beads from each assortment are too tiny to fit on memory wire, or too big to fit next to a Czechmate, so save those for future projects.

Step 3. Make the bracelet:

Cut 4 pieces of wire, each about 1-1/8 coils long (Like going all the way around the clock face from midnight to 2pm.).

3a. Cut 4 pieces of wire, each 1 to 1-1/8 coil long. Make sure they are all the same length.
Carefully round 1 end of each wire.

CzechMate Memory Wire Bracelet Step 3b

3b. For a 2-color bracelet, count out 21 tile beads of each color, in sets of 3.

For a 1-color bracelet, use approximately 42 beads. For a 3-color bracelet, count out 15 tile beads of each color in sets of 3. Lay them out in the order that you’ll use them. You might not use all the beads you laid out, but it’s easier to keep your pattern going correctly if you lay out the beads in advance.

String 1 bead.

3c. String 1 tile bead.

Pick up a 2nd wire, and string 1 bead. String a 3rd bead onto both wires.

3d. Pick up a 2nd wire, and string 1 tile bead.
String a 3rd tile bead onto both wires.

String 2nd color using same pattern.

3e. String 2nd color using same pattern.

Don't worry that the beads and strands flip and flop around at this point.

Don’t worry that the beads and strands flip and flop around at this point.

End with 2 tile beads. Make sure you have at least 1/2" (12mm) of wire left.

3f. End with 2 tile beads. Make sure you have at least 1/2″ (12mm) of wire left.

3g. After your last 2 beads, push beads snug (but not super tight), and trim wire to approx. 1/2″ if necessary. Next, very carefully round the end wires for both strands (one wire at a time). Abrupt / harsh movements may chip the end bead.

Take another of your prepared wires, and string 4 seed beads, or a single bugle bead. Place these next to your strung CzechMates … do they look good? If not, pick a different color or size and test it before you begin the next step.

Back at the beginning, feed a new piece of prepared wire through the other hole in one of your first beads.

3h. Back at the beginning, feed a new piece of prepared wire through the other hole in one of your first beads.

3i. Where the wire comes out, add 3-5 seed beads (or a bugle bead) so they are the same total length as a Czechmate tile bead or slightly shorter.

Feed through next CzechMate, add bugle or seed beads, repeat to end of bracelet.

3j. Feed through next CzechMate, add bugle or seed beads, repeat to end of bracelet.

Repeat for 4th row, trim excess if necessary, and carefully round the ends.

3k. Repeat for 4th row, trim excess if necessary, and carefully round the ends. (Click image for close-up.)

Tips & Errata:

Do your best to make the loops all face the same direction, but don’t be hard on yourself if they don’t. Here is my first bracelet, with wonky ends and a chipped bead. When I taught a class on how to make this bracelet, I introduced the “practice making loops” step, and not a single person chipped a bead!

Example of bad loops on my first memory wire bracelet.

Close-up of bad loops on my first bracelet. The tips listed above should help you make better loops and avoid chipped beads.

By my 3rd bracelet, I realized it’s much easier to finish the ends if the strands (after looping) are tiny bit shorter than one full coil, so now I design these more like cuffs than bangles.

Czechmate and Memory Wire - Finished Cuff-Style bracelets

It’s much easier to finish the ends, if each strand, after looping, is slightly shorter than one full coil, more like a cuff than the bangles I originally envisioned.

You’ll soon perfect your ability to make all your loops at the same angle. After that, these are quick and easy to make, so make a bunch for gifts or to sell!

Czechmate Memory Wire Bracelets

Variations on a theme.

Depending on the size of your spacer beads, some bracelets spike up a bit in the middle, and others curve up at the outside edges. This is part of the fun with these designs. Used in this pattern, I think the CzechMates™ Two Hole Triangle Beads look like tiny Stegosaurus / dragon spikes.

Parts & Supplies:

Any questions? Please ask! (Click on “Comments” or “Leave a Reply” below.)

Easy to Make Leather and Trade Bead Wrap Bracelet

September 17, 2014

Making a wrapped-leather bracelet doesn’t have to be difficult or take a lot of time – this colorful African bead bracelet is proof of that. In fact, if you can string beads and tie a simple overhand knot, you can make the “Volta River” Wrap Bracelet.  It’s an easy afternoon project!

Continue Reading…