Browsing Category

How-To

More uses for: Glueables (bracelets, pendants)

April 6, 2009

You know Rings & Things is all about the “grow your business” tips. One of the most inspiring kinds of tips we’ve found in the craft jewelry world are ways to multipurpose the parts you use and the designs you make. Here’s another way of getting that extra mileage…out of bracelet blanks and frame charms/pendant blanks:

cindy_rtcolorexplosionwebInstead of gluing onto them, “paint” pretty designs on the flat pads with rubber-stamping inks. Cindy Gimbrone shows off this great inspiration in her wonderfully titled blog post, “Glue is Not My BFF”.

cindy_rtcoprbraceletwebCindy also came up with the idea of adding texture and design elements by hammering a bracelet blank. This way, you wind up with a personalized piece of jewelry with no need to spend much on embellishments!

cindy_rtwatchpropellerswebAnother unglued inspiration from Cindy is this Deconstructed Watch on our brass square frame. This project can be done for under $10!

Here’s one of Lisa‘s ideas from her A Bead A Day blog:

lisa_brace5multi-stranding by adding a couple strands of chainmaille-type link work on either side of the bracelet blank.

lisa_flower-funlong1In another great burst of inspiration, Lisa also created not just a bejeweled pendant, but also an amazing bracelet centerpiece, from our glue-on pendant frames.

Lisa says that this third design– lisa_round_p_earl_31–is easy to do, but I think it’s so impressive that you’d think it took a jewelry master’s touch.

The always-productive Lisa also came up with this cool approach, lisa_black_and_white6which she titled “Jewelry Making w/Scrapbooking Supplies”.

Tish (quite brilliantly I think) documented her first experiment with bracelet blanks, “in case it was brilliant.” She wasn’t satisfied with the results of the bracelet, but wound up with a great tutorial on what to look out for when combining polymer clay with bracelet forms!

tish_img_8994More “Glueable Challenge” pieces by Tish included the poly clay design above…

dawno_gluablewip1_1braceletDawno deconstructed a bracelet blank in a nice tutorial at her blog…

…and invented a cool new technique–

dawno_asian-woman-pendant–that I want to call faux cloisonné!

Melanie of Earthenwood Studios had multiple ideas too. Interestingly she also took apart a bracelet blank,

melanie_025this time to make a necklace.

She also combined her unique “cog” and “face” ceramic creations with our frame charms:

melanie_013We hope these neat creations by our Blog Partners give you some ideas that you’ll run with and make your own!

Have more ideas for using glueable frame charms & bracelet blanks? Talk about them in a comment below!

April giveaway: “DIY Display Ideas”:
* You enter by leaving comments under the March 31 giveaway announcement
* At the end of April, 2 winners will receive coveted Rings & Things goodie packs!
*
So read the blog regularly to see if you won!

Multi-purposing frame charms: Inchies

April 2, 2009

Quick post today!

A trend we’ve noticed in the scrapbooking world is “inchies”. These are like little challenges to yourself: Create a nice collage in the space of a square inch (ergo the name). What about wearable inchies?

Can you say "inchies"?!

Can you say “inchies”?!

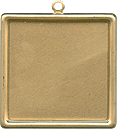
Check out our item #49-441-0, 30mm square brass picture-frame charm! The usable surface inside the frame is almost exactly a square inch. This finding is perfect for gluing things onto. You could even follow Dawno’s idea and incorporate some brass wire into your collage, for a neat faux cloisonné look.

Thanks to Amy M for this idea. PS: a 2″x2″ collage is called a twinchie!

More mini-collage ideas? Share ’em here in a comment!

April giveaway: “DIY Display Ideas”:
* You enter by leaving comments under the March 31 giveaway announcement
* At the end of April, 2 winners will receive coveted Rings & Things goodie packs!
*
So read the blog regularly to see if you won!

April giveaway contest: DIY displays!

March 31, 2009

In our April newsletter going out this week (sign up to receive it!), we have a great discussion of do-it-yourself display ideas… Here’s how to take that idea, run with it, and win a prize in our April blog contest!

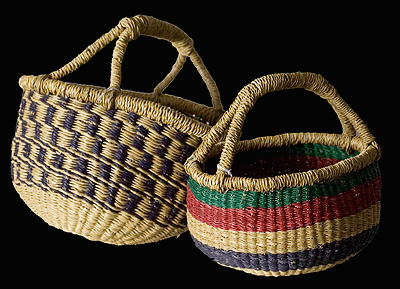
baskets_22-575-d-16

Craft / jewelry displays?

In jewelry suppliers’ catalogs, you can find many display and packaging options for selling your wares. But often you can increase customer’s interest, decrease your overhead costs, and grow your craft jewelry business–with a more personal touch!

Our newsletter article brings lots of great ideas for inexpensive, do-it-yourself (DIY) displays. Whether it’s re-using packaging, incorporating natural materials,upcycling “vintage” items or going seasonal, you can do a lot with a little.

We’d love to hear what additional DIY display ideas you’ve used or that you’ve seen. Leave a comment here to tell us about (or send an image of) your fave DIY display in our April blog competition, and you could win one of our famous goodie bags!

For other types of advice on running a strong business, check out our new list of crafts business tips. Happy show season!

PS: The winners of our March blog drawing have been randomly drawn. Congratulations to SusanSW and Beadsophy!

Another use for… Orange miracle beads

March 30, 2009

Looking for another market for your beaded productions? How about fishermen…or more accurately, fish?

Mmmm, beads!

Mmmm, beads!

It turns out that beads make good bait for certain fish. Trout think orange-colored Miracle beads are salmon eggs, and will try to eat them. Steelhead, less easily fooled, just think the beads are inferior to their own eggs and try to move them away–which gets them caught on the hook.

Local anglers have told us that the shine of the bead catches the fish’s eye very successfully. They put one bead on the line with a hook below it and a bobber on the top of the line. Both the 8mm and the 4mm sizes have been used.

This makes us curious, what other beads can you use in lures, artificial flies, etc.? What about the other orange beads, like opaque glass ones? Share your experiences and ideas in a comment below!

March news: New monthly lottery, right here on the Rings & Things blog. Here’s how it works:
* You enter by leaving comments. Comment on any March post(s).
* At the end of March, I’ll randomly draw 2 winners of surprise goodie packs! …So read the blog regularly to see if you won!

Multi-purposing your art beads: Beadable pen findings (& more)

March 27, 2009

Rings & Things has introduced a popular line of beadable-pen findings, perfect for displaying art beads!

These pens are the perfect partner for any bead artisan’s wares. (Lampwork? Clay? The possibilities go on…) They’re also a great way of showing customers that they can “multi-purpose” any beads they buy from you.

beadable_normal_dotted_line_pen1

Artists can set off the charms of their glass, ceramic, metal or other bead creations to maximum advantage by pairing them with a choice of pen colors. A range of seven hues, from pearl white or matte silver to burgundy or copper, is on hand.

Made of genuine brass alloy, these blue-ink beadable ballpoints have an anodized finish. Each pen is 6″ long with a 2.5″ beadable section (adjustable by 0.125″). The pen nib retracts with a twist. The rod (mandrel) is 3/32″, perfect for showing off lampwork beads with 2.5mm holes or greater. The metal casing has good heft, unlike plastic varieties. The shorter threads of the rod screw into the base of the pen.

beadable_ink_refill_55-904-07

These pens become even more of a permanent treasure with the addition of optional ink refills. Refills are offered separately in either black or blue ink.

We carry an ever-growing line of ‘beadable’ specialty findings, from magnifying glasses to lighter covers to bookmarks. Keep an eye on our site for more new items that you can bead in various ways!

Have a favorite beadable finding? Looking for one but haven’t found just the right thing yet? Leave a comment below to talk about it!

March news: New monthly lottery, right here on the Rings & Things blog. Here’s how it works:
* You enter by leaving comments. Comment on any March post(s).
* At the end of March, I’ll randomly draw 2 winners of surprise goodie packs! …So read the blog regularly to see if you won!

Bead societies

March 20, 2009

Are you a member of a bead society yet? (Or a polymer-clay or metal-clay guild, or another craft group?) Rings & Things always encourages you to share knowledge and fun with like-minded souls in your area…

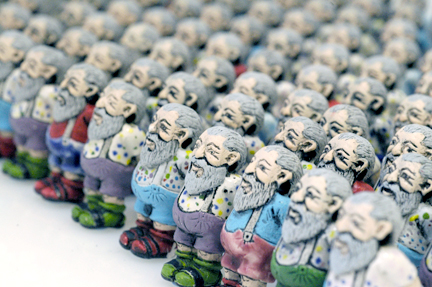
russ_bead_army

“We’re here to help you”: join a bead society & meet some new faces!

There are lots of reasons to join a local group of beaders or other craft/jewelry artists.

  • Socializing with people who have similar interests
  • Learning new techniques & tricks that’ll help you “grow your business”
  • Donating your skills for a cause: editing a newsletter, scheduling workshops and field trips, organizing charitable fundraisers or educational workshops in local schools…
  • Membership is usually very inexpensive or free!

…but the simplest reason to join is for FUN! ☻☺

Do you realize how incredibly many of these groups exist? Check these constantly-updated resources to find a group near you:

There seems to be quite an upswing of interest in forming local groups lately. If you don’t find a group near you, will you be the founder of a new one?

Rings & Things wants to hear from YOU about any more bead societies and art guilds that haven’t made it onto our lists yet. Leave us a comment here with information!

By the way, Rings & Things doesn’t track the meeting times & places of all of these groups. (We’ve found that these may change.) But you can announce your bead society’s latest meetup schedule right here — so just leave a comment below to plug your group.

March news: New monthly lottery, right here on the Rings & Things blog. Here’s how it works:
* You enter by leaving comments. Comment on any March post(s).
* At the end of March, I’ll randomly draw 2 winners of surprise goodie packs! …So read the blog regularly to see if you won!

More uses for choker forms

March 17, 2009

In the spirit of multipurposing that our “grow your business” project often mentions, we’d like to report on some great uses people have recently invented for Rings & Things’ chokers.

We’ve been seeing some brilliant applications of wire-wrapping to our choker forms. A number of ideas involve wrapping part or all of the form itself. This turquoisey design is from Tish:

justatish_r_tchoker_zoom

Another take by Tish on the wrapped-choker idea:

justatish_img_8689

Dawno combined an inspiration from abstract artist Piet Mondrian with choker wrapping:

dawno_red-choker-form-with-dangles

Melanie at Earthenwood Studios found our choker blank provided a good structure to express her ongoing steampunk inspiration:

earthenwood_020

At her “A Bead A Day” blog, Lisa wrapped the entire choker form and added a pendant and coordinating bead accents:

abeadaday_universe22

In a similar vein, Tish went for a softer feel, designing a loosely ribbon-wrapped choker:

justatish_img_8742 (Tish provides a full, excellent tutorial on making this one!)

How about wrapping wire on some other element of your design? Dawno beaded the choker form itself, but wrapped the great dangles in this design:

cathedral-cut-magnetic-clasp-choker-bust

And Lisa made a stunning wire-wrapped focal piece in this choker design:

abeadaday_silver-choker6

Another wire-wrapping idea for a focal is this stunning bit of sculpture by Dawno:

dawno_silver-and-botmo-purple-swirly-choker

Somewhat more minimal wire work is involved in the hammered tendrils dangling from this “Tiger, Tiger Burning Bright” choker by Margot Potter, a.k.a. The Impatient Crafter:

margot_tiger-tiger-burning-bright

What’s your inpiration for using choker forms? Share a comment–or even a picture!

March news: New monthly lottery, right here on the Rings & Things blog. Here’s how it works:
* You enter by leaving comments. Comment on any March post(s).
* At the end of March, I’ll randomly draw 2 winners of surprise goodie packs! …So read the blog regularly to see if you won!

Pearls Before Swine

March 10, 2009

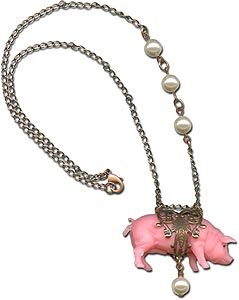
pearls_before_swine

Dave,

Of course I want to say “ham, bacon, sausage, ham hock….” But, instead I used the following R&T’s parts for the “Pearls before Swine” Necklace (this is from memory since Val has the necklace):

Qty Stock Description
1 Found Item Plastic pink pig (couple inches long?) (sub other plastic critters at will)
2 #44-150-7 Filigree, Harvest, AC
16″ #40-099-08-7 Chain, Ftage, Curb, 2.8mm, AC
9 #37-136-7 Jump Ring, Round, Medium, AC
1 #37-422-7 Head Pin, 2″, Standard, AC
3 #37-722-7 Eye Pin, 2″, Standard, AC
1 #39-343-7 Clasp, Lobster, 12mm, Brass, AC
4 #05-810-08-201 Crystal, Bead, Round, Pearl, LtCrmRose

Happy blogging!

Mollie

PS: This is Sondra’s pig–I pignapped him for the necklace; just a little jewelry surprise for her–she has no idea he is even gone.

March news: New monthly lottery, right here on the Rings & Things blog. Here’s how it works:
* You enter by leaving comments. Comment on any March post(s).
* At the end of March, I’ll randomly draw 2 winners of surprise goodie packs! …So read the blog regularly to see if you won!

Our Design Gallery expands

March 5, 2009

[ ~ 2018 Update: We’ve upgraded our design gallery (again!), and expanded some of the sections – so links below are updated. Also, we no longer produce a printed catalog; we’re just online (plus we have a Showroom in Spokane, Washington — it’s open to the public, so come visit us if you’re in Eastern Washington state!) ~ ]

You’ve received our new 2009-2010 catalog, haven’t you? We’re very happy with it. One reason is all the fun jewelry designs it features. Now…

gallery_logo

Rings & Things has uploaded dozens and dozens of these new entries to our Design Gallery! (Finally done. I see the light at the end of the carpal tunnel.) ☻☺ At last count we had something like 668 designs up. We group this free inspirational material into some useful categories:

Every design is illustrated by a great big beautiful picture of the finished piece and a parts list, complete with links to our online store if you’re going to buy the components.

You’ll also find links to free downloadable PDFs with full instructions to extra steps for making each design. (For example, we don’t re-write how to properly open and close jump rings, or make good head pin loops in each tutorial — we have a link to a PDF of jewelry basics. And for how to torch-enamel jewelry, we link back to our blog article where this is lots of room for good photos.)

Have a favorite Design Gallery item? Ever been inspired by one of our designs? Saw your contest entry on our site? Leave a comment to talk about it!!

March 2009 news: New monthly lottery, right here on the Rings & Things blog. Here’s how it works:
* You enter by leaving comments. Comment on any March post(s).
* At the end of March, I’ll randomly draw 2 winners of surprise goodie packs! …So read the blog regularly to see if you won!

Brand your jewelry: custom metal tags

March 3, 2009

Rena Klingenberg mentioned a great idea in her “Jewelry Business Blog” (link removed 2019 because the original site no longer exists and now goes somewhere bad). Here’s a pretty artistic way to grow your business:

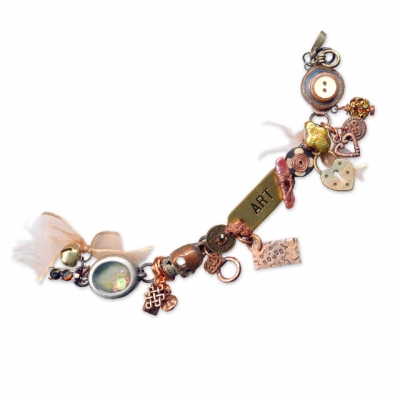
normal_upcycling_bracelet

There’s more than one way to use metal stamping!

Brand your jewelry! Now, Rings & Things is in the western USA. But I’m no iron-brandishing cowboy. I’m talking about a kinder, gentler way of making a lasting impression on your customers.

Mark your jewelry with small custom metal tags. They’re durable, they show that you care about the quality of the items you make, and they can coordinate with your designs.

  • There are companies who will sell you pre-made tags in the shape you like: hearts, ovals, diamonds and more.
    By shopping around, you can find these in sterling, gold fill, copper or other metals.
  • Just add your business name or logo to the tag — you can also get a metal stamp (die) custom-made with your design.
  • You can personalize the tags even more. How about enameling the stamped design? Or a quick bit of antiquing solution?

If you get tags in some quantity, you should be able to do all this for several cents to a dollar per tag. But there’s a way to lower the cost even more! Consider using metal-stamping tools, for a very quick and simple “logo”. Why not overlap stamped letters on each other for a monogram (or cattle-brand) look? And most metal stamp sets include one more more dies for symbols like &, @, or ?… With a bit of your creativity, you’ll have a memorable logo in no time at all. (Just think how recognizable the Calvin Klein “cK” logo is.)

Attach your snazzy metal tag to each jewelry item with a matching jump ring. You’ll be amazed how sharp and professional the results can look!

A side benefit: metal stamping jewelry keeps growing in popularity. You can use the same tools to create focal pendants and more…

Have you discovered other useful ways to “brand” your line of jewelry? Share them in a comment!

March news: New monthly drawing, right here on the Rings & Things blog. Here’s how it works:
* You enter by leaving comments. Comment on any March post(s).
* At the end of March, I’ll randomly draw 2 winners of surprise goodie packs!